How to Use Milk Paint on Furniture


Milk paint is a unique way to update old furniture pieces or give new ones a rustic, farmhouse finish. If you’re interested in how to use milk paint on furniture, here’s what you need to know!
This guide will cover everything from the basics of this paint to tips and tricks for painting furniture with it like a pro. With this, you’ll be on your way to creating beautiful and one of a kind pieces using milk paint!
There are many types of paint for furniture available on the market, including milk paint. If you’re new to this type of paint, don’t worry! We will go through everything you need to know about milk paint so that you can confidently use it on your furniture.

But, milk paint isn’t for everyone because it comes with a learning curve if you have your mind set on a specific finish.
What Is Milk Paint?
Unlike regular paint, milk paint is made with natural ingredients like lime, casein (a milk protein), and clay. It’s also non-toxic, making it a great option for painting children’s furniture.
It’s been used for centuries to paint everything from furniture to walls, and it’s becoming popular again with DIYers who want to paint their furniture with a rustic look.

Supplies Used for Milk Painting Furniture
As an Amazon Associate, I earn from qualifying purchases. I also may earn from other qualifying purchases with other companies or get free product to review and use. All opinions are my own.
- Scraper
- Gorilla Glue
- Dremel Multi Tool
- SurfPrep Sander (Use code RAY10 to get 10% off your order)
- Sanding Sheets (Use code RAY10 to get 10% off your order)
- Foam Sanding Sponge (Use code RAY10 to get 10% off your order)
- Bondo
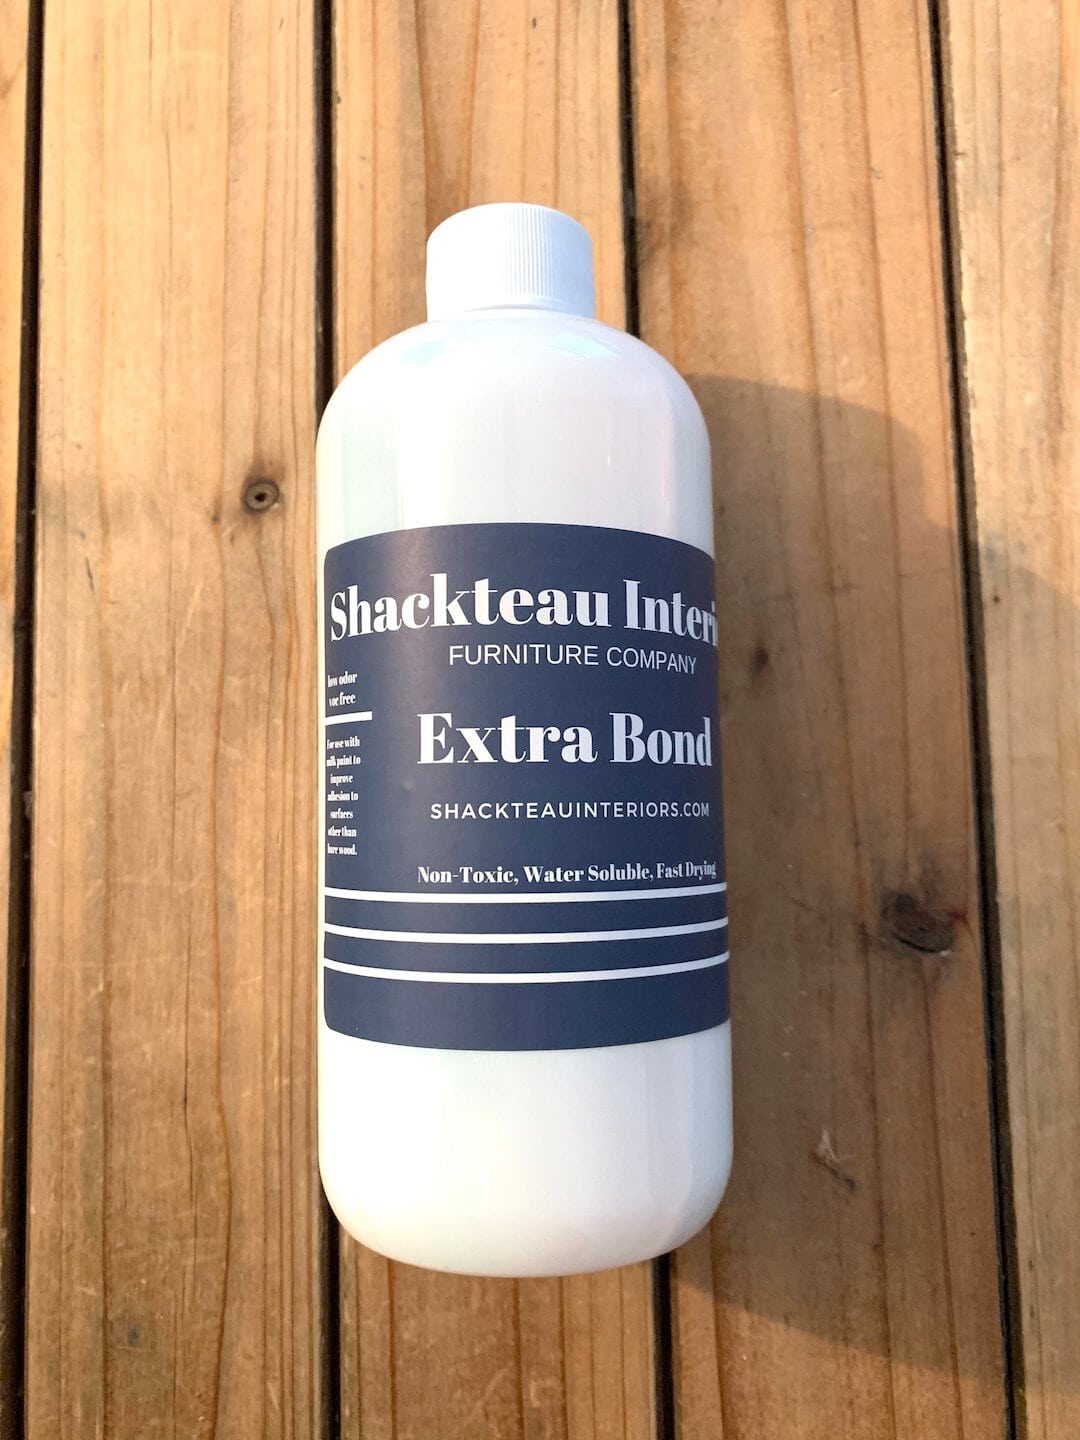
- Shackteau Interiors Extra Bond
- Zibra Paint Brush (Round)
- Wood Filler
- Carbide Scraper
- Drawer Stops
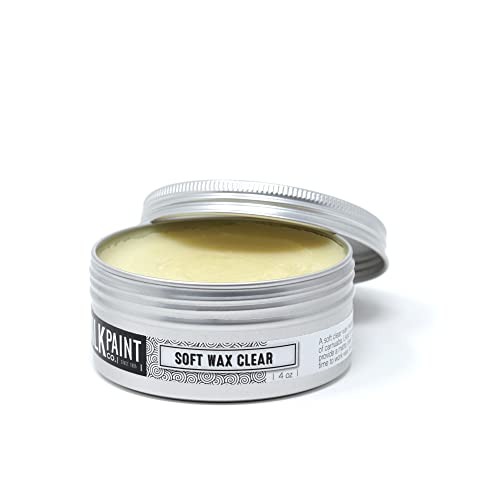
- Soft Wax
- Clear Shellac
- Shackteau Interiors Milk Paint
Grab our list of 10 must have painting furniture supplies too!
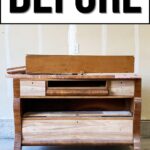
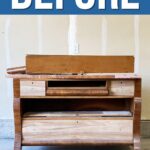
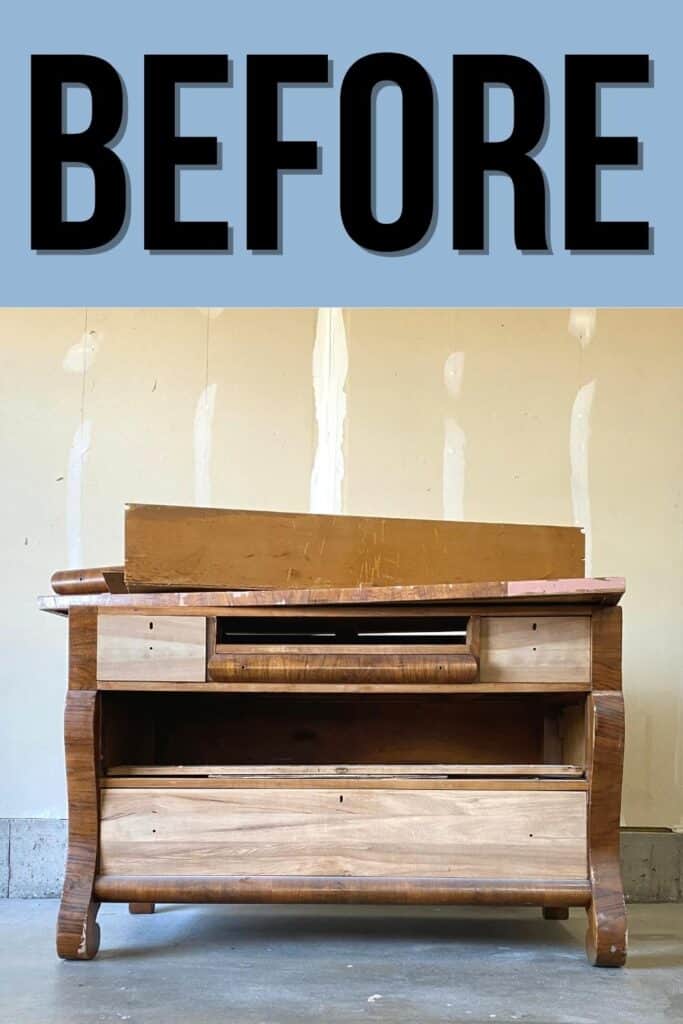
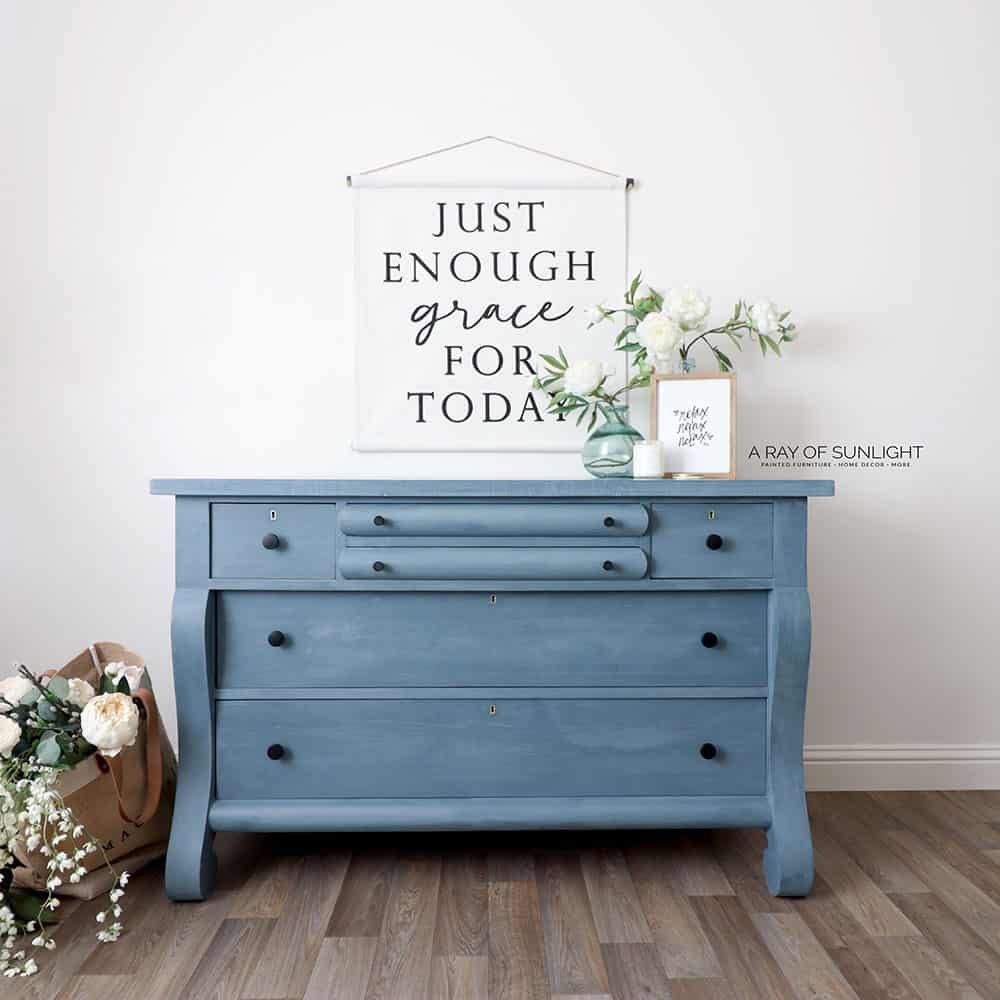
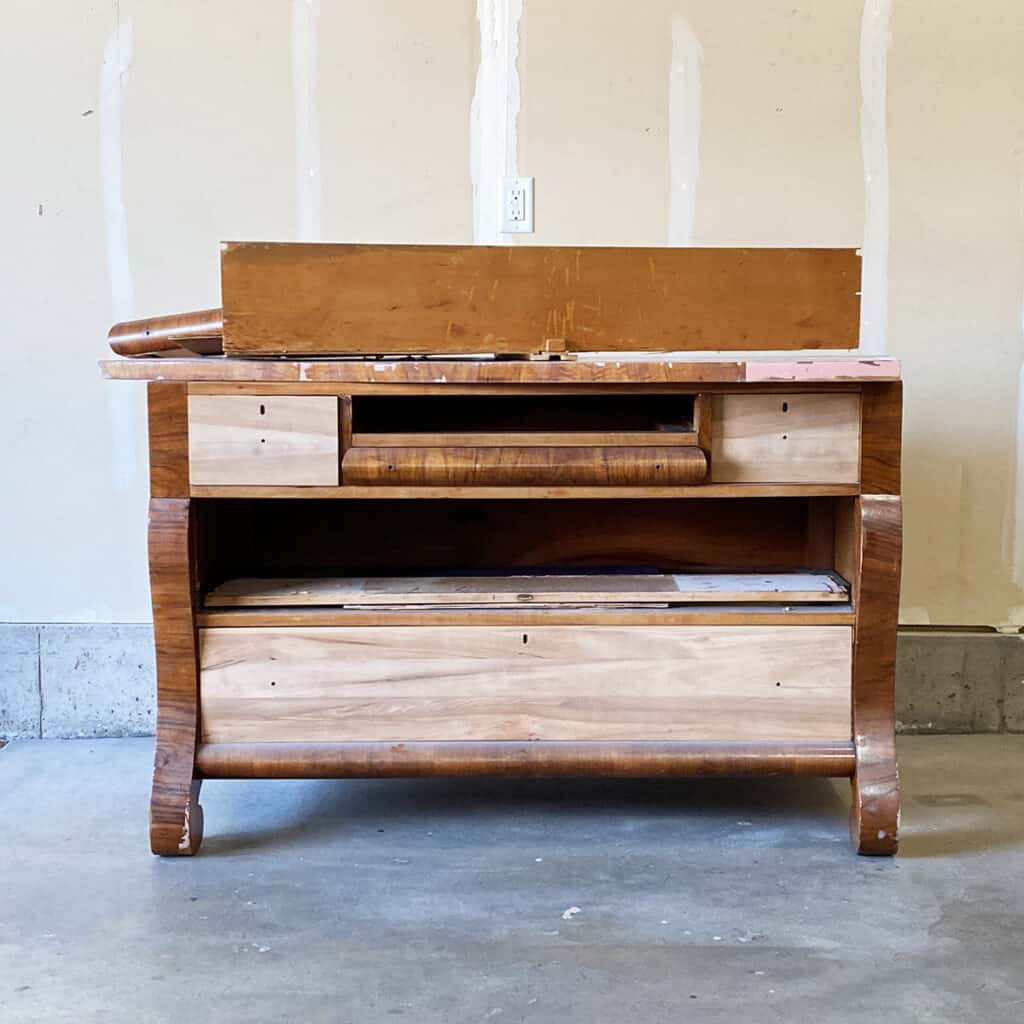
Alright, here is the dresser we’re painting with milk paint.
When we bought it, I didn’t realize how bad of shape it was in… But when I got it home, I started to see all the things and could smell smoke on it…I shouldn’t have paid $80 for it! Oh well.
Repairing Old Furniture
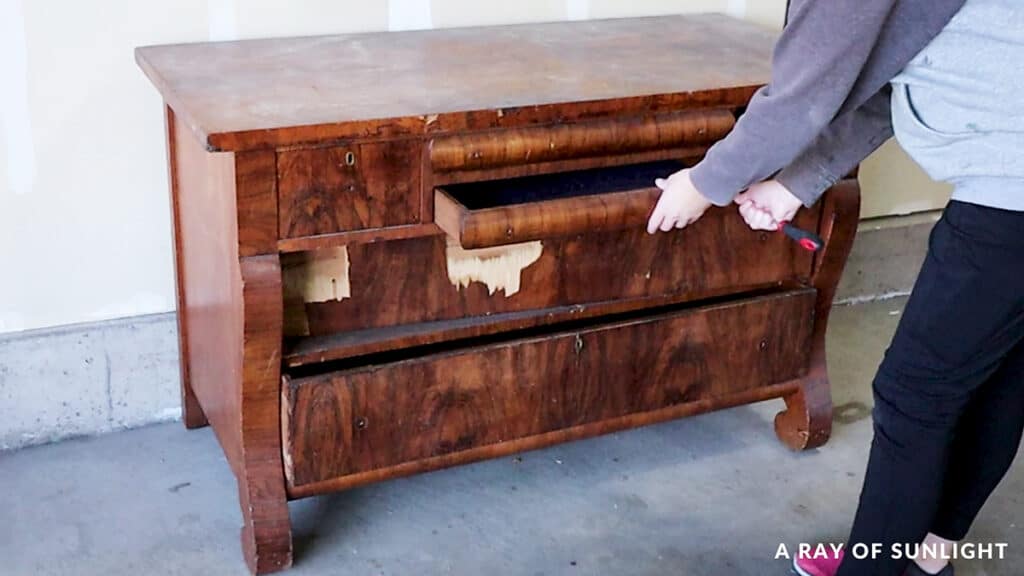
Anyway, I bought this thing over 3 years ago, and slowly worked on it as I had the motivation to. Last year, I removed the veneer from most of the drawers… some of the veneer was glued on extra well, and it was an absolute pain even with my tricks to easily remove veneer.
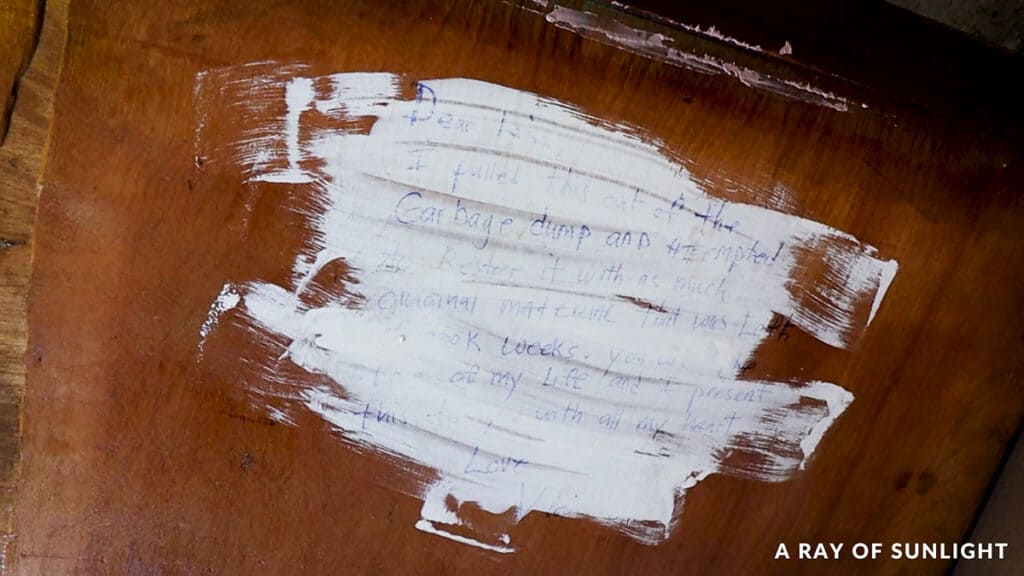
I fixed the chipped veneer, got rid of the smoke smell, and found this little love note from someone… that someone tried to paint over… hahaha
And I took apart some of the drawers. Then I lost steam and put it away until just recently. Then I cut new wood for those drawer bottoms and put the drawers back together, attached the top to the dresser, and repaired damage with Bondo.
Check our guide on dresser drawer bottom replacement here to learn more.
Get Our Secrets!
Grab this super convenient How to Repair Furniture Ebook with all of our secrets on how to repair furniture for only $14.
You can print it out and have instant access whenever you come across damaged furniture, and know exactly how to fix it!
Click on the picture of the book to purchase!

Check out my honest Bondo wood filler review here to learn more. It was all SO MUCH WORK and I wanted to give up multiple times. But I also didn’t want it to just go to the landfill… so here we are.
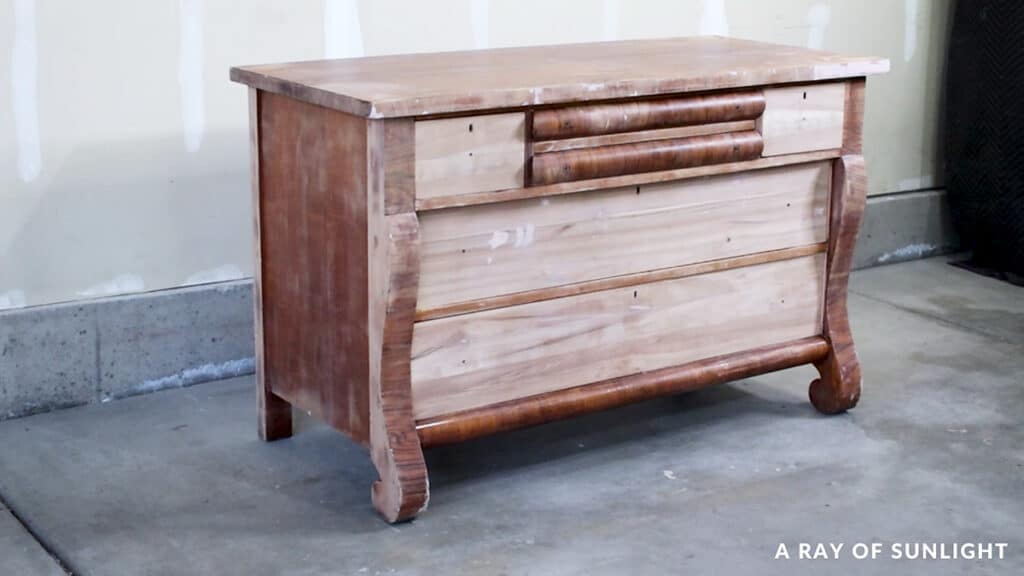
With all of that out of the way though, here’s what it finally looked like after we had cleaned it and prepped it for painting. Read these posts to learn more about how to clean furniture before painting and how to prepare furniture for painting!
How To Use Milk Paint On Furniture
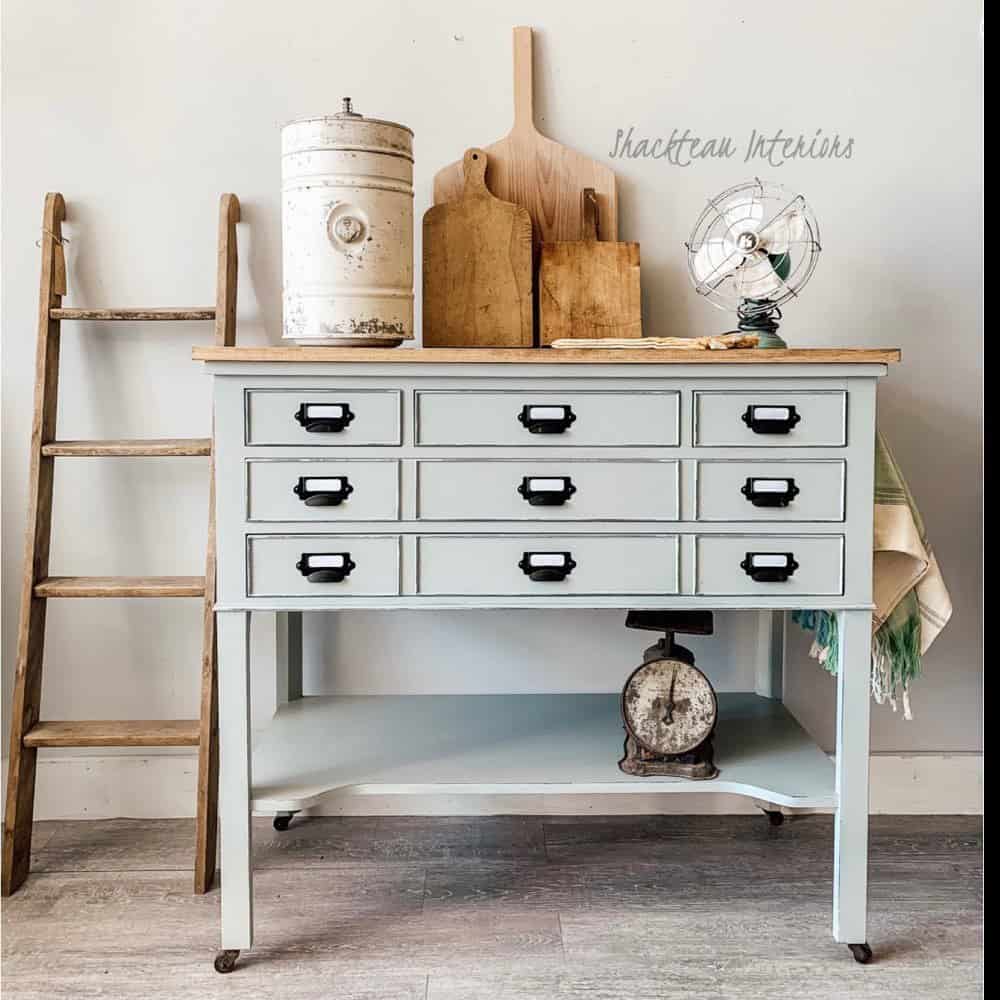
I chose milk paint for this dresser because it creates an old, worn look… exactly what this piece is. Old and worn out, but in good enough condition to be of use. Milk paint comes in a powdered form, but all you have to do is add water to turn it into paint.
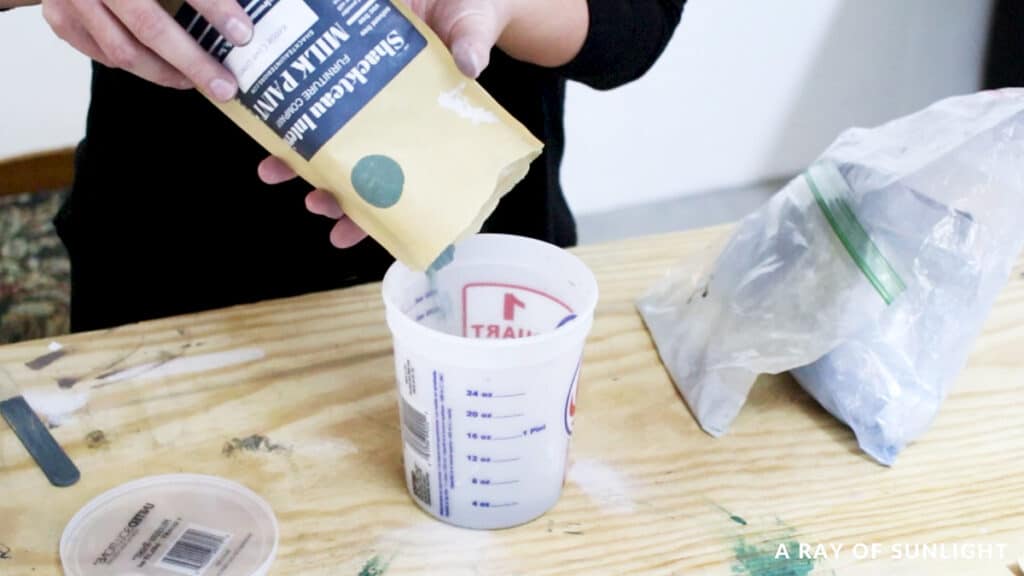
So, I ravaged through my stash of powdered milk paint and mixed some colors together. Then I mixed up a big batch of something similar. Mixing milk paint colors together is different than other types of paint since it’s a powder.
How To Mix Milk Paint
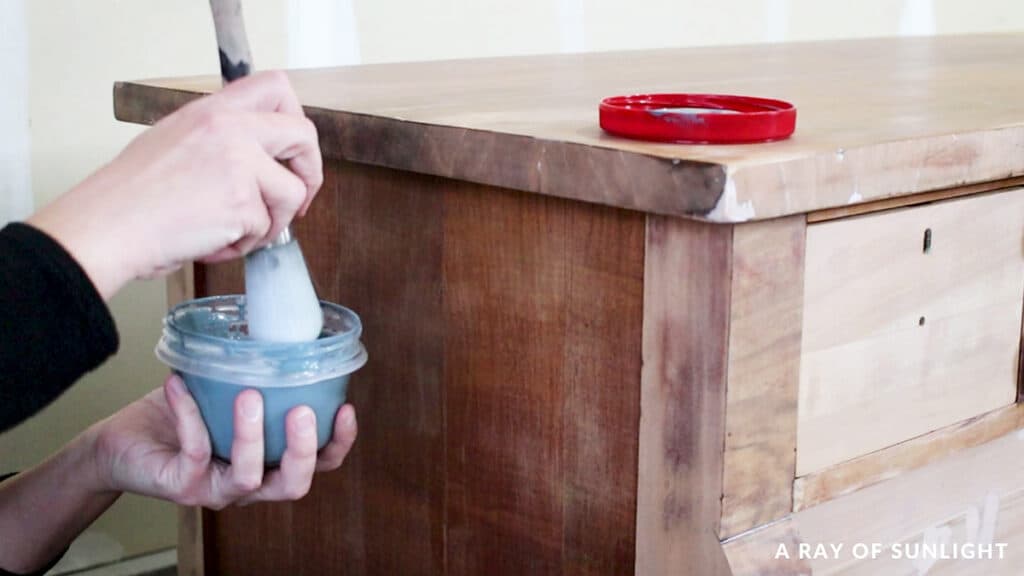
Mix 1 part water to 1 part milk paint powder, mix it together really well, or shake it up, and let it sit for 10-15 minutes so the powder can disintegrate and it can all come together to make a thicker paint.
But, once it’s mixed up, it doesn’t keep for very long, so I only mixed up half of the batch, or what I thought I would use that day. Learn everything you need to know about mixing milk paint here.
Adding Milk Paint Bonding Agent
One other thing about this paint is that it is known to create a chippy look if you don’t paint it on raw wood. If you don’t want it to chip, mix some Extra Bond into the mixed-up milk paint.
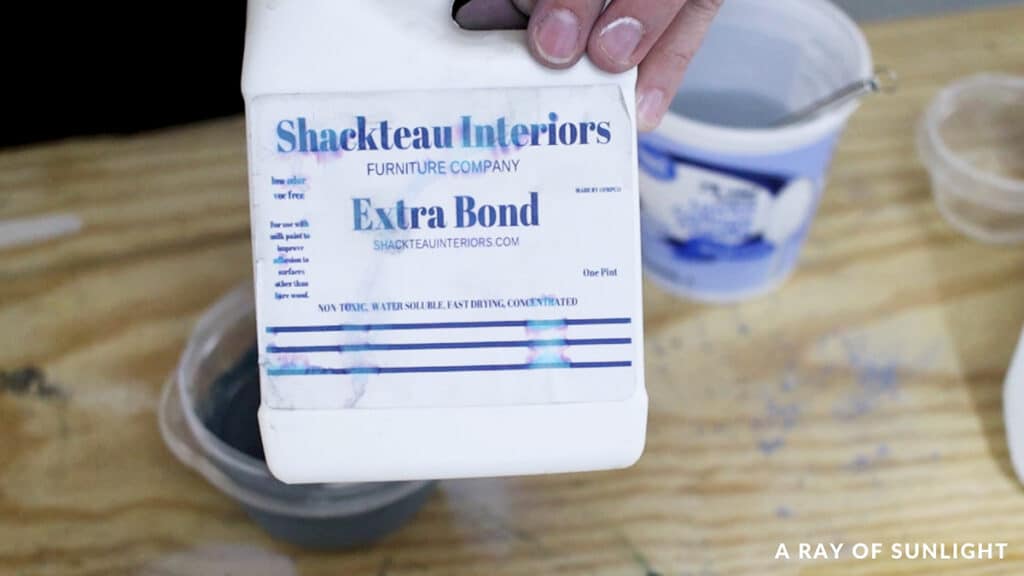
Technically I think it’s a 2:1 ratio… so 2 parts mixed milk paint to 1 part Extra Bond. I swear this stuff is just glue because it smells like Elmers glue… but I can’t confirm that.
Then I let the paint sit for 15 minutes and then I painted it onto the dresser with a round Zibra paint brush. If you want a chippy finish, here’s how I get a chippy paint finish with milk paint every time!
Best Brush For Milk Paint
I love Zibra paint brushes because they are affordable, and they come in different shapes that make it easier to paint furniture. My favorite is the round brush.
Read this post to learn your options for the best paint brushes for painting furniture, aside from the Zibra brushes. Oh, and these brushes will last forever if you clean them out after a project is done. Here’s my guide on how to clean paint brushes.
Painting Furniture with Milk Paint
When painting milk paint, I like to brush it on and then go back over it in a long brush stroke. Can you spray milk paint? Yep! You can!
Milk paint can have a lot of variations, so going back over it with long brush strokes helps minimize the variations in the pigments. This first coat went on super thin.
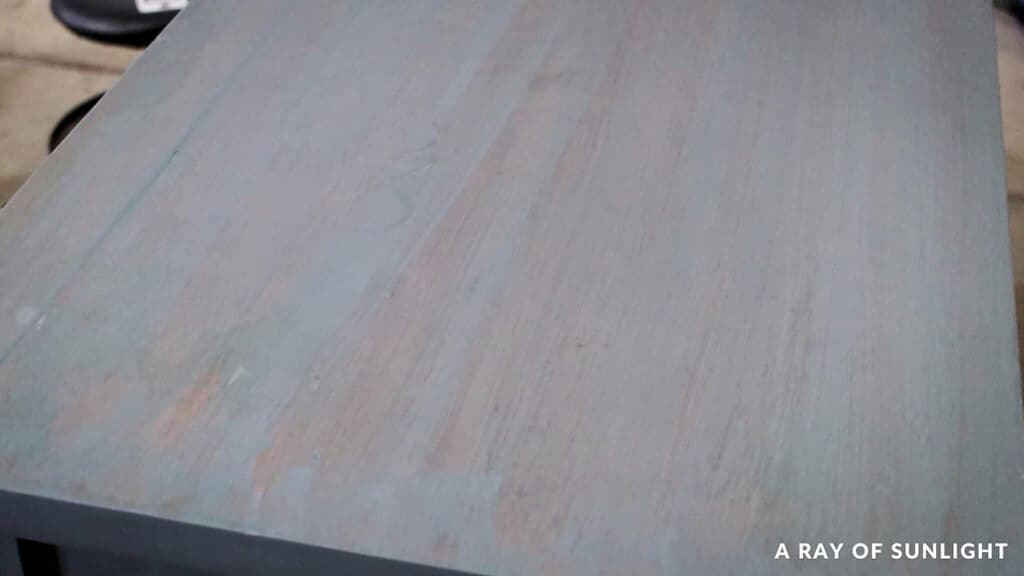
That’s partly because of the bonding agent, but also, milk paint tends to look really bad on the first coat. But the second coat should have full coverage or almost full coverage.
How Long Does Milk Paint Take To Dry
Milk paint dries pretty quickly. Within 30 minutes usually, you can paint the next coat of milk paint. I painted the dresser with 2 coats (one right after the other) before walking away from it for the night.
When I came back the next day, there were 2 places where the veneer was lifting, thanks to the moisture from the paint. So I chipped those off and filled them with wood filler. Here are more methods on how to fix veneer that is lifting. Learn more about the best wood fillers for furniture you can use here.
Would you like to save this?
And I mixed up another batch of paint and painted on another coat on everything to make sure it was all the same color.
Painting Over Wood Filler with Milk Paint
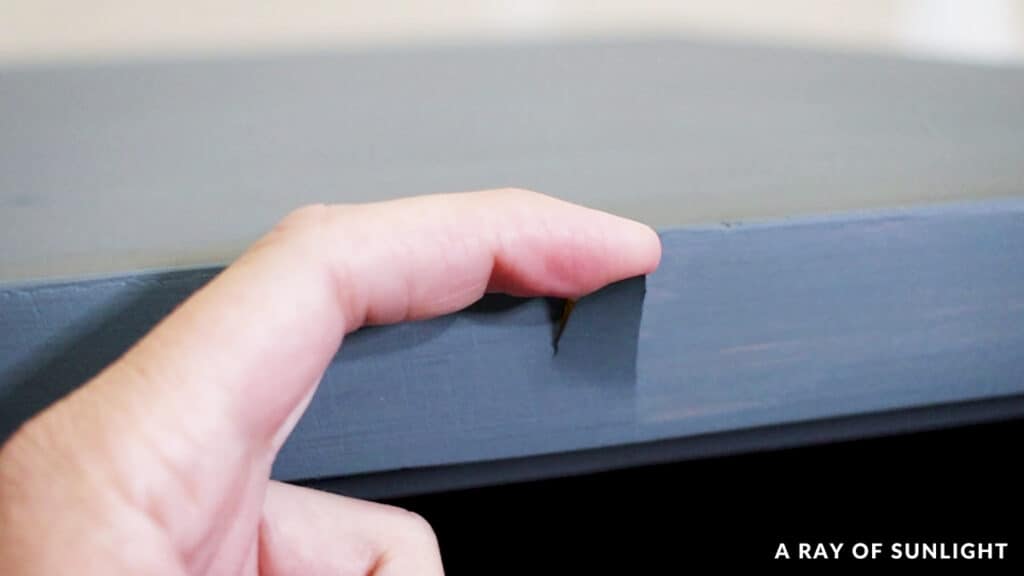
I had to touch up those spots where I wood filled. I put some Extra Bond over them to help the paint stick and then I painted over them… just to find one of them chipping again. So I had to sand it again and try to touch it up again…
Sometimes milk paint really has a mind of its own and doesn’t like to stick where wood fillers are. But I kept at it and it kept chipping because of the damaged veneer right there.
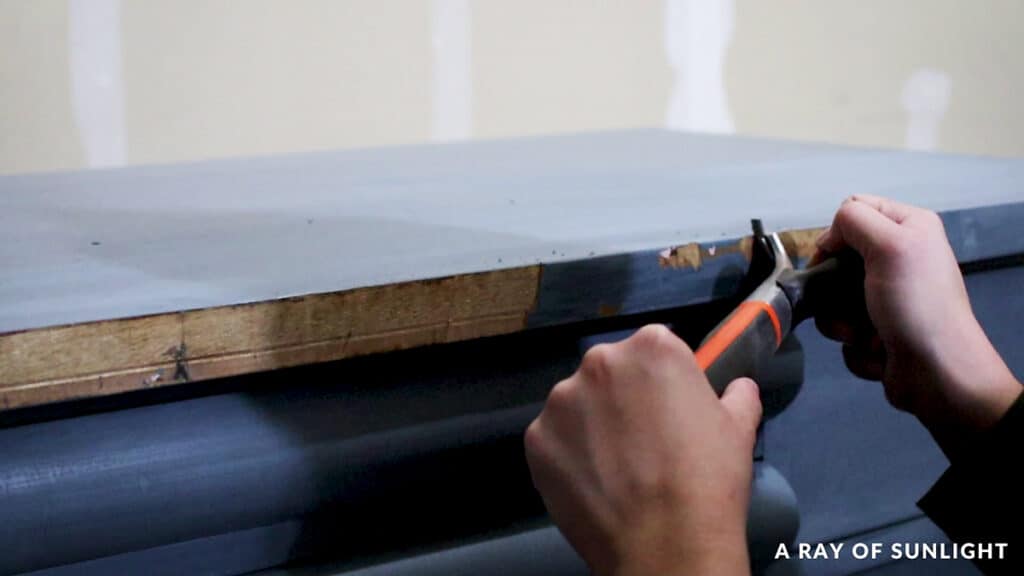
So I ended up just scraping off the veneer (with my carbide scraper) on that whole area, and then painting it all again. Learn about how to repair veneer edging here.
Which was kinda tricky because I didn’t have much paint left, and it doesn’t have much of a shelf life.
But I finally got it all fixed! Then I replaced the missing drawer stops and sanded all of the paint to smooth it out and blend variations in the pigments. If you’re having the same drawer problem, learn how to fix old dresser drawers from falling out here.
Sealing Milk Paint with Soft Wax
Milk paint is super porous, so it has to be sealed. It can be sealed with wax, water-based polyurethane, or hemp oil. This time I sealed it with some soft wax.
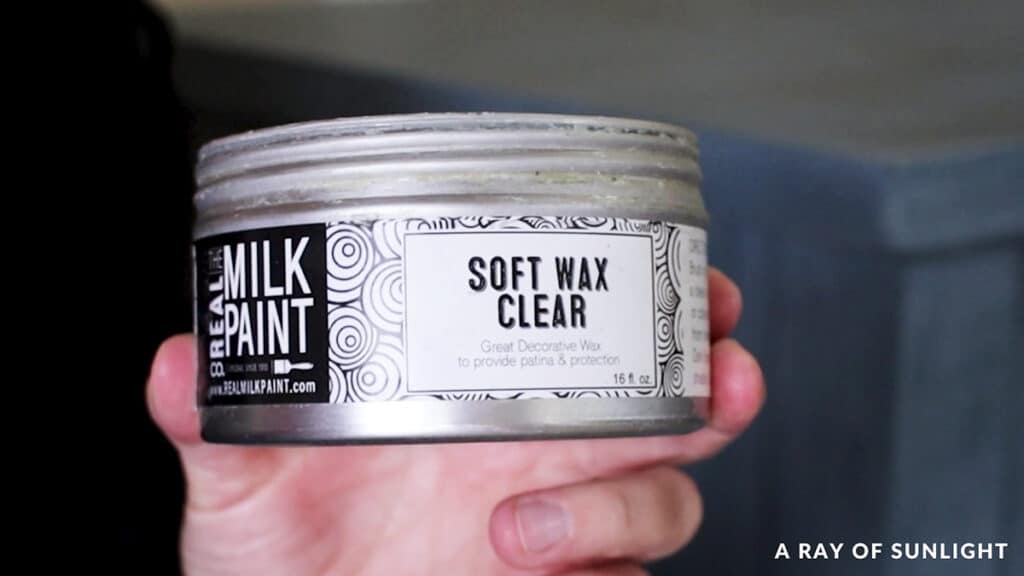
Water-based polyurethane will make the milk paint chip even more. If that’s the look you’re going for, then I recommend the water-based polyurethane.
Here’s how to apply polycrylic to painted furniture. Learn all about how to seal milk paint with these 3 ways to seal milk paint. Then I added the new hardware and put on some keyhole covers… Check out my guide on finishing touches of painting furniture for a successful makeover.
You can watch the full makeover in our YouTube video below, or keep scrolling to see what it looks like now!
More Before and After Makeovers
See All >
Click any of these “before” photos below to view the “after” of that makeover.


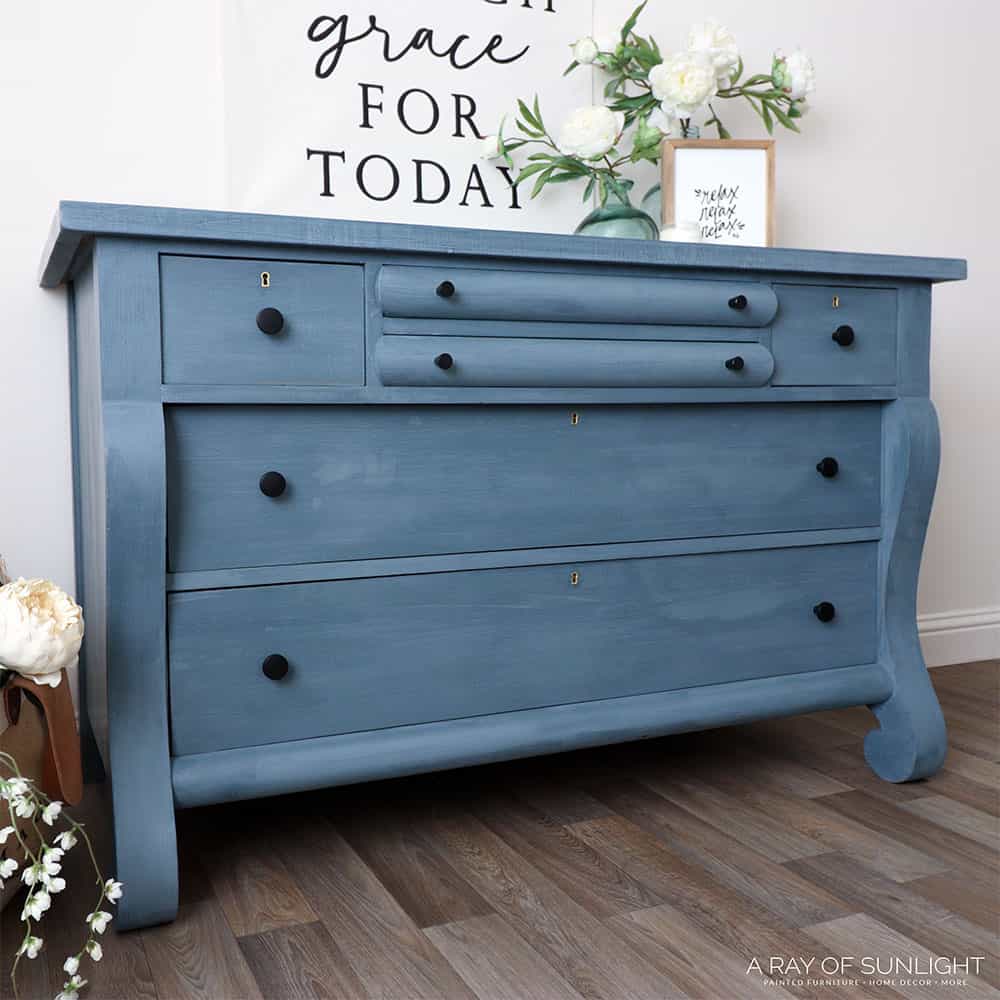
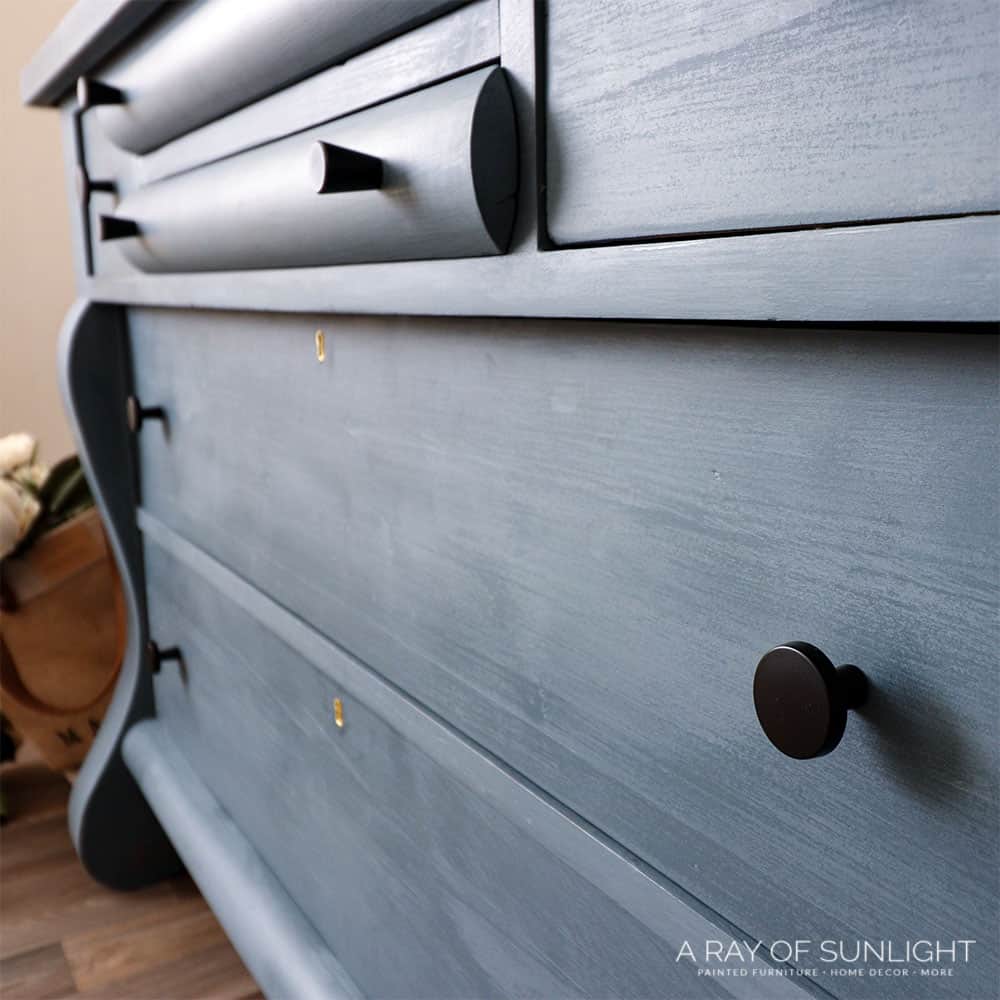
It’s rustic and totally gives a nod to its history. Even though I tried to prevent chipping, there were still a couple of small spots where the paint still chipped. I’m honestly not sure about the overall look… I think I might repaint it with something else. What do you think??
Scroll down for additional tips on how to use milk paint on furniture. Check out more hand painted dresser ideas here for your next DIY project, and for more antique dresser transformations, check out these painted antique dresser ideas.
Milk Paint vs Chalk Paint
Each has its own advantages and disadvantages, so it’s important to choose the right type of paint for your project.
Powdered Milk Paint
Milk paint is a natural product made from milk proteins and lime. It’s non-toxic, making it a good choice for painting children’s furniture.
The downside of milk paint is that it can be tricky to work with if you want a solid finish with no variations, and you have to mix it with water. It is known to create chippy finishes, but when it does adhere to a surface, it is on there good. See what a chippy milk paint finish looks like on this chippy blue painted hutch!
It’s a porous paint, so it needs to be top coated. Learn more about topcoats for painted furniture here!
Chalk Paint
Chalk paint, on the other hand, is a synthetic product that contains calcium carbonate. It comes premixed, is easy to work with, and creates a solid, matte finish.
You can also create your own chalk paint with this homemade chalk paint recipe! It sticks well to furniture, better than latex paint, but it still needs help to stick to most surfaces well. It also has to be top coated for the best durability. Check out this post to learn more about how to chalk paint furniture.
Read through my comparison between milk paint vs chalk paint to learn more about these 2 types of paint side by side.
Best Milk Paint For Furniture
There are a few different brands of milk paint for furniture, but the best brand in my opinion is Shackteau Interiors milk paint which I also used in this antique pie crust table makeover. It’s very pigmented so it has great coverage. They have the best selection of colors too!
Other great brands of milk paint are The Real milk paint (it doesn’t chip very much, even when you try to), Miss Mustard Seed milk paint, and Sweet Pickins milk paint. Check out this stunning navy blue milk painted dresser using Miss Mustard Seed milk paint.
Here’s our list of the best milk paint for furniture to learn more about the top powdered milk paint options!
Rustoleum milk paint and General Finishes milk paint are not the same. Get my Rustoleum milk paint review here. And read about painting with General Finishes milk paint here. Check out more milk painted furniture ideas here!


Does milk paint always create a chippy finish?
While milk paint is known for creating a chippy finish, it is not always a guaranteed outcome. Depending on the type of surface you are painting and how well you prep it, milk paint may adhere to the surface without chipping.
Some people intentionally want a chippy finish when using milk paint, while others prefer a more solid color.To prevent chipping, mix in a bonding agent to your milk paint. If you do want to get a chippy finish with milk paint, you can distress the areas you want to chip using sandpaper, This will create the illusion of natural wear and tear on your furniture.
Once you have your desired level of distressing, seal your milk painted furniture. This will not only help make it more durable but can also enhance the chippy look.
How long does it take for milk painted furniture to fully cure?
Curing time of milk painted furniture can vary depending on factors such as humidity levels and the type of topcoat used.
If you used a water-based polyurethane as the topcoat, your milk painted furniture should be ready to use within 2 weeks. This type of topcoat dries quickly and can be applied in multiple coats for added protection.
Hemp oil is another popular topcoat for milk painted furniture, but it requires a longer curing time of at least 30 days. If you’re in a hurry to use your furniture, this may not be the best topcoat choice.
Furniture wax is another option for sealing milk painted furniture, but it takes even longer to cure than hemp oil. It’s important to let your milk painted furniture cure completely before using it regularly.


How to Use Milk Paint on Furniture
Milk paint is a unique way to update old furniture pieces or give new ones a rustic, farmhouse finish. Here's how to use milk paint on furniture.
Materials
Tools
Instructions
- Repair any damage on the old furniture then clean with a degreaser and prep the dresser for paint.
- Mix 1 part water to 1 part milk paint powder, mix it together really well, or shake it up, and let it sit for 10-15 minutes.
- For chippy paint finish, add some Extra Bond to the milk paint mixture and let the paint sit for 15 minutes.
- Apply 2 coats of milk paint, letting it dry between coats (within 30 minutes usually).
- Seal the milk painted dresser with soft wax then add your hardware!
Recommended Products
As an Amazon Associate and member of other affiliate programs, I earn from qualifying purchases.
More Milk Painted Furniture makeovers
- Black Milk Painted Dresser
- The Chippy Gray Milk Paint Dresser
- Spring Makeover – Layering Milk Paint
- DIY Dark Green Nightstands
- DIY Cedar Chest Makeover
Follow us on YouTube to get more tips for painting furniture. Or share your project with us on our Facebook Group and be part of our community. See you there!
Thank you for showing me about how to get smoke out of furniture . I thought I had the answer but I didn’t I only had half th answer.
I just love watching you repaint furniture and showing me how to do it right,that’s what I love about your show too all your help with painting and how to re-do furniture , how to re-surface finishes that’s my favorite .
That is such a unique and beautiful color. I wouldn’t change it.
Thank you so much!