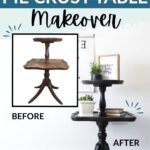
Antique Pie Crust Table Makeover

Are you looking to give a tired old piece of furniture a new lease on life that is consistent with its age? Then, look no further than this antique pie crust table makeover!
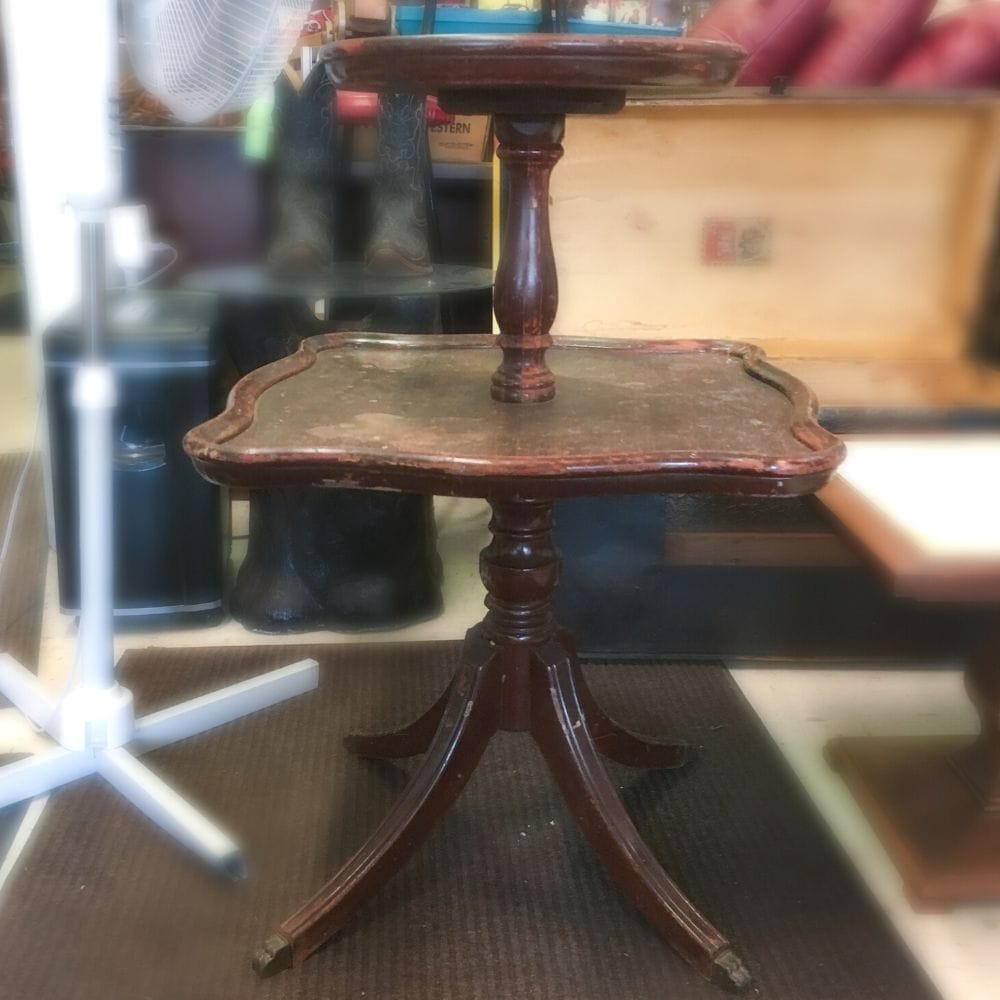
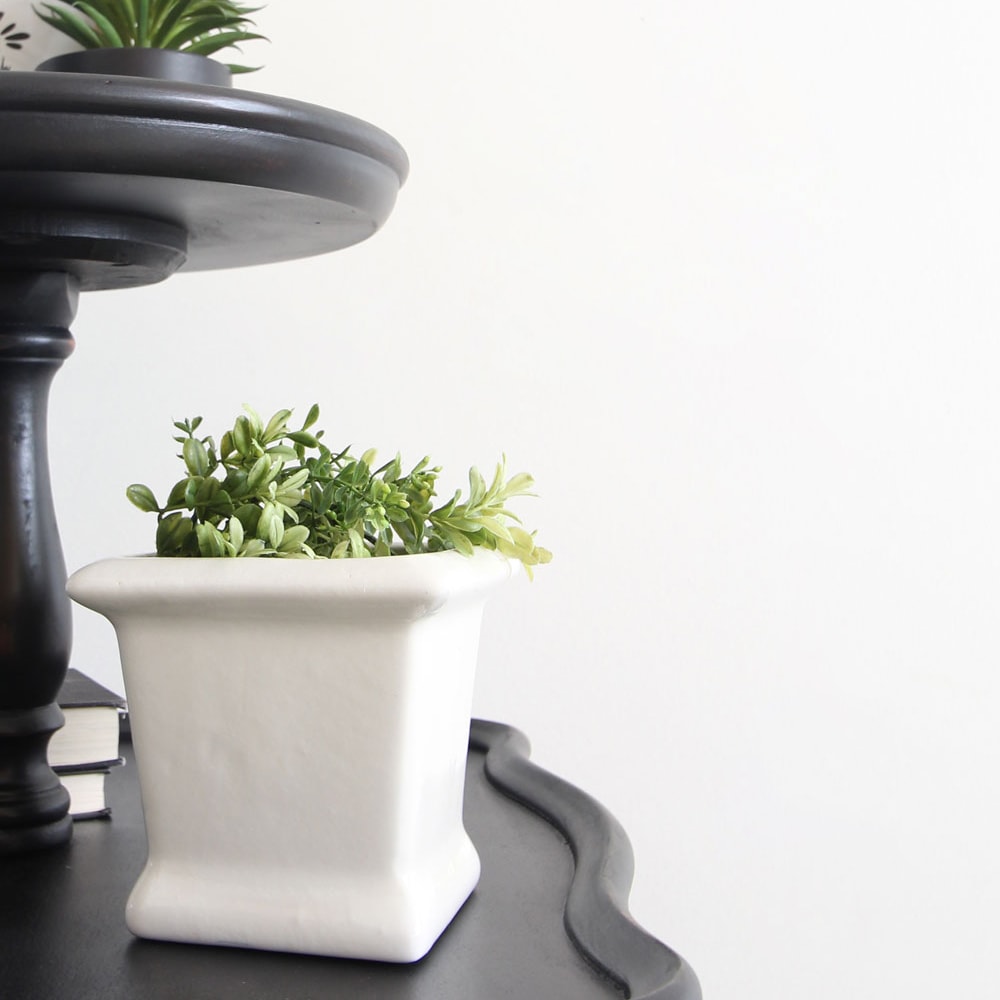
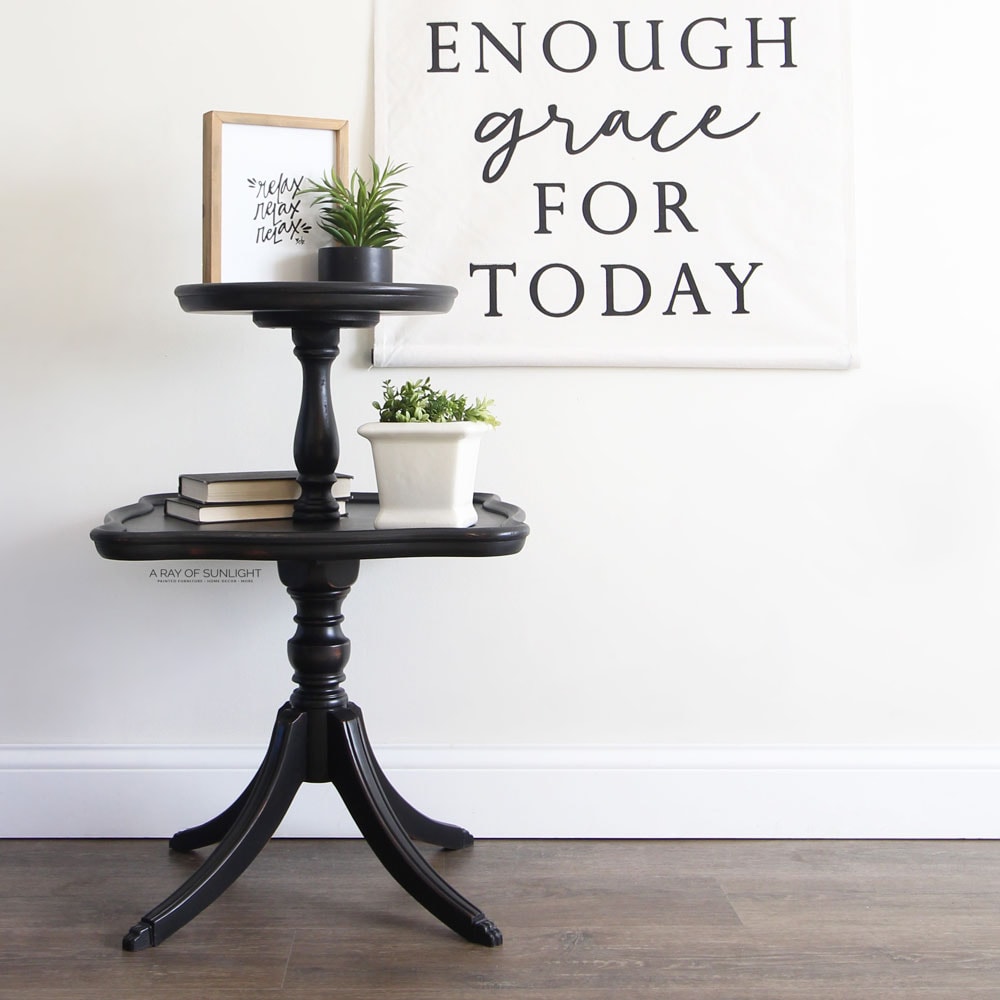
This two tier mahogany table was worn and scratched, but with some milk paint, it has been completely transformed into another of these black painted furniture ideas. The result is an antique style piece that looks true to its age but isn’t worn out.
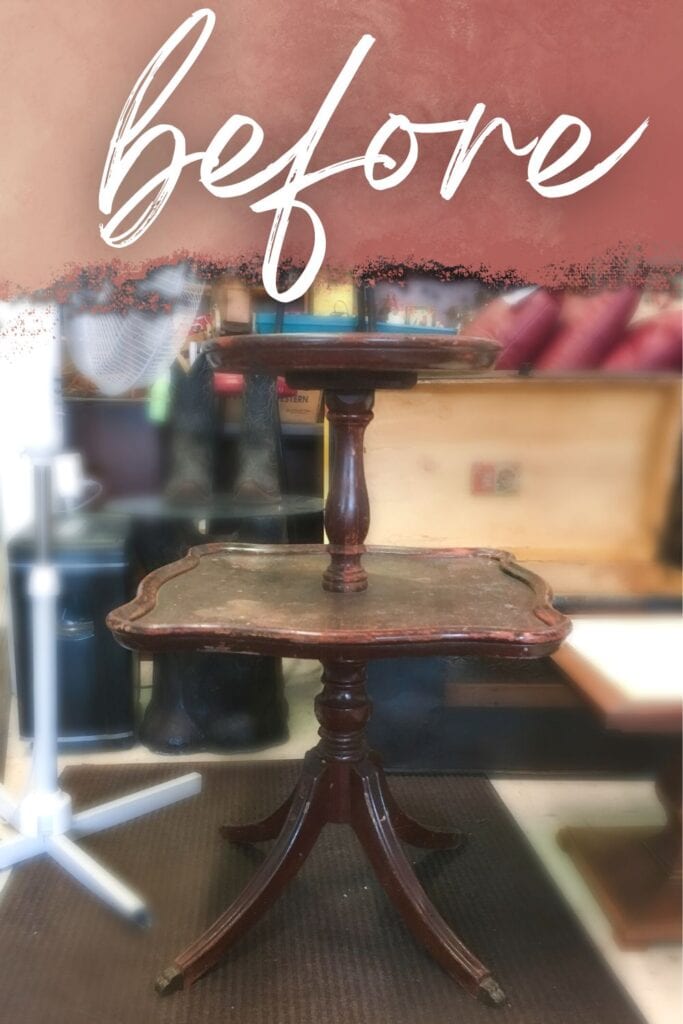
Upcycling furniture is a great way to give new life to an old piece and save money in the process. But sometimes, it can be hard to know where to start, especially when you have something like this antique pie crust table with a scratched and worn original finish.

What might look worn out and outdated now can be transformed into something stunning with some creativity and effort. That’s why we decided to take on this project and share how we gave this two tier end table a complete makeover!
You don’t have to be an expert to do these DIY projects. If you’re ready, keep reading for the step by step process of how we created this beautiful transformation!

Supplies Used for Antique Pie Crust Table Makeover
As an Amazon Associate, I earn from qualifying purchases. I also may earn from other qualifying purchases with other companies or get free product to review and use. All opinions are my own.
- SurfPrep Sander (Use code RAY10 to get 10% off your order)
- Coarse 1/2″ Pro Foam Pads (Use code RAY10 to get 10% off your order)
- Stripwell QCS (Use code SUNLIGHT10 to get 10% off your order of Stripwell QCS!)
- Shop Vacuum
- Tack Cloth
- Dixie Belle Boss Primer (Clear)
- Shackteau Interiors Milk Paint in Black Beach
- Zibra Round Paintbrush
- 220 Grit Sandpaper
- Minwax Oil Based Polyurethane
Removing the Old Finish
First, I removed most of the old finish. This isn’t usually necessary with furniture, but the finish on this one was very scratched up and dinged up all over, so I opted to remove it beforehand.
I used my SurfPrep 3×4″ sander and coarse 1/2″ pro foam pads. Check out our blog post about the best sanders for furniture to learn more about how to pick one that best suits your needs and budget.
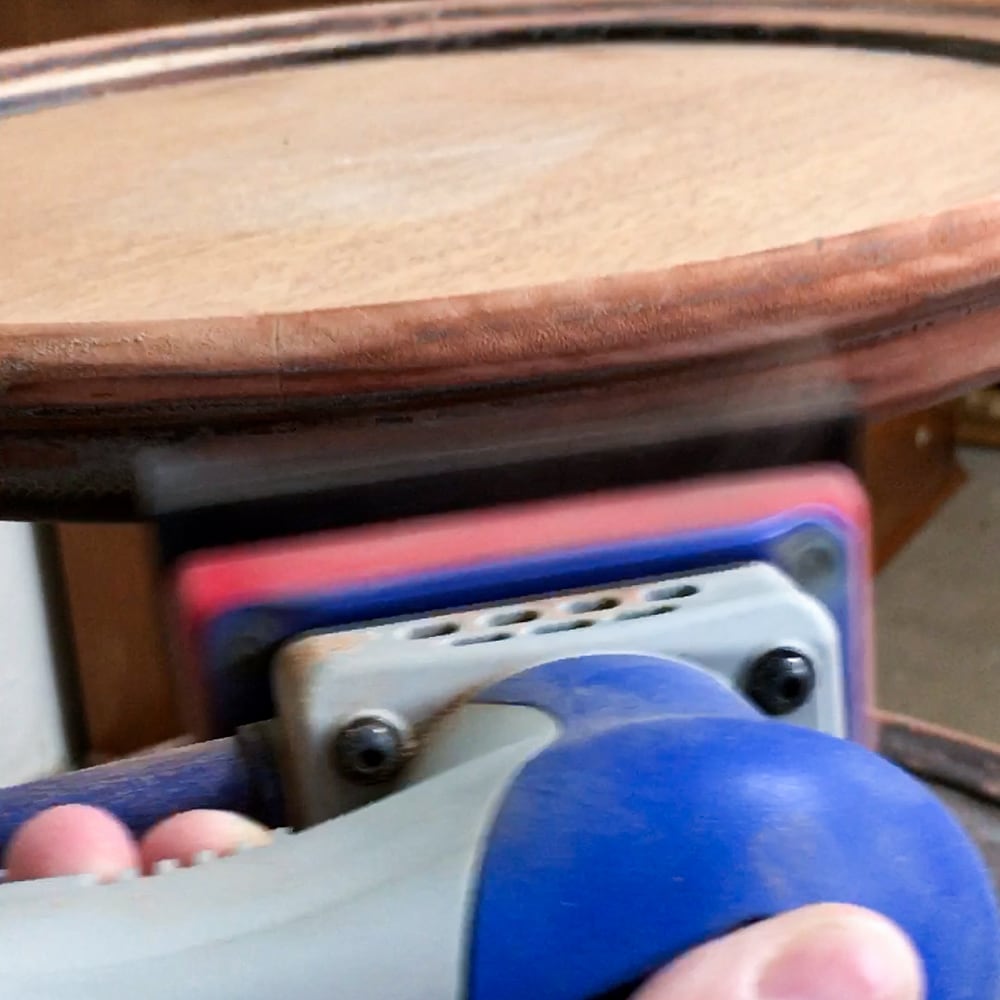
The 1/2″ foam pads made sanding all of the curves and details possible and easier than normal, but it would have been even easier to remove the old finish with Stripwell QCS instead of sanding. Check out my honest Stripwell QCS review to learn about how this chemical stripper works and my experience with it.
Check out our post on refinishing a dresser to learn exactly how to use Stripwell QCS. Get more tips on how to sand curves on furniture here.
Using a stripper can be messy, but so can all of the dust a sander creates if it isn’t hooked up to vacuum to suck up the dust. Honestly, I think sanding takes about the same amount of time as using a chemical stripper. Here’s how to attach shop vac to sander if you’d like this setup.
After sanding with the coarse foam pads, I switched to medium foam pads to smooth the wood out a little more for the paint, and then I cleaned up with my shop vacuum and wiped it off with a tack cloth to remove any remaining dust.
Priming Before Using Milk Paint
Then, I sprayed on 2 coats of Dixie Belle Boss Clear Primer. Milk paint doesn’t really need a primer, but I wanted a chippy look, and it will not chip when you work with raw wood, which is what I was left with after sanding off the finish.
Here’s our list of the best primers for painting furniture to help you pick the right one for your next project.
This table is also made of mahogany wood, and it is notorious for leaving stains in the finish when you paint over it. This primer helps milk paint chip more, but it is also one of the ways on how to stop stains from coming through the paint.
The awesome thing about this primer, though, is that it is waterbased, so you don’t have to deal with stinky primers. But, honestly, it doesn’t block bleedthrough as well as the stinky primers.
In this case, since I used black, I didn’t need the primer to completely block all of the stains. I put it into my sprayer and thinned it out a little bit with some water so I could apply it better. I didn’t use very much water, though, because I didn’t want to mess it up.
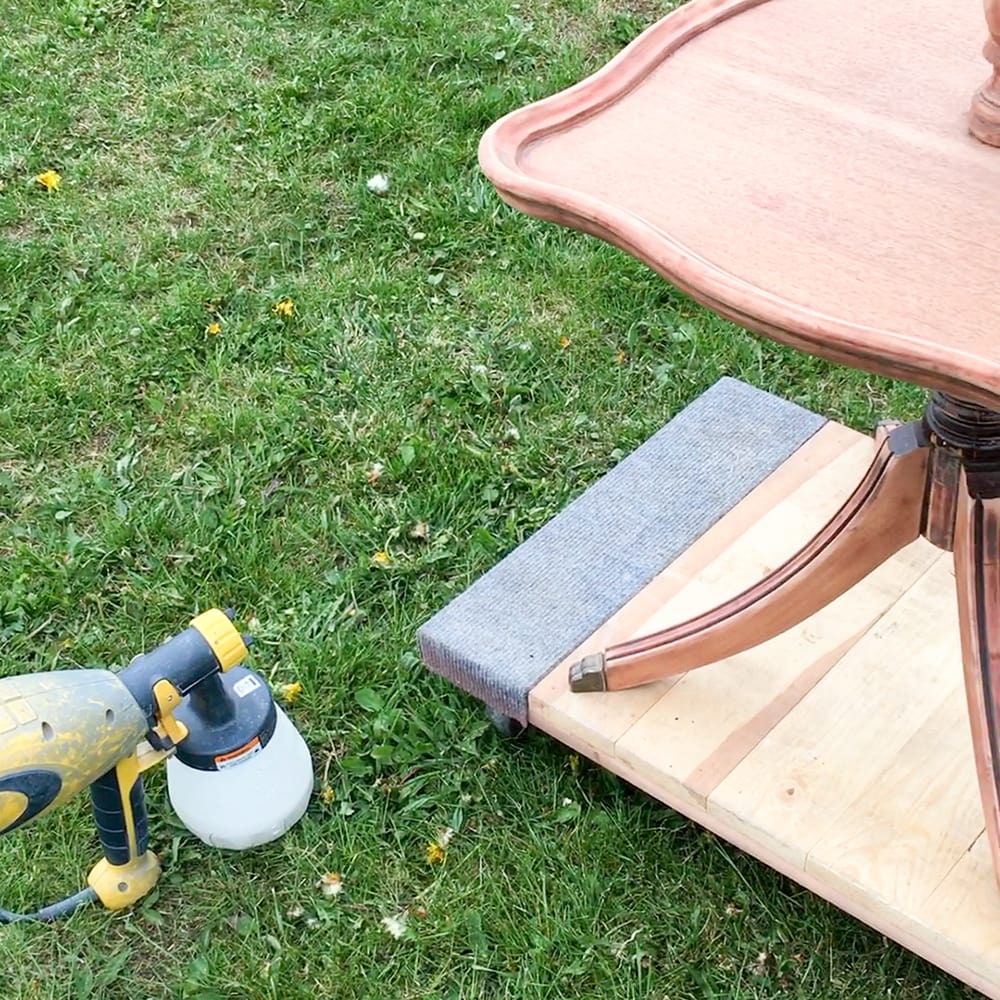
I probably used about 10% water for the primer. Here is more about how to thin paint for a Wagner FLEXiO sprayer.
Would you like to save this?
You can totally use a paintbrush for this step – here’s our list of the best paint brushes for painting furniture. Here’s our list of the best HVLP paint sprayers for furniture if you want to use one, too.
I let the primer dry between coats, and then I let it dry overnight.
Milk Painting Furniture
The next day, I mixed up some Shackteau Interiors Milk Paint in the color Black Beach with some water – read our how to mix milk paint post to learn how simple it is. Then, I brushed it on with a Zibra round paintbrush. I love the round brushes for projects that have all these curves and for any spindles. Application is so much easier!
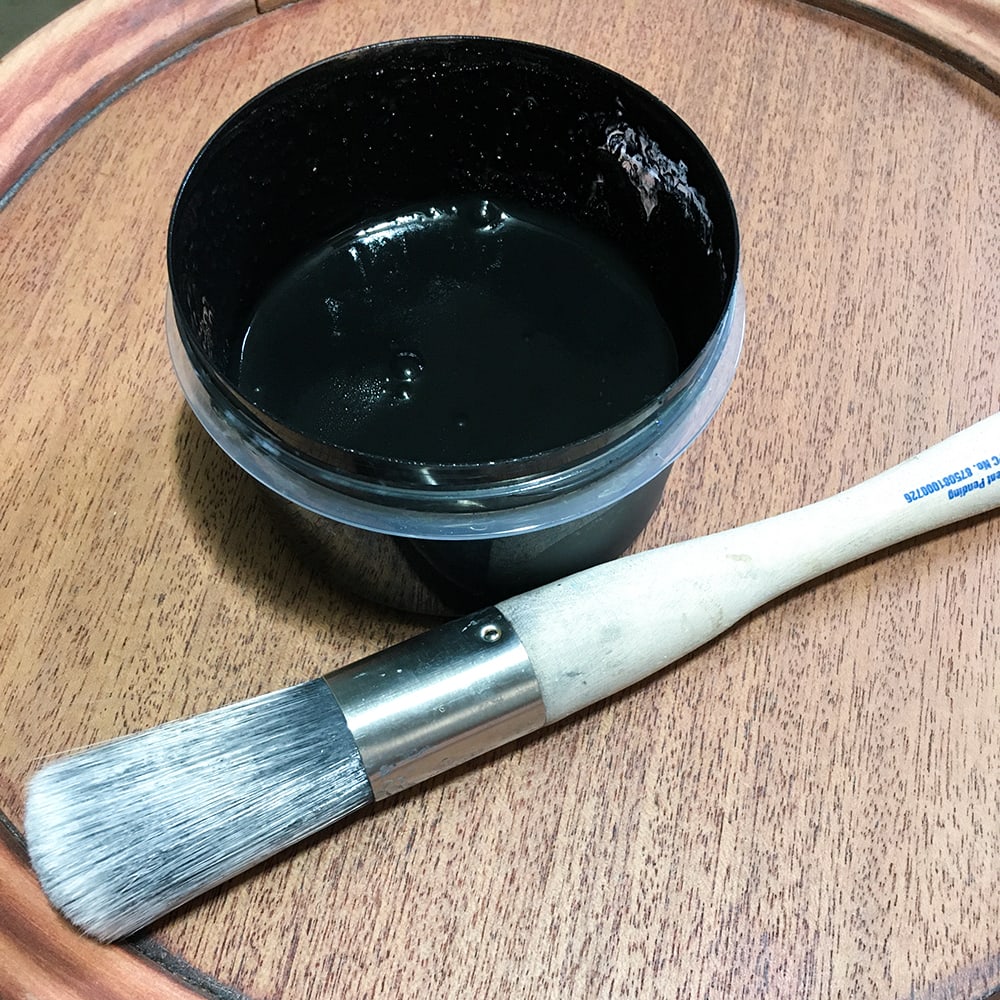
The milk paint goes on so well with Zibra brushes, and Black Beach has great coverage. One coat is really all that is needed! Then, I let it dry. It dries very fast, though – in less than an hour, typically.


Distressing and Topcoating Milk Paint
Once dry, I sanded it with 220 grit sandpaper to distress it and smooth out the gritty feeling of the finish. If you aren’t sure how to do this, read our distressing furniture techniques post to learn different ways to create this look.
Now, black is hard to topcoat without leaving a streaky finish to it, so I sprayed on 3 light coats of Minwax oil based polyurethane in a spray can. Learn more about the features, pros and cons, and how-to’s of the Minwax polyurethane spray here.
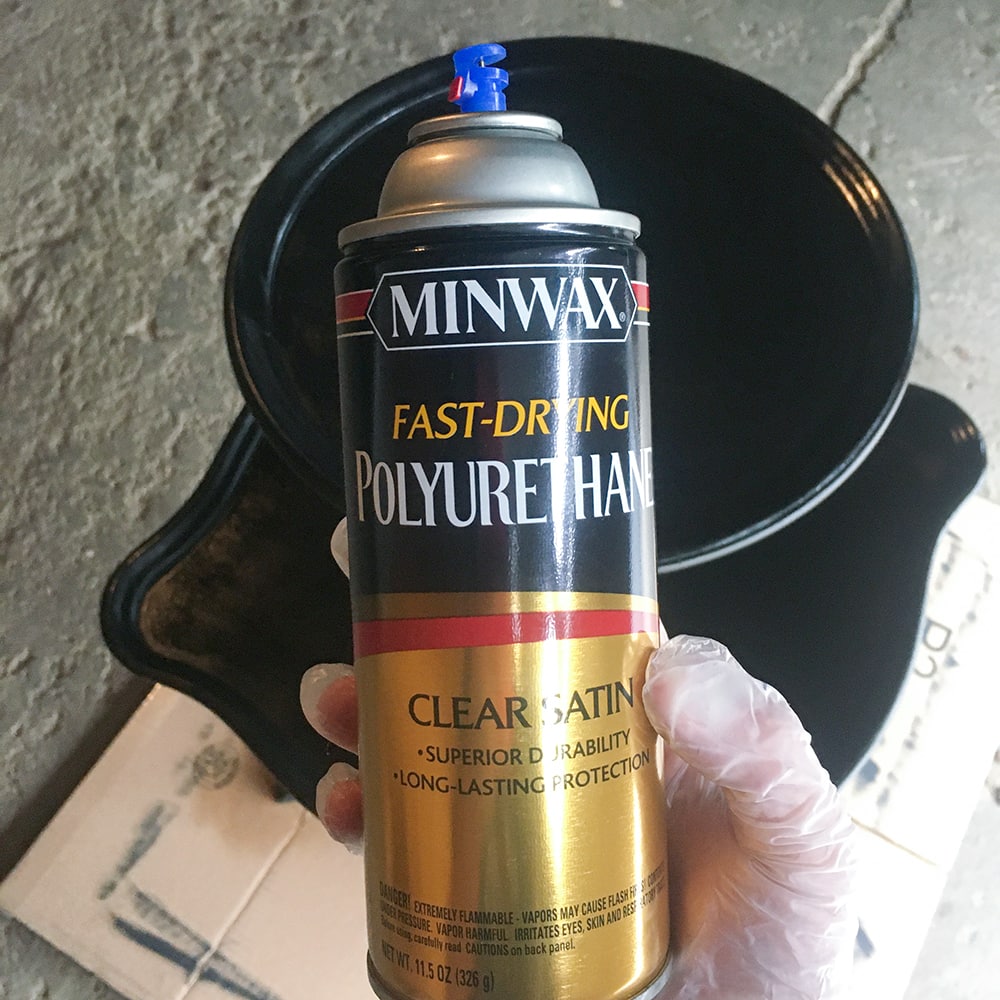
The oil based polyurethane is great for dark colors because it doesn’t leave a streaky look, and the amber tint makes the finish look even deeper.
Before I applied it, we let the paint dry for at least 48 hours so we didn’t mix waterbased products and oil based products together and create a reaction between them.
If you have a sprayer, it’s easy to apply waterbased polyurethane and create a perfect looking finish! Here is how to spray polyurethane to learn more about this process.
If you aren’t sure what topcoat to use, here are our posts on the best topcoats for furniture and wax vs polyurethane for more guidance.
And here’s how the antique pie crust table makeover turned out!! For similar projects, check out these painted sofa table ideas.
More Before and After Makeovers
See All >
Click any of these “before” photos below to view the “after” of that makeover.


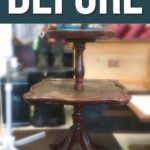
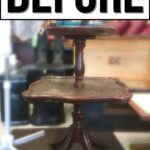
It was worn out and just looked sad before. Now, it has a fresh finish, but the finish was done in a way that it can still be true to its character and age.


Antique Pie Crust Table Makeover
Do you want to transform an old piece of furniture but don't know where to start? Here's the step by step process for our antique pie crust table makeover.
Materials
Tools
Instructions
- Remove the old finish using a SurfPrep sander and foam pads or a chemical stripper. Then use medium foam pads to smooth the wood.
- Use a shop vacuum and tack cloth to remove all the dust.
- Spray 2 coats of clear primer, let the primer dry between coats, and then let it dry overnight.
- Mix milk paint with water, apply with a brush, let dry.
- Sand with 220 grit sandpaper.
- Allow the paint to dry for 48 hours before applying 3 coats of oil based polyurethane.
Recommended Products
As an Amazon Associate and member of other affiliate programs, I earn from qualifying purchases.


more black painted furniture makeovers
- Painting Oak Furniture Black
- Black Painted Antique Buffet
- DIY Farmhouse Dresser in Black
- DIY Black French Provincial Dresser
- How to Paint Cheap Furniture
Learn the Art of Updating Furniture!
If painting furniture feels overwhelming or your past attempts didn’t go as planned, this course will guide you step by step.

Follow us on YouTube to get more tips for painting furniture. Or share your project with us on our Facebook Group and be part of our community. See you there!