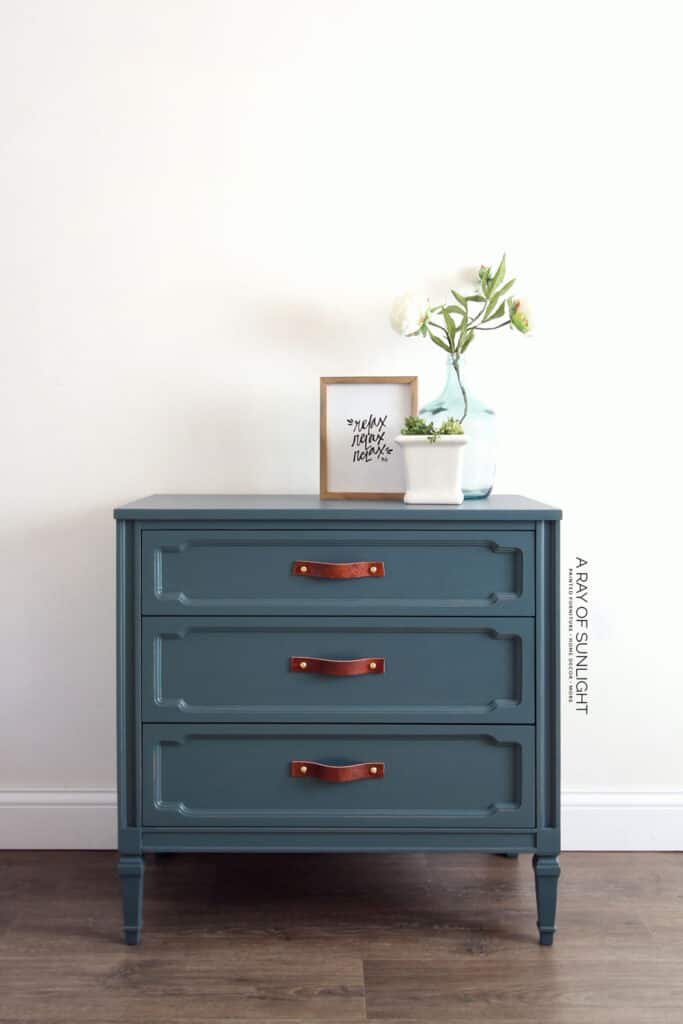
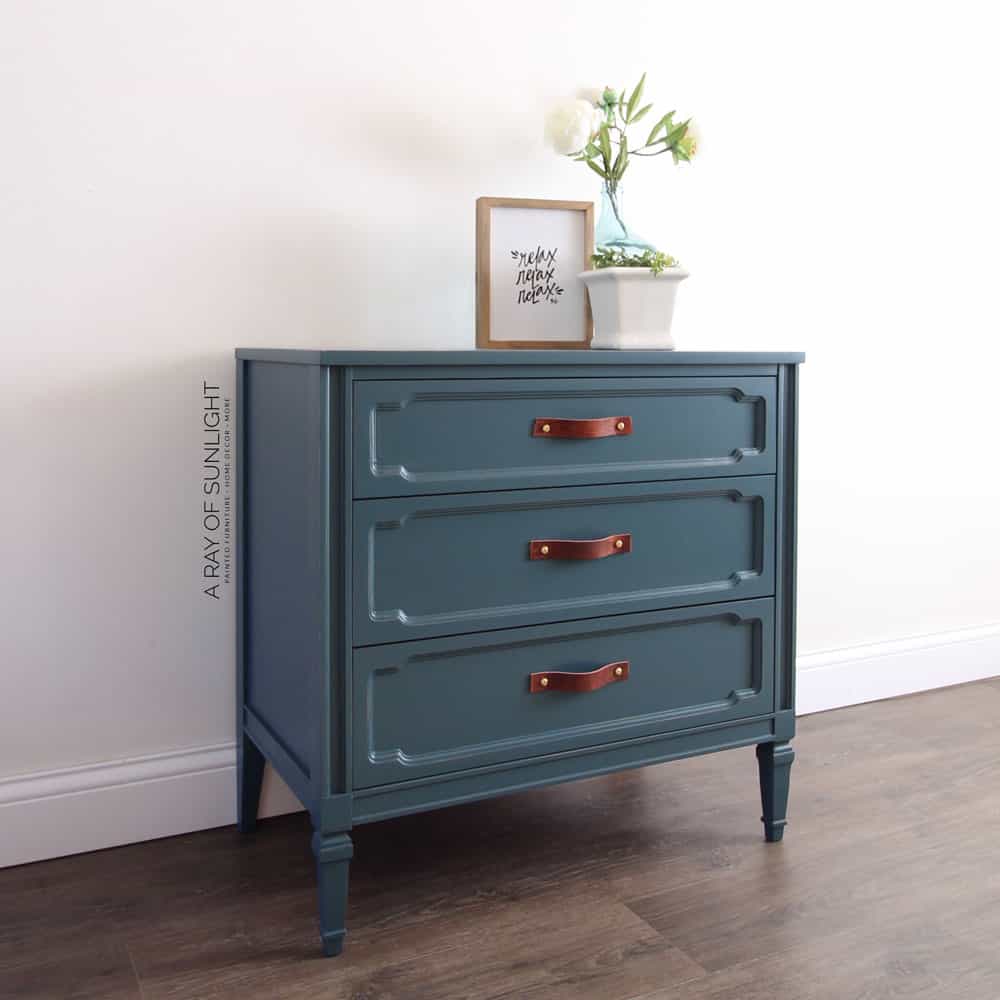
Vintage Dresser Painted with Teal Furniture Paint


If you love DIY dresser makeovers as much as we do, then you’re in for a treat! Get ready to be inspired by this stunning vintage dresser painted with teal furniture paint from Fusion Mineral Paint. The simple yet chic design of this dresser, combined with the bold color choice, will instantly upgrade any room in your home.
There’s something so satisfying about giving an old piece of furniture new life through a fresh coat of paint. So let’s dive in and see how this dresser was transformed!
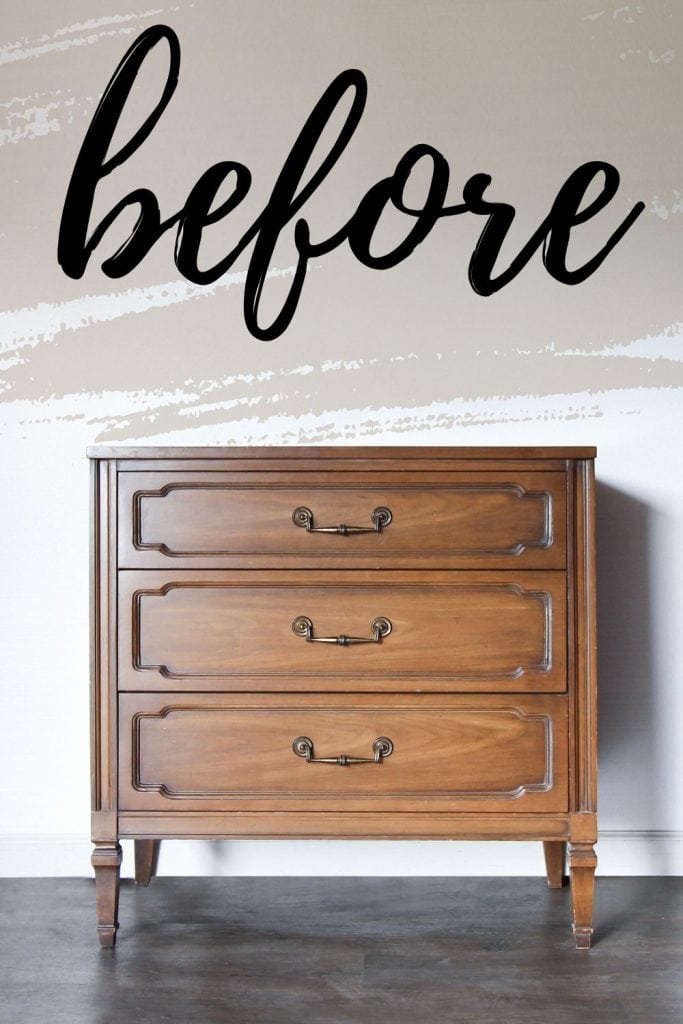
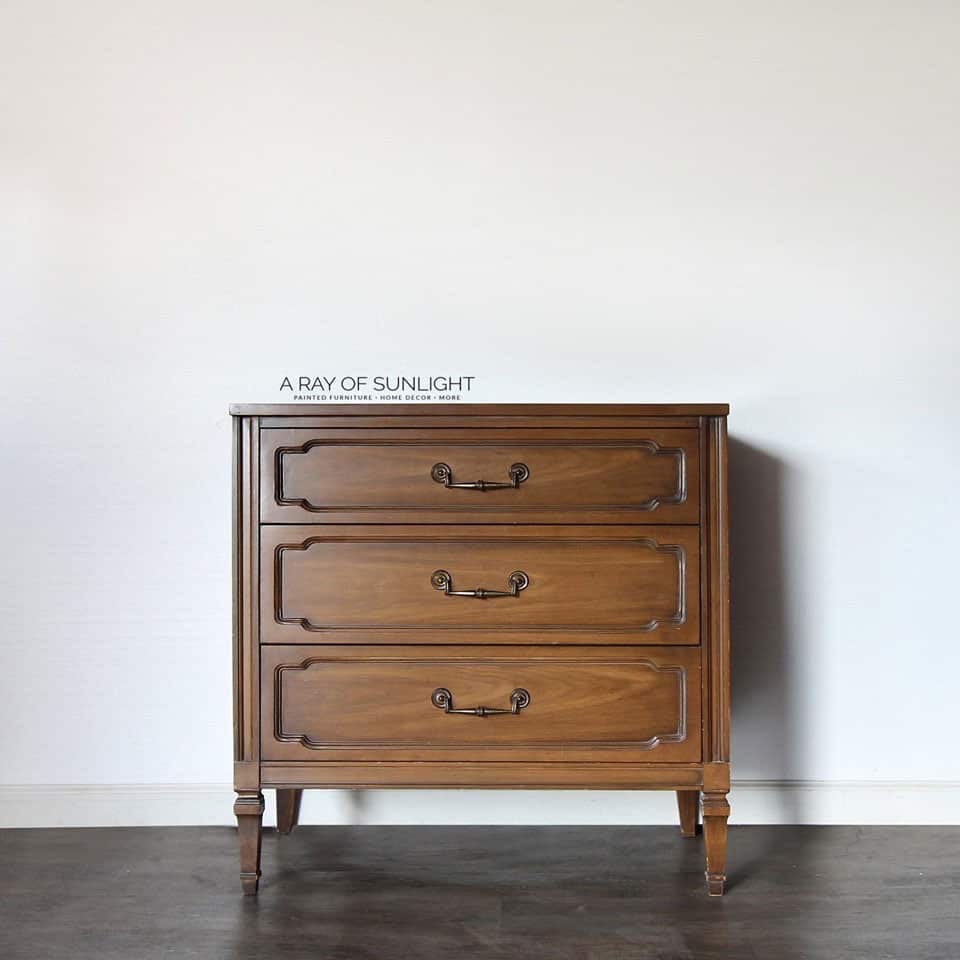
A nice little family contacted me and asked if I wanted this dresser for free! Isn’t that amazing? It’s a high quality piece, though it didn’t have a makers mark on it.

But it’s the perfect size for a bedside table or for a kid’s dresser. And I love the vintage modern style! So of course I snatched it right up (while I thanked them profusely!)
Don’t you just love finding hidden gems like this? This vintage dresser had so much character and charm, just waiting to be brought back to life. Here goes another awesome furniture makeover idea to add to your list of must try projects!

Supplies Used for Vintage Dresser Painted with Teal Furniture Paint
As an Amazon Associate, I earn from qualifying purchases. I also may earn from other qualifying purchases with other companies or get free product to review and use. All opinions are my own.
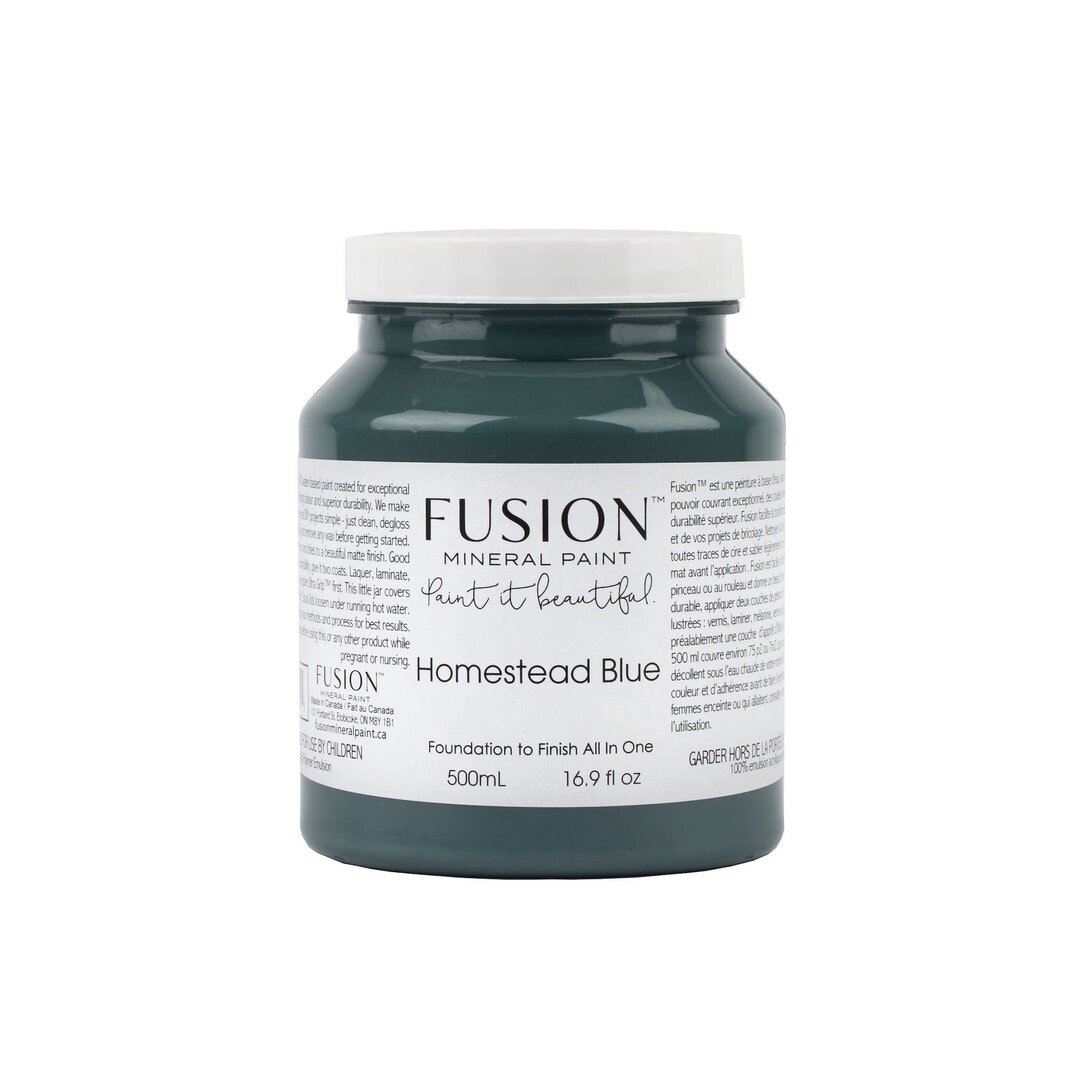
- Homestead Blue By Fusion Mineral Paint
- Krud Kutter
- 220 Grit Sandpaper
- Shop Vac
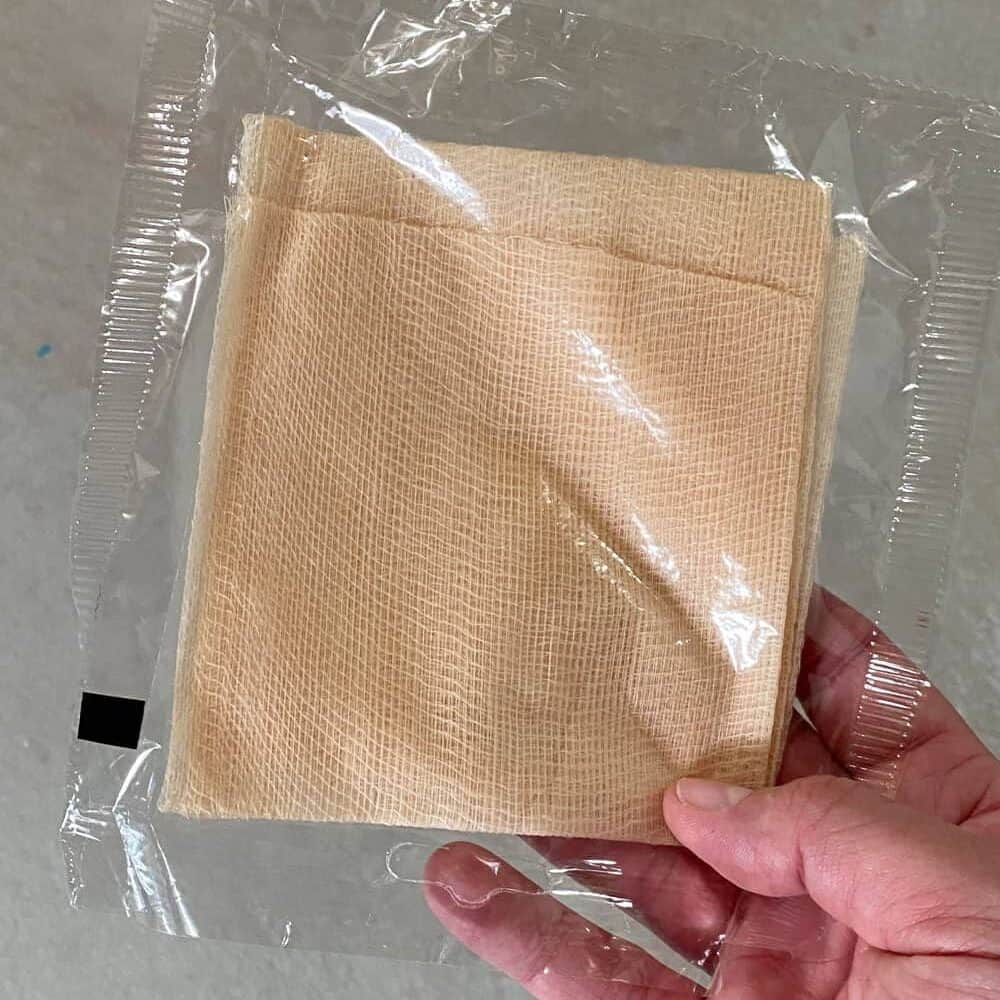
- Tack Cloth
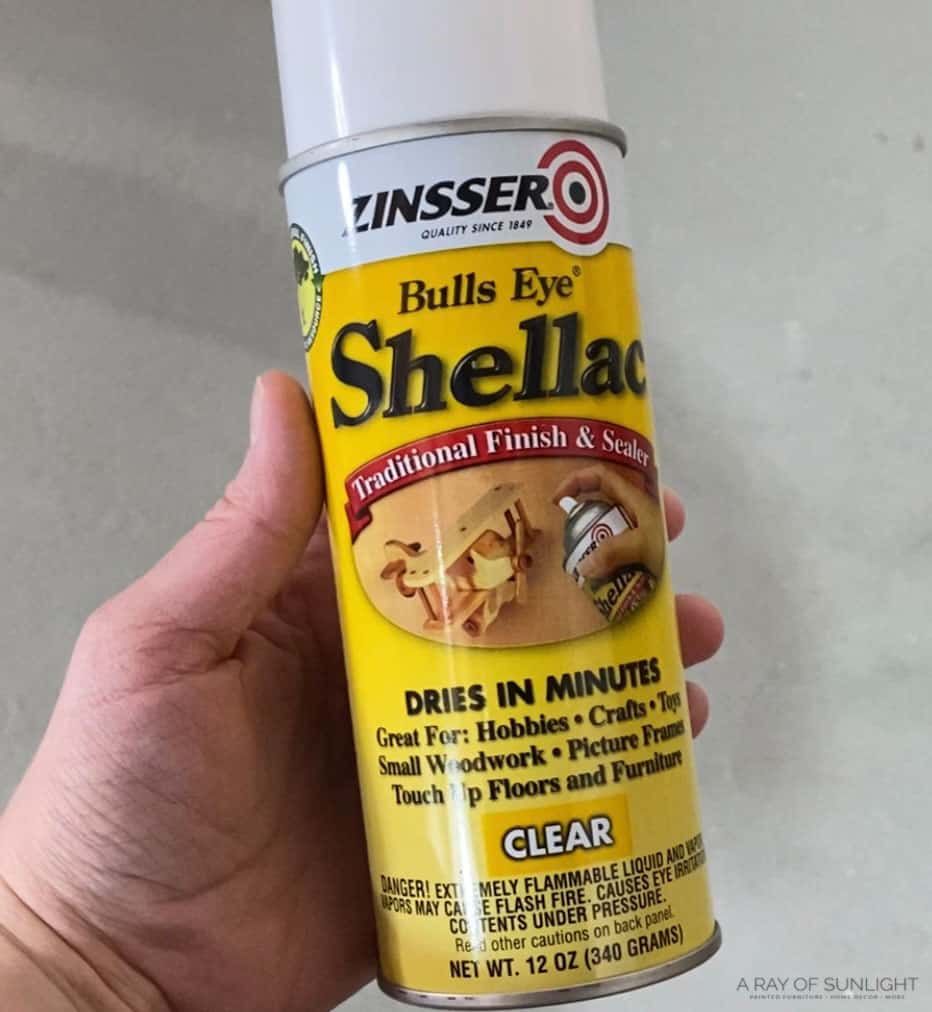
- Clear Shellac in a Spray Can
- Painters Tape
- Pre Taped Plastic
- Fuji Q4 Paint Sprayer
- Sprayer Paint Filters
- Varathane Polyurethane Satin Sheen
- Respirator
Prepping Dresser for Teal Paint
To start off, I prepped the dresser for paint. Yeah I know, I want to skip this step too.
But whenever I have, I’ve always regretted it because my paint job didn’t look as good or it wasn’t very durable in the end.
Prep is everything if you want a durable paint finish! Learn more about how to prepare furniture for painting here.
First I removed the hardware and then I cleaned the dresser with Krud Kutter and a damp rag.
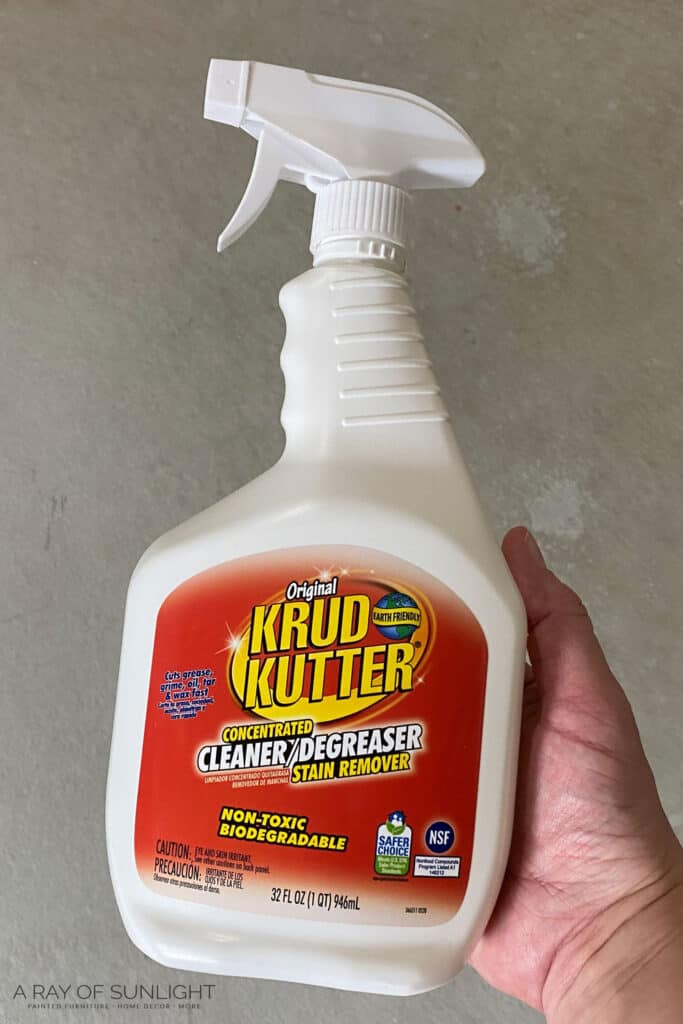
The Krud Kutter cleans off oils and grease on the surface so the paint can stick better. Check out how to clean furniture before painting to learn more.
Then I scuff-sanded the entire dresser with 220 grit sandpaper. Scuff sanding just means to sand the surface just enough that the surface is scuffed. It basically makes it so the paint can hold on better.
(Think of trying to hold onto something slick… it’s really hard to hold onto it. But if it has a little bit of a texture to it, it’s so much easier to hold onto. The same thing happens with furniture and paint.)
Learn more about the importance of sanding before painting furniture here.
After scuff sanding, I used my shop vac with the brush attachment to suck up all of the dust, and I used a tack cloth to pick up any remaining specks of dust that were left behind.
(Tack cloths are amazing and so much better at picking up dust than a wet rag!)
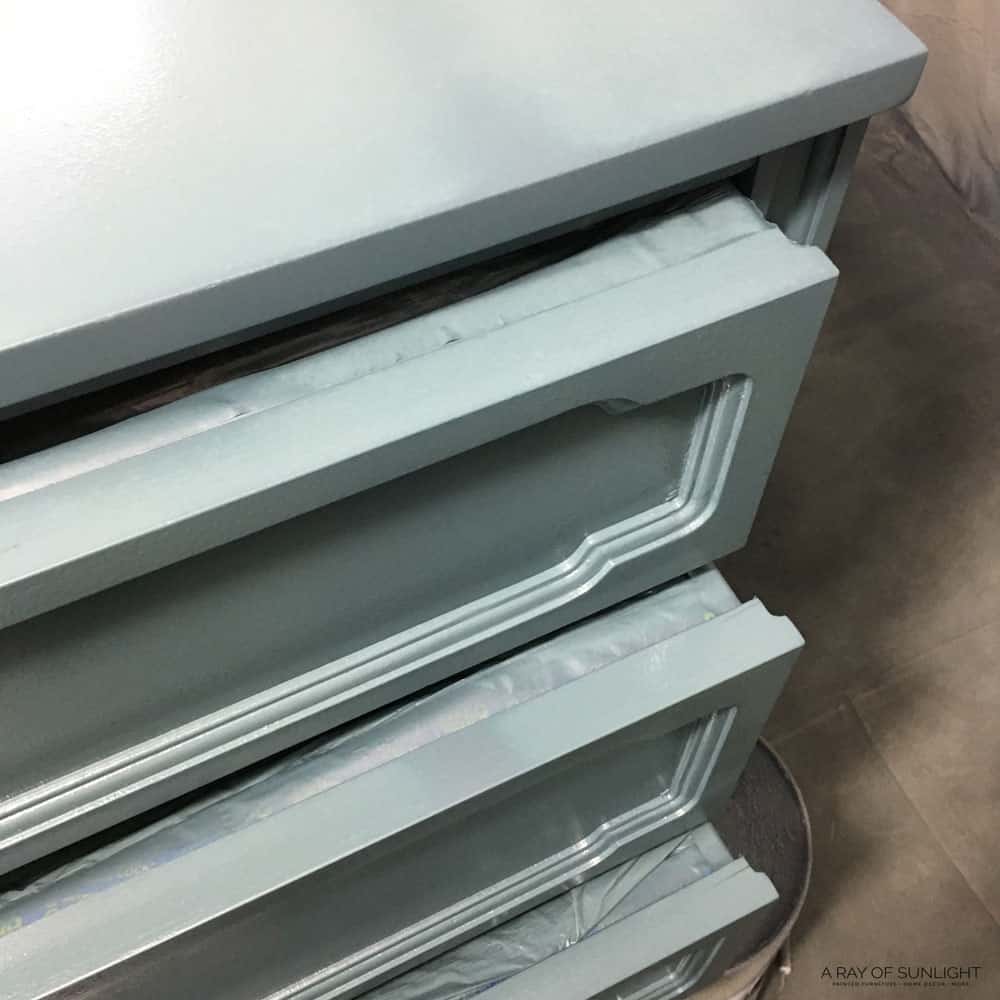
When it was dry, I taped off the drawers with this technique from this post on how to prevent overspray when painting furniture so the paint wouldn’t get inside of the drawer when I sprayed on the paint.
Priming Before Painting Dresser Teal
Yeah, you’re probably going to be tempted to skip over this step too. And it might be just fine… or you might end up wishing that you would have taken time to just do it.
The biggest reason why I prime before I paint is so the wood underneath doesn’t bleed through, causing stains in your paint job.
It’s weird. Honestly, I didn’t know about it for a while after I really started to paint furniture. And I had no idea what it was when it started happening.
I just kept trying to paint over the stains to cover them up… until I realized that wasn’t working. haha
Clear shellac is amazing at blocking stains, and I love that it’s clear, so I can distress the edges of the furniture to make the wood show through a bit.
Check out my list of the best primers for painting furniture here.
Yeah, it’s also weird that shellac can be used as a primer. But it really works. It’s actually the base of one of the best primers ever.
But it stinks, so I prefer to spray the clear shellac on outside and with a respirator on.
In the end, I sprayed 2 coats of shellac on, waiting at least an hour in between coats, and then letting it dry overnight so it has extra time to seal the wood.
Painting Dresser with Teal Paint
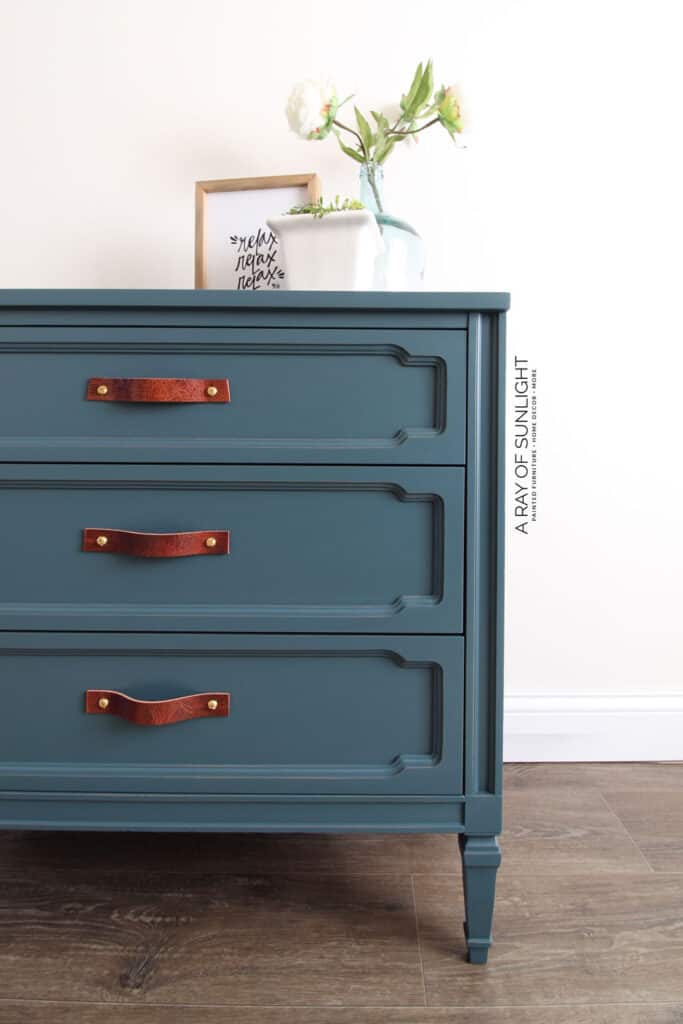
After the shellac primer was dry, I painted the dresser. I used my Fuji paint sprayer to spray the Homestead Blue Fusion Mineral Paint on without any brush marks.
Check out my Fusion Mineral Paint vs Heirloom Traditions Paint comparison if you’re considering these two paints.
Would you like to save this?
I ended up spraying 2 coats to get full coverage, and I did thin it out a little bit. Read more about how to use the Fuji Q4 Platinum paint sprayer here. See this sprayer in action in this painting a dresser blue makeover.
You can also see how we painted this flat file cabinet in Fusion’s Coal Black with our more budget-friendly paint sprayer in this repainting furniture makeover.
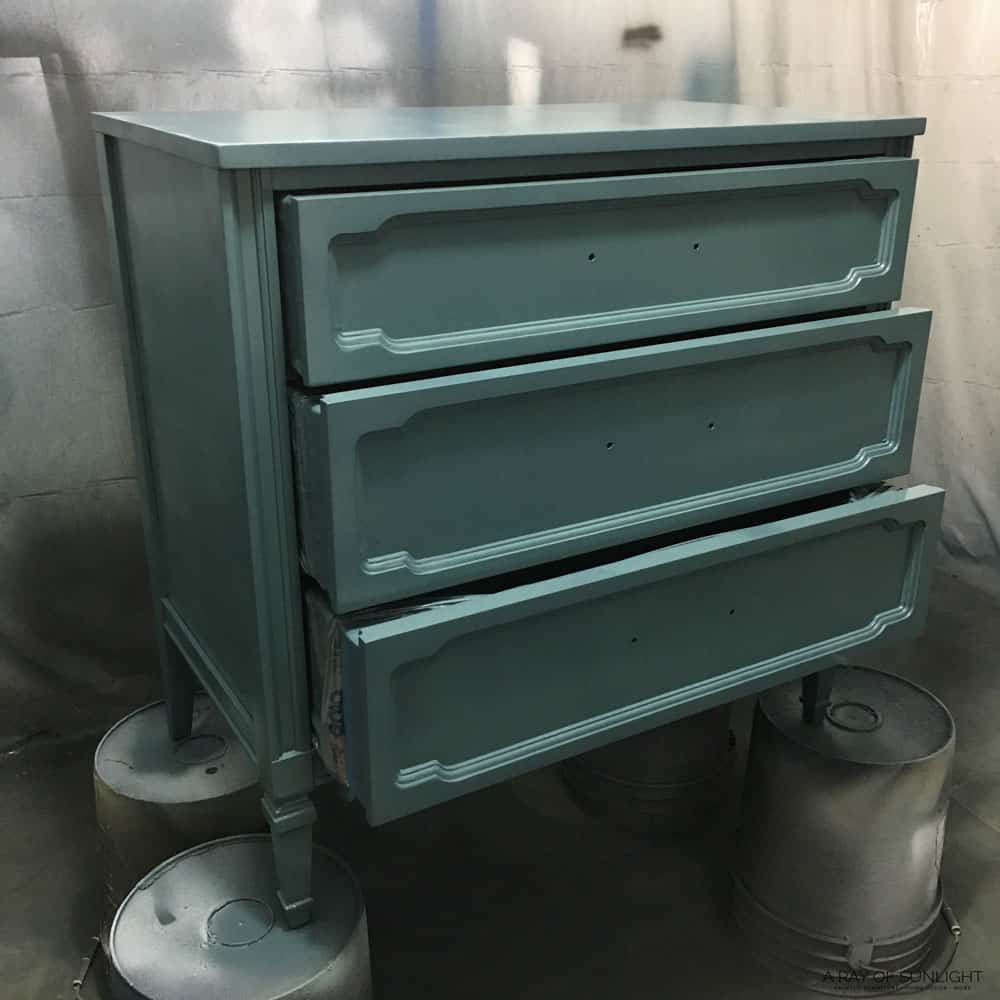
After the second coat was dry, I sanded the dresser with 220 grit sandpaper to smooth it out and distress the edges a little bit. Read this post to learn all about distressing furniture.
And then I cleaned up the dust again with my shop vac and tack cloth.
Topcoating Teal Painted Dresser
Then I put some of my favorite topcoat into the paint sprayer and I sprayed 3 coats of it, letting it dry between coats. Check out my list of the best topcoats for painting furniture here.

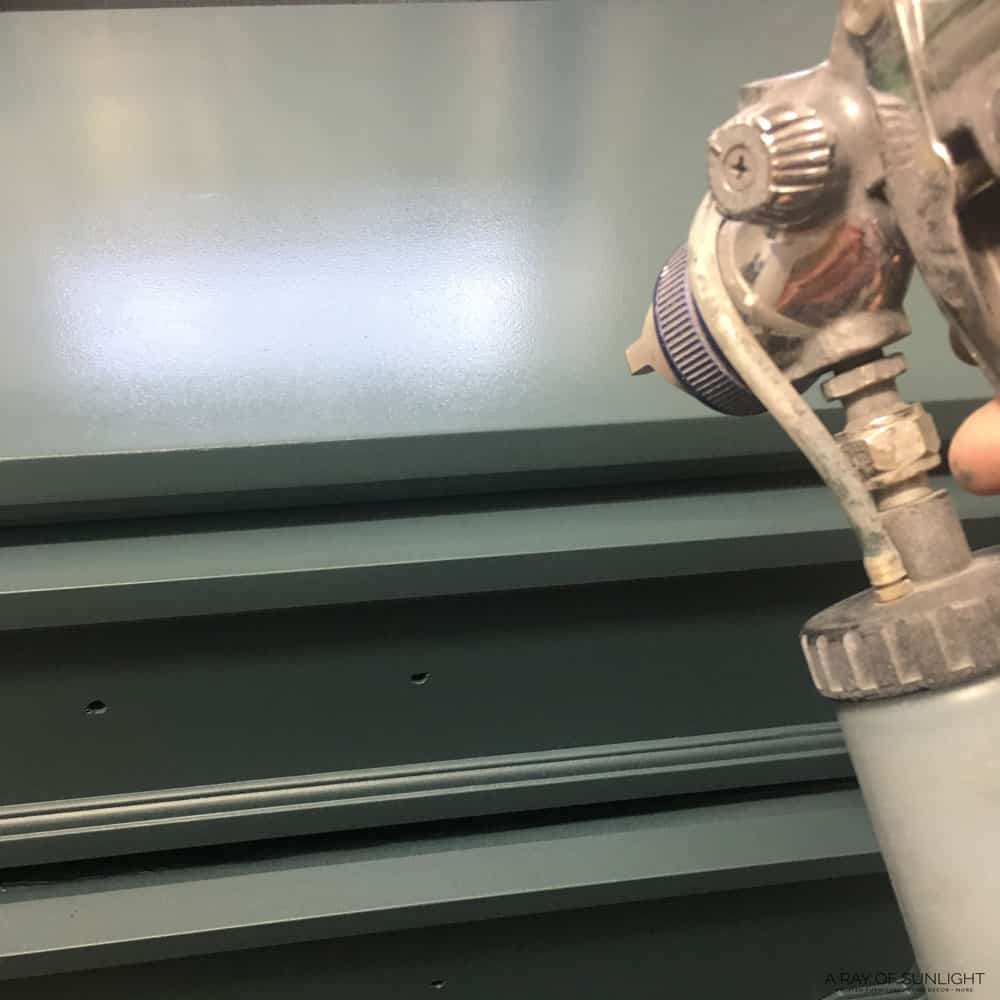
I also sanded it smooth with 400 grit sandpaper (it doesn’t scratch as much) before the last coat to make the poly feel super smooth.
Adding Hardware to Teal Painted Dresser
Then I finished off the dresser with some of my DIY leather pulls. I love these leather pulls because you can make them into any size, so they are easy to replace an odd size of drawer pulls.
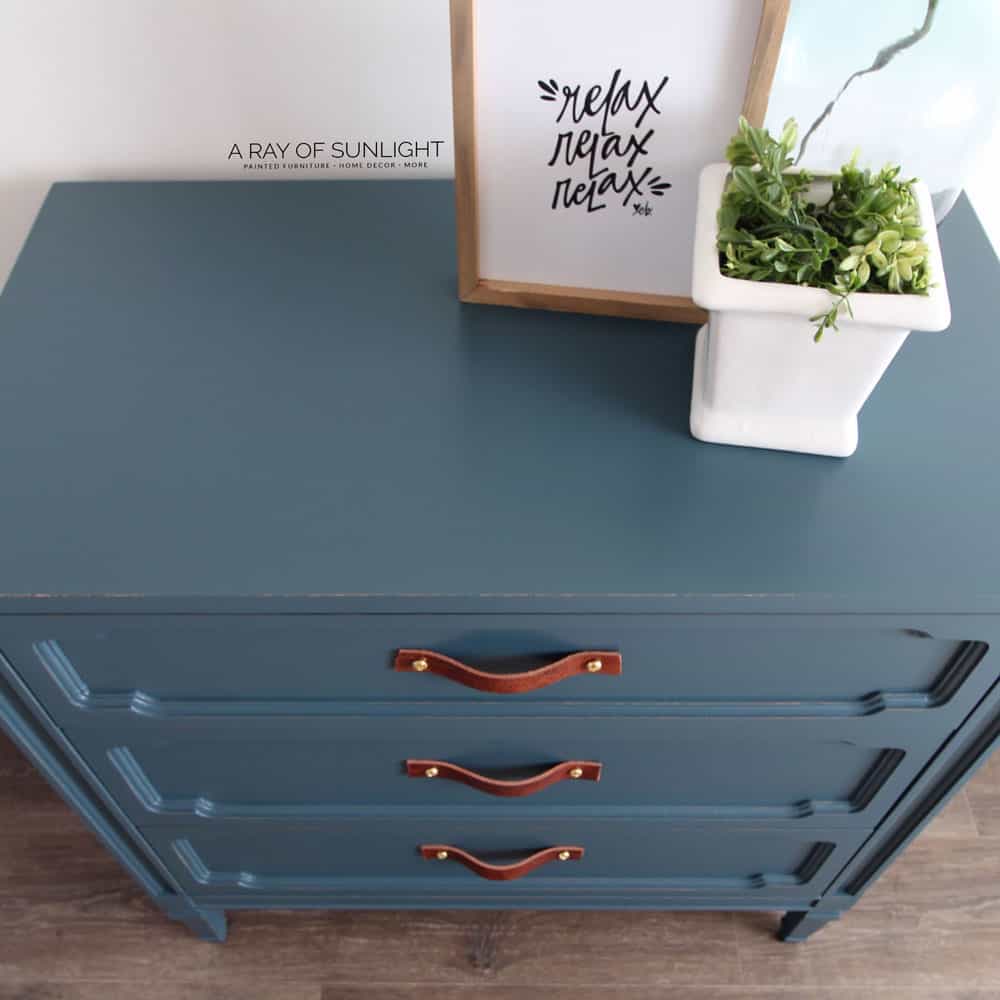
Here’s what it looks like now! Let me know in the comments what you think! You can also check out more teal painted furniture ideas here if you want to try teal paint on your furniture again.

More Before and After Makeovers
See All >
Click any of these “before” photos below to view the “after” of that makeover.


Are there any special techniques for using Fusion Mineral Paint?
There are a few special techniques that you can use for the best results of using Fusion Mineral Paint. Follow the preparation steps we have done in this makeover to get started.
For painting Fusion Mineral Paint, you can use a brush, roller or paint sprayer. We prefer to use one of these best paint brushes for painting furniture, like the Staalmeester brush.
For spraying, we also like to use the Wagner FLEXiO 3500 sprayer for an even smoother finish.
Always remember to apply thin coats of paint rather than one thick coat. This will help to prevent drips and make your finish look better.
Usually, two coats are enough for full coverage, but depending on the color of your surface, you might need more.
Make sure to let each coat dry completely before applying the next one. Fusion Mineral Paint dries to the touch in just 30 minutes, but it’s a good idea to wait at least 24 hours, especially before using your furniture.
Check out our Fusion Mineral Paint review for more tips and tricks on using this paint.


Does Fusion Mineral Paint come in other colors aside from teal?
Absolutely! Fusion Mineral Paint has got you covered with an amazing selection of colors, not to mention their popular teal shade.
With over 50 colors to choose from, you’ll find the perfect hue for your project. Whether you prefer muted neutrals or bold and vibrant tones, there’s something to suit every style and taste.
Fusion Mineral Paint not only comes in a wide range of colors, but it also gives you amazing coverage and durability.
That means it’s perfect for all of us busy DIYers out there who want high quality results that will stand the test of time.


Vintage Dresser Painted with Teal Furniture Paint
Make your own teal painted dresser. Check out this vintage dresser painted with teal furniture paint makeover.
Materials
Instructions
- Prep the dresser for paint by removing hardware and cleaning it with Krud Kutter and a damp rag. Scuff sand the dresser with 220 grit sandpaper and use the shop vac and tack cloth for all the dust.
- Tape off the dresser to prevent paint overspray then prime with clear shellac to block stains. Spray 2 coats of shellac and wait at least an hour between coats. Leave to dry overnight.
- Spray 2-3 coats of teal paint onto the dresser for full coverage. After the second coat dries, sand the dresser to smooth it out. You can also do this to distress the edges a little bit. Clean all the dust with the shop vac and tack cloth as well.
- Seal the paint with 3 coats of water-based polyurethane. Let the topcoat dry between coats.
- Attach hardware to the painted dresser.
Recommended Products
As an Amazon Associate and member of other affiliate programs, I earn from qualifying purchases.


More Dresser Makeovers
- Grey Chalk Paint Dresser
- Grey Painted Dressers
- Painted Light Blue Dresser
- DIY Navy Blue Bedroom Dresser
- Painting a Dresser Blue
- Boys Dresser Ideas
Follow us on YouTube to get more tips for painting furniture. Or share your project with us on our Facebook Group and be part of our community. See you there!
When my parents retired from the farm and moved to the city, my dad bought a new bedroom suite that looked like your before picture. Mom had never had new furniture and had always had to paint the old stuff to freshen it up. Mom treasured the new furniture after waiting more than 50 yrs ! Now people buy what she had treasured and paint it. Interesting how the times change. Little did my mom know back in the 30s and 40s, that she wasn’t financially poor, she was very early a 2020 trendy person !!
This teal dresser is beautiful! My bedroom furniture needs a makeover and I’ve been putting it off. Thank you for the instructions and inspiration! Have a blessed day!
I’m so glad to help! Thanks so much Jody! I’m thrilled you love this teal dresser!!