The Insanely Easy Way to Remove Veneer


Are you tired of having to deal with your furniture that has peeling or damaged veneer? This insanely easy way to remove veneer from wood will have you done with your project before you know it! Not only is it easy, but you probably already have all of the tools you need!
No need to spend hours or money on repairing old furniture with this hack. After removing veneer from wood like this, you give your furniture a fresh start.
Wood veneer is on a lot of furniture, including really high quality furniture, vintage furniture, and even antique furniture.

It’s a really thin piece of high-quality wood. Veneer basically just covers less quality wood that isn’t considered as pretty. (The wood underneath veneer is usually really great quality wood though!)
Moisture and heat can make the veneer lift up, and the edges of veneer can easily be chipped off.
So a lot of antique or vintage furniture has damaged veneer and fixing, repairing, and removing veneer comes with the furniture painting territory.
**Scroll down for some tips on how to fix veneer without actually removing it – and how you can still stain it, or paint it! **
I’ve spent quite a bit of time trying to slowly scrape wood veneer from old furniture, only to be annoyed at how long it takes.
This time though I decided to work smarter instead of harder. I grabbed a couple of things from around the house and let them do the work for me!
There was no blood, sweat, or tears when I removed veneer this time!
Supplies Used to Remove Veneer
As an Amazon Associate, I earn from qualifying purchases. I also may earn from other qualifying purchases with other companies or get free product to review and use. All opinions are my own.
- Old Wet Towel
- Metal Scraper
- Old Iron
Tips and Tricks for Removing Veneer
- Speed up the process a little by spraying water onto the wood veneer before even putting the towel on. This will help the wood get wet faster.
- If you live in a really dry and hot climate, make sure the towel stays wet. You may have to get it wet again a couple of times.
- You could do it without the iron, but the iron is the icing on the cake to make the veneer lift away.
- Make sure the water (and steam from the iron) doesn’t get onto any veneer in good condition. You don’t want to ruin perfectly good veneer on another part of your furniture!
- Be gentle with the scraper if you have a stubborn spot. You don’t want to accidentally gouge the wood under the veneer. To avoid gouging and scratching the wood, hold the scraper almost level (horizontal) with the veneer.
Check out this damaged wood dresser makeover where we used several methods to remove and repair veneer!
Get Our Secrets!
Grab this super convenient How to Repair Furniture Ebook with all of our secrets on how to repair furniture for only $14.
You can print it out and have instant access whenever you come across damaged furniture, and know exactly how to fix it!
Click on the picture of the book to purchase!

Other Ways to Remove Stubborn Veneer
Here are more ways to get any stubborn veneer from your furniture.
Use a Heat Gun and a Metal Scraper
- Hold the heat gun a few inches from the veneer. Let the heat soften the glue and then use the metal scraper to gently lift up the veneer.
Use a Hair Dryer and a Metal Scraper
- Same as with the heat gun, hold the hairdryer (blowing air as hot as possible) a few inches from the veneer until the glue has softened. Then lift up the veneer with the metal scraper. This method is really time intensive if the veneer is really glued on.
Use a Hammer and a Metal Scraper
- You can get the metal scraper under the old veneer with a little help from a hammer. Position the scraper right by a stubborn spot. Then hammer the end of the scraper into and right below the veneer. This method usually ends up with some damage to the wood underneath.
Would you like to save this?
Use a Power Sander
- Use 60 grit sandpaper and an orbital sander to sand through the veneer and to the wood underneath. Most furniture has two layers of veneer, so if you try the power sander, get ready to be sanding for a long, long time.
Use a Wood Planer
- If you have a wood planer on hand, this is the time to bust it out. A wood planer can go through a lot more wood at one time than a power sander.
Should I Remove Veneer From Furniture?
You don’t always need to remove old wood veneer to fix it! Try these tutorials to fix chipped wood veneer instead of removing it:
- How to Fix Chipped Wood Furniture
- How to Repair Chipped Veneer Furniture
- How to Repair Bubbled Veneer (in the middle of the veneer)
- How to Fix a Chipped Wood Corner
- How To Fix Veneer That Is Lifting
You can also glue veneer down with some wood glue and this wood glue syringe!
What option are you going to try? Have you ever removed veneer from furniture before?!
How do I know if my furniture has veneer?
To determine if your furniture has veneer, you can look for signs of a thin layer of wood on top of another material.
You can check for veneer by inspecting edges and corners of the furniture piece, as well as any intricate details like carvings or inlays.
Another way to tell if your furniture has veneer is by looking at the grain pattern. If the wood grain looks too perfect or uniform, it could be a sign of veneer.
Solid wood tends to have natural variations in the grain and texture, while veneer often has a more consistent appearance.
Can I remove veneer and leave the underlying material exposed?
After removing the veneer, yes, you have the choice to leave the underlying material exposed. This could be a great option if the wood underneath is in good condition and has an attractive grain or color.
However, keep in mind that removing veneer can damage the surface of the furniture, so you may need to sand and refinish it before leaving it bare.
Additionally, the underlying material may not have the same strength and durability as veneer, so it could be more prone to scratches or damage.
Overall, it is possible to remove veneer and leave the underlying material exposed, but you should carefully consider the condition and type of wood before making this decision.
Removing veneer from furniture isn’t as hard as you may think, and it can completely transform the look of a piece.
Whichever method you do, make sure to take your time and be gentle with the process. And remember, you can also fix veneer without removing it entirely.

How to Remove Veneer from Wood
This insanely easy way to remove veneer from wood will have you done with your project before you know it! Not only is it easy, but you probably already have all of the tools you need!
Materials
- Old Wet Towel
Tools
Instructions
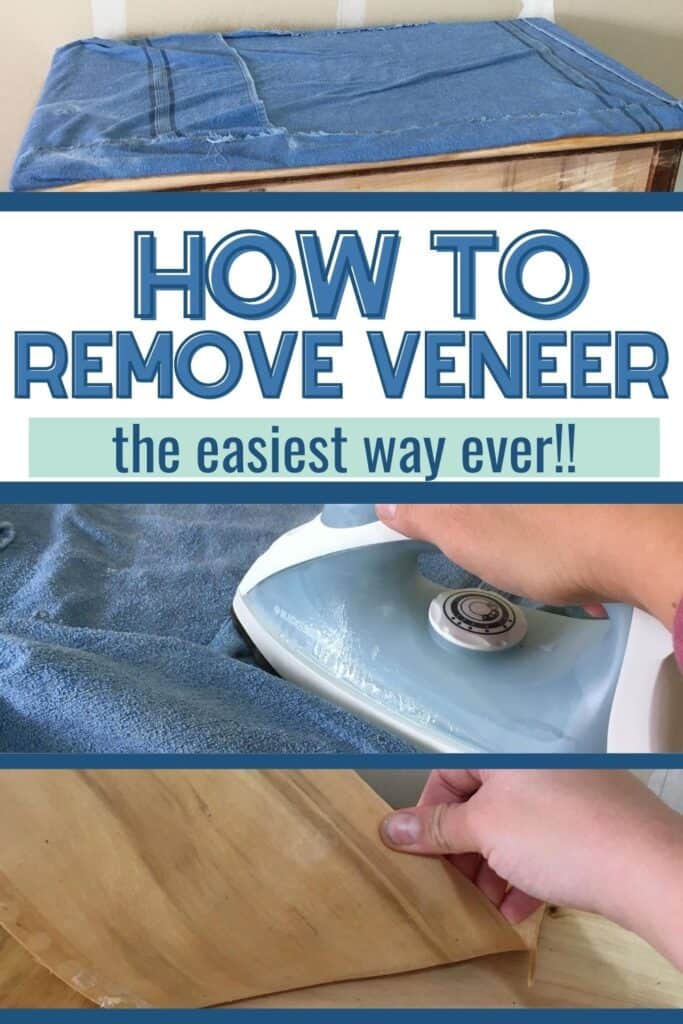
- Get a towel wet with really warm water. You want it to be wet but not dripping wet. Then lay the towel over the veneer you need to remove. Let it sit on the veneer for 2 hours to moisten up the veneer.
- Heat an old iron to its hottest setting. Set it on one spot of the damp towel for 20-30 seconds (be sure to not let it burn the towel.) The heat from the iron will soften the glue that holds the veneer onto the wood. It will also dry the veneer out and start to lift the veneer away from the wood.
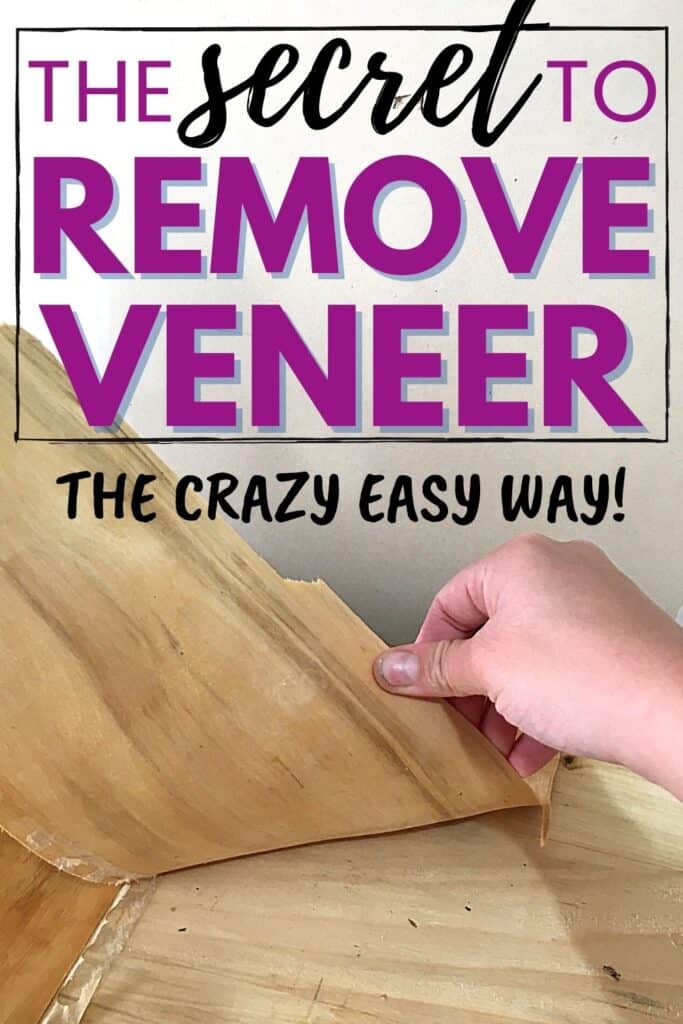
- Lift up the towel and use the metal scraper to gently lift the veneer up all the way. The veneer should be mostly lifted up or loose.
- Repeat steps 2-3 until the veneer is all removed.
- Sand the new wood with 220 grit sandpaper to smooth it out.
Notes
Use an old towel and an old iron that you don't mind getting ruined. I have a super cheap craft iron for projects like this.
Recommended Products
As an Amazon Associate and member of other affiliate programs, I earn from qualifying purchases.

More Repairing Furniture Resources
- Repairing Veneer with Wood Filler
- Repair Damaged Furniture
- How to Repair Rattan Furniture
- How To Fix Dog Chewed Wood Trim
- How To Fix Cracks In Wood Before Painting

Follow us on YouTube to get more tips for painting furniture. Or share your project with us on our Facebook Group and be part of our community. See you there!
I have struggled to remove veneer before, can’t wait to try this! Looks so much easier!
This was great advise on how to remove veneer! I have a beautiful old dresser I can’t wait to try this on! I have been dying to redo it but was to afraid I would damage the wood underneath! Thank you for your advise!
I run a hot iron over that wet towel and it cuts the wait time from hours to minutes. I’ve done it several times and the results are perfect.
Have a chifforobe and matching child’s vanity I bought and am redoing for my daughter. I’ve seen posts on FB groups about people removing the veneer and finding beautiful wood underneath but the reality is it doesn’t always go that way. The chifforobe had more damage on the bottom, I removed the veneer off the two bottom drawers and regretted it. There were knots in the wood on the front of the drawer that were a complete paint to cover. I ended up doing an entire skim coat of Bondo on a curved drawer front bc the knots felt smooth but when I primed u could still c cracks in the primer. When I tried to patch just the knots and cracks radiating out from it it made the curved drawer front uneven unless u sanded all the way through the Bondo. Like they were raised front the surface. Of course this set was a 1920’s-1930’s Art Deco so depression era, and had been neglected for a long time. So just to let people know sometimes it’s easier just to fill the chipped places of veneer and blend patches, instead of having to pretty much recreate a part of the piece. There isn’t always pretty wood underneath.
Good point! You never know what is under the veneer. I’ve had worm holes, knots and whatnot under the veneer. But I also usually stain the wood or keep it as is when I remove veneer, so those things haven’t been an issue.
Do you know if the knotted wood was pine? I’m going to redo a badly damaged buffet given to us and would love pine to be under the veneer since I have mostly antique + vtg Euro pine furniture.
Need your advice. I have a large console I’d over to refinish. It has a dated crackle finish all over and loads of nooks and crannies. I assume the top and doors are veneer, but not positive. Can I use this technique on painted venee an what about the rounded nooks?
I’m gonna try this method on my granddaughters front door. It’s a huge door but about 5 inches from lock, the veneer is gone on most of the door 🤨