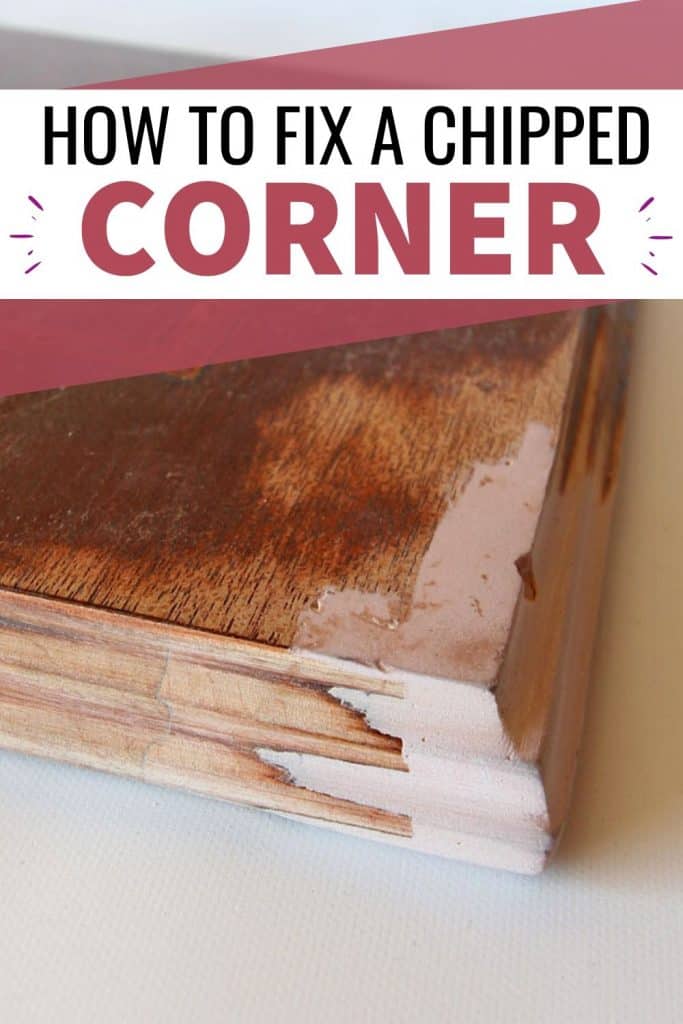
How to Fix a Chipped Wood Corner

It’s easier than you think to fix a broken corner on your old furniture. Whether your dog chewed it, the movers broke it, or someone was playing too hard, here’s how to fix a chipped wood corner. Repairing old furniture can seem intimidating, especially if you haven’t done it before.
Learning to fix chipped wood corners is a valuable skill for any furniture owner. Not only will it save you money on potentially expensive repairs, but it also allows you to keep your cherished pieces in good condition for years to come.
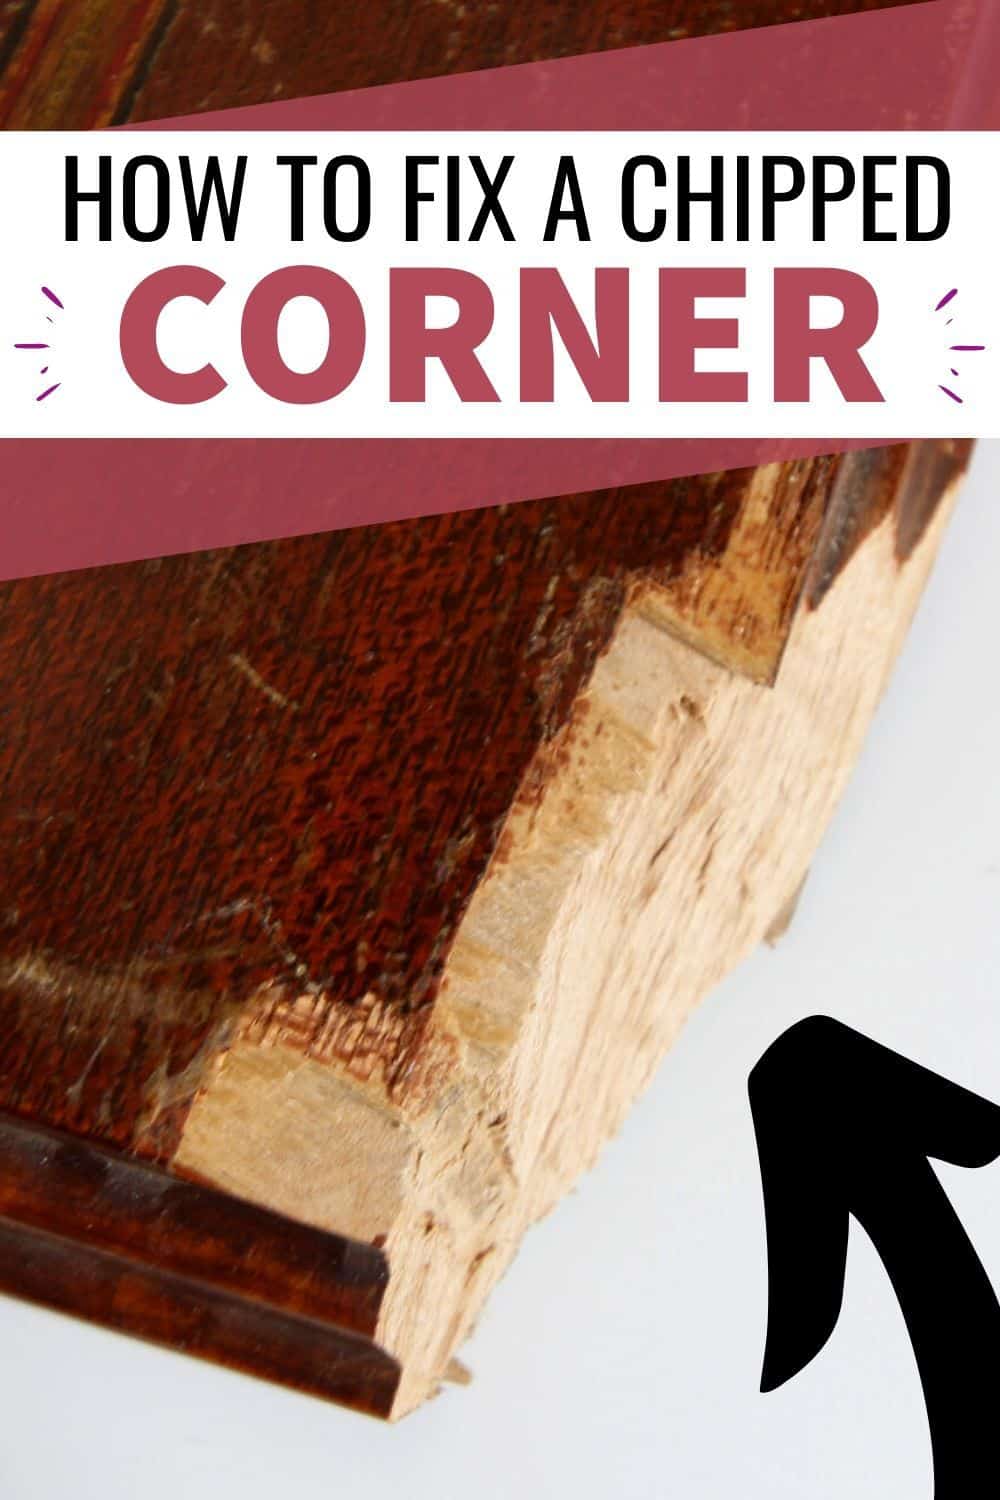
Old furniture is notorious for being damaged or broken. But before you toss your grandma’s dresser in the dump, try your hand at fixing it! It could be due to wear and tear or accidents. These chips can be a bit of an eyesore and might even affect the furniture’s structure.

One of the biggest reasons wood corners get chipped is when you accidentally bump or knock into furniture while moving it around during moves or when you’re rearranging a room. Another culprit is pets who love to chew on anything they can get their teeth on.
Luckily, fixing a chipped wood corner is a relatively easy and straightforward process!
Supplies Used to Fix a Chipped Wood Corner
As an Amazon Associate, I earn from qualifying purchases. I also may earn from other qualifying purchases with other companies or get free product to review and use. All opinions are my own.
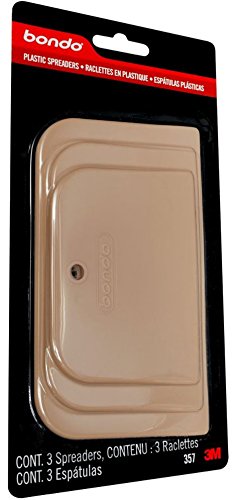
- Bondo & Bondo Spreader
- Hot Glue Gun & Hot Glue Sticks
- Vaseline (Cooking Spray also works!)
- Old Piece of Cardboard and Paint Stick
- Utility Knife
- Sandpaper (80 Grit to 220 Grit)
- SurfPrep 3×4 Vacuum Compatible Sander (Use code RAY10 for 10% off your order)
- SurfPrep Sanding Sheets (Use code RAY10 for 10% off your order)
- Primer
- Paint
Keep reading below for more details on each step and get the FAQs! Plus I made a little video of the process, catch the full video at the bottom of this post!
Make a Hot Glue Mold
The easiest way to repair a broken or chipped corner of furniture is to first make a mold of the shape and details.
Every piece of furniture usually has at least 2 of everything, so it should be pretty simple to find a corner that has the same details as the damaged corner.
Once you locate a corner that is in good condition, you can make a really simple mold of it with a hot glue gun and hot glue.

How to Make a Hot Glue Mold
First, rub some Vaseline or spray some cooking spray over the corner that is in good condition. The Vaseline is super important because it will make it easy to remove the hot glue once it is cooled.
You’ll want to make a mold that is about 1 to 2″ bigger than the damaged area, so make sure you make a big enough mold.
Make a mold by simply squeezing hot glue all over the corner. Lay it on thick, and make sure there aren’t any holes in the hot glue.
Be very careful to not burn yourself or touch the hot glue. Man, that stuff hurts! Let the hot glue cool completely and then gently remove it.
To prepare for the next step, rub more Vaseline on the inside of the mold. This will help it not stick to the Bondo!
Alternative to Hot Glue Mold
The hot glue can damage the finish on the good corner. If you don’t want to paint your furniture, you may want to use this mold putty kit instead.
It’s a two part product that turns into a flexible rubbery texture once dried. Simply mix the two parts together and then cover the good corner with a thick layer.


You’ll still want to rub some Vaseline on the corner before making your mold. But since this stuff isn’t hot like hot glue, it won’t damage the finish.
Check out this quick video that shows how to use the Amazing Mold Putty kit.
Here’s how I used a mold putty kit in my guide on how to fix a missing chunk of wood.
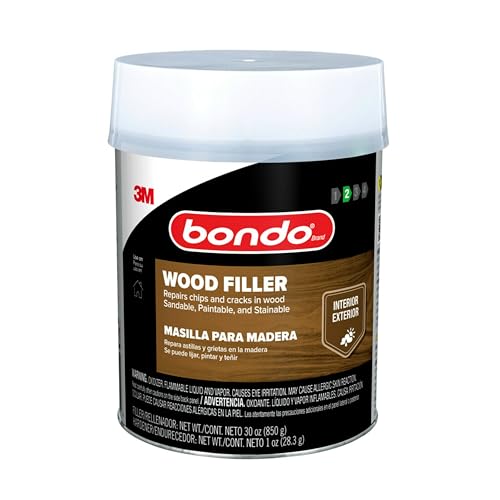
Bondo and Different Types of Bondo
Ahhh Bondo. A damaged piece of furniture best friend! Bondo is a two part epoxy filler that is easy to mix up, and easy to spread, but it dries harder than wood in about 30 minutes or so! Basically, it’s a miracle product.
I prefer this Bondo autobody kind, but you can also use the Bondo wood filler or the Bondo all purpose. They all basically work the same.
Check out my Bondo wood filler review to learn more about the pros and cons of this product. See if Can a beginner fix this furniture damage? in this post!
The biggest difference I have noticed between them is the color. The wood filler version looks like wood filler, the autobody kind is pink, and the all purpose kind is light grey.
If you want to stain the damaged area like in this post about how to repair chipped veneer furniture, you’ll want to go with the wood filler version.
Get Our Secrets!
Grab this super convenient How to Repair Furniture Ebook with all of our secrets on how to repair furniture for only $14.
You can print it out and have instant access whenever you come across damaged furniture, and know exactly how to fix it!
Click on the picture of the book to purchase!

It doesn’t take stain exactly like wood does, but it’s a lot better for staining than the autobody and all purpose kinds. Learn more about Bondo and the best wood fillers for furniture here! Get more tips on staining wood filler in this post.
How to Mix Bondo
Bondo starts to dry fast, so it’s best to only mix up a small amount and work fast!
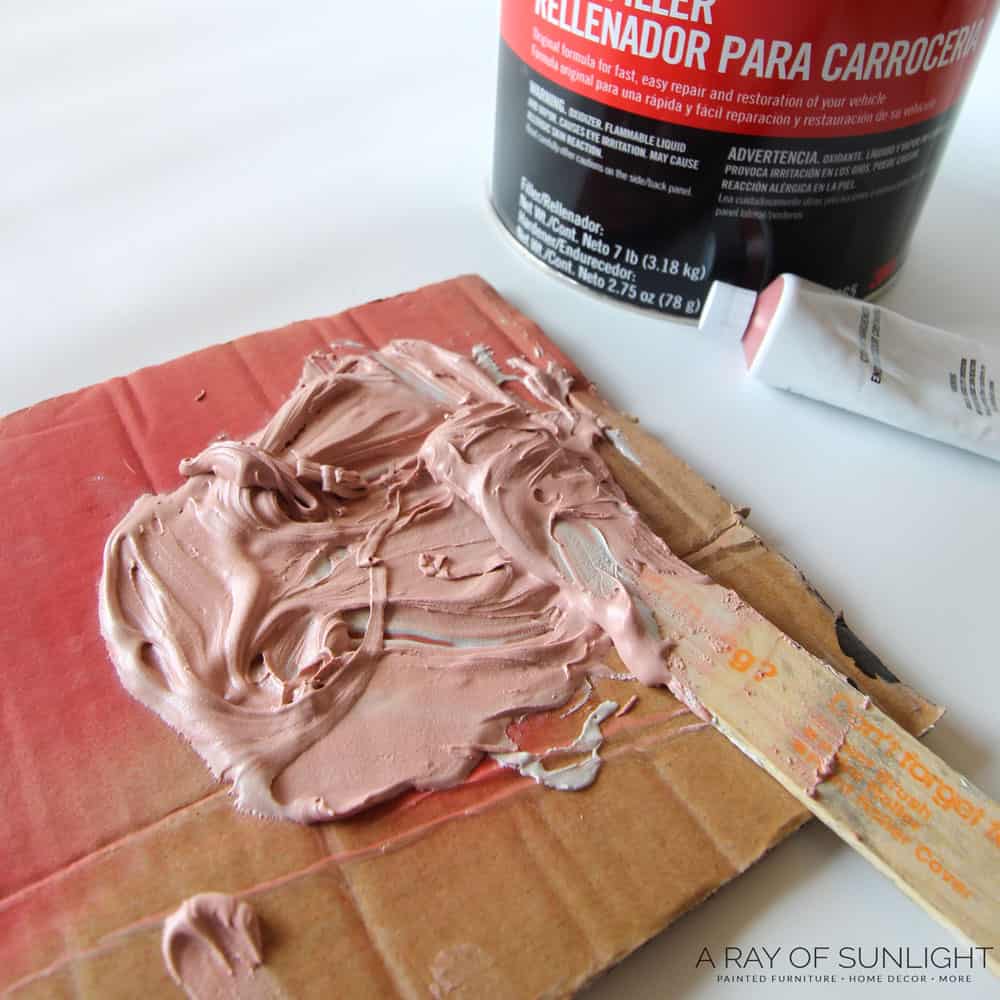
I like to mix my Bondo on a piece of cardboard, and with a paint stir stick. Put a blob of the Bondo base onto the cardboard. Then squeeze some hardener on the Bondo.
Mix the Bondo well so it’s all one shade of pink (you want it to be a little darker than the color of the Bondo spreader!)
Put Bondo on the Chipped Wood Corner
Now take your nice and clean Bondo spreader and spread the Bondo all over the damaged corner. Lay it on thick and try to press it into the damage.
See how we used Bondo to repair damaged veneer on this old dresser in this post about how to fix damaged wood furniture before painting!
Would you like to save this?

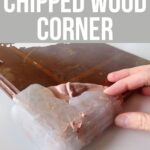
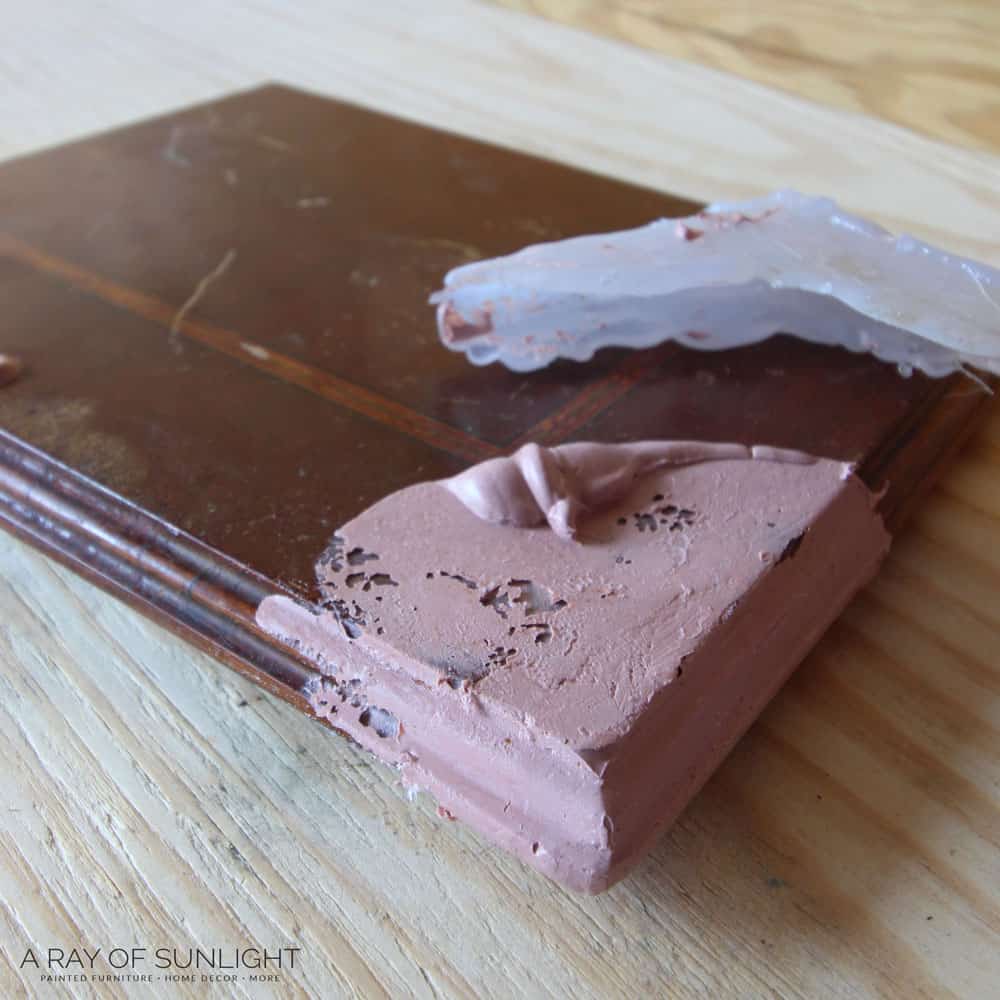
Put the Mold over the Wet Bondo
Working quickly, put the mold (make sure you rubbed vaseline inside of it before mixing the Bondo!) over the Bondo and press firmly.
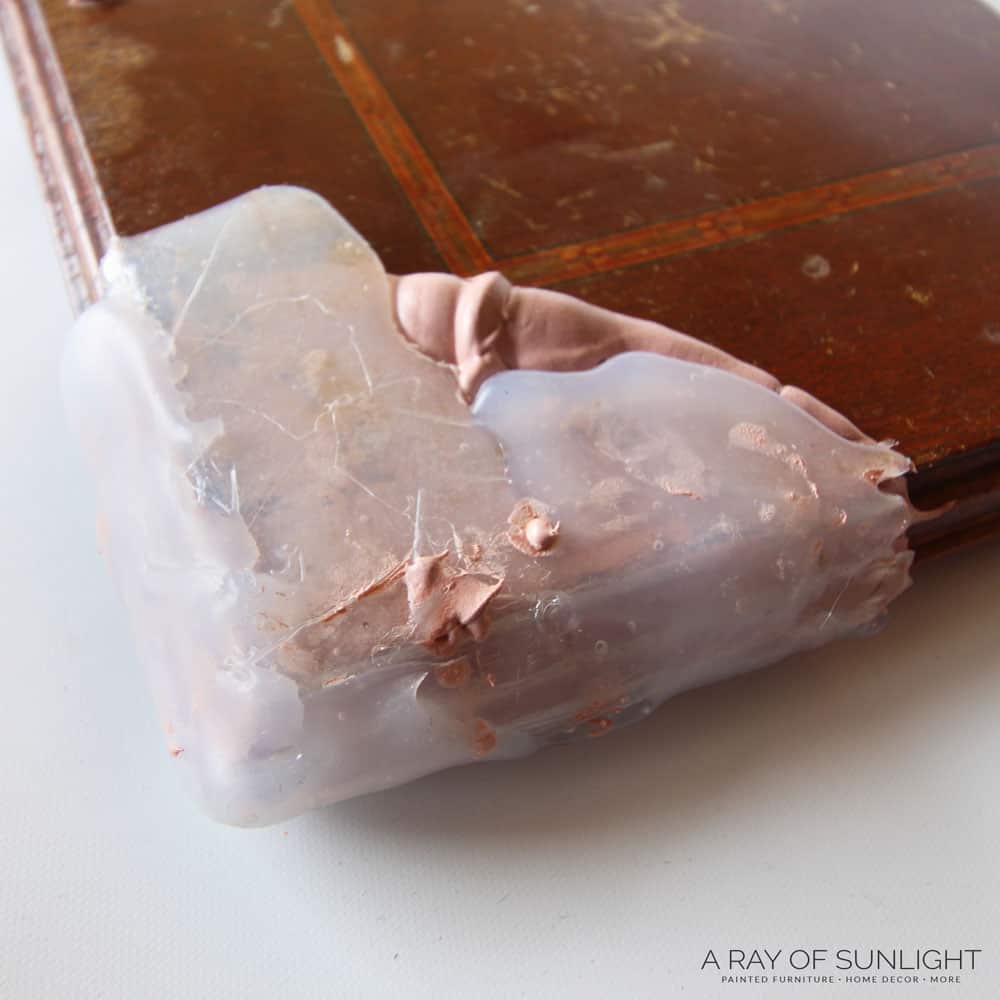
Make sure to line the mold up with the existing wood. You want the Bondo repair to line up as much as possible so you don’t have to sand and shape the dried Bondo as much.
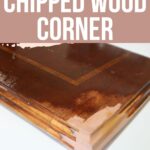
Hold the Molded Bondo in Place
Hold the mold in place until the Bondo starts to set up (usually only a couple of minutes!) You don’t want the hot glue mold to shift at all until the Bondo starts to set up.
Once it isn’t sticky anymore, you can remove the mold.
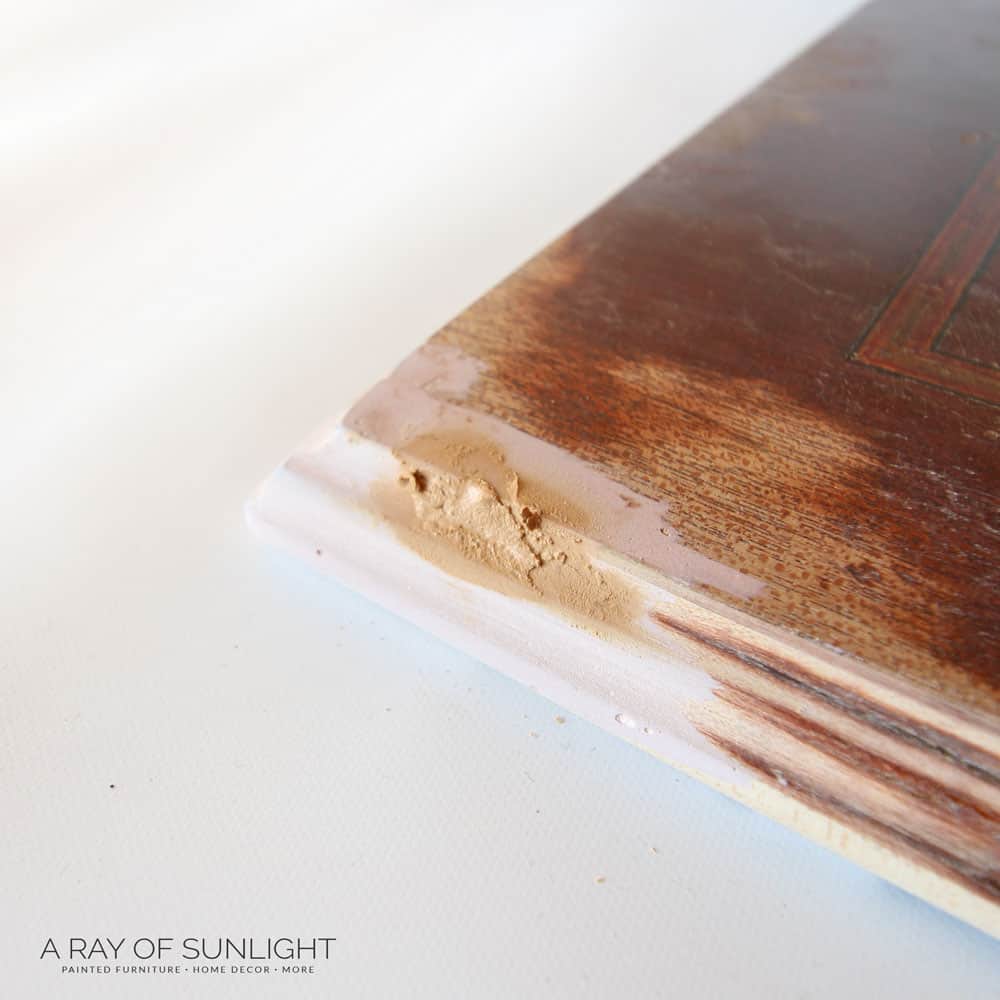
Remove Excess Bondo
Before the Bondo dries too hard, scrape the excess Bondo off with a utility knife. There is sure to be a blob or two of Bondo that didn’t stay under the mold.
You don’t want to have to sand all of that Bondo down, so remove it with a utility knife while you can still cut through the Bondo.
Once it dries, you won’t be able to cut through the Bondo, so it’s super important to remove the major excess right after it sets up.
Be sure to not remove too much though! Some excess is good so you can shape the Bondo once it’s dry. Then let it dry completely (usually about 30 minutes or so).
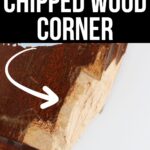
Smooth and Shape the Bondo
Now to make the Bondo look pretty! I like to sand down any large flat areas with my power sander. It’s fast and efficient! Learn more about the best sanders for furniture here!
For the power sander, I like to use 150 grit first. And then smooth it out with 220 grit. But for any details, I like to sand by hand. It’s slow going, but it really pays off to get all of the details just right!
When sanding by hand, I’ve found 80 grit to be the easiest to shave off the most at first, and then I work my way up to 220 grit to smooth it out.
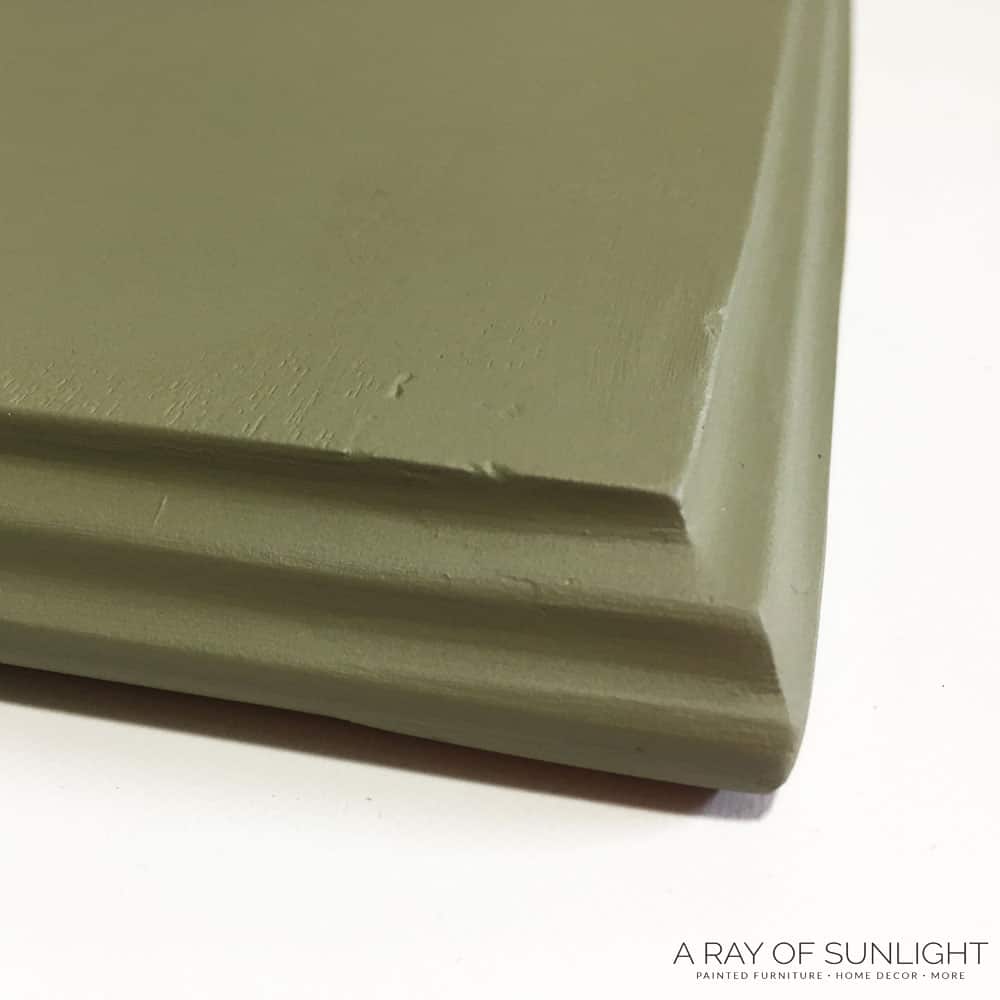
The goal is to get the Bondo completely flush and smooth with the existing wood that wasn’t damaged.

Air Bubbles in Bondo
Sometimes you’ll come across a little air pocket in the Bondo. If it’s a small area then I just fill it in with regular wood filler, let it dry, and then sand it down smooth again. It’s not worth it to do a whole another round of Bondo just for a small air pocket in the Bondo.
Get more tips on how to repair chipped wood furniture in this post.

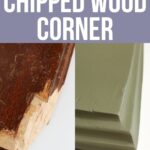
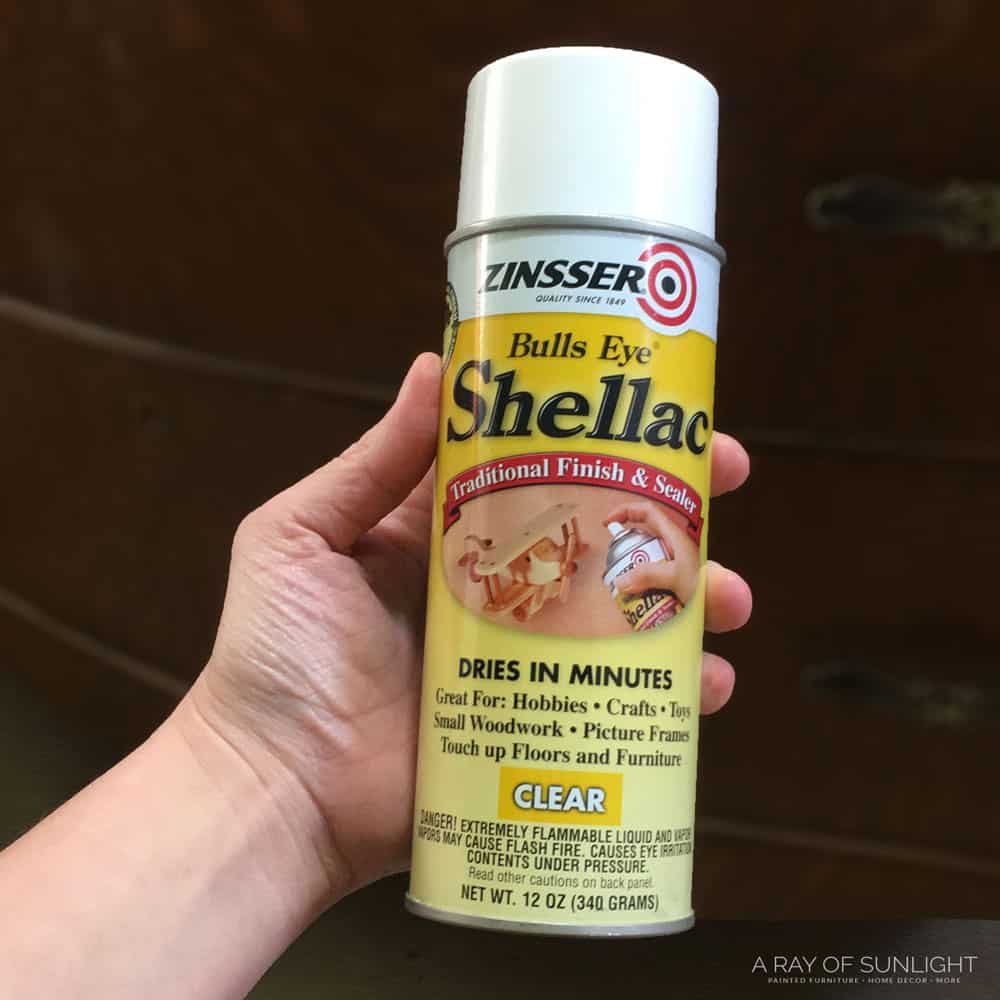
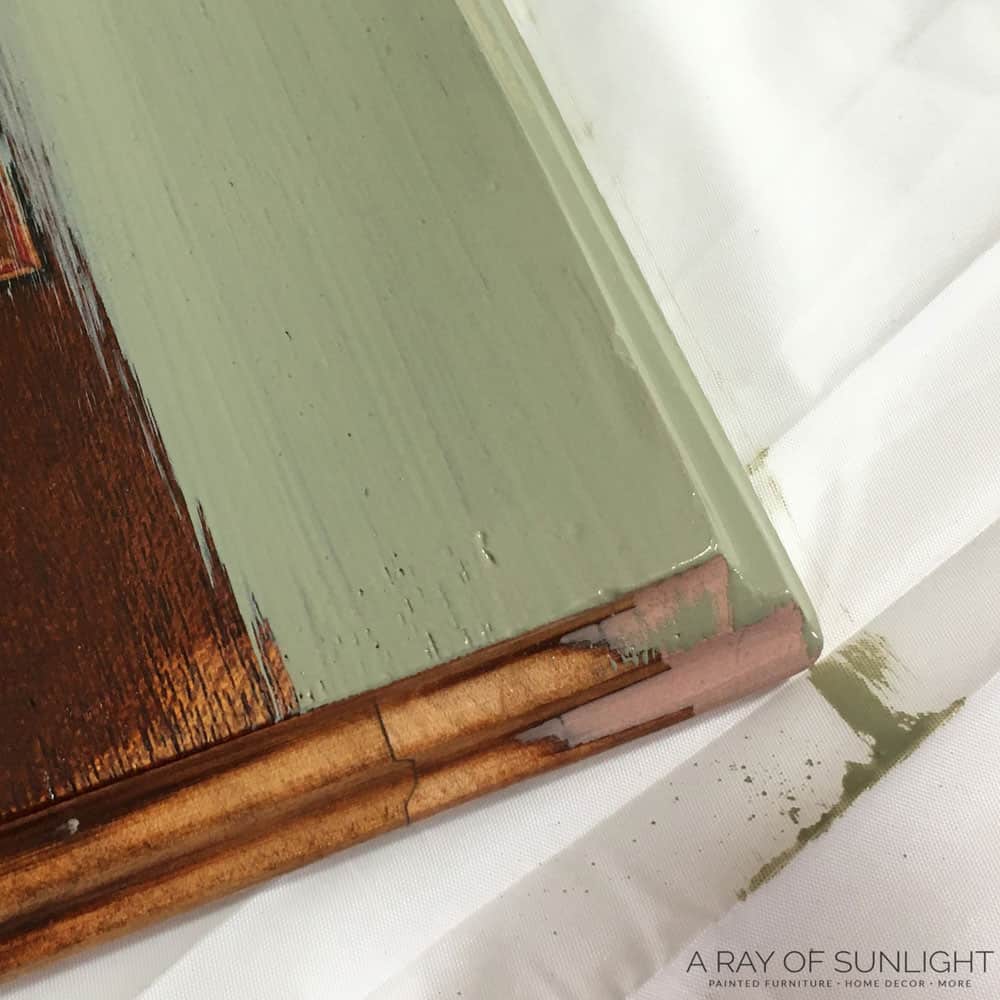
Prime and Paint Repaired Wood Corner
Before you move on to the fun step of painting, you’ll want to prime that area. In this case, there are a few different reasons to use a primer before painting.
- The bare wood will most likely “bleed through,” causing red, yellow or orange stains to appear in your paint. Trust me, they won’t go away if you put another coat of paint on them.
- The primer will help the sheen of the paint be the same. Without primer, the repaired area will have a different sheen than the non damaged area.
- If you’re using a light color, the primer will help you cover the dark wood faster than the paint can.
I recommend BIN shellac primer or clear shellac. None of the typical waterbased primers will prevent bleedthrough!
Check out this post to learn more about the best primers for painting furniture (and how to choose the right one).
Learn more about the best primers to prevent bleedthrough in this post about how to stop stains from coming through paint!
After a couple of coats of primer, you’re ready to paint!
If you’re a visual learner, watch the process here!
More Before and After Makeovers
See All >
Click any of these “before” photos below to view the “after” of that makeover.


How to Fix a Chipped Wood Corner
It's easier than you think to fix a broken corner on your old furniture. Whether your dog chewed it, the movers broke it, or someone was playing too hard, here's how to fix a chipped wood corner.
Materials
- Bondo
- Hot Glue Sticks
- Vaseline
- Old Piece of Cardboard and Paint Stick
- 80 Grit Sandpaper
- 220 Grit Sandpaper
- Primer
- Paint
Tools
Instructions
- Find a match to the damaged area. Rub some vaseline over the corner so that it will be easy to remove the mold you make once it is cooled.
- Now, make a mold of the shape by squeezing hot glue all over the corner. Lay it on thick, and make sure there aren’t any holes in the hot glue. Make a mold that is about 1-2″ bigger than the damaged area. Let it dry and then remove it.
- Mix up a small amount of Bondo on a piece of cardboard and spread it over the damaged area.
- Put the hot glue mold over the wet Bondo and press firmly. Make sure to line the hot glue mold up with the piece of furniture.
- Hold the mold in place until the Bondo starts to dry. Once it isn’t sticky anymore, you can remove the mold.
- Before the Bondo dries too hard, scrape the excess Bondo off with a utility knife. Be sure to not remove too much though! Some excess is good so you can shape the Bondo once it’s dry. Then let it dry completely (usually about 30 minutes or so).
- Sand the area and make Bondo completely flush and smooth with the existing wood that wasn’t damaged.
- For any air pockets, fill them in with regular wood filler, let dry and then sand them down smooth again.
- Prime and paint the repaired surface!
Recommended Products
As an Amazon Associate and member of other affiliate programs, I earn from qualifying purchases.


More Repairing Furniture Resources
- Repair Damaged Furniture
- How to Fix Chipped Wood Furniture
- How to Repair Bubbled Veneer
- Wood Stain Repair
- Can You Really Fix a Broken Dresser?
Follow us on YouTube to get more tips for painting furniture. Or share your project with us on our Facebook Group and be part of our community. See you there!

I just came across your blog. You are very talented. I noticed that you put hardener in your bondo. Do I need the hardener for the all purpose bondo. Thank you.
Hey there! You will need hardener with any bondo that you use. A tube of hardener comes with every container of Bondo. Best of luck!
I love your site, thank you so much for your time
Always wanted to know how this is done to fix a corner, I’ve used wood filler for holes and deep scratches but never corners. Thank you it gives me confidence to try this.