How To Fix A Missing Chunk Of Wood


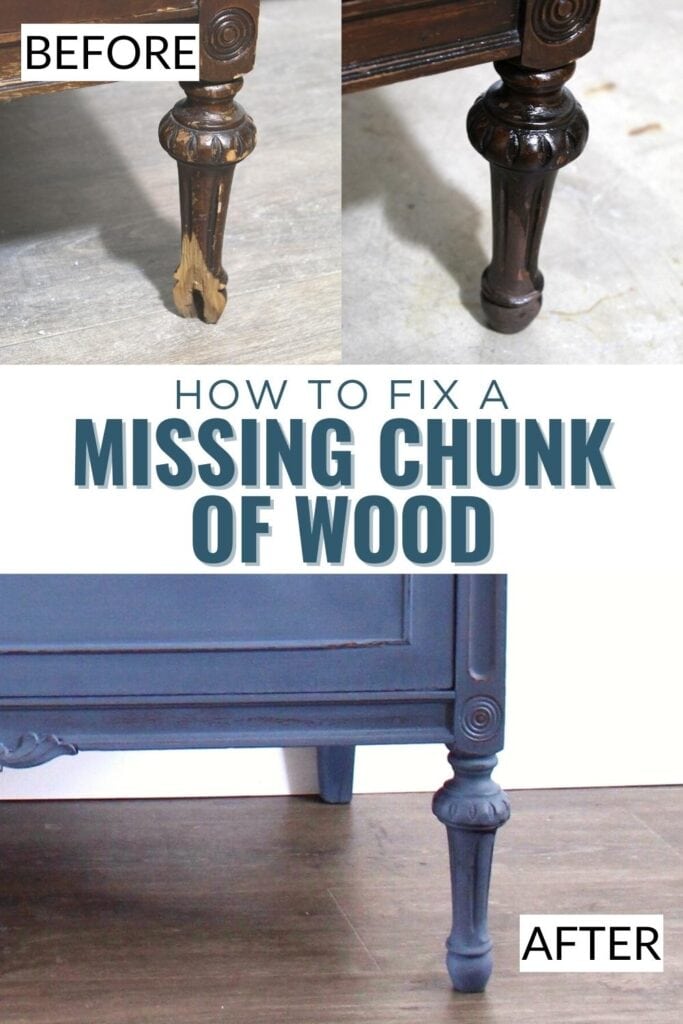
Have you ever stumbled upon a piece of wood furniture with a missing chunk, and immediately thought, “There’s no way this can be fixed!”? Well, we’re here to change that thought! Today, we’ll journey through the exciting process of how to fix a missing chunk of wood.
Whether the piece is a cherished family heirloom or a bargain from the flea market, we have the solution for repairing old furniture. So, grab your tools and get ready, because we’re about to restore that piece of wood to its original splendor!
We all know that wood furniture is not just functional but also adds an aesthetic touch to our homes. However, over time or due to unforeseen accidents, our precious items may suffer some damage.

But there’s great news – fixing a missing chunk of wood is not as daunting as it might seem! With our helpful guide, you’ll learn how to breathe new life into your furniture, even if it is chipped, cracked, or has missing chunks.
So, pull up your sleeves, and let’s turn that seemingly lost cause into a proud piece of furniture again!
Supplies for Fixing a Missing Chunk of Wood
As an Amazon Associate, I earn from qualifying purchases. I also may earn from other qualifying purchases with other companies or get free product to review and use. All opinions are my own.
Before we dive into the tutorial, we need to gather our tools and supplies. Here’s a handy list to ensure you are well-prepared:
- Vaseline
- Amazing Mold Putty
- Putty Knife
- Disposable Gloves
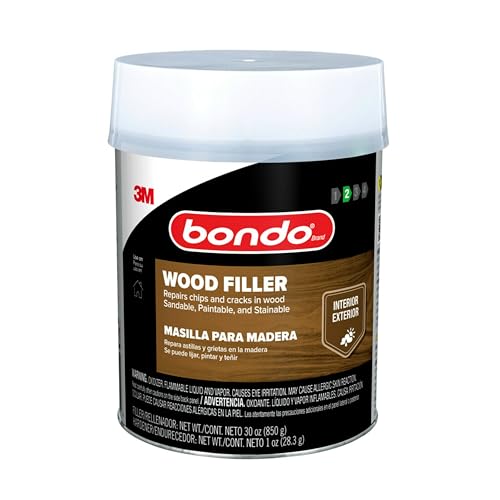
- Bondo Wood Filler or Kwikwood
- Power Sander (Use code RAY10 to get 10% off your order)
- 120, 150, and 220 Grit Sandpaper
Make sure you have all these supplies at hand before beginning. This will make the process smoother and more enjoyable!
Bondo VS KwikWood
When it comes to fixing damaged wood, both Bondo and Kwikwood have their own unique strengths.
Bondo is a two-part putty that is typically used for auto body repairs but they came out with a wood filler version that also works exceptionally well on wood due to its high durability.
It adheres strongly to wood surfaces, resists shrinkage, and once hardened, can be treated much like regular wood. This includes sanding, painting, and staining. It’s ideal for larger repairs or repairs where you need to spread the filler.
On the other hand, Kwikwood is a hand-mixable two-part epoxy putty, specially formulated to repair and rebuild wood quickly and easily.
When cured, it looks and behaves like wood, and can be sanded, drilled, painted, and stained. It’s easy to shape and mold, making it perfect for intricate or detailed repairs.

So, how do you choose which one to use for your project? Consider the size and detail of your repair. For very large or flat repairs, Bondo would be the better choice.
For smaller, detailed repairs, or when you want to shape the repair slightly before it hardens, Kwikwood could be your best bet. Just remember, both products will give you a durable, long-lasting repair when used correctly!
Check out our blog post about the best wood fillers for furniture to learn more about the different wood fillers and when you should use them.
For future reference, we also listed the best wood repair putty that we have personally used!
How to Fix a Missing Chunk of Wood
Alright, let’s dive into the nitty-gritty of repairing that missing chunk of wood. Remember, the key to success here is patience and precision. So, let’s get started!
Making the Mold
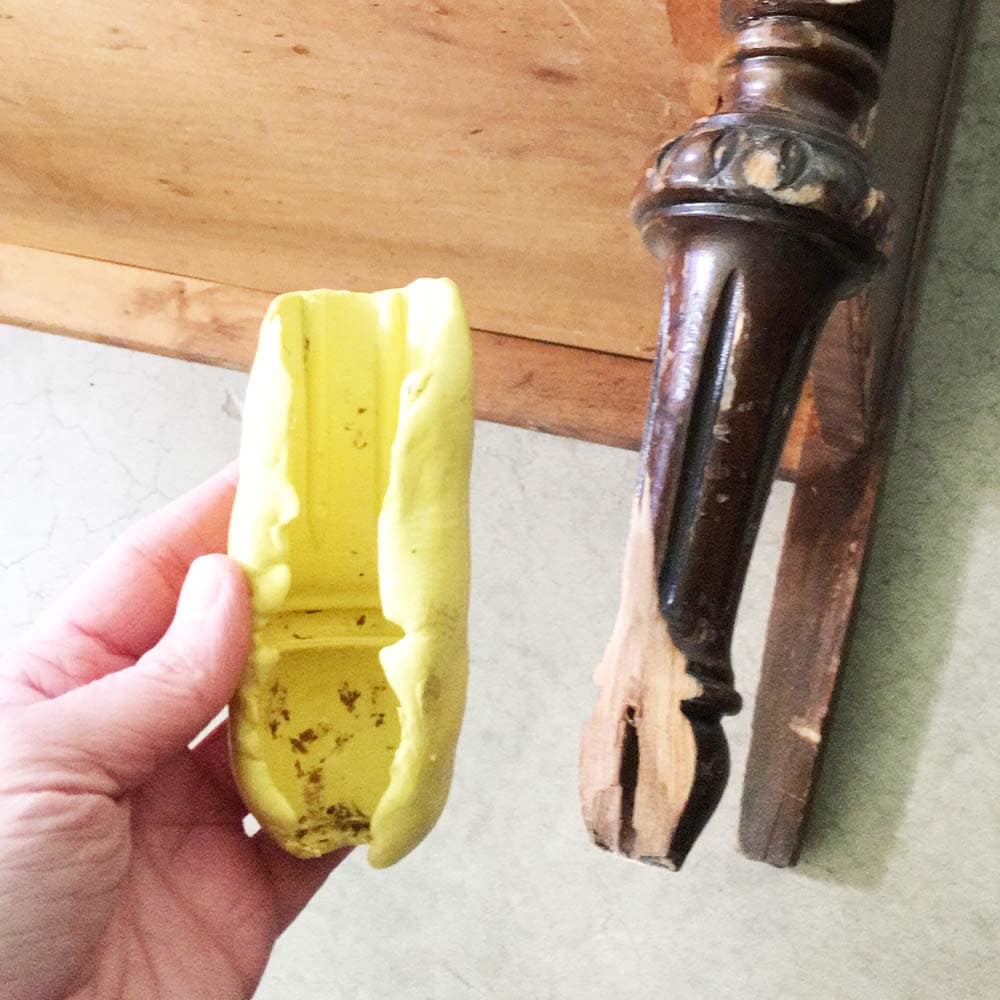
Start by applying a thin layer of Vaseline to the undamaged part of the wood that mirrors the missing chunk. This will make for easy removal of the putty mold we are about to make. Usually, furniture has at least 2 of every detail, 1 on one side, and 1 on the other side of the furniture.
Would you like to save this?
Next, mix equal parts of the yellow and white Amazing Mold Putty for about a minute until they blend into a consistent, well mixed color.
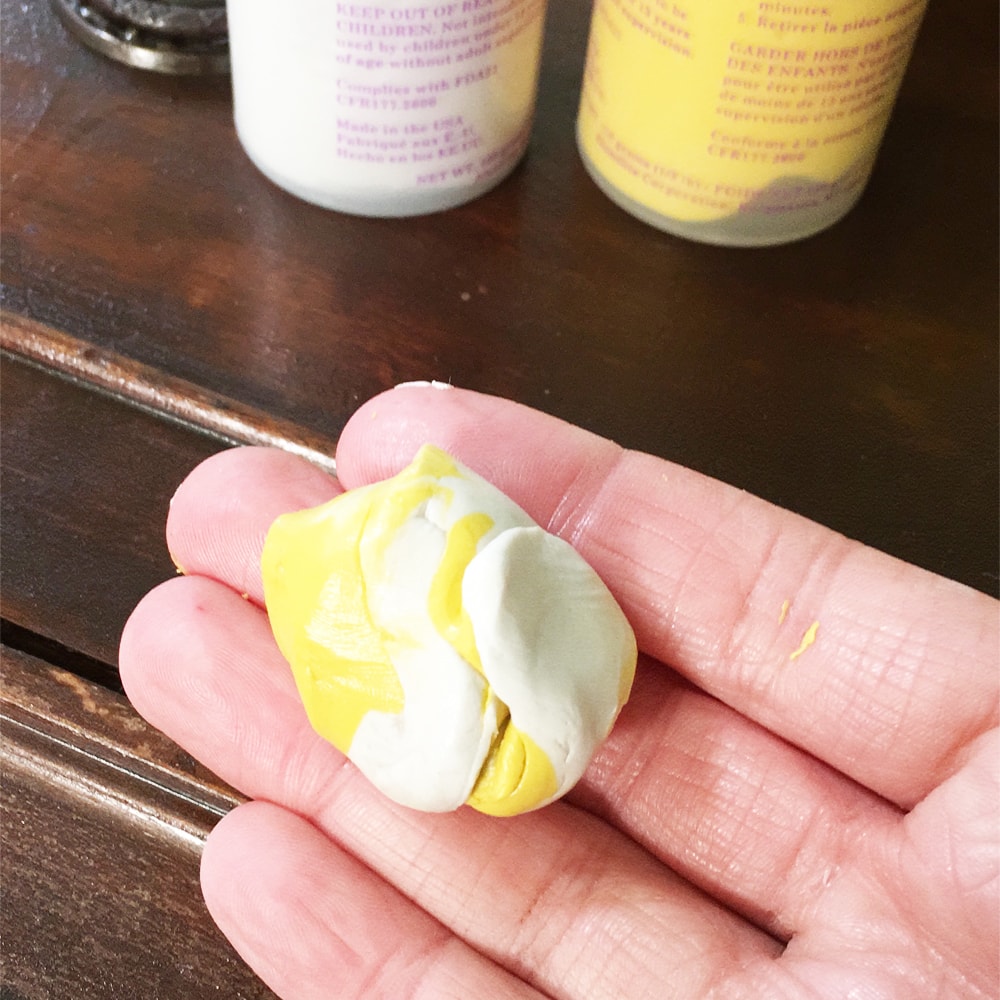
Immediately apply the putty to the Vaseline-covered area. Press gently and roll it into place to make sure the putty fills all the details. This part needs to be done within 2 minutes before it starts to cure.
Leave the putty on the wood for about 15-20 minutes to let it harden into a mold. Once it’s set, you should be able to easily peel off your mold.
Repairing the Missing Chunk
Now, mix your Bondo or Kwikwood according to the manufacturer’s instructions. Here is our tutorial on how to use KwikWood, or read our repairing veneer with wood filler post that talks more about mixing Bondo.
Get Our Secrets!
Grab this super convenient How to Repair Furniture Ebook with all of our secrets on how to repair furniture for only $14.
You can print it out and have instant access whenever you come across damaged furniture, and know exactly how to fix it!
Click on the picture of the book to purchase!

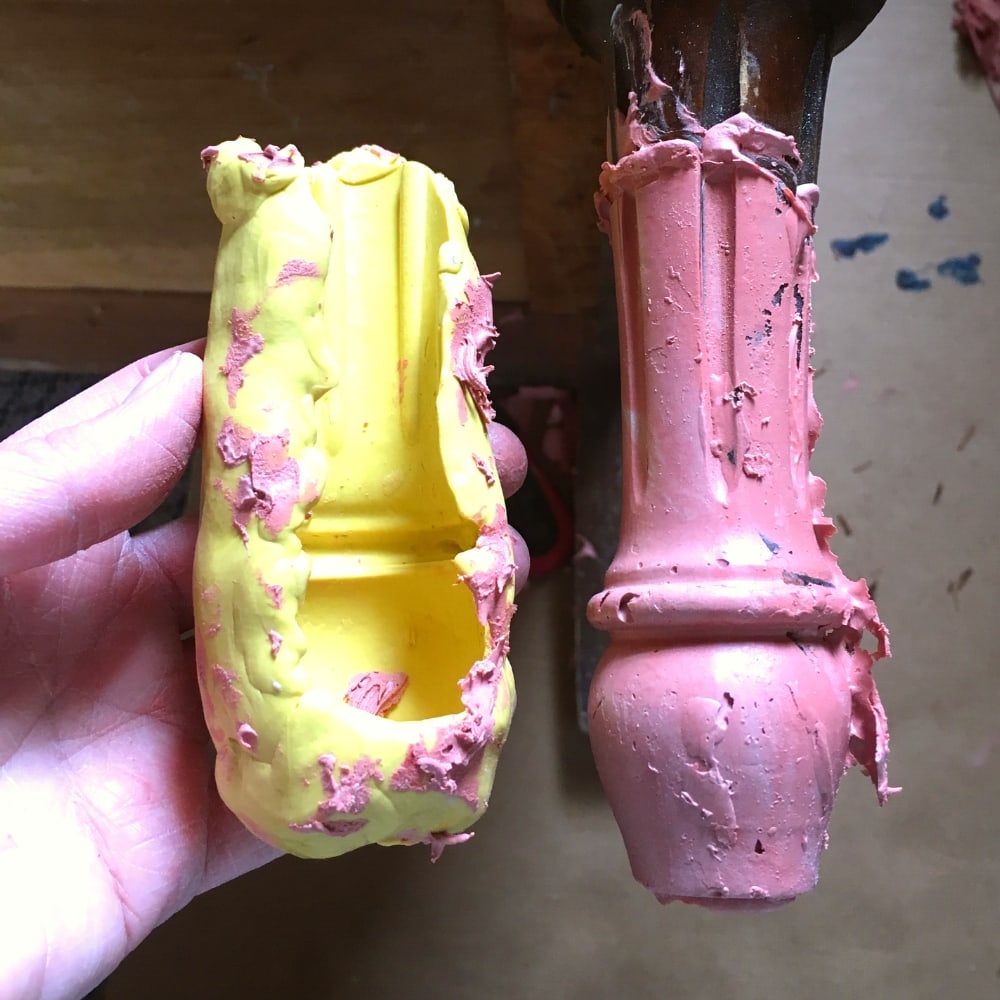
Using your putty knife, press the Bondo filler into the missing chunk area. For Kwikwood, push the KwikWood into the damaged area with glove-covered hands. Try to fill it a bit over the top as we’re going to sand it down later.
Next, press your mold into the filler. This will transfer the exact shape to the wood filler. Let it sit until it is hard enough that the wood filler won’t change shape. For Bondo, this is within 5-10 minutes. For Kwikwood, this is in about 15-30 minutes.
Then gently remove the mold. Don’t worry if it doesn’t look perfect, we’re going to make it right in the next steps.
Allow the Bondo or Kwikwood to dry completely. This could take anywhere from 15 minutes to a couple of hours, depending on the product and the size of the repair.
Here’s everything you need to know about Bondo wood repair for your furniture.
Sanding and Finishing
Once dry, start sanding the filler to the exact shape you need it to be. If you are working with a flat surface, you can use a power sander. If there are a lot of details, sanding by hand is best.
Begin with 120 grit sandpaper, then move to 150, then finish with 220 for a smooth finish. Here’s the best sandpaper for furniture to help you choose the right type of sandpaper for your project.
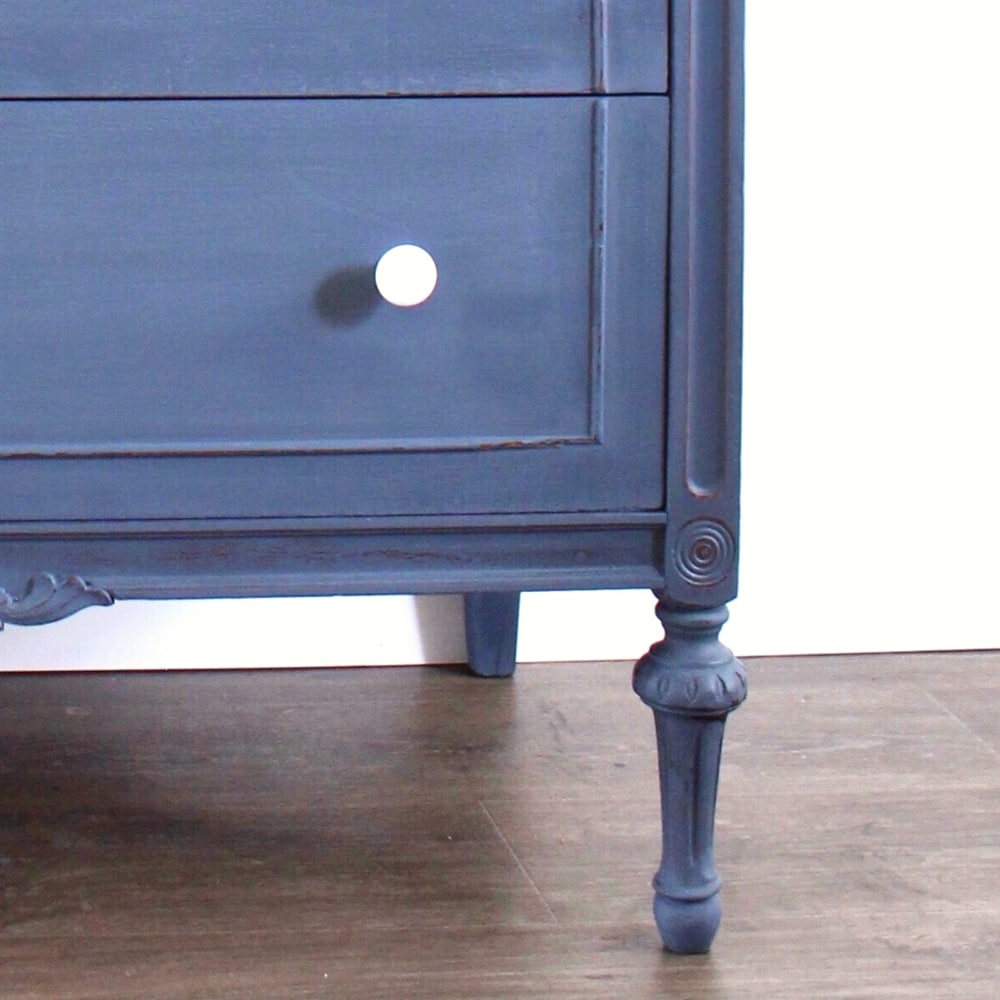
Finally, paint or stain the repaired area to match the rest of the piece.
For tips on how to paint your repaired chunk of wood and the surrounding wood, visit our painting furniture post and find the tutorial you need. To stain the repair to match the stained wood finish around the repair, visit our wood stain repair tutorial. You can also check this major patio table makeover where we also did wood stain repair.
And voila! You’ve successfully fixed a missing chunk of wood. Just remember, practice makes perfect. So don’t get discouraged if it doesn’t turn out perfect the first time. Happy fixing!
more furniture repair tips
- How to Fix a Chipped Wood Corner
- How to Repair Bubbled Veneer
- How To Fix Old Dresser Drawers From Falling Out
- How To Fix Dog Chewed Wood Trim
- How To Fix Veneer That Is Lifting

How To Fix A Missing Chunk Of Wood
Do you have furniture that has a missing chunk and you are hopeless that it will not be fixed? Here's our step by step guide on how to fix a missing chunk of wood.
Materials
Instructions
- Apply Vaseline to the undamaged wood that matches the place where the chunk of wood is missing.
- Mix yellow and white Amazing Mold Putty until it is a consistent color.
- Apply putty to the Vaseline covered area, press gently, roll, and fill within 2 minutes. Allow the putty to harden on the wood for 15–20 minutes.
- Mix Bondo or Kwikwood according to the manufacturer's instructions. Press Bondo filler onto the damaged area with a putty knife OR KwikWood with glove-covered hands.
- Press the mold onto the filler, making sure it sits flush with the wood around it, and let it sit until hardened, 5–10 minutes for Bondo and 15–30 minutes for Kwikwood.
- Remove mold and let Bondo or Kwikwood dry completely.
- Sand filler to the desired shape using a power sander or hand for flat surfaces or intricate details. Start with 120 grit, gradually increase to 150, and finish with 220.
- Paint or stain the repaired area to match the overall piece.
Recommended Products
As an Amazon Associate and member of other affiliate programs, I earn from qualifying purchases.


Follow us on YouTube to get more tips for painting furniture. Or share your project with us on our Facebook Group and be part of our community. See you there!