Painting a Hutch
A hutch, or a china cabinet, is super versatile and fits right in whether it’s your dining room, kitchen, or living room. Painting a hutch gives it a fresh look, especially if it’s an old piece that needs a little TLC. It can also help update the style to match your current aesthetic or decor.
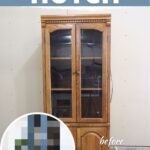
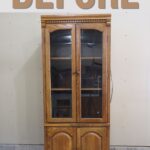
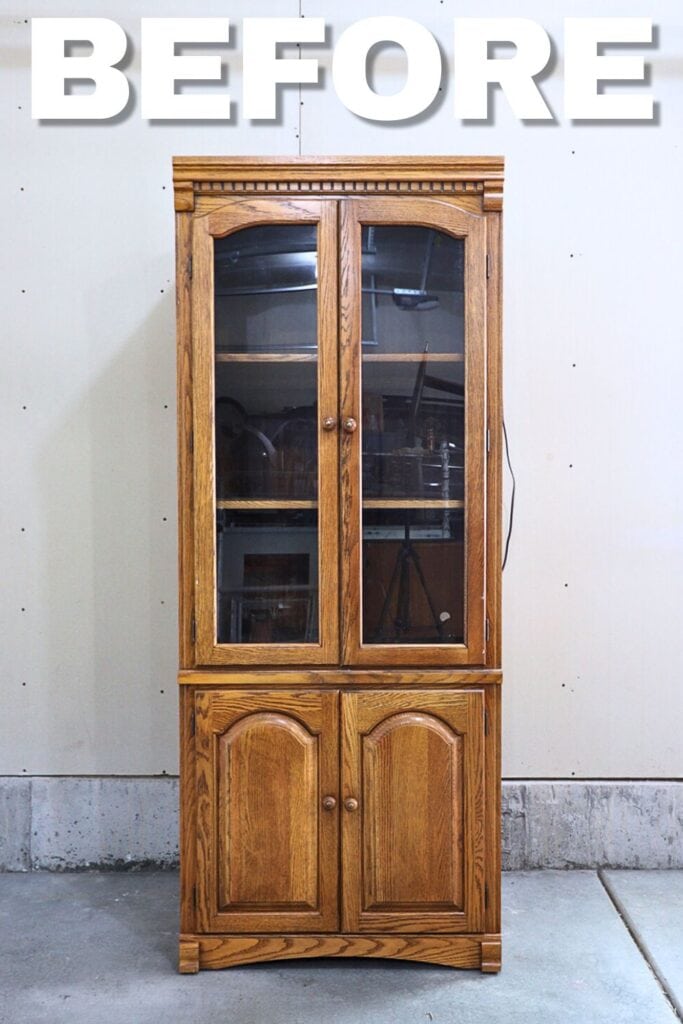
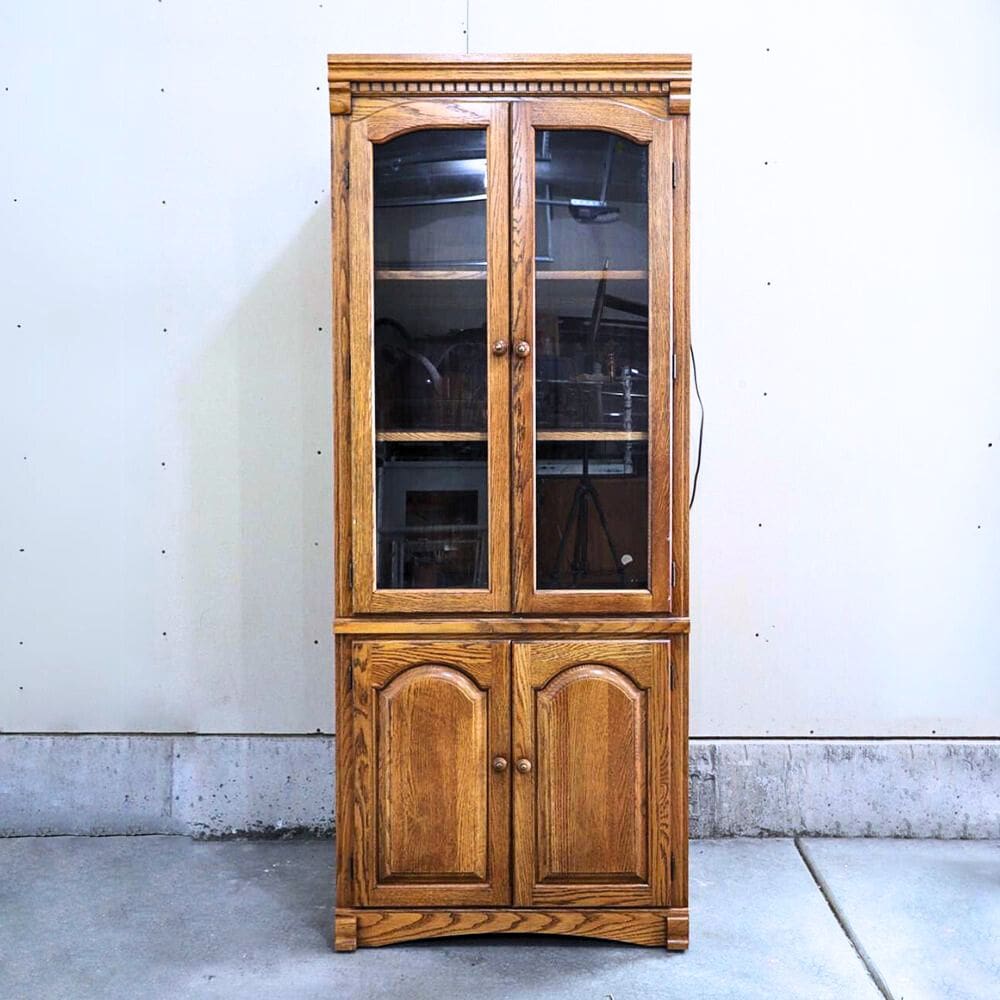
So we’ll transform this oak furniture into a beautiful and modern blue hutch that will surely be the focal point in any room. Keep reading to see how we did one of these blue painted furniture ideas and see the results!
One of the best things about painting furniture, or in this case, painting your hutch, is all the endless options for making it your own. You can choose the color, the finish, and even details like decorative stencils or new hardware.
Or if it’s an old hutch that’s been passed down from generation to generation, you can paint it with the same color and keep the sentimental value intact. This maintains the original piece while giving it a fresh new appearance that will last for more years to come.

And let’s not forget the cost effective aspect. Painting also saves you from splurging on a brand new piece. Sure, it takes a bit of time and elbow grease, but these DIY projects really give you a nice sense of pride and joy when you see something old turn into something new and gorgeous and uniquely yours!
So let’s dive into this furniture makeover! We’ll cover all the necessary details to help you create your own painted hutch dream. Follow along from prep to paint to all the tips and tricks we’ve learned along the way.
It’s also Furniture Fixer Upper day, where we join 4 of our talented furniture friends and bring you brand new makeovers! I’ll link to my friend’s makeovers after our after photos at the bottom of this post! Don’t forget to check out their masterpieces!! Okay, back to our makeover!

Supplies Used for Painting A Hutch
As an Amazon Associate, I earn from qualifying purchases. I also may earn from other qualifying purchases with other companies or get free product to review and use. All opinions are my own.
- Power Drill
- Krud Kutter
- SurfPrep Sander (Use code RAY10 to get 10% off your order)
- SurfPrep Sanding Screens and SurfPrep Pro Foam Pads (Use code RAY10 to get 10% off your order)
- SurfPrep Vacuum (Use code RAY10 to get 10% off your order)
- Tack Cloth
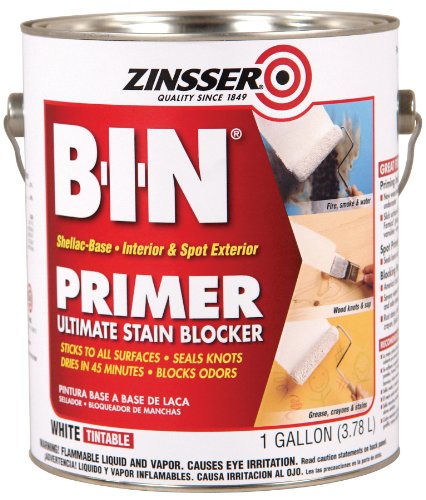
- BIN Shellac Primer
- General Finishes Milk Paint in Klein Blue, China Blue, and Driftwood
- Paint Filter
- Mohair Roller
- Country Chic Paint Oval Brush
- Farmhouse Paint in Pumice Stone
- Cling On Brush
- Yellow Delicate Frog Tape
- Zibra Square Brush
- Painting Triangles
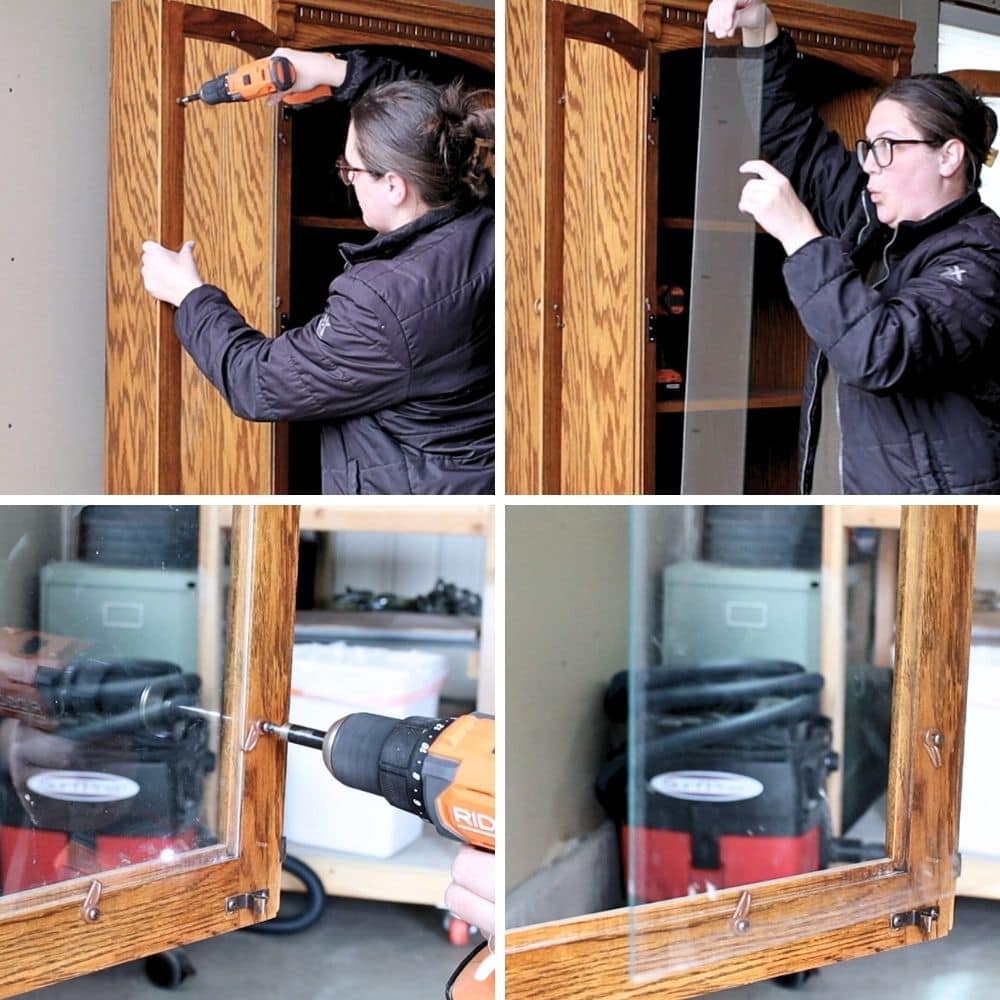
Removing Glass from Cabinet Doors
First I removed the glass from the 2 cabinet doors. For this cabinet, the glass was held in with a few hooks, screwed on around the door. It was really easy to unscrew the hooks and remove the glass with my RIDGID power drill. I’m always nervous when removing the glass because one time I broke it while it was out of a hutch. Never again hopefully!
Prepping a Hutch for Paint
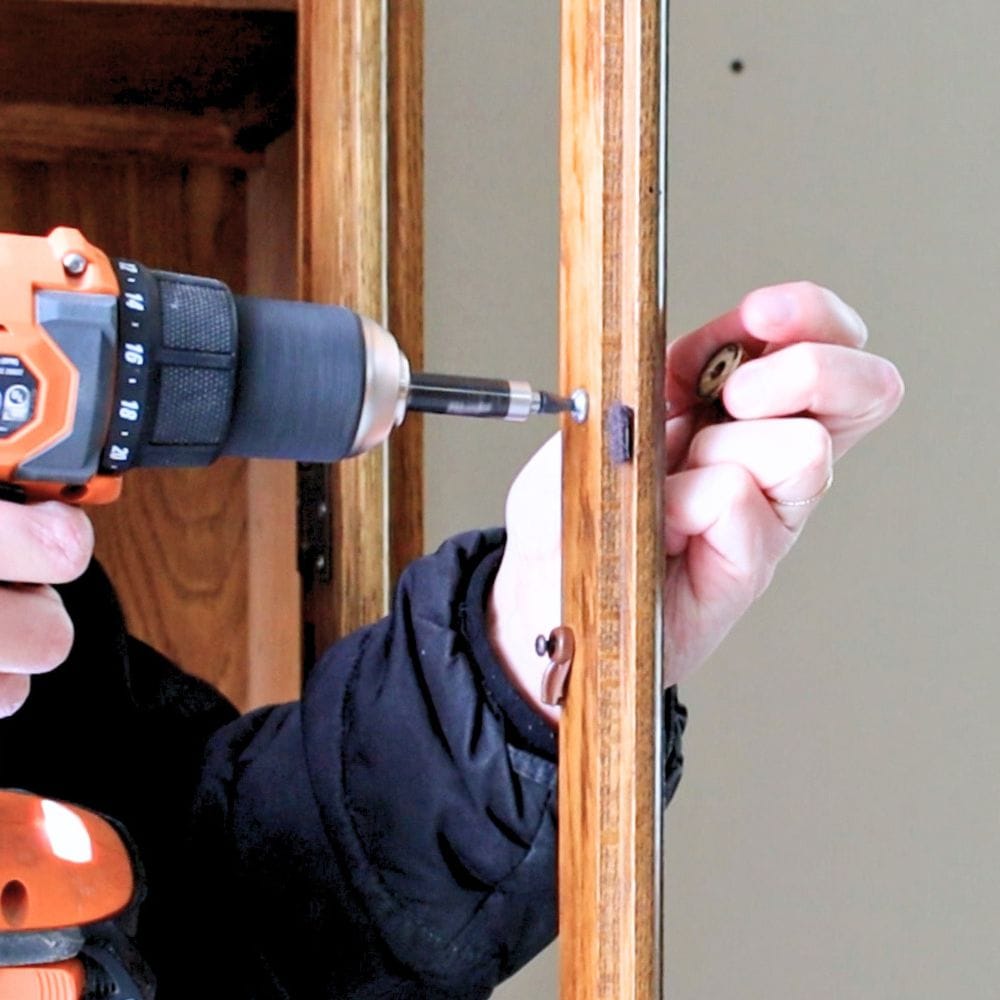
I also removed the other random hardware pieces for the doors, but I thought I might paint this piece with the doors on, so I left the hinges on the doors. But I labeled all of the pieces well so I could easily put them back in place when the paint is done.
Then I cleaned the hutch with Krud Kutter to remove any grease and grime, and all of the dust from this cabinet sitting in my garage for months! I also scraped off some lingering tape residue and something else while I was at it. Ahh, squeeky clean now!
The next day, I thought better of it and removed the hinges and the doors from the cabinet so I could paint this properly and not get paint on the hinges. I avoid removing doors if at all possible because sometimes they don’t go back on properly. So in the process I labeled the hardware very well so everything would go back on in the same place as before.
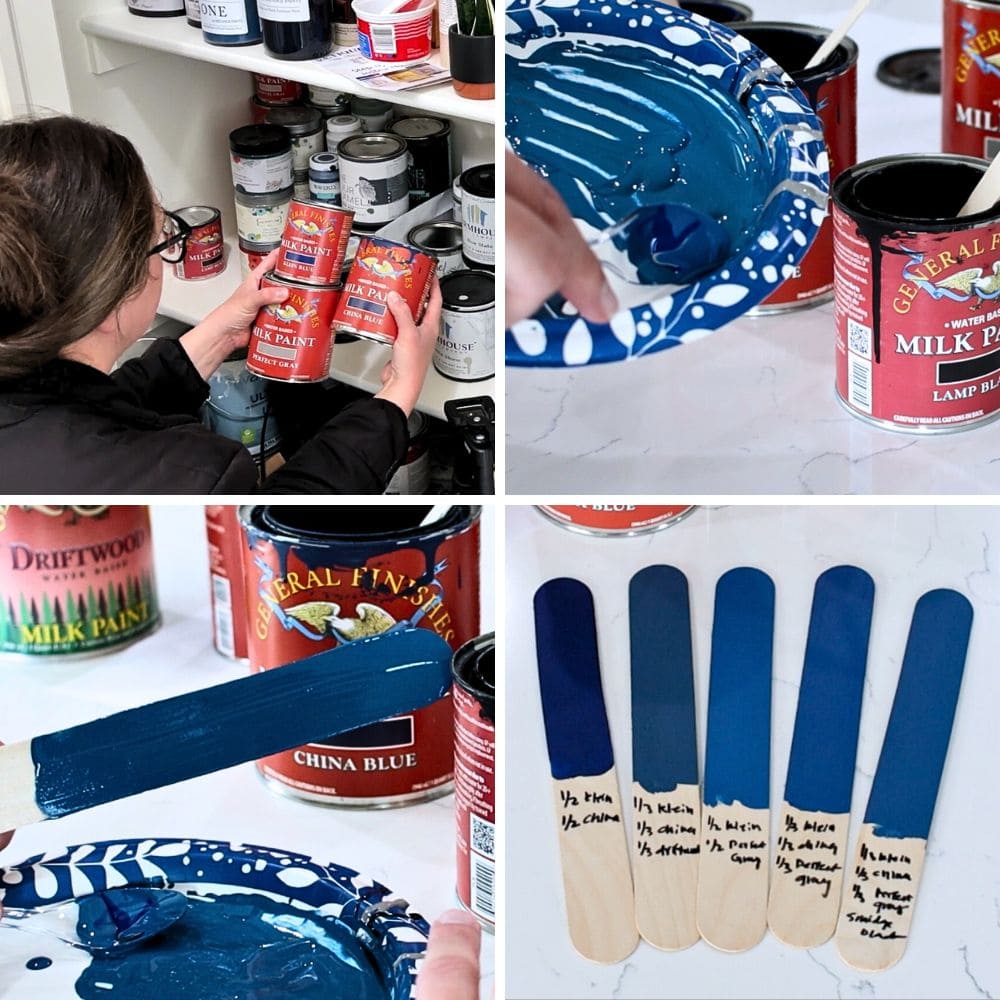
Deciding What Color to Paint
Then I got stuck picking a paint color. I swear this is almost the worst part of any DIY project. I have quite a bit of paint on hand, and I’m trying to use it all up. But I was nervous that a project of this size would take a lot of paint. So, I gathered some General Finishes Milk Paint and tried mixing some of the colors together to create a new color with the remnants.
I really only had a few shades of blue and grey to choose from, so I mixed different combinations together, put them on paint sticks, and dried the paint to see what they looked like. Which one would you have chosen for this hutch?? For a more detailed guide on mixing paint colors, here’s how to mix different colors of paint.
Sanding Oak Furniture Before Paint
While we ruminated on the paint color, Taylor scuff sanded the hutch with 220 grit sanding screens and medium+ pro foam pads on the SurfPrep sander to help the paint and primer stick to the surface the best it can! If you don’t sand before priming and painting, the paint will often scratch off.
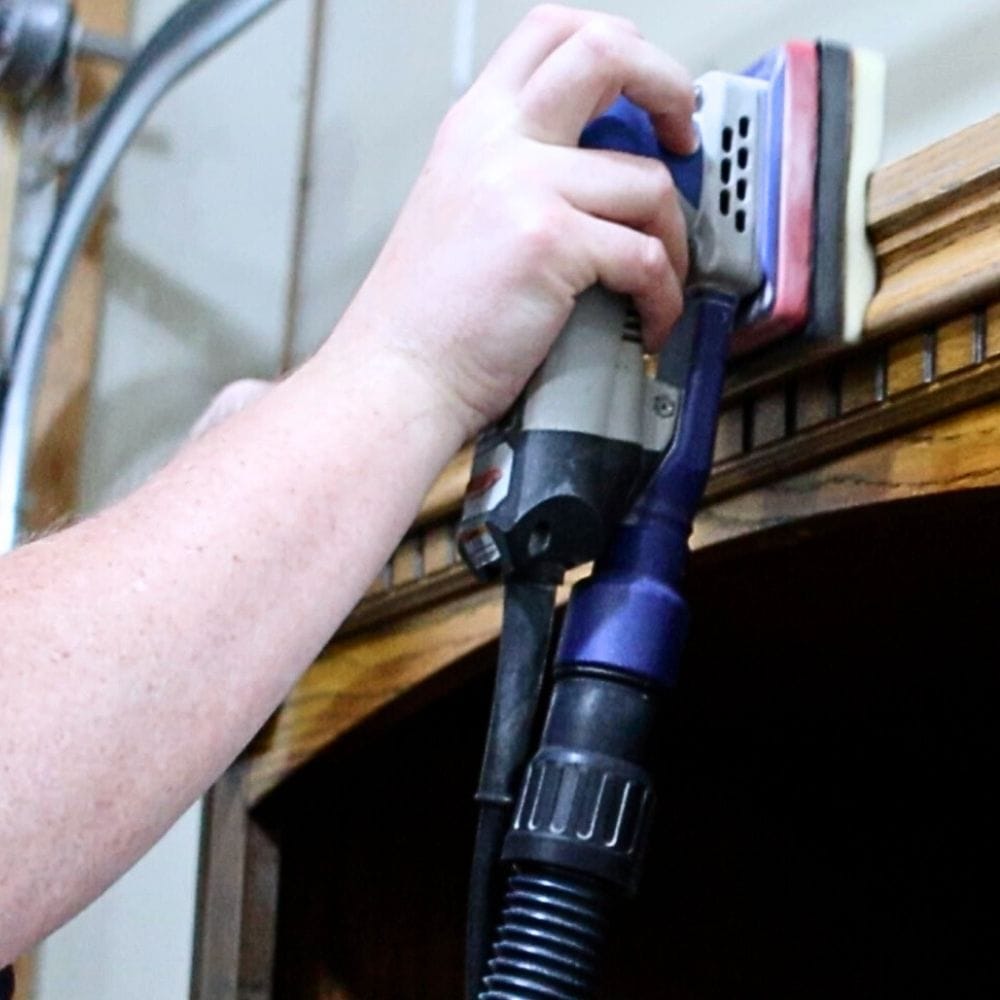
Then he removed the dust with our vacuum hose and then wiped it down with a tack cloth. I’m so thankful he is willing to do the boring parts of painting for me!
Painting Oak Cabinets with Grain Showing
Since this cabinet is oak with deep wood grain, I opted to roll the primer onto the cabinet to push it into the wood grain, and to help prevent orange stains from coming through the paint. Notice I didn’t try to fill in the wood grain with a filler. There is nothing wrong with seeing the wood grain on oak furniture! The trick here is to roll the primer onto the oak to fill the wood grain, instead of spraying the primer on.
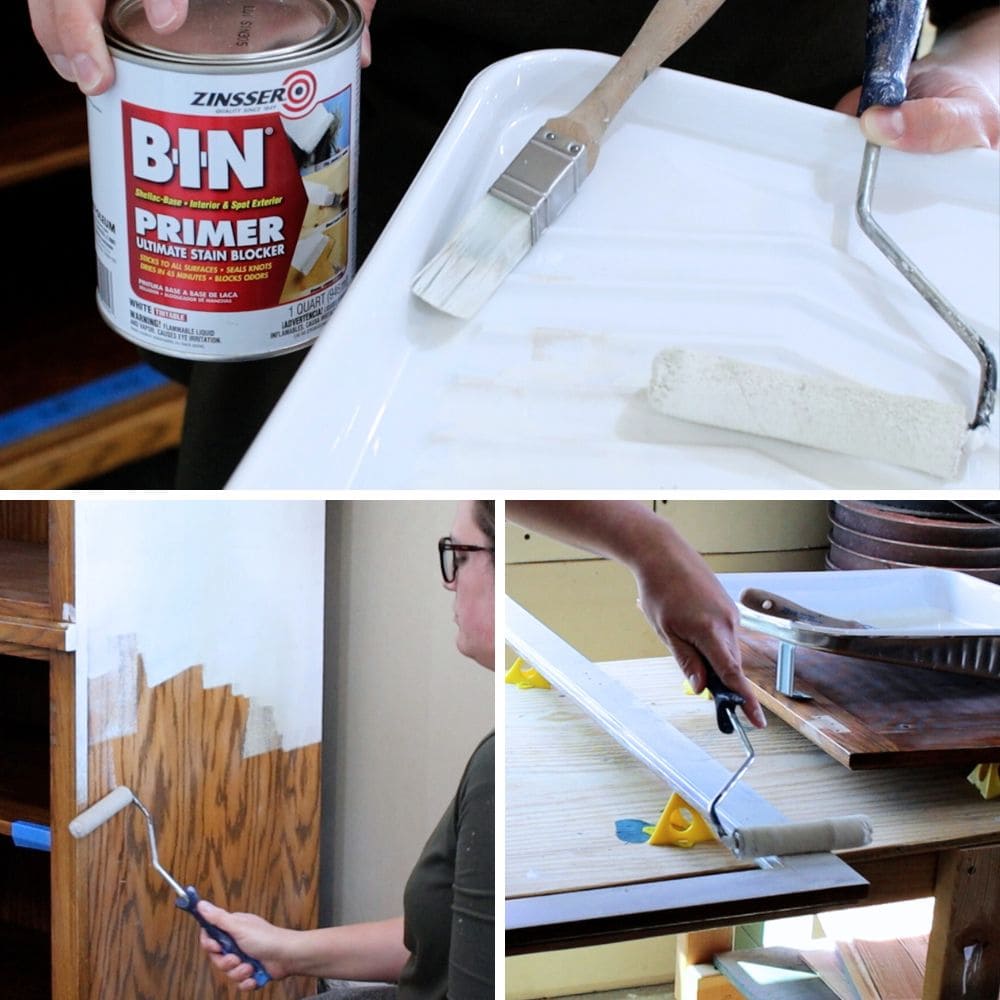
If you spray, you’ll end up seeing a lot of tiny dots where the wood grain is, or you will just see black where the wood grain is. When painting oak with light paint colors, this option doesn’t look very good. But, you can spray the primer and paint on if you’re using a dark color like black, and then those dark spots aren’t noticeable at all.
Here’s painting oak furniture white, where we also used a roller to apply the primer.
Priming Oak Furniture
The whole primer situation was crazy, though! I tried to tint the BIN shellac primer, and sat at Home Depot for about an hour while the paint techs tried the best they could to tint it. They weren’t very successful, though, which was really unfortunate. Right from the get go, it was weird.
Eventually, I realized that the tint never mixed in completely and there were specks of the tint all throughout the can. So, in the can the primer looked white, but when it was rolled on, it had spots all over and started to look more brown like they tried to tint it to.
Would you like to save this?
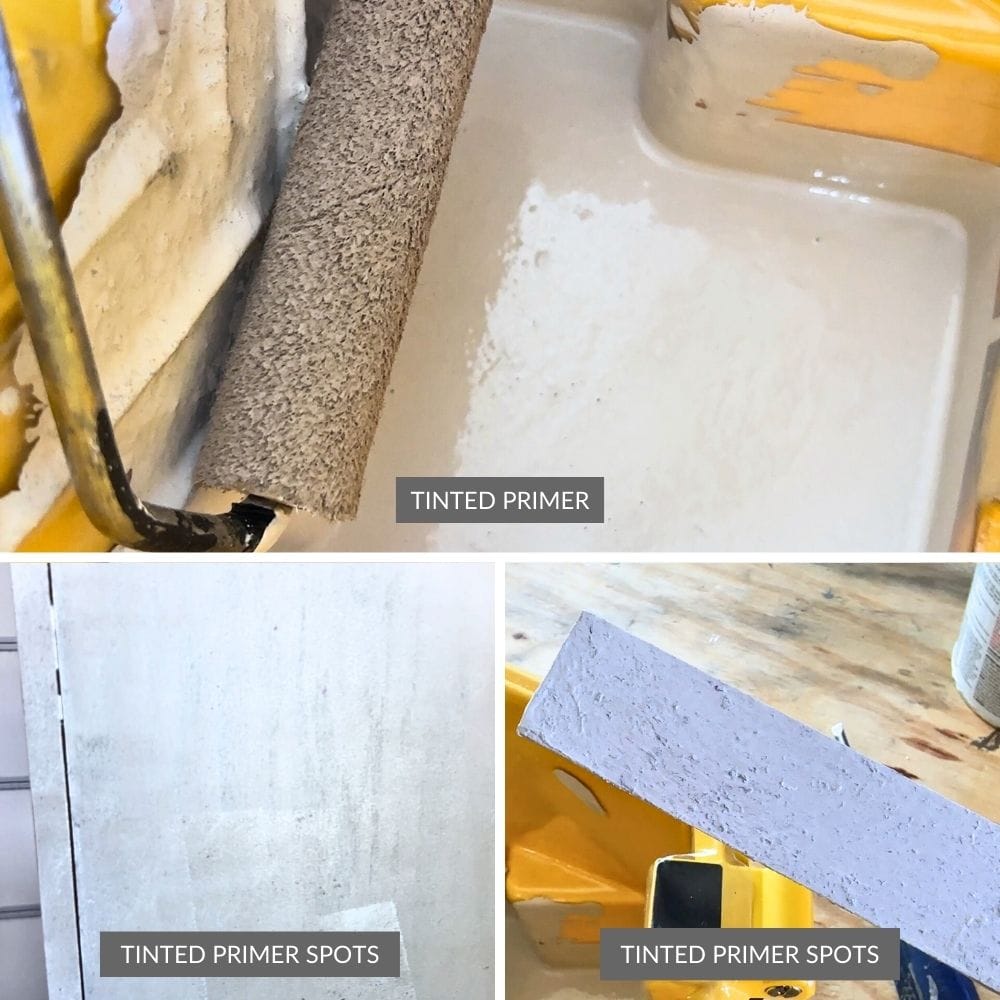
Nervous about the primer’s durability, I switched over to non tinted BIN shellac primer for the rest of the cabinet. I really wanted tinted primer so I wouldn’t have to paint as many coats of paint over it to get full coverage. But it was a no go.
About an hour later, I scratched at the primer, and it was all very durable. So, I gave the tinted primer another try, for part of that one side. But the tint was leaving a lot of texture behind, and it was just weird. So I switched back to the regular primer…. now I’m not sure what to do with the tinted primer… do I take it back to the store because it doesn’t work?? Even though I used part of it??
What Grit Sandpaper For Primer on Wood?
The next day, I convinced Taylor to sand the primer smooth for me. He used 400 grit sanding screens and very fine foam pads to sand the primer, to mostly avoid sanding through the primer and back to the wood surface. Look how satisfying it is to sand with the foam pads! They get into all the curves so well, and much easier than regular sandpaper!
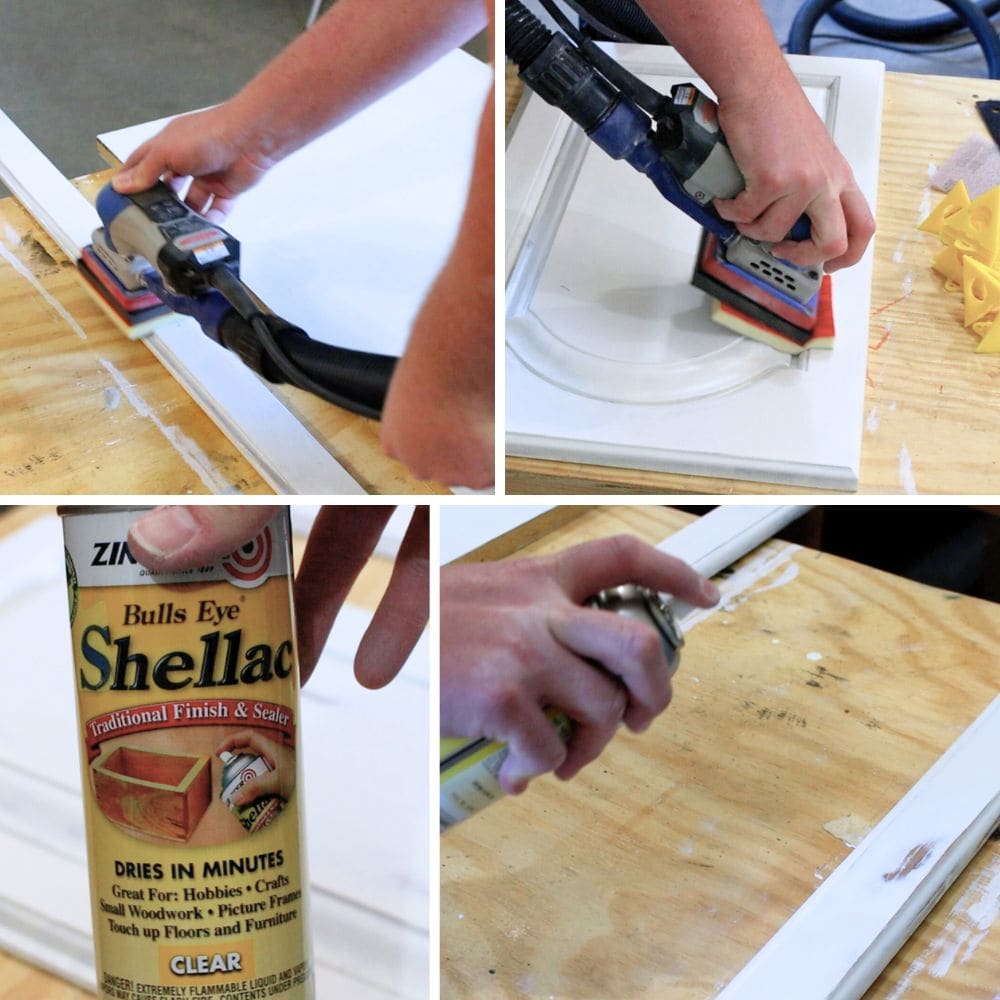
Once again, he vacuumed up the dust and wiped everything down with a tack cloth to remove all of the dust. There were some places that he sanded through the primer, so he spot primed them with clear shellac to make sure those areas didn’t let stains come through the paint. We let that primer dry for about an hour or so while I mixed up the paint.
Using General Finishes Milk Paint on Furniture
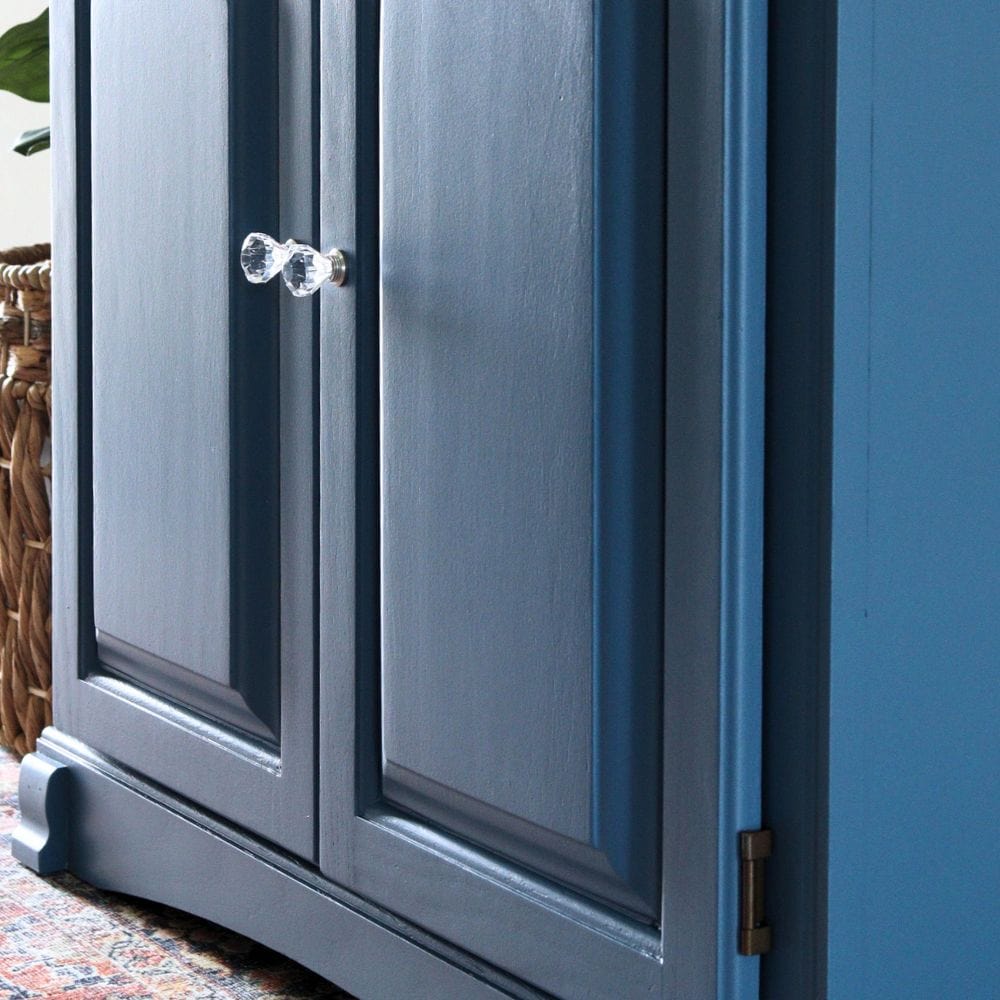
For the paint color, I chose a mixture of 1/3 Klein Blue, 1/3 China Blue, and 1/3 Driftwood. Some of this paint is old, so I poured it into a paint filter to prevent the dried paint from being on my hutch project. I also even used a cup to measure out equal amounts of paint.
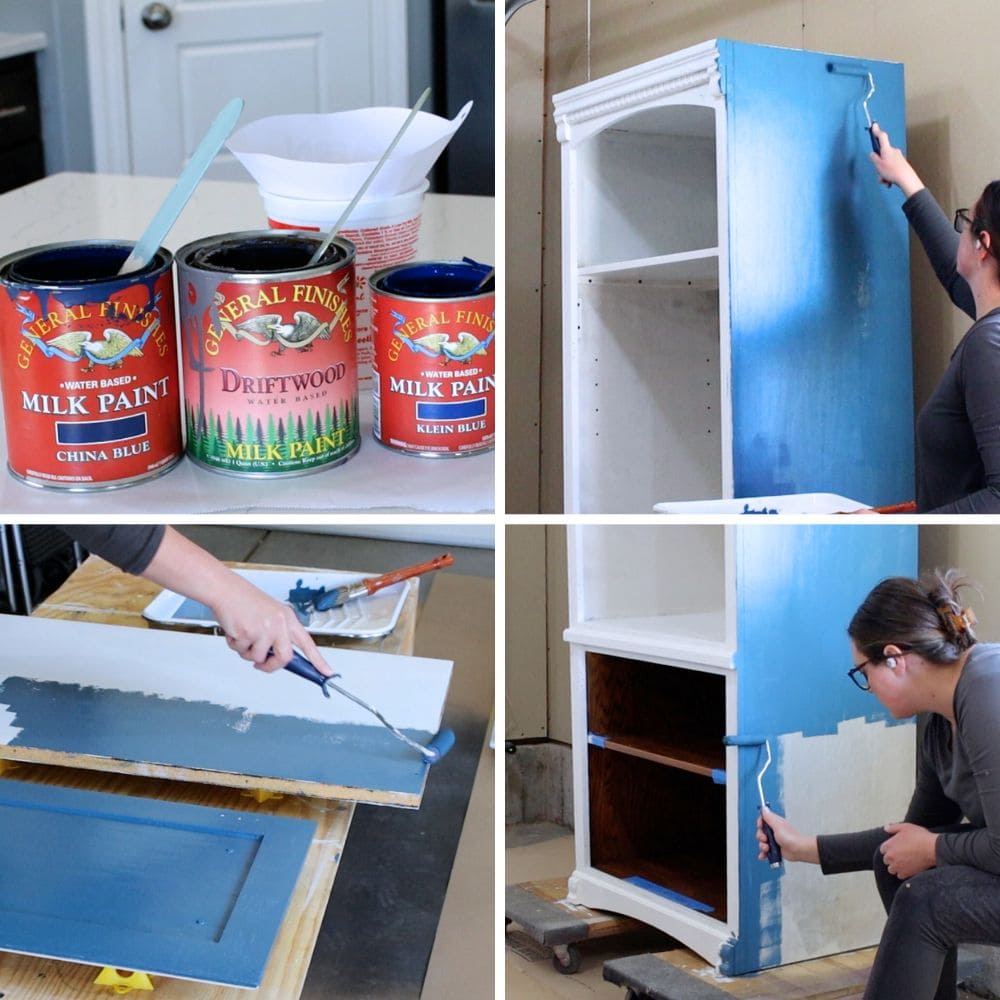
Then I brushed and rolled the General Finishes Milk Paint onto the backs of the cabinet doors. This way they could dry first and I could get another coat on them sooner and be able to flip them over to paint the other side within the day. I used a mohair roller and the Country Chic Paint oval brush to apply the paint to get a very smooth finish.
To prevent brush marks, I brushed on the paint and then rolled back over it with the mini roller. This paint levels very well on it’s own though and doesn’t usually end up with brush marks when dry. It’s some of the smoothest drying paints out there for furniture!
Using Farmhouse Paint
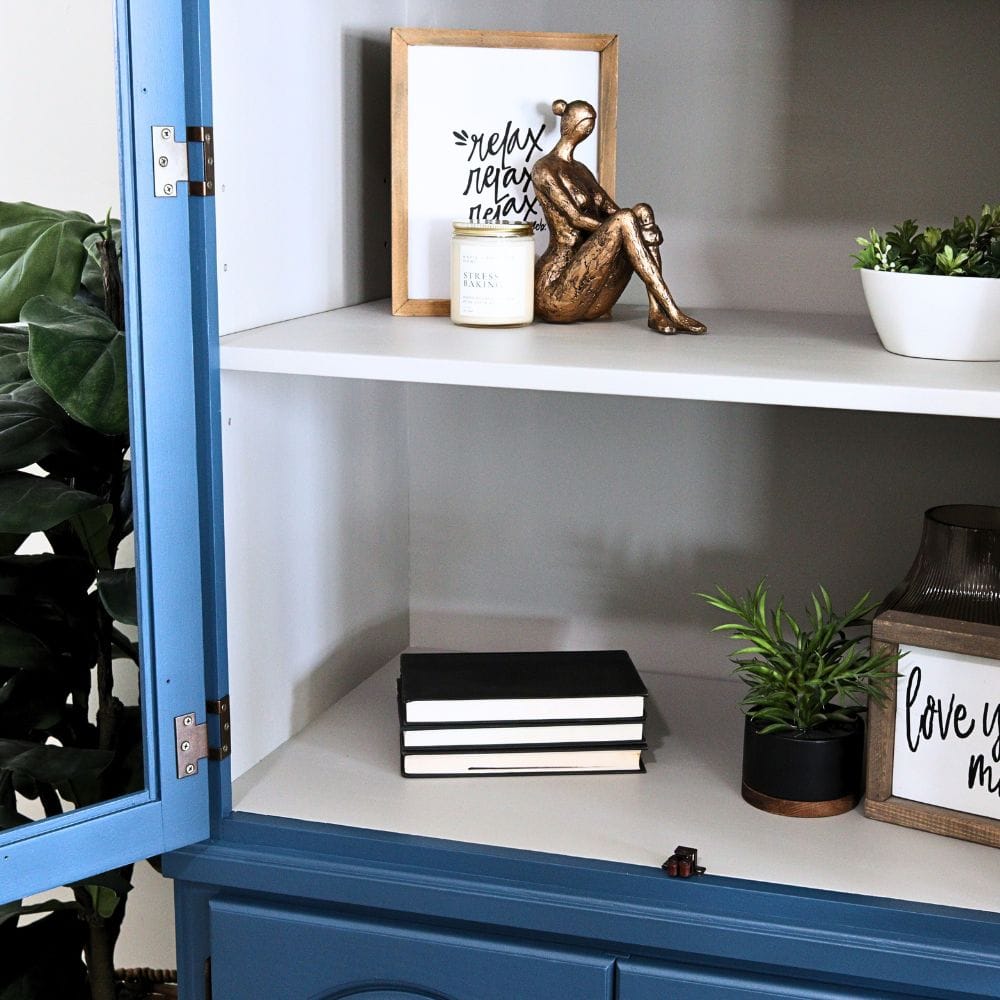
Once the outside was painted, I loved the look of the lighter paint color on the inside of the hutch. So, I grabbed some light beigy grey paint to paint inside. This Farmhouse Paint in the color Pumice Stone is what I had on hand, and I love the contrast it created!
Farmhouse Paint is similar to General Finishes Milk Paint. It self levels very well and is very easy to brush on. I used a Cling On brush to apply the paint and the brush just glided! I was careful to not paint on the blue paint, and let it all dry.
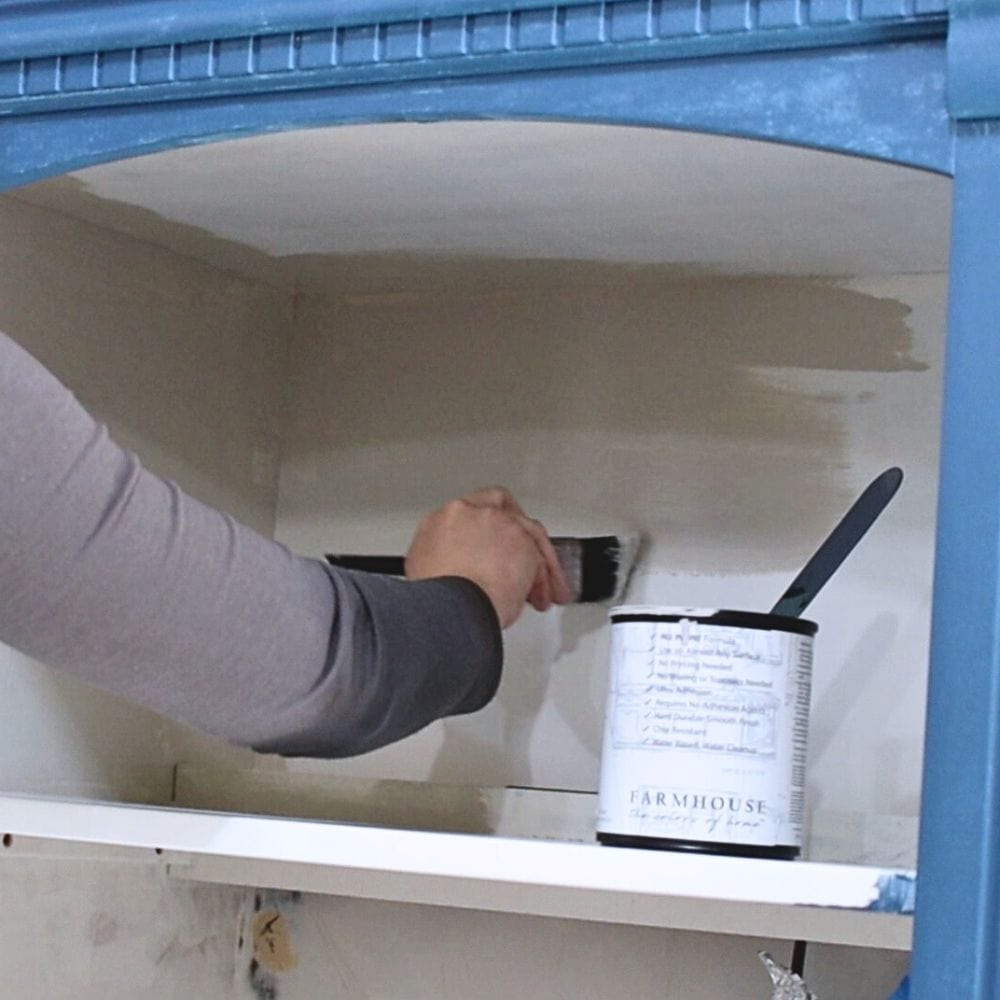
On tricky places I used the yellow delicate Frog Tape to tape off the blue paint so it wouldn’t ruin the paint it was taped on, and I could paint the other color without getting paint where I shouldn’t. Removing the tape was the most satisfying part of this whole process.
As I painted the 2nd coat of paint inside the cabinet I realized that I made a big mistake… The shelf that I started to paint blue wasn’t supposed to be blue! Ugh! So, I had to paint over the blue with the light greige paint. Thankfully Farmhouse Paint has great coverage and it took just 2 coats to cover up the blue!
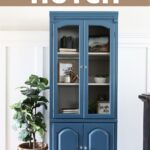
Blue Painted Hutch Makeover
The next day, I put the hutch together because I had to get photos for a deadline. Thankfully, the doors went back on properly, thanks in part to all of my labeling! Don’t worry, though; I went back and sprayed a few coats of topcoat on the hutch afterward, so this paint will be as durable as possible! It’s alright on its own, but clear topcoat makes the paint much more scratch resistant!
Here’s what it looks like now!! You can also update your piece with these painted hutch ideas and chalk painted hutch ideas. If you want a more natural look, try these hutch refinishing ideas! If you have a corner piece, check out these painted corner cabinet ideas.
I also have more tips on updating oak furniture and how to get a high end look without replacing it here!

More Before and After Makeovers
See All >
Click any of these “before” photos below to view the “after” of that makeover.


The color is a little brighter than I expected, but I love it! I think it will be a fun pop of color, without being too much in your face, for whoever it ends up with! What do you think of the light interior against the blue exterior?? Let me know in the comments!
Don’t forget to check out these other awesome before and after furniture makeovers from my Furniture friends!! (Click the links below the photos!)
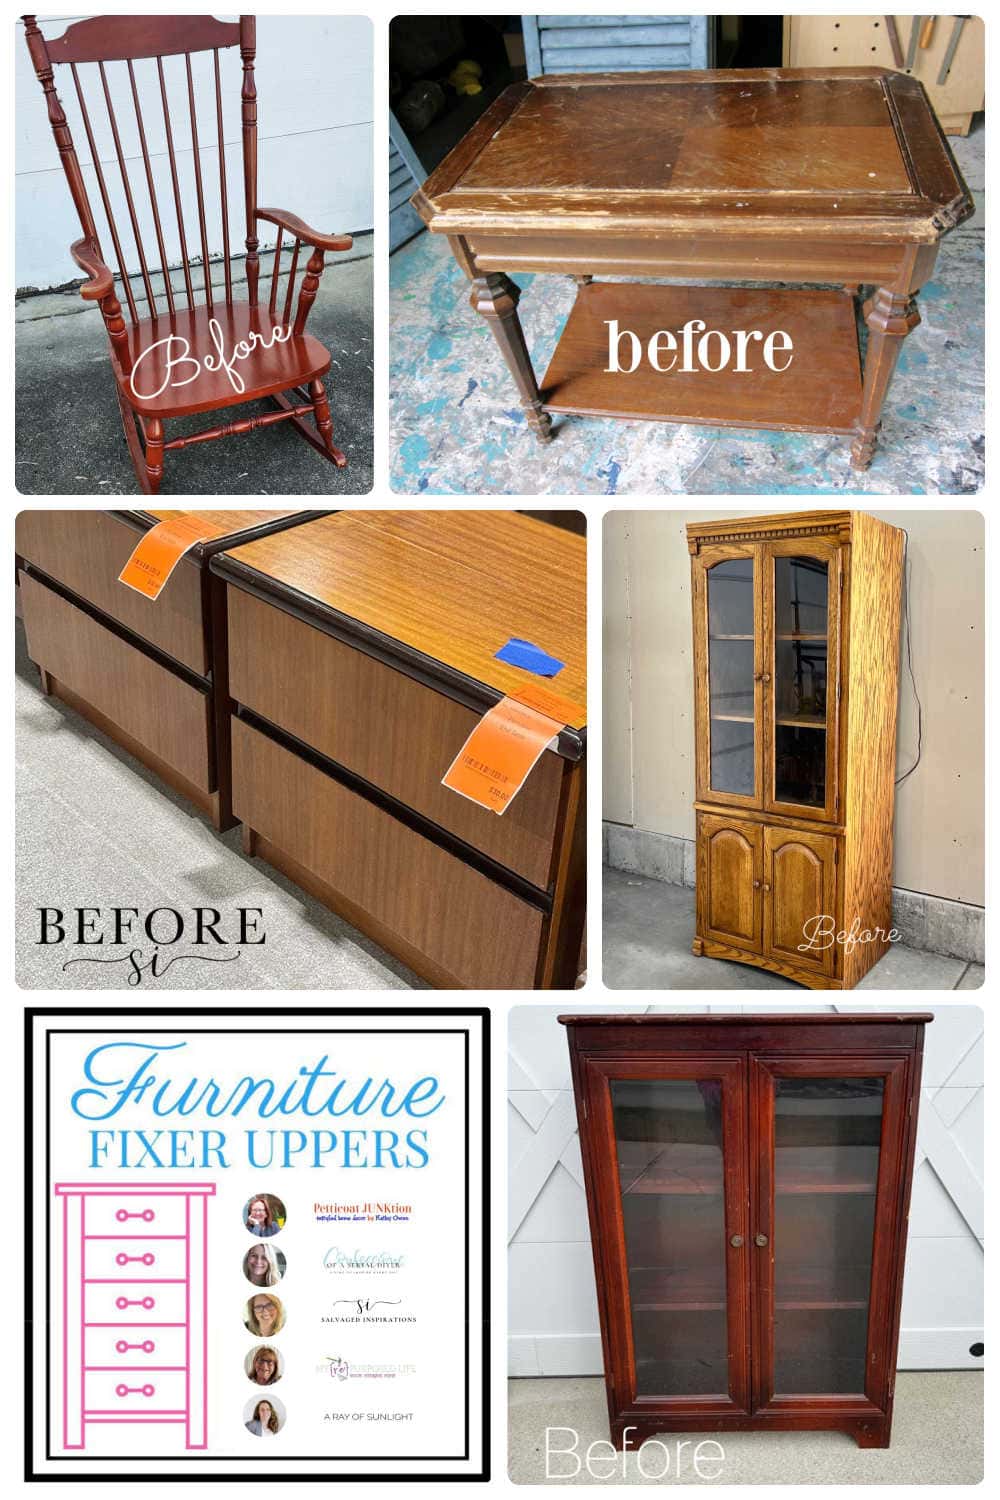
- Vintage Cabinet with Glass Doors Makeover from Confessions of a Serial DIYer
- Stenciled End Table Makeover from Petticoat Junktion
- Rocking Chair Makeover from My Repurposed Life
- Modern End Tables Makeover from Salvaged Inspirations


Painting A Hutch
Painting a hutch create a fresh look and helps update the style to match your current aesthetic or decor.
Materials
- Krud Kutter
- SurfPrep Sanding Screens (Use code RAY10 to get 10% off your order)
- SurfPrep Pro Foam Pads (Use code RAY10 to get 10% off your order)
- Tack Cloth
- BIN Shellac Primer
- General Finishes Milk Paint in Klein Blue, China Blue, and Driftwood
- Paint Filter
- Farmhouse Paint in Pumice Stone
- Yellow Delicate Frog Tape
- Painting Triangles
Tools
Instructions
- Carefully remove the doors, hinges and hardware from the hutch. Better to label them to make reassembly easier later.
- Clean the hutch with Krud Kutter to remove any grease and grime, and all of the dust. You want a clean surface to work on before painting for the best finish.
- Scuff sand the hutch with 220 grit sanding screens and medium+ foam pads on the SurfPrep sander to help the paint and primer stick to the surface the best it can. Then remove the dust with vacuum hose and then wipe it down with a tack cloth.
- Roll the primer onto the cabinet to push it into the wood grain, and to help prevent orange stains from coming through the paint. Sand the primer smooth with 400 grit sanding screens and very fine foam pads to avoid sanding through the primer and back to the wood surface, then vacuum up the dust and wipe everything down with a tack cloth to remove all of the dust.
- Brush and roll 2 coats of General Finishes Milk Paint (mixture of 1/3 Klein Blue, 1/3 China Blue, and 1/3 Driftwood) onto the backs of the cabinet doors. To prevent brush marks, brush on the paint first then roll back over it. For the inside of the hutch, brush Farmhouse Paint in the color Pumice Stone for a beautiful contrast - do 2 coats for full coverage. Let everything dry after.
- Put the hutch back together from the doors, hinges to hardware. You can also apply a few coats of clear topcoat so the painted hutch will be as durable as possible, but it's still alright on its own.
- Now you have your beautiful and newly painted hutch!
Recommended Products
As an Amazon Associate and member of other affiliate programs, I earn from qualifying purchases.


More China Cabinet Makeovers
- DIY Blue China Hutch
- Chippy Blue Painted Hutch Makeover
- Painting a China Cabinet
- Painted Hallway Cabinet Makeover
Follow us on YouTube to get more tips for painting furniture. Or share your project with us on our Facebook Group and be part of our community. See you there!
The light interior against the blue exterior looks amazing…and I love your staging and styling! Pinned! XOXO
Thanks for the love Denise!! You are so kind!
What a beautiful color! The cabinet was dated and dull before, now it’s so much more appealing.
Thanks so much Marcie! I feel the same way!
Well, after all the ups and downs with that paint job/primer it turned out great. Love the color on that piece. Happy Friday- Diana
Thank you so much for the love Diana!
I love this blue! I don’t think it is too bold at all and thankfully you mixed enough. And I agree…I don’t mind the wood grain of oak showing through at all either! Beautiful job! XOXO
Thank you Christy! And I’m right there with ya, so glad I mixed enough paint up! haha
Natalie,
I love the new look of your painted hutch. The blue is very pretty. Fabulous makeover!
Pinned!
gail
Thanks so much for the love Gail!!
I LOVE this piece! Love the colour you chose and the white inside is a great contrast choice. I wish I was closer. This piece would be perfect in my home. Thanks for sharing!
Thank you so much for the love Anita! I’m so glad you love the new look!
Hi Natalie! I have been following you for about 5 years now. Same as the other bloggers here and i’m so glad you have joined up with them for Furniture makeovers. I love GF and i have always wanted to try the Klein Blue and the China blue so i probably would have chosen the darkest but the hutch turned out perfect! So smooth and silky. Thank you for sharing! I have not heard of Farmhouse Paint. I will have to look that up.
I’m so glad I can join them too! We’re so thankful to have you! They are both pretty bold colors! but I’m very happy with how it turned out in the end. Thanks for the love!
Beautiful piece! What type of top coat do you use and how do you apply? Spray or brush? Thank you.
I use Varathane Waterbased poly and I like to spray it. Here is How to Spray Polyurethane But you can apply it by hand here How to Apply Polycrylic to Painted Furniture
Wowza, this looks so fresh and beautiful! Love the color and how smooth it is. Thank you for sharing it on Farmhouse Friday. Featuring it tomorrow. Hope you link up again soon. pinned
Thanks for featuring our painted hutch makeover! So glad you love it Cindy!