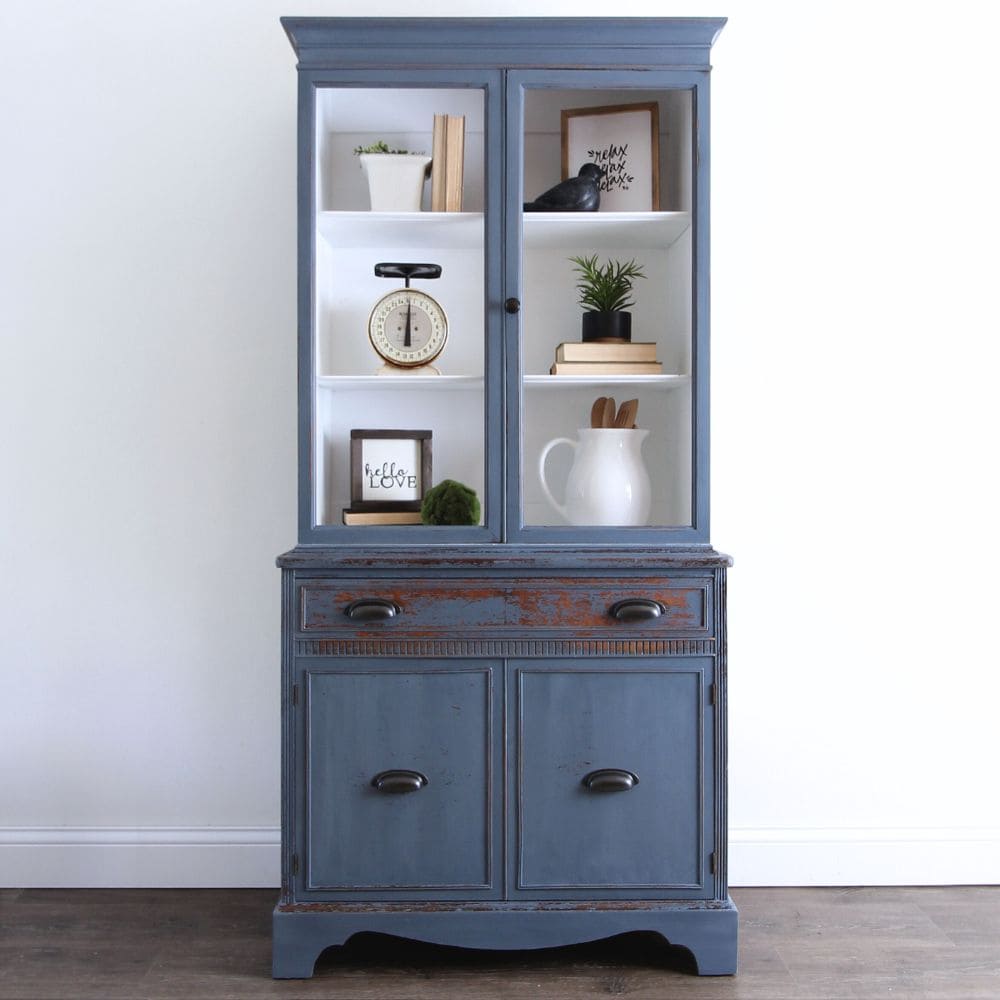
DIY Blue China Hutch


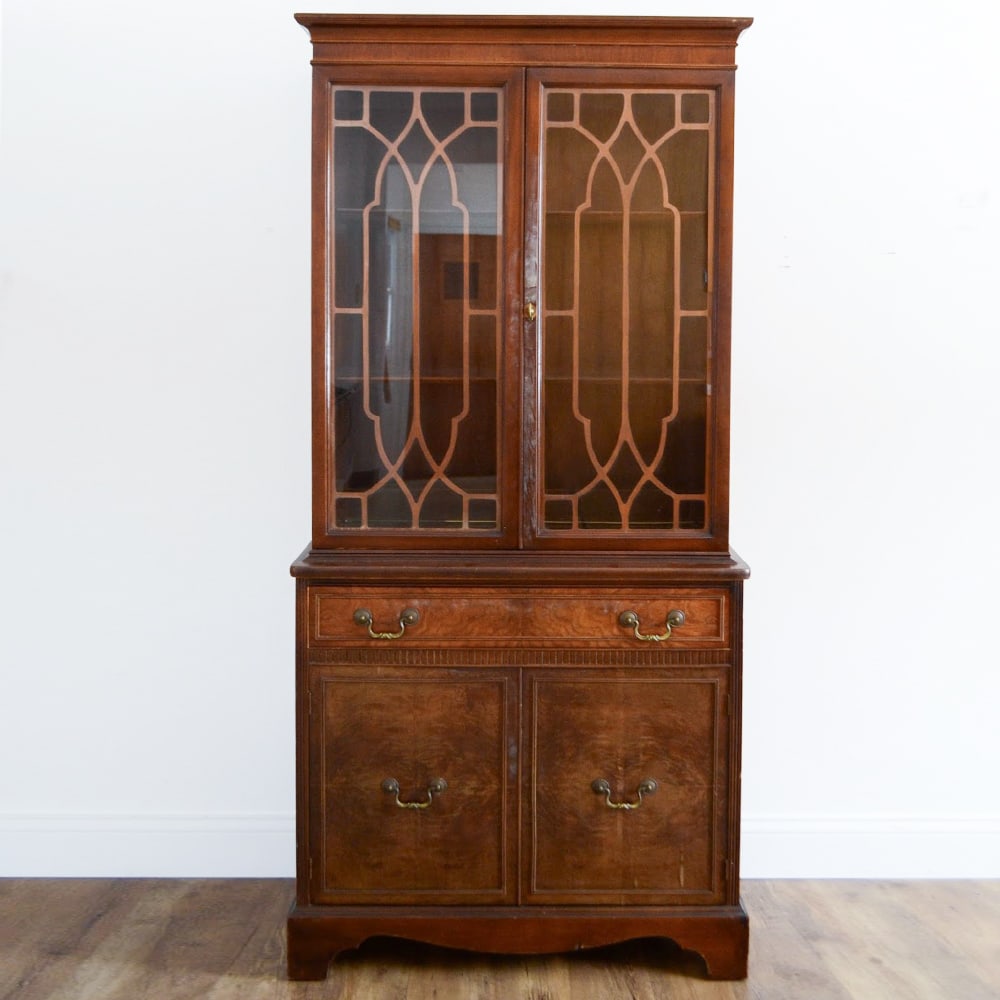
Welcome to our latest project, a DIY blue china hutch makeover! If you’re a fan of blue painted furniture and looking for a creative and charming way to update your space, then this blog post is for you. We’ll guide you through the process of transforming an old water damaged cabinet into a beautiful piece of furniture using milk paint and other techniques.
From prepping and repairing, to priming and painting, we’ve got all the tips and tricks you need to nail that farmhouse look in your home. Let’s get started!

As we all know, blue has been a popular color in home decor for quite some time now and it’s no surprise why. It’s calming, versatile, and adds a touch of elegance to any room. So why not incorporate it into your furniture as well?

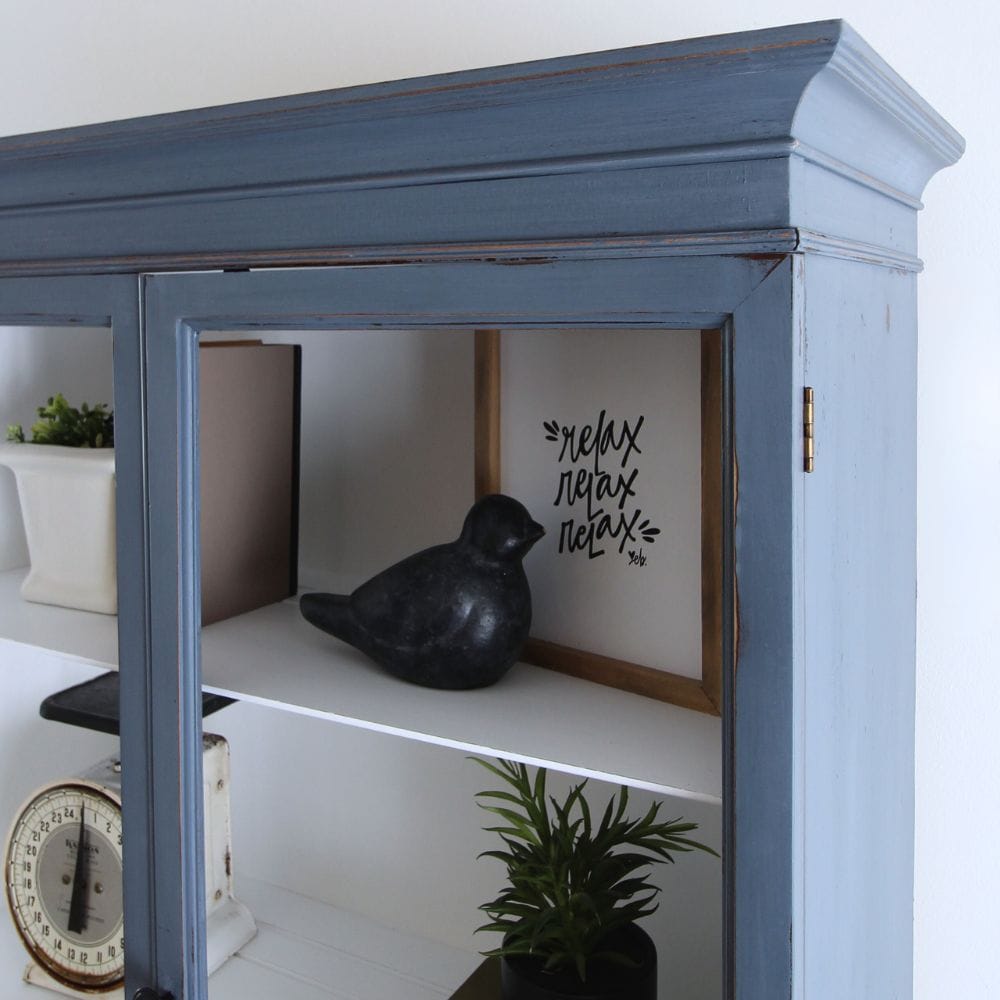
For this particular makeover, we wanted a chippy blue finish with a farmhouse feel. To do this, we used a combination of Shackteau Interiors Milk Paint in various shades and General Finishes Enduro Poly. We also added new dark cup pulls for a more updated and cohesive look.
This blue china hutch will surely inspire you to add some color and personality to your living space. So let’s jump right in and see how it all came together!

Supplies Used for This DIY Blue China Hutch Makeover
As an Amazon Associate, I earn from qualifying purchases. I also may earn from other qualifying purchases with other companies or get free product to review and use. All opinions are my own.
- Screwdriver
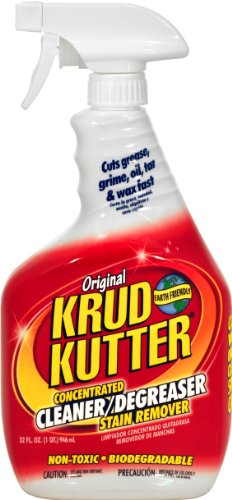
- Krud Kutter
- Damp Rag
- Bondo
- 220 Grit Sandpaper
- Shop Vac
- Tack Cloth
- Tape
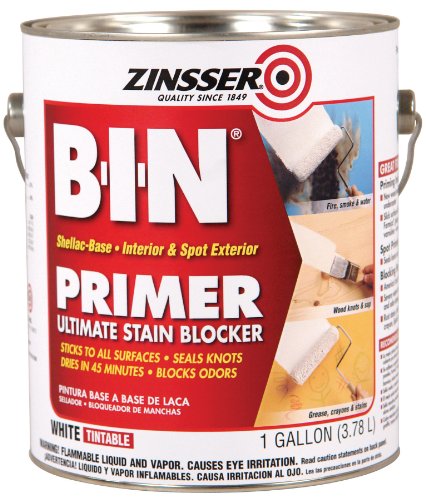
- BIN Shellac Primer in a spray can
- General Finishes Enduro Poly in White
- Paint Sprayer
- Shackteau Interiors Milk Paint in Coolidge Blue, Harbor Blue, Blue Moon, Coastal Fog, and Sand
- Polyurethane
- Dark Cup Pulls
Prepping the Hutch
But before we get into the details of the transformation, let’s talk about how we prepped the hutch for painting. This step is crucial as it makes sure that your paint will adhere properly and gives you a smooth finish.
Check out our blog post about how to prepare furniture for painting to learn more about the step by step process of preparing furniture before painting.
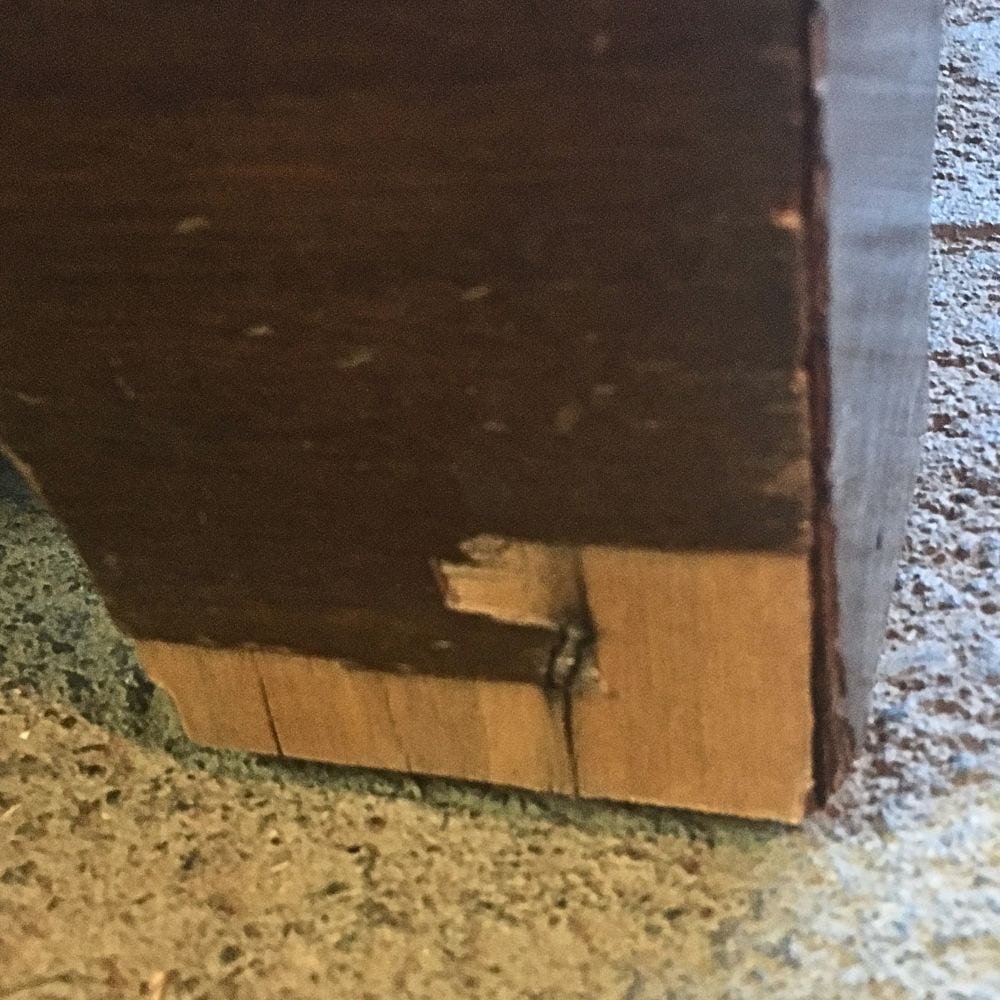
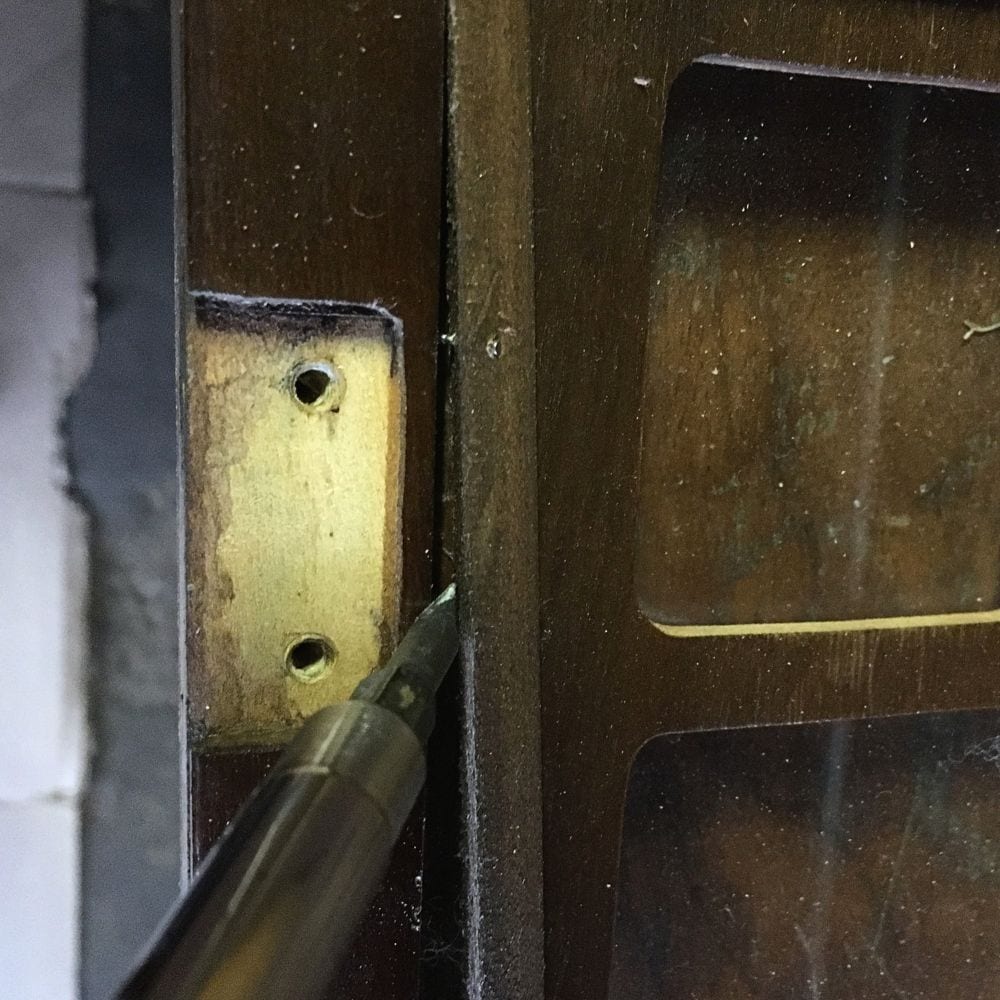
First, we assessed the condition of the hutch. The cabinet was quite old and had suffered from water damage, causing the wood veneer to lift in some spots. We also needed to remove the doors and hardware, as well as the glass from the doors.
Check out this post to learn more about repairing water damaged wood.
For the doors, we removed them by carefully unscrewing the hinges and labeled them to avoid any confusion when it came time to put everything back together. We also took off all the door pulls and drawer handles using a screwdriver.
To remove the glass, we gently pried off the wood trim holding it in place, and set it aside. For more details on removing glass doors, our makeover on painting a china cabinet will be helpful.
After everything was removed, we cleaned the hutch thoroughly with Krud Kutter and a damp rag and let it dry completely. This step is important because any dirt or grime can affect the paint’s adhesion. Learn all you need to know about how to prepare furniture for painting here.
Repairing Damaged Veneer
As mentioned earlier, our hutch had some water damage and the wood veneer was lifting in some areas. To fix this, we used Bondo wood filler. We applied the Bondo to the affected areas, making sure to fill any gaps and smooth out the surface.
Check out our honest Bondo Wood Filler review to learn more about the pros and cons of using this wood filler.
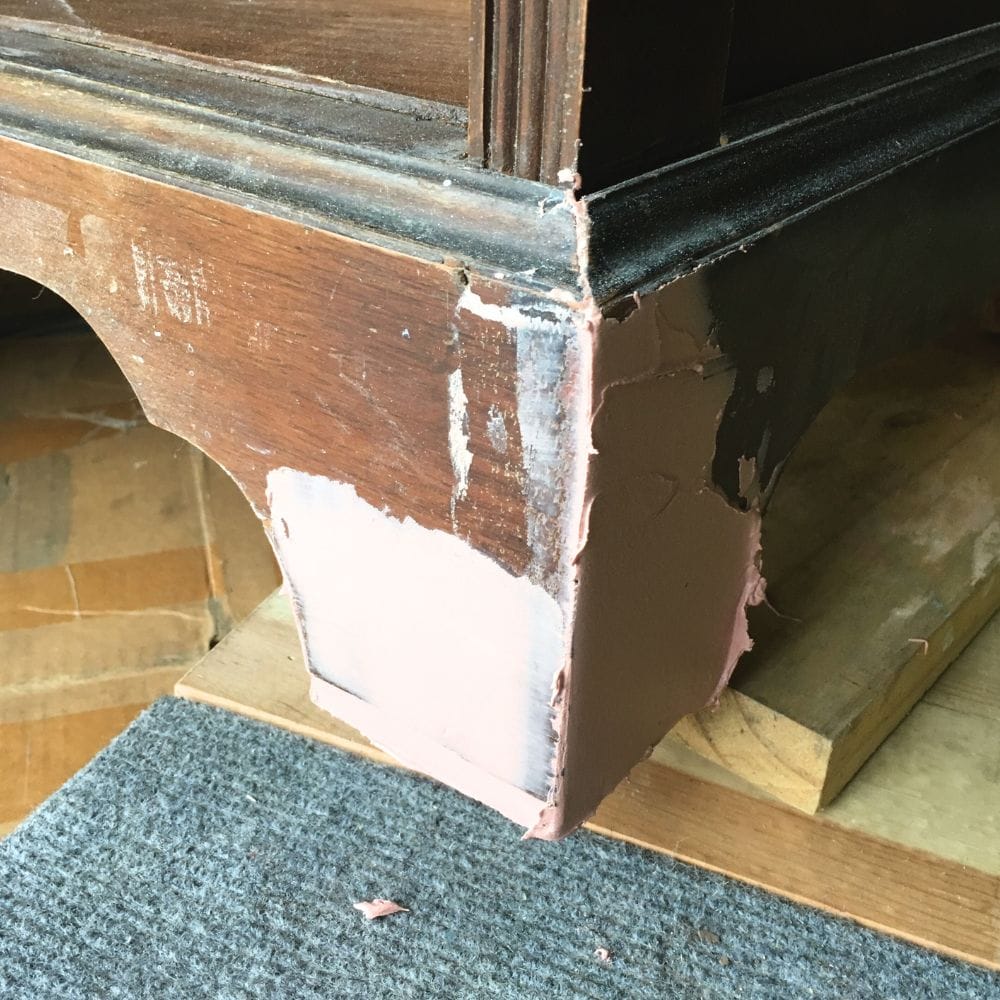
Once it was dry, we sanded it down with 220 grit sandpaper until it was flush with the rest of the hutch. For more tips on repairing damaged veneer, you can check out our post on repairing veneer with wood filler.
Here are more methods on how to fix veneer that is lifting.
We also gave the interior of the cabinet a scuff sanding with 220 grit sandpaper to help the primer and paint stick to the wood. Then we got rid of the dust using a shop vacuum and tack cloth.
Priming and Painting Hutch Interior
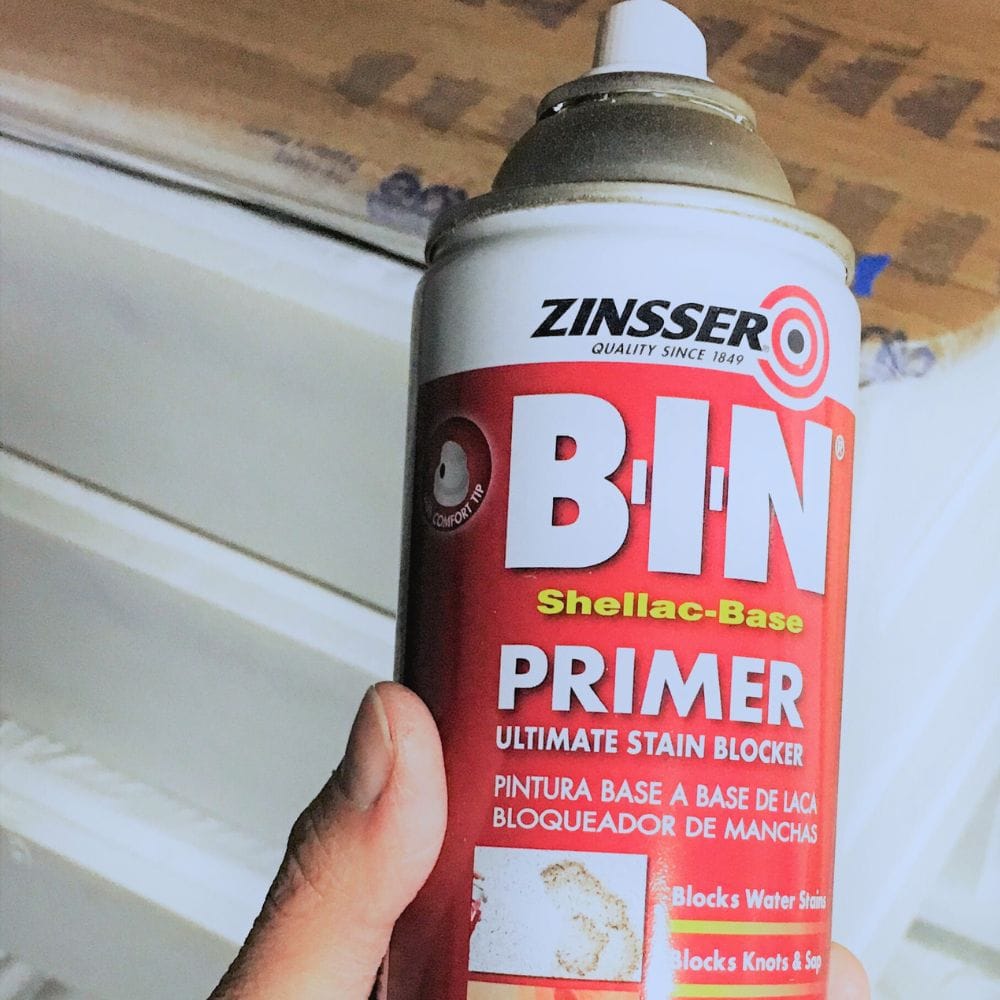
Then it was time to prime and paint the interior of the cabinet. We made sure to tape off the inside to prevent any primer from getting on the outside. Learn more in the post about how to prevent overspray when painting furniture.
We used BIN shellac primer in a spray can for easier application and better coverage.
Would you like to save this?
Here’s our best primers for painting furniture to learn more about how to choose the right one for your project.
It took two coats of primer to fully cover the wood and we let each coat dry for 45 minutes before lightly sanding it with 220 grit sandpaper. Check out the best spray primer for wood here.
We sprayed 3 coats of General Finishes Enduro Poly in White on the inside for a nice white painted finish that doesn’t need a topcoat.
This paint has to be sprayed on, so if you need a paint sprayer, here’s our list of the best HVLP paint sprayers for furniture.
Check out our honest Wagner Control Spray 250 review to learn more about the paint sprayer we used in this makeover.
Alternatively, you can go for the Sherwin Williams Emerald Urethane Trim Enamel Paint which can be brushed on. Take a look at this post on painting furniture white to see how we did it with enamel.
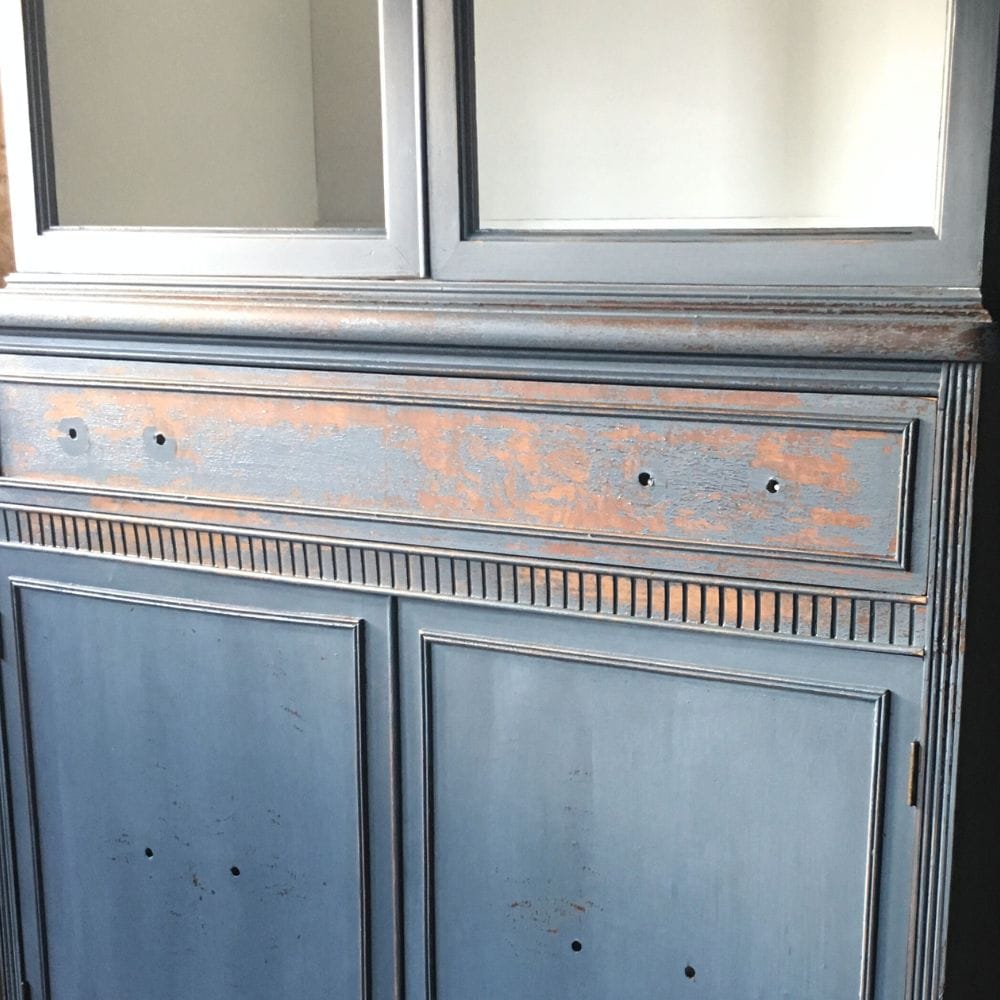
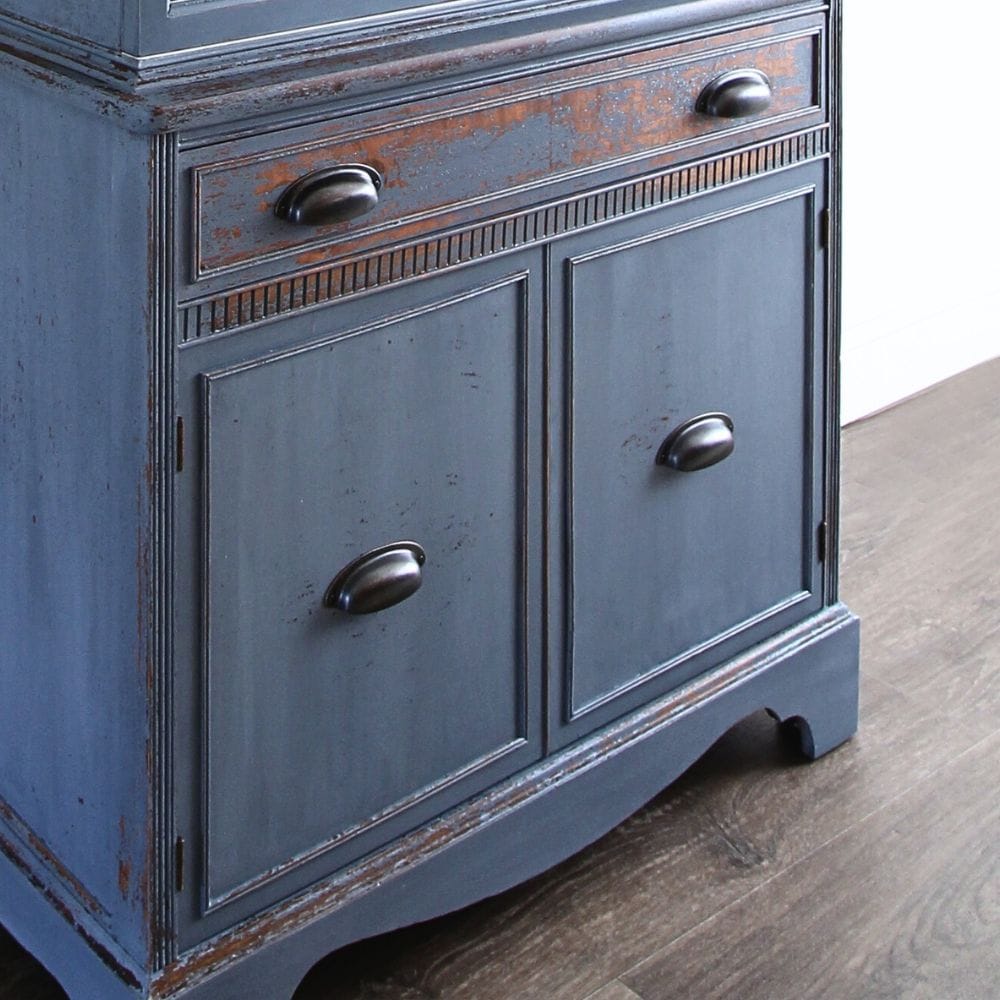
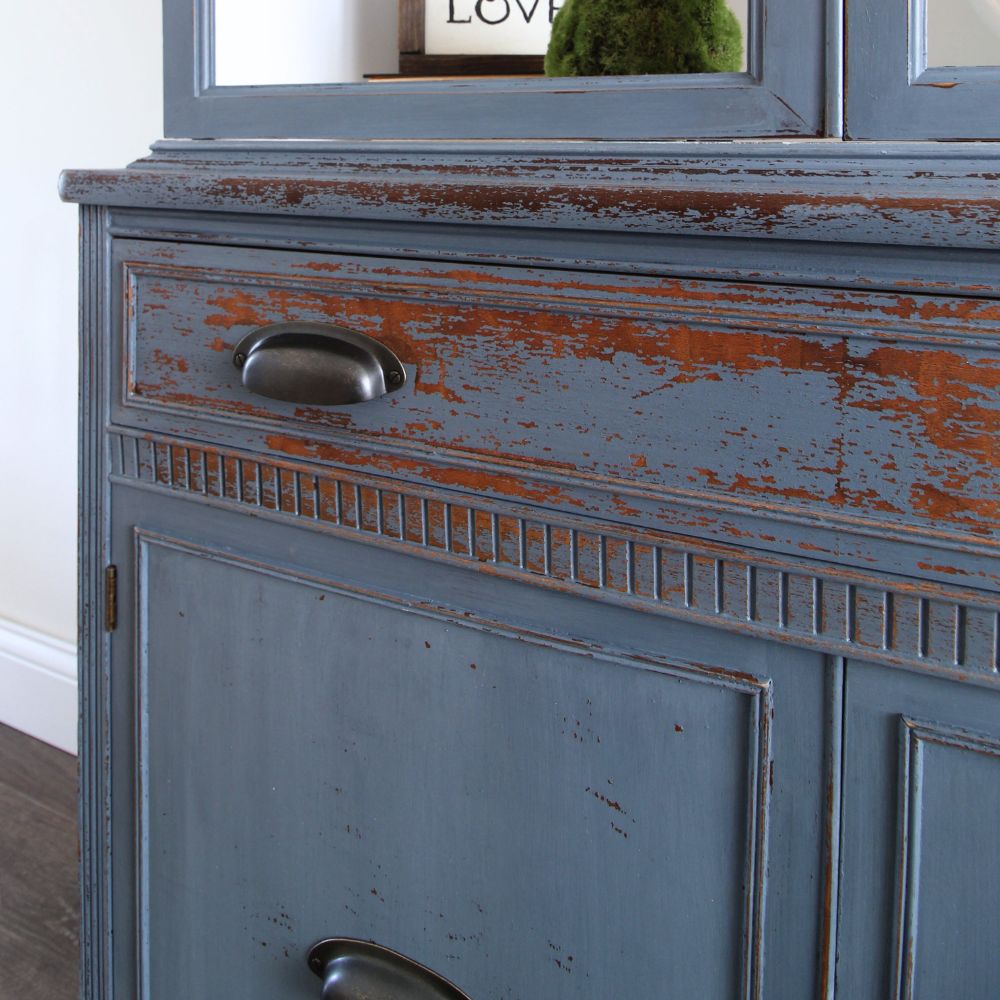
Creating a Chippy Blue Finish
Once the interior was painted, it was time to tackle the exterior of the hutch.
We mixed Shackteau Interiors Milk Paint in 5 different colors: 4 tablespoons of Coolidge Blue, 2 tablespoons of Harbor Blue, 2 tablespoons of Blue Moon, 1 tablespoon of Coastal Fog and 1 tablespoon of Sand.
This recipe is very similar to what we used on our chippy blue painted hutch makeover.
We applied 2-3 coats of the mixed milk paint to the exterior of the hutch, making sure to sand lightly with 220 grit sandpaper after for a chippy finish then removed the dust from sanding with a shop vac and tack cloth.
You can also learn our secret to a chippy paint finish with milk paint every time!
Sealing Blue Painted Hutch
To seal the milk paint and give it a more durable surface, we top coated the hutch with 3 coats of polyurethane. Polyurethane even adds to the chippy look of the milk paint! Check out our post on how to spray polyurethane for tips and tricks on applying it.
After the final coat of polyurethane was dry, it was time to reattach the doors and hardware. We carefully screwed the hinges back on, making sure they were aligned correctly. Then we added new dark cup pulls for a farmhouse look.
If you love this blue painted hutch, you’ll also enjoy our similar makeover of a painted display cabinet. You can also update your piece with these painted hutch ideas and chalk painted hutch ideas. For a more natural look, try these hutch refinishing ideas!
More Before and After Makeovers
See All >
Click any of these “before” photos below to view the “after” of that makeover.


This DIY blue china hutch makeover is a perfect example of how a little bit of effort and creativity can transform an old, damaged piece into a stunning one that adds character and charm to any room. If you have a corner piece, here are painted corner cabinet ideas you can do! You can also give yours a new purpose with these repurposed China cabinet ideas.
From repairing damaged veneer to creating a chippy blue finish, this project required some skill and patience, but the end result was truly worth it.


DIY Blue China Hutch
Transform an old hutch into a stunning DIY china blue hutch with this step-by-step makeover guide!
Materials
- Krud Kutter
- Damp Rag
- Bondo
- 220 Grit Sandpaper
- Tack Cloth
- Tape
- BIN Shellac Primer in a spray can
- General Finishes Enduro Poly in White
- Shackteau Interiors Milk Paint in Coolidge Blue
- Shackteau Interiors Milk Paint in Harbor Blue
- Shackteau Interiors Milk Paint in Blue Moon
- Shackteau Interiors Milk Paint in Coastal Fog
- Shackteau Interiors Milk Paint in Sand
- Polyurethane
- Dark Cup Pulls
Instructions
- Remove all doors, drawers, and hardware, labeling them for correct reassembly later.
- Remove the glass by gently prying off the wood trim.
- Clean the hutch thoroughly with Krud Kutter and a damp rag, then let it dry completely.
- Apply Bondo to areas with water damage and lifting wood veneer, and sand down until flush with the rest of the hutch.
- Give the interior of the cabinet a scuff sanding, then remove dust with a shop vacuum and tack cloth.
- Tape off the inside of the cabinet, then apply two coats of BIN shellac primer, sanding lightly after each coat.
- Apply three coats of General Finishes Enduro Poly in White to the interior for a white painted finish.
- Mix Shackteau Interiors Milk Paint in five different colors and apply 2-3 coats to the exterior of the hutch.
- Sand lightly for a chippy finish and remove dust with a shop vacuum and tack cloth.
- Apply three coats of polyurethane to the hutch to seal the milk paint and create a more durable surface.
- Reattach the doors, making sure they are correctly aligned.
- Add new dark cup pulls for a farmhouse look.
Recommended Products
As an Amazon Associate and member of other affiliate programs, I earn from qualifying purchases.


More Blue Painted Furniture Ideas
- Dreamy Blue Painted Dresser
- Blue Painted French Provincial Dresser
- DIY Blue Painted Nightstands
- Antique Desk Makeover
- Corner Cabinet Makeover
Follow us on YouTube to get more tips for painting furniture. Or share your project with us on our Facebook Group and be part of our community. See you there!
So well done, love the final outcome and the blue color.
Thank you for visiting and sharing your links with us at SSPS #291. See you again next year!
So happy you shared this at Tuesday Turn About! I’m delighted to be featuring your post at the last party of 2023!
Hi Natalie! I love it! I have only tried milk paint once and i didn’t like it. Instead of chipping it had more of a crackle. I’m going to go back and read your milk paint tutorial because i love the look of milk paint.
Thanks so much for the love! Looks like you found the info you needed to get the chippy milk painted look you want! Happy you’re here Cheryl!
I guess I’m not a fan of chippy! I mean, why go to the trouble cleaning, patching, sanding, priming, sanding, painting, sanding…just to have a piece that looks like the paint is falling off, and the piece needs to be refinished (painted!)? Asthetics?
Yeah, we can totally see where you are coming from with this. Chippy paint is definitely not for everybody.
That is really lovely!
Thank you so much Joanne!