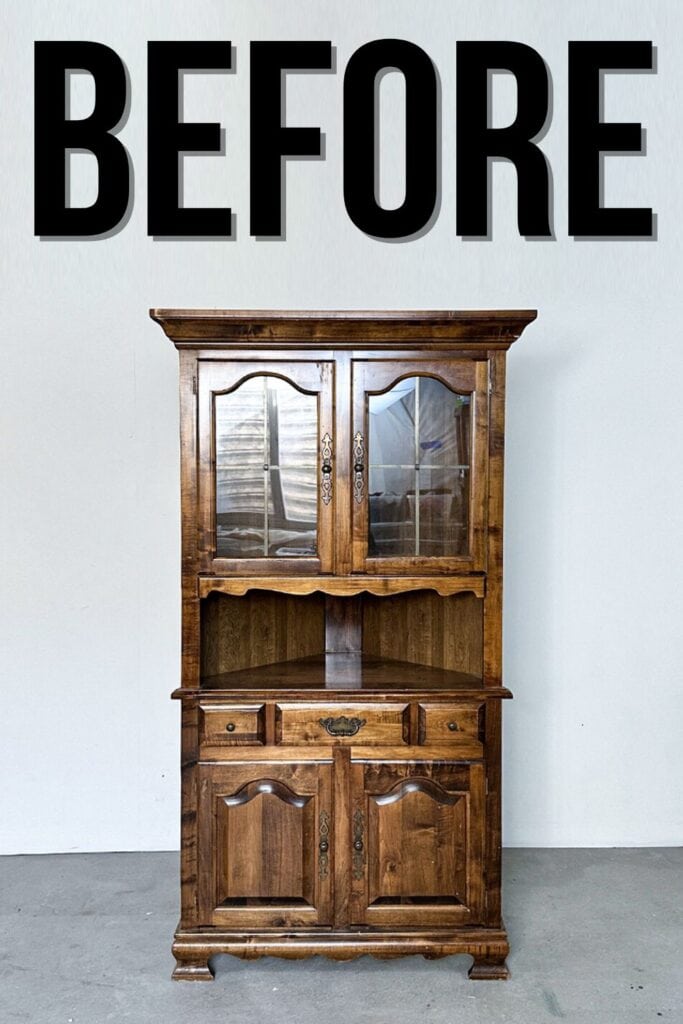
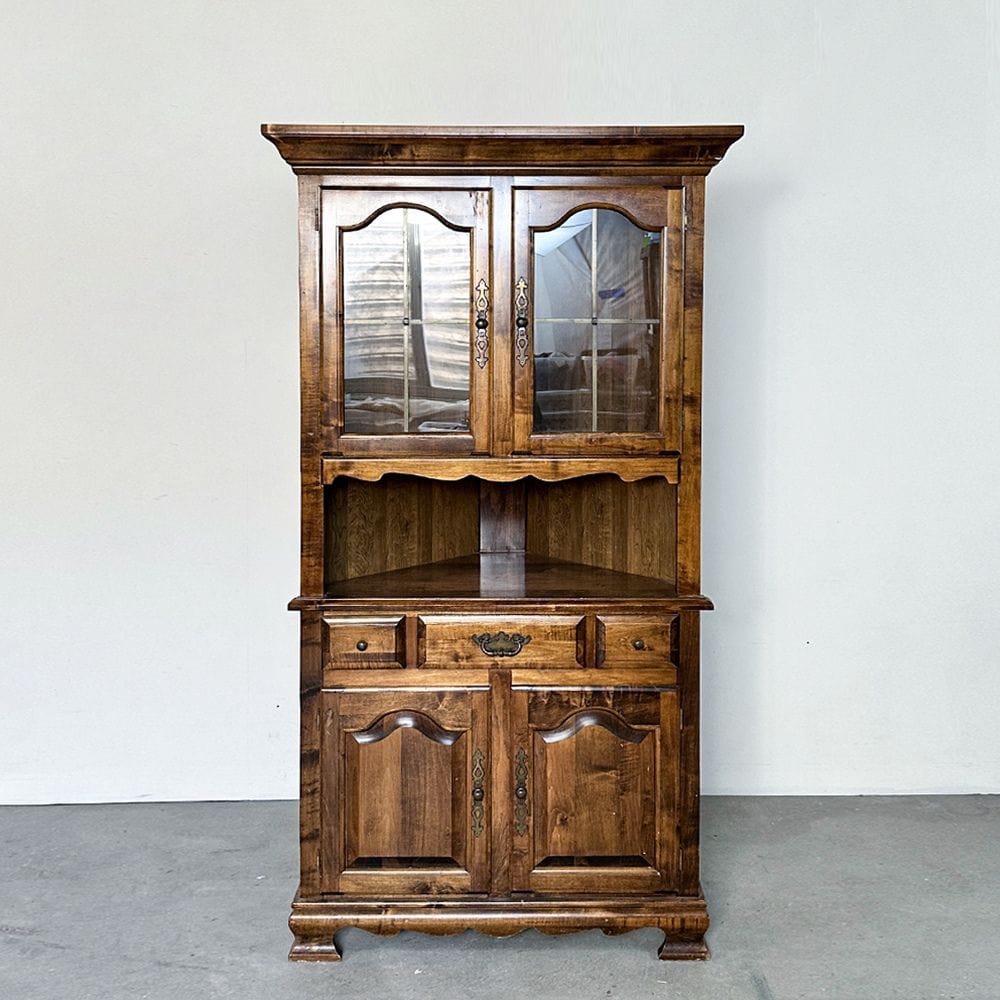
Corner Cabinet Makeover
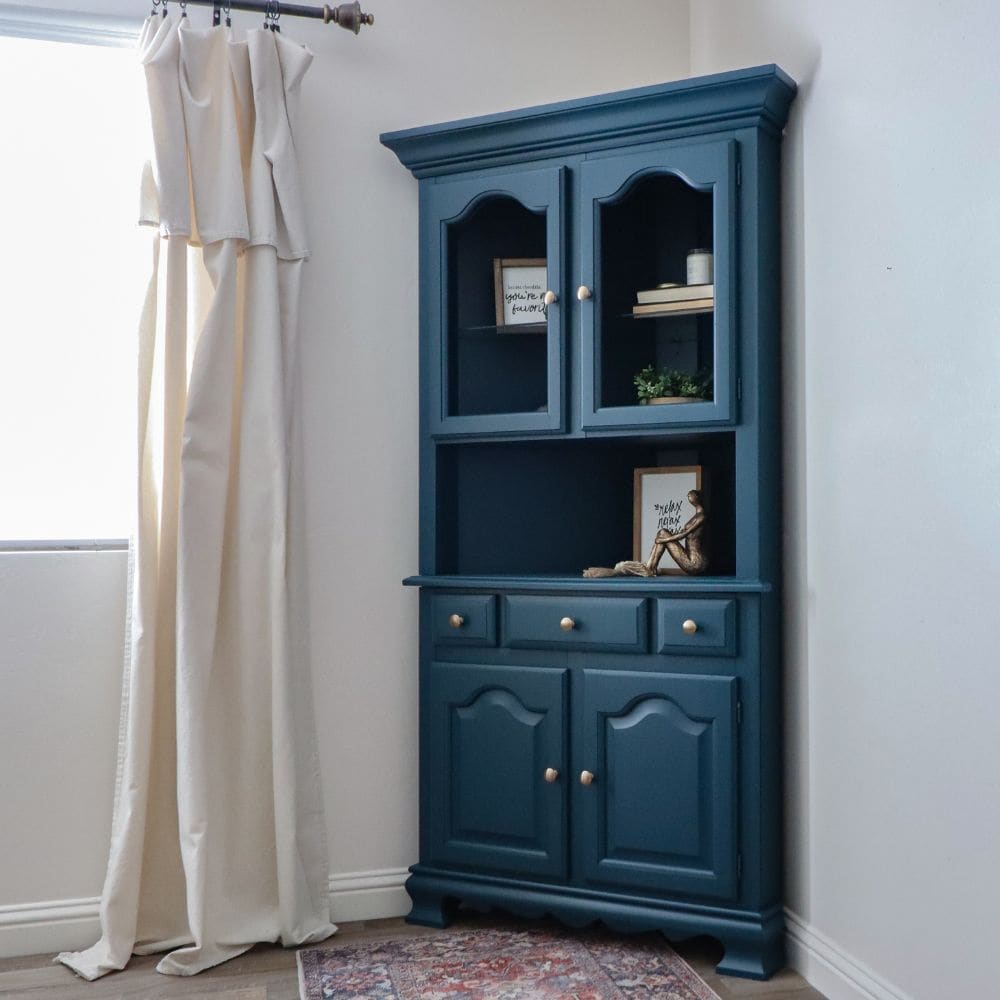
We are excited to share with you this corner cabinet makeover! This project was all about turning a dated and worn corner piece into one of these beautiful blue painted furniture ideas. Its blue teal hue definitely adds a pop of color and personality to any room it is placed in.
We’ll go through each step of the process and provide helpful tips along the way. Instead of getting rid of a perfectly functional piece, why not give it some freshening up and a whole new look?
These cabinets are a great addition to any space, as they make use of otherwise empty or often neglected corners. Of course, they are also functional storage spaces to keep your everyday essentials or display cherished mementos.

However, like any piece, they can get a bit dull and outdated over time. Or maybe you’re just looking to update it to match your evolving style. Whatever the reason may be, this project is an awesome way to breathe new life into an old piece.
So, how did we create this transformation? Keep reading for the step by step guide, along with helpful tips and tricks to make the process even easier.

Supplies Used for Corner Cabinet Makeover
As an Amazon Associate, I earn from qualifying purchases. I also may earn from other qualifying purchases with other companies or get free product to review and use. All opinions are my own.
- Electric Screwdriver
- Krud Kutter
- Damp Rag
- Plastic Wood Filler
- KwikWood
- 150 Grit Sandpaper
- Medium Foam Pad (attached to a sander) (Use code RAY10 to get 10% off your order)
- Festool RTS 400 REQ Sander
- Heirloom Traditions Paint in Mediterranean
- Wagner FLEXiO 595 Paint Sprayer
- Paint Filter
- New Hardware
Removing Cabinet Hardware
The first step in this project was to remove the door pulls from all four doors. We used an electric screwdriver for a quick and easy removal process. Then we pried off the back plate that was held on with tiny nails.

Next up, we took off the glass and metal decorative trim from each glass panel. It was a breeze to remove the rubber gasket that sat around the glass from inside the hutch, just a quick pull.
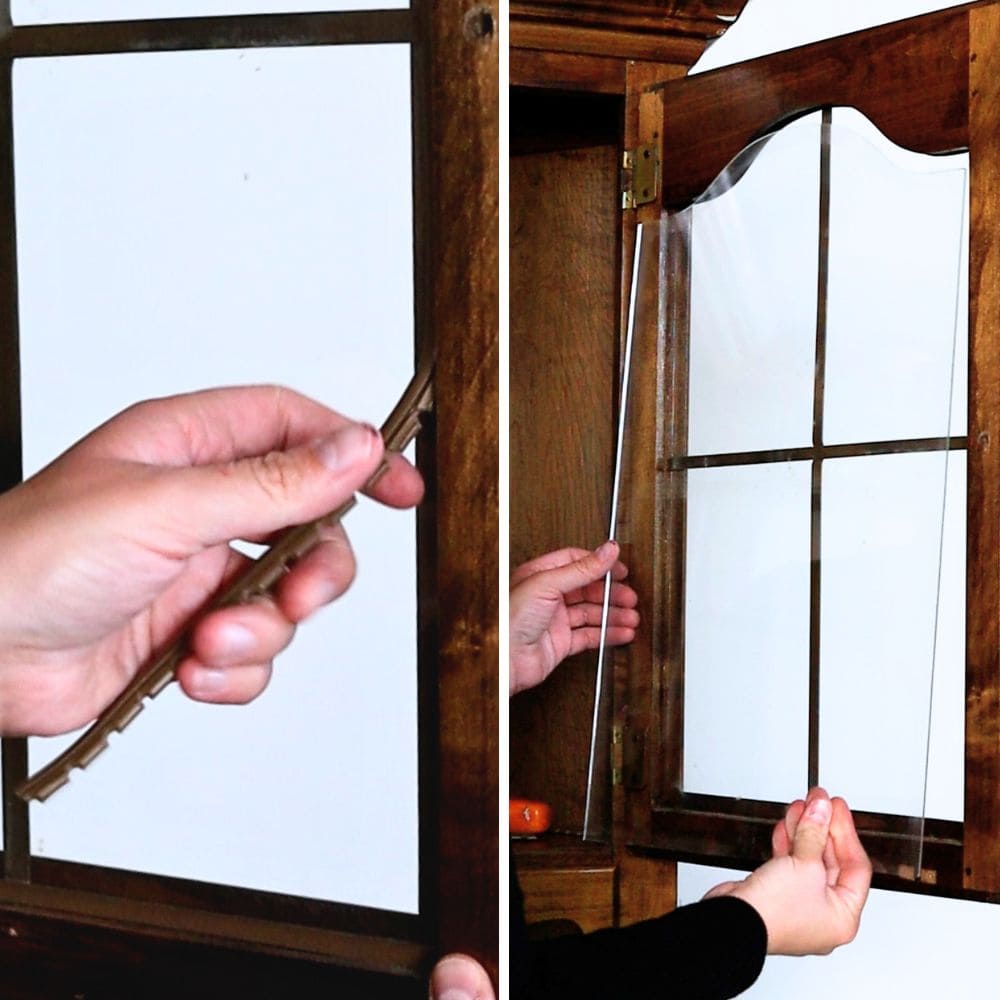
After that, we carefully and gently put aside the glass and got rid of the not so pretty metal trim that just sat in the opening. Yes, we were actually glad to toss away the trim for good!
Cleaning Corner Cabinet
After removing all hardware and glass, we cleaned the entire piece with Krud Kutter and a damp rag. This helped to remove any dirt and grime that had accumulated over the years. We then rinsed everything with a clean, damp rag to make sure it was completely clean, and then we just let it dry.
This should not be skipped as it helps the paint to adhere better and creates a smoother finish. Learn how to clean furniture before painting and how to prepare furniture for painting to get the best results!


Filling Knicks, Holes, and Dings
With any old piece of furniture, you’re bound to find some knicks, holes, and dings. No worries, though; you just have to fill them. If you’re not sure which one to go for and when to use them, we got you covered with our post on the best wood fillers!
So, what we did was use plastic wood filler to fill in these imperfections. And for those drawer pull holes, we filled them with Kwikwood. You can learn from our tutorial on how to use KwikWood if you’re not familiar with this product.
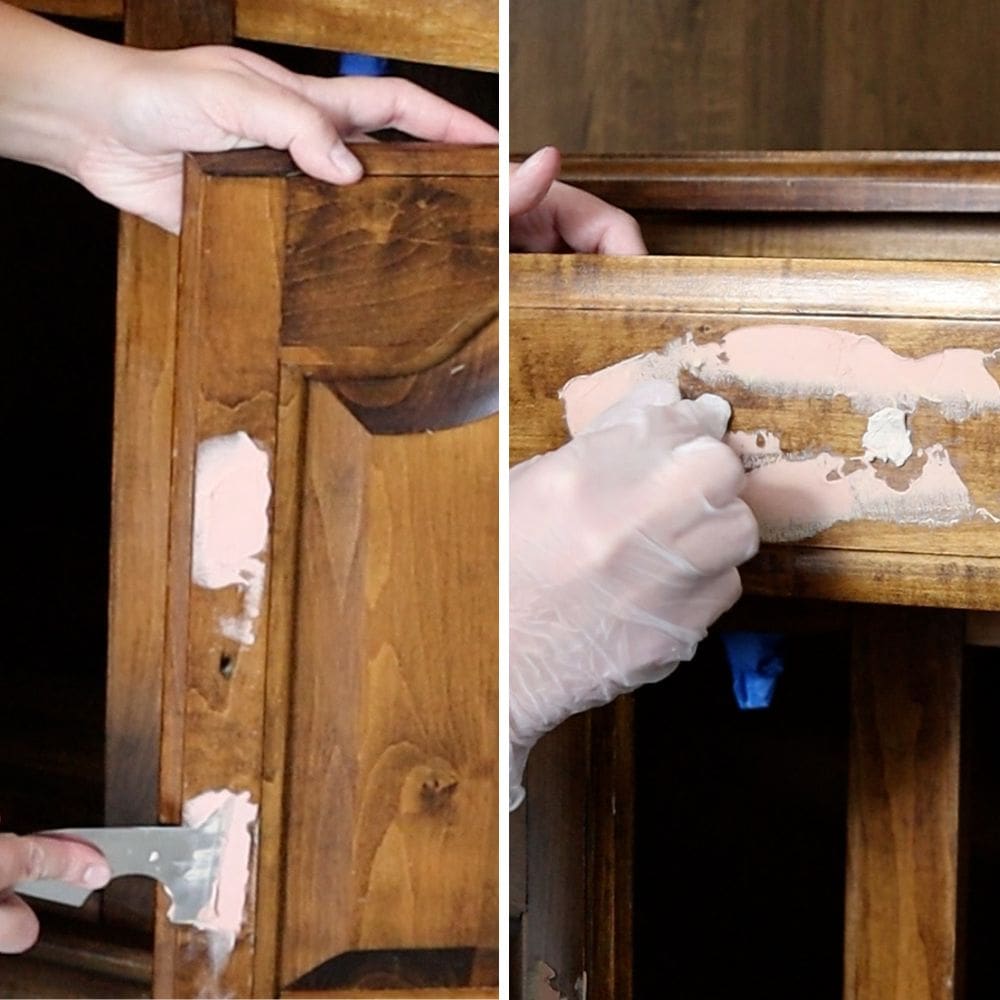
We could easily switch out the hardware for something new by using Kwikwood, but there are also other ways of filling holes when replacing cabinet or furniture hardware if you’re interested. Luckily, the cabinet pulls were just one hole each and perfect for new knobs.
After using the fillers, we sanded them down with 150 grit sandpaper and a medium foam pad attached to our Festool RTS 400 REQ sander. You can learn the best sandpaper for furniture painting options in this post.
We’ve also actually done a detailed Festool RTS 400 REQ sander review over here, so you can check it out if you’re also in the market for one. Here are more best sanders for furniture.
We also gave the rest of the piece a light sanding with the medium foam pad to lightly scuff the surface and make it easier for the new coating to stick. And then we removed the dust.
Would you like to save this?
Painting Corner Cabinet Blue
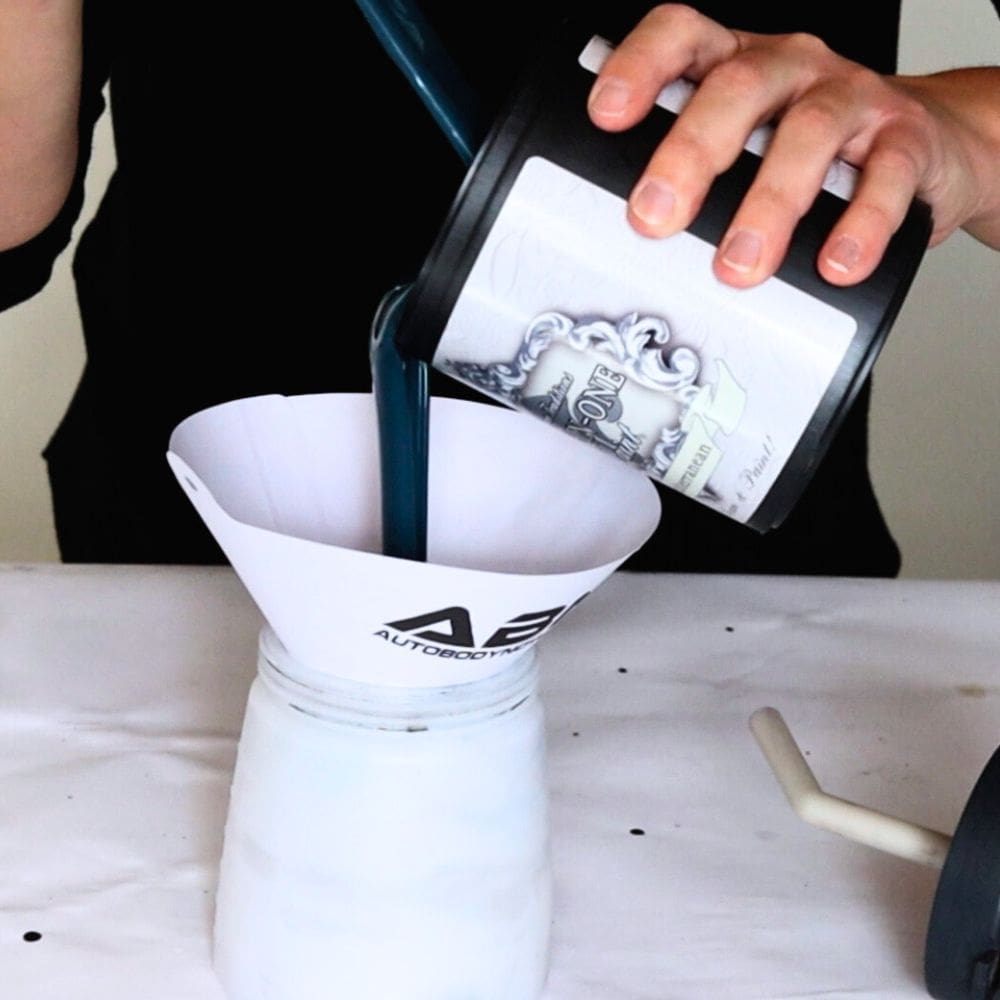
We chose to use Heirloom Traditions in Mediterranean. If you haven’t tried it, this could be the perfect opportunity to do so! Here’s more on painting furniture with Heirloom Traditions Paint.
You can also read our Heirloom Traditions All in One Paint review and look into Heirloom Traditions Paint before and afters here for inspiration.
To help the coating spray on smoothly and evenly, we thinned it with 20% water. Doing so helps it flow better through our Wagner FLEXiO 595. Here’s how to thin paint for a Wagner FLEXiO sprayer so you don’t end up with clogging and uneven finish. If you do get into issues, our Wagner paint sprayer troubleshooting guide will come in handy.
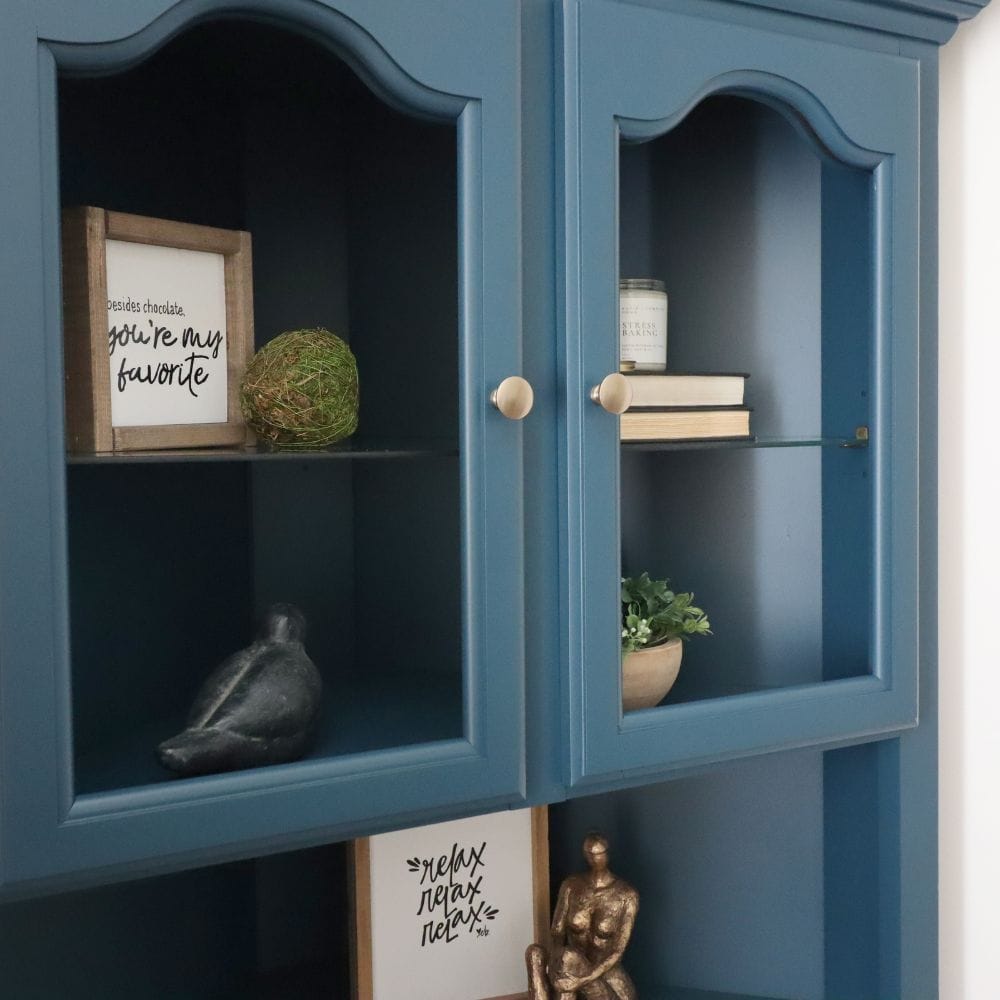
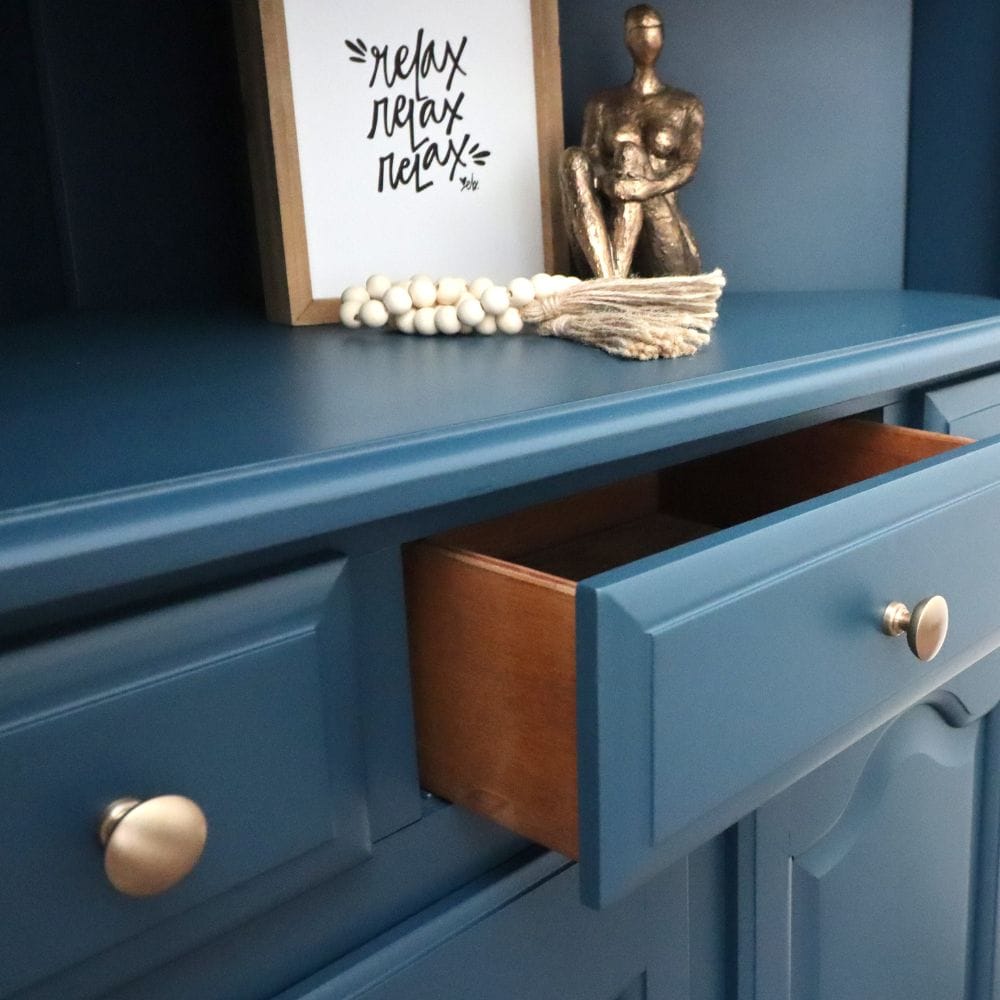
We sprayed two blue coats inside and outside the piece. These two were enough to get full coverage and a smooth finish. We love this teal blue color too much!

But, of course, you can choose any color that suits your style and space. You can check out our post on the best painted furniture colors to get some ideas. We have a list of the best Heirloom Traditions Paint colors here.
Since Heirloom Traditions Paint is an all in one product, it already has a built in topcoat, which means there’s no need for a separate one. Here are more best all-in-one paints for furniture you can try!
So we went ahead and added new hardware to give the cabinet a more modern look that also complements its blue color. The new knobs were an instant upgrade from the old ones, and they really make a difference in the overall appearance of the piece. We have a whole post on how to change hardware on furniture if you need a detailed guide.
You can watch the whole process in our YouTube video below, or scroll down to see the after photos! Get more similar projects from these painted hutch ideas and painted corner cabinet ideas.
More Before and After Makeovers
See All >
Click any of these “before” photos below to view the “after” of that makeover.


With just a few simple steps, we were able to transform this outdated piece into a stylish and functional painted corner cabinet. Isn’t it just what every home needs? So next time you come across a neglected piece, don’t be afraid to give it an update and add your own personal colorful touch.
Don’t forget to check out these other awesome before and after furniture makeovers from my Furniture Flipping friends!! (Click the links below the photos!)
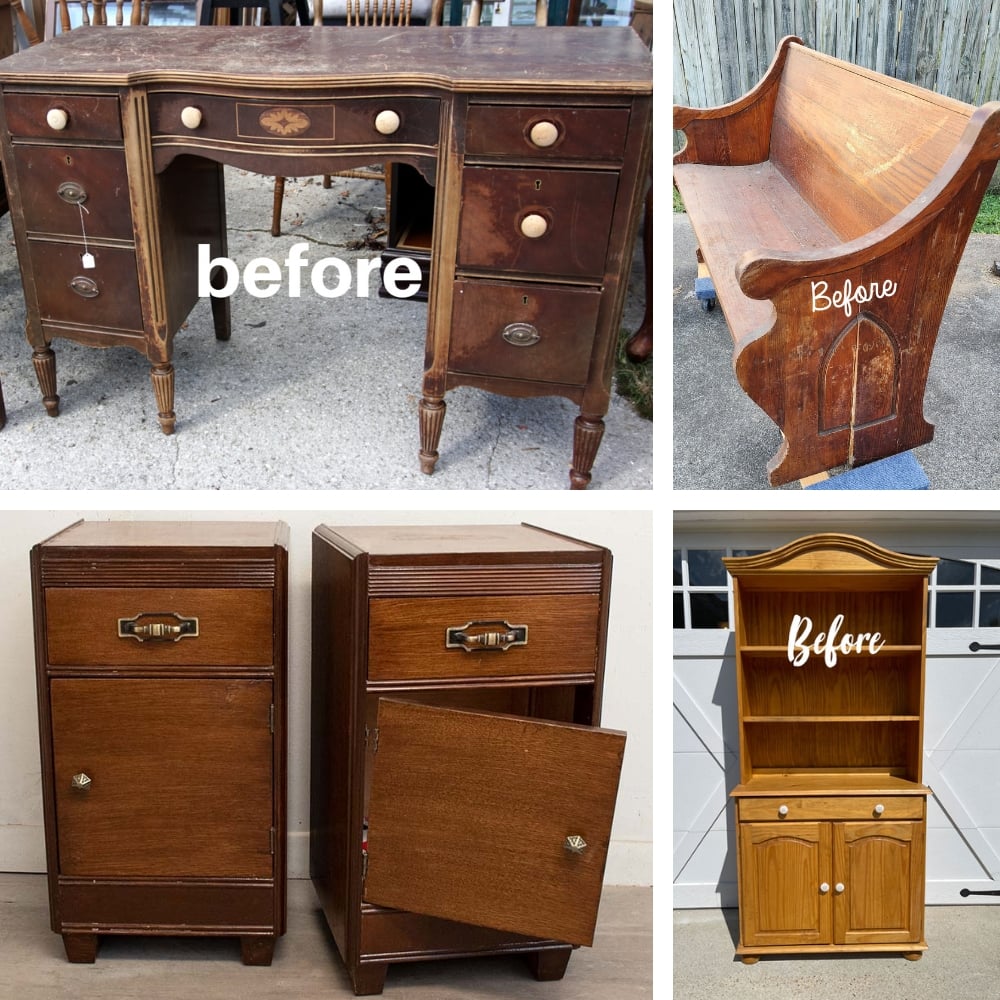
- Antique Painted Desk from Petticoat Junktion
- Small Church Pew Makeover from My Repurposed Life
- Nightstands with Decoupage Makeover from Salvaged Inspirations
- Painted Hutch Makeover from Confessions of a Serial DIYer


Corner Cabinet Makeover
This corner cabinet makeover project transformed an outdated piece of furniture into a stylish and functional addition to any home.
Materials
Instructions
- Remove corner cabinet hardware with an electric screwdriver and carefully remove the glass and decorative trim.
- Clean the entire cabinet with Krud Kutter to remove dirt and grime, then rinse with a damp rag and let it dry.
- Fill in any knicks, holes, or dings with plastic wood filler or Kwikwood for drawer pull holes. Sand down the fillers with 150 grit sandpaper and/or a medium foam pad attached to a sander. Remove the dust.
- Thin paint with 20% water and spray two coats inside and outside of the cabinet using a paint sprayer.
- Add new hardware to painted corner cabinet.
- Line the back of the cabinet with peel and stick wallpaper if desired.
Recommended Products
As an Amazon Associate and member of other affiliate programs, I earn from qualifying purchases.


More Painted Furniture Makeovers
- Painted Hallway Cabinet Makeover
- Flat File Cabinet Makeover
- Farmhouse Cabinet Makeover
- DIY Painted Hallway Cabinet
- Modern Dresser TV Stand Makeover
Learn the Art of Updating Furniture!
If painting furniture feels overwhelming or your past attempts didn’t go as planned, this course will guide you step by step.

Follow us on YouTube to get more tips for painting furniture. Or share your project with us on our Facebook Group and be part of our community. See you there!
Just beautiful, Natalie! That blue is gorgeous! So happy to have you in our group! XOXO
So excited to join the group each month To show off our latest furniture makeovers! Thanks for having me!
This corner cabinet looks so modern and gorgeous now! Beautiful makeover Natalie! XOXO
Thank you so much Denise!
Thank you!! Oh nice catch! I wrote this post, fully planning to put wallpaper on the back of the cabinet, but then decided not to do it the next day.
Such a nice transformation. Did you replace the glass minus the trim? Can’t tell from photos.
In our after photos we always leave the glass out so we don’t have to deal with the glare from the glass. And then we put it back in once we have taken photos.
Gorgeous. Love the color!
Thank you so much Pam!
Thank you so much Linda!!
Yay! Best of luck!
Oh I’m so glad to hear it! Thank you for the love on this corner cabinet!
Removing the decorative trim from under the glass top doors really updated the cabinet. Amazing what a can of paint can do. Very nice.
Right?? It’s really amazing how much a piece of furniture can change just by painting it. Thank you so much for the kind words. Glad you liked this corner cabinet makeover!