The Farmhouse Cabinet Makeover


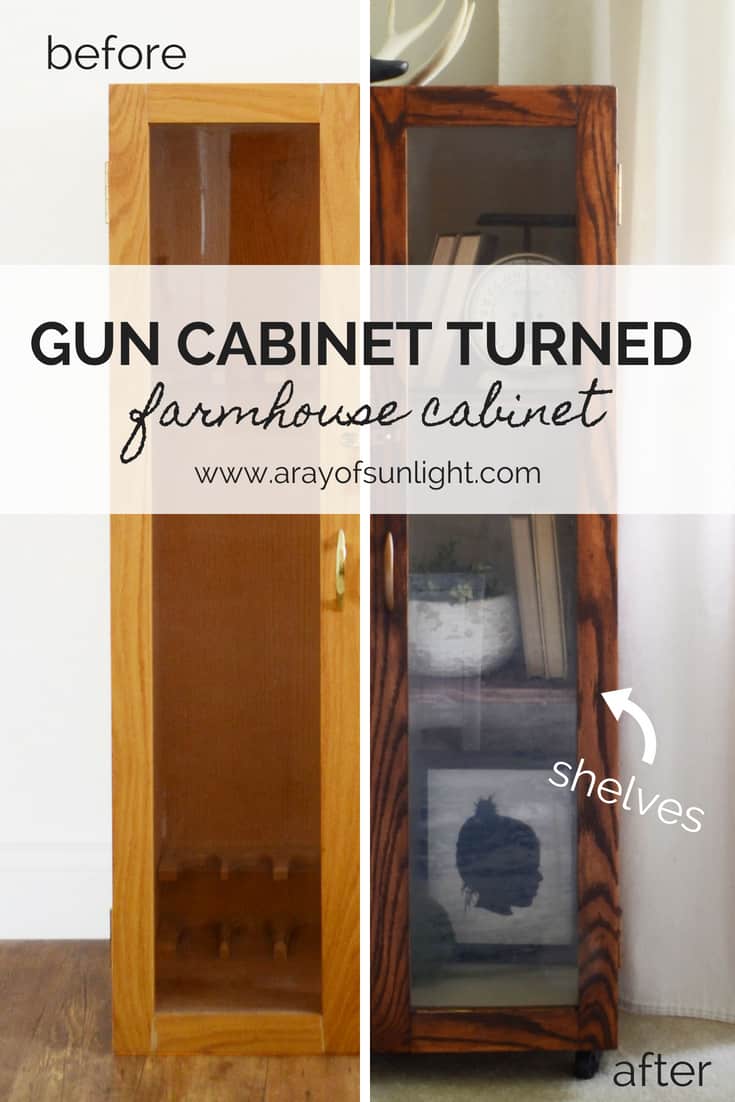
Do you have a piece of furniture in your home that’s collecting dust and needs some updating? Today, we’ll be talking all about how we transformed my husband’s old gun cabinet into a farmhouse decor friendly cabinet. Man, there’s nothing like a good farmhouse cabinet makeover!
Not only are these furniture makeover ideas a great way to add some charm and character to any room, but they also give new life to old furniture. Let’s get started!
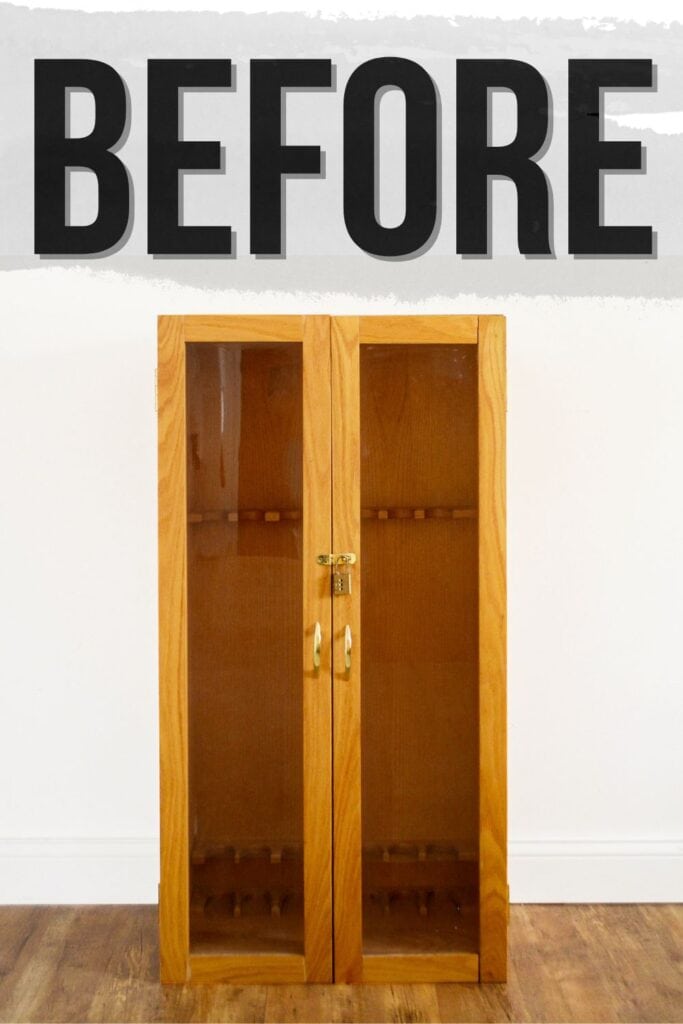
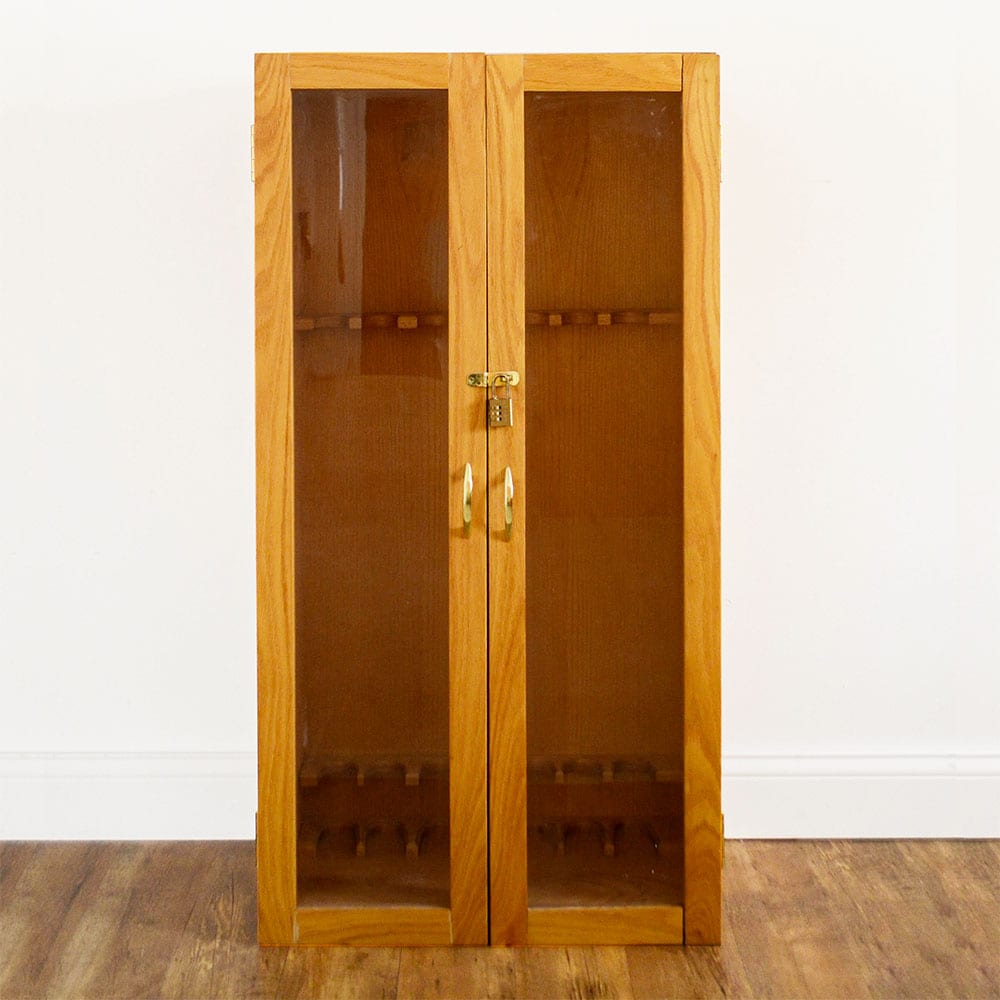
Do you remember when woodshop was a typical class in every high school? Back in the day, my husband LOVED going to his woodshop class. He built this cabinet there. My husband built it out of oak, and then lacquered it. Definitely not the style I want in my home right now, so I had to switch it up a bit.

You may also have an old furniture piece that you just can’t seem to part with, but it doesn’t quite fit in with your current decor. Instead of throwing it out, consider giving it a fresh coat of paint! It’s an easy and affordable way to update furniture and make it match your personal style.
This is also a great chance to repurpose your furniture. It’ll still be functional, just with a fresh purpose and look. So, check out this farmhouse cabinet makeover and get inspired to makeover your own old furniture!

Supplies Used for Farmhouse Cabinet Makeover
As an Amazon Associate, I earn from qualifying purchases. I also may earn from other qualifying purchases with other companies or get free product to review and use. All opinions are my own.
- Hammer
- Putty Knife
- Flathead Screwdriver
- Bondo
- 220 Grit Sandpaper
- Power Sander
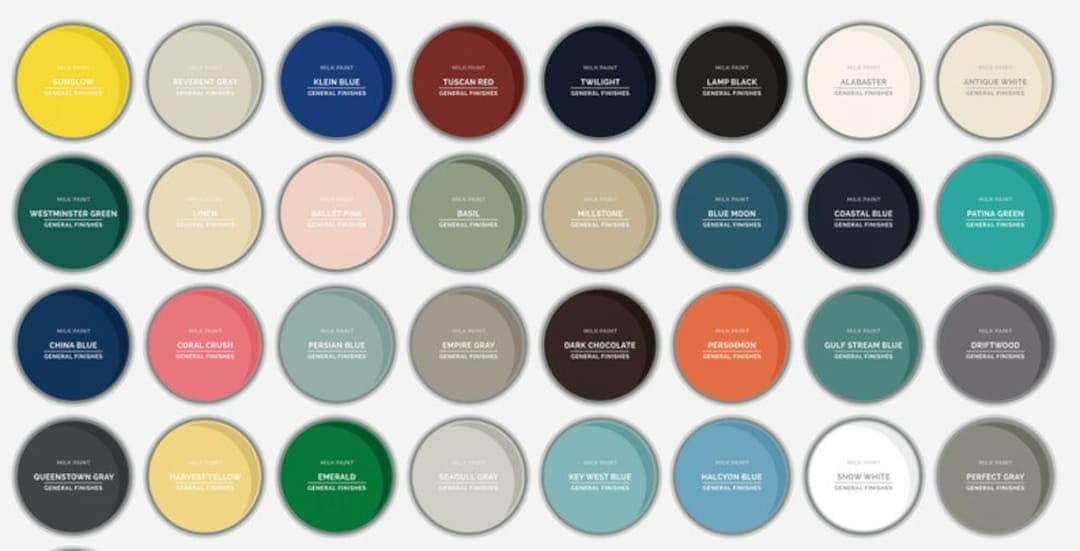
- General Finishes Milk Paint – Linen
- Painters Tape
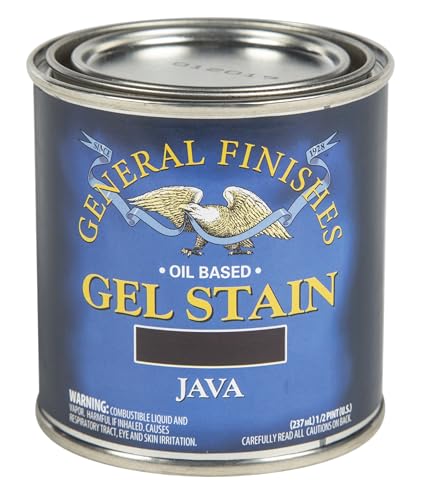
- Gel Stain in Java
- Waterbased Polyurethane
- 1″x12″ Pine Board
- Kreg Shelf Pin Jig
- Shelf Pin
- Drill
- Rust-Oleum Champagne Bronze
- Wheels
Removing Cabinet Racks
First, I busted out the hammer and a few straight-edged tools (putty knife, flat head screwdriver, and another type of flat tool that I’m not sure what it’s called, ha!) to pry off the racks that held the guns up.
Ohhh man that was a pain! He sure knew what glue was when he put it all together! The top two parts of the racks were just nailed in, but the bottom was glued to the base like no one’s business. There was a lot of busting, splitting wood, and major scratches made just trying to get that bottom rack out.
The best trick was using my hair dryer to heat up the metal putty knife and then hammering the putty knife between the pieces of wood. We finally got it though!
Repairing Cabinet Damage
Once it was warm outside, I took it out to Bondo all of the destruction that I had caused. Here is a great video and written tutorial on how to repair damaged furniture using Bondo.
Get Our Secrets!
Grab this super convenient How to Repair Furniture Ebook with all of our secrets on how to repair furniture for only $14.
You can print it out and have instant access whenever you come across damaged furniture, and know exactly how to fix it!
Click on the picture of the book to purchase!

I sanded the rough wood a bit, then applied the Bondo. Once it was all dry, I sanded the Bondo and wood smooth with 220 grit sandpaper. I didn’t fill in any holes or scratches on the outside of the cabinet. I only used it on the inside of the cabinet, because Bondo doesn’t take stain well. At all.
I knew I had to paint the inside, but I wanted to do something different for the outside. Once all the Bondo and repair work was complete, and the doors and hardware were taken off, I sanded everything, inside and out with 220 grit sandpaper.
Since this is a super simple design with no detail, I used my power sander. Then, I vacuumed and wiped all of the dust off. Read this post to learn more about the best sanders for furniture.
Farmhouse Cabinet Makeover by Painting and Staining
The inside got 3 coats of General Finishes Milk Paint in Linen. I taped all of the edges off, so I didn’t get paint anywhere it wasn’t supposed to be. Once the paint was dry, I removed the tape and proceeded to stain the outside with General Finishes gel stain in Java.
Here’s the great thing about gel stain, if you don’t already know. It is meant to sit on the top of the wood and not soak in like regular wood stain. Sure, you can use it like regular wood stain, but it can also be used for pieces like this that already have a finish on them.
All you have to do is lightly sand the original finish down a bit so the stain has something to stick to. Then wipe the stain on, let it sit for a minute, and wipe it off with a clean rag.
Gel stain tips: Make sure to always wipe with the grain and not against the wood grain. It’s also best to start with a finish that is in good condition, and not something that has large areas where the finish has worn off, while other areas the finish is still intact. This will create uneven staining.
Check out this post on painting furniture black where we used Java gel stain on the base of this cedar chest! See gel stain in action with this tutorial on how to stain wood darker.
I gave the whole cabinet two coats of stain, and then sealed the new finish with poly. Check out my list of the best polyurethane for furniture here.
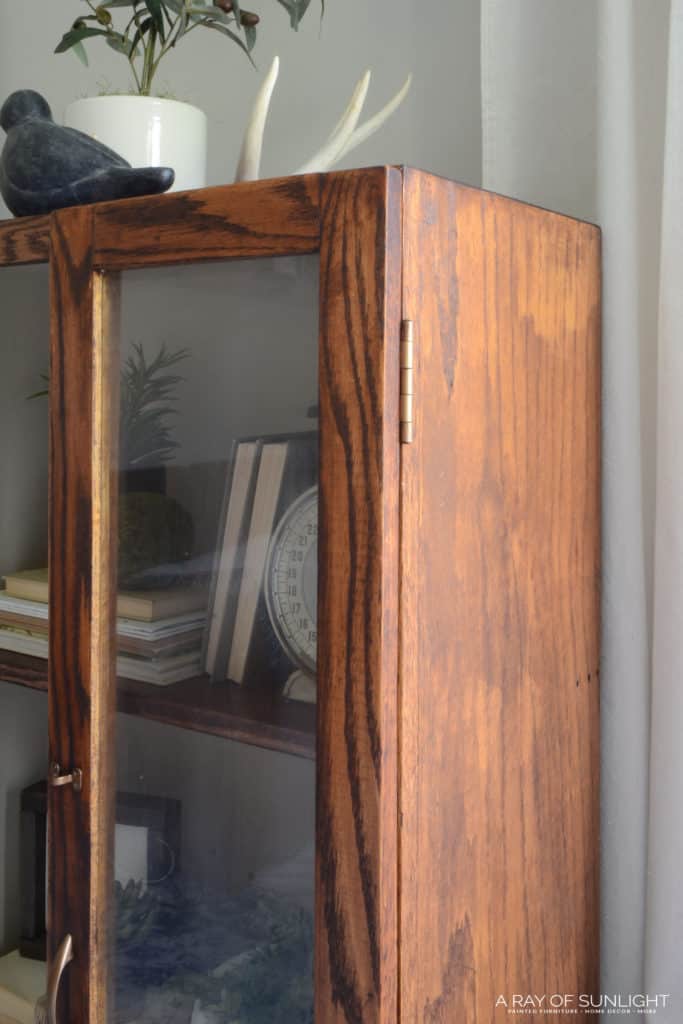
I really wanted this cabinet to look worn and to show the character of how it was built, and how it was transformed. So, there are a few nail holes on each side that are still showing, and the finish on one side is decently splotchy. I love the extra character these elements give this farmhouse cabinet!
Adding Shelves to Farmhouse Cabinet
Then I cut down a 1″ x 12″ pine board into two shelves (the Home Depot guys are such a great help when I don’t want to cut wood on my own).
After sanding and wiping off any dust, I applied two coats of the Java gel stain, and then sealed the finish with more poly.
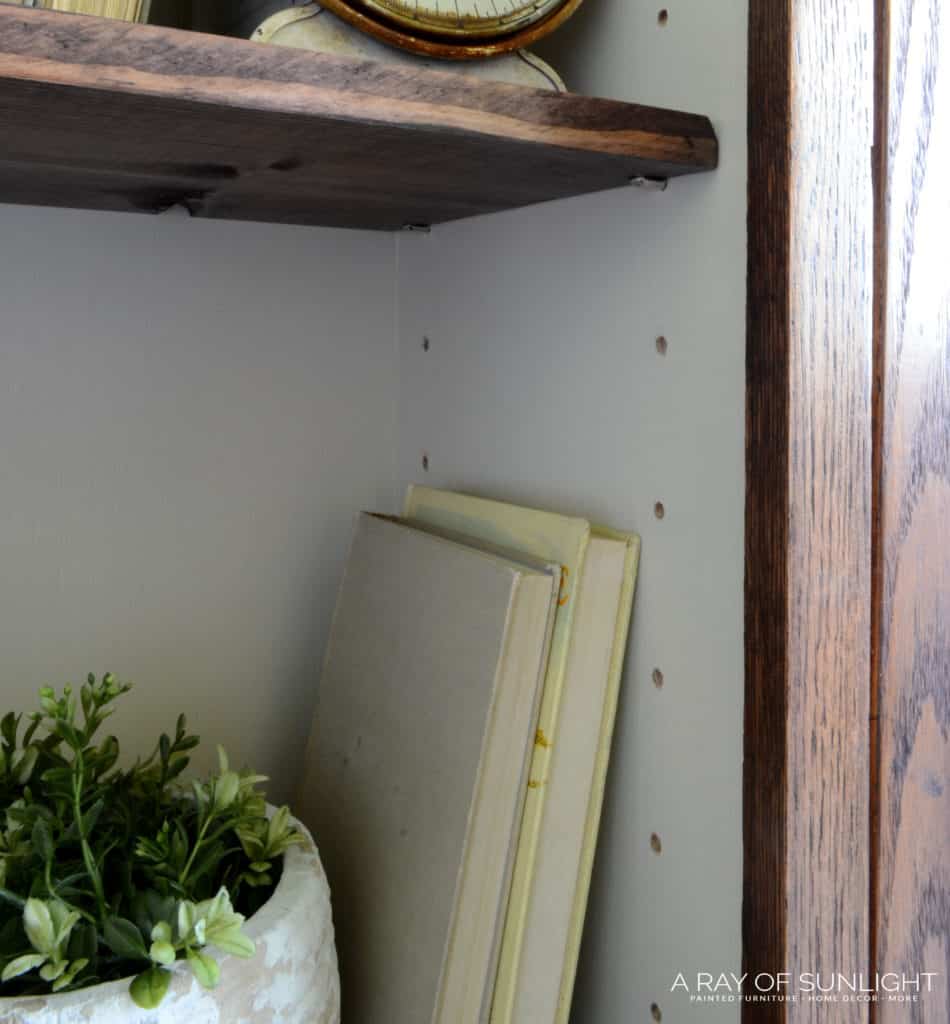
At first I thought about creating shelves that were nailed down into place, but the more that I thought about it, I knew I wanted to have the pin and hole type shelving. That way I could move the shelves, and even make more shelves in the future if I wanted to.
I soooo dreaded this part. Oh, it was going to be a beast to drill all of the holes in the perfect spot and have them all lined up so the shelves don’t wobble. That was until I found out about this Kreg shelf pin jig.
I have the pocket hole Kreg Jig, I actually have two of them. So I know that they have good products that make tasks like this sooo much more simple. I also used these shelf pins to hold the shelves up.
So, I bought myself a Kreg shelf pin jig. I waited for shipping and then got to work. All by myself! And I created all of these perfectly spaced holes in less than 30 min. Seriously. So easy!
Would you like to save this?
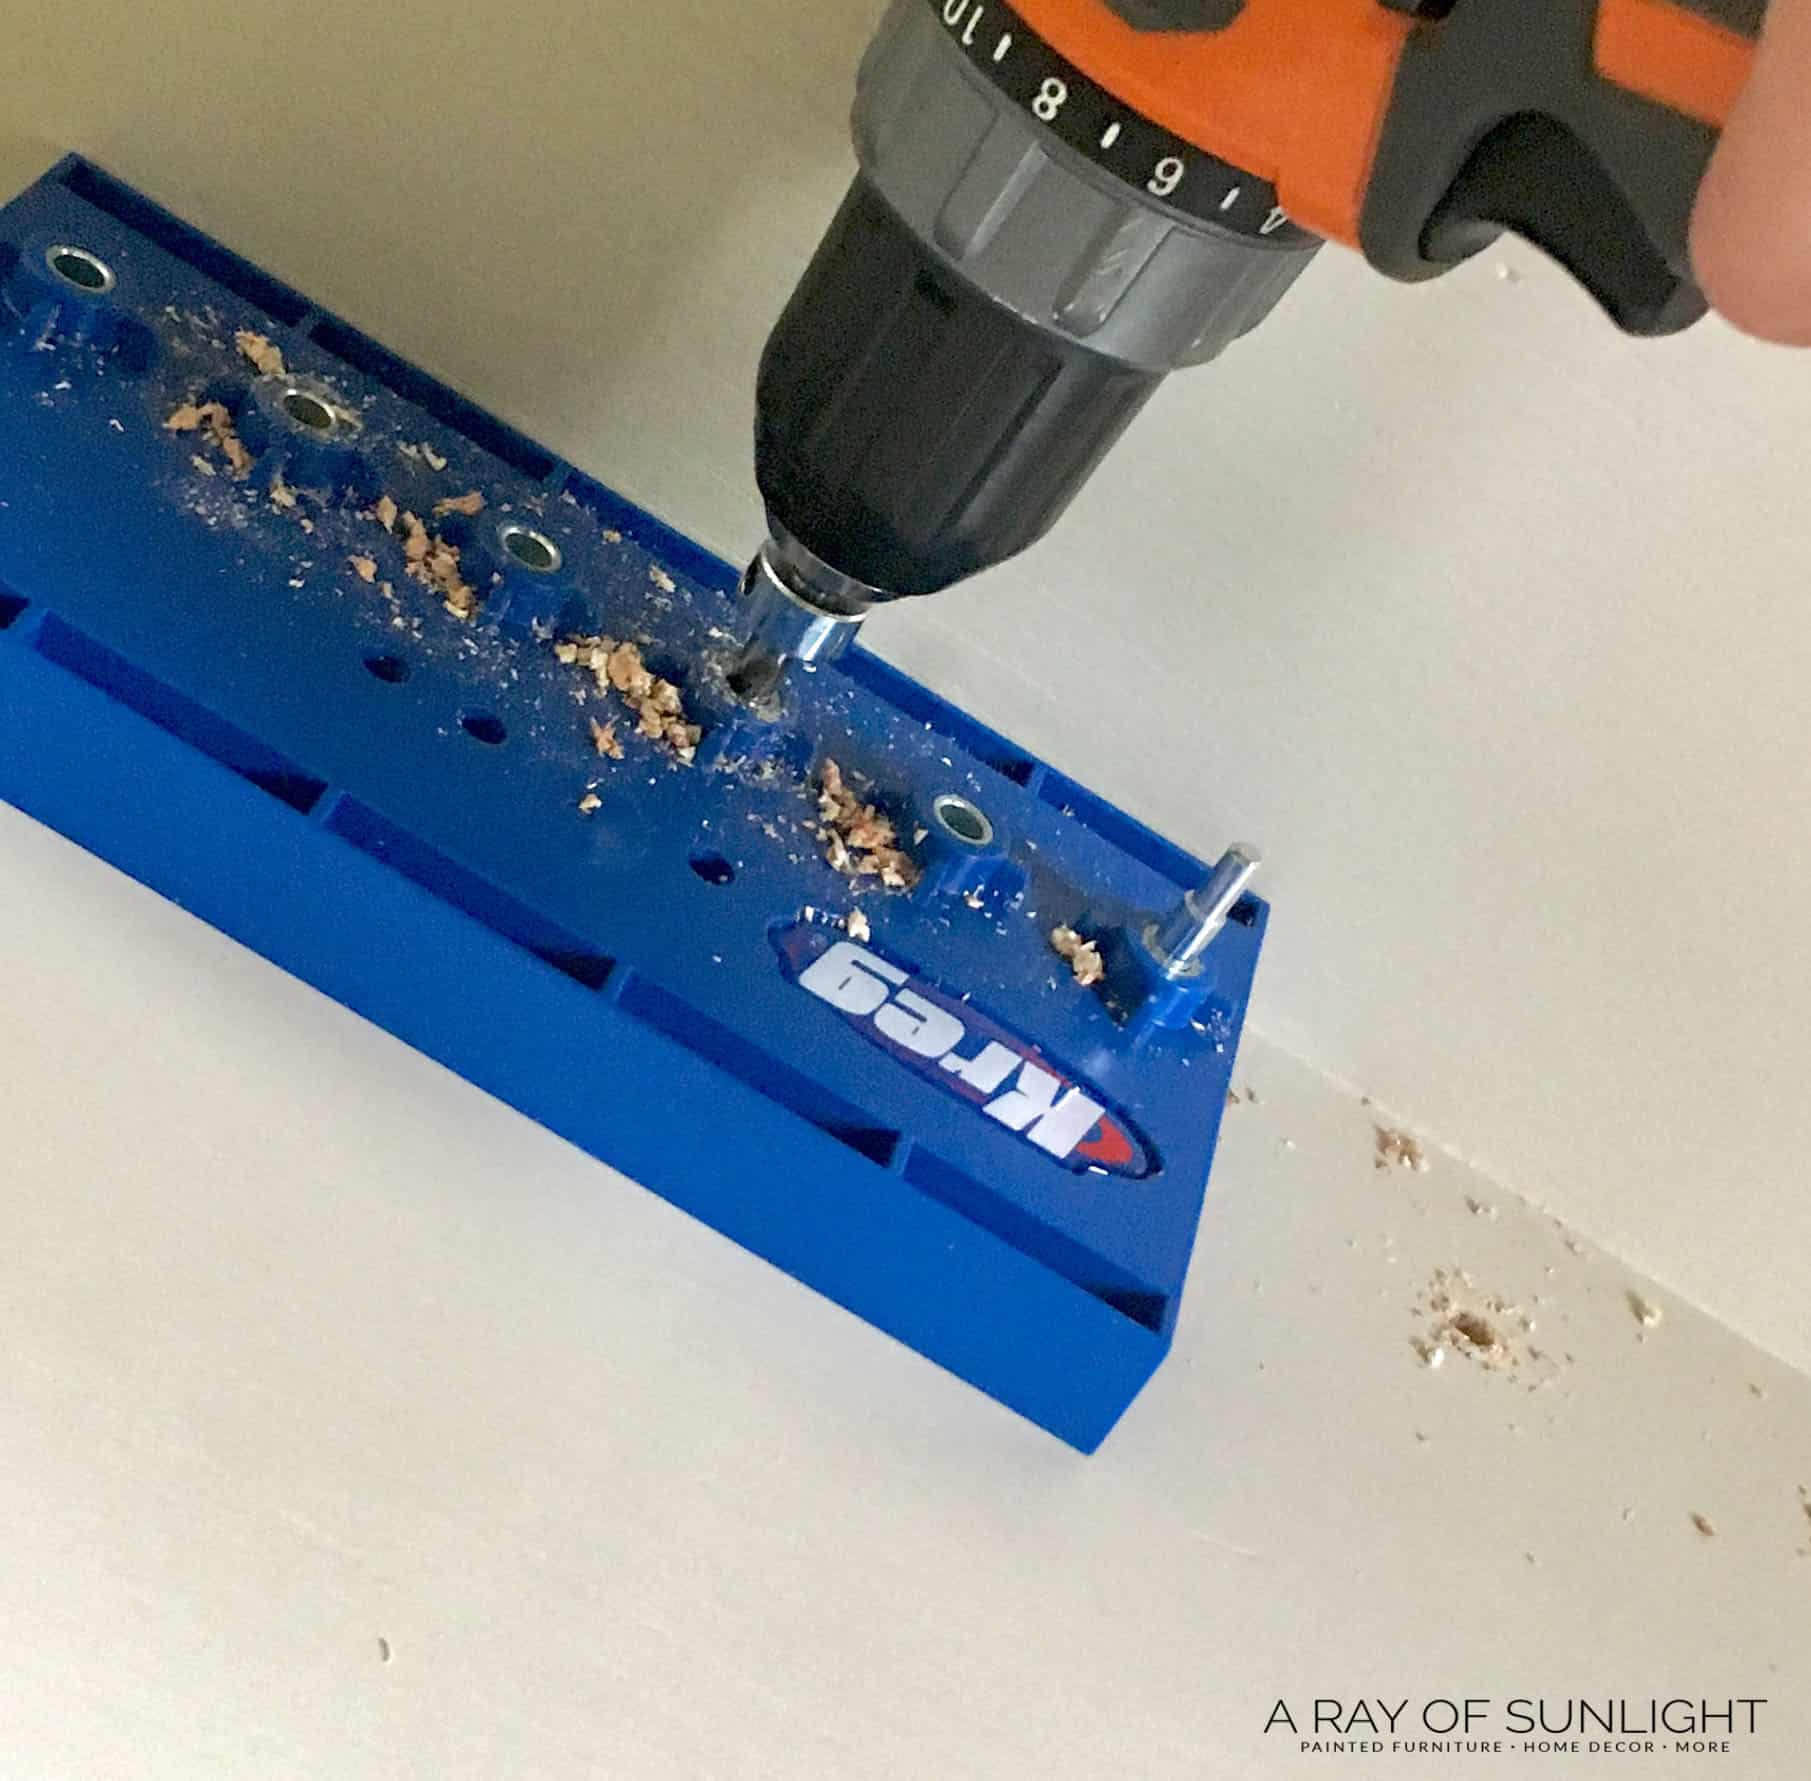
I laid the farmhouse cabinet down on one side and clamped one of my daughter’s books to the top inside of the cabinet (because I don’t need holes going all the way up to the top of the cabinet). Then, I pushed the jig up against the side of the cabinet and the edge of the book.
Then I used the provided drill bit to drill the perfect holes into the cabinet. It also comes with a depth guide so you don’t have to guess how far to drill into the wood!
I only drilled every other hole because I don’t think I’ll need holes that close together for this cabinet, and once I reached the end of the jig, I moved it down and used the little holding pin to hold it into the right place for the next holes.

I repeated that process on each side of the cabinet to create two lines of holes on each side of the cabinet. But here’s a quick video of the process!
Updating Farmhouse Cabinet Hardware
Aside from the farmhouse cabinet makeover, the hardware got a little makeover too! They originally were polished brass. I picked up some Rust-Oleum Champagne Bronze spray paint, and sprayed the hardware (below pictured as the “before”). Check out this how to paint drawer pulls post to learn about painting hardware.
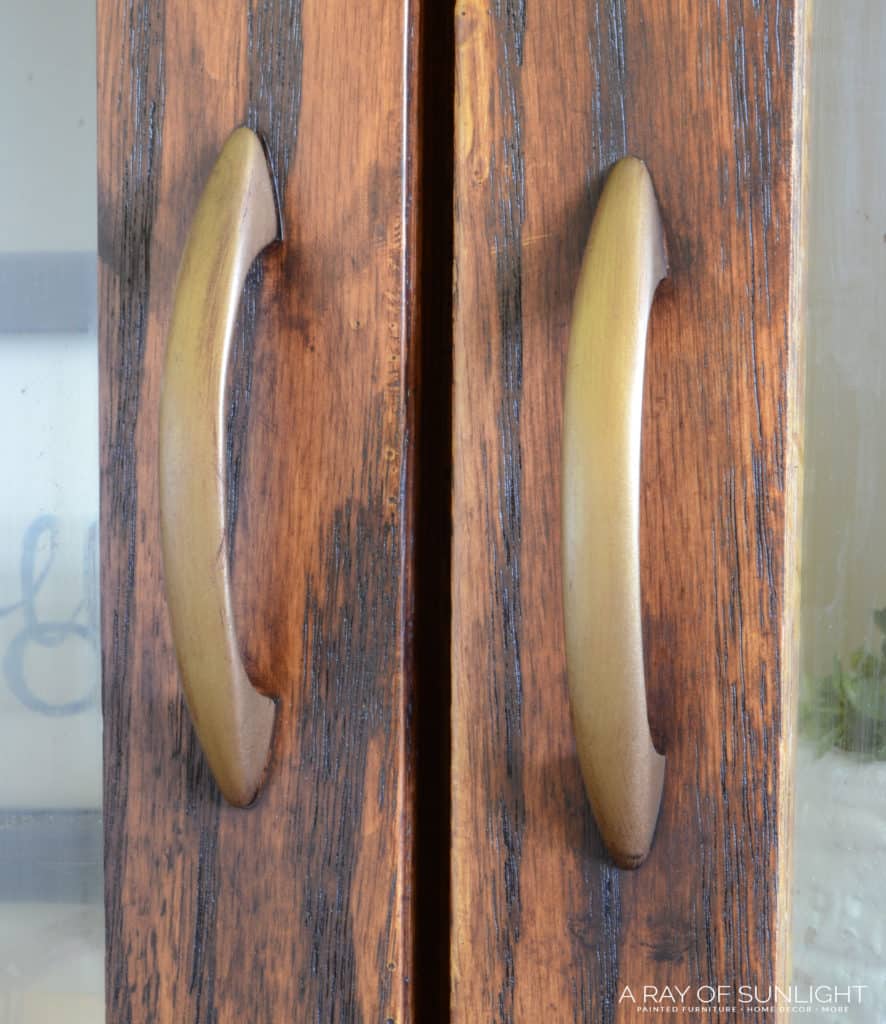
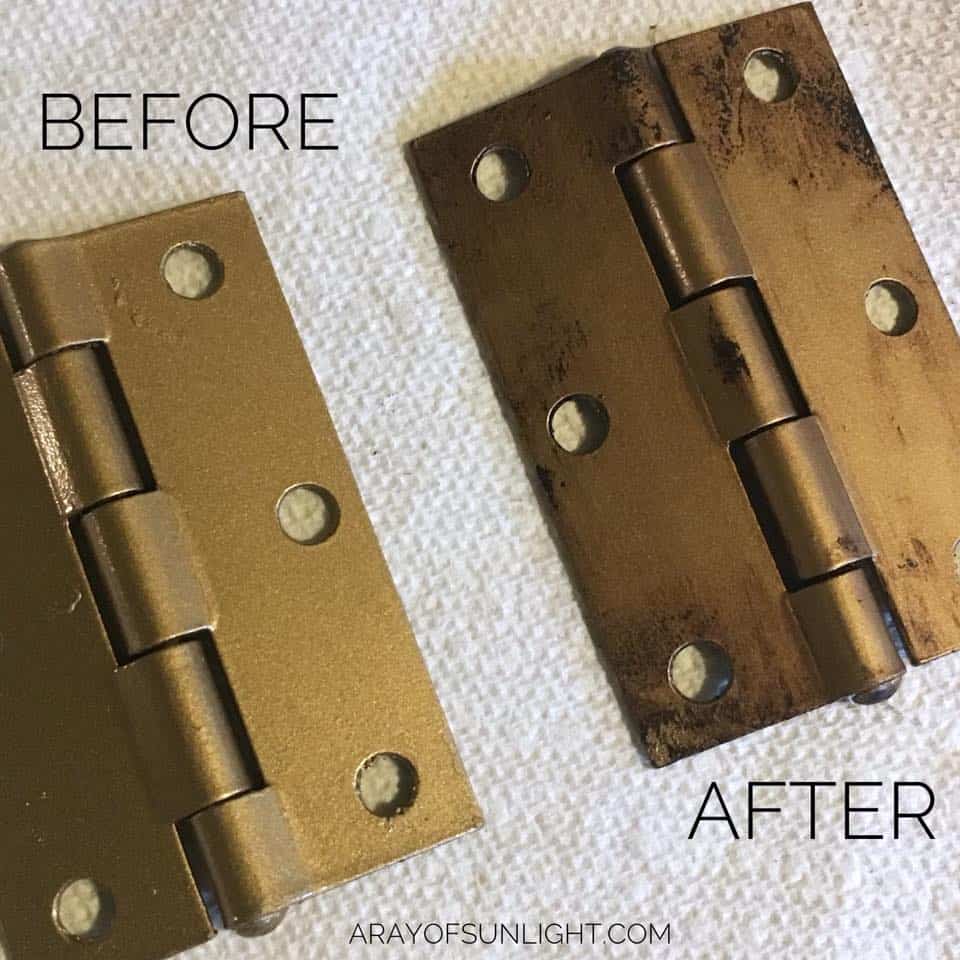
I didn’t love the look and wanted it to be a little more antiqued, so I went over the brass with more java gel stain. It created the perfect look and it was super simple!
I also added these wheels to the bottom of the cabinet. Easy peasy, just lined them up and screwed them in.
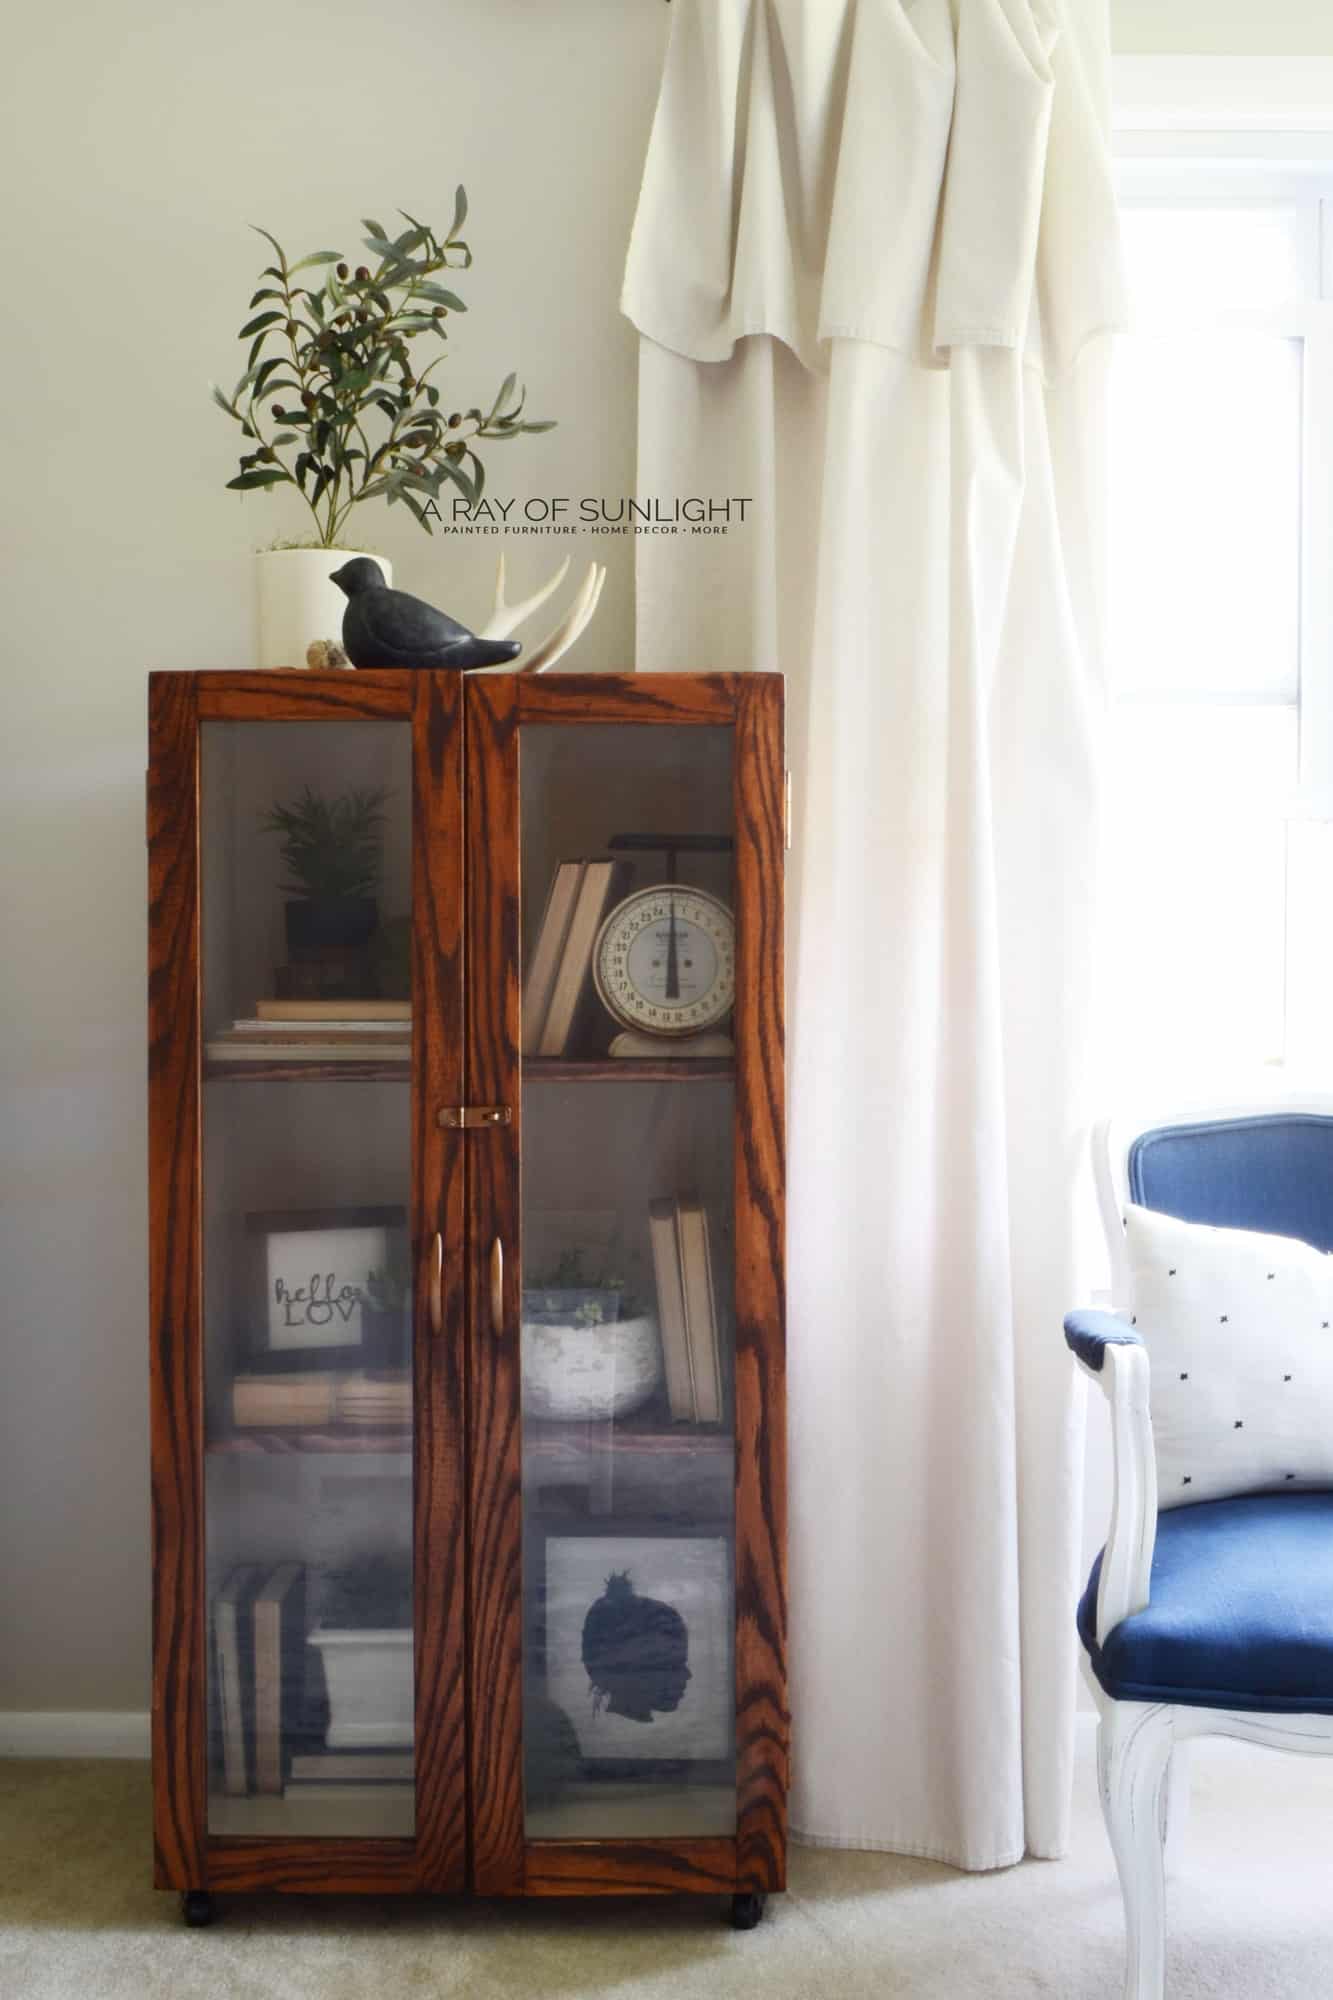
Now this farmhouse cabinet is ready to be a centerpiece in our home for years to come. Instead of being stuck in the closet collecting dust! Pair this up with the perfect DIY farmhouse drop cloth curtains to complete the look.
I couldn’t wait to fill it up with so many decor goodies! Some of them are thrift store and yard sale finds, like the books, the antlers, and the vintage scale.
More Before and After Makeovers
See All >
Click any of these “before” photos below to view the “after” of that makeover.


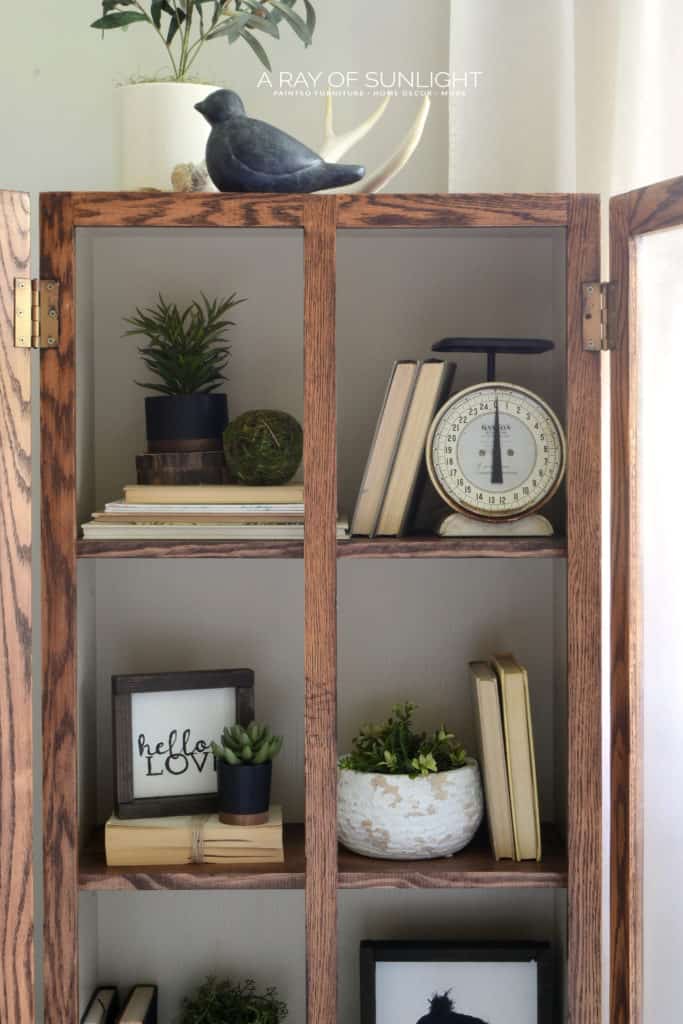
The signs and faux olive tree plant were DIY projects, and the rest of the decor, the greenery in the black pot, the black potted succulent, the blackbird (sold out), the moss ball, and the chippy white bowl filled with pieces of this boxwood garland were found at Target and Hobby Lobby.
The white container on the bottom shelf was also thrifted, but it was filled with green baby breath garland. Find out more about the white and blue chairs in this cane back chair makeover!
Repurposed Cabinet Ideas
If you need more ideas on how you can use your old cabinet for something new, then you’re in luck! Aside from this farmhouse cabinet makeover, there are plenty of ways to repurpose cabinets to fit your home and lifestyle.
- Transform it into a bookshelf – Remove the doors and add some paint or wallpaper to give your cabinet a new look. Here are wallpaper dresser ideas for inspiration on using wallpaper on furniture. If you have a bookshelf already, update them with these painted bookshelf ideas.
- Make it as storage space – If you have kids, this is perfect for storing their toys and games. Simply remove the doors and add baskets or bins inside for easy organization. You can also use it as extra pantry space in the kitchen or as additional storage in your home office.
- Turn it into a dresser – Remove the shelves and add hanging rods to hang clothes. You can also add drawers to store smaller items and accessories.
- Use it for outdoor storage – If you have a patio or garden, an old cabinet can be repurposed to store gardening tools, pots, and other outdoor essentials. Paint it with weather resistant paint to protect it from the elements. You can also add hooks on the sides to hang smaller items.
After you’ve decided on the perfect repurposing project for your cabinet, it’s time to get creative and make it your own. Paint it with a fun color like these painted hutch ideas, or stain it to bring out the wood’s natural beauty with these hutch refinishing ideas. You can also add new hardware to give it a fresh and unique touch.
So what do you think of this farmhouse cabinet makeover? Leave me a comment below! I love to hear from you!


The Farmhouse Cabinet Makeover
This old gun cabinet had a major upgrade. Here are the steps for the farmhouse cabinet makeover.
Materials
Tools
Instructions
- Pry off the gun racks from the cabinet using the hammer, putty knife and screwdriver.
- Fix any damages with Bondo then remove the doors and hardware. Sand everything with 220-grit sandpaper.
- Tape off edges to prevent overspray then apply 3 coats of paint on the inside of the cabinet.
- Once dry, remove the tapes then stain the outside of the cabinet with gel stain. Let stain sit for a minute, and wipe it off with a clean rag. Make sure to always wipe with the grain and not against the wood grain.
- After two coats of stain, seal the new finish with poly.
- Cut down a pine board into shelves, apply 2 coats of gel stain to them as well then seal the finish with more poly.
- Drill holes on each side of the cabinet with a Kreg Shelf Pin Jig to create two lines of holes, and put in the shelf pins to hold the shelves up.
- Spray the hardware with some paint and attach the wheels to the bottom of the cabinet.
Recommended Products
As an Amazon Associate and member of other affiliate programs, I earn from qualifying purchases.

More Cabinet Makeover Ideas
- Painted Hallway Cabinet Makeover
- Repainting Furniture – Flat File Cabinet Makeover
- Painting a China Cabinet
- Painted Display Cabinet
- Corner Cabinet Makeover
Follow us on YouTube to get more tips for painting furniture. Or share your project with us on our Facebook Group and be part of our community. See you there!
I love that jig! I would be a great gift for my hubby and then it would be handy to have around for me to use.?
Happy late father’s day! Right??? 😉
Beautiful transformation!
When I first looked at this cabinet, I thought, gee thats kinda plan and just blah. However, as usual, when you put your spin on it, it looks GREAT!. You are so talented.