How to Paint Drawer Pulls


Today I’m sharing how to paint drawer pulls. This works for all sorts of hardware as well, including hinges and door knobs. The process only takes a few hours, and it’s pretty simple when you break it down.
Painting furniture can be a fun and easy way to update your home decor, and revamping your drawer pulls is just one simple step in the process. So let’s get started with updating furniture hardware!

You can paint the whole piece of furniture including the hardware, or you can just update the hardware alone. This is a great option if you like the overall look of your furniture but just want to update it with more modern hardware.

Painting furniture hardware can make old pieces into stylish and modern accents. Not only is it budget-friendly, but it also allows you to match the hardware to your personal style and decor. Plus, it’s a fun and easy DIY project that can be completed in just a few hours.
Ready to learn how? Keep reading!
Supplies Used to Paint Drawer Hardware
As an Amazon Associate, I earn from qualifying purchases. I also may earn from other qualifying purchases with other companies or get free product to review and use. All opinions are my own.
- Degreasing Cleaner (I use Krud Kutter)
- 220 Grit Sandpaper
- Tack Cloth to get all of the sanding dust off of the hardware
- Primer (BIN Shellac Primer or Clear Shellac are my favorites!)
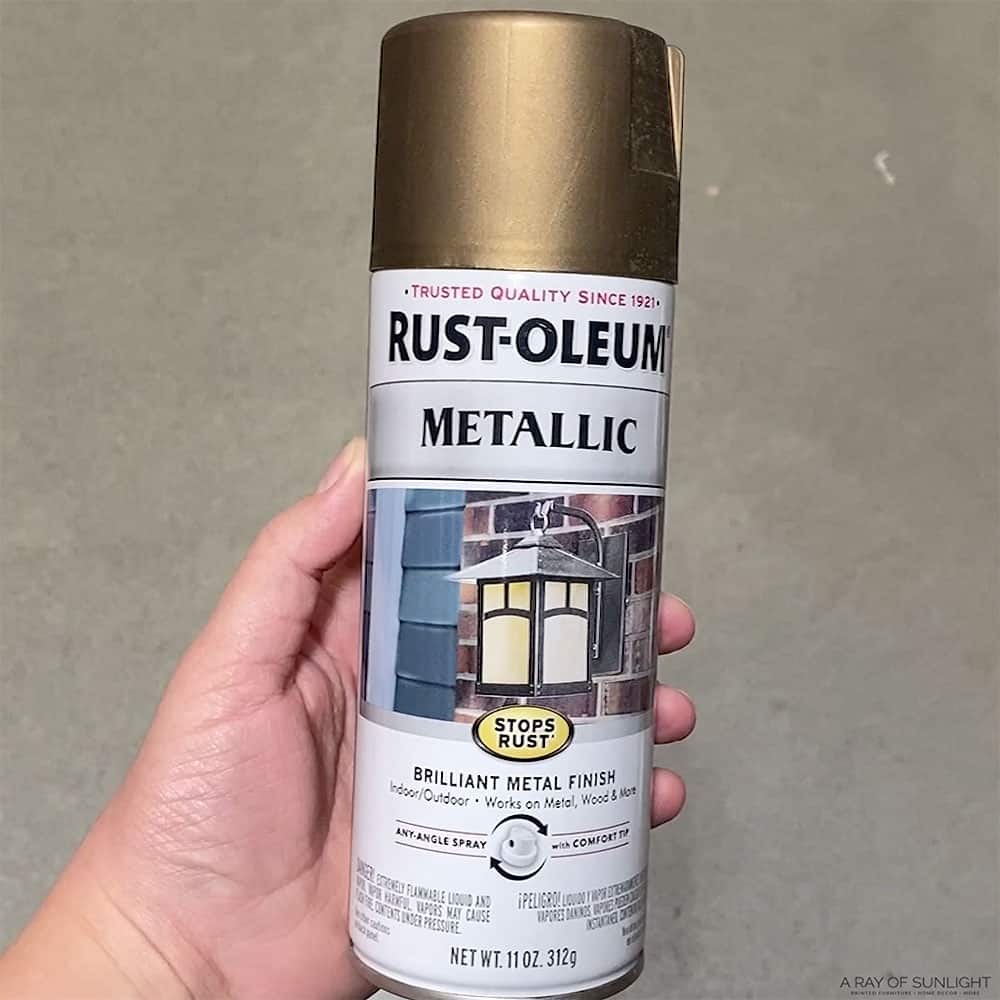
- Paint (Right now I love Rust-oleum Champagne Bronze)
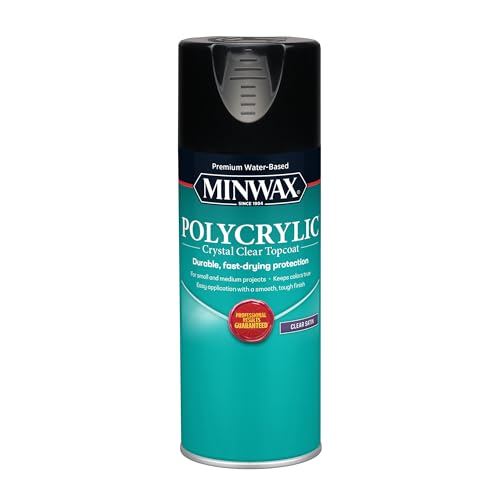
- Topcoat (Make sure it’s compatible with your spray paint – oil or waterbased)
Clean the Hardware
You can scrub them really really well and get them back down to almost bare metal… I have a separate blog post on how to clean old furniture hardware here!
Or you can just give them a quick scrub with a degreasing cleaner to remove the layer of dirt, grease and grime. I personally like to use Krud Kutter.
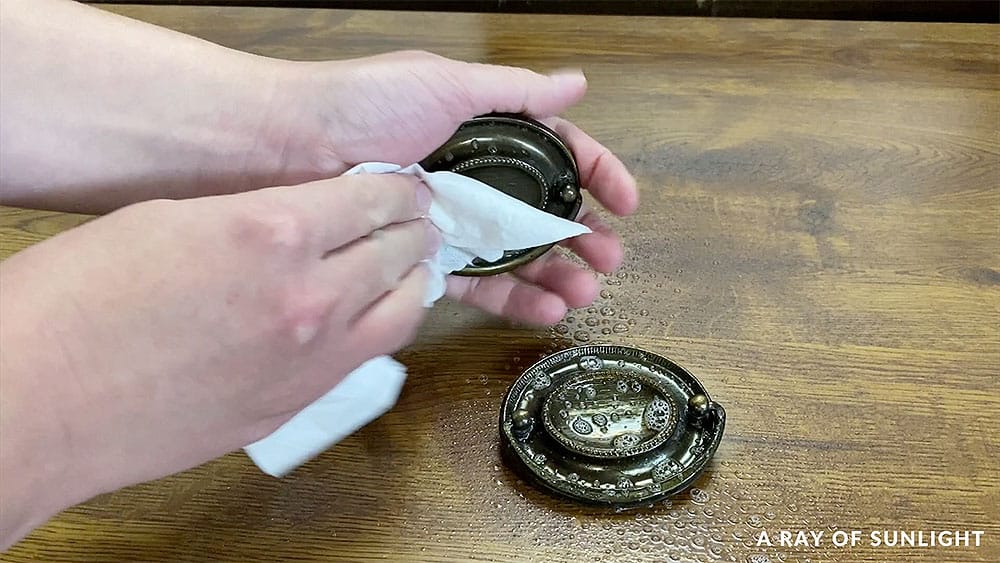
Then make sure they are completely dry.
Lightly Sand the Hardware
This can be an optional step if you scrubbed the hardware down to bare metal, or if you use a really good bonding primer in the next step, or if the hardware isn’t in a high traffic area.
When I lightly sand, or scuff sand, I typically use 220 grit sandpaper. Learn more about sandpaper for furniture here.
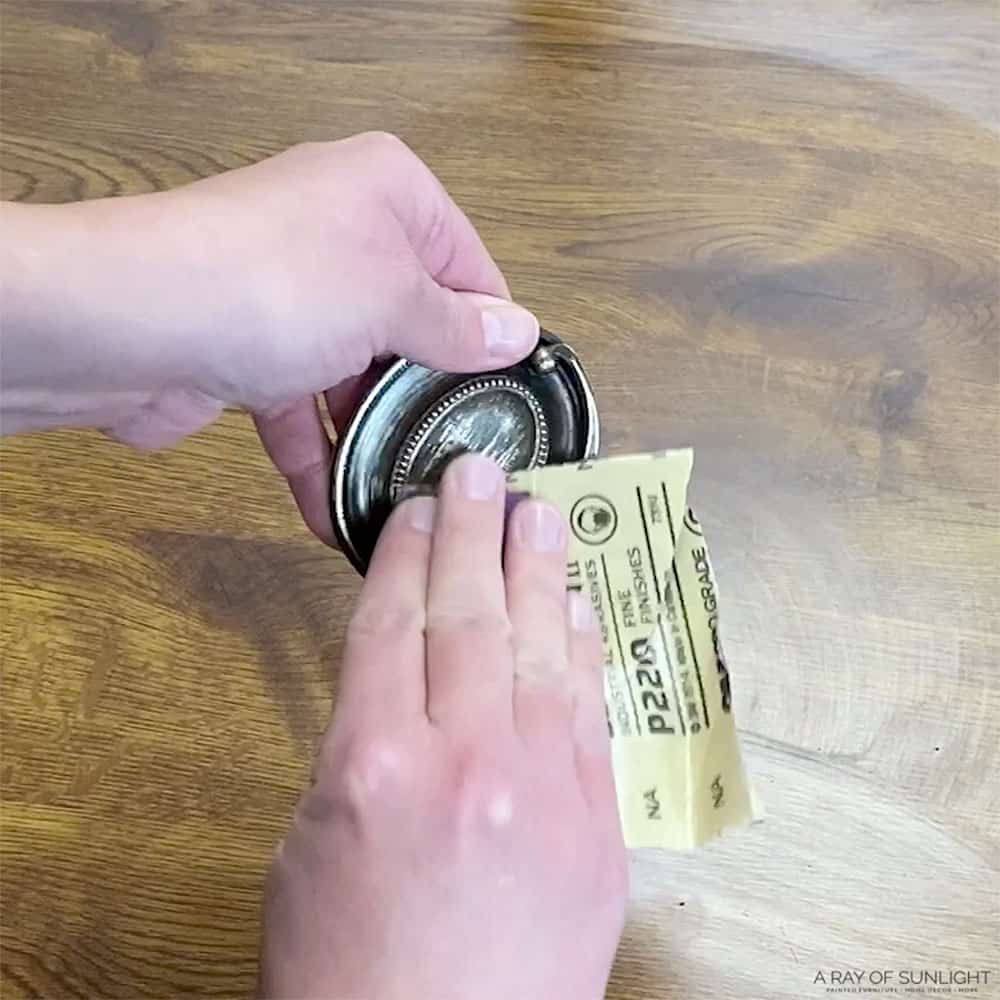
I don’t want to leave too many sanding marks behind, but I want to scuff the surface to give to paint something to hold onto. Especially on slick surfaces.
Then I wipe off the dust created from the sanding.
Prime the Hardware
The primers that I completely trust to stick to any surface (even surfaces that haven’t been sanded) are shellac based primers.
So BIN shellac primer and clear shellac. Plus they cure quickly and you can paint oil or waterbased paints over them.

If I use a shellac primer, I’ve learned that I can typically get away with not sanding beforehand. But it never hurts to sand before either.
I like to use a spray can for a really nice finish. When I spray with a spray can, I try to spray a couple of light coats.
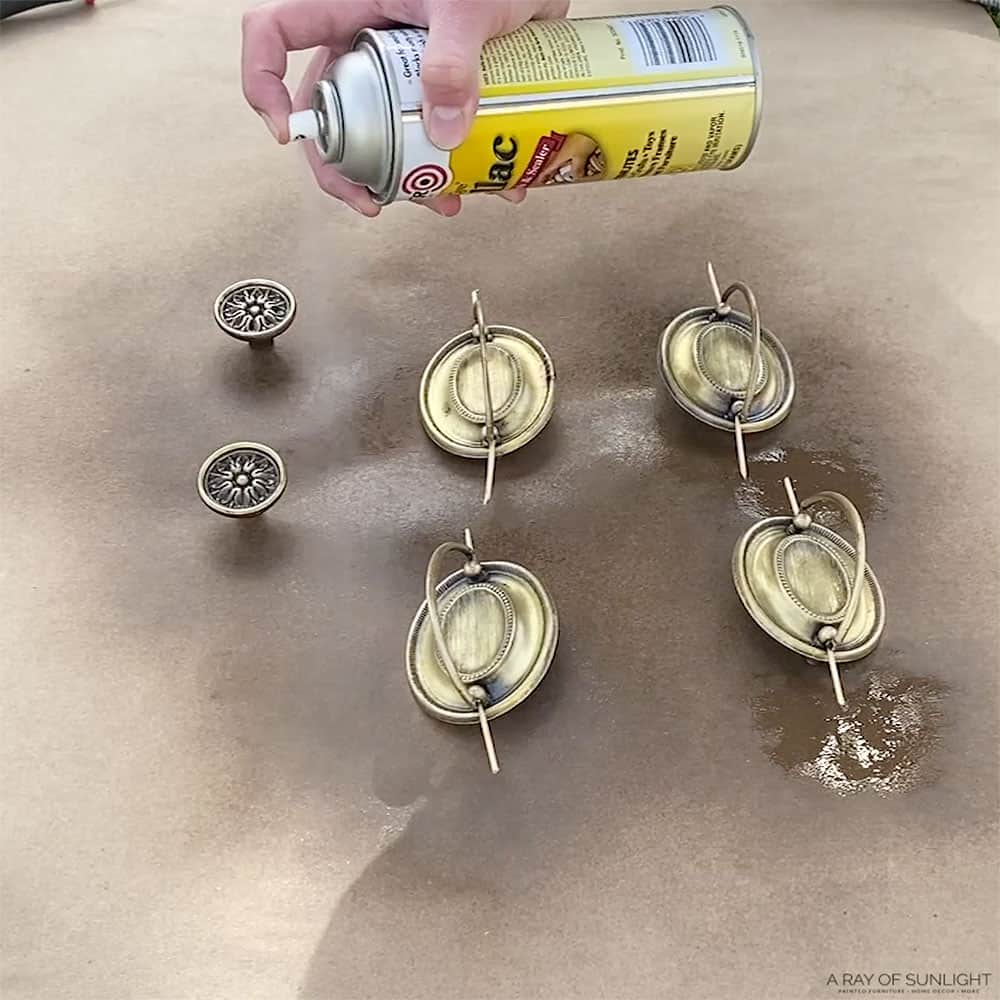
And then I let it dry for about an hour before I move on to the next step.
Paint the Hardware
My go-to right now is this champagne Rust-oleum metallic spray paint because I love this color. Check out how we used it in this farmhouse cabinet makeover.
I’ve had great experience with these metallic spray paints as well!
Check out my list of the best spray paint for metal here for more options.
Once again, when I’m spraying I try to spray light coats, letting it dry for a few minutes between coats… basically to the point that it is a little tacky.
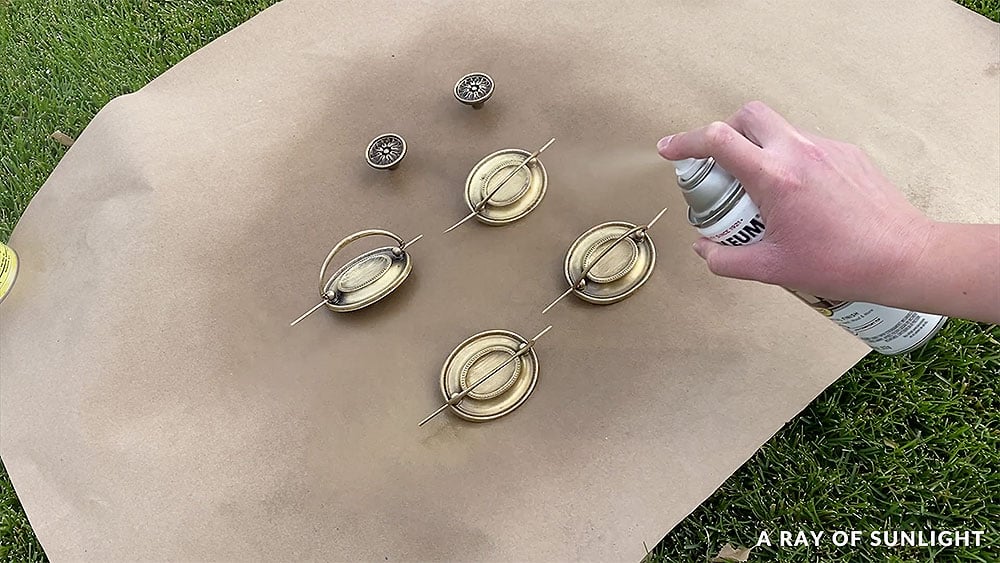
But most of these spray paints usually say to apply more coats within an hour, so I make sure to apply the next coat within an hour. Or else it says to wait typically 48 hours. And nobody has time for that, right?? For a more detailed guide, here’s how to spray paint drawer pulls!
It’s one thing to spray paint hardware, but did you know you can actually use spray cans to paint furniture too!? Find out what the best spray paint for wood furniture is right here! Check out my comparison between Krylon vs Rustoleum spray paints here.
Topcoat the Paint (Optional)
This is completely optional. But if you’re worried that it’s going to get scratched up, you may want to topcoat the paint.
Would you like to save this?
I typically don’t topcoat, and I haven’t had issues with durability. But you’ll want to check to make sure that whatever topcoat you use is compatible with the paint you used. Most of this spray paint is oil based, so you’ll want to use an oil based topcoat.
Let Painted Hardware Dry
This step is super crucial. You’ll want to give your hardware time to dry before you put it back in operation.
Allow 24 hours before lightly using it or installing it… and then be extra careful with it for about a month while it completely cures.
Extra Painting Hardware Tips
Here are some extra tips that might help your project go smoother.
What Kind of Paint to use on Handles
I love to use spray paint, but you can use chalk paint, acrylic paint, oil paint… The paint that I wouldn’t recommend is latex paint that is made for walls.
If using a chalk paint or acrylic paint, I would definitely top coat the painted hardware. But no matter the paint you use, the process is the same.
What Kind of Paint to use on Bail Pulls
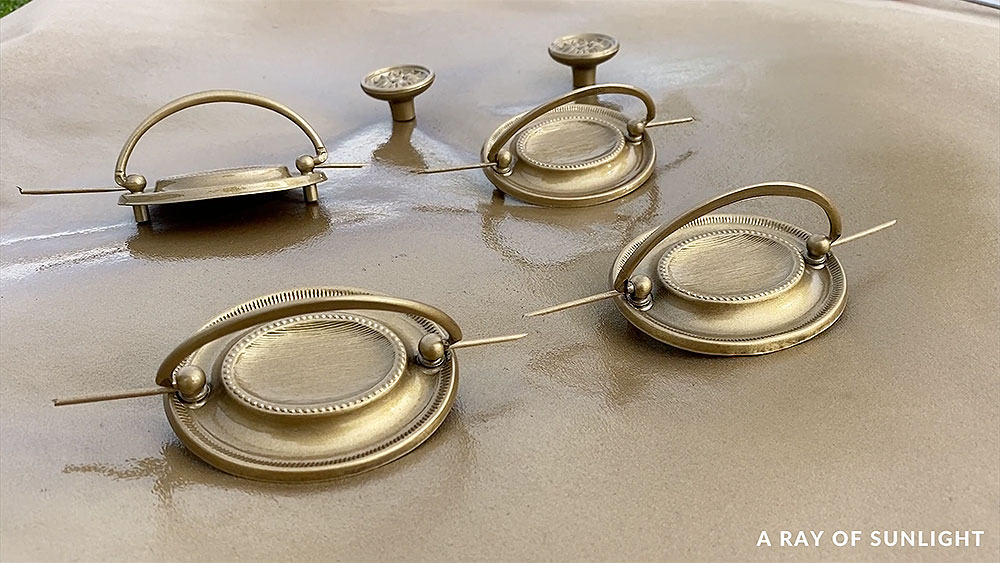
If your hardware is bail pull style with a handle that moves, you can stick toothpicks where the handles attach to the back plate, so the handles stay up in the air.
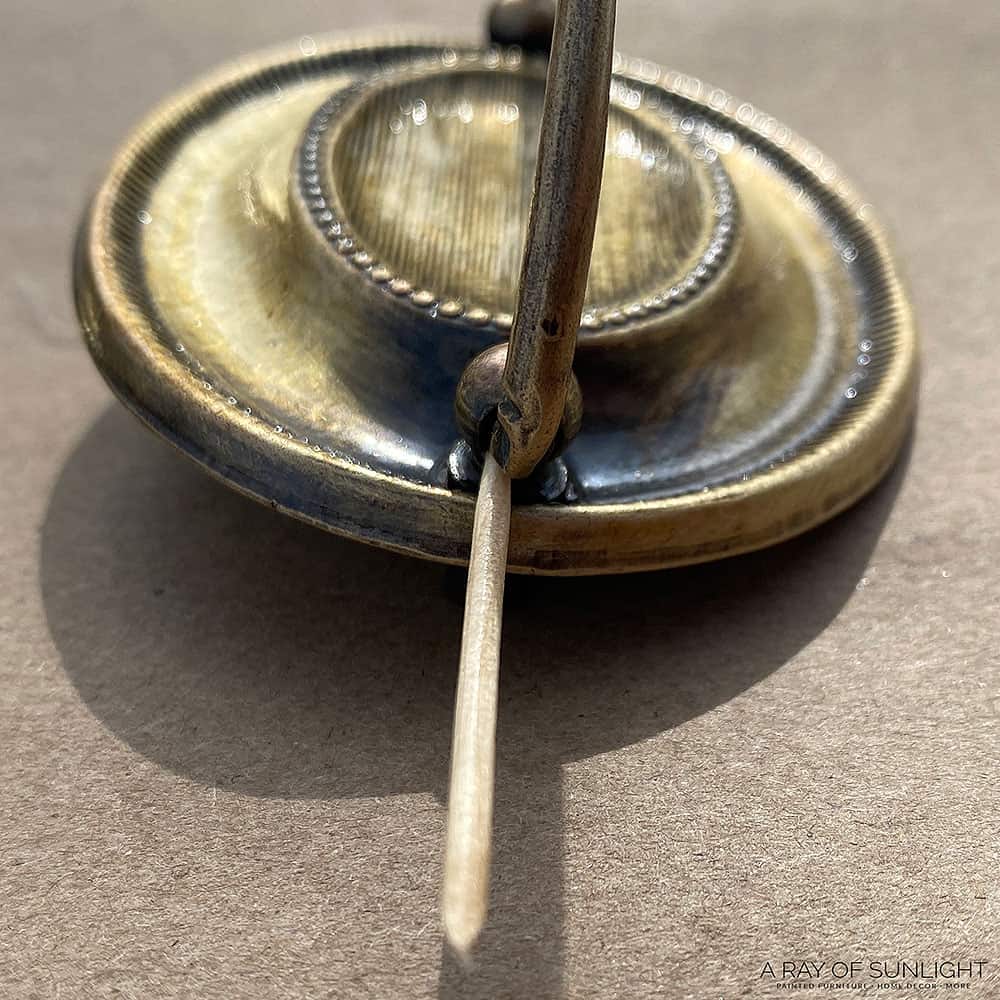
Then you can spray the top and bottom of the handles, and all of the back plate all at once.
What Kind of Paint to use on Hinges
When painting hinges, you can open them all the way, so they create a triangle shape. Spray the middle of the inside of the triangle, and then flip it over and spray the rest of the hardware.

This makes it so you can spray everything that you can see when they are installed. Write labels on tape, and then fold the labels in half and tape them so you know where each hinge belongs.
What Kind of Paint to use on Knobs
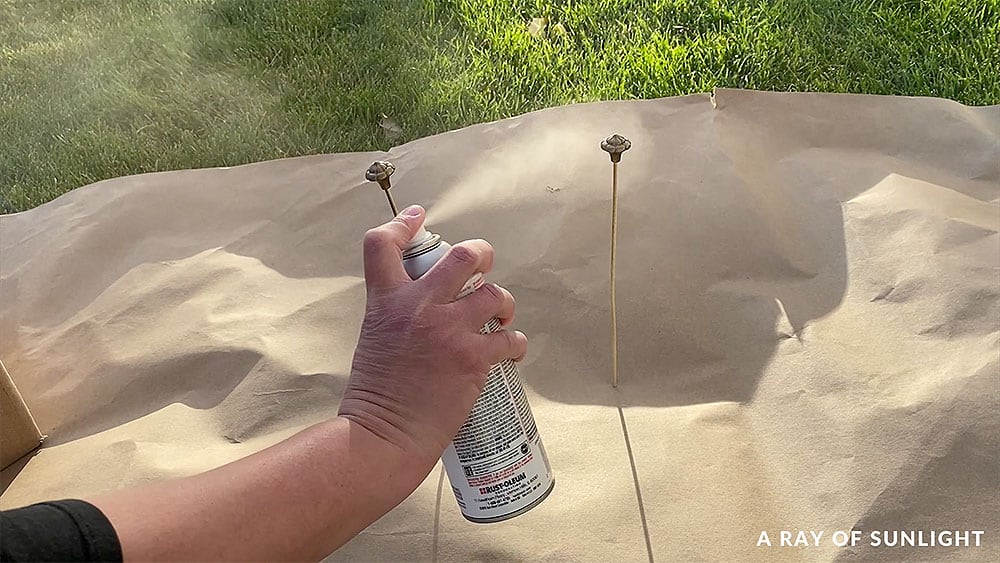
Stick a toothpick or skewer through some paper or cardboard and then put the knob on the toothpick to help it stay upright when you spray it. If you use a long skewer, you can keep it elevated so you can paint the underside too!
What Kind of Paint to use on Screws
Stick screws through some paper, Styrofoam or cardboard too so you can paint the heads.
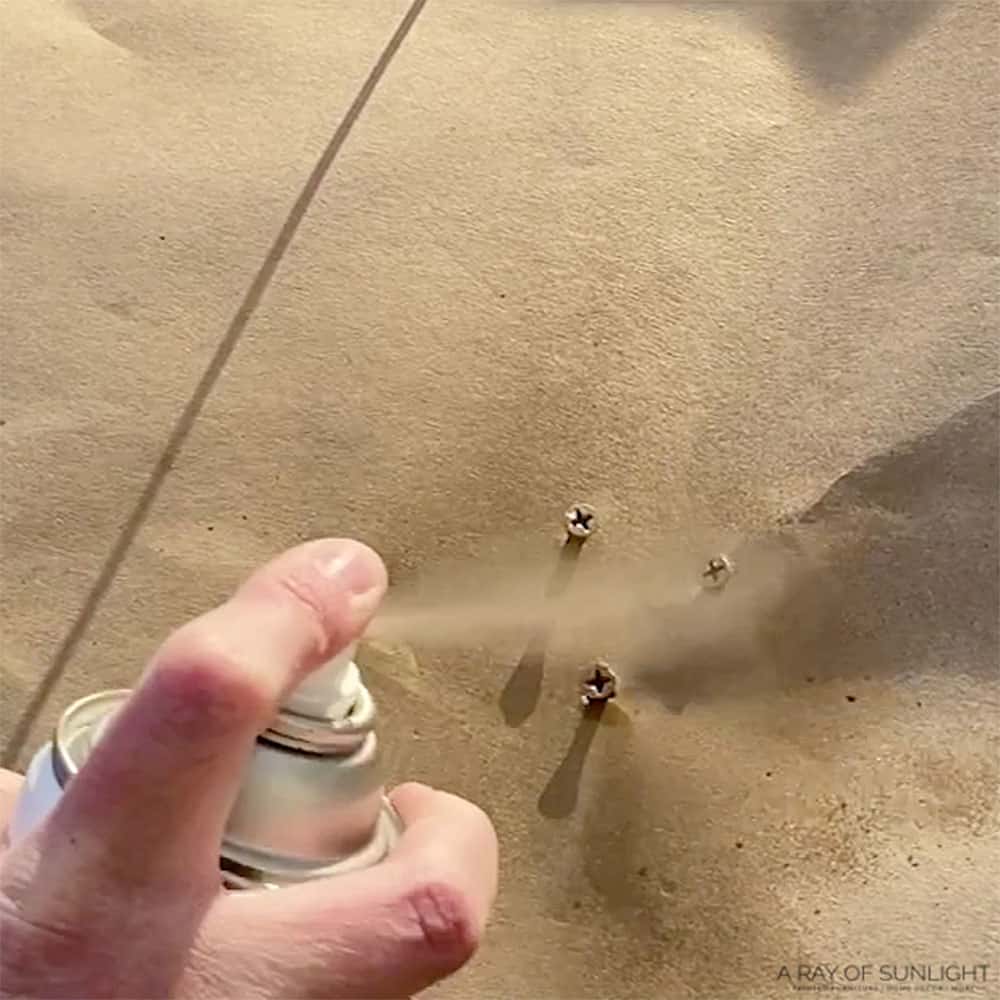
Or sometimes I spray the spray paint on some paper and brush it onto the heads instead.
Watch my “How to Paint Drawer Pulls” video to see it in action!
Can you paint hardware with a brush instead of spray paint?
Sure, you can definitely paint hardware with a brush instead of using spray paint. This method may be preferred by some DIY-ers who enjoy the control and precision that a brush allows.
When using a brush, it’s important to use a high-quality brush to avoid brush strokes and get a professional-looking finish. Here are your options for the best paint brushes for painting. However, it may also take longer to create an even and smooth finish compared to spray painting.

Can you paint hardware without removing it?
Yes, you can paint hardware without removing it! This is a great option for those who want to update their hardware without the hassle of taking everything apart. To do this, simply tape off any areas around the hardware that you don’t want painted and cover with plastic or paper.
However, keep in mind that while this method may be easier, it may not yield the best results. Painting hardware without removing it can lead to missed spots, uneven coverage, and drips or runs in the paint. Additionally, it may be more difficult to get a smooth and professional finish.
In some cases, the type of hardware may also affect whether or not you can paint it without removing it.
For example, intricate or detailed hardware may be difficult to paint without taking it off first. It’s also important to make sure the hardware is clean and free of any dirt or grime before painting.
Overall, while it is possible to paint hardware without removing it, you will have better results by taking the time to remove and properly paint each hardware piece individually.

How to Paint Furniture Hardware
In this how to paint furniture hardware guide, learn the steps to help paint stick and last so your hardware looks fresh again.
Instructions
- Clean your hardware with a degreasing cleaner to remove the layer of dirt, grease and grime.
- Lightly sand the hardware with 220 grit sandpaper. Then wipe off the dust created from the sanding.
- Spray a couple of light coats of shellac based primer to your hardware. Let it dry for about an hour.
- Spray light coats of paint to your hardware, letting it dry for a few minutes between coats.
- Topcoat your painted hardware. This is completely optional but if you’re worried that it’s going to get scratched up, you may want to do this.
- Let your painted hardware dry. This step is super crucial. You’ll want to give your hardware time to dry before you put it back in operation. Allow 24 hours before lightly using it or installing it… and then be extra careful with it for about a month while it completely cures.
Recommended Products
As an Amazon Associate and member of other affiliate programs, I earn from qualifying purchases.


More Furniture Hardware Resources

Follow us on YouTube to get more tips for painting furniture. Or share your project with us on our Facebook Group and be part of our community. See you there!
Can you provide information on where you purchase your new or used cabinet hardware? TIA. 🙂 Gary
Good question! I like to purchase new hardware from Dlawless hardware online, or from hobby lobby. Or from Home Depot or Lowes but they are more expensive. Amazon has decent prices sometimes too.
Hi, thank you for the info on using BM advance.
I’m wondering if you ever used a glaze or stain with this paint to give it depth?
I haven’t used glaze with BM yet. I’ve used it over chalk paint many times though and have a tutorial on that. How to Glaze Over Chalk Paint
Thanks for the toothpick tip! I was trying to come up with a way to spray paint my Hepplewhite pulls:)
Great tutorial thank you so much for sharing your tips! I have not used some of these products before I am excited to try them 🙂 Tanya @twelveOeightblog
How did you create that dark depth in the creases instead of an all over champagne color?? Thanks!
It looks great huh? That’s just the shadows from the design creating that look.