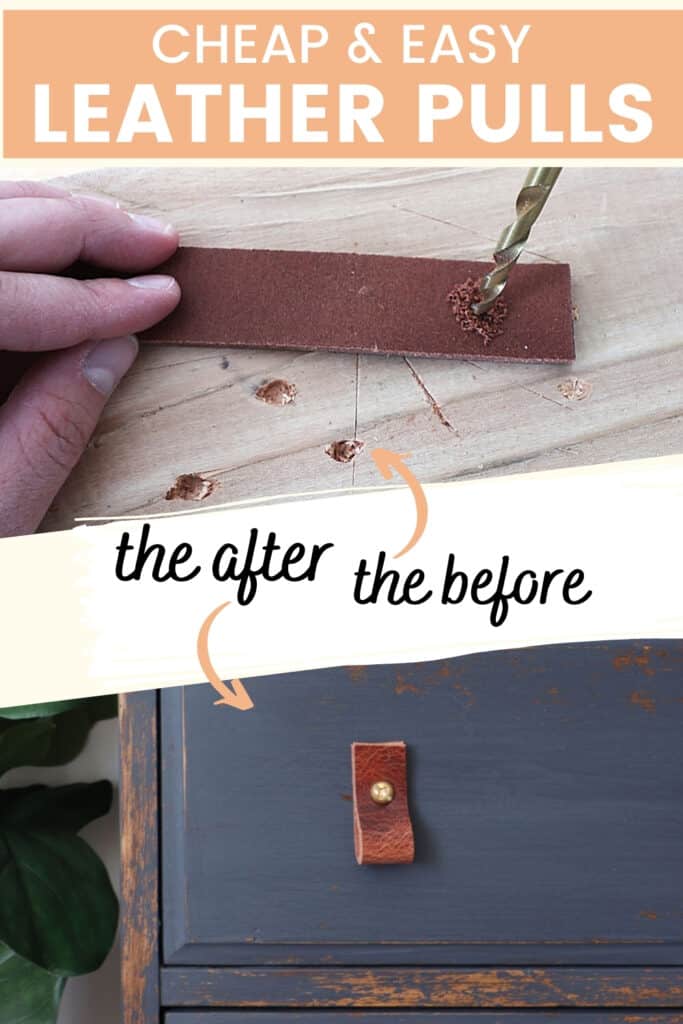
DIY Leather Pulls


Changing drawer pulls is the easiest way to update and change the look of your furniture! These DIY leather pulls are super easy to make and can fit any weird hole spacing, so you don’t have to fill in the old hardware holes!
They are also great for these furniture makeover ideas you’ve been wanting to try. Plus, you can make them in any color or style that matches your personal taste and home decor. So let’s get started on this fun and budget friendly project!
These DIY leather pulls are seriously so easy to make! In about 15 minutes, you can have a whole set of new hardware for your furniture. That’s less time than it takes to go and browse for new pulls at the store!

Plus, they are so much cheaper to make than to buy! I mean, have you seen the prices of leather pulls?? These are much cheaper! Plus, you can easily customize them to any size and style that you need!
Now you may be thinking that making your own leather pulls is too complicated, especially if you don’t have experience. But trust me, if I can do it, so can you! All you need is some simple materials and basic crafting skills.
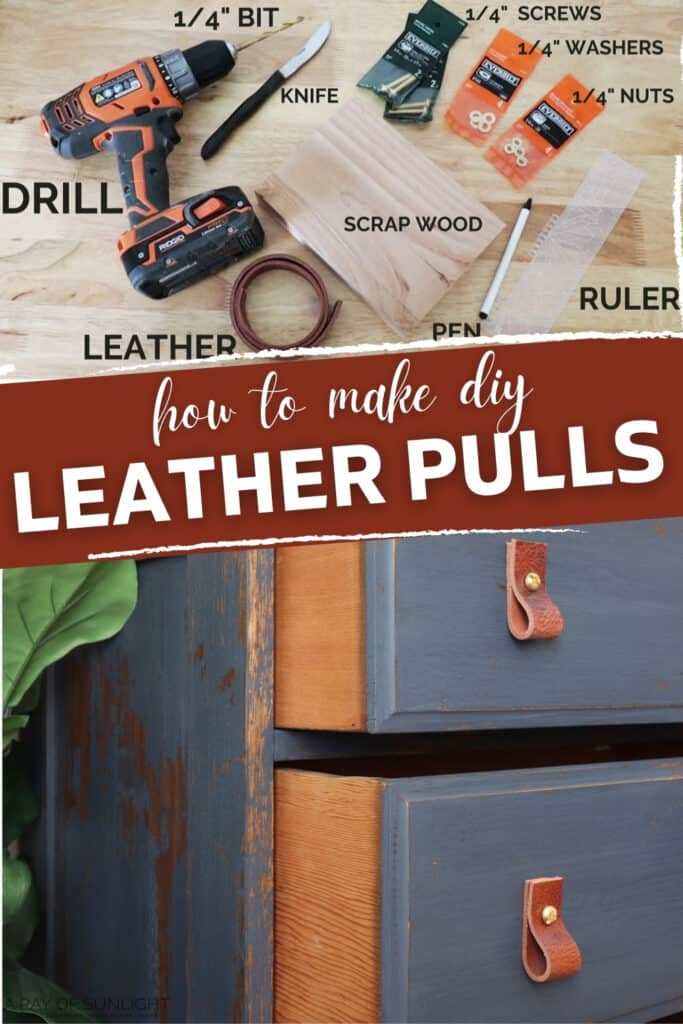
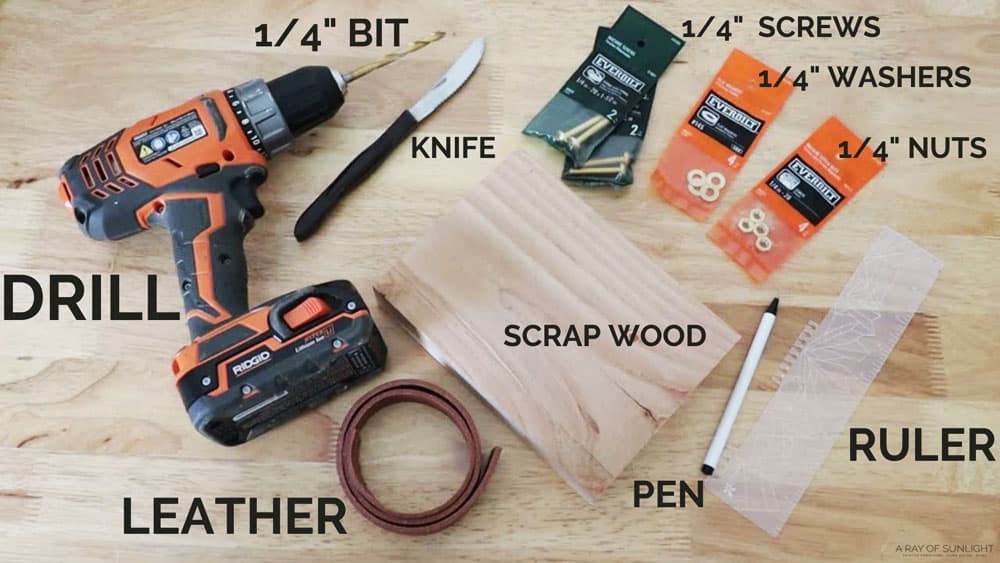
Supplies Used For DIY Leather Pulls
As an Amazon Associate, I earn from qualifying purchases. I also may earn from other qualifying purchases with other companies or get free product to review and use. All opinions are my own.
- 1″ Vintage Tan Leather
- 1/4 in.-20 x 1-1/2 in. Screws (Pick a screw length that is a little bit longer than the thickness of your drawer front.)
- #14 Washers
- #14 Nuts
- Drill
- 1/4″ Drill Bit
How to Make Leather Pulls
Making leather drawer pulls DIY for furniture is a simple and straightforward process that anyone can do. Here are the steps how to make DIY leather pulls for your furniture!
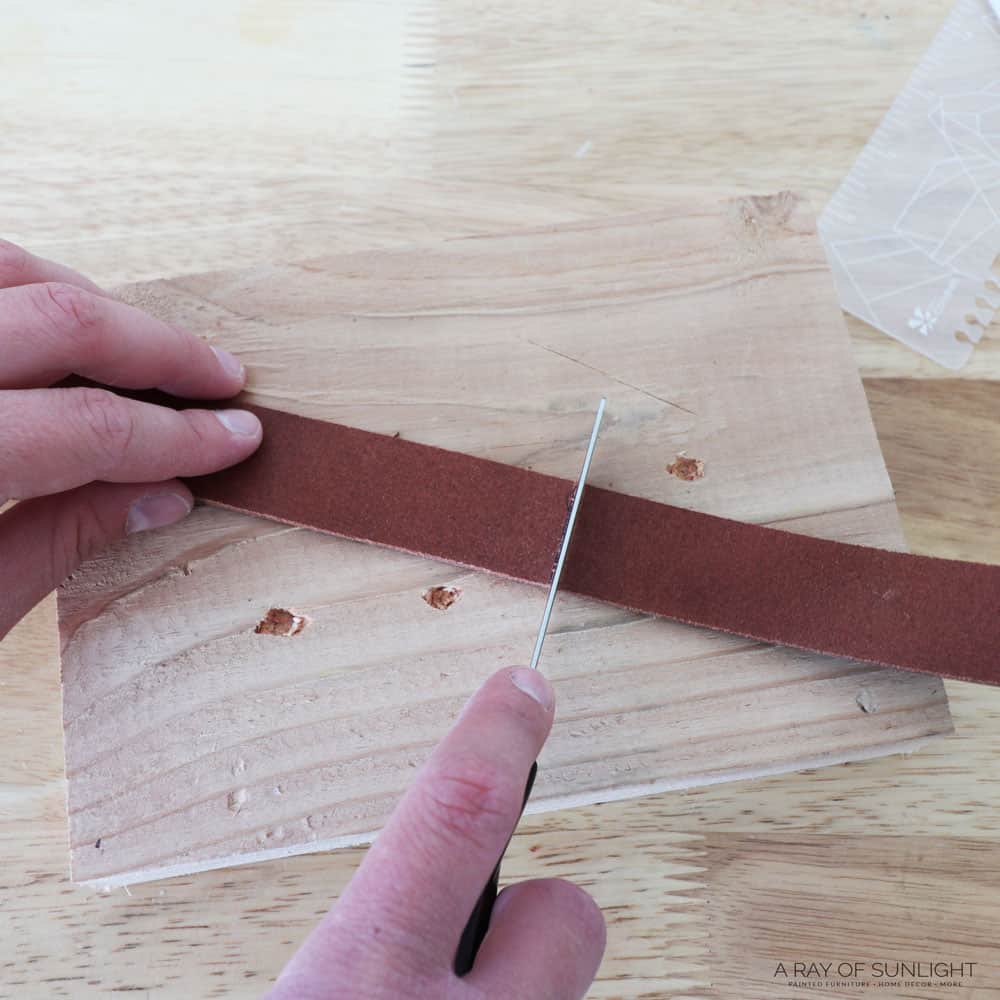
How to Cut Leather to Size
First, cut your leather to the size you want it. (Read below for more tips on how to measure the right length for leather handles or pulls)

Grab a cutting board or a piece of wood, and a sharp knife. I like to use a steak knife from my kitchen to cut the leather. Mark your leather at the length you want to cut it, and then simply saw back and forth with your knife to cut through it.
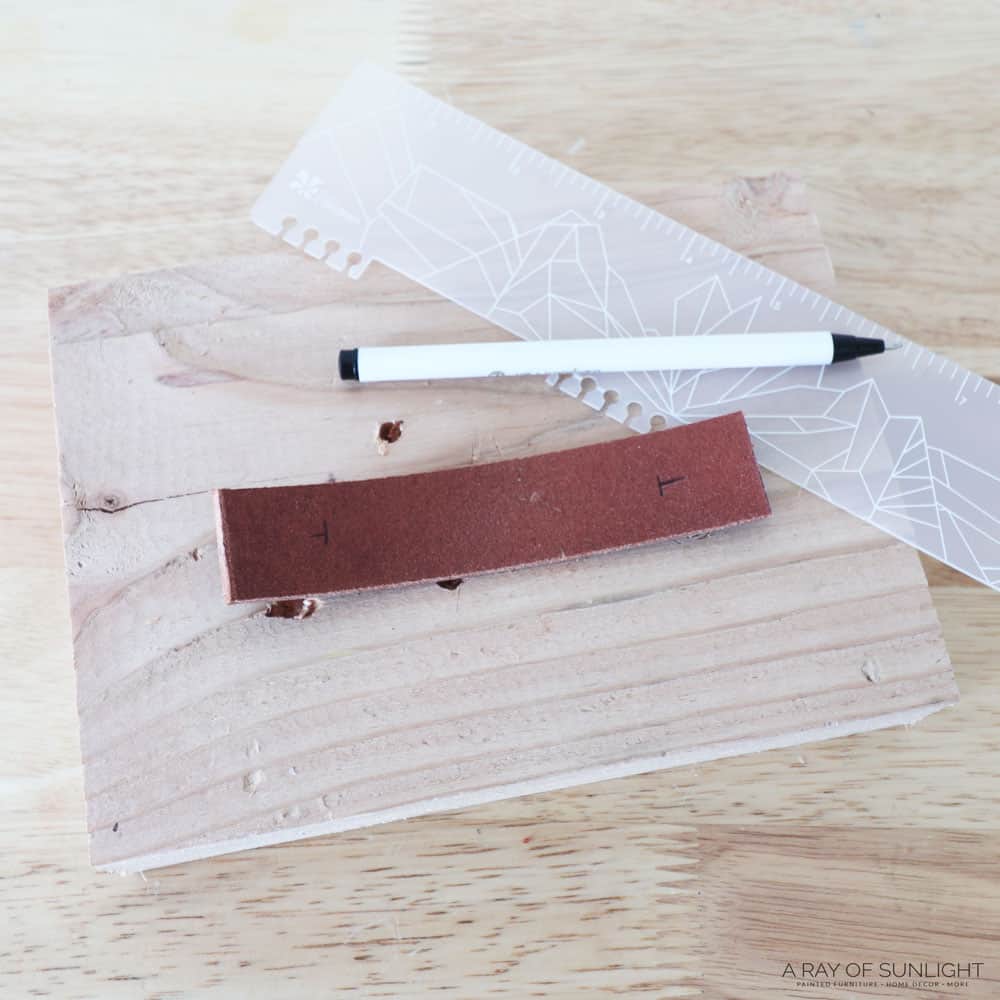
How to Measure Drawer Pull Holes
Then grab your drill and your drill bit. Measure where you want to make the holes for the screws. I measure about 3/4″ – 7/8″ in from each edge of the leather. Make sure to measure and mark on both sides of the leather so you get holes that will line up in the right place and not make a mistake when drilling.
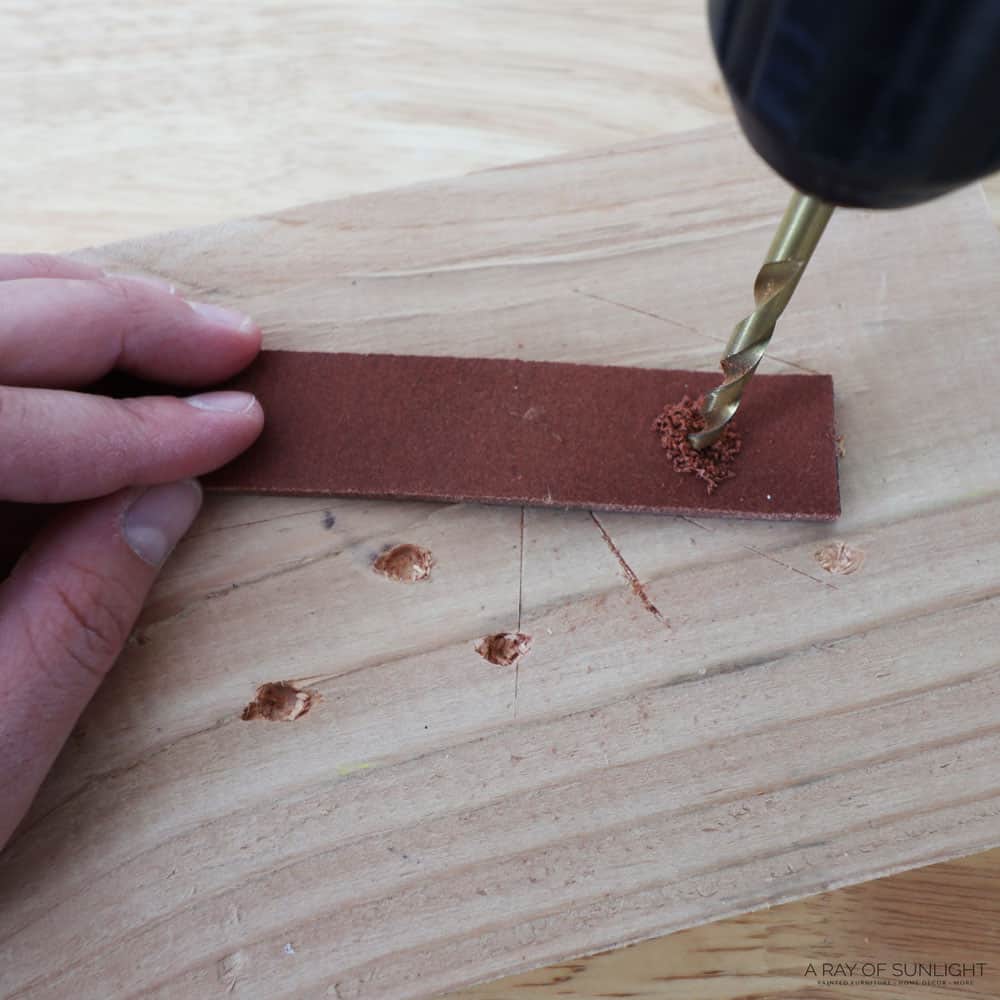
Drill Holes into Leather for the Screws
Then drill your holes into each end of the leather. Clamp the leather down onto your cutting board or a piece of wood so that it doesn’t move around when you are drilling. Drill slowly and carefully so you don’t split or crack the leather.
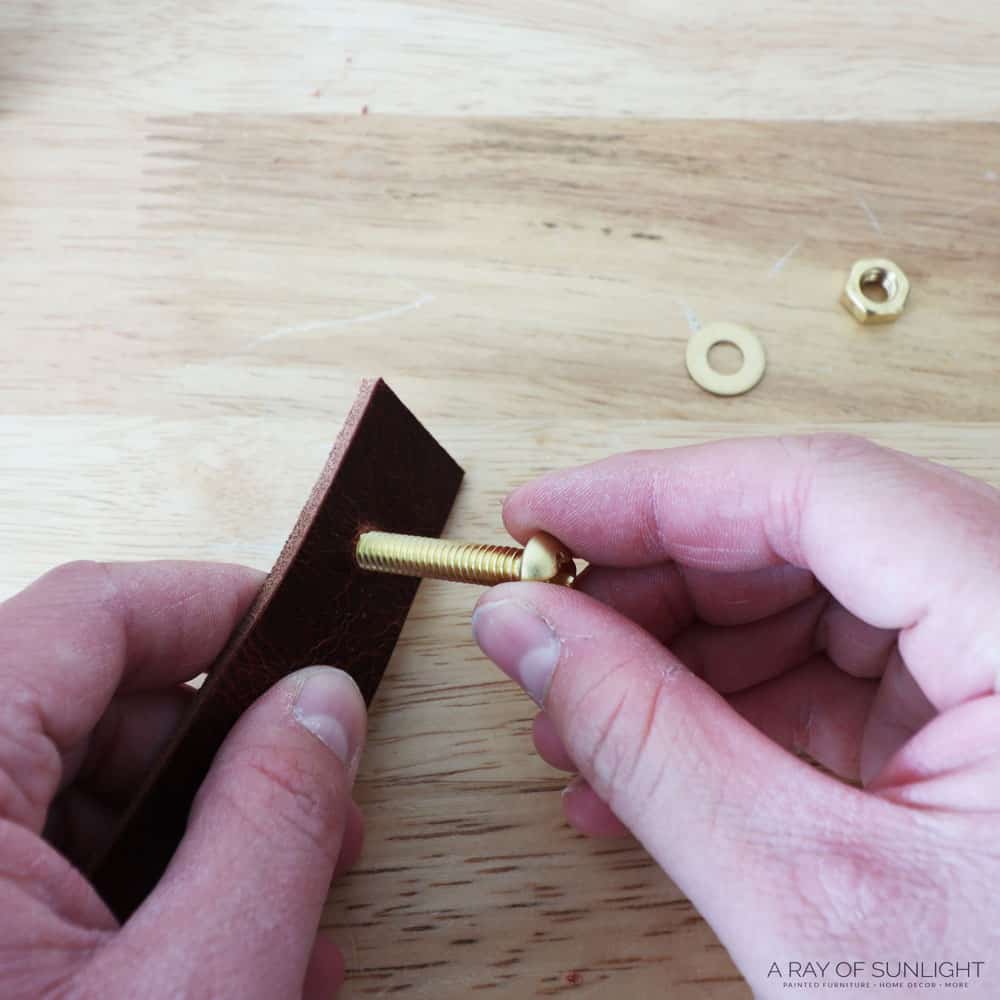
Place the Screws Through Leather Holes
Next, grab your screws, nuts, and washers! Place the screw through the hole(s).
Would you like to save this?
If your hole is a little small, you should be able to still twist the screw through the holes. But if your hole seems a bit too tight, you may need to drill the holes just slightly bigger. Just drill a little bit more out until it fits snug and not too tight.
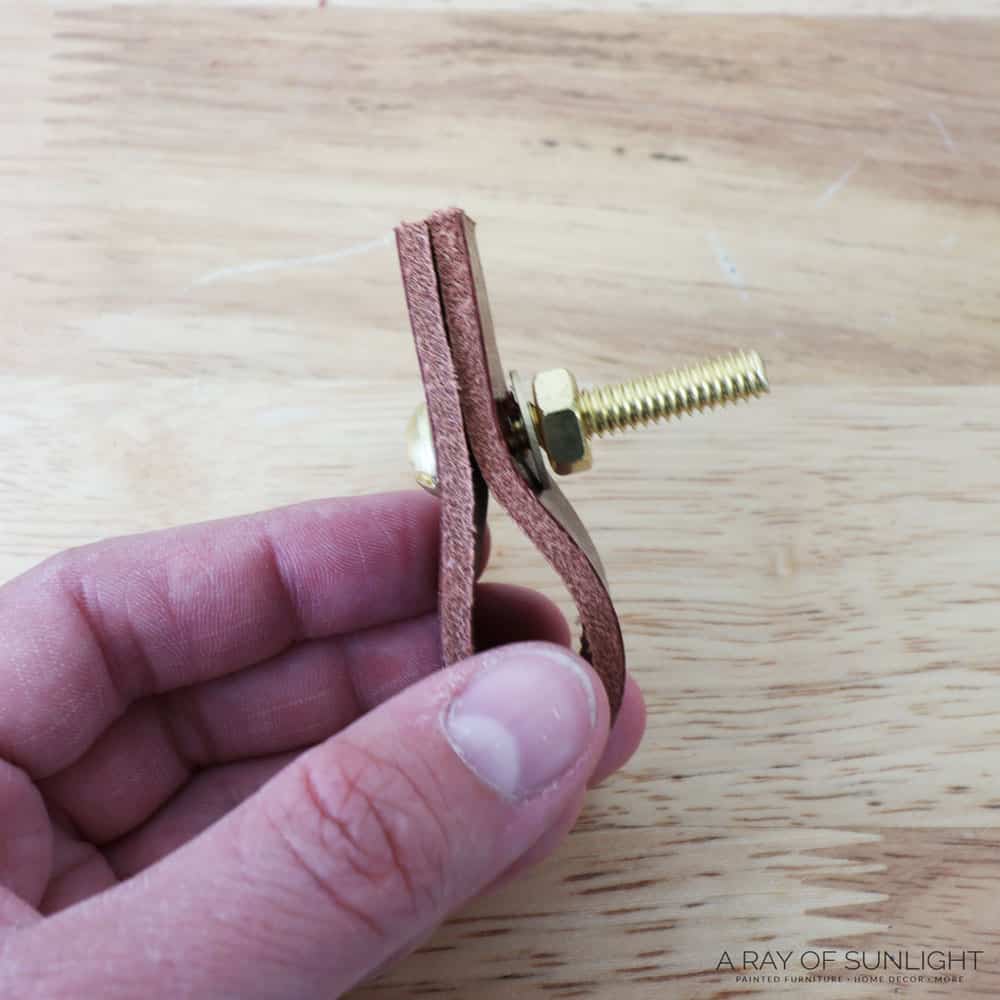
Attach DIY Leather Drawer Pulls
To attach your new pulls to your furniture, place the screw through the hole in the drawer. On the inside of the drawer, place the washer onto the screw, and then tighten the nut on the screw. Repeat for each leather drawer pull and you’re done!
Check out this quick video to see exactly how to make these leather pulls!
More Before and After Makeovers
See All >
Click any of these “before” photos below to view the “after” of that makeover.


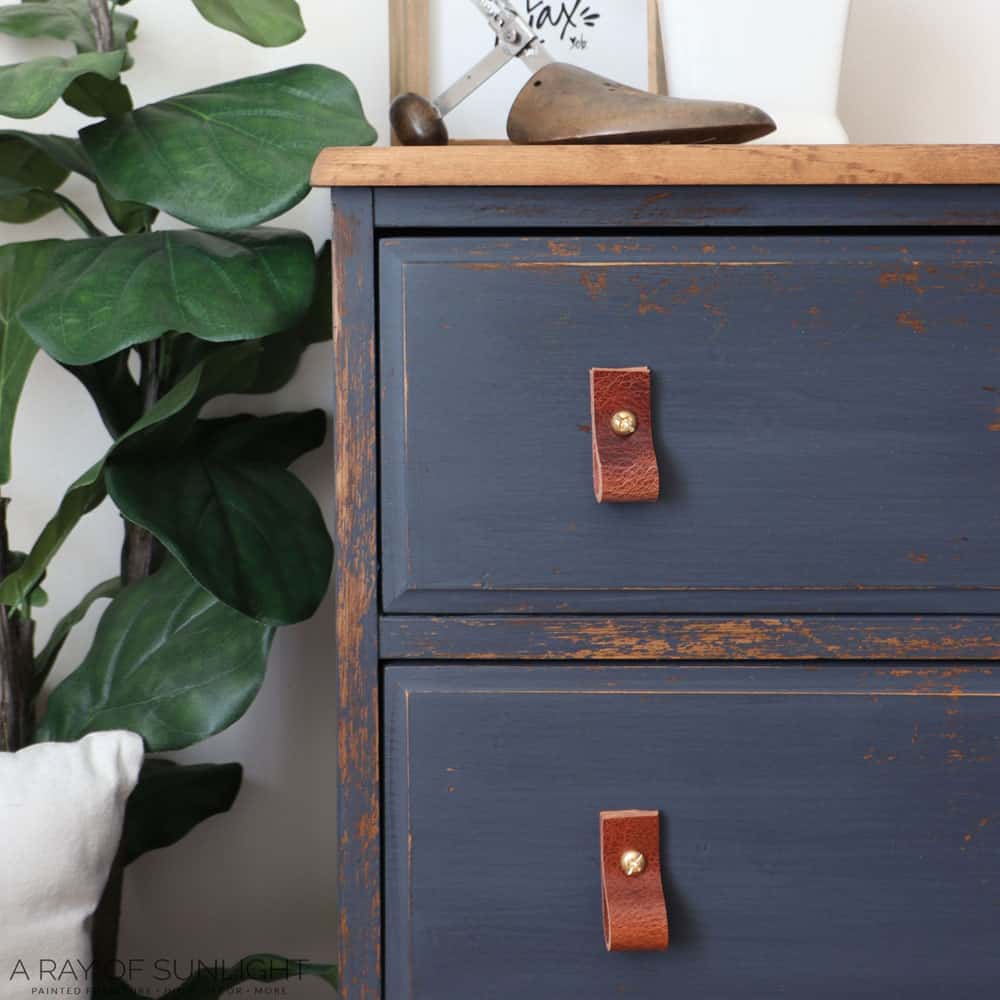
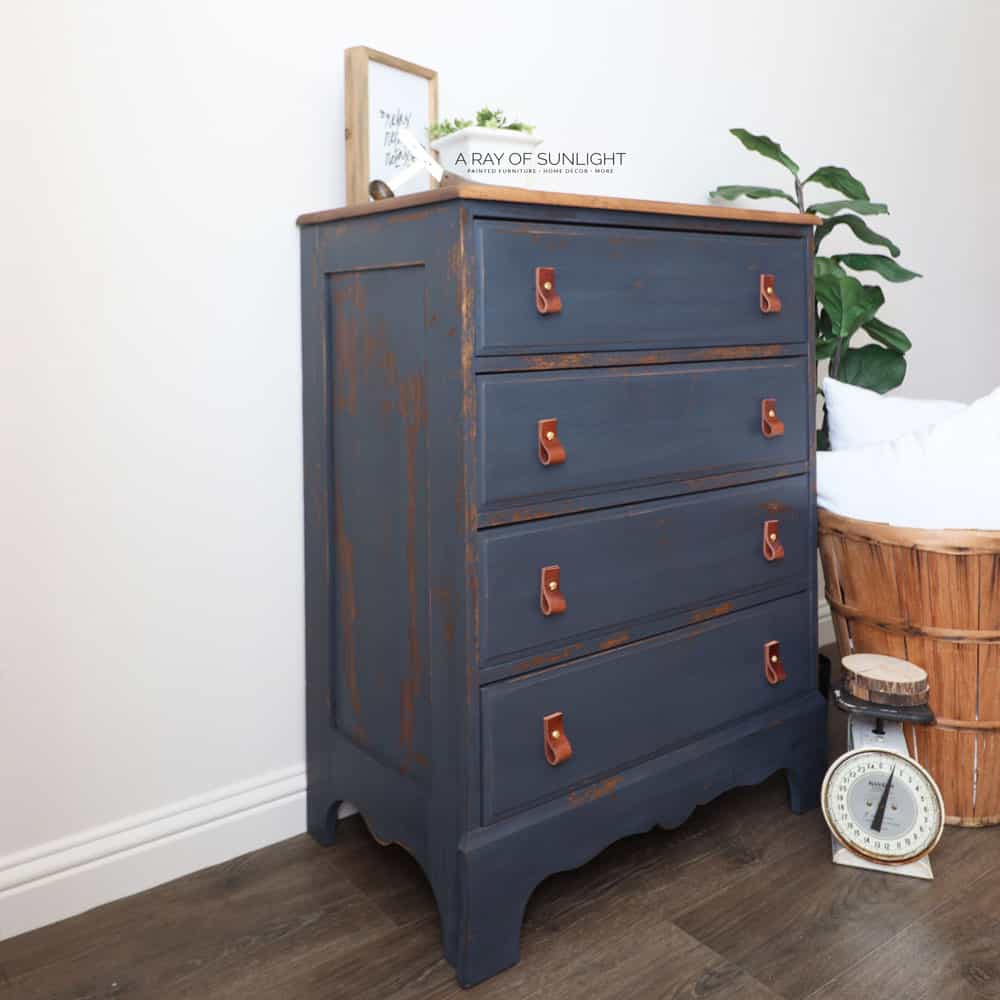
Get all of the details of this navy blue DIY dresser makeover here, which includes these DIY drawer pulls!


How to Make Leather Handles Instead of Pulls
You can make DIY leather handles instead of the drop-down pulls! Instead of folding the leather in half and using only one screw per pull, don’t fold the leather in half. Then use 2 screws on each handle instead of the 1 screw per pull.

How to Measure Leather for Drawer Holes
But, how do you measure correctly for different hole spacing?? I like to measure from the center of one hole to the center of the other hole. Then I add in about 2″ – 2 1/2″ to that measurement. The extra 2″ – 2 1/2″ includes 3/4″ on each side of the screws. And then the extra amount makes the pulls curve out, giving you space for your hand to go in between the drawer front and the pull.
EX: For 3″ center to center hardware holes, I would cut the leather to 5 1/2″ long. (But please double-check that this is the right size for you!!)
For 5″ center to center hardware holes, I would cut the leather to 7 1/8″ – 7 1/2″ long. (Of course, double-check that this is the right size for you!!)
What is the best way to preserve leather?
After going through the process of making your own DIY drawer pulls, you’ll want to make sure you preserve the leather to keep them looking great. The best way to do this is by using a leather conditioner or cream. This will help moisturize the leather and prevent cracking or drying out.
Apply a small amount of the conditioner or cream onto a soft cloth and gently rub it into the leather. Allow it to dry completely before using your pulls again.
Another key step in taking care of leather is to keep it out of direct sunlight and away from heat sources. These can make the leather fade or dry out, which can lead to cracks or discoloration. If you can, try to position your furniture so that the pulls aren’t directly hit by sunlight or heat.
Finally, it’s important to clean and condition your leather regularly to maintain its quality. You can do this every few months or whenever you feel it’s needed, based on how often you use your furniture.
By following these simple steps, you make sure that your leather pulls for drawers will last for a long time and continue to add style and functionality to your furniture.

DIY Leather Pulls
Changing drawer pulls is the easiest way to update and change the look of your furniture! These DIY leather pulls are super easy to make and can fit any weird hole spacing, so you don’t have to fill in the old hardware holes!
Tools
Instructions
- First, cut your leather to the size you want it. You can measure from the center of one hole to the center of the other hole. Then add in about 2″ – 2 1/2″ to that measurement.
- Mark your leather at the length you want to cut it, and then simply saw back and forth with your knife to cut through it.
- Then grab your drill and your drill bit. Measure where you want to make the holes for the screws. You can measure about 3/4″ – 7/8″ in from each edge of the leather. Then drill holes into each end of the leather.
- Attach the pull to the furniture by placing the screw through the hole in the drawer. On the inside of the drawer, place the washer onto the screw, and then tighten the nut on the screw.
Recommended Products
As an Amazon Associate and member of other affiliate programs, I earn from qualifying purchases.

More Furniture Hardware Resources
- How to Change Hardware on a Dresser
- Filling Holes when Replacing Cabinet or Furniture Hardware
- How to Paint Drawer Pulls
- How to Spray Paint Drawer Pulls

Follow us on YouTube to get more tips for painting furniture. Or share your project with us on our Facebook Group and be part of our community. See you there!