Painting a China Cabinet with Wise Owl One Hour Enamel


Are you in the market for a new china cabinet, but don’t want to break the bank? If so, consider painting a china cabinet with Wise Owl One Hour Enamel Paint! This paint dries quickly and comes in a variety of colors, so you’ll be able to enjoy your new china hutch in no time.
Enamel paint is one of the types of paint for furniture you can use to give your furniture a fresh new look. So keep reading to see how to paint with Wise Owl One Hour Enamel in this china cabinet makeover!
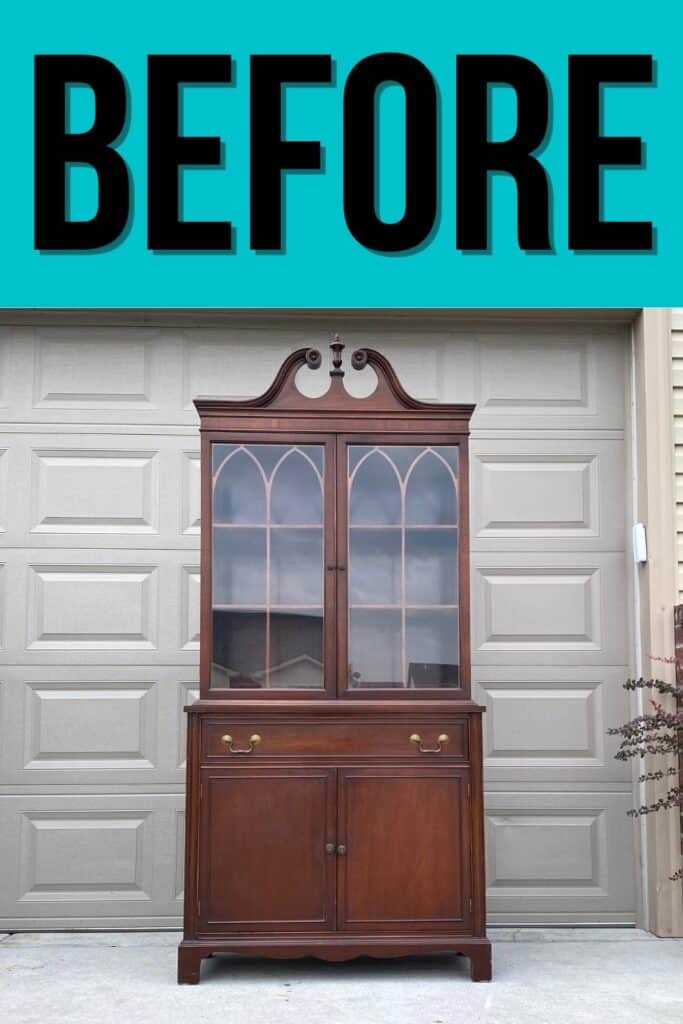
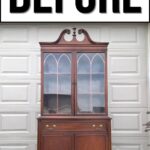
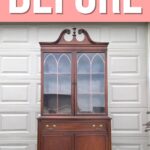
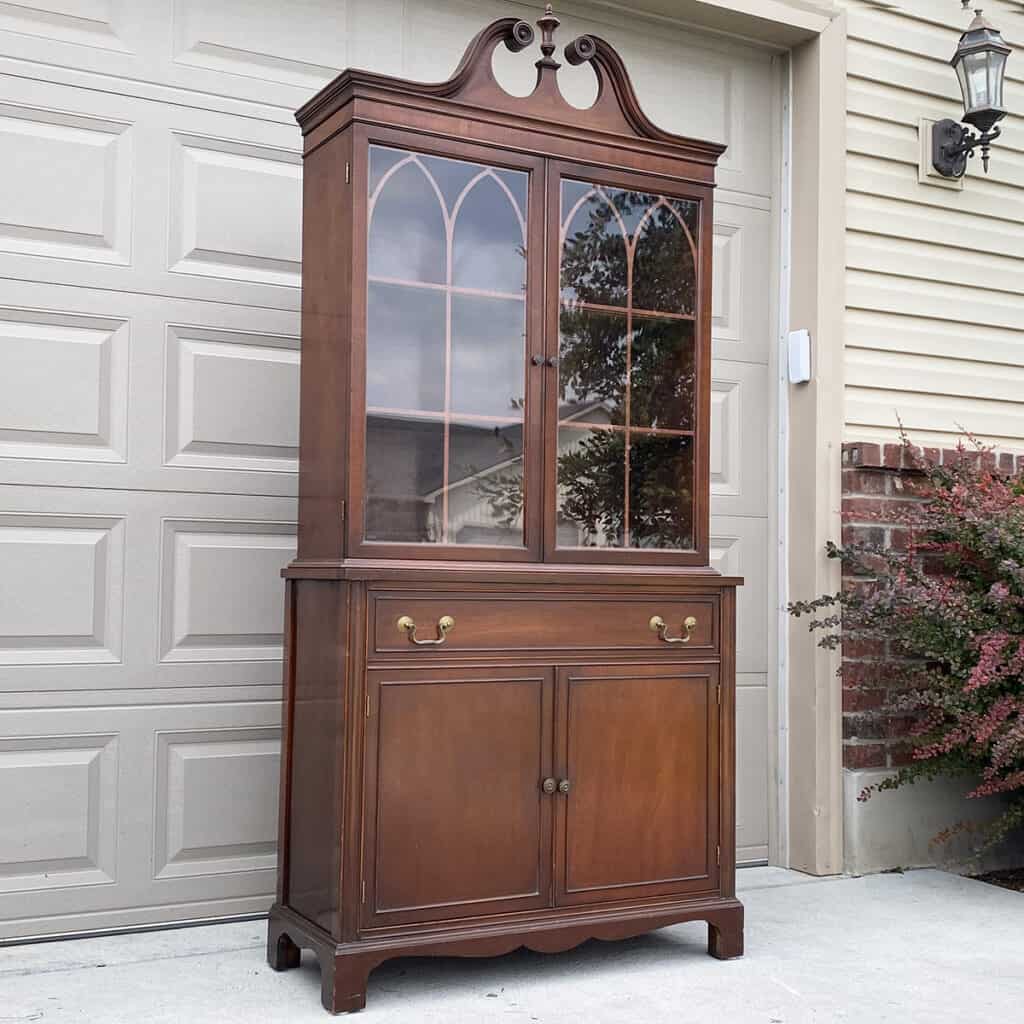
We bought this china cabinet from Facebook Marketplace for $100. It’s in great shape! I don’t know that I love the top, but I’m going to try to change that. If you’re also considering updating your china cabinet, then you’ve come to the right place!

China cabinets are a classic addition that can bring elegance and charm to any dining room or kitchen. But, if you have an older one, it might have scratches, discoloration, or an outdated finish that doesn’t quite fit your home decor anymore.
Painting china cabinet is a budget friendly way to give it a new lease on life and customize it to match your personal style. So let’s get started on this makeover with Wise Owl One Hour Enamel Paint!

Supplies Used For Painting a China Cabinet
As an Amazon Associate, I earn from qualifying purchases. I also may earn from other qualifying purchases with other companies or get free product to review and use. All opinions are my own.
- Electric Screwdriver
- Krud Kutter
- KwikWood
- Plastic Wood Filler
- Scraper
- 220 Grit Sandpaper
- Shop Vac
- Tack Cloth
- Medium+ and Fine Grit Foam Sanding Sponges (Use code RAY10 to get 10% off your order)
- SurfPrep Sander (Use code RAY10 to get 10% off your order)
- Painters Tape
- Pre-Taped Plastic
- Black Aqua Lock Primer
- Wagner FLEXiO 3500 Paint Sprayer
- BIN Shellac Based White Primer
- Paint Filters
- SW Mohair Paint Roller
- Zibra Paint Brush
- Wise Owl One Hour Enamel in Black Cherry
- Sherwin Williams Emerald Urethane Trim Enamel in Pure White
- Country Chic Paint Oval Paint Brush
- Clear Silicone Caulking
- New Hardware
Prep Before Painting Old China Cabinet
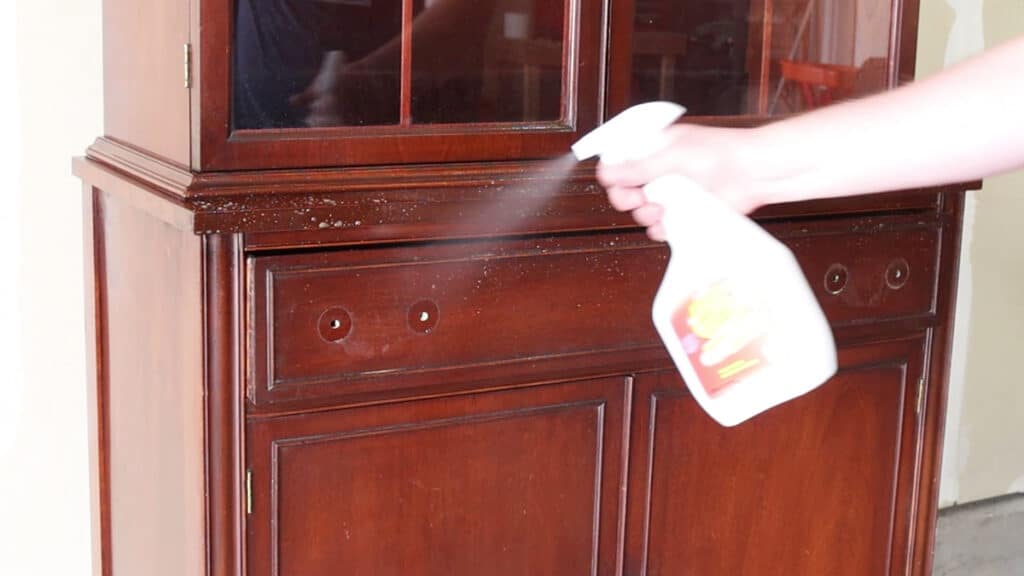
Alright, we got started with this china cabinet makeover by prepping it. My husband removed the hardware for me, and then he used Krud Kutter for our next step of paint prep. This hutch had a lot of grime on it, so he spent quite a bit of time cleaning it all off, and then he rinsed it again to make sure it was clean. Learn more on how to clean furniture before painting here.
I wasn’t sure what hardware I was going to want to use, so he filled in the inside holes on the drawers so I could put knobs on or other pulls without having to worry about the size of the new hardware. Check out this comparison post on the best ways of filling holes when replacing cabinet or furniture hardware.
And while he was filling the holes, he also filled in all of the scratches with plastic wood filler. This is my first time really trying this stuff. I love how it is pink but dries into the regular wood filler color. I honestly don’t know that it works any better than regular wood filler though… You can read through this post to learn more about the best wood fillers for furniture.

Get all the details you need on how to prepare furniture for painting here!
How to Remove Fretwork from China Cabinet
Then, he took a break to watch the kids, and I went to work removing the fretwork from the china cabinet’s doors. My husband didn’t want to mess with this part because he was worried he would mess it up and I can’t blame him. Haha
The fretwork sits between the glass and the door panels, so you basically have to remove the glass to get to it.
How to Remove Cabinet Glass Doors
Thankfully, it isn’t very hard to remove the glass doors from a china cabinet. The glass is usually held on with some pieces of wood that are nailed in, or a rubber gasket that you can pop out. This one has the pieces of wood, so I just pried the pieces of wood off with a scraper. They came off easily and I just worked on one at a time.
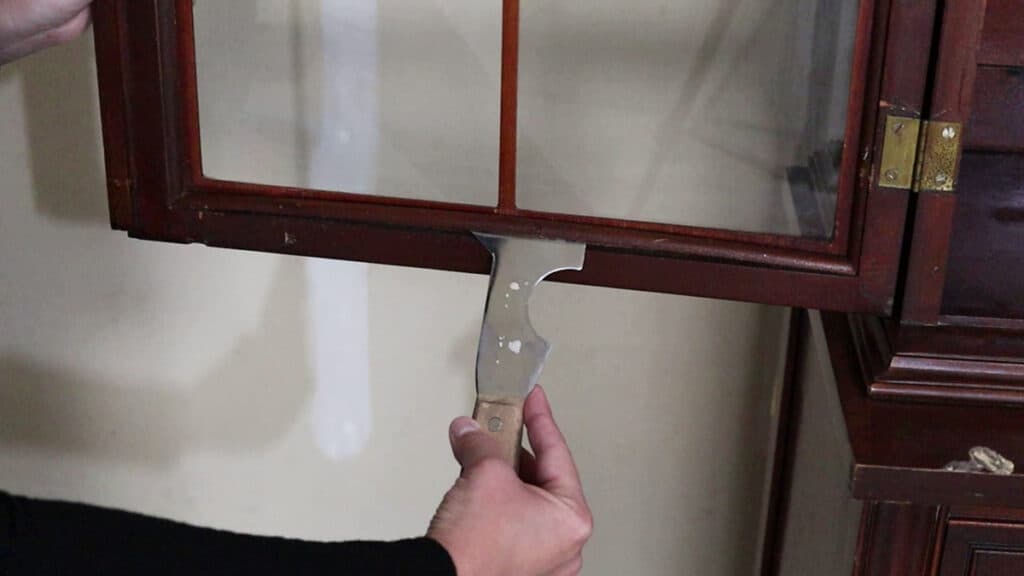
I left the top piece of wood in to kind of hold it all to the cabinet, and then I let it slide out gently, hoping that I wouldn’t break the glass.
The fretwork came out with the glass, and I set them flat on some moving blankets so they wouldn’t scratch or break. It’s a little nerve wracking to make sure the glass doesn’t break, but other than that it’s a super easy process.
With that out of the way, I tried to remove the top. Looking at it from the top it looked like it was just nailed on… But when I tried to pry it off, it wasn’t budging. So I think there was some glue holding it together too.. Or something! Soooooo I guess it’s staying on. Haha
Sanding and Preventing Overspray Before Painting
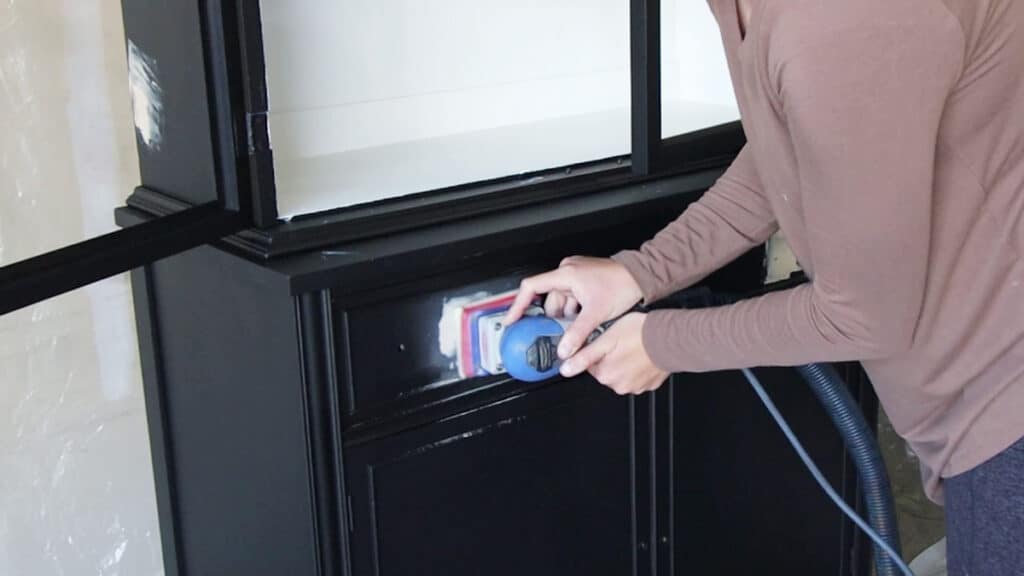
Then I sanded the KwikWood down and scuff sanded the whole cabinet to help the paint stick to it better. Learn more about sanding before painting furniture here.
Also… I love my SurfPrep sander! It makes this scuff sanding step so much easier! But here are the best sanders for furniture if you’re looking for a new sander. And then I cleaned up all the dust with my vacuum and tack cloth.
I personally didn’t want to remove the doors on this cabinet because putting doors back on can be a pain… so I opted to tape off the hinges with painters tape. And then I didn’t want paint to get into the bottom cabinet, so I taped that off with some more painters tape and pre-taped plastic.
I hate taping off cabinets like this… but I was pretty sure I wasn’t going to have enough paint for in here. Learn more about how to prevent overspray when painting furniture here so you don’t waste any paint on unwanted surfaces.
Priming Outside of Cabinet with Black Aqua Lock Primer
Alright, I’m going to go with a darker color for this china hutch, and it says to not use a shellac based primer because it will make it dry too fast.. so I used this Aqua Lock primer in black.
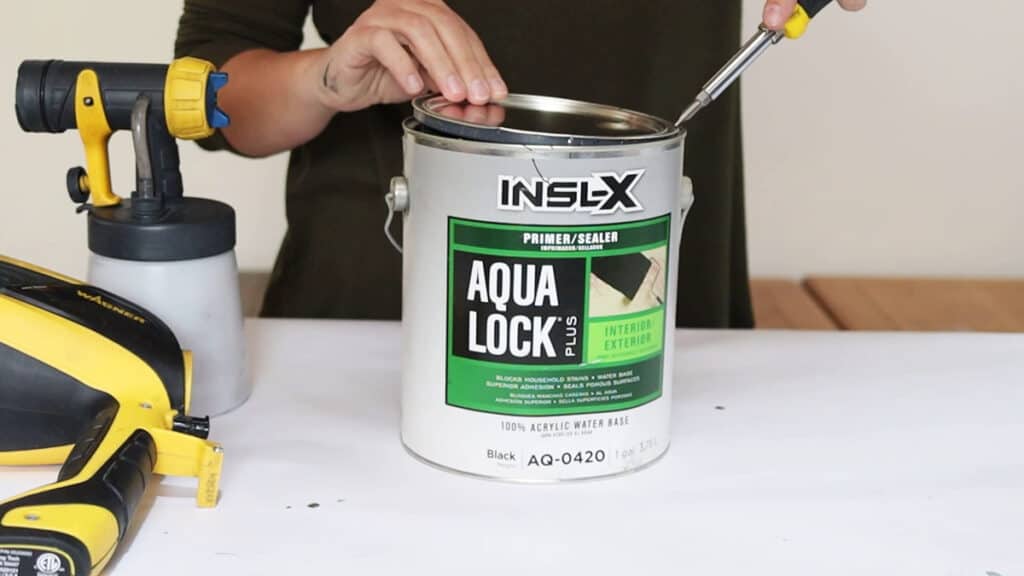
It’s waterbased, and it’s black. And it is an excellent bonding primer. Here’s my list of the best water based primers and best primers for painting furniture for other furniture primer options!
It doesn’t block bleedthrough stains, but I’m hoping we don’t get any stains coming through since the color will be darker. It’s risky business though.
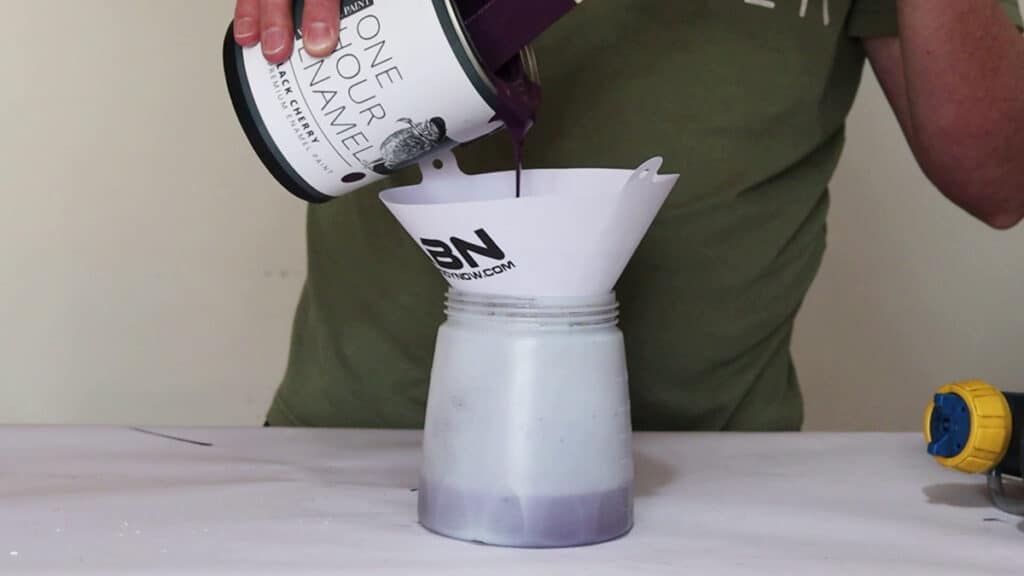
So I stirred it up real good, and then I poured it into the paint sprayer and through a filter to make sure dried paint or random debris wouldn’t get into the paint sprayer.
Even though the primer says to not thin it… I did. With maybe 10% water. It’s pretty thick primer and I don’t want to have a lot of texture when I spray it. It sprayed beautifully!! Man I love this primer. I kind of wish it came in a satin sheen because it would be a beautiful paint. Haha
I sprayed it all over the cabinet with my Wagner sprayer, but I tried not to spray inside the top cabinet because I had other plans for that…
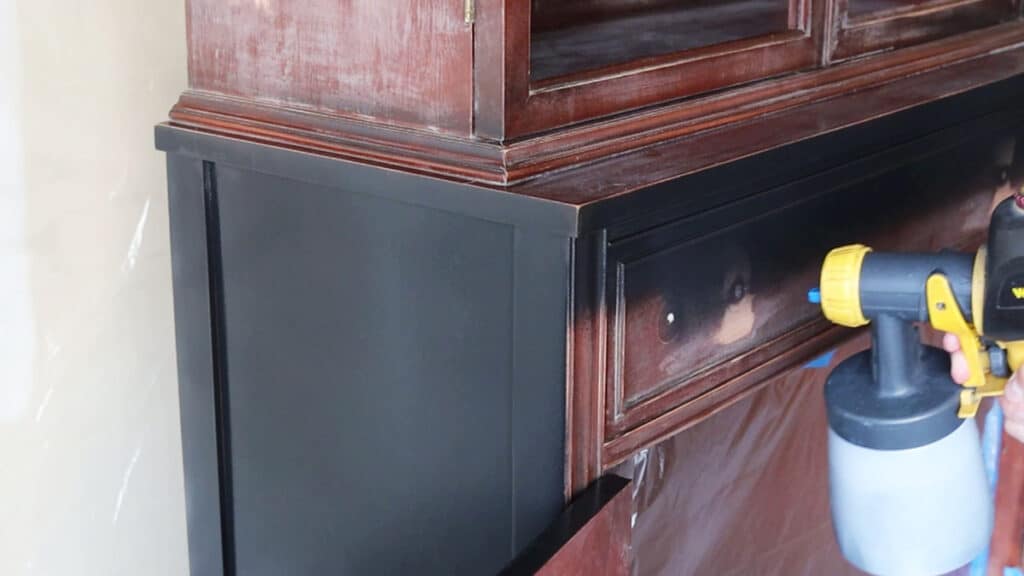
And then I let the primer dry for 45 minutes. When the primer was dry, I could clearly see where I had sanded the KwikWood down on the drawer because I sanded it down to bare wood… So I put some more wood filler on those areas.
Priming Inside of Cabinet with BIN Shellac
And then I grabbed some BIN shellac based primer. This can of primer is really old so there’s a lot of dried primer in it. It’s bad! So, I filtered it before I used it… and look at how many clumps were in it!
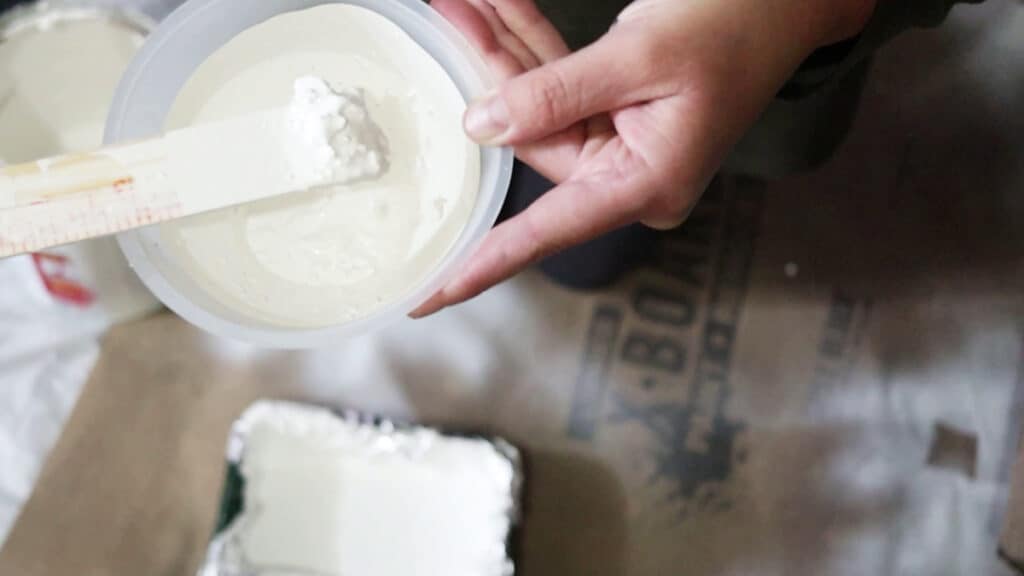
This is exactly why I filter our paint before I spray it. No matter what. You never know what kind of clumps are in the paint, and any small little thing can clog a paint sprayer.
Anyway… After I filtered it… which was not a fun process by the way, I brushed and rolled the BIN shellac primer in the cabinet. Check this post for the best rollers for painting furniture you can use.
BIN shellac based primer has excellent bonding properties, it helps with coverage, especially when painting a light colored paint like white, and it blocks bleedthrough stains from ruining your paint job. Especially with light colored paint. Read more about bleedthrough and how to stop stains from coming through paint in this post.
It also dries quickly and sands easily after about an hour. I painted 2 coats of primer and let it dry overnight. The next day I sanded the wood filler and the rest of the hutch to make sure everything felt nice and smooth.
The black Aqua Lock primer didn’t really need sanding because it was smooth already, but the BIN shellac primer definitely needed sanding to make it feel smooth. Then I cleaned up the dust and touched up where I had gotten the white primer on the black primer. And then I taped the upper cabinet off so I wouldn’t get paint inside of it.
Would you like to save this?
how to paint a china cabinet with Wise Owl One Hour Enamel
While I was doing that, my husband put the paint in the paint sprayer. For this project, we picked out the Wise Owl One Hour Enamel in the color Black Cherry (this color has since been discontinued).
I have heard a lot about the One Hour Enamel, and even though I used it once a long time ago, I wanted to try it again. Here’s my Wise Owl One Hour Enamel review to read my experience with this paint and learn more about its pros and cons.
You can also check out our best enamel paint for furniture post, where we feature Owl One Hour Enamel and other enamel paints to help you decide which enamel paint to use for your project.
And what better way to paint a china hutch, than going bold with a color I’ve never used ever before. Haha They say it doesn’t need to be thinned, even when spraying, so we didn’t thin it. (But we should have.) Read more about how to thin paint for a Wagner sprayer here.
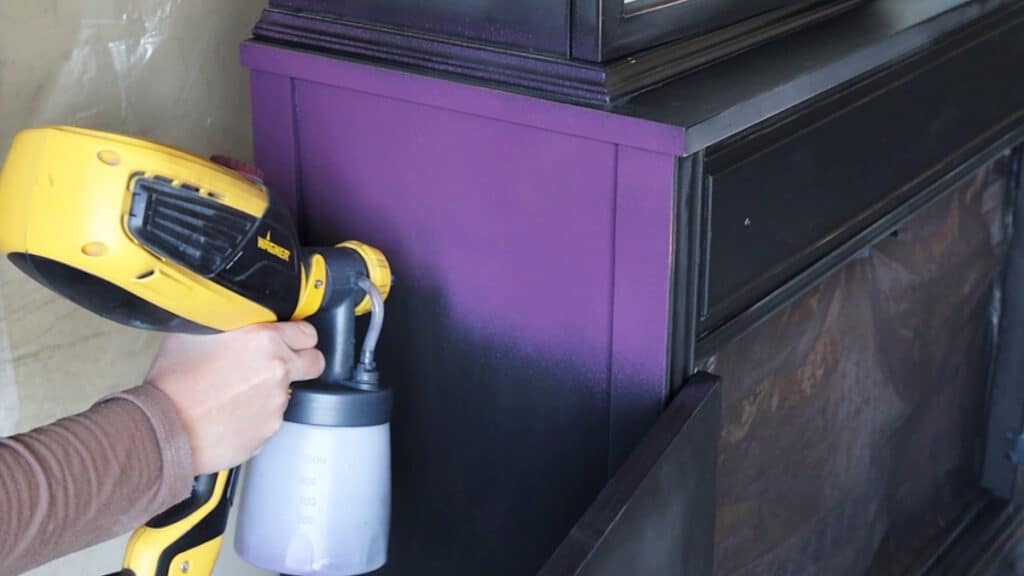
Spraying Enamel Paint with Wagner FLEXiO Sprayer
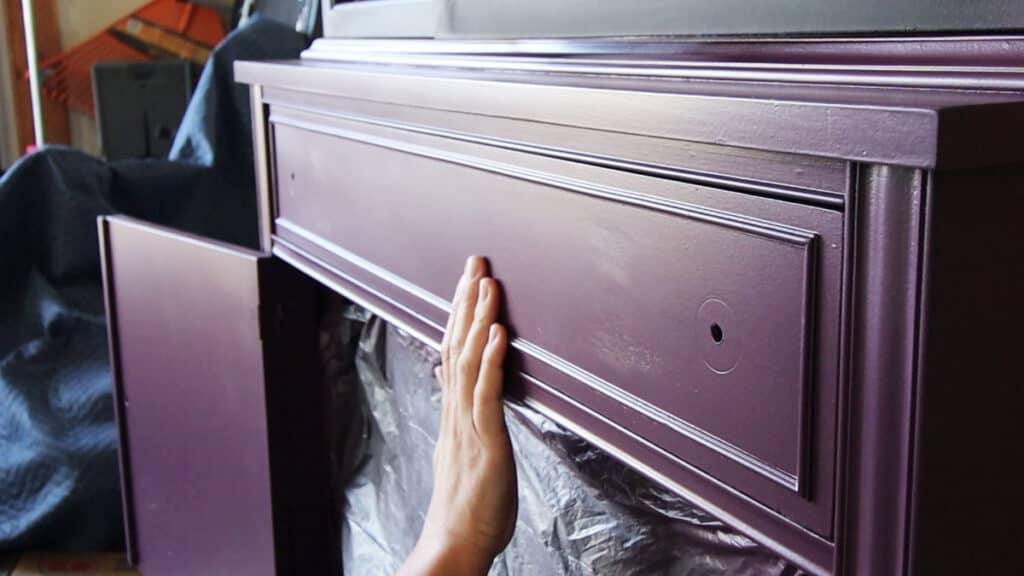
And then I tested the spray on a piece of cardboard and felt good about it… Until I started to spray it on the cabinet… and then I started to wonder what I was thinking.
First… the color was lighter than I thought it would be. And it scared the heck out of me.
And then I was nervous about how it was doing to dry… if the paint was going to dry with a lot of texture in it. So I stopped for a minute and thought about it for a few minutes.
It dried pretty fast so I was able to see that there was a good amount of texture which made me nervous.. but maybe I just didn’t spray it thick enough so it dried faster and wasn’t able to level out like it should have.
Sooo I decided to keep going but spray it thicker. The paint itself is thicker than I’m used to, so I had the fluid setting all of the way open, and the power was at 2-3… It was a slow process, but I eventually got the first coat on.
A couple of hours later I went back to check it out… and it wasn’t terrible, but it wasn’t as good as I wanted it. There was still a lot of texture, and there were a lot of tiny bubbles, so it felt pretty rough. And I could still see the wood grain on the drawer.
So I filled that in again, and proceeded to sand everything with 220 grit sandpaper to smooth out the texture. I didn’t use my electric sander because I didn’t want to sand too much off. I just wanted to smooth out the bumps. The sandpaper did get a little clogged up too, but not terribly.
And while I did that, my husband thinned the paint out by 10%. And then I sprayed the next coat of paint. It went on SOOO much better!!
But once it was dry I could see and feel air bubbles still… but there wasn’t as much texture. So I sanded it again, and I thinned it just a tiny bit more so I wouldn’t run out of paint, and I sprayed a 3rd coat. That was the ticket. It’s not perfect, but thinning the paint made it look and feel so much better!
Learn more about how to thin paint for Wagner FLEXiO sprayer here, and check out this post to learn about painting furniture with a sprayer.
It dried for a day and then I removed the tape, and taped off the bottom of the hutch so I could paint the inside of the cabinet without getting drips on the purple paint. Check out these posts to learn how to prevent paint bleed through painter’s tape and out what is the best painters tape that doesn’t bleed.
And then I just brushed and rolled 3 coats of Sherwin Williams Emerald Urethane Trim Enamel on it. Check out my honest Sherwin Williams Emerald Urethane Trim Enamel review here. Read through this post to learn more about painting furniture with enamel paint.
Also, learn more about the best paint brushes for painting furniture here.
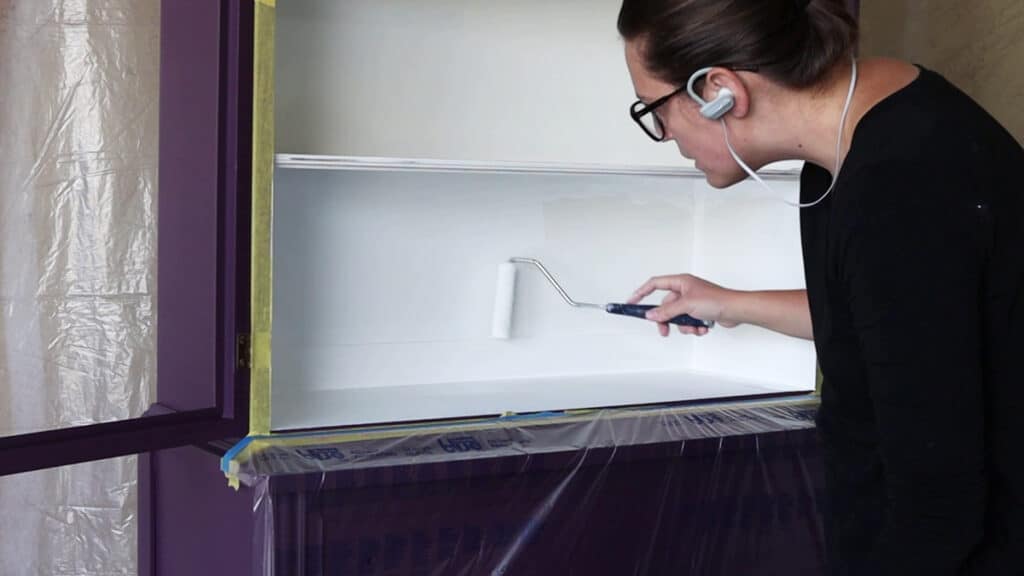
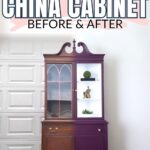
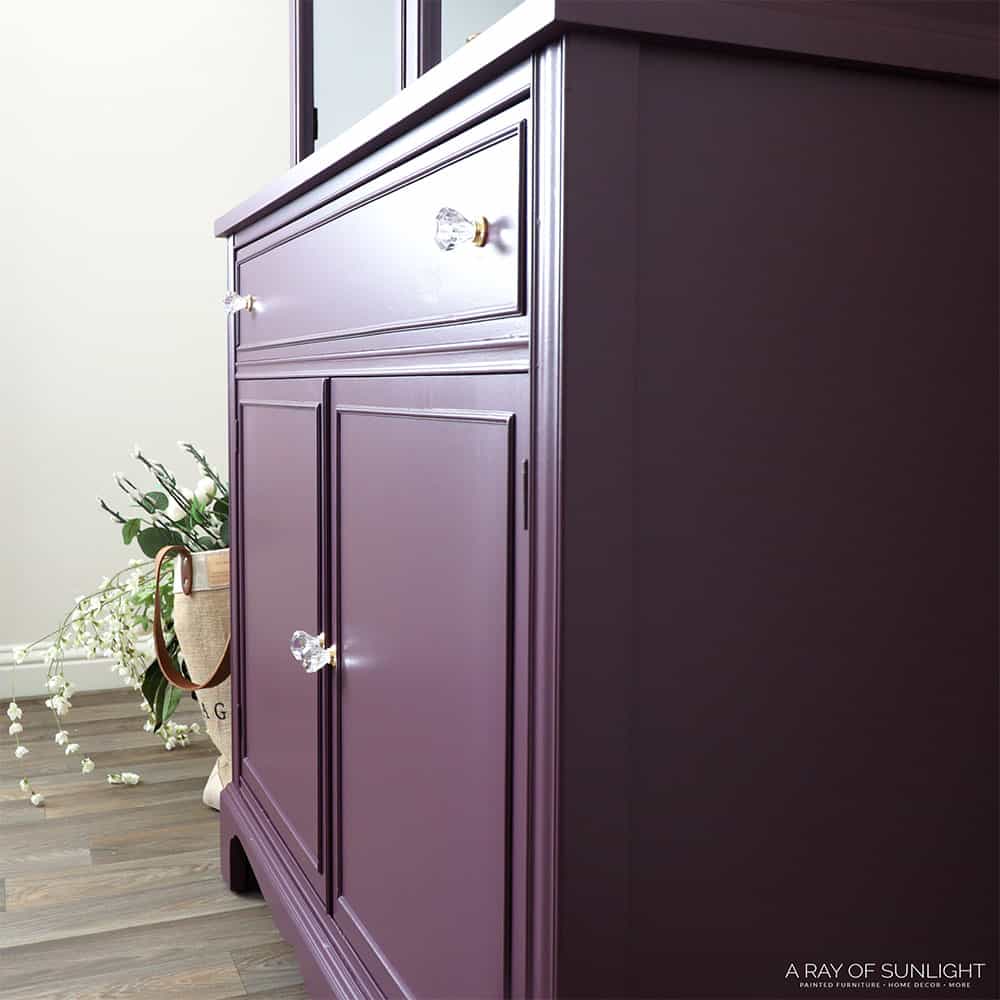
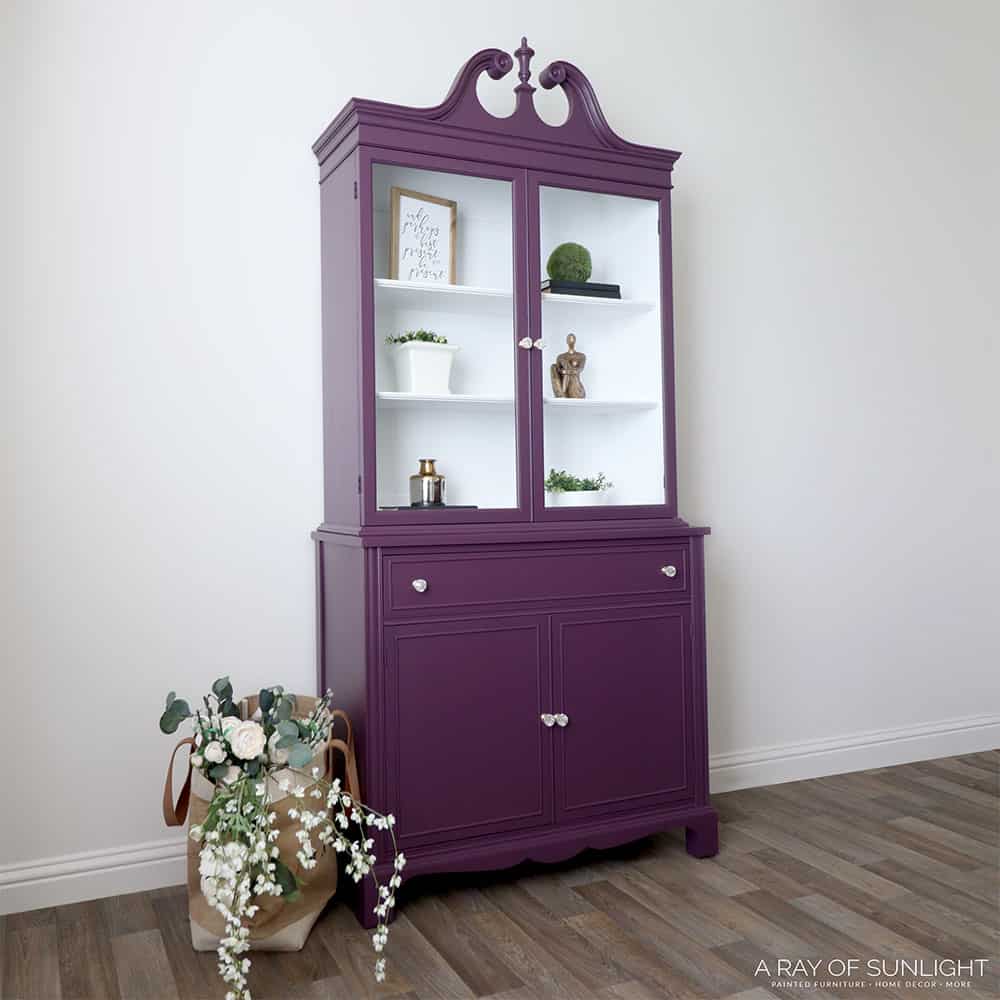
Ohhhh I love the look of the white interior!! Learn more about painting furniture white with Sherwin Williams Emerald Trim Enamel here. Then I removed the tape and put on new hardware…
Watch the full makeover on YouTube below:
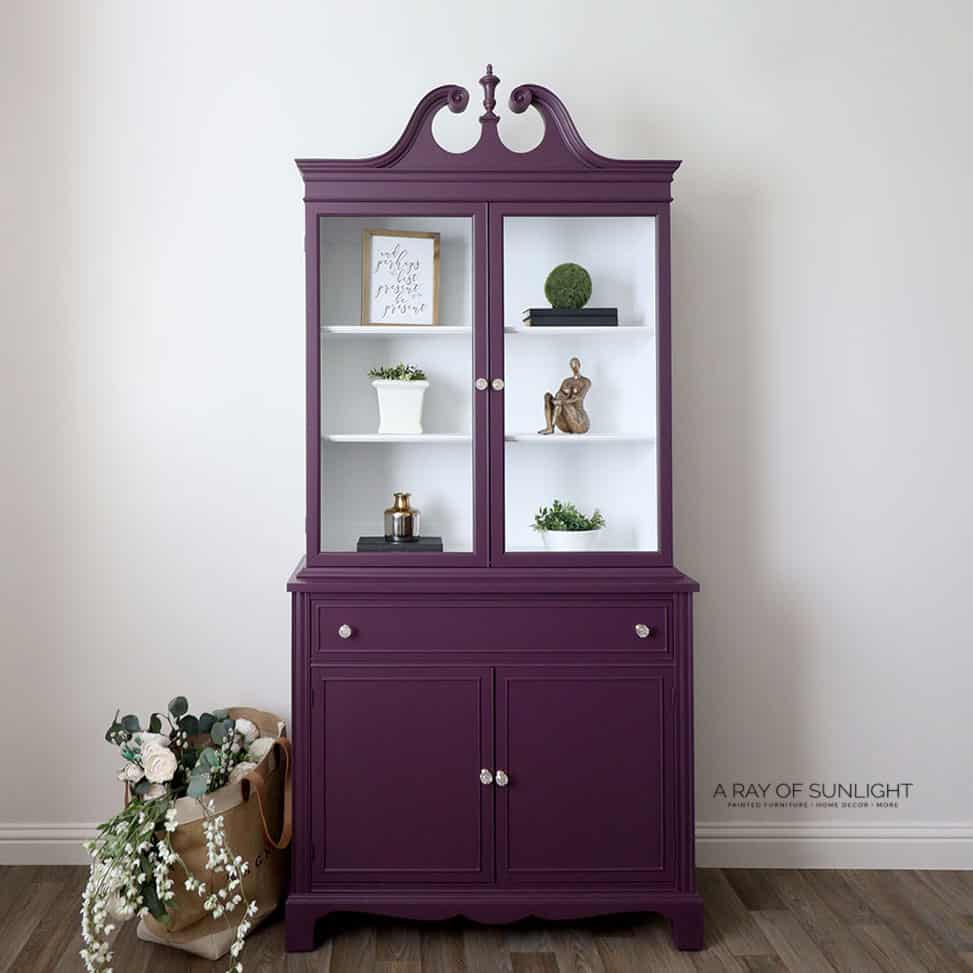
And here’s what it looks like now! It’s a night and day difference huh?? It’s bold and purple! Haha I’ve never painted anything purple before, let alone a large china cabinet! Haha But I like it. It’s definitely a statement piece!
More Before and After Makeovers
See All >
Click any of these “before” photos below to view the “after” of that makeover.


We do have a list of purple painted furniture and purple dresser ideas here for inspiration. You can also check out some pink dresser ideas here for a different bold color option.
You can also update your piece with these painted hutch ideas and chalk painted hutch ideas. For a more natural look, try these hutch refinishing ideas! If your piece needs some height, here’s how to add legs to a cabinet.
And get more ideas for your next DIY project with these painted bookshelf ideas.
As for the paint, I’m not sure that I’ll use it again. I can get a better looking and feeling finish with other paint (like spraying Heirloom Traditions Paint in this painting furniture black makeover) and less hassle.
How to Put Glass Back in Cabinet
Oh, and one more thing, I didn’t put the glass back in until after I took photos of it, so I didn’t have the glare in the glass to deal with. But I learned a trick for putting glass back in… I just put some clear silicone caulking around the edges to hold it in place instead of putting all of the wood pieces back in.
Tips for Using Enamel Paint on Furniture
If you’ve decided to use enamel paint, you should start by choosing one of these best enamel paint for furniture options. You can read more on these enamel paint brands in the post and see which one suits your needs best.
Once you have the right paint, make sure to properly prep your furniture before painting like we did above. This includes cleaning, sanding, and filling in any imperfections. Enamel paint is durable, but it won’t adhere well to a dirty or damaged surface. Also, don’t forget to prime your piece before painting with enamel for best results.


Depending on the enamel paint, you may need to thin it out before spraying. This allows for a smoother finish and easier application. As mentioned in the post, thinning the paint made a huge difference in the overall look and feel of the painted china cabinet.
Lastly, remember to apply thin coats and allow for proper drying time in between. This will prevent drips and brush marks, especially if you’re using a brush or roller instead of a sprayer. And if you do encounter any air bubbles or texture, do as we did and sand and thin out the paint for a better finish.
What do you think of the new look? Would you ever paint your furniture purple?? Let me know in the comments!


How to Paint a China Cabinet with Enamel Paint
Give your old china hutch a new makeover without breaking the bank. Here are the steps for painting a china cabinet.
Materials
- Krud Kutter
- KwikWood
- Plastic Wood Filler
- 220 Grit Sandpaper
- Medium+ and Fine Grit Foam Sanding Sponges
- Painters Tape
- Pre-Taped Plastic
- Black Aqua Lock Primer
- Bin Shellac Based White Primer
- Paint Filters
- Wise Owl One Hour Enamel in Black Cherry
- Sherwin Williams Emerald Urethane Trim Enamel in Pure White
- Clear Silicone Caulking
- New Hardware
- Tack Cloth
Tools
Instructions
- Prepare the china cabinet for paint by removing old hardware and cleaning it with Krud Kutter. Fill in hardware holes and scratches with wood filler.
- Now, remove the fretwork and glass doors of the china cabinet. Pry off the wood pieces holding the glass using a scraper. Let it slide out gently, and be careful not to break the glass. The fretwork will come out with the glass.
- Sand the cabinet to help paint stick better. Clean all the dust that came from the sanding with the vacuum and tack cloth. Tape off areas of the cabinet to prevent overspraying paint.
- Prime the outside of the cabinet with black bonding primer. Let this primer dry for 45 minutes. Then prime the inside of the cabinet with 2 coats of BIN shellac-based primer. Leave to dry overnight.
- The next day, sand the cabinet to make sure everything feels nice and smooth. Clean all the dust from sanding.
- Apply 3 coats of purple paint all over the cabinet and 3 coats of white enamel paint in the interiors of the cabinet.
- Remove the tapes and attach new hardware. Put back the glass doors with some clear silicone caulking around the edges to hold them in place.
Recommended Products
As an Amazon Associate and member of other affiliate programs, I earn from qualifying purchases.


More China Cabinet Makeovers
- Antique China Hutch Makeover
- Black Painted China Cabinet
- Painted Hutch Makeover
- Repurposed China Cabinet Ideas
- Corner Cabinet Makeover
Learn the Art of Updating Furniture!
If painting furniture feels overwhelming or your past attempts didn’t go as planned, this course will guide you step by step.

Follow us on YouTube to get more tips for painting furniture. Or share your project with us on our Facebook Group and be part of our community. See you there!
It’s beautiful! I love the color. But more than that, the inside painted white gives it a zing I don’t think would have happened otherwise! Very beautiful❣️
Yay! Happy you like the color! The white interior definitely gave it a nice touch didn’t it? Thanks so much. I’m SO glad you love this china cabinet makeover!!