Painting Furniture with a Sprayer
Looking for a way to paint faster or get a brush free look on your next project? Painting furniture with a sprayer is exactly how I do that. A sprayer is a wonderful tool that can help you create a professional looking finish in less time.
It’s one of the painting techniques for furniture that can give you a smooth and even coat of color without any brush marks. So, keep reading if you want to save time and effort while getting flawless results!
But before you pick up a sprayer, there are a few things you need to know in order to get the best results. It is one of my favorite tools because it creates a clean, smooth finish, and it’s faster than a good ol’ paintbrush or a roller.
However, using a paint sprayer on furniture might seem complicated at first. And, of course, there are several kinds on the market so choosing one can get overwhelming. Well, not anymore.
In this blog post, we’ll walk you through everything you need to know about painting furniture with a sprayer and share some great options to check out if you’re ready to invest in them and level up your DIY game.
Supplies Used for Painting Furniture With a Sprayer
As an Amazon Associate, I earn from qualifying purchases. I also may earn from other qualifying purchases with other companies or get free product to review and use. All opinions are my own.
- Paint Sprayer
- Paint – More about this later in this post!
- Topcoat – if needed
- Paint Stick
- Paint Filters
- Thinning Agent – Water/Mineral Spirits
- Cardboard to test on
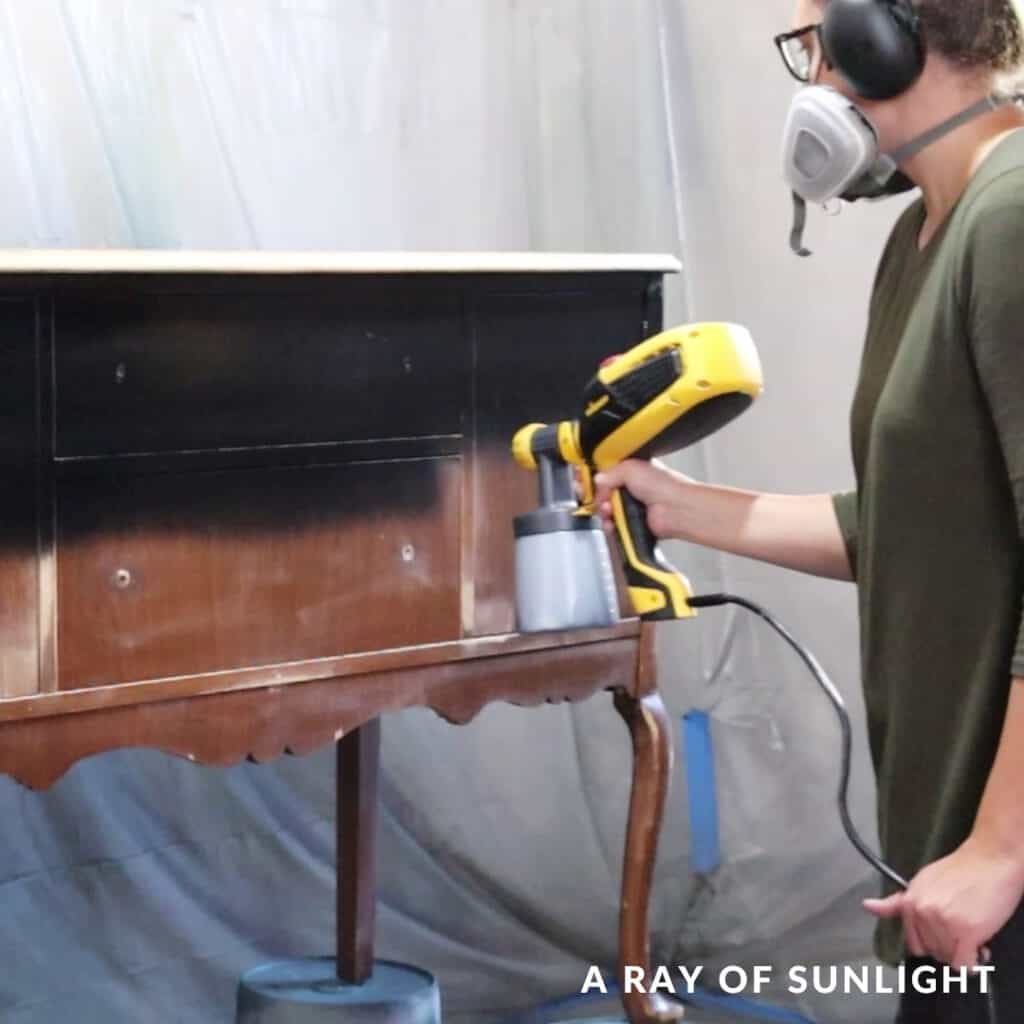
- Mask/Respirator
- Painter’s Tape
- Plastic
Check out my list of 10 must haves painting furniture supplies here. I also have a great list of spray paint tools in this post.
Prepare the Furniture
First, prep by removing the hardware, cleaning, and lightly sanding your piece. If you’re not sure how, here’s how to clean furniture before painting. You can learn the importance of sanding before painting furniture in this post. We also have a more detailed guide on how to prepare furniture for painting here.
Test Out the Sprayer with Water
When I got my first sprayer, I was excited to use it, but I wasn’t sure how to work it, and I was nervous that I would make a mess. But I had heard that it’s best to test it out with some water first, so you can get a feel for how it works. So I did. It’s a great way to get familiar with your tool.
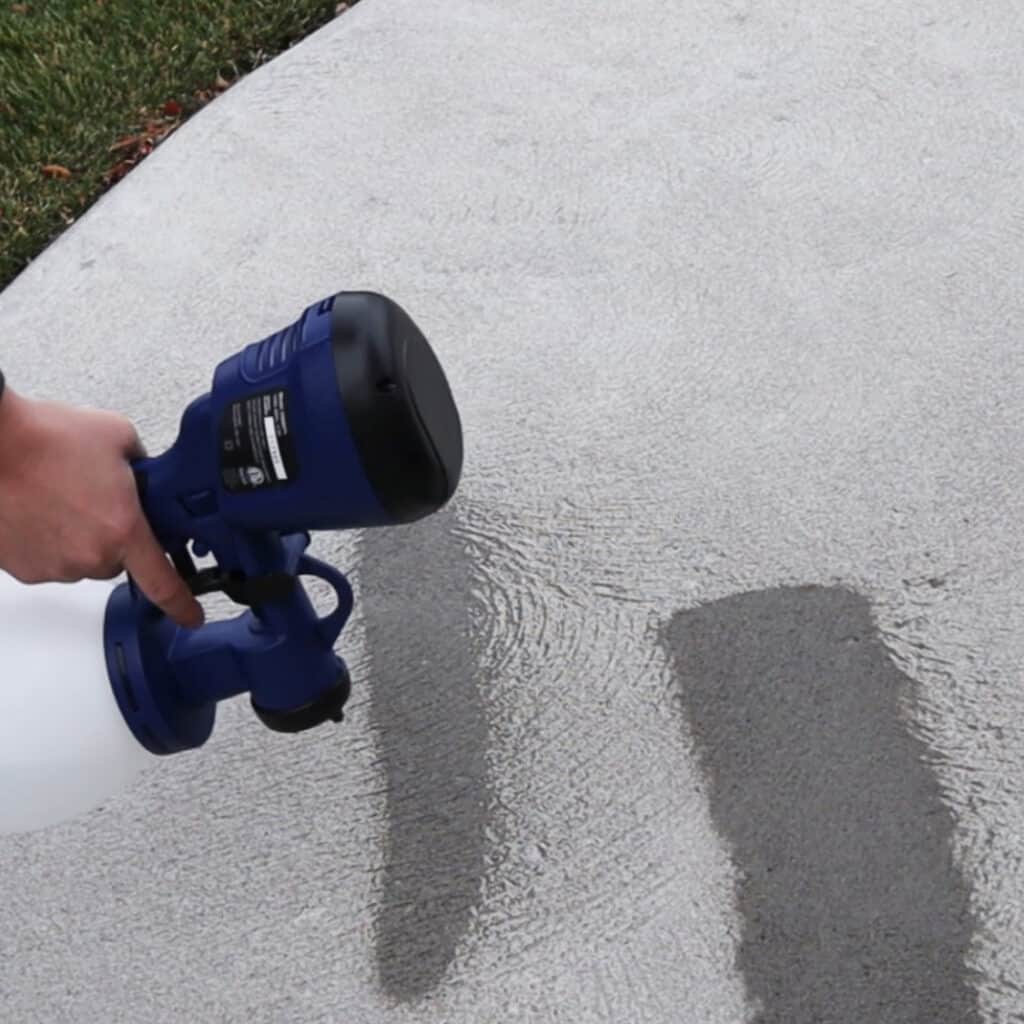
Plus, you don’t waste paint, and you don’t have to clean up a mess if it isn’t for you.
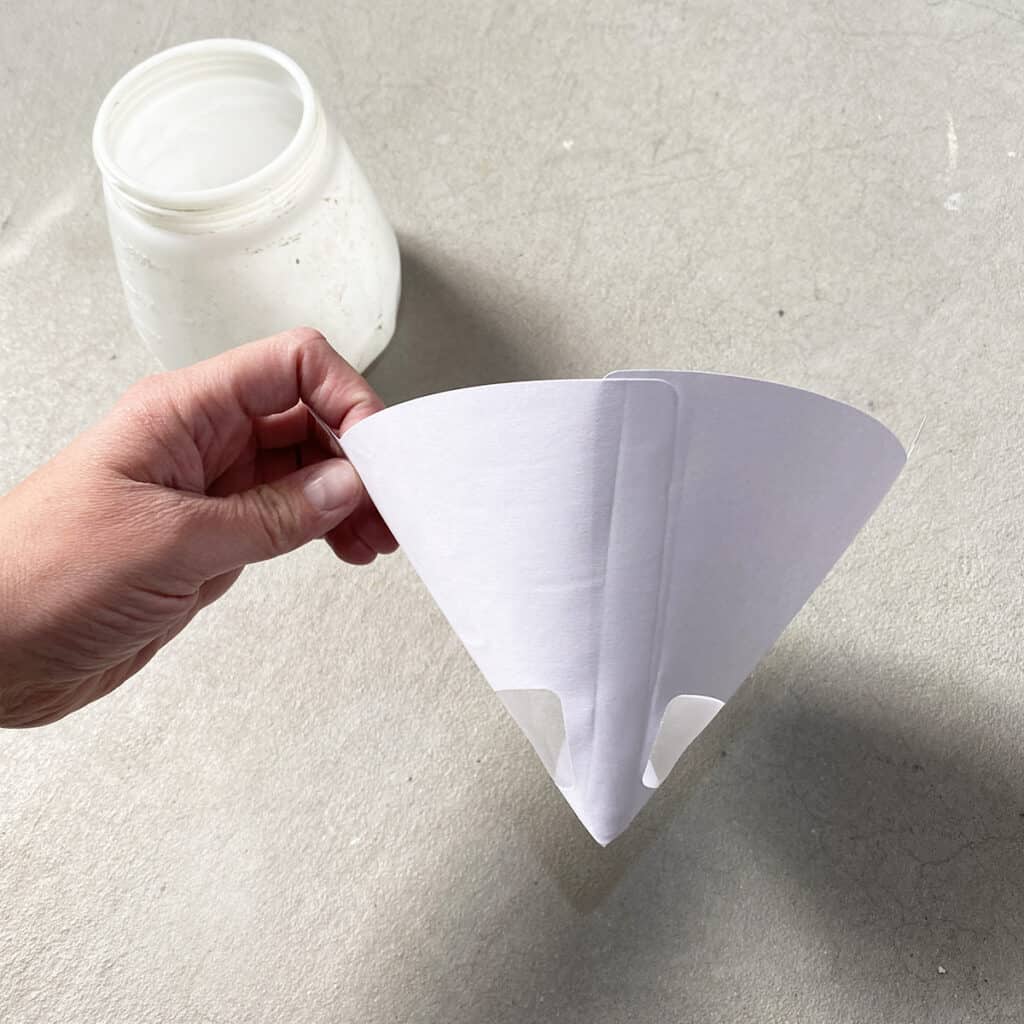
Filter Paint Before Spraying
Then, pour the paint into the container through a mesh filter. These mesh filters that I use are funnel shaped, so they fit perfectly. We run it through the filter first to remove any debris or particles, like dried paint, that can clog your HVLP gun.
Do you have to thin paint for a sprayer?
You don’t always have to, but it will make the paint level out better and create a more professional looking finish. Here’s a great video for the best paint sprayer for furniture, comparing when you do thinning vs when you don’t.
Most, but not all, HVLP sprayers require you to do this. If you do, make sure to use the right thinning agent. Otherwise, you’ll ruin that paint.
What to thin paint with for a spray gun?
Mix water in waterbased paints, like we did with our chalk painted nightstand makeover in this post on how to use the FLEXiO 3000. You can also use Floetrol. If oil based, use mineral spirits. If you’re not sure what to use, check the back of your paint container.
If it says to clean up with soap and water, you can usually thin with water. If it says to clean with mineral spirits, you can usually thin with mineral spirits.

How to thin paint for a paint sprayer
Thoroughly mix the thinner with the filtered paint in the sprayer container using a stick. For waterbased, I like adding water while it’s still filtering through the filter. This makes it easier for it to go through the mesh.
I thin the paint between 10% to 15%. And then I test it. I add more water if it has a lot of big bumps or texture when I apply it. If it seems really thin, I add more paint to thicken it back up. If not, it might not cure well, and it is more prone to dripping while drying.
Check out this guide on how to thin paint for a sprayer, and here’s how to thin paint for Wagner FLEXiO sprayer if you have this model.
How to Work a Paint Sprayer
Then, assemble the sprayer parts as shown in the owner’s manual. Adjust the settings and test it on a piece of cardboard or paper.
The material flow adjustment is the setting that usually needs the most adjustment. If too much paint comes out, lower the material flow. If not very much comes out, turn the material flow up.
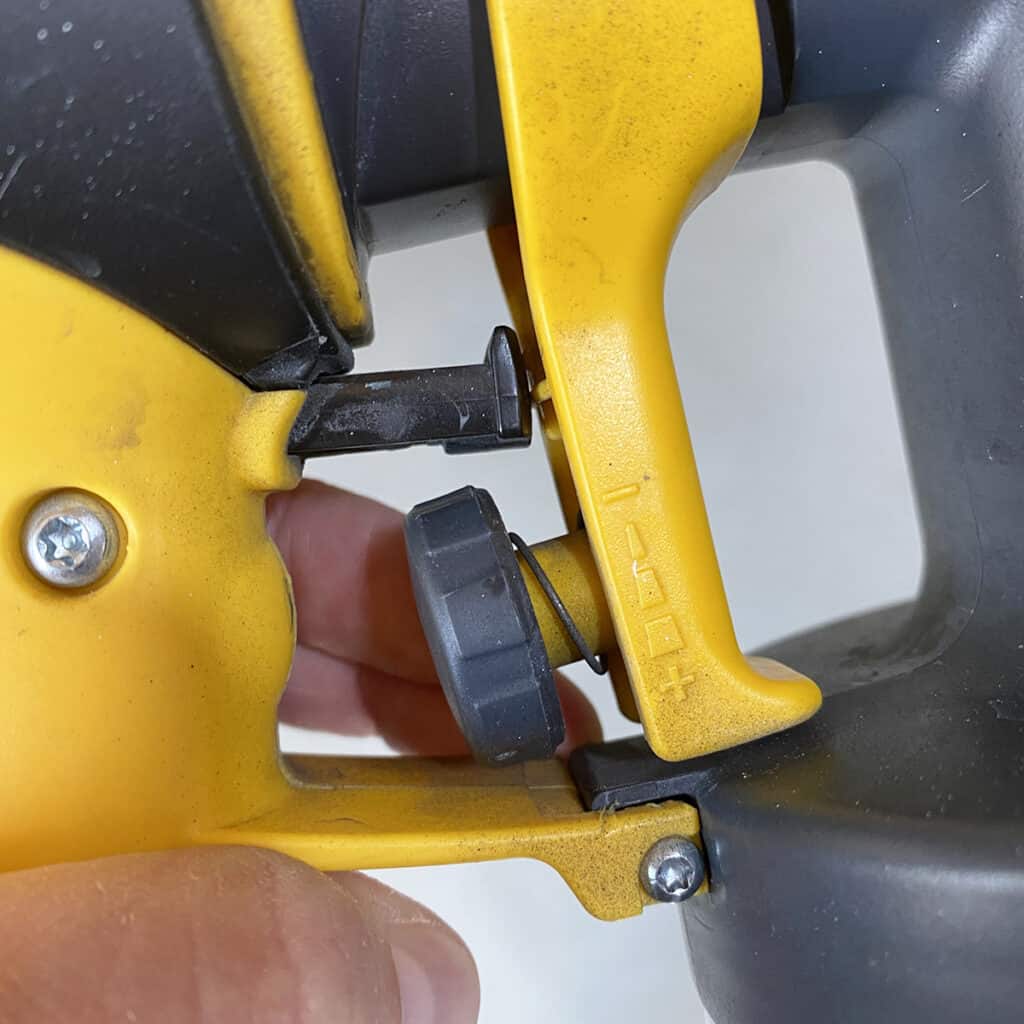
Remember, the key is to get the right amount of air and paint flow so that the mist that comes out of the nozzle isn’t too fast or too slow for the speed that you’ll move when spraying. Keep adjusting these Wagner paint sprayer settings until you’re comfortable with them.
Watch this video on how to use the Wagner FLEXiO 3000, and for our personal experience with this model, here’s my Wagner FLEXiO 3000 review!
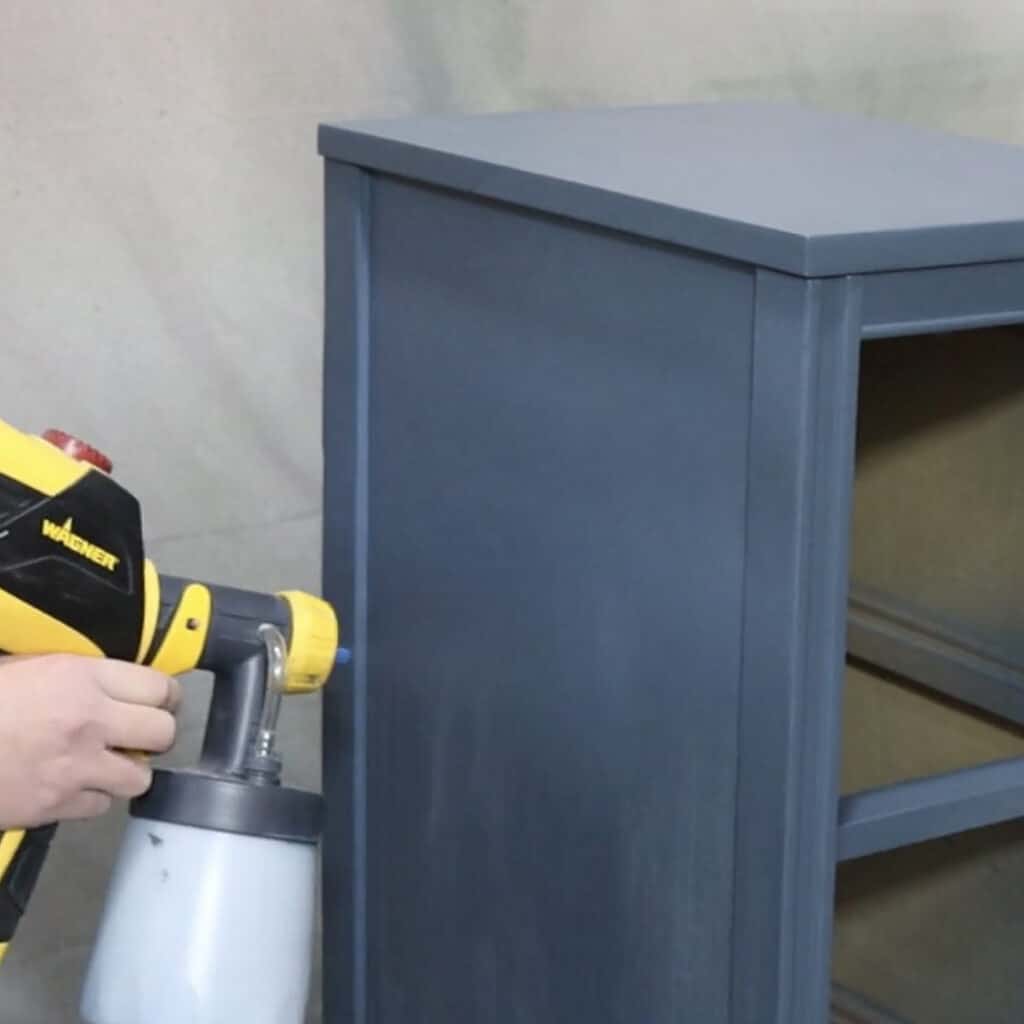
Tips for Using a Paint Sprayer When Painting Furniture
- Spray lighter than what you think you need. It’s better to apply a thinner coat than too much and have drips.
- Ideally, the HVLP gun should be around 12 inches away from the furniture when spraying.
- Spray in straight lines, back and forth across the piece.
- Overlap each line by 50% to create an even coat all over.
- A good rule of thumb is to not leave your paint in the sprayer for more than a few hours.
Get more tips on how to use a paint sprayer for furniture here. Check out this guide on how to use Vonforn paint sprayer if you have this model.
If I’m using easy to clean paint like chalk paint, I can leave it in all day without cleaning it out. Suppose I’m using a very durable one like Sherwin Williams Emerald Urethane Trim Enamel. In that case, it’s best to clean it out between coats.
How to Fix Spray Paint Drips
If you catch the drips when the coat is still wet, simply brush them away with a brush. If the drips are dry, you’ll have to sand or scrape it off to remove it. Then, you can apply the new color again (after you’ve adjusted the settings to not spray as much paint! haha)
Check out our more detailed guide on how to fix spray paint drips here. And watch this part of a makeover where I applied too much topcoat and how I fixed the drips.
Would you like to save this?
How to Clean a Paint Sprayer
If you want this tool to last as long as possible, it’s best to clean it right after you finish a project. Or in the middle of a project if you’re using a very durable, fast drying paint.
Cleaning isn’t complicated; it should only take 5 to 10 minutes. For waterbased paints, use warm water and soap. For oil based, use mineral spirits. If you aren’t sure, the back of the container should tell you what to use. Here’s more on what to use to clean paint sprayer.
Once you’ve detached the container and the suction tube, rinse them. Now, put some cleaner solution in the container and reassemble it. Plug in, turn on the sprayer, and spray the solution to clean what’s inside.
Repeat this until the spray comes out clear. If any paint is left inside, it will dry and can clog when you use it again. Read more about how to clean a Wagner paint sprayer here for more tips and tricks.
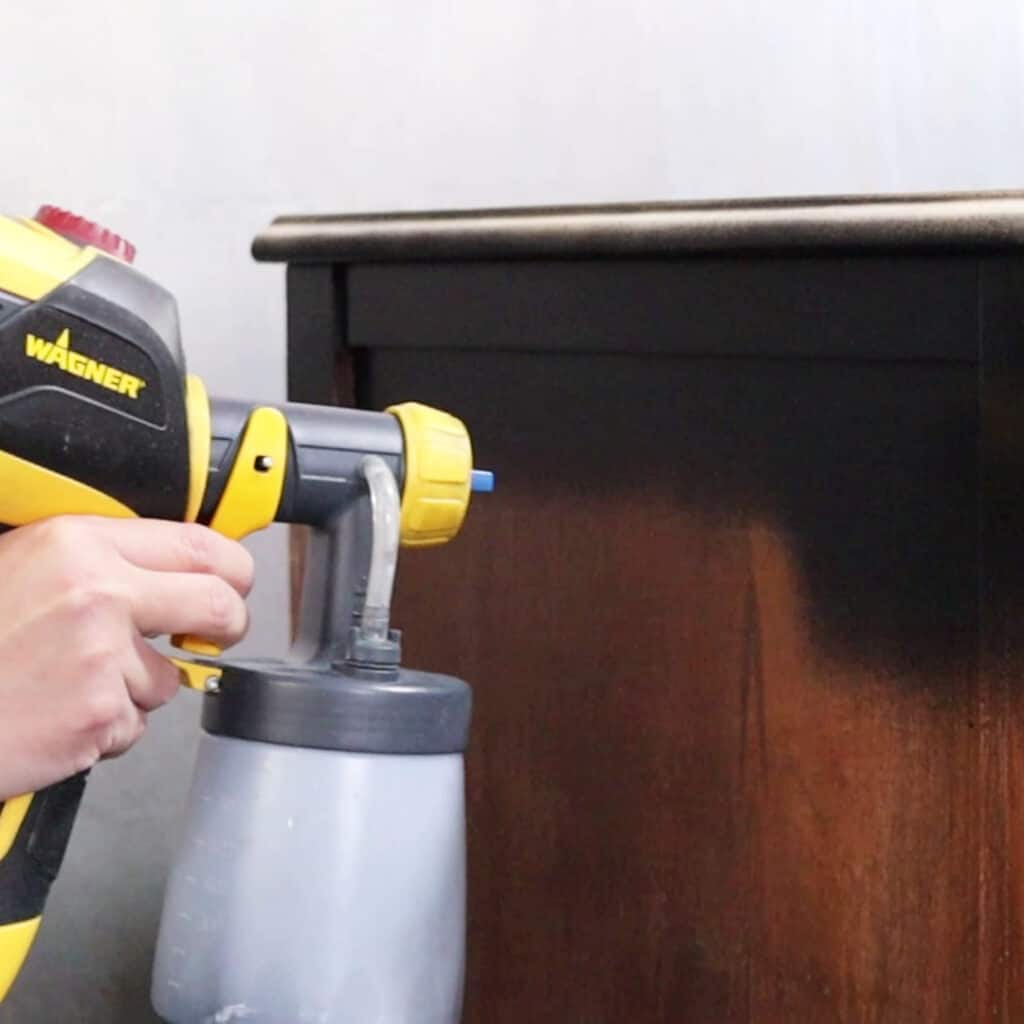
How to Spray Water Based Polyurethane
You need to mix waterbased polyurethane very well because the flattening agent settles at the bottom of the can. If you don’t mix it back together, you will end up with an uneven sheen on your piece. Then put it through a mesh filter before it goes into the sprayer.
When topcoating dark colors, I like to add a small amount of waterbased paint to the polyurethane to tint it to the color I’m topcoating. Tinting helps reduce any foggy or streaky looks that it can create sometimes. Get more tips on how to spray polyurethane here.
When I was starting out, I had a lot of questions. Below are some common questions and answers for painting furniture with a sprayer.
What is the Best Paint Sprayer for Furniture?
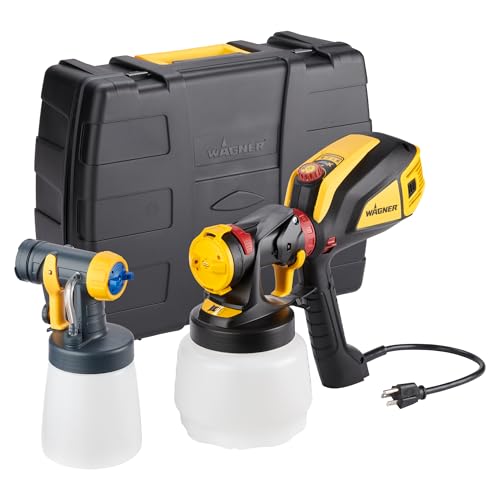
I’ve tried a couple, but my favorite is the Wagner FLEXiO 3000/595. The Wagner FLEXiO 3000 has 9 air settings that work for various paints. It will even spray thick chalk paint without thinning it!
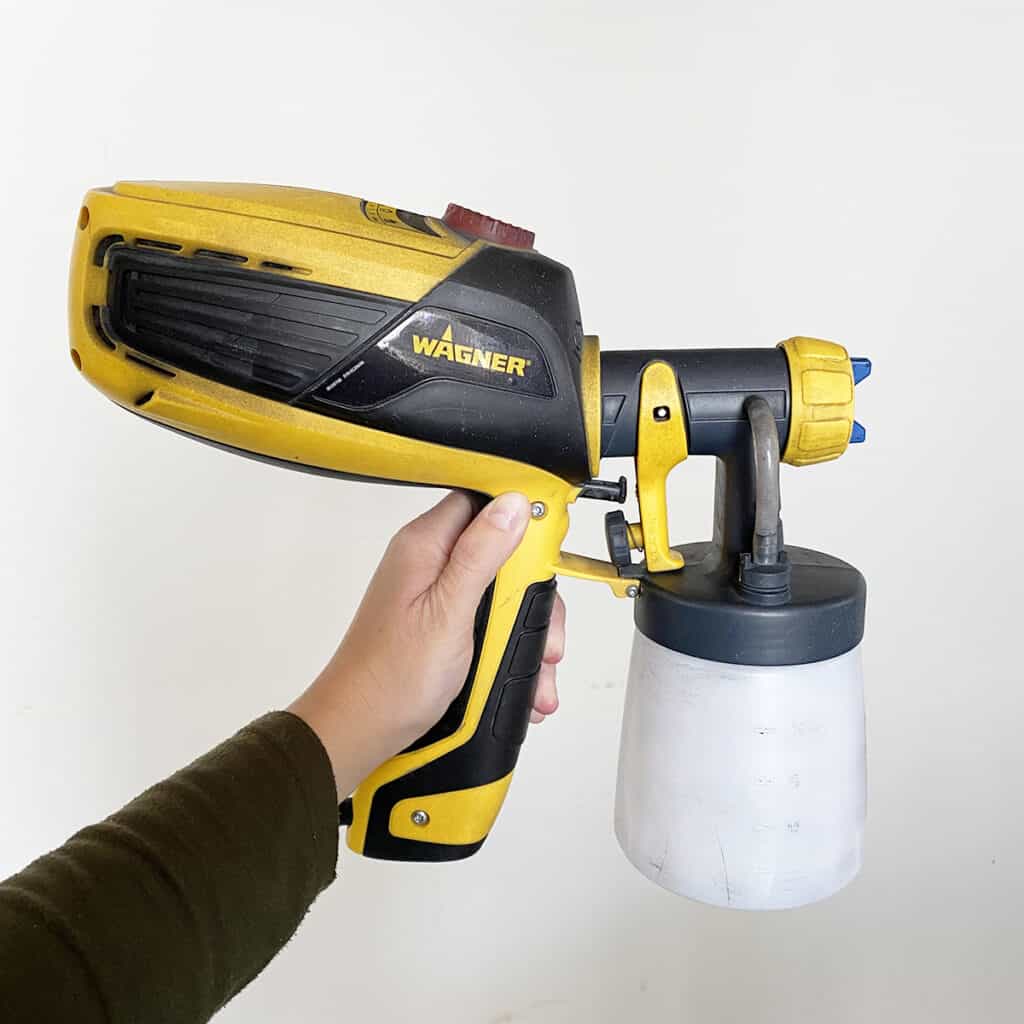
But the finish looks much smoother (there are fewer and smaller bumps) if you dilute thicker paints out. Unlike other cheaper options, you don’t have to be precise when thinning.
And it comes with two different nozzles. One is for large projects like fences and walls. And the Detail Finish Nozzle is for fine finish projects like furniture or cabinets.
I like High Volume Low Pressure or HVLP sprayers because you don’t need an air compressor. (An air compressor can cost you a few hundred dollars for the size you need.)

Another great option is the Wagner FLEXiO 5000. Check out my honest Wagner FLEXiO 5000 paint sprayer review here, and here’s how to use Wagner FLEXiO 5000 paint sprayer. Check out more best Wagner paint sprayers for furniture here.
If you still need more options, check out my list of the best HVLP paint sprayers here and the best electric paint sprayers here.
What is the Best Paint for Spraying Furniture?
Waterbased types are the easiest to work with. They dry quicker, are more durable than ever, are easy to clean up with soapy water, and aren’t as toxic as oil based ones.
Some of my favorites are:
- General Finishes Waterbased Milk Paint
- Emerald Urethane Trim Enamel
- Country Chic Paint
- Behr Flat Latex Paint mixed with calcium carbonate powder to give it more adhesion
Learn more about painting furniture with latex paint here and how to thin latex paint for HVLP sprayer here. And if you’re wondering, can you use chalk paint in a sprayer? – get answers here! Check out more options from our list of the best paint for spraying furniture here.
Can You Use Primer in a Paint Sprayer?
Yes, you can! Stay away from shellac based primers when using HVLP sprayers, though. (Check the sprayer’s manufacturer for more information.)
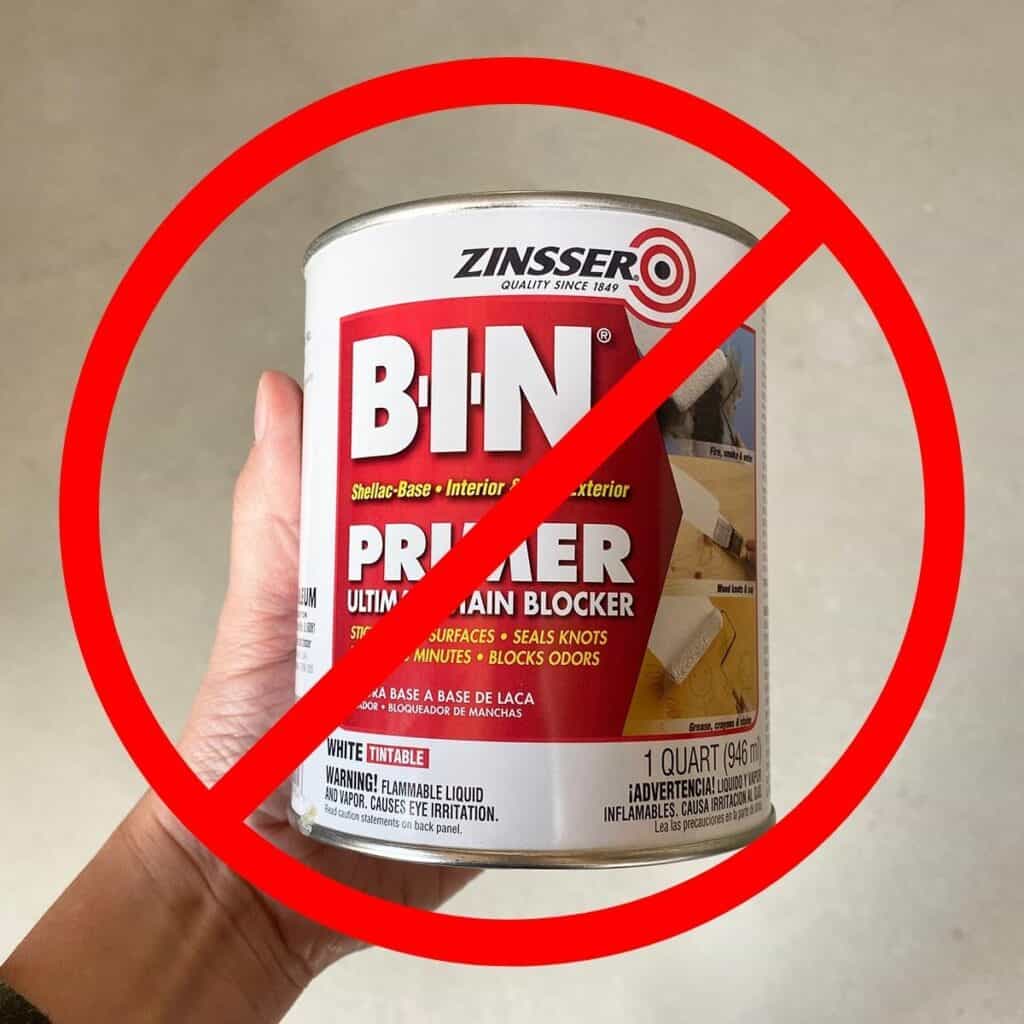
Shellac has a low flash point, so it doesn’t take much heat for it to combust. Also, remember to put on a mask/respirator and goggles because primers often have strong fumes. If you do need to apply shellac this way, make sure to learn how to clean shellac primer out of a sprayer after use.
How to Thin Primer for a Sprayer
Sometimes, when the primer is thick, you will need to thin it first. Waterbased primers can be thinned with water, while oil based primers, with mineral spirits. Read the back of your container to see if they recommend thinning and to see what they suggest cleaning it up with. And don’t forget to mix it well.
Make sure to pour the primer through a filter. We don’t want any debris in it or else the sprayer can get clogged.
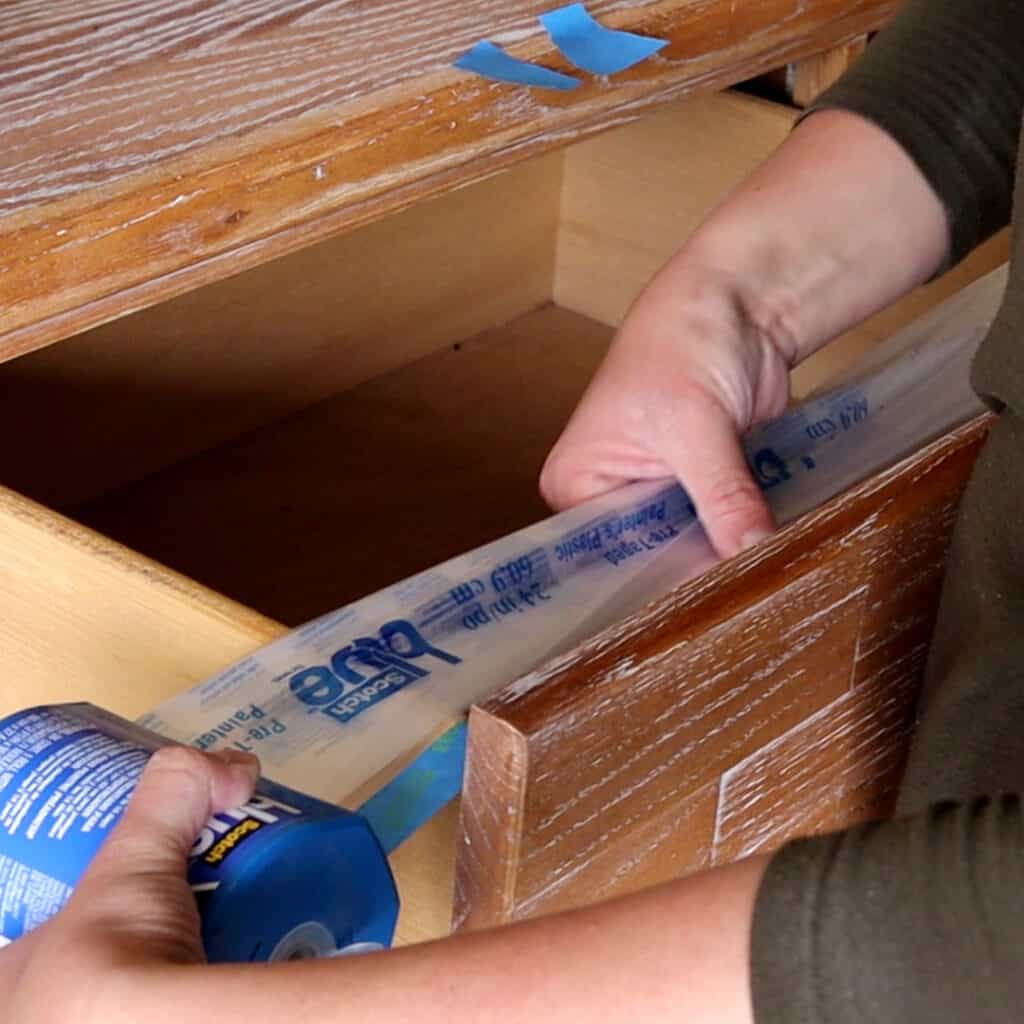
How to Spray Paint Furniture Without Making a Mess
I highly suggest laying plastic or cardboard on the floor and the walls of wherever you’re doing your project. Also, cover anything else with plastic. Then, put painter’s tape and plastic on the areas that you don’t want any coating to get on, like the inside of drawers.
If you’re working inside your home, it’s important to follow these steps to protect your area and yourself. For more helpful tips, check out our guides on how to prevent overspray when painting furniture and how to use a paint sprayer indoors.
I make sure the paint flow is coming out at the right speed. If a lot of paint comes out, it can spray pretty far and can get on everything around you.
Is it Better to Spray or Brush Paint on Furniture?
This is a matter of preference. Personally, I like using a sprayer instead of a brush or a roller. It creates a smoother finish with fewer bumps and no brush strokes. I love how professional my project looks when using it.
However, a paintbrush is easier to use when working indoors. And I don’t have to worry as much about ventilation when using a brush and waterbased paint. It’s also cheaper, but the application does take longer. Check out the best paint brushes for painting furniture here!
An HVLP gun also requires a lot more preparation, as mentioned above. But for me, the excellent quality I can create on my furniture makeovers outweighs the time spent taping and protecting things beforehand. Check out our spray paint vs brush paint furniture comparison here.


With all this information, I hope you are ready to try painting furniture with a sprayer! I’m excited to see your final result. Comment below and let us know how it went, and feel free to ask questions.
More Paint Sprayer Resources
- Spray Painting Furniture
- HomeRight Super Finish Max Paint Sprayer
- Fuji Q4 Platinum Paint Sprayer & Fuji T70 Spray Gun
- Wagner vs HomeRight Paint Sprayers
- This One Change Made My Painted Furniture Look Professional
Follow us on YouTube to get more tips for painting furniture. Or share your project with us on our Facebook Group and be part of our community. See you there!
I love your tutorials!!! The music with it was cute, too!
Thank you so much Kristine!
Love your tutorials. Would love to know how long you let paint dry between coats and if you need to clean out the sprayer between coat while waiting for paint to dry.
I built shaker style doors and drawer fronts for a custom vanity. Can they be sprayed laying horizontally on a plywood table, or do they have to be vertical so the paint will flow from the sprayer?
They can be sprayed laying down, no problem. But they will dry better and feel smoother when dry, if they are sprayed and dry while vertical.