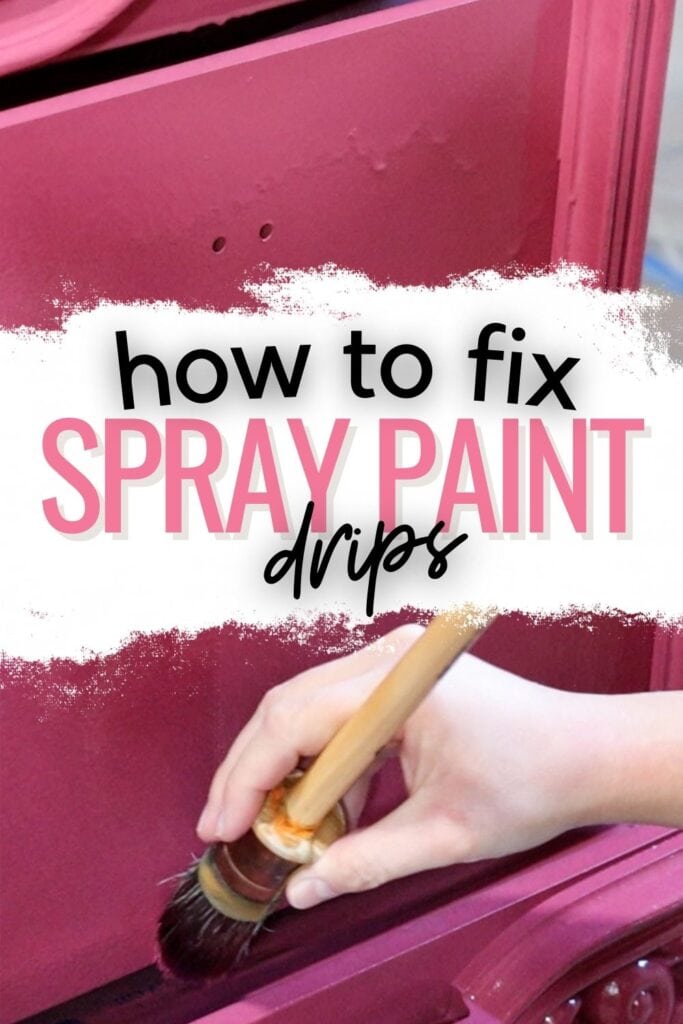
How to Fix Spray Paint Drips
Are you tired of dealing with paint drips every time you use a sprayer? It’s frustrating and wasteful, but it doesn’t have to be that way! With just a few simple tips, you can learn how to stop the dreaded drip from ruining your projects. In this blog post, we will show you 6 easy steps on how to fix spray paint drips so that your projects turn out perfect every time.
Remember, taking some extra time to learn how to use a paint sprayer on furniture properly will benefit you and your projects in the long run. From making sure not to thin the paint too much to double checking for sagging after each coat, these helpful hints are essential for anyone who wants flawless results when using a sprayer.
Spraying furniture can be a great way to get a professional finish without the hassle of traditional painting methods. However, if you don’t follow the right steps, it’s easy to end up with paint drips and an uneven finish.
Fortunately, there are some simple tips that anyone can use to avoid this problem. In this blog post, we will show you the steps for fixing spray paint drips so that your projects turn out perfect every time. With just a few minutes of preparation and knowledge about proper techniques, you’ll be able to get beautiful results without any mess or fuss!
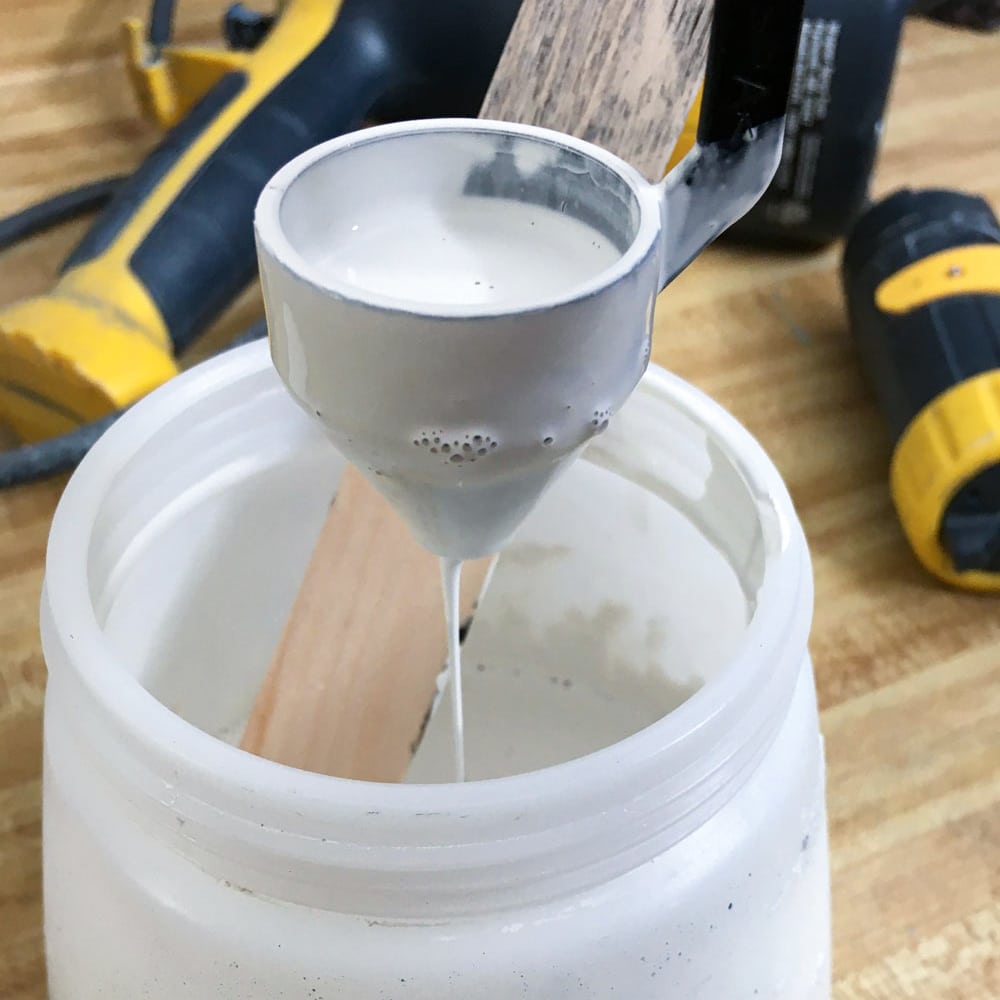
supplies used to fix spray paint drips
As an Amazon Associate, I earn from qualifying purchases. I also may earn from other qualifying purchases with other companies or get free product to review and use. All opinions are my own.
- 220 Grit Sandpaper
- Paintbrush
- Damp Cloth
How to Fix Spray Paint Drips
There are a few ways to fix the paint drips after they have happened, and there are a few ways to prevent drips from happening again. Go through each of these steps and make sure you are doing each one to get the best results with your paint sprayer.
Don’t Thin the Paint Too Much
The first step in avoiding paint drips is to not thin the paint too much. Different types of sprayers require different viscosities of paint, so you should always check your manual to find out what works best for your particular model.
Over-thinning the paint can cause it to run instead of staying put, and makes it harder to get an even finish. (On the flip side, if the paint is too thick, it might not spray out of your paint sprayer, especially if you are using a cheap paint sprayer that is built more for stains, like the Wagner Double Duty sprayer.)
So, you need to find the right thickness of paint for the paint and the sprayer that you are using.
Read our post on how to thin paint for a Wagner FLEXiO sprayer for all of our advice on thinning paint.
And check out our post on the best paint for spraying so you can choose the paint that will make your project easier!
Don’t spray too much paint in one area
It’s also important to not spray too much paint in one area. If you apply coats that are too thick, they will be more likely to drip and run down the surface as they dry.
Thin coats of paint will also help your paint to not drip, especially in corners or areas that you spray with a couple of passes of the paint sprayer.
You can change the controls on your paint sprayer to make less paint come out of the paint sprayer. (The professional paint sprayers have more adjustments to control how much paint comes out too.)
Here’s our guide to walk you through everything you need to know about how to use a paint sprayer with tips and tricks to help you.
Double Check for Sagging Paint After you Spray
Stick around for a minute to make sure your paint doesn’t start to drip. You might notice some areas where the paint looks like it’s really thick, or that it looks like it’s starting to sag.
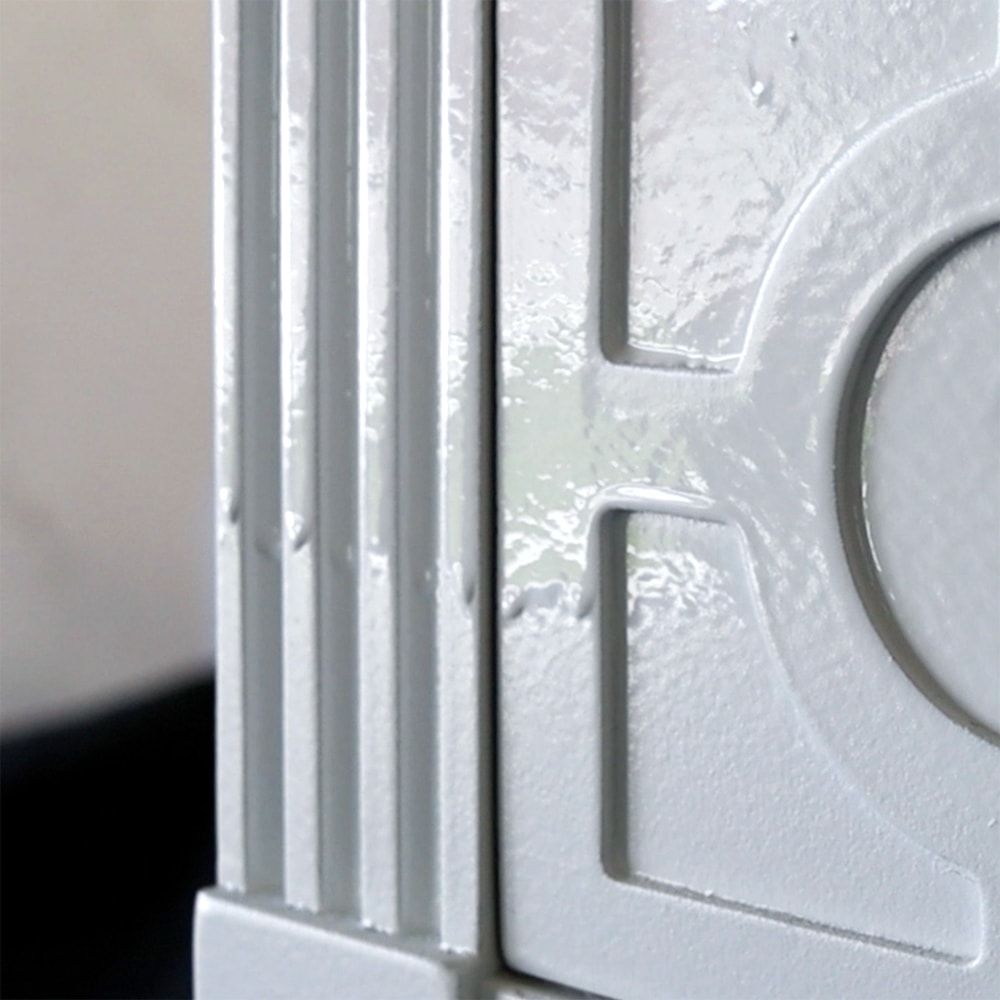
Simply brush those areas with a clean ( I like to get it a little damp too) paintbrush to spread out and remove some of the paint. It would be better to have a brush mark or two in your paint finish than to have a dry paint drip and have to spend more time fixing and painting over it.
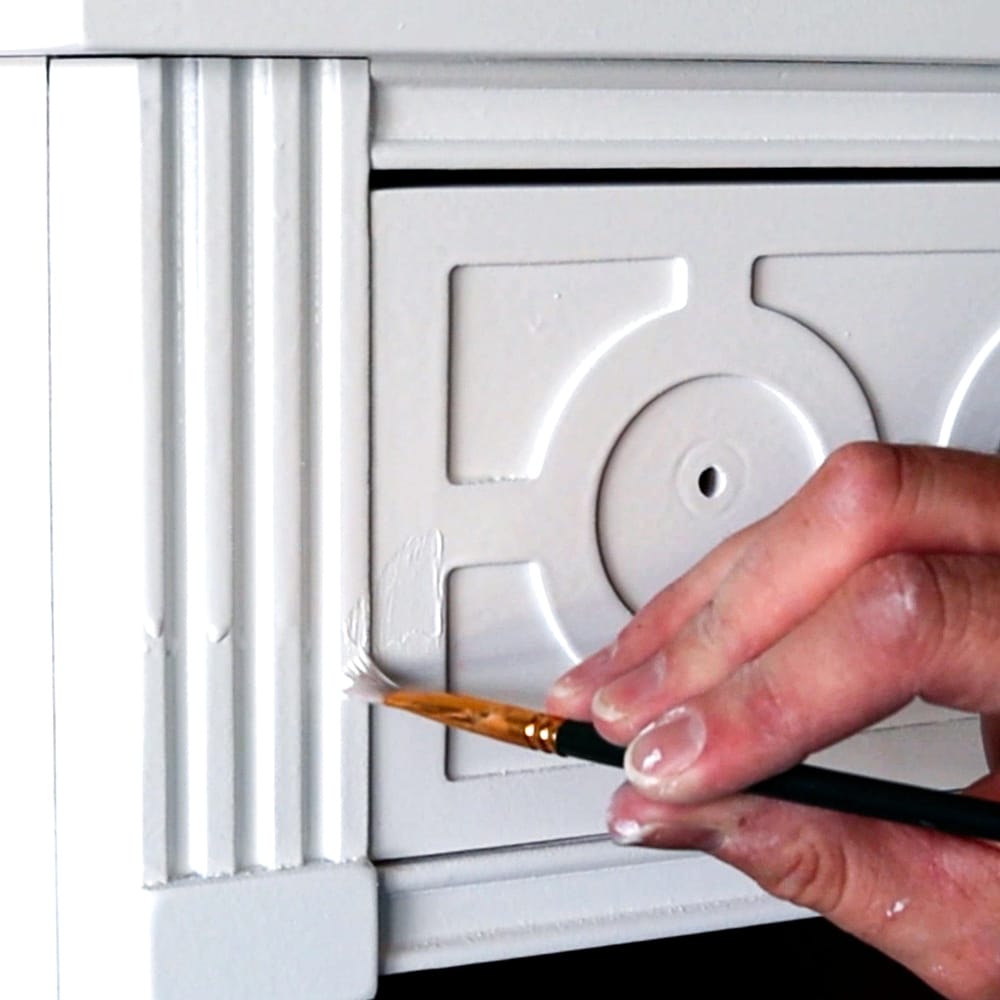
If you catch the drip before it dries, and you brush it away, you may want to sand the brush marks a little bit with 220 grit sandpaper before painting another coat.
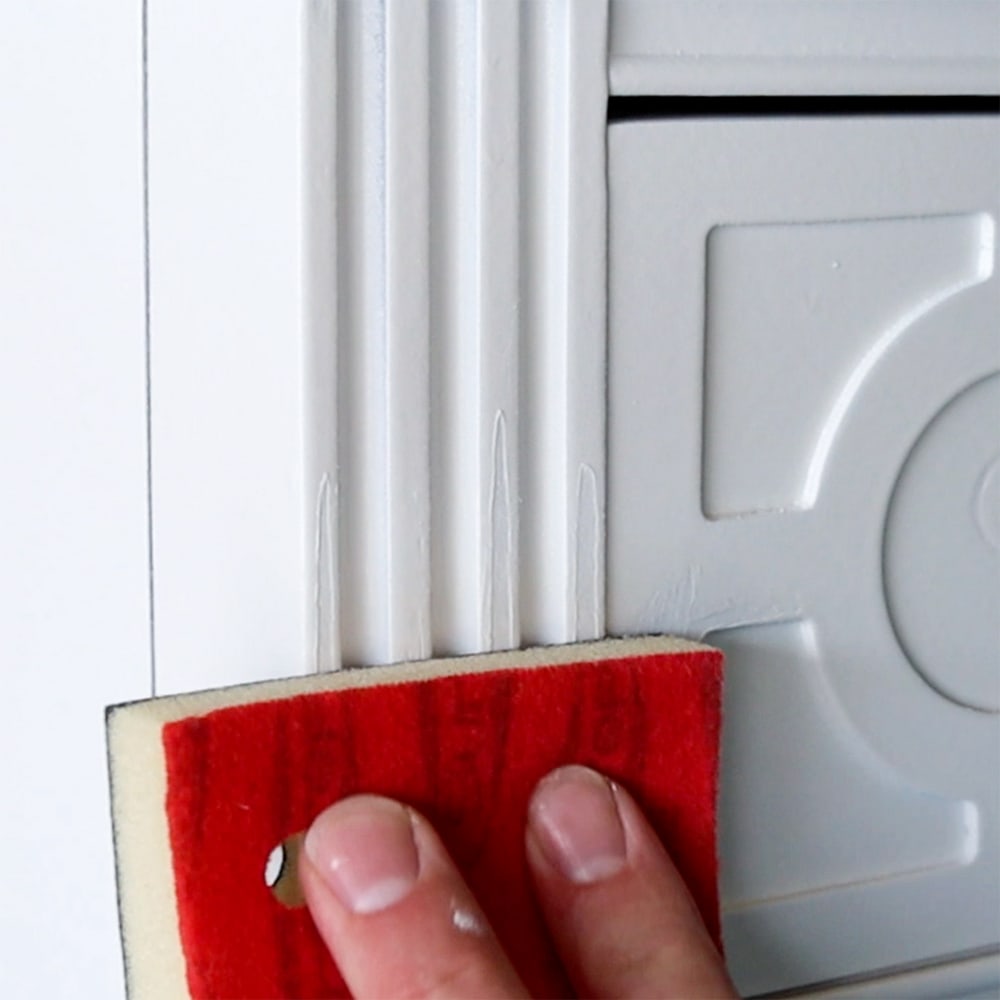
Sand Dry Paint Drips Before Painting Another Coat
If you notice the paint drips after the paint has dried, don’t worry, you can still fix it! Sand the paint drip away with 220 grit sandpaper, remove the dust, and then spray another light coat (or two) over it.
Usually, you’ll have to sand pretty deep into the paint to get the drip completely gone, so it usually takes more coats of paint to cover it back up (than if you brushed it away when it was wet.)
Would you like to save this?
If you catch the drip before it dries, and you brush it away, you may want to sand the brush marks a little bit before painting another coat.
Sometimes you can alternatively use a damp cloth to wipe away the paint drip if it has dried halfway. Just rub an old rag or a paper towel over the drip to remove most of the paint and smooth out the surface.
You might still have to sand it a little before you paint again, but it will be much faster than waiting for the drip to dry completely and then sanding it away.
Keep Your Distance from the Surface
When the drips are fixed, try to prevent it from happening again. Adjust your sprayer’s settings if they were too high last time, and then remember that it’s also important to keep a good distance between your sprayer and the surface that you are spraying.
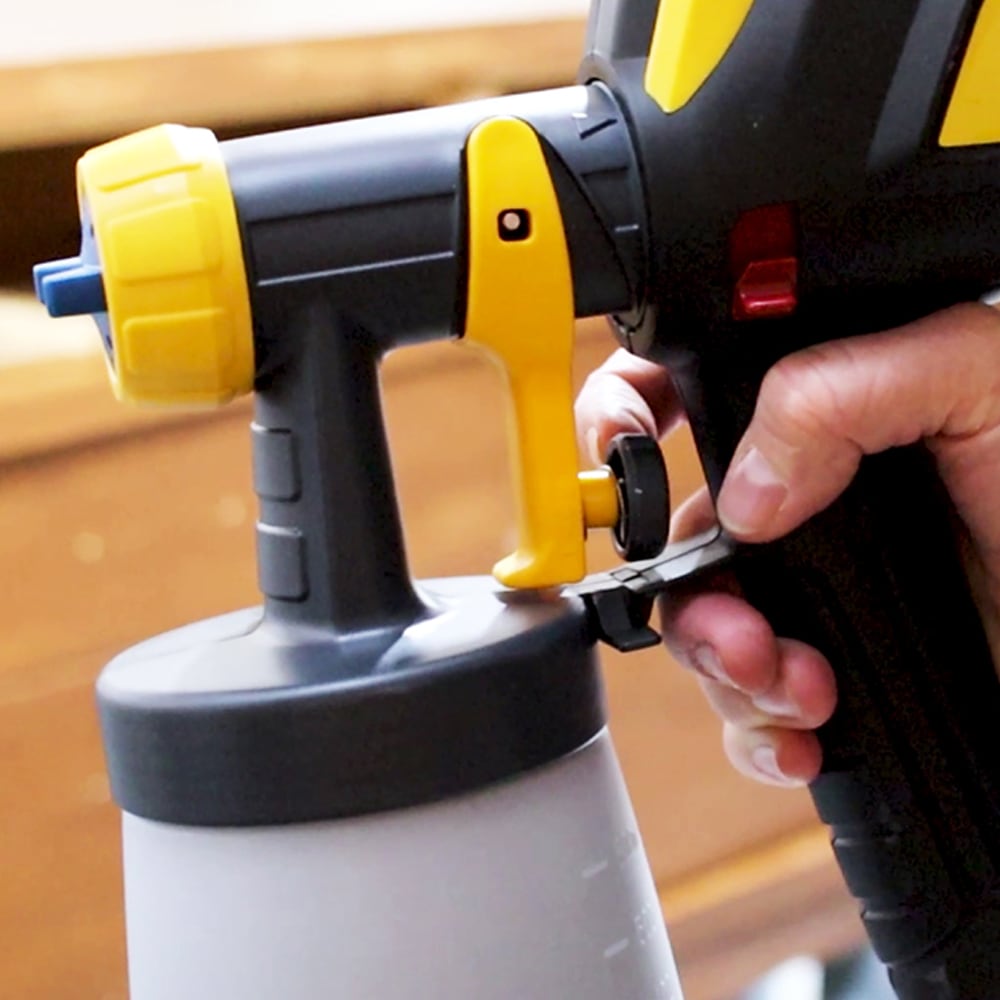
Keeping at least 6 inches away is ideal, but if you have to spray closer than that, make sure to lower the fluid settings so less paint comes out. With this step, also remember that you shouldn’t have to feel rushed when using a sprayer.
Make sure the settings a low enough that you feel like you can control how much paint is landing on the surface.
Clean Your Equipment Regularly
Finally, it’s important to keep your equipment clean and well-maintained. Make sure to regularly clean out the nozzle of your paint sprayer to prevent build-up and clogs. This will help your paint sprayer work more effectively, without leaving behind any drips or runs.
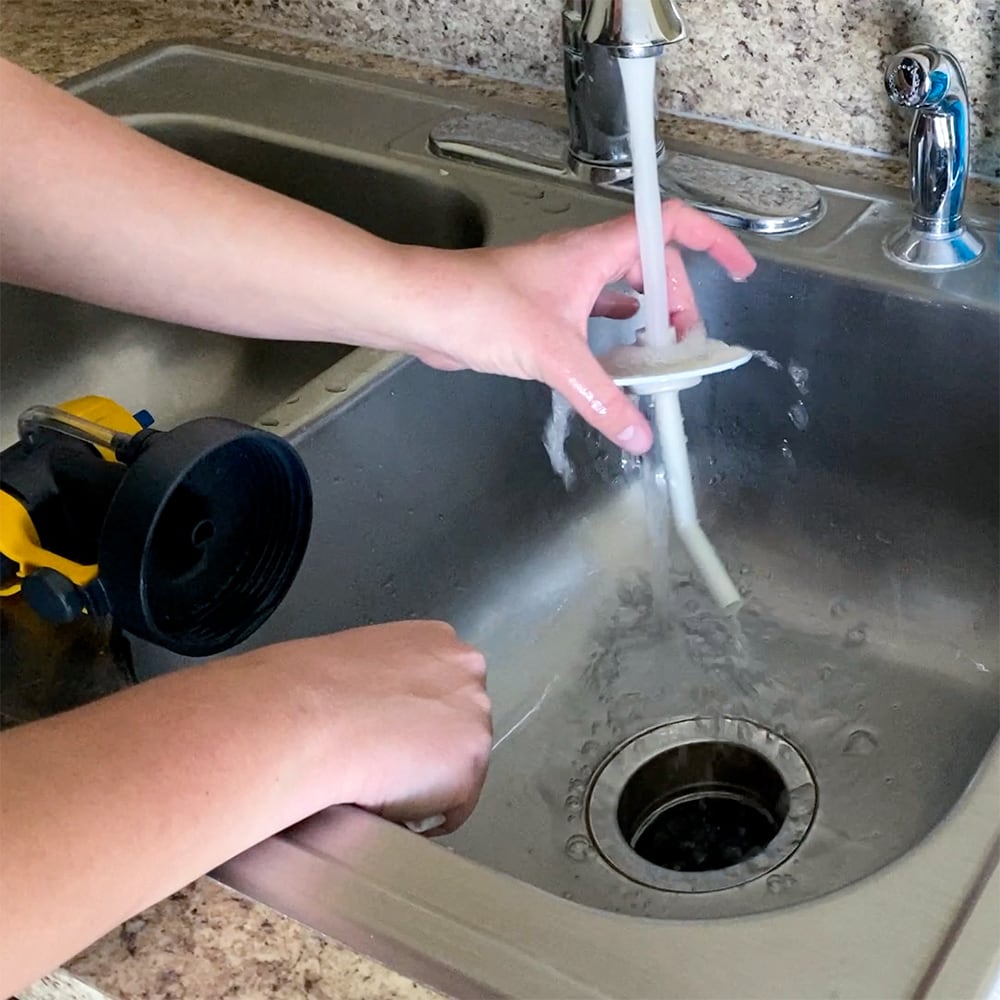
For example, if you let your sprayer get dirty, and there ends up being a clog inside, your sprayer’s settings will need to be turned up a lot to try to get the clog out.
You can also follow this guide on how to unclog a paint sprayer.
Once the clog is gone, the sprayer will shoot out a lot of paint, leaving you with a lot of paint in one spot. It’s honestly just frustrating to have to keep messing with the sprayer, and that’s what happens when you don’t clean it out after using it.
If you want to enjoy your projects, take the 5-10 minutes after to clean out your sprayer for next time.
Here is how to clean a Wagner FLEXiO paint sprayer. It’s super easy I promise!
If you’re still having issues, check out our Wagner Paint Sprayer Troubleshooting post to learn how to fix the problems you’re having.


Best Paint Sprayers for Painting Furniture
Now that you know how to fix and avoid paint drips, you might be wondering if you need a better paint sprayer. Here is our list of the best paint sprayers for painting furniture.
I personally prefer the Wagner sprayers because they are so easy to use and easy to clean, oh and they are very budget friendly! Here is our list of the best Wagner sprayers for furniture.
A very cheap paint sprayer will only go so far for creating a professional looking finish on your furniture, and it very well may be sucking away your precious time. Plus, they are harder to use because you have to thin the paint out just right.
If your time is valuable to you, do yourself a favor and purchase a Wagner FLEXiO 3500 sprayer that won’t break the bank, and is easy to use.
Check out my honest Wagner 3500 Paint Sprayer Review here to learn more about the features, and pros and cons of this sprayer.

How to Fix Spray Paint Drips
Do you get drips when you use a sprayer? Check out these easy steps on how to fix spray paint drips so that you can have flawless results without a mess.
Materials
- 220 Grit Sandpaper
- Damp Cloth
Tools
Instructions
- Always check the manual to find out what thickness of paint works best for a particular model of sprayer.
- Change the controls on your paint sprayer to make less paint come out of the sprayer.
- Wait for a minute to check for drips, thick, or saggy areas. If there are drips, use a clean paintbrush to spread and remove the paint.
- When you notice the paint drips after the paint has dried, use 220 grit sandpaper to sand the drip. Remove the dust and spray another light coat.
- If it has dried halfway, use a damp cloth to wipe away the paint drip.
- Adjust the sprayer's settings and keep at least 6 inches of distance between your sprayer and the surface that you are spraying.
- Clean the nozzle of your paint sprayer to prevent clogging the sprayer.
more paint sprayer tips
- How To Use A Wagner Double Duty Paint Sprayer
- Spray Paint VS Brush Paint Furniture
- Best Electric Paint Sprayer
- Wagner Flexio 5000 Paint Sprayer Review
- Best Paint Sprayer for Home Use
Follow us on YouTube to get more tips for painting furniture. Or share your project with us on our Facebook Group and be part of our community. See you there!