HomeRight Super Finish Max Paint Sprayer | Review and How to Use


It’s been my goal for years to try out all different kinds of sprayers, and so today is the day that I get to share another paint sprayer with you! The HomeRight Super Finish Max paint sprayer!
So whether you’re a beginner who’s learning how to use a paint sprayer on furniture or an experienced painter, read on for all the info you need!
This HomeRight paint sprayer is one that I’ve seen a lot of in the furniture painting world, so I was so excited to try it out!
By the way, this post will just be about the sprayer itself. I’ll be sharing a separate post on the actual dresser makeover later.
Oh, also, I bought this sprayer with my own money. All opinions (this goes for everything that I put out there) are my own. So let’s dive into it!
As an Amazon Associate, I earn from qualifying purchases. I also may earn from other qualifying purchases with other companies or get free product to review and use. All opinions are my own.
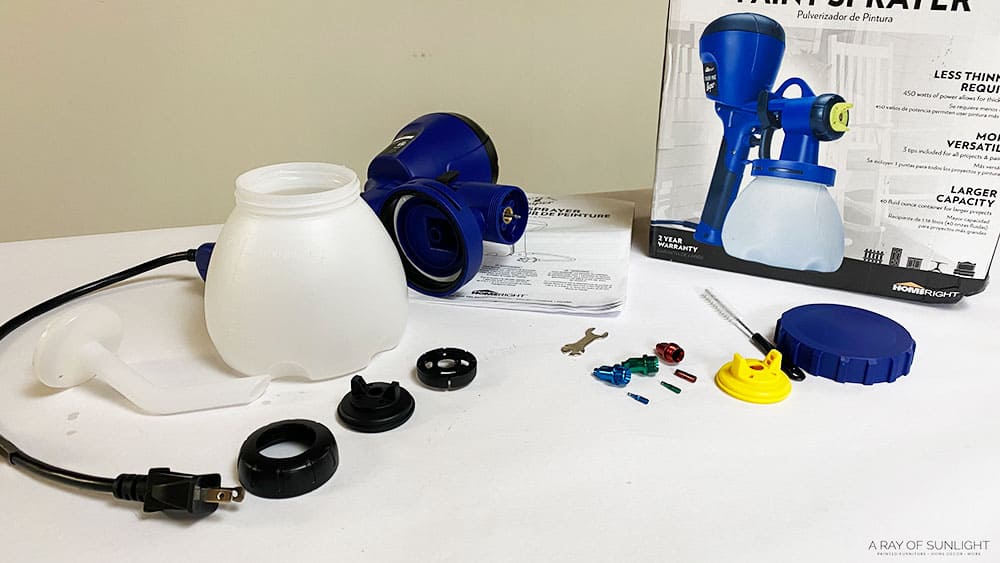
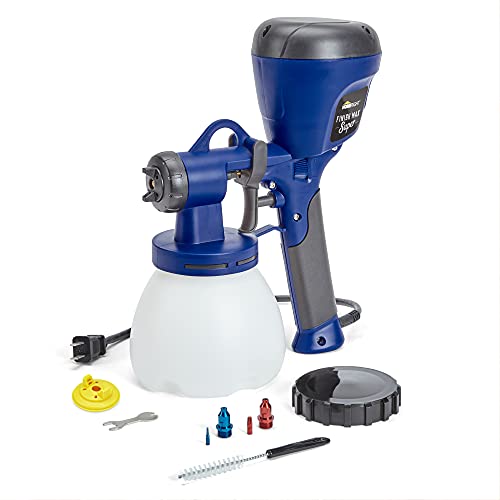
Unboxing The HomeRight Super Finish Max Paint Sprayer
So this HomeRight paint sprayer doesn’t need an air compressor, it’s budget friendly at around $100, it comes with 3 different size tips which is really nice for a beginner paint sprayer. It’s a plug and go sprayer, so you just need a power outlet to make it work.
The first thing that I did after I ohhed and ahhed over it was read the owner’s manual so I knew more about it. Then I changed the tip so I was using the smallest tip, and I put the black fine spray cap on it.
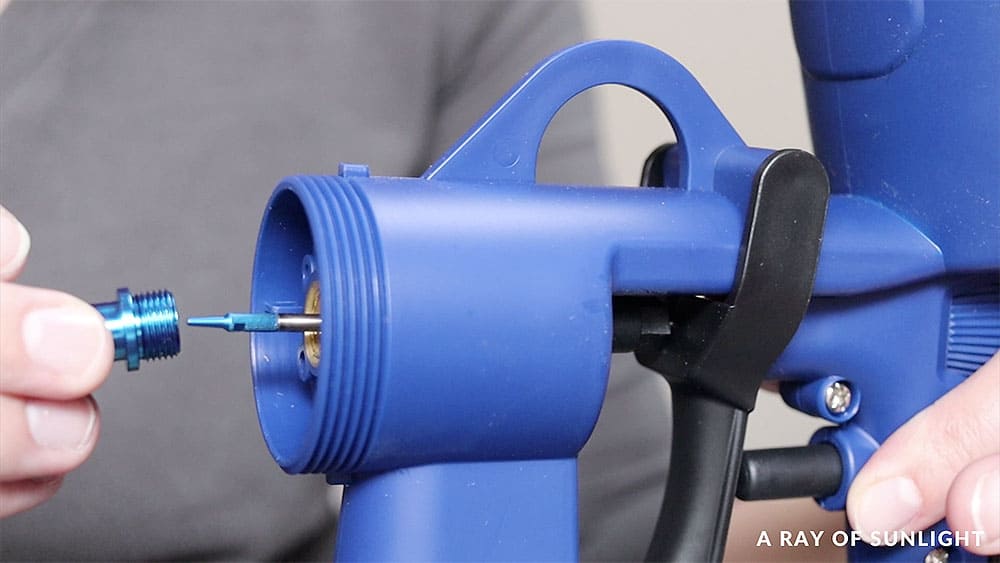
I’ve learned from my high end paint sprayer that I like to use a smaller tip so I can get a finer, texture free finish.
How to use HomeRight Super Finish Max Paint Sprayer
I filled it up with some water so I could test out the spray. This is something that I think every newbie should do with their paint sprayer.
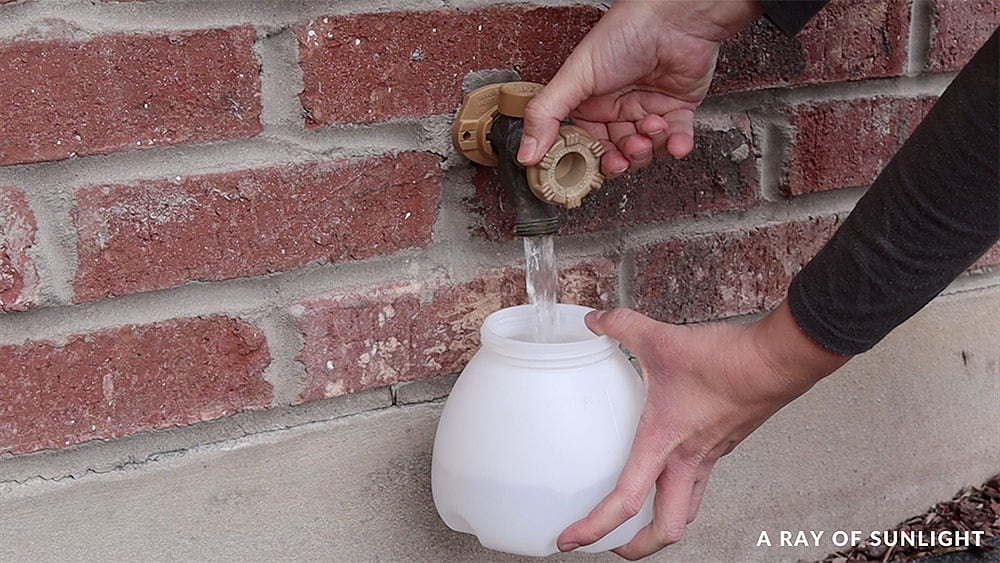
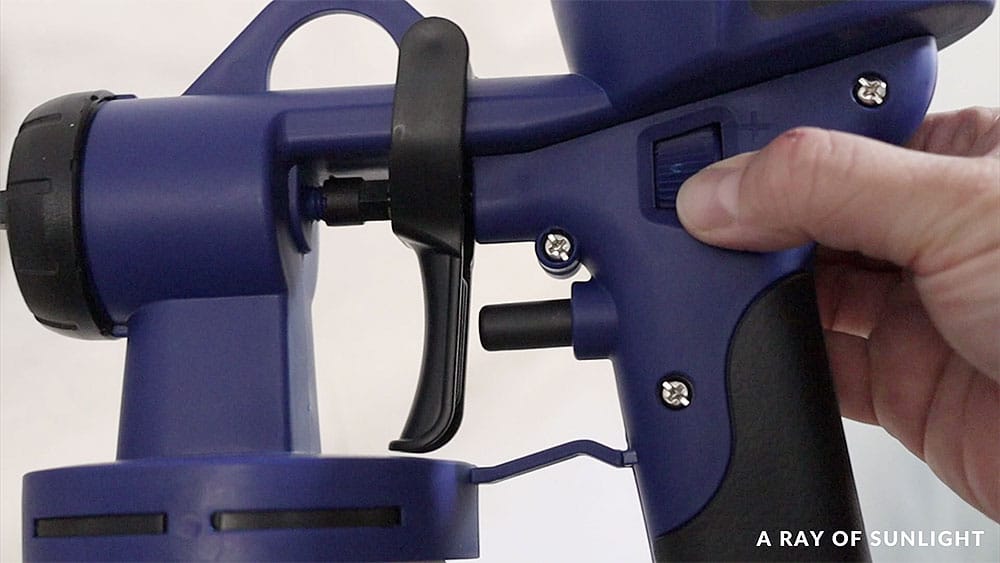
You can learn so much about it from just spraying water! Then I plugged in its rather short cord… And I messed around with the settings.
I changed the dial on the side of the sprayer to make it not spray any water, and then I rotated it upwards to get it to spray more water.
Then I changed the direction of the cap to make it spray in a vertical fan, then again to make it spray in a horizontal fan, and again to make it spray in a round pattern.

Oh man, it’s fun to just spray water out of a paint sprayer! Haha
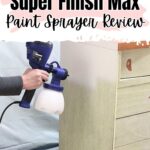
Painting with HomeRight Super Finish Max Paint Sprayer
When I felt comfortable with it, I went inside to add paint to it. Check out my list of the best paint for spraying furniture here.
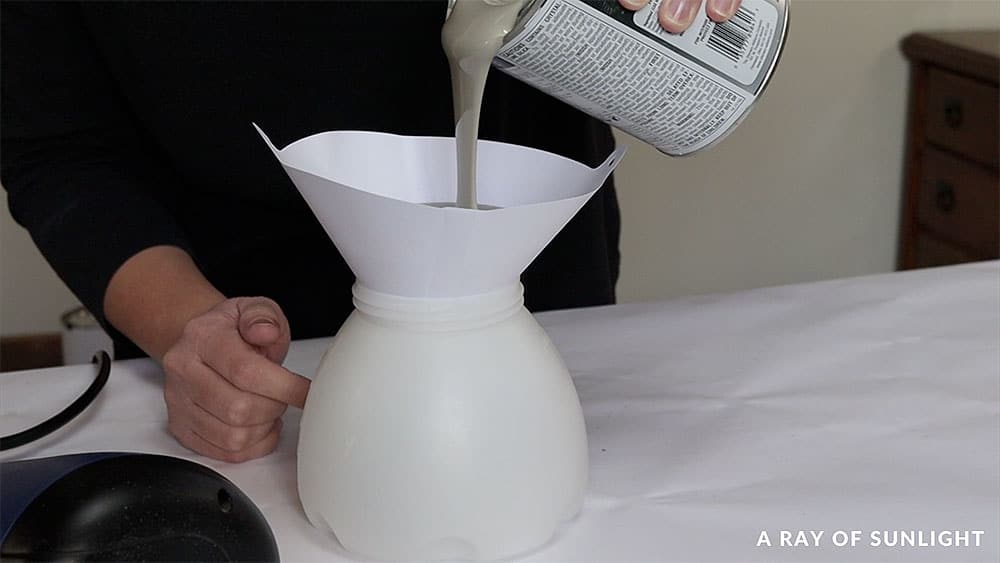
First I put a filter on the cup so it would filter any debris or dried paint clumps from getting into the paint sprayer.
The tiniest little thing can clog the paint sprayer or get into the paint finish, and these filters keep those things out of the paint sprayer.
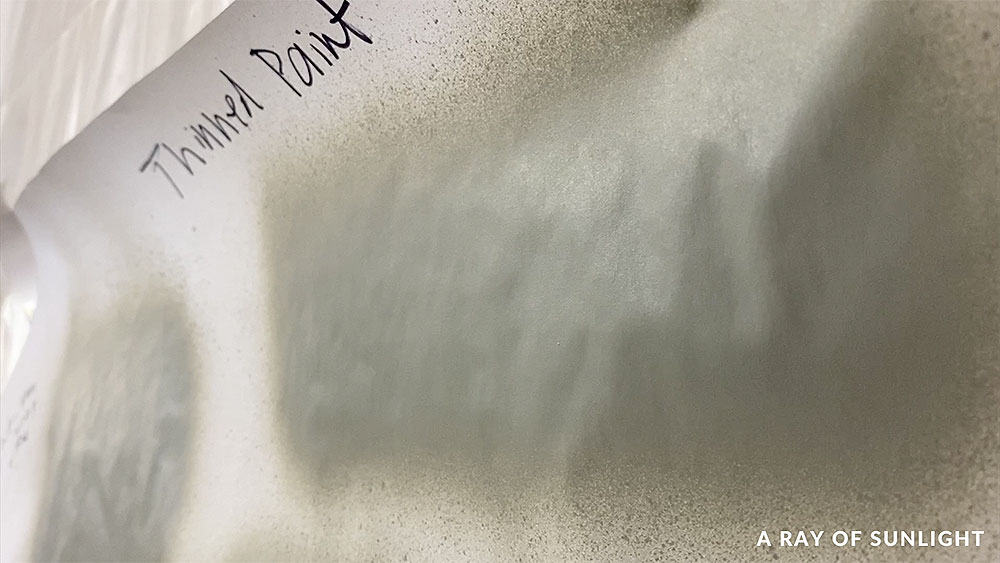
So, this paint sprayer doesn’t come with much information on how to thin paint. The owner’s manual basically said to thin it to the paint manufacturer’s specs since all paint is different. But that’s not very helpful. Haha
Do you have to thin paint for Homeright Super Finish Max?
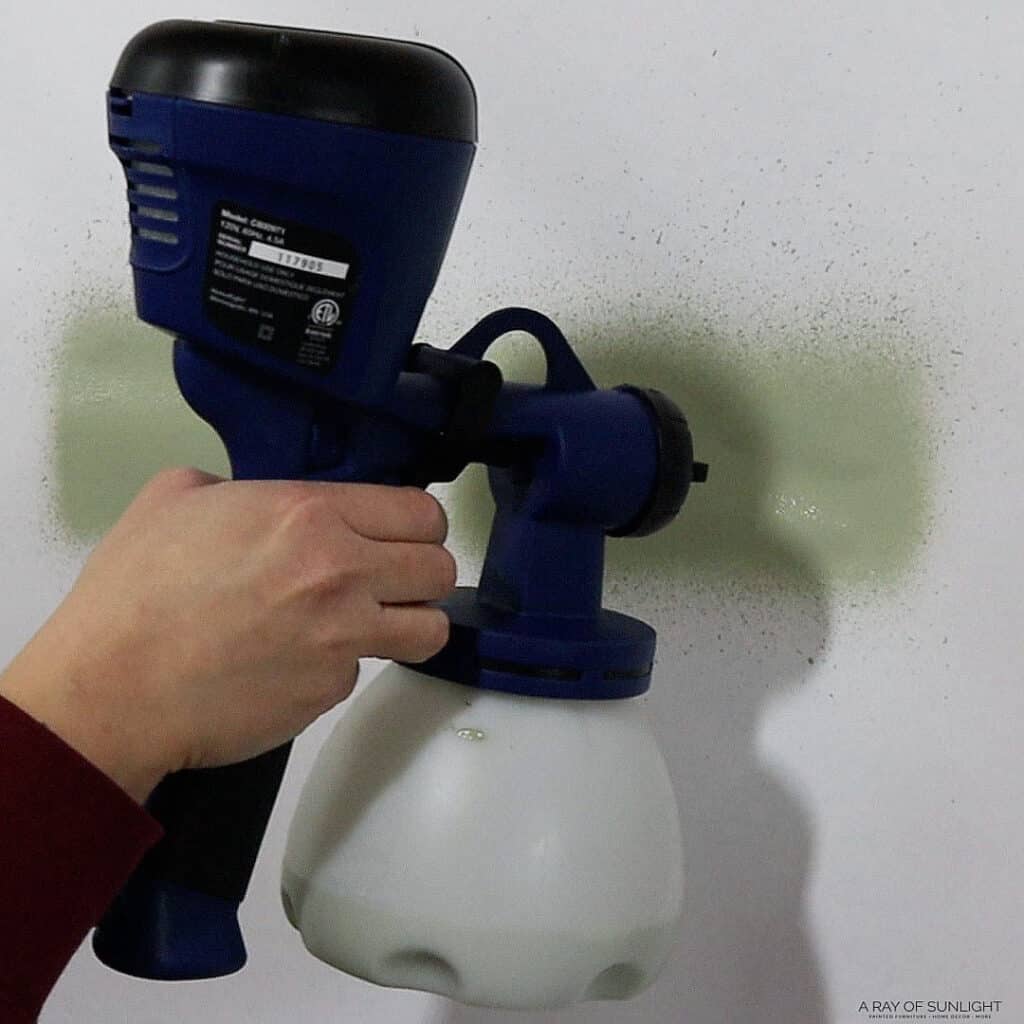
Just for fun, I tried to spray some Sherwin Williams Emerald Paint without thinning it out to see how and if it would spray paint that hasn’t been thinned out.
Guess what! It sprayed it with the 4mm tip! But, can you see how much it splattered everywhere?
When it dried, it still had a slight texture to it too. And this is a high end self leveling paint, so it’s going to level out better than most paints.
If you don’t mind some texture on your furniture, then it wouldn’t bother you at all though! So then I added some water to it (since it’s a waterborne paint) and sprayed it again.
This time it didn’t splatter near as much, and when it dried, it didn’t have any texture in it at all!
Another day I put some thick chalk paint in it, since chalk paint doesn’t have the self-leveling properties, and since it’s a lot thicker.
I’m not going to lie, I was pretty impressed! With the 2mm green tip and the fine spray cap, the HomeRight paint sprayer was able to spray thick Country Chic Paint without adding any water to it at all.
BUT, it sputtered, stopped spraying for a second, and splattered a lot. And there was a good amount of texture in it.
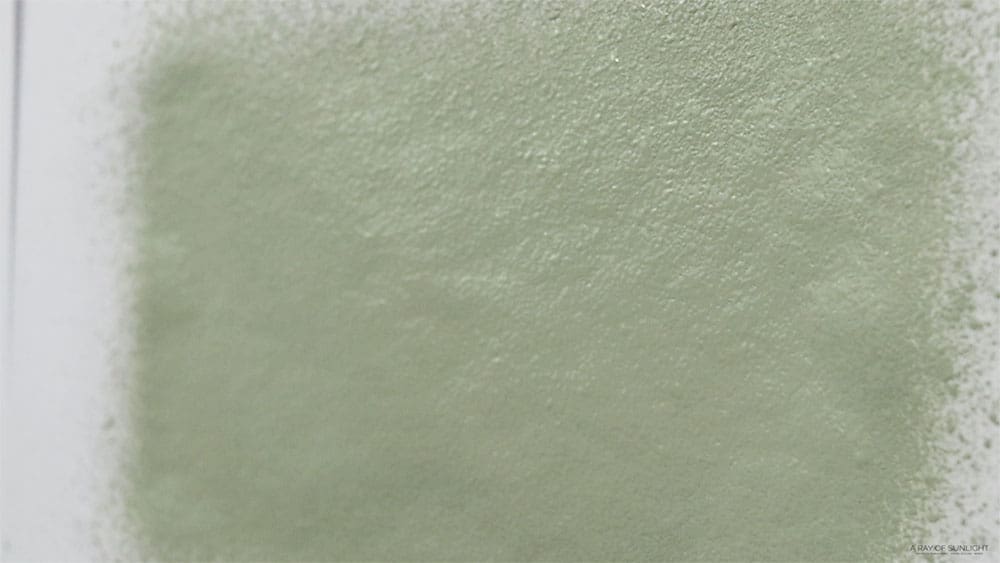
Then I thinned it out about 15% with water and sprayed again. This time it acted more like it did with not thinned out Sherwin Williams Emerald Paint. But it did stop spraying once while I was trying to spray it.
And then I thinned it out to have a runout time of around 40 seconds with my Wagner viscosity cup, and it sprayed like a dream!
The spray was very fine (ignore the splatters on the top, those are from another paint sprayer because I was testing multiple sprayers at a time here.), and there was absolutely no texture in it!
I’ll share more about my experiment with thinning paint and comparing 4 different sprayers in another post soon!! I learned so much from that experiment and I can’t wait to share it with you!!
How to Thin Paint for HomeRight Finish Max Paint Sprayer
Alright, so for this dresser makeover, I ended up using homemade chalk paint with latex waterbased paint.
So I added a little bit of water to the powder to do that…and then put it into the paint. And then when it came time to really thin the paint, I thinned it out with around 15% water.
So in the end I had 16 ounces of paint to around 2.5 ounces of water (or 5 tablespoons of water). Then I mixed it together really well.
Just for fun, I tested it in my Wagner viscosity cup to see how thick the paint was compared to how I would thin my paint out for my Wagner Double Duty paint sprayer… and the run out time was double what I normally would want.
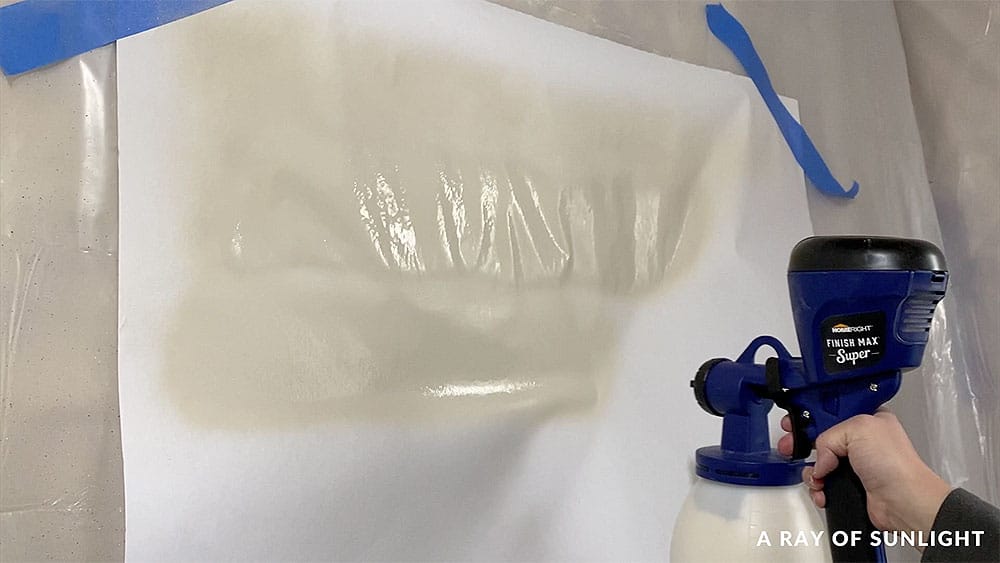
Testing the Spray Before Spraying the Project
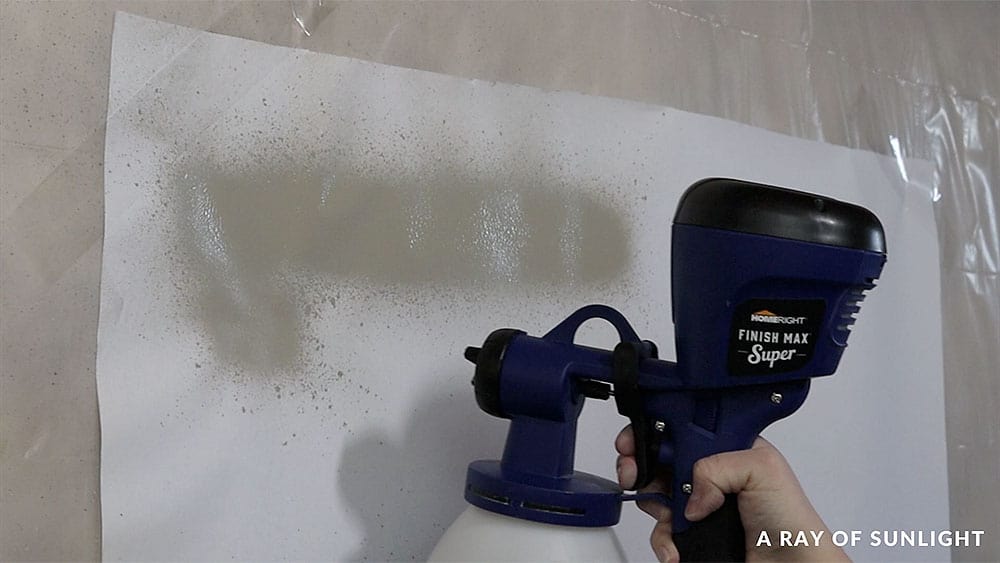
Like always, I tested the paint out before I sprayed it onto my project. And I played around with it more than I would usually just so you could see what happens if you have the settings up too much, or too low.
Obviously, when the dial was moved all of the way up, it sprayed out way too fast and I got drips and runs on the paper.
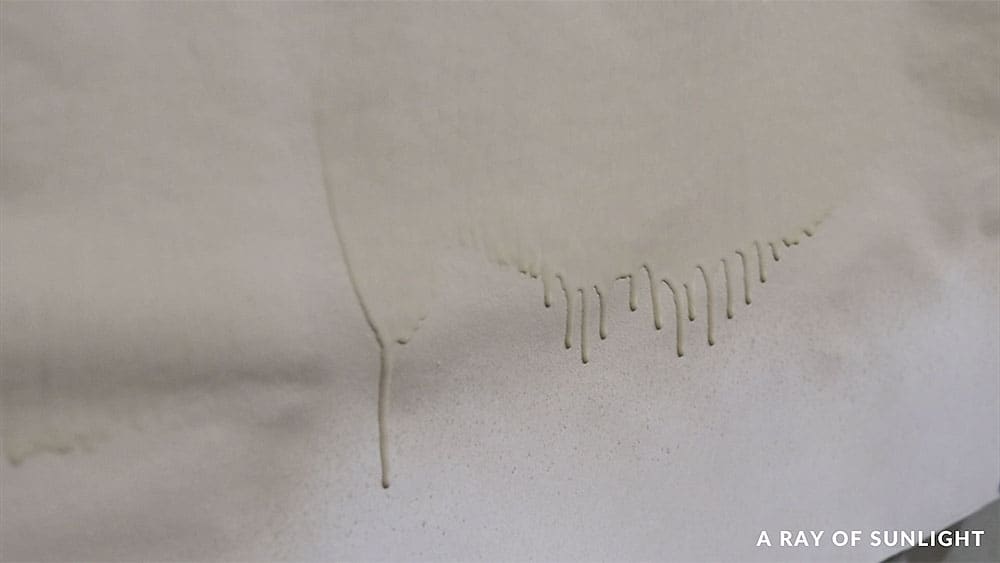
When the dial was moved down too much, barely any paint came out. I found my happy spot at around 9 turns from being turned all of the way down.
Here’s what it looked like while I sprayed the dresser.
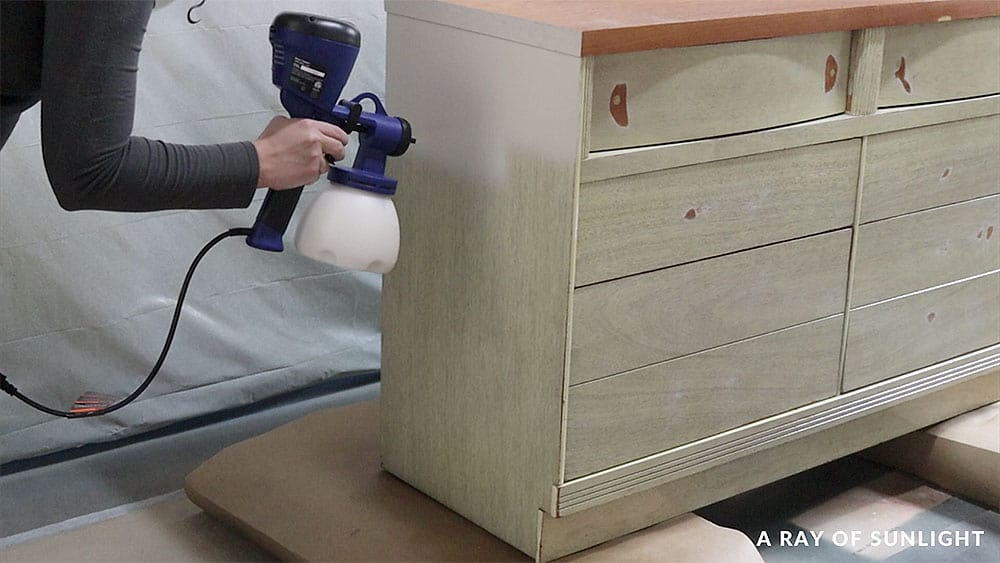
I tried to overlap the spray on every pass. With the HomeRight you don’t have to start the turbine off of the project to make it not spit.
I honestly was really impressed with how well it sprayed the paint! I don’t remember seeing any excess spitting, and the finish was very fine, just how I like it!
How to Clean HomeRight Super Finish Max Paint Sprayer
And then, before I sprayed the topcoat on, I cleaned out the paint sprayer.
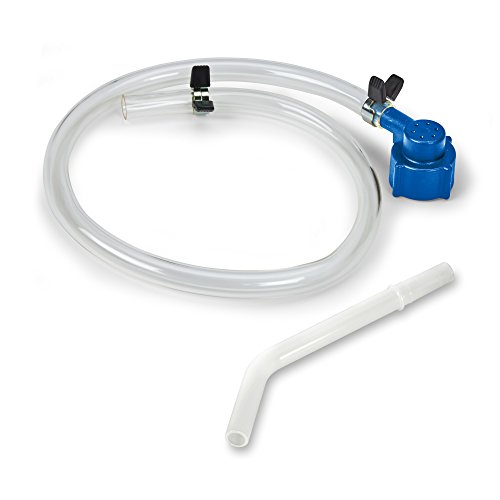
So while I was shopping for this paint sprayer, I saw this cleaning tool, and I thought that it looked interesting. So I tried it out.
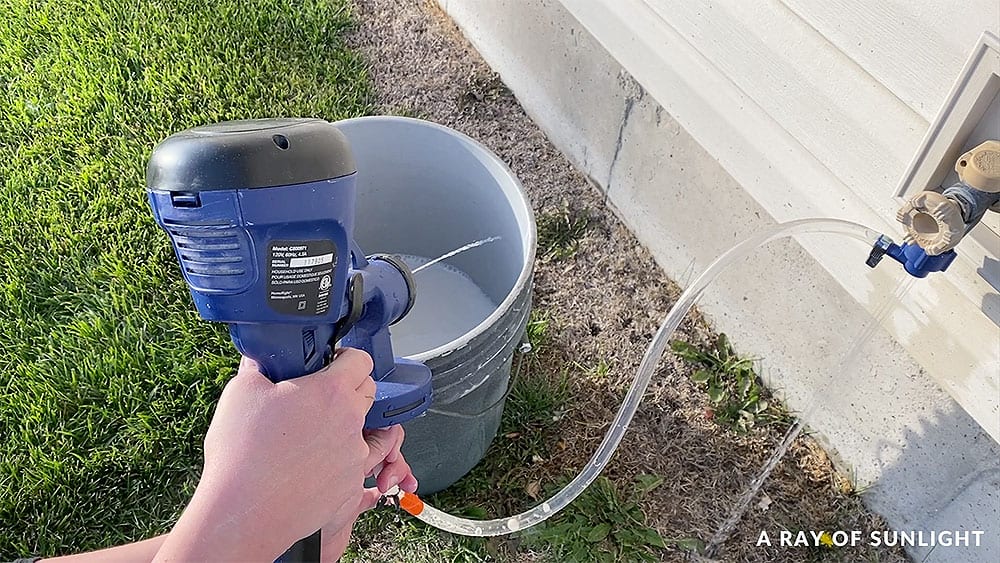
You have to use it on a faucet that has threads on it though, so I couldn’t use it in the sink that I normally do.
So I hooked it up outside, and honestly, I thought that it made the job of cleaning so much more difficult.
The hose is so short that I had to bend over the whole time, and it was just a pain. Literally, my back hurt so bad after. Haha It would have been so much easier to just clean it out at the sink like I typically do.
Anyway, so first I unplug the paint sprayer, and then I pull back the trigger to let it release the paint stuck inside of the paint sprayer.
Then I dump out the paint that is leftover in the container and rinse out the container. Then I like to rinse off the suction tube and fill the container up with warm soapy water.
If you use a product that isn’t water-based, you’ll need to use the cleaning agent that the paint recommends using.
And then I sprayed that warm soapy water into a bucket to get the inside of the paint sprayer cleaned out.
Then I like to fill it up with clean water to rinse out the soapy water. And then I unscrewed the cap and tip from the head of the sprayer to rinse all of those pieces off.
The hardest thing with the HomeRight is cleaning where it attaches to the container. There is a black part up in there that you have to clean in between and it’s kind of a pain. I’m just not used to that with my other sprayers.
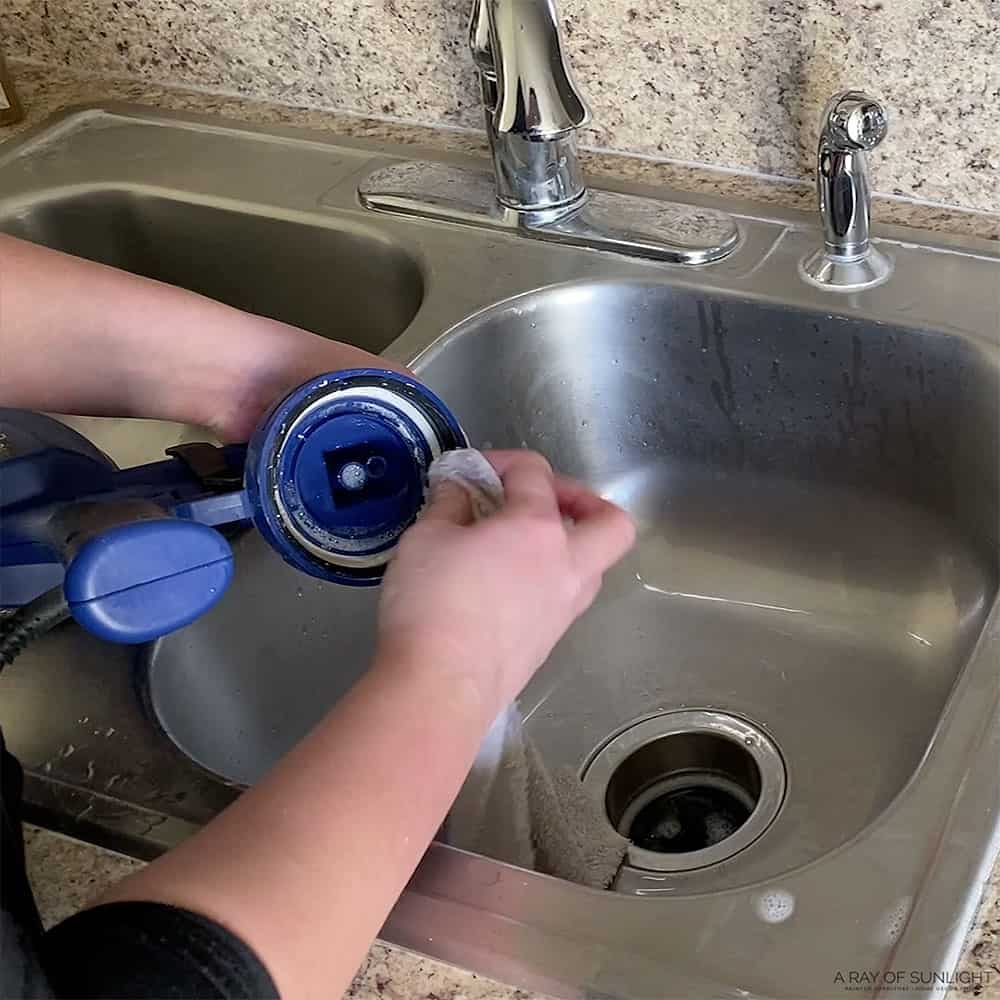
Oh, and the motor doesn’t detach from the head of the sprayer, so you have to be careful to not put the sprayer underwater and get the motor wet. Here’s a very detailed guide on how to clean HomeRight paint sprayer properly.
Spraying Polyurethane with HomeRight Super Finish Max Paint Sprayer
Then I put some waterbased polyurethane in the HomeRight sprayer since I used chalk paint on this dresser.
I filtered the poly to make sure it didn’t have anything in it that would clog the sprayer. Then I added a little bit of water to it because I like the finish better when it’s thinned out a little bit.
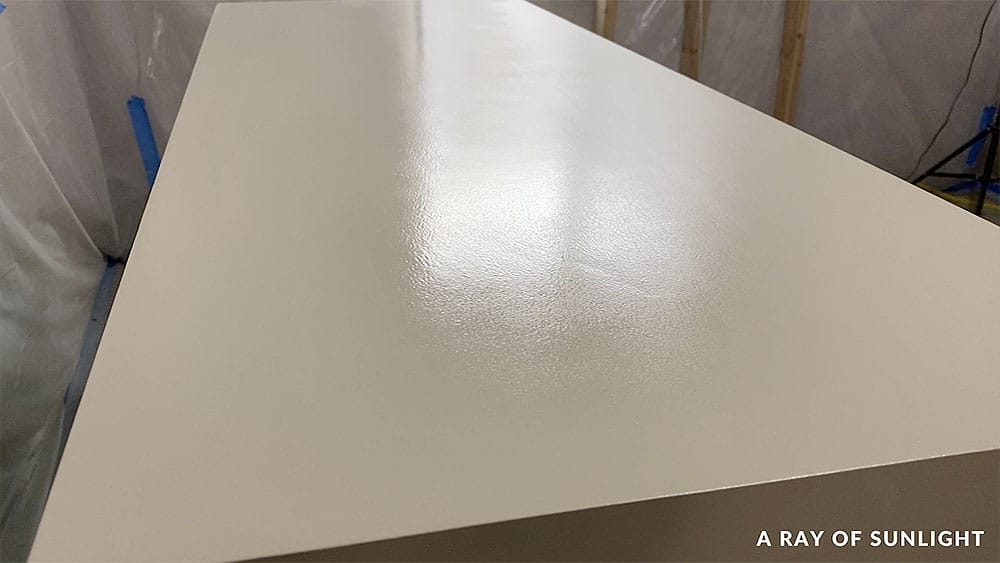
I again tested it to make sure that I liked the way it was spraying. And then I sprayed it just like I had sprayed the paint. Once again it went on so smooth! No excess splattering at all.
Here’s a close up of what it looked like on the dresser.
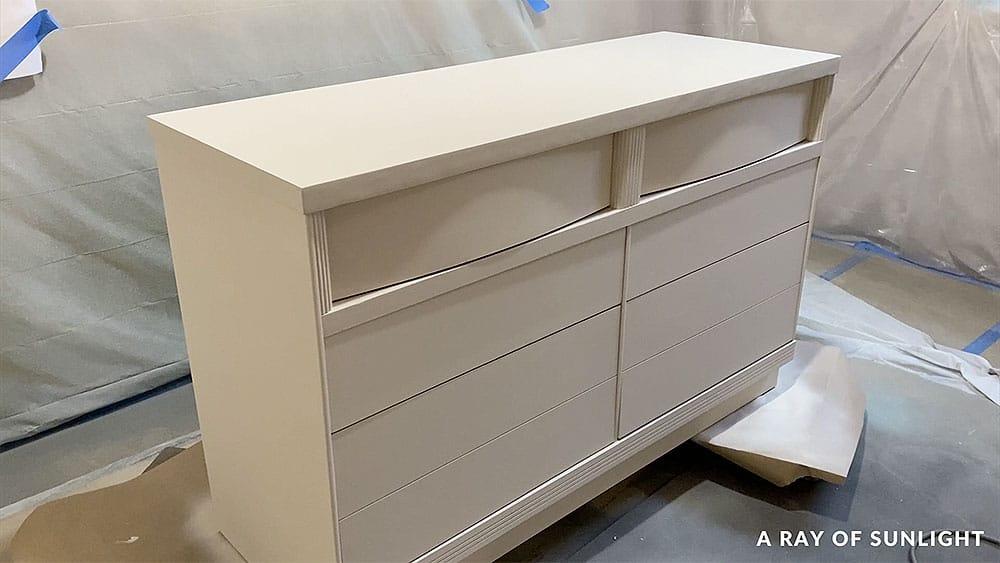
And here’s what the dresser looked like after being painted. I haven’t added hardware or staged it yet, but you can see what kind of finish I was able to get from the HomeRight paint sprayer and some homemade chalk paint.
See this finished homemade chalk paint dresser makeover here!
Would you like to save this?
My Review of the HomeRight Super Finish Max Paint Sprayer
Okay, so after I’ve used it, here are my thoughts about the HomeRight Super Finish Max paint sprayer.
Nozzle
I really wish the nozzle or head of the sprayer came apart from the motor like the Wagner sprayers do.
It doesn’t sound like much, but it would really make cleaning and attaching the container easier. Check out my Wagner vs HomeRight paint sprayers comparison to learn more.
Can Spray Thicker Paints
It sprayed so well! I checked the thickness with the Wagner viscosity cup, and the paint that I sprayed was almost twice as thick as what I would have sprayed with the Wagner Double Duty sprayer.
The finish looked great still! And it was able to still spray thick paint (even though it didn’t create the best finish, it still created a decent finish with the not thinned out paint.)
So I would still thin out the paint, but I wouldn’t worry about being exact with the water to paint ratio all of the time.
Can Adjust the Width of the Spray
You can adjust the width of the spray by changing out the air cap. I think that’s awesome that you have that option because I love changing the width of the spray on my professional paint sprayer.
Cord Is Short
I don’t like that the cord is so short! But that’s definitely not a deal breaker because I plug it into an extension cord most of the time anyway.

Cleaning is More Difficult
Cleaning the part where the container attaches to the sprayer isn’t as easy as what I’m used to because it’s not just a flat surface.
But I don’t think it’s a deal breaker because the rest of the cleanup process was just as easy.
The Metal Tips
I love that it comes with metal tips that can be switched. I really like using a smaller tip than typically recommended, so I really appreciate that you can change the tip size like you can with the more expensive paint sprayers.
Spitting
It didn’t spit like the Wagner paint sprayers do when you first pull the trigger.
So you don’t have to remember to partially pull back the trigger to start the turbine before you pull the trigger all of the way back. It’s nice to not have to remember another thing to do. Haha
Price
Price wise it’s right in between the other “beginner” paint sprayer prices. So that’s great!
Clicking Air Cap
When you turn the cap to change the direction of the spray, it kind of clicks into place, and I love that!
Overall
In the end, I’m really happy with it! There are so many great things about it, that in the end far outweigh the things I wish were different.
So I can see myself using it more and more than my other beginner paint sprayers. I can’t even believe that I’m saying that. Haha
Check out how this compares in our Homeright Finish Max VS Super Finish Max blog post. We’ve also got a separate post for our Homeright Finish Max Paint Sprayer Review here. If you want more paint sprayer reviews, check out this post to learn more.
HomeRight Super Finish Max Troubleshooting
There can be a few challenges when using your HomeRight paint sprayer but you can learn how to fix them quickly and easily below!
How to Unclog Homeright Paint Sprayer
If you get a clog in your paint sprayer, you’ll need to stop spraying and clean out the sprayer. A good cleaning will find what is clogging it and remove it.
I would even go as far as pouring the paint back into the paint container that it came in, and cleaning out the container. And spraying water through the paint sprayer to help push out whatever is clogging it.
Then take apart the front end of the paint sprayer and rinse everything out, and make sure there isn’t dried paint on the air cap that is making it spray weird.
Then I would filter out the paint before it goes into the paint sprayer. Seriously, the littlest speck can clog a paint sprayer. Cleaning it well between use, and filtering out the paint has saved me so much!
When I first started spraying I didn’t clean or filter the paint so much, and I dealt with a clogged paint sprayer many times before I realized that there was a better way.
How to Get a Smooth Finish with a Paint Sprayer
The best way to get a smooth finish with a paint sprayer is to thin the paint out before spraying it.
Sure, the paint sprayer might be capable of spraying thick paint, but that doesn’t mean that it’s the best idea.
If you don’t want to have any orange peel texture in your spray-painted finish, the paint should be thinned out to the right viscosity. The right viscosity changes depending on the paint sprayer you use, and what paint you’re using.
But typically, if you thin your paint out 10-20% , the paint will lay down better, creating a more smooth finish.
Thick paint like chalk paint can and probably will need to be thinned out more to get a really smooth finish.
If your paint sprayer comes with a viscosity cup, read the owner’s manual to see what they recommend for the run out time of the viscosity cup.
That just means that you will need to time how long it takes for the paint to completely run out of the viscosity cup.
With my Wagner Double Duty paint sprayer, I would thin out the paint until it ran out of the viscosity cup at around 40 seconds.
If the paint sprayer doesn’t come with a viscosity cup, thinning the paint with 10%-20% thinning agent will usually create a smooth finish.
If your paint is water-based, you can add water to the paint to thin it out.
If your paint is oil-based, you can typically add mineral spirits (check with the paint company for the best recommendations) to thin it out.
Why is My Paint Sprayer Spitting?
There are a few things that can make a paint sprayer spit.
First, make sure everything on your paint sprayer is put together correctly and tightly. If things are loose, your sprayer won’t spray correctly.
Second, if your paint is too thick for the paint sprayer, it will spit more. Try thinning it out, and try it again.
Third, some paint sprayers (Wagner brand specifically) need the trigger to be pulled back partially to get the motor going before you pull the trigger all of the way back to get the paint to come out.
If you don’t pull the trigger part of the way first, then the sprayer will spit when you first start spraying.
Fourth, make sure the paint has been filtered. Small specks of debris can partially clog your sprayer, making it not spray correctly.
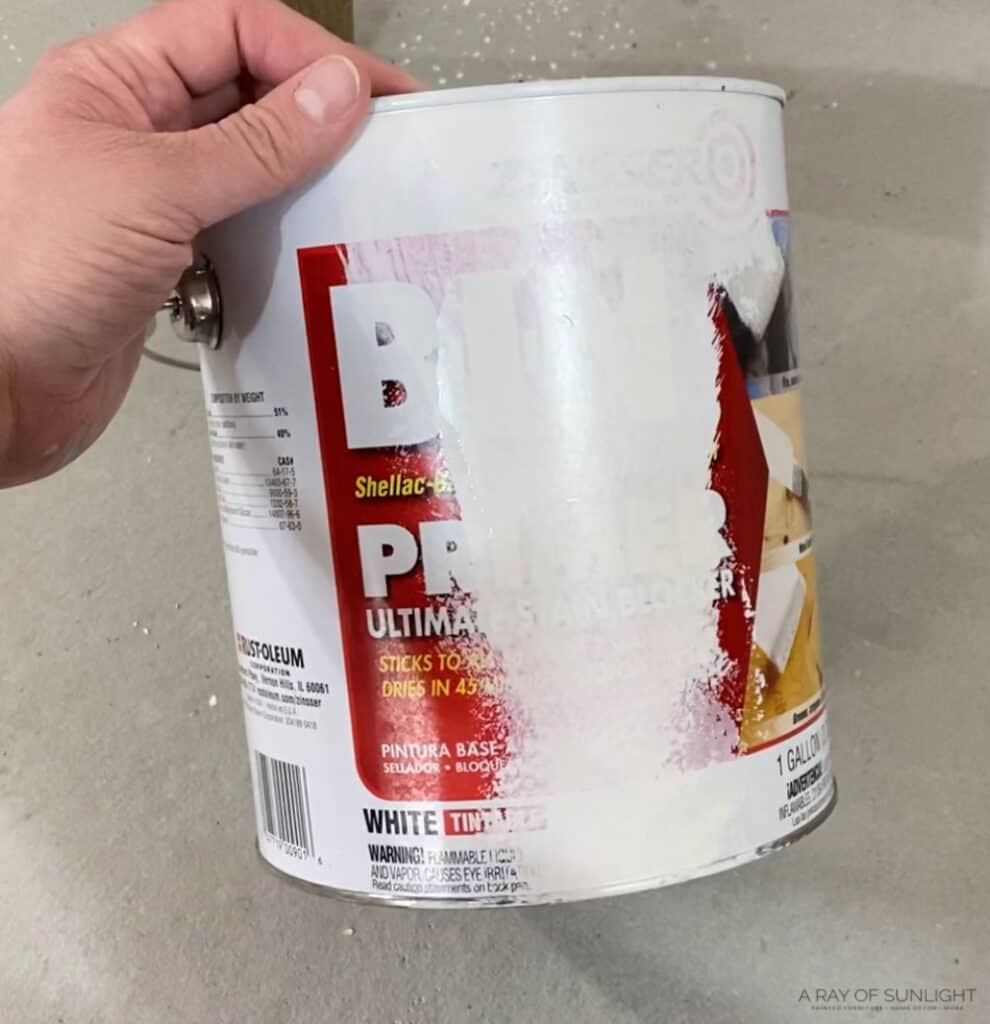
Can You Put Primer in a Paint Sprayer?
Yes! But first, check with the paint sprayer and the primer to make sure they are compatible. I’m mostly talking about the “flash point” of primers.
Some paint sprayers warn you not to spray or clean with products that have a flash point below 100 degrees. (Flash point is the temperature at which a product can produce enough vapor to ignite.)
Shellac primers, specifically BIN shellac primer has a flash point below 70 degrees Fahrenheit, so it’s not recommended to use it in some paint sprayers.
Then, treat the primer just like you would treat paint in a paint sprayer.
Some primers are thin, so they don’t need to be thinned out first (like BIN shellac based primer). But most primers are thick and should probably be thinned out before spraying.
Don’t forget to always clean the paint sprayer after using it with shellac. Here’s a guide on how to clean shellac primer out of sprayer.
Can HomeRight Super Finish Max Paint Sprayer be used with stain or varnish?
Yes, the HomeRight Super Finish Max Paint Sprayer is versatile and can be used with both stain and varnish. Its ability to spray oil or water based materials makes it perfect for a variety of projects, from furniture refinishing to home improvement projects.
So aside from paint, you can also use this sprayer to stain and varnish pieces. So it’s very handy because you don’t need to invest in different sprayers for different materials.
Plus, the Super Finish Max is easy to clean, so switching between paint, stain, and polyurethane is a breeze. With this sprayer, your DIY projects just got easier and more efficient!
Is it difficult to assemble the HomeRight Super Finish Max Paint Sprayer?
Assembling and disassembling the HomeRight Super Finish Max Paint Sprayer is actually quite simple. The instructions are clear and easy to follow, making the process quick and hassle-free. With just a few simple steps, you can have your sprayer ready to use in no time.
Even if you are not familiar with using paint sprayers, you shouldn’t have any difficulty assembling or disassembling the HomeRight Super Finish Max Paint Sprayer.
First, you will need to remove and fill the container with the material you will be spraying. Then, determine the size of tip and needle you will need and select the proper Air Cap for your desired spray pattern, whether it be fine or wide.
After that, simply insert the pick-up tube into the cylinder housing and attach the container to the sprayer. It’s that easy!
Do you have this paint sprayer? Or have you been wanting to try it? Let me know in the comments if you have any other questions or more tips!
More Paint Sprayer Resources
- Best HVLP Paint Sprayers for Furniture
- How to Prevent Overspray When Painting Furniture
- Spray Paint Tools
- How to Fix Spray Paint Drips
- Spray Paint vs Brush Paint Furniture
Follow us on YouTube to get more tips for painting furniture. Or share your project with us on our Facebook Group and be part of our community. See you there!
You did use BIN Shellac primer in your homeright sprayer? I think thats what I got from your comment. Just making sure. I am struggling with the sprayer and bin 123.
No. I would not use BIN shellac based primer in the homeright sprayer.
It is not recommended because the flash point (the point at which it can combust) is so low. Meaning that it doesn’t take much to make it catch on fire. The Homeright sprayer’s motor is right there, so if there is a spark in the motor and a lot of fumes, you could have a big problem. That’s how I understand it anyway.
So please do not use shellac products with a sprayer like this. If you have a different sprayer, ask the brand what the recommendation is.
I’ve used primer on 2 pieces and both times it left a wonderful finish. However, Ive tried 3 different to brands of paint/enamel for the top coat. Every time it has left an orange peel or the a much more textured finish then the primer. I’ve thinned accordingly using a viscosity cup and mimiced your settings for the sprayer. (And tried to play around with the settings a bunch) Do you have insight on this?
Hey Chris! What a bummer! I have no idea what it would be though. I’m sorry!
HOw do you filter the paint? thank you
We use these filters.
Hi. I want to use this sprayer to paint kitchen cabinet doors. I will use Sherwin Williams Emerald Paint. You said that you use same paint not tinned with 4mm nozzle. I would like to thin my paint to get very smooth finish. My question is: if I thin Sherwin Williams Emerald Paint 10 or 15% what size nozzle should I use?. Thank you for very good instruction.
George
Hey George! Great question! You should be able to thin the Sherwin Williams Emerald paint by 10 to 15% and use the 4mm nozzle to get a very nice and smooth finish. Best of luck on your project!