Homemade Chalk Paint Dresser Makeover

Today, I’m sharing the good, bad, and ugly of this homemade chalk paint dresser makeover that I did when I tested out the HomeRight paint sprayer. I went back to my roots, I made my share of mistakes, and I had to fix some bleedthrough issues, too.
When recreating these DIY dresser makeover ideas, it’s totally normal to run into some challenges. But don’t worry; I’m here to guide you through the process and hopefully help you avoid some of the mistakes I made!
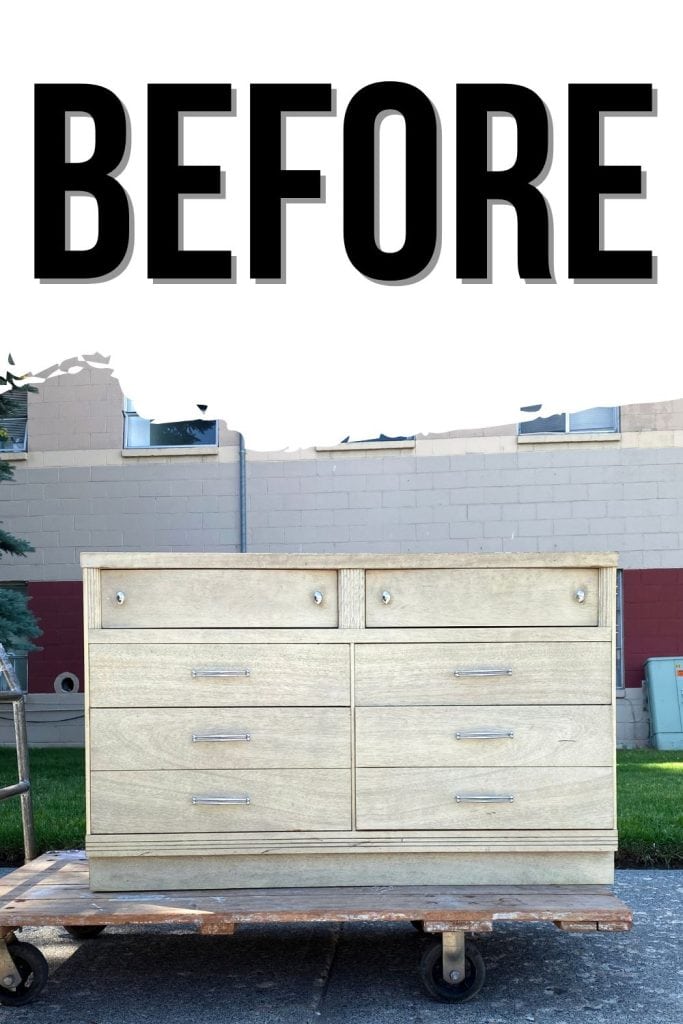
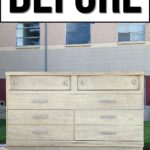
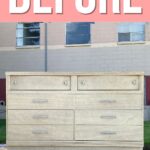
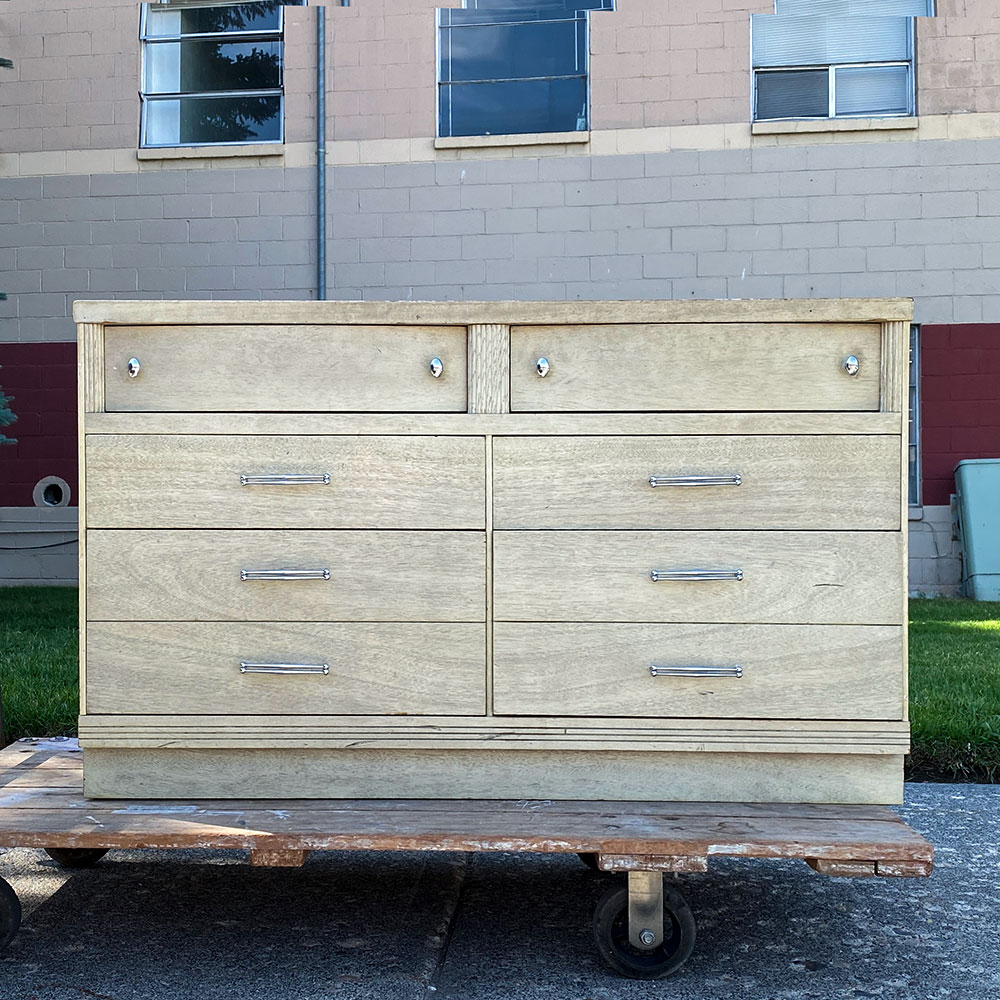
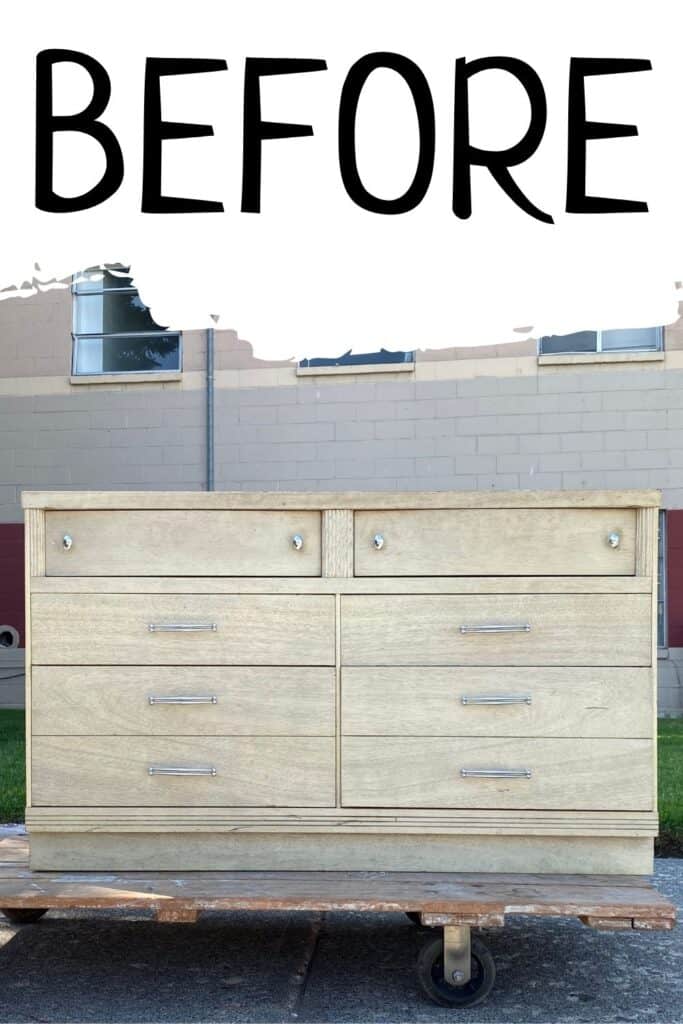
You can see above what the dresser looked like before. We bought it from Facebook Marketplace for $50, which is a steal in my area. If you want to know the best places to get good furniture for cheap, check out this post to learn more!

The piece was in pretty good shape, but its old color and hardware made it look dated and kind of dull. It definitely had potential, though, so I was excited to give it a fresh new look. Plus, this was the perfect opportunity to try out the HomeRight HVLP gun.
But again, things didn’t go as smoothly as I had hoped. You’ll know what happened as you read on, and I hope you can learn from my mistakes and save yourself some trouble. Now, let’s dive into this homemade chalk paint dresser makeover!

Supplies Used for this homemade chalk paint dresser makeover
As an Amazon Associate, I earn from qualifying purchases. I also may earn from other qualifying purchases with other companies or get free product to review and use. All opinions are my own.
- Krud Kutter
- KwikWood to fill the old hardware holes
- Orbital Power Sander
- 100 Grit, 150 Grit, and 220 Grit Orbital Sander Sandpaper
- 220 Grit Sandpaper
- Shop Vac
- Tack Cloth
- Gorilla Glue
- Clear Shellac
- Respirator
- Almond Wisp from Behr Paint
- Calcium Carbonate Powder
- Plastic Bowl
- HomeRight Super Finish Max Paint Sprayer
- Paint Filters
- Wood Filler
- My Favorite Waterbased Polyurethane
- 400 Grit Sandpaper
- Painting Sponge
- New Knobs
Prep Dresser for Makeover
First things first, we did all of the boring prep work. Learn why it’s so important to prepare furniture for painting here!
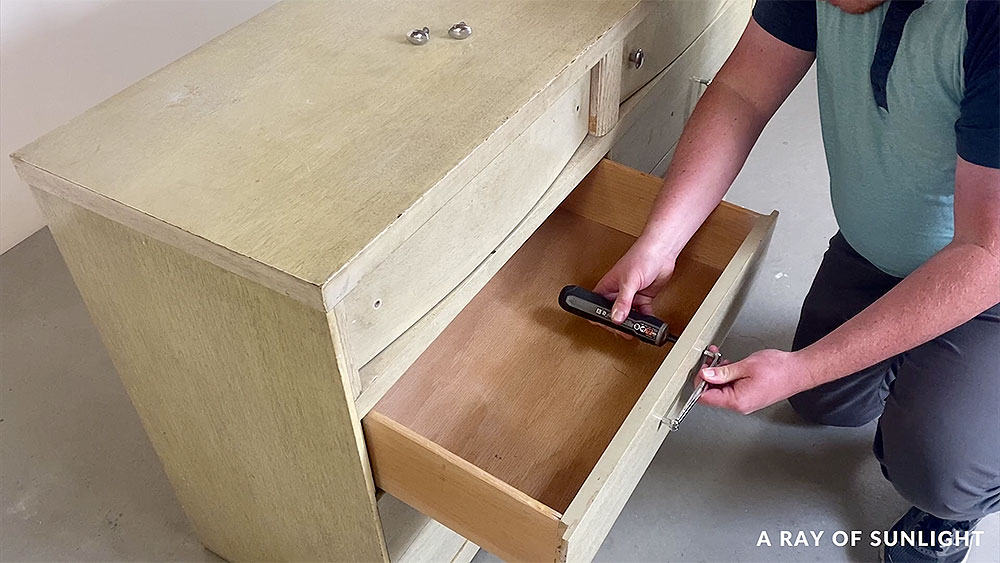
We removed the hardware, cleaned it off, and filled in the old hardware holes.
I recently did a tutorial comparing the most popular ways of filling holes when replacing furniture hardware… I thought it was super interesting!
The top had a lot of scratches, so I decided to sand it down and get all of those scratches out of it. I started with 100 grit sandpaper on my orbital sander to eat through the finish fast.
*Update: Since this project, I have bought and used a handful of power sanders! Read this post to learn about the best sanders for furniture!
I did really good and didn’t blow through the thin veneer at all on the top. But when I got to the sides, all of my luck was gone. Oops
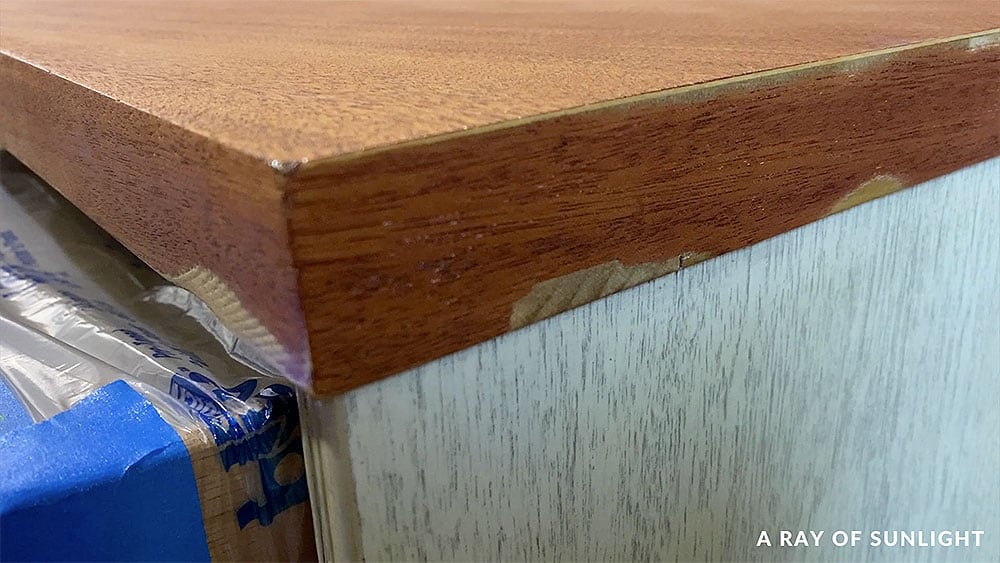
I blew through that thin veneer in a few spots. I probably shouldn’t have used such a coarse grit on the sides, huh? Or I should have stuck with what I do best and removed the stain with a chemical stripper, so I didn’t have much chance to sand through the veneer. Learn how to remove wood stain here.
Oh well. You live, and you learn, right? Anyway, so I continued sanding and did the whole move slowly through the different grits of sandpaper until I got it to where I wanted it to be.
So, I sanded everything with 150 grit. And then, I hand sanded with 220 grit sandpaper to smooth it a little bit more for the new color. Learn more about the best sandpaper for furniture painting here.
Then, since I had the sander out, I sanded the filler in the hardware holes down so it was flush, and I took a minute or two to lightly sand the rest of the dresser’s surface with 220 grit sandpaper. Since this piece was pretty flat, I was able to use the orbital for most of the scuff sanding.
Learn more about the importance of sanding before painting furniture here.
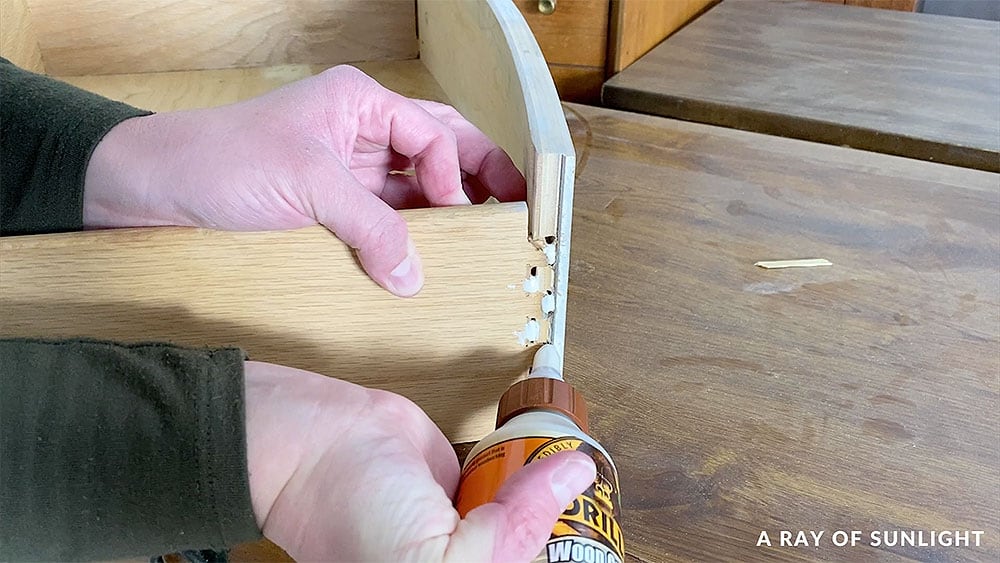
Then, my husband vacuumed out the inside of the piece. And I glued a drawer back together that was falling apart. Here’s a guide on dresser drawer bottom replacement if the drawer needs more than just a simple repair.
Prime Dresser to Prevent Bleedthrough
The next day, with the repair done, and the drawers all taped off – one of the ways how to prevent overspray when painting – I applied clear shellac all over the piece.
Have you used this stuff to block stains on your furniture? Check out more of the best primers to stop tannin bleed you can use here.
Why Do I Prime with Clear Shellac?
If you’re wondering what in the world I’m talking about… Hi, welcome to my furniture makeovers. Haha
I like to use clear shellac to block stains from showing up in my new finish. It also makes paint stick really really well, which is weird because it’s mostly known as a topcoat.
Someone out there, please explain why it helps with adhesion so well even for really slick surfaces. I don’t know why it does what it does. I just know that it works. And I love the spray can version because it’s easy to spray on. It does stink a lot, though. That’s its downside.
Anyway, I applied 2 really good coats of clear shellac all over, letting it dry for at least an hour between coats and then overnight before applying the new color.


Painting A Dresser with Homemade Chalk Paint
And then, the next day, I made the homemade chalk paint I will use.
How to Make Homemade Chalk Paint
I used the color Almond Wisp from Behr. I personally really like this homemade chalk paint recipe that uses 1 cup flat latex paint and 5 tablespoons food grade calcium carbonate powder. I also have this list of chalk paint recipes you can try on your future DIY projects.
**Note: I’ve since used BB Frosch Paint Transformer Powder. It is amazing and much better than this recipe. Check out my honest BB Frosch Paint Transformer review to learn more about the features and pros and cons of this product.
I mix together a little bit of water, maybe a tablespoon or two of water… and the calcium carbonate powder.
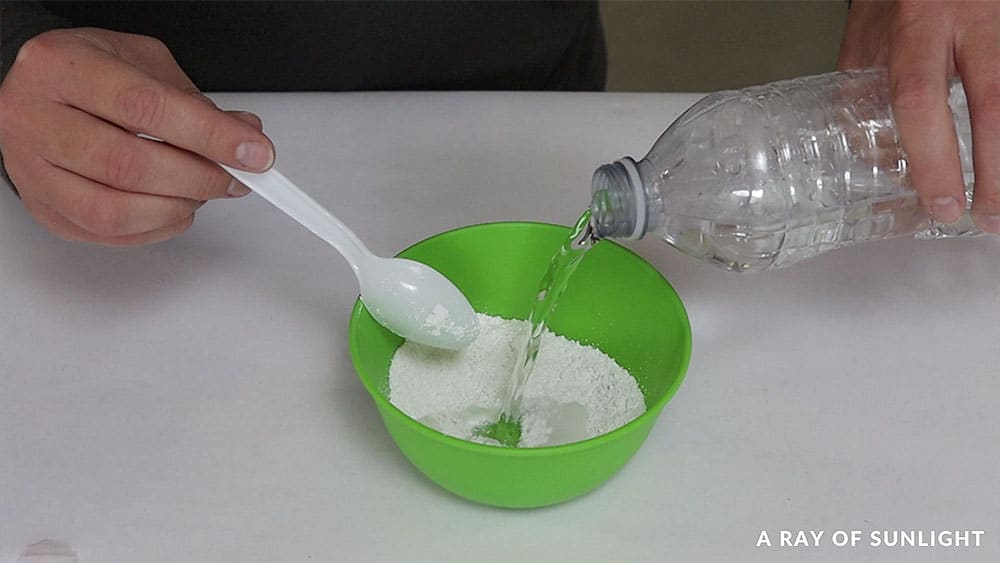
Then, I put that mixture into the flat latex and mix it together really well. This is a super cheap alternative to the regular one; you can mix it with any color or brand of flat latex, and it sticks really well!
You can check out this painting furniture with latex paint post where we used this recipe on these rustic blue nightstands. Have you made this homemade version before?? If you’re not ready to make your own, check out these white chalk paint for furniture options.
If you’re wondering what is the difference between chalk paint and regular paint, you can learn about it in our post.
Would you like to save this?
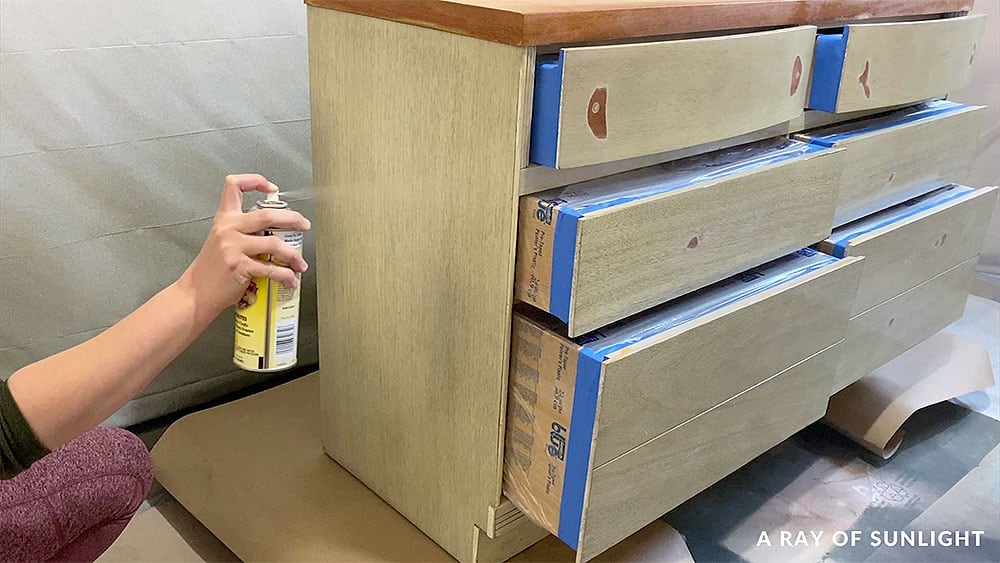
Spraying Homemade Chalk Paint
Then, I applied the tan color to the dresser.
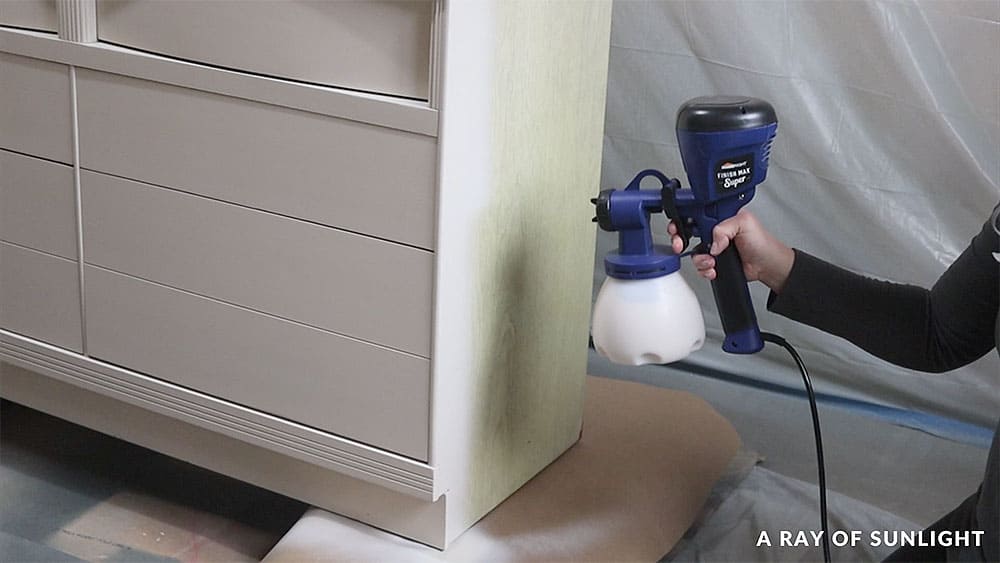
Check out this HomeRight Super Finish Max paint sprayer review to see how I thinned the paint, the settings I used, and all the tips you need to know when using the HomeRight paint sprayer. Here’s a guide on how to clean HomeRight paint sprayer that will come in handy as well.
If you’re still wondering, “Can you use chalk paint in a sprayer?” – get all the answers here!
After the first coat was dry, I noticed a lot more scratches that should have been filled or sanded out, and I even noticed a slight paint drip. Read through my post on how to fix spray paint drips to tackle this issue.
Since I sanded the top down to bare wood, there was a lot of wood grain that needed to be filled in on the top. So, I took a break from applying the next coat and worked on covering those things up.
I filled the wood grain on top and filled in the scratches and blemishes everywhere else. Learn more about how to hide wood grain when painting here. When those things were dry, I sanded them all down flush and even sanded out the drip. Then, I cleaned up my mess.
Prime and Paint Filled in Areas
And then, I applied more clear shellac over those repairs. I know, from past experience, that filling in wood grain tends to bring out bleedthrough issues, so I didn’t want to give it a chance to give me issues. Read this post to learn more about how to stop stains from coming through paint!
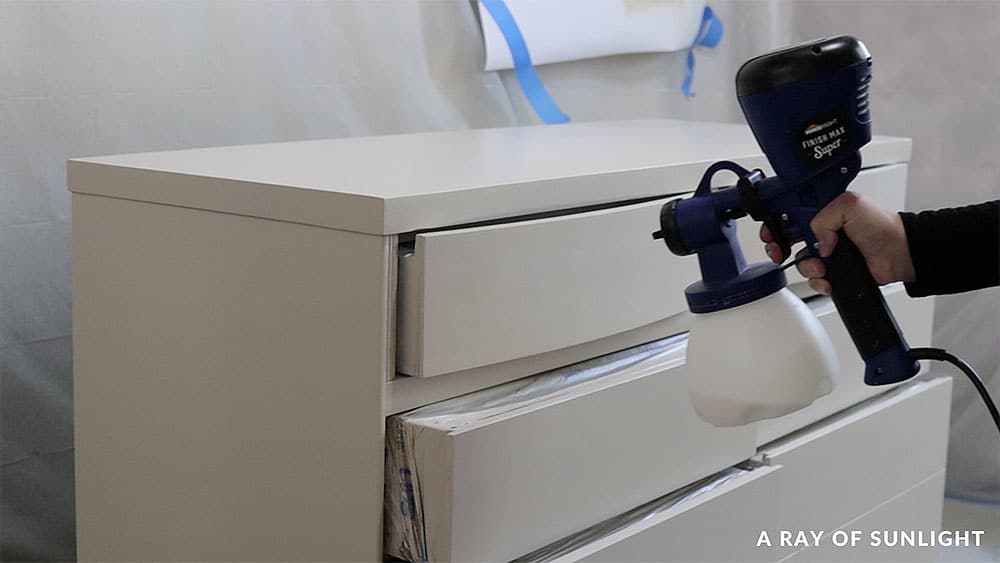
The next day, I added another coat of color all over. Actually, I think I ended up with 3 coats by this point. This paint dries so fast though, so the painting part didn’t actually take long. Everything else was taking forever. Haha
Topcoating Homemade Chalk Painted Dresser
So, after that last coat was dry, I lightly sanded the piece with 400 grit sandpaper to make the finish feel smoother. Then I sprayed a coat of waterbased poly onto the dresser. Learn more about how to spray polyurethane here.
After the poly is dry, I like to sand it lightly with 400 grit sandpaper again to make it feel really smooth again.
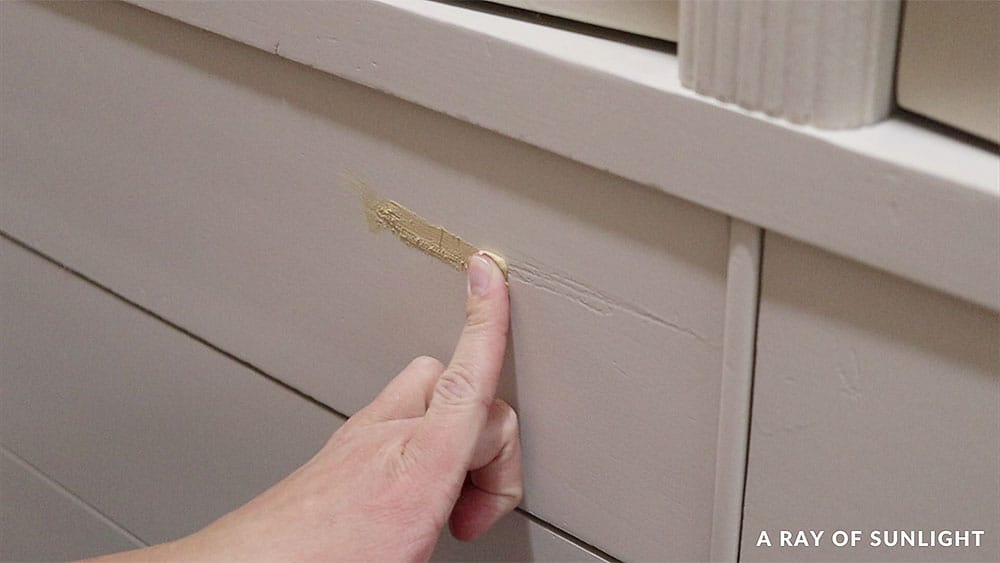
How to Fix Bleedthrough
And that’s when I found a few bleed through stains coming through.
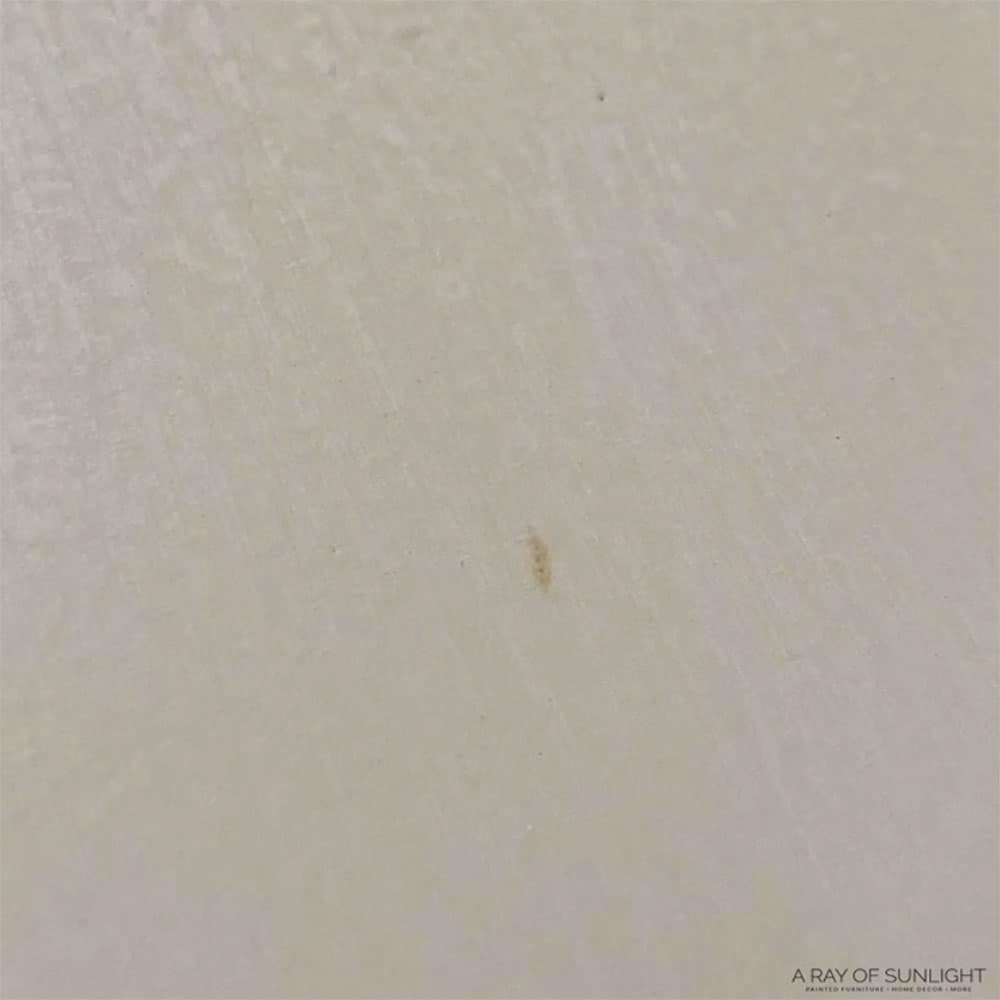
This is such a common thing. You don’t see any stains coming through the new color and think you’re almost done.. and then once you put your topcoat on, the stains show up. It’s SO annoying. Basically, you’ve just gotta start over.
Thankfully it was just on one drawer, so I pulled that drawer aside and I applied a couple of coats of clear shellac on it. And then I let it dry overnight again. Then, the next day, I just wiped the color all over that one drawer because I didn’t want to get my sprayer dirty for such a small area.


Topcoat with Polyurethane Again
After the 2 coats on that drawer were dry, I finished everything again with a topcoat, so I ended up with 3 coats of topcoat on all of it.
Did you keep track of how many coats of everything I used?? I lost track haha. Learn more about the best topcoats for painting furniture here.
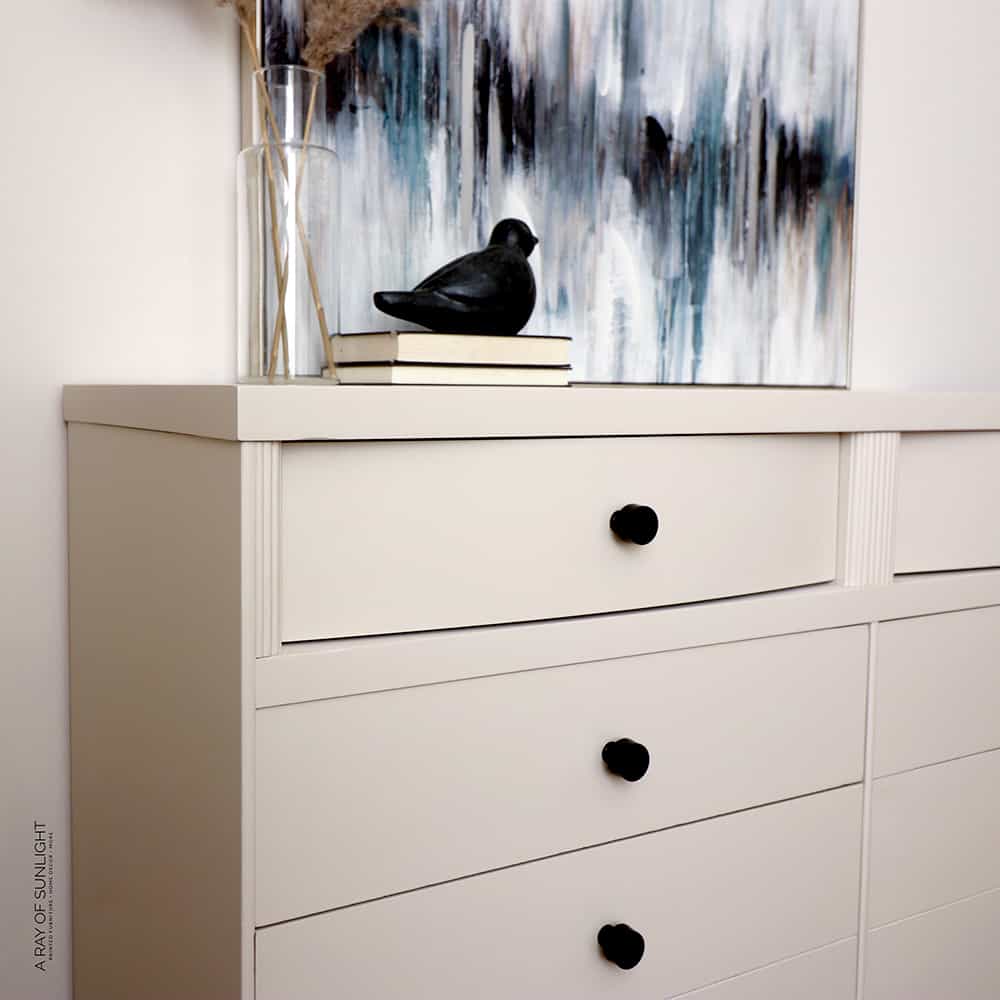
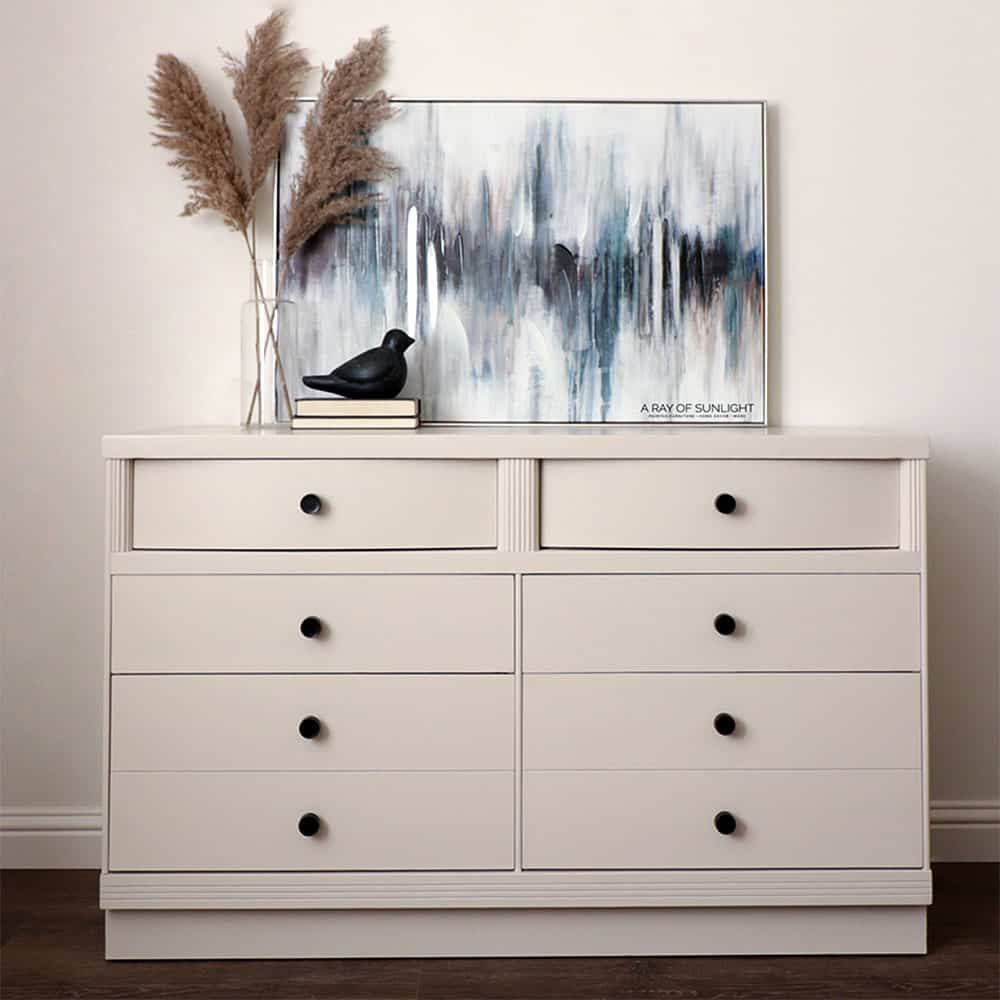
Add New Hardware
To finish it off, we put new hardware on each drawer. I really wanted to put the edge drawer pulls on, but since the bottom drawers really are one drawer and not 2 drawers, I couldn’t pull those off. So I ended up going with these simple knobs.
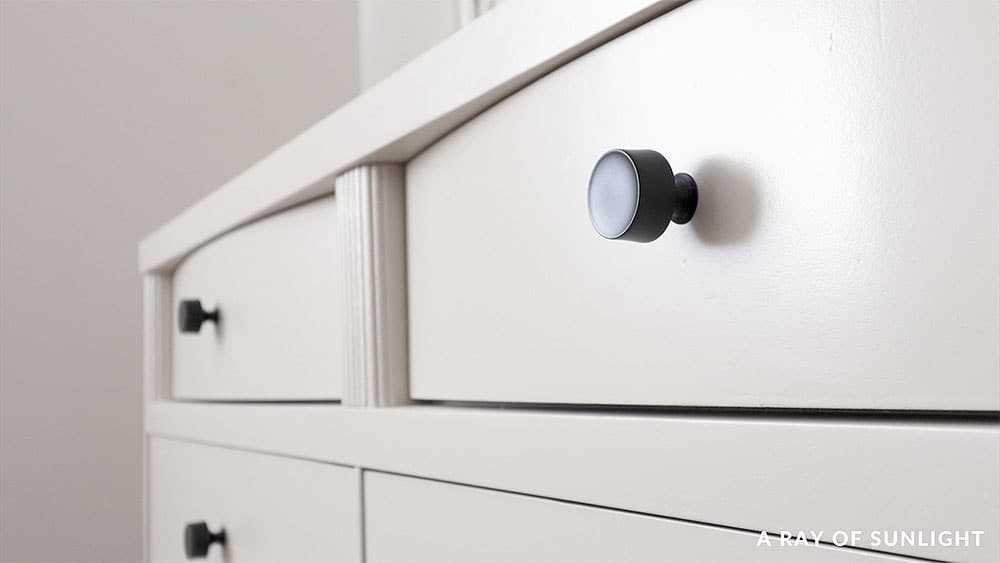
And I love them! It looks so sleek. I had such a hard time deciding on what hardware to put on this piece. These knobs weren’t my first choice, but because of how the drawers were, I couldn’t use my first choice. I love these knobs, though, so I think it worked out in the end.
The bleedthrough was a bit of a pain, but it could have been so much worse. I’m so glad it was only a few spots in one drawer!
If you want more inspiration for adding a modern touch to your home, here’s our list of modern dresser ideas! For more budget friendly makeovers, here are cheap DIY dresser ideas.
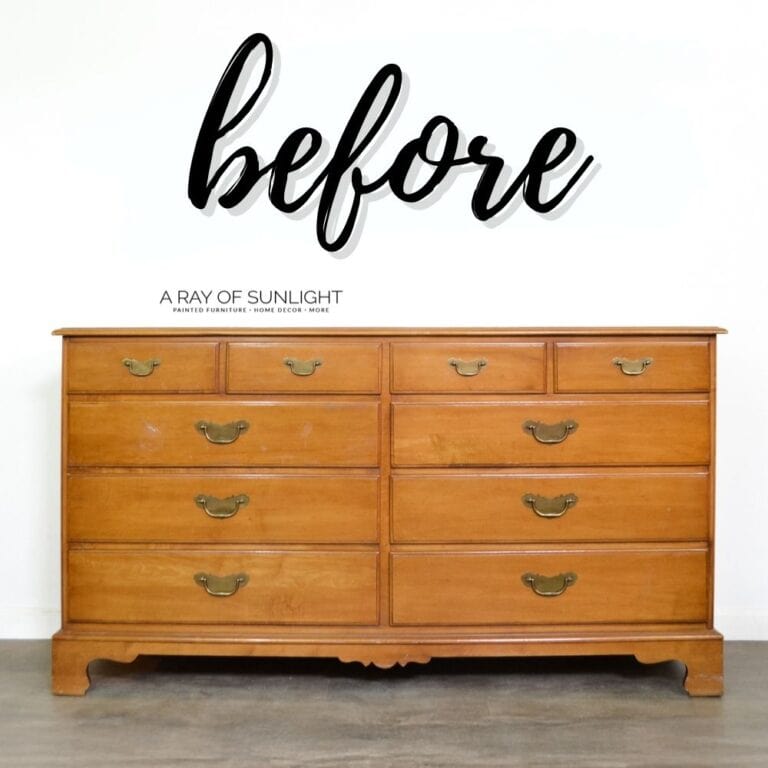
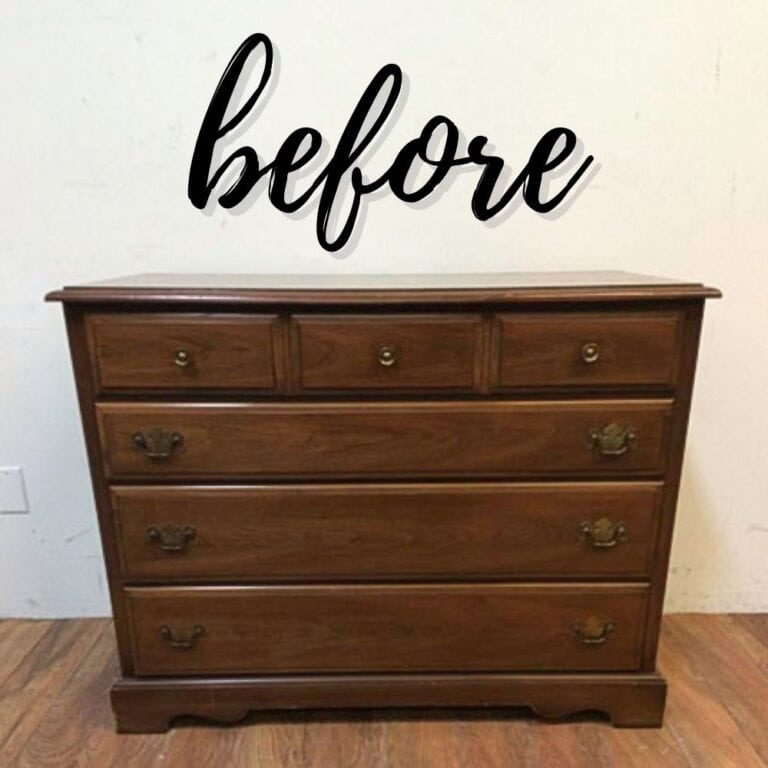
More Before and After Makeovers
See All >
Click any of these “before” photos below to view the “after” of that makeover.


And the homemade chalk paint went on like a dream. It sticks super, super well, too… Actually, I forgot how good it is. So I’m so glad that I tried it again. Anyway, what do you think??


Homemade Chalk Paint Dresser Makeover
Update your old dresser with this homemade chalk paint dresser makeover using chalk paint made from latex paint and calcium carbonate powder.
Materials
- Krud Kutter
- Kwik Wood
- 100 Grit Orbital Sander Sandpaper
- 150 Grit Orbital Sander Sandpaper
- 220 Grit Orbital Sander Sandpaper
- 220 Grit Sandpaper
- Tack Cloth
- Gorilla Glue
- Clear Shellac
- Almond Wisp from Behr Paint
- Calcium Carbonate Powder
- Plastic Bowl
- Paint Filters
- Wood Filler
- Water-Based Polyurethane
- 400 Grit Sandpaper
- Painting Sponge
- New Knobs
Instructions
- Prep the dresser for paint. Remove its hardware, clean it off, and fill in the old hardware holes. Then sand everything with 150 grit and then with 220 grit sandpaper to smooth it a little bit more for paint. Vacuum all the dust from sanding.
- Apply 2 coats of primer onto the dresser to prevent bleed through stain. Let the primer dry for at least an hour between coats, and then overnight before painting.
- Mix up 1 cup of latex paint, 5 tbsp of calcium carbonate powder, and 1-2 tbsp of water to make homemade chalk paint. Mix it together really well.
- Apply homemade chalk paint onto dresser. After the first coat dries and there's any wood grain and scratches, fill them in then sand them down. Prime then paint those filled in areas after. Paint dresser with 2-3 coats.
- After that last coat of paint dries, lightly sand the dresser with 400 grit sandpaper to make the paint finish feel smoother. Then seal the painted dresser with 2-3 coats of waterbased polyurethane.
- To finish it off, add your new dresser hardware.
Recommended Products
As an Amazon Associate and member of other affiliate programs, I earn from qualifying purchases.


More Chalk Painted Furniture Ideas
- How to Spray Paint a Dresser with Chalk Paint
- Glaze Over Chalk Paint
- Chalk Painted Nightstand Makeover
- Chalk Painted Desk
- How to Chalk Paint Laminate Furniture
Follow us on YouTube to get more tips for painting furniture. Or share your project with us on our Facebook Group and be part of our community. See you there!
Can you please share the brand of shellac you used? Is it water based? Thanks so much! jodie
The exact shellac that I used is linked in the supply list. It’s just regular clear shellac. I don’t recommend anything that says that it’s synthetic or waterbased shellac. Only the real, alcohol based stuff will really work.
Hi , Natalie, Great timing! I have this a dresser very similar to yours and planning on painting it a dark color. I normally use the spray shellac before moving on to painting but the dresser is in my basement and I have no way of of moving it at this time. My question is can I just scuff sand this piece and use an all-in-one paint? I’m torn now whether I’m doing the right thing by skipping the primer. You wouldn’t think it wouldn’t be a bleeder being a blonde finish to the dresser but i’m questioning myself now cause of your video. By the way, now I may change my knobs because of how beautiful yours looks now. Thank you again!
Sue
Hey Sue!
Ohh that’s so hard. You just never know if it’s going to bleed. If you go dark, you hopefully won’t have any issues!
If you are really worried, you can prime it with a waterbased primer like grey zinsser 123 primer. And let the primer dry for a day before painting over it.
Good luck!!
Wow this turned out amazing! I am going to have to try some of your homemade chalk paint!
Thank you so much Christina! I hope you do try the homemade chalk paint!
Oh My, your Homemade Chalk Paint Dresser Makeover is fabulous. I appreciate the directions for making chalk paint. And I’ve got to tell you that’s a great idea about using shellac for priming.
Thanks bunches for sharing this makeover with Sweet Tea & Friends this month.
Hey, Paula! I’m so thrilled you liked the makeover. It’s also great to know you appreciated the directions for making chalk paint as well as the tip on using shellac for priming. Thanks for all the love on this, it’s so appreciated!