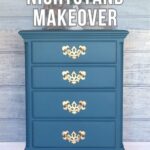
Chalk Painted Nightstand Makeover

One of the best things about refinishing furniture is that furniture can be passed down from generation to generation but be updated so it doesn’t look like it’s old and worn out. With this chalk painted nightstand makeover, the biggest change, other than the finish, was repairing the legs.
Using chalk paint in this makeover allowed for a durable finish that will last for years to come. Not only is it easy to work with, but it also comes in a wide variety of colors, making it perfect for any of these chalk paint furniture ideas.

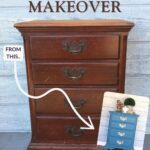
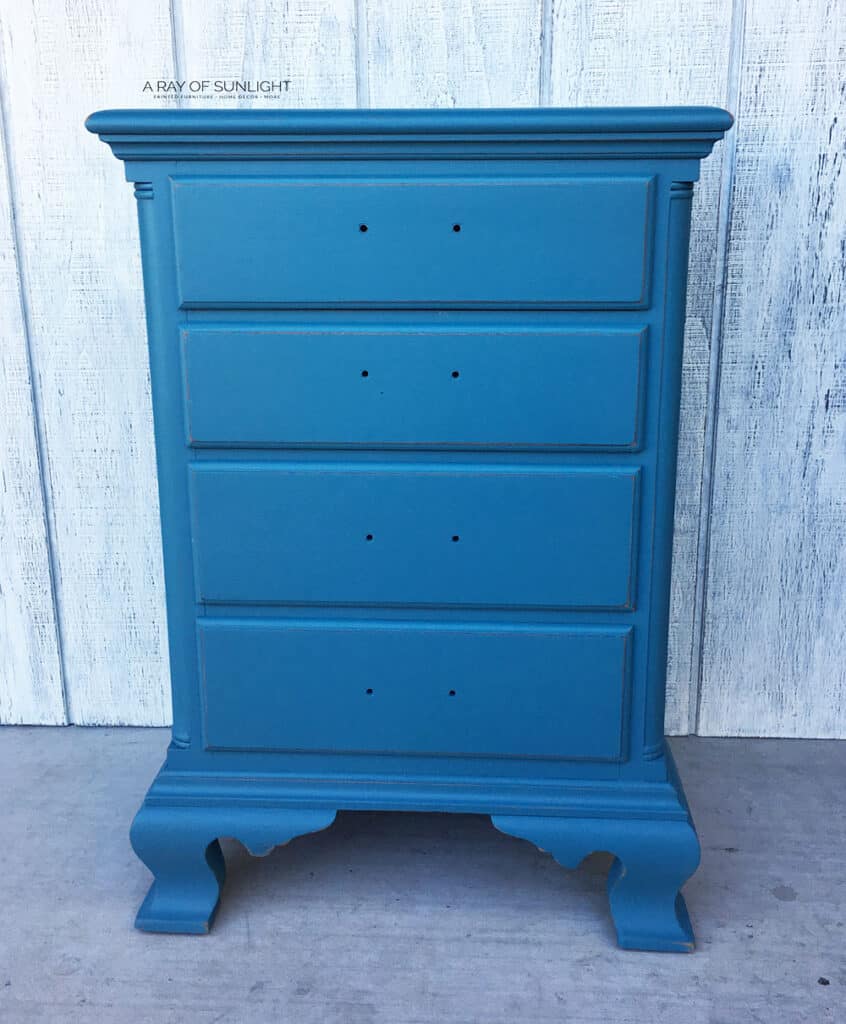
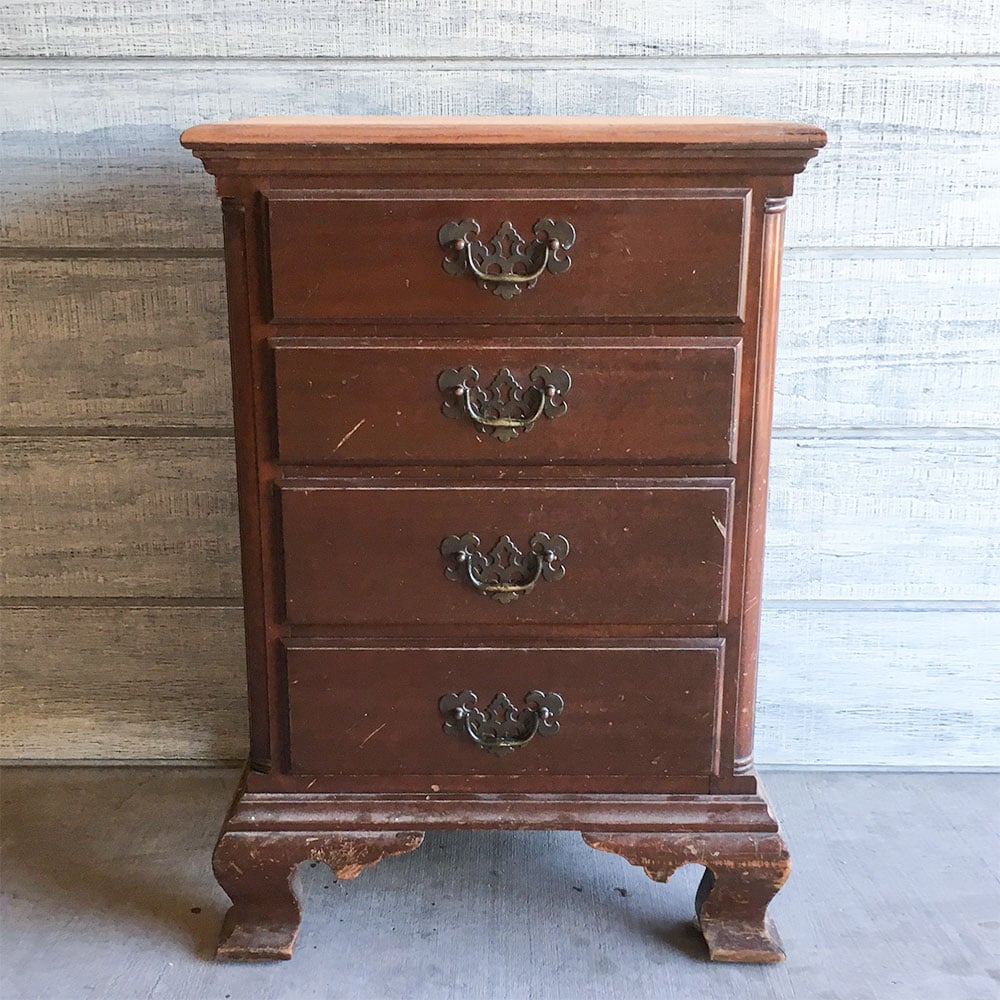
My client inherited this old nightstand that was once her grandmother’s. It is solid mahogany with 4 drawers, but the top was pretty badly beaten up with scratches and water rings all over.

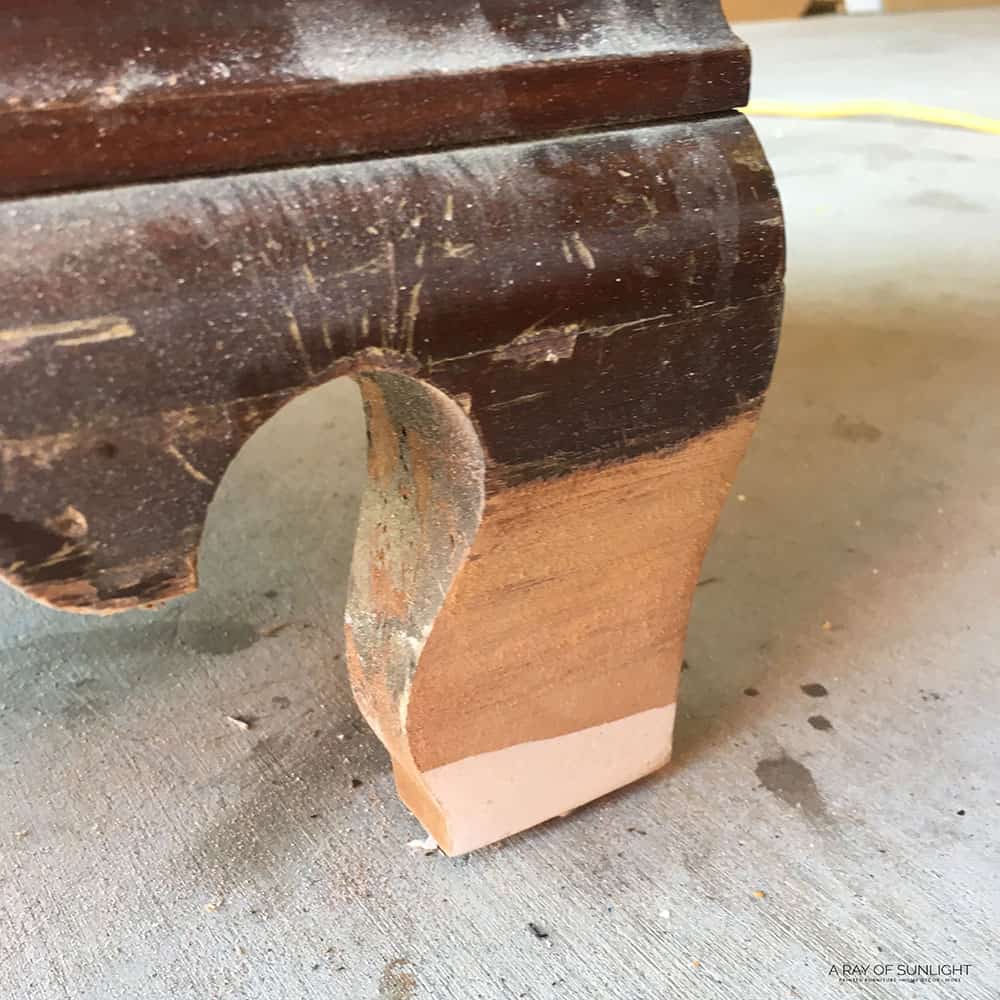
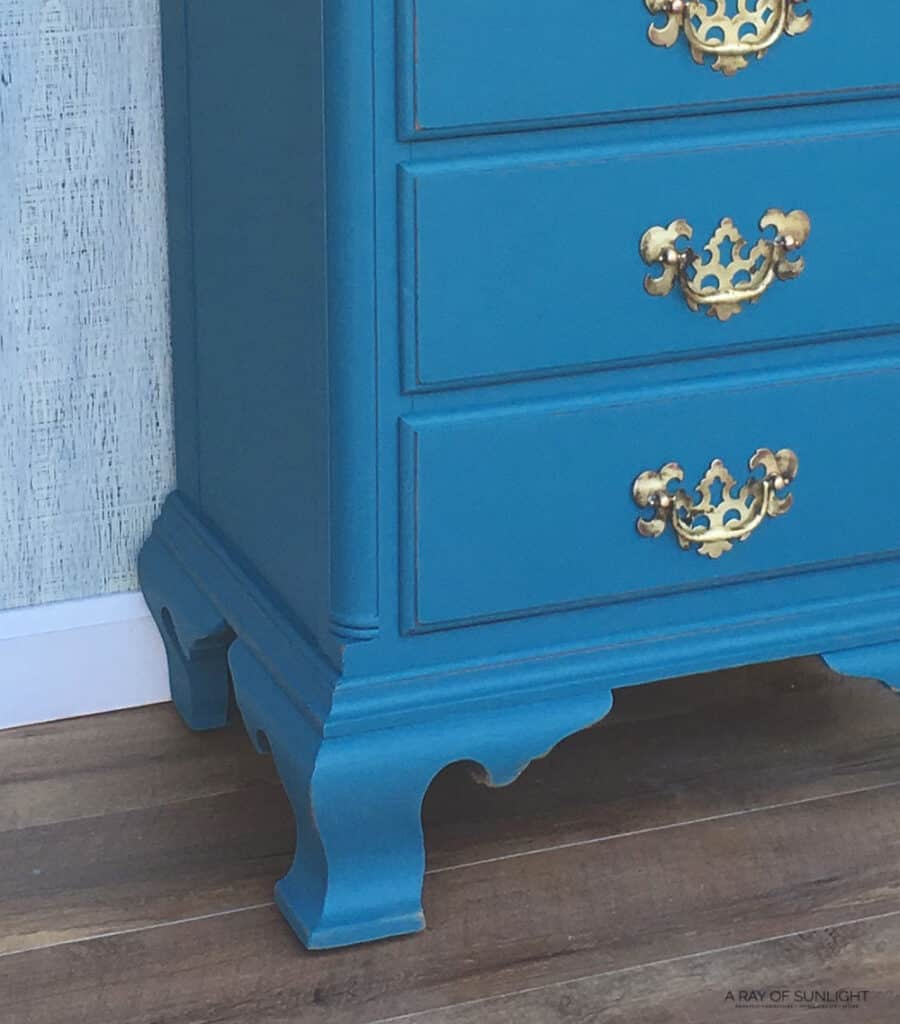
Not to mention the finish was coming off. The worst of it was that the back legs had broken. They once had flared out like the front legs, but the beautiful curve had broken off both of the back legs.

Thankfully we were able to update this piece and repair the legs so no one would know that it was once broken.


Supplies Used for Chalk Painted Nightstand Makeover
As an Amazon Associate, I earn from qualifying purchases. I also may earn from other qualifying purchases with other companies or get free product to review and use. All opinions are my own.
- Orbital Sander
- 60 Grit Sanding Discs (these are the best brand)
- Bondo and Bondo Scraper
- Utility Knife
- Behr Latex Paint Color Matched – Sorry I don’t know the color 🙁
- The Best Water-Based Topcoat
Grab these supplies and let’s get started on this nightstand makeover!
Sand Nightstand Top and Fix Nightstand Legs
First, we used the orbital sander with 60-grit sandpaper to sand the top of the nightstand down to bare wood. Read more about the best sanders for furniture here!
Next, we took all of the drawers out and tipped the nightstand onto its top. This made it so much easier to fix the back legs.
After lightly sanding where the legs had broken off, we mixed up a batch of Bondo. This stuff works miracles. It dries fast and hard, unlike wood filler.
*Update: Check out this post on how to fix a chipped wood corner to see how I could have used Bondo and hot glue to make the back legs look like they originally did!
Get Our Secrets!
Grab this super convenient How to Repair Furniture Ebook with all of our secrets on how to repair furniture for only $14.
You can print it out and have instant access whenever you come across damaged furniture, and know exactly how to fix it!
Click on the picture of the book to purchase!

Using the plastic Bondo scraper, I spread the Bondo onto the legs, filling in the broken area. After it was completely dry, I sanded each leg completely flat.
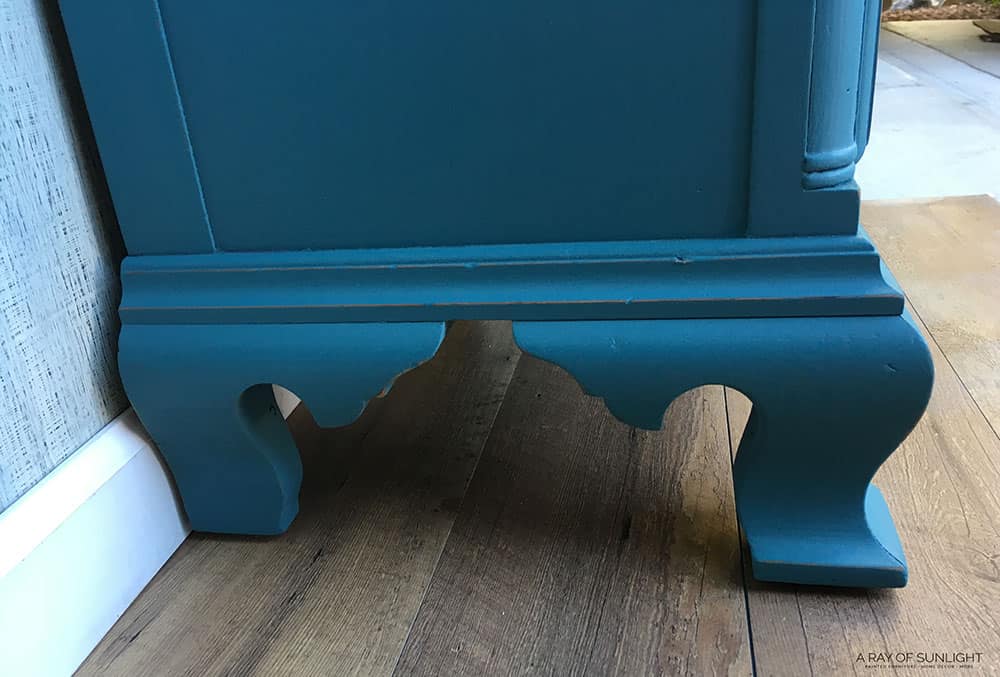
Wahoo! The legs were finally repaired and everything was ready for some paint.
Paint Nightstand with Homemade Chalk Paint
I removed the hardware from the drawers, cleaned the nightstand off, and taped off the drawers. Here’s all about how to clean furniture before painting.
Then I filled some minor scratches in with wood filler, and then sanded that wood filler down when it was dry. For more serious imperfections, here’s my guide on how to repair deep scratches in wood furniture.
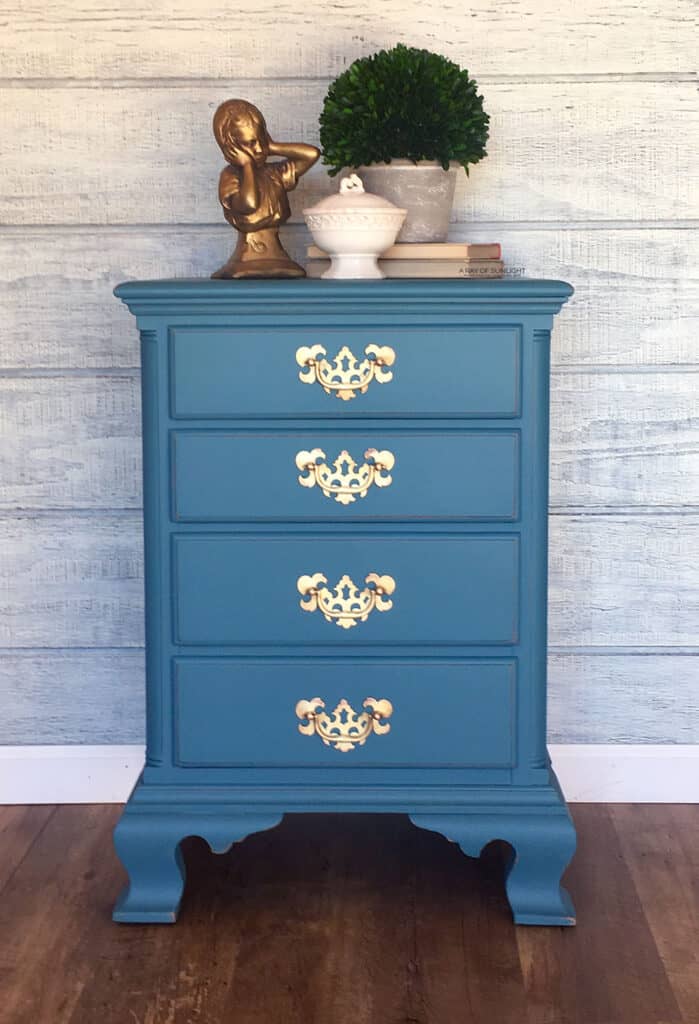
She wanted the nightstand to match her pillowcase, so we picked a color-matched can of latex paint from Home Depot.
We mixed that latex paint into chalk paint with this homemade chalk paint recipe. I brushed on 2 coats of paint to get full coverage.
Check out this post to learn how to paint furniture without brush marks!
*Update- I had no idea about “bleed through” when I painted this. Somehow I was lucky and didn’t have those stains coming through. I hope that my client doesn’t have issues with them now.
If you are painting furniture and you want it to look good, please read this post about how to stop stains from coming through paint, so you don’t have ugly stains all over your paint.
Clean Nightstand Hardware
The hardware was covered in dirt and grime, but it easily came off with Bar Keepers Friend. We usually have to scrub a lot to get hardware to this point, but the grime came right off of these ones.
Would you like to save this?
Read this post about cleaning old furniture hardware to learn how to get your hardware nice and shiny again.
Topcoat Chalk Painted Nightstand
After a few coats of paint and some light distressing, I gave it a few coats of poly to make the paint even more durable, and to make it more wipeable.

You can wipe the poly on, or you can even spray poly on with a paint sprayer (my personal favorite way to do it). Learn how to spray polyurethane in this post.
Chalk paint is very porous, so it really needs to be top-coated. Unless you like your paint to stain and collect dust like none other. Haha, check out this post about the best topcoats for painting furniture.
More Before and After Makeovers
See All >
Click any of these “before” photos below to view the “after” of that makeover.


Now this mahogany nightstand has a new life. It went from being old and worn out to being perfect for her bedroom where she can enjoy it for years to come. For more nightstand makeovers like this, check out these small nightstand ideas!
It is such an honor that Brooke (like many others) chose us to transform her grandmother’s nightstand! Get more inspiration from these chalk painted furniture and chalk painted antique furniture ideas.
If you want to know how to price flipped furniture, head on over to my post to learn more.
Can I customize homemade chalk paint color?
Yes, you can definitely customize the color of your homemade chalk paint! In fact, it’s one of the best things about making your own.
The easiest way is to get your latex paint tinted at your hardware store with the specific color you want.
Or you can mix different shades of latex paint to create any color you want. This gives you so many options and makes it super easy to match your furniture to a specific color or style in your home.
If you’re still undecided on what color or shade to go for, here are the best painted furniture colors for inspiration. If you want to try pink, check out these pink chalk painted furniture ideas.
You can also easily find latex paint at your local hardware store. The best part is that the store can mix the paint into any color you want.
You can even bring a small 1″ color swatch or choose from big paint brand colors to get the perfect shade for your project. This makes it easy to match your furniture to your existing home decor or personal style.
Make sure to test your color on a spare piece of wood or cardboard before painting your furniture to make sure you’re happy with it.
And remember, some colors might look different when they dry, so be patient and wait until the paint is completely dry before making any final decisions.
If you started painting and come across any chalk paint problems, our guide will help you fix them.


Chalk Painted Nightstand Makeover
Give your old furniture a new lease of life with chalk paint. Here are the steps for this chalk painted nightstand makeover.
Materials
- 60 Grit Sanding Discs
- Bondo and Bondo Scraper
- Behr Latex Paint Color Matched
- Waterbased Polyurethane
Tools
Instructions
- Sand the top of the nightstand down to bare wood with the orbital sander and 60-grit sandpaper.
- Take out all the drawers of the nightstand. To fix nightstand legs, lightly sand it, mix Bondo and spread it onto the legs, filling in the broken area. After it dries completely, sand each leg completely flat.
- Now, remove the nightstand hardware and clean the nightstand. Tape it off as well to prevent overpainting. If there are minor scratches, fill them in with wood filler then sand the wood filler down when it dries.
- Get your chalk paint and apply 2 coats onto the nightstand for full coverage.
- While the paint dries, clean your hardware.
- Apply a few coats of poly onto your chalk painted nightstand to make the paint even more durable. Chalk paint is very porous, so it really needs to be top-coated.
- Add your hardware back.
Recommended Products
As an Amazon Associate and member of other affiliate programs, I earn from qualifying purchases.


More Nightstand Makeovers
- Repurpose a Desk into Nightstands
- DIY Emerald Green Mismatched Nightstands
- Vintage Nightstands Makeover
- French Provincial Nightstands Makeover
- DIY Teal Blue Nightstands

Follow us on YouTube to get more tips for painting furniture. Or share your project with us on our Facebook Group and be part of our community. See you there!
What a beautiful color!! Nice work!!