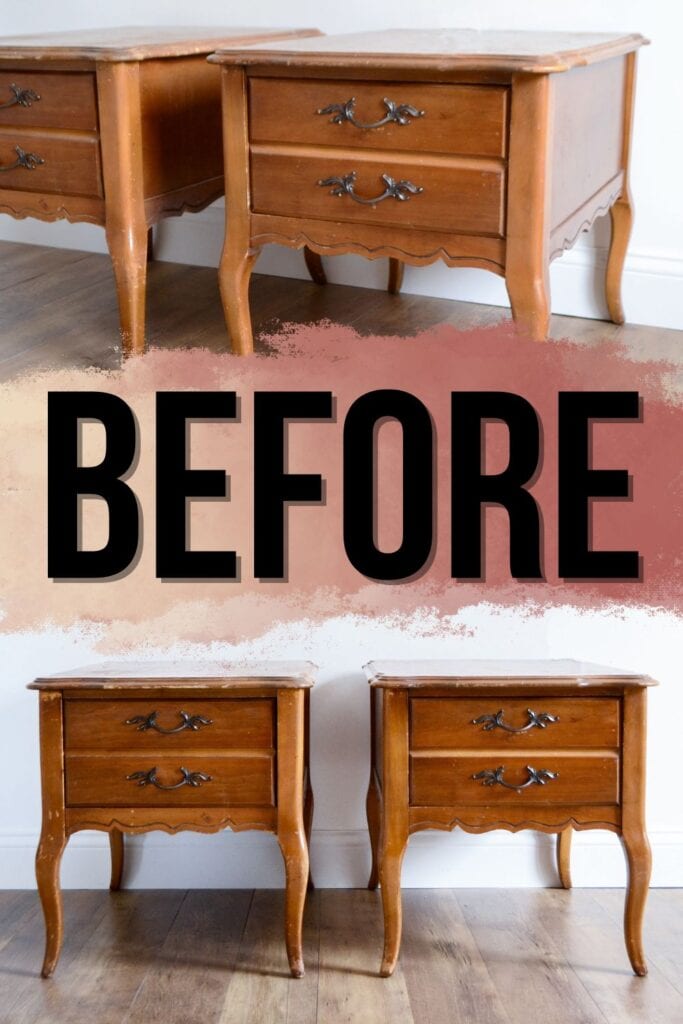
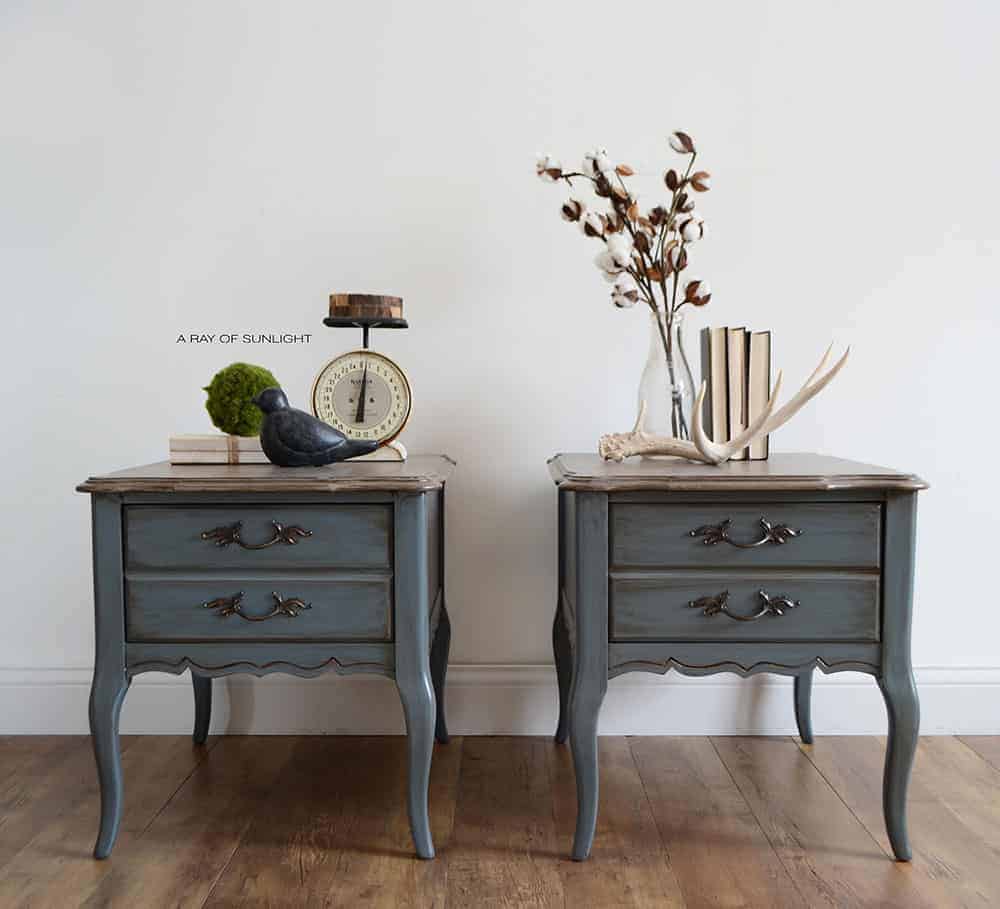
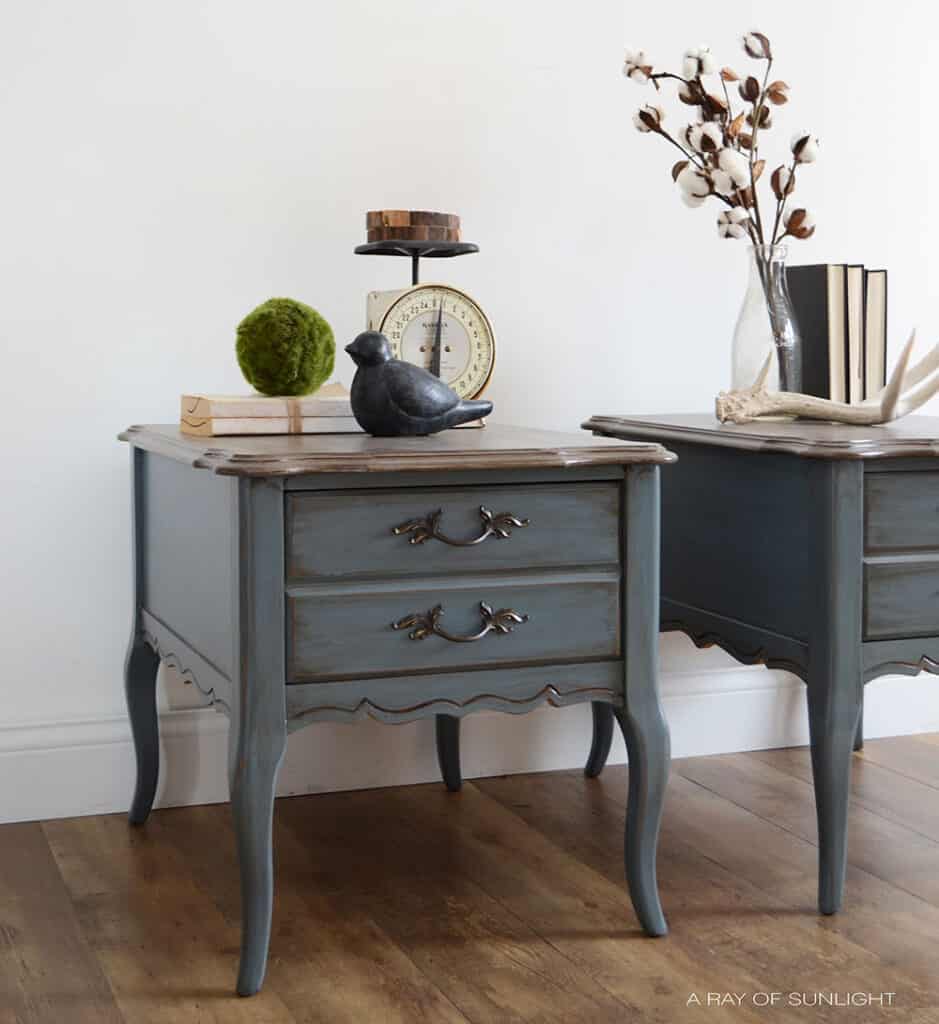
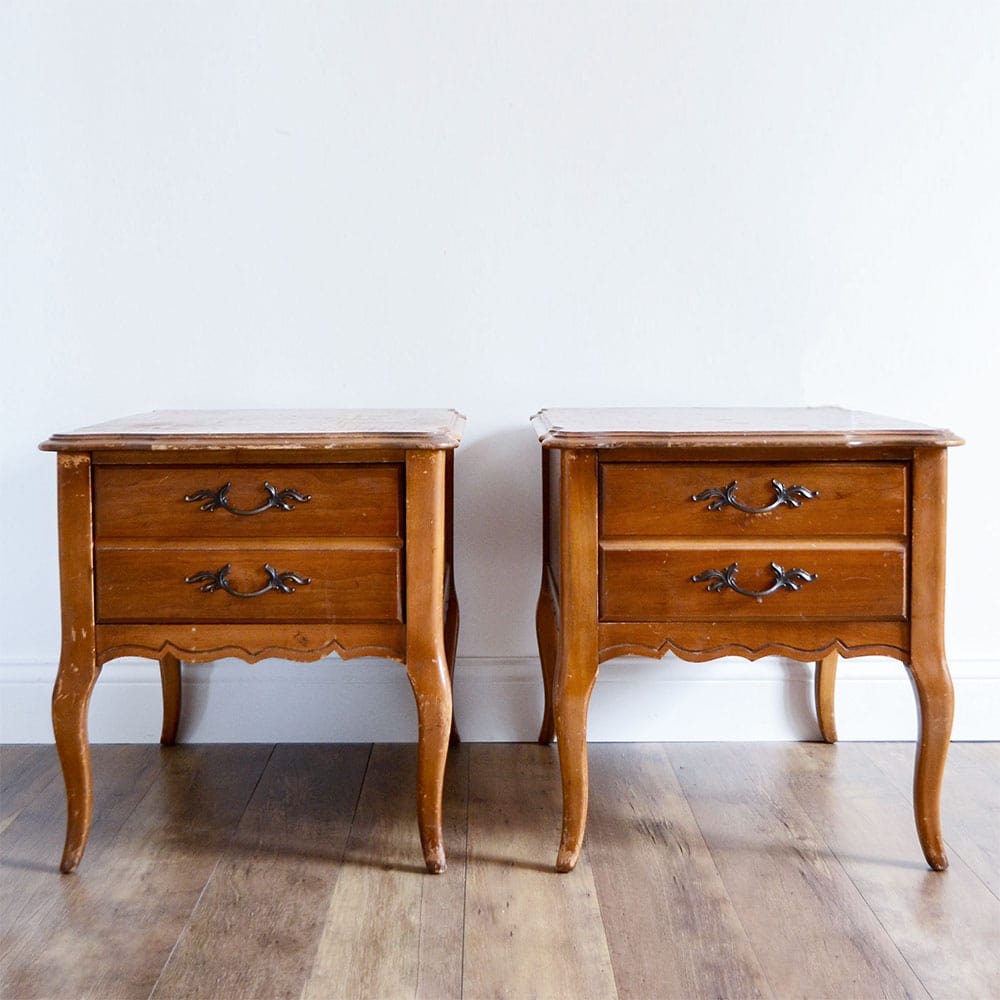
French Provincial Nightstands Makeover


Check out this french provincial nightstands makeover with french blue furniture paint. This color has a light and airy feel, perfect for brightening up a bedroom. This painted nightstands idea is perfect for those looking to add a touch of elegance and charm to their bedroom decor.
If you’re tired of your boring old nightstands, this nightstands makeover is just what you need! Say goodbye to plain and dull furniture and hello to a stylish and chic bedroom.
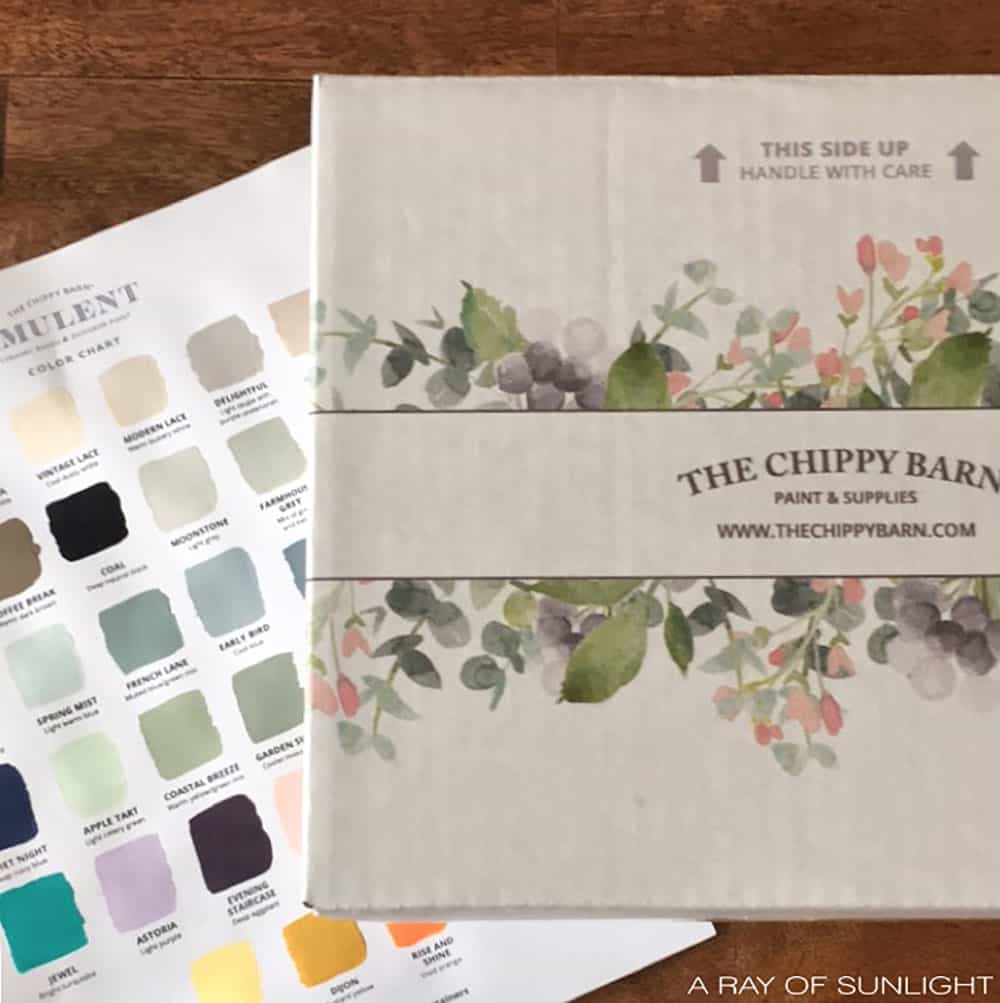
Have you heard of the Amulent ceramic based furniture paint? We gave it a try and wanted to fill you in on all the deets!

So what is Amulent paint (From The Chippy Barn)?? How is it different than chalk-based paint? Well you can head here to read all the info on that.
The biggest thing that stuck out to me is it’s self-leveling technology. You know I hate brush strokes showing and want a smooth flat finish. That reason alone was why I wanted to try this new paint out!

Supplies used for French Provincial Nightstands Makeover
As an Amazon Associate, I earn from qualifying purchases. I also may earn from other qualifying purchases with other companies or get free product to review and use. All opinions are my own.
- Krud Kutter
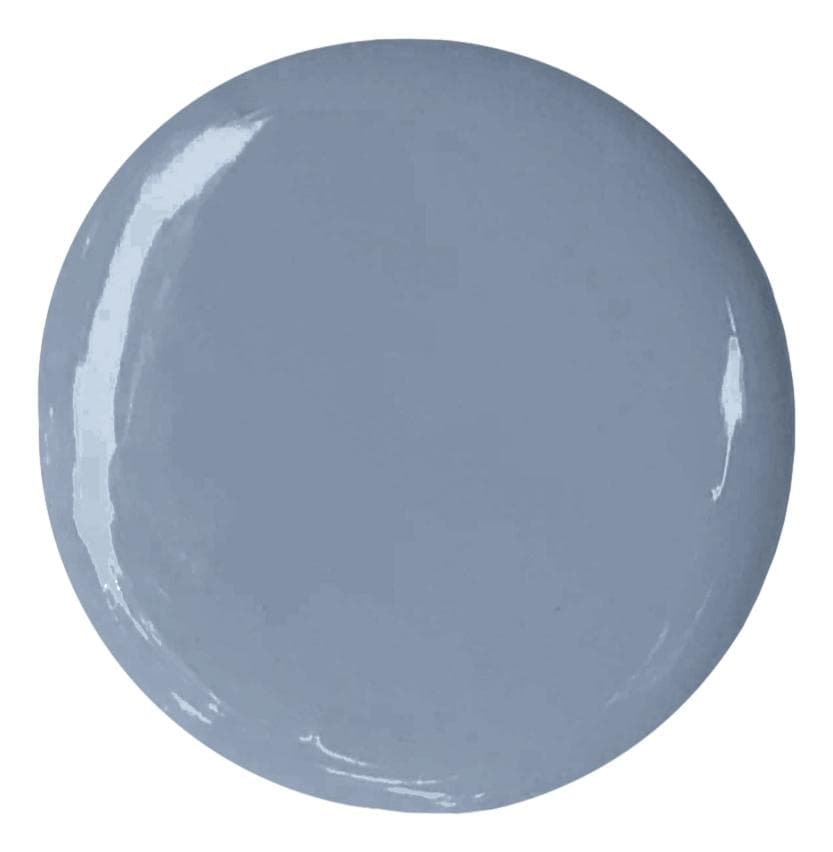
- The Chippy Barn Amulent Paint in Old Blue
- Painting Sponge
- 220 Grit Sandpaper
- Varathane Polyurethane in Satin
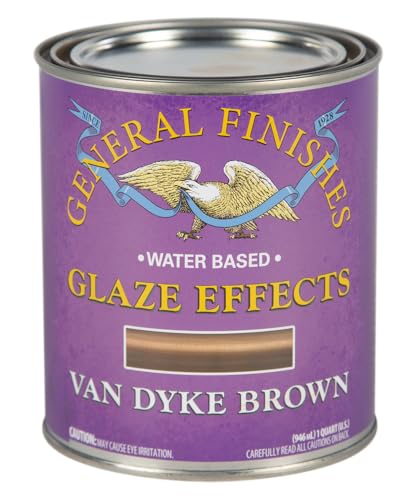
- Van Dyke Brown Glaze
- Behr Latex Paint in Suede Gray, Kindling, Alpaca and Black
Prep Nightstands
I prepped these french end tables just the same way I normally would (more on how to prep furniture here).
Paint Nightstands with Amulent Paint
Then to test out the leveling technology of ceramic-based paint, I painted the Old Blue paint on with a painting sponge instead of with my sprayer.
The painting sponge is a great tool to use to help level out paint and avoid brush strokes and unevenness.
The only downside with the painting sponge is how thin the coats of paint go on, so it usually takes more coats of paint to get complete coverage.
This downside is usually so worth it though to avoid brush strokes! In the end though I was impressed with how great the coverage was and how smooth the paint went on!
It looks like the paint was sprayed on instead of brushed on! Wahoo!!
Distress Painted Nightstands
Next up I lightly distressed the paint with 220 grit sandpaper. Learn more about distressing furniture here.
One of the biggest reasons I love chalk paint instead of latex paint is because of how easily chalk paint distresses compared to latex paint.
Well, Amulent pulled through and easily distressed, creating my favorite farmhouse feel!
Topcoat and Glaze Painted Nightstands
I sealed the paint with our favorite poly, Varathane polyurethane. Learn ALL of my tips and tricks on how to spray polyurethane here!
And then gave the pieces an antiqued feel with General Finishes Van Dyke Brown Glaze. Need to SEE how to glaze? Check out this video on how I glaze.
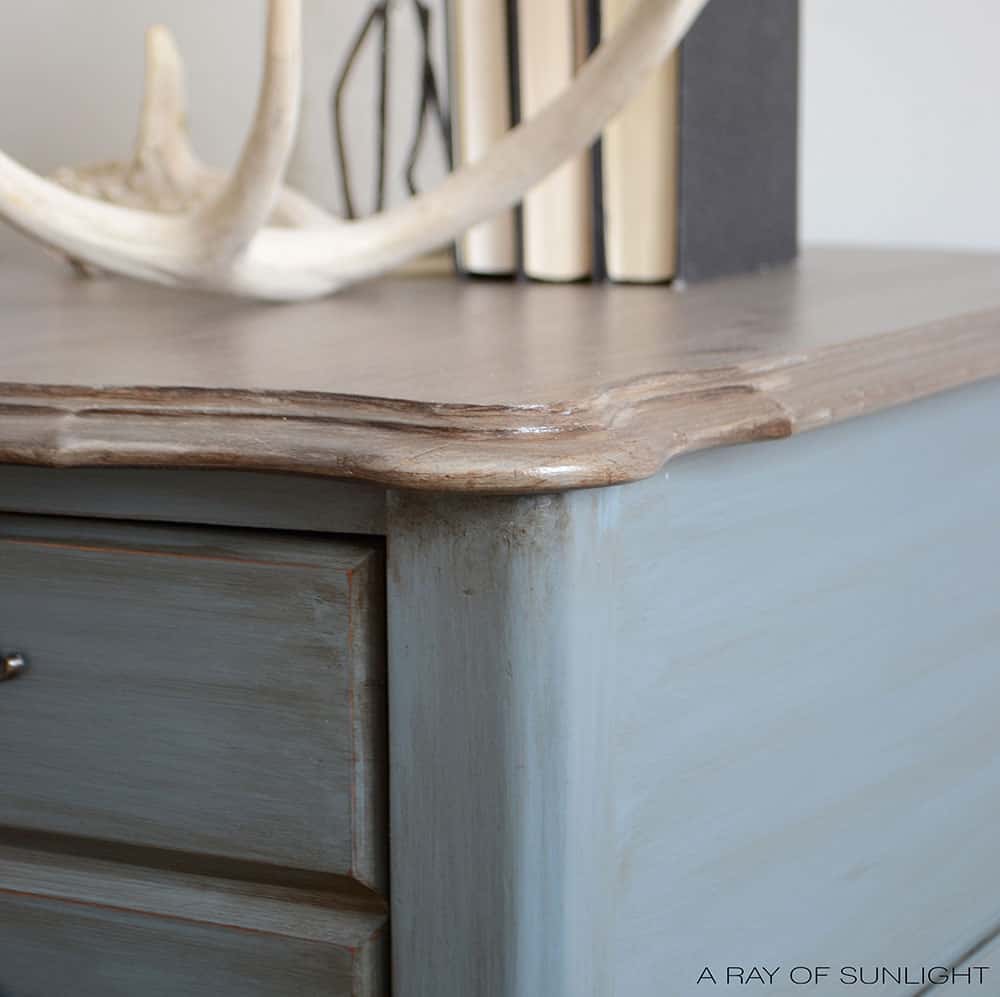
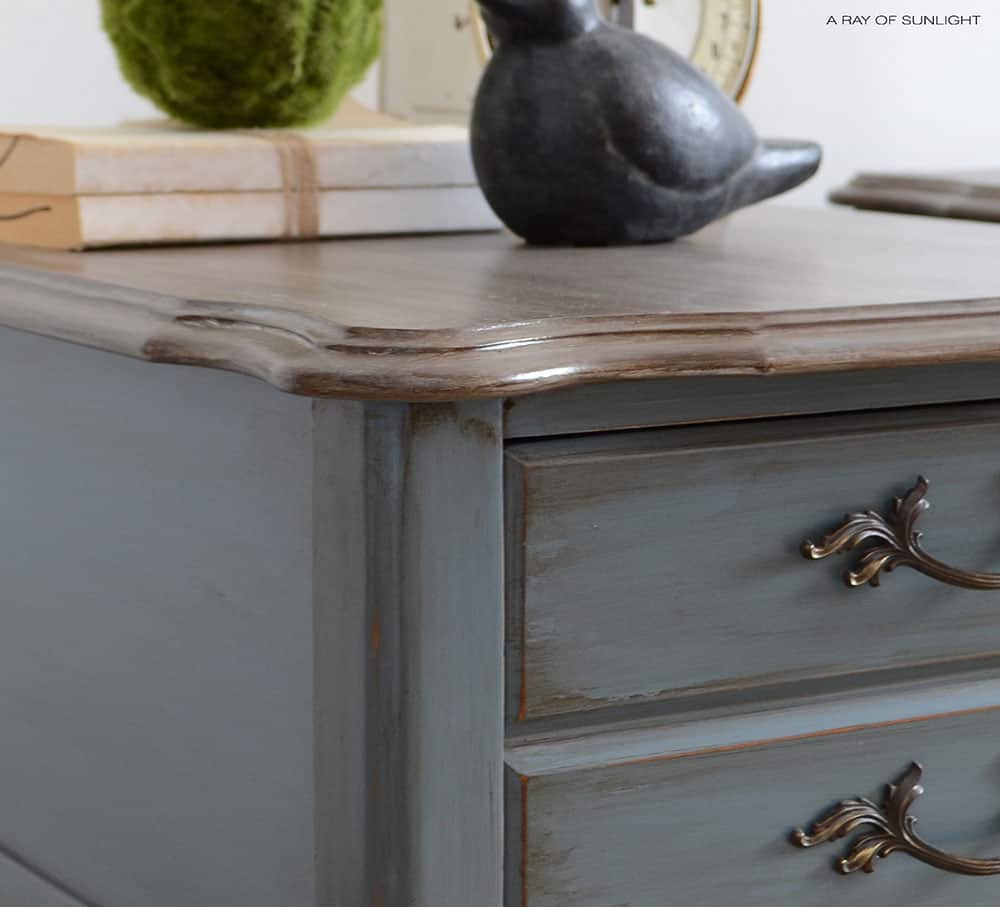
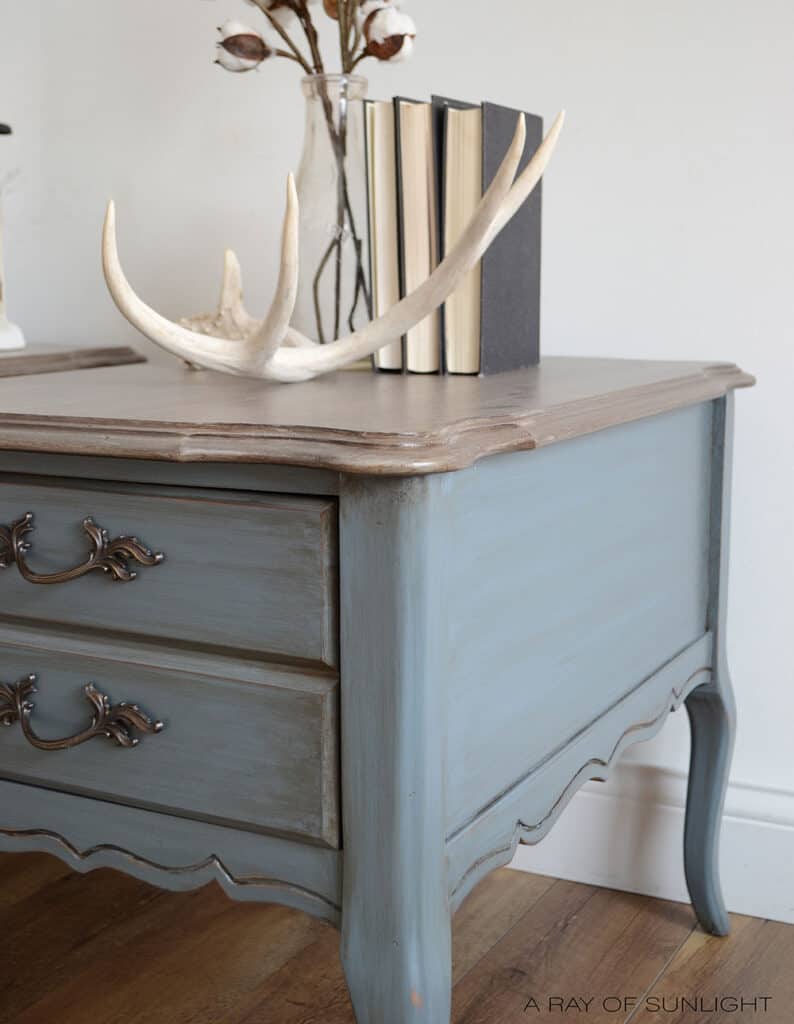
Create a Weathered Look for the Tops
For the tops we created a weathered wood finish using a similar technique as these white farmhouse end tables.
I layered Suede Gray, Kindling, Alpaca and Black then painted a coat of Van Dyke Brown Glaze on the top.
Would you like to save this?
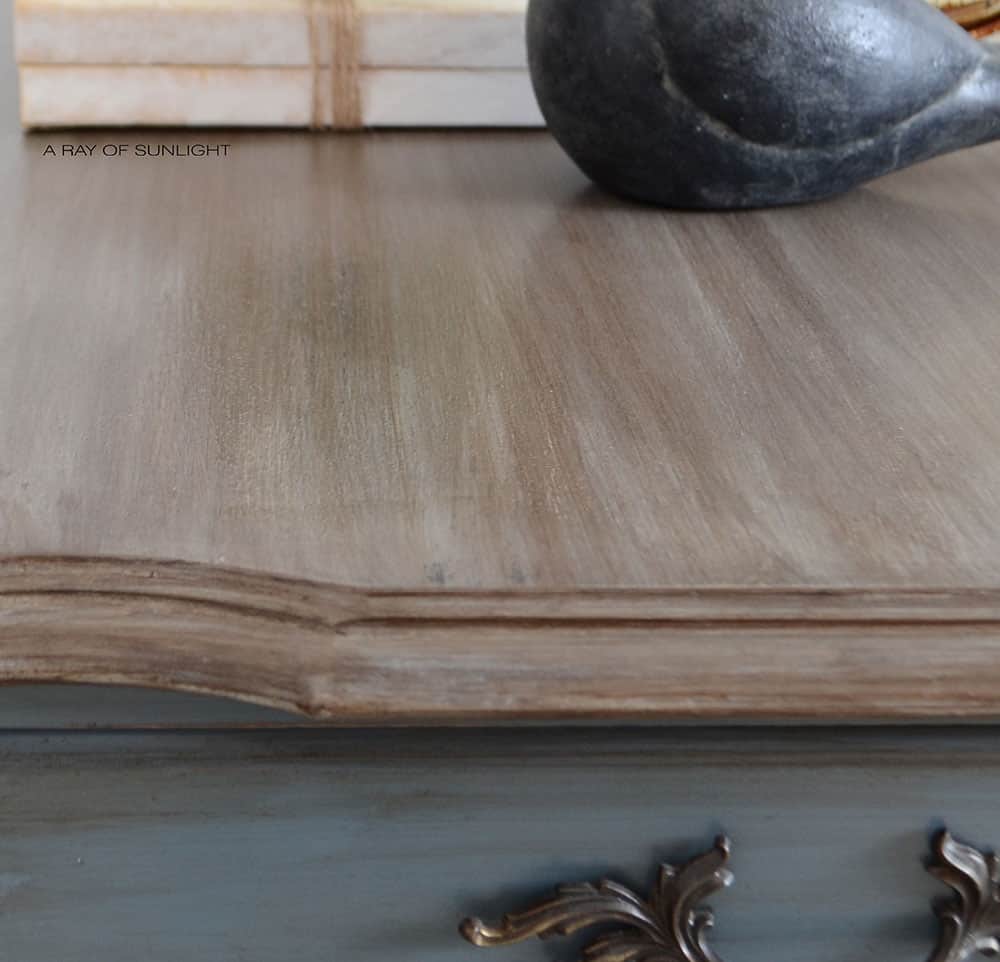
I thought I wanted them white washed a bit, so I gave them a layer of white wash, but realized I enjoyed the darker finish better with the blue base, so I gave them one more coat of Van Dyke Brown Glaze.
You could use this natural homemade wood stain for a weathered wood look!
Then I sealed the tops with more Varathane polyurethane. Learn more about the different topcoats for painting furniture here.
It was so fun trying out this new paint line!
I’m super impressed with how easy it was to work with as well as how durable it is! It took polyurethane and glazing perfectly and didn’t rub off at all when I glazed over it with a wet rag.
The coverage was spot on and didn’t drive me to insanity by needing so many coats.
So head over to The Chippy Barn and order yourself some Amulent paint to try for yourself! Oh and don’t forget to ohh and ahh over their hardware selection too!
If you like how these nightstands turned out, you should check out these shabby chic painted furniture ideas and small nightstand ideas. And for more one of a kind nightstand makeovers, here are unique nightstand ideas!
More Before and After Makeovers
See All >
Click any of these “before” photos below to view the “after” of that makeover.


Is Amulent paint Good for beginners?
Yes, Amulent paint is definitely suitable for beginners! It is incredibly easy to work with, making it a great option for those who are just starting out with furniture painting.
The consistency of the paint is smooth and creamy, making it easy to apply and creating a flawless finish.
Plus, Amulent has a wide range of colors to choose from, so beginners can experiment with different shades without feeling overwhelmed.
And if you make a mistake, don’t worry! Amulent is forgiving and can easily be sanded down or painted over without any issues.
In fact, many beginners have had great success with using this paint. With its self leveling technology, even beginners will feel like pros when using Amulent paint!


What is self leveling technology in Amulent paint?
Amulent paint is known for its excellent self leveling properties, making it a go-to choice for furniture painters.
Self leveling technology refers to the ability of a paint to spread out evenly and smoothly without leaving any brush strokes or unevenness on the surface it is applied on.
This feature is especially useful when painting furniture, as it allows for a professional and smooth finish without the hassle of stinky oil based paint, or the use of a paint sprayer.


French Provincial Nightstands Makeover
Paint your furniture a beautiful old blue color and some antiquing glaze. Here are the steps for this french provincial nightstands makeover.
Materials
Instructions
- Prep the french nightstands for paint.
- Apply a few coats of Amulent Old Blue paint onto the nightstands with a painting sponge.
- Once dry, lightly distress the painted nightstands with 220 grit sandpaper.
- Seal the painted nightstands with waterbased polyurethane then glaze with General Finishes Van Dyke Brown Glaze to give the pieces an antiqued feel.
- Create a weathered look on the tops by layering latex paint then a coat of Van Dyke Brown Glaze.
- Seal the weathered tops with more waterbased polyurethane.
Recommended Products
As an Amazon Associate and member of other affiliate programs, I earn from qualifying purchases.


More French Furniture Makeovers
- French Painted Furniture
- DIY Black French Provincial Dresser
- Blue Painted French Provincial Dresser
- French Blue Dressers

Follow us on YouTube to get more tips for painting furniture. Or share your project with us on our Facebook Group and be part of our community. See you there!
Hi I love these nightstands! Especially the beautiful tops. Im trying to recreate these tops on a piece that I’m doing. I looked at your weathered top tutorial that you have linked but I’m still unsure on some of the steps you did with these tops. What base did you use for the main paint color before you started dry brushing the other colors? Was it Kindling? After you did the dry brushing did you put poly on top before you did the brown glaze and the whitewash? Or did you do all the glazing and whitewash before the poly? Also what kind of brush do you use for the dry brush effect that you achieved with these tops? Lastly one of the colors is listed as Alpaca but there is no link to the color but it does specify it as Behr paint is the color alpaca blanket? Behr doesn’t have a color that is just called alpaca. Sorry for all the questions I’m just in LOVE with the tops you created and want to recreate them and want to do it correctly. Do you have any video tutorials on the weathered tops? I looked thru your YouTube and couldn’t find one. It would be amazing to see a video on this technique I’ve never created my own weathered top before so any advice you can give is greatly appreciated. I love your work! Absolutely Beautiful pieces
I wish I could give you better direction, but this project was completed about 5 or 6 years ago, so I can’t remember the exact exact process. I do have another project with very similar tops, and they might guide you better. How to Create a Weathered Wood Gray Finish