The Best Stain for Weathered Wood Look
If you love the farmhouse and rustic style, you’ll want to know the best stain for weathered wood look! Those things go together like peas in a pod, right? This way, you can give your furniture that natural, aged appearance that adds character and charm to any space.
Even if you’ve never tried these refinishing furniture techniques before, this guide will walk you through the process step by step. Let’s get started!
Have you ever tried to get that barnwood finish on new wood and the color just looked fake? Or have you seen the price of faux weathered wood?? It’s expensive! But you don’t have to break the bank or settle for a less than real look anymore.
Why not DIY this weathered look yourself? It’s much more affordable and the results are so much better. We’ll show you how to use this stain to give your piece a natural rustic finish, and you won’t believe how easy it is!

You can also learn how to create a weathered wood finish by painting instead. Because sometimes you aren’t starting with raw wood or wood that can even be stained. Paint it instead!
I have tried a few products hoping to get the perfect barnwood finish. But they all seem fake. Nothing has worked for me until I finally tried this DIY weathered stain. If you like painting or refinishing, you most likely already have these two ingredients in your home!
Supplies Used for DIY Weathered Wood Stain
As an Amazon Associate, I earn from qualifying purchases. I also may earn from other qualifying purchases with other companies or get free product to review and use. All opinions are my own.
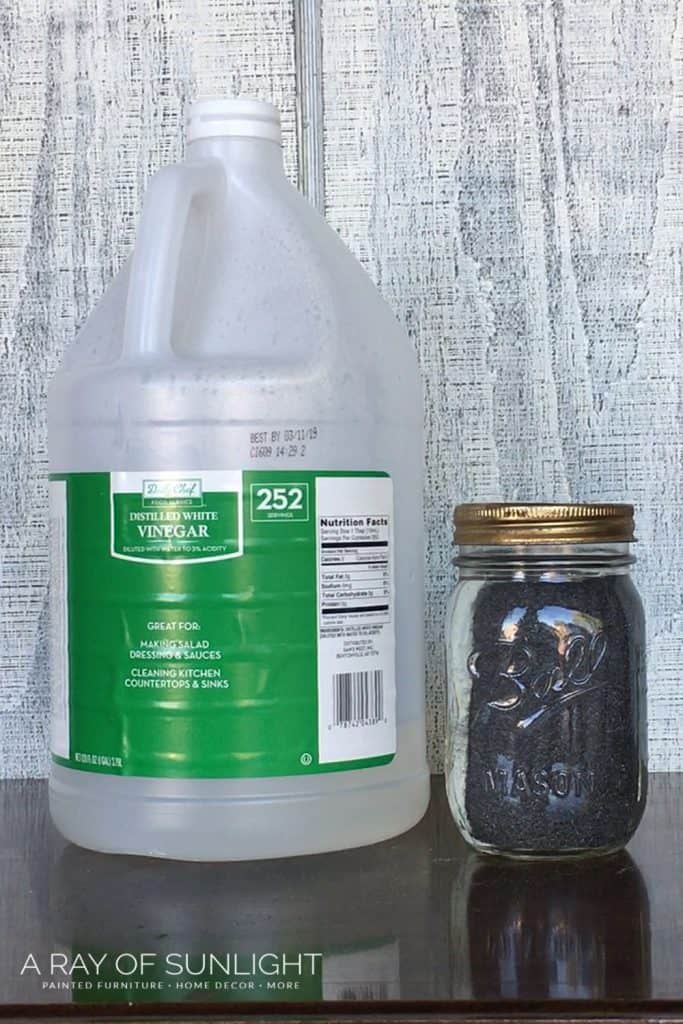
- Vinegar
- Steel Wool (0000)
- Mason Jar with Lid (I used a pint)
- Gloves
- Wood Project (I used common pine)
- Cheap Paint Brush
The Best Stain for Weathered Wood Look
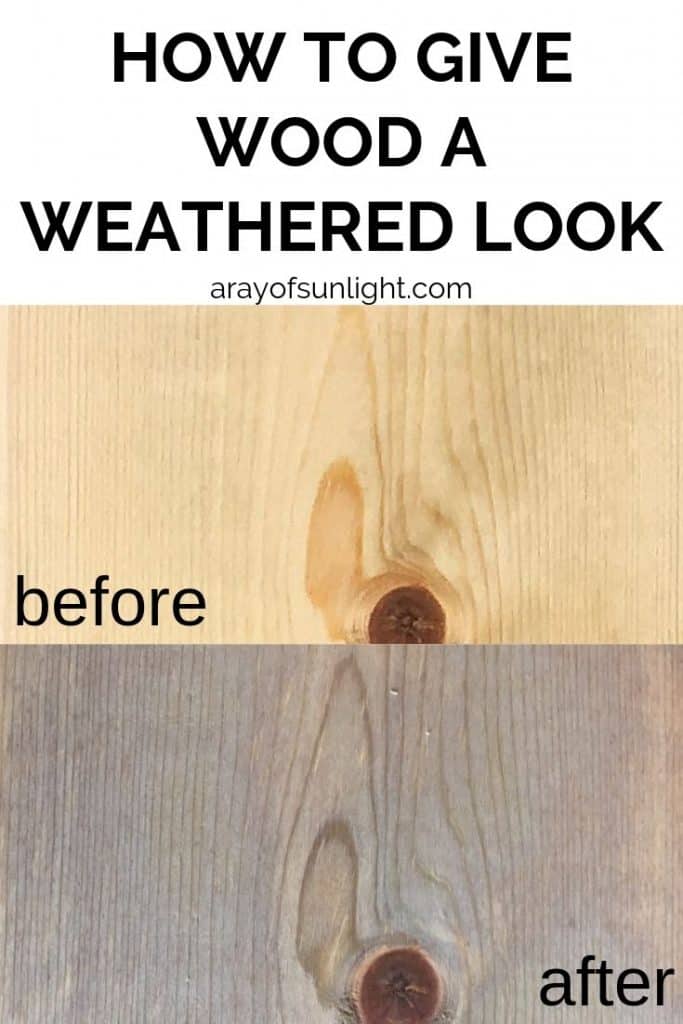
Have you ever heard of homemade stain? It’s a simple recipe with vinegar and steel wool that turns wood different shades, just like a stain. But without the strong chemical smells or the price tag.
I mean sure, a quart of Minwax stain is less than $10, but what if you could make the same amount for less than $5? Plus, there are no VOC’s and it’s eco friendly! AND the results are more authentic. What more could you ask for?
First things first, if you want it to really look weathered, you will want to recreate the dings, scratches, and gouges that you see in the real thing!
How to Make Weathered Wood
Keep in mind that this should be done before you apply any stain. So after you mix the stain up, grab some of these tools and start doing these few ideas:
- Take your hammer to the wood and get your frustrations out.
- Lay some screws and nails on it and hit them a few times randomly.
- You can drop a heavy metal chain on your wood to create dents on it.
- Or scratch up the surface with a screwdriver!
- You can use a chisel to take some wood from the edges as well.
- And even drop rough rocks on it.
If you really want crazier results, you can drag it down the road and back to create a lot of scratches and gouges. Yeah, I’ve definitely done this a few times. haha! Once you have it scratched up to your liking, you can sand it down a bit with 220 grit sandpaper and then stain it.
How to Make DIY Weathered Wood Stain
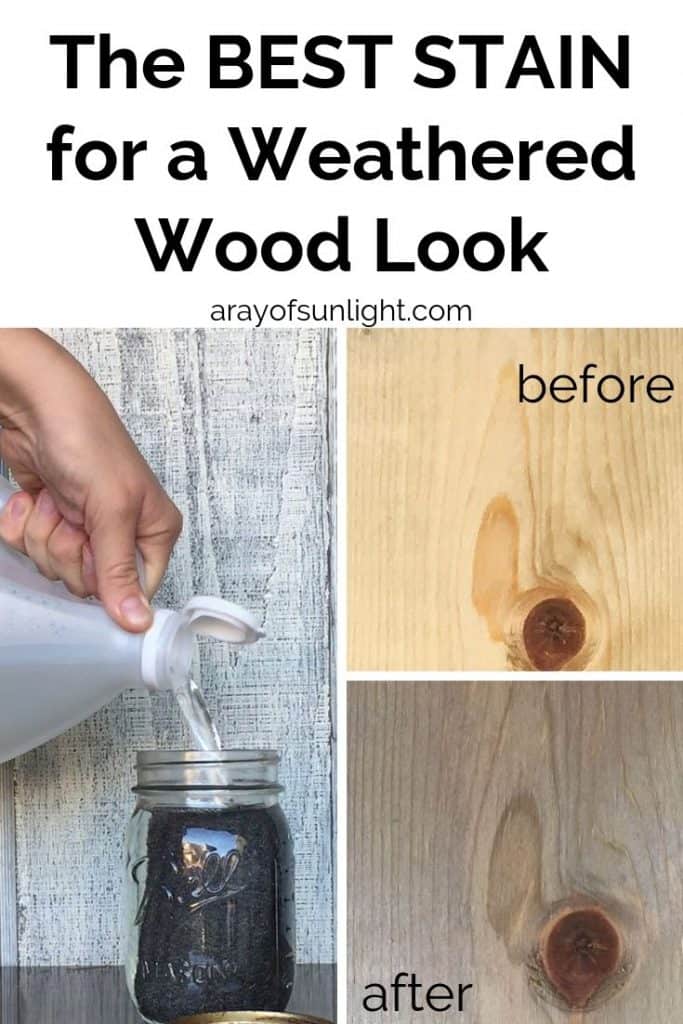
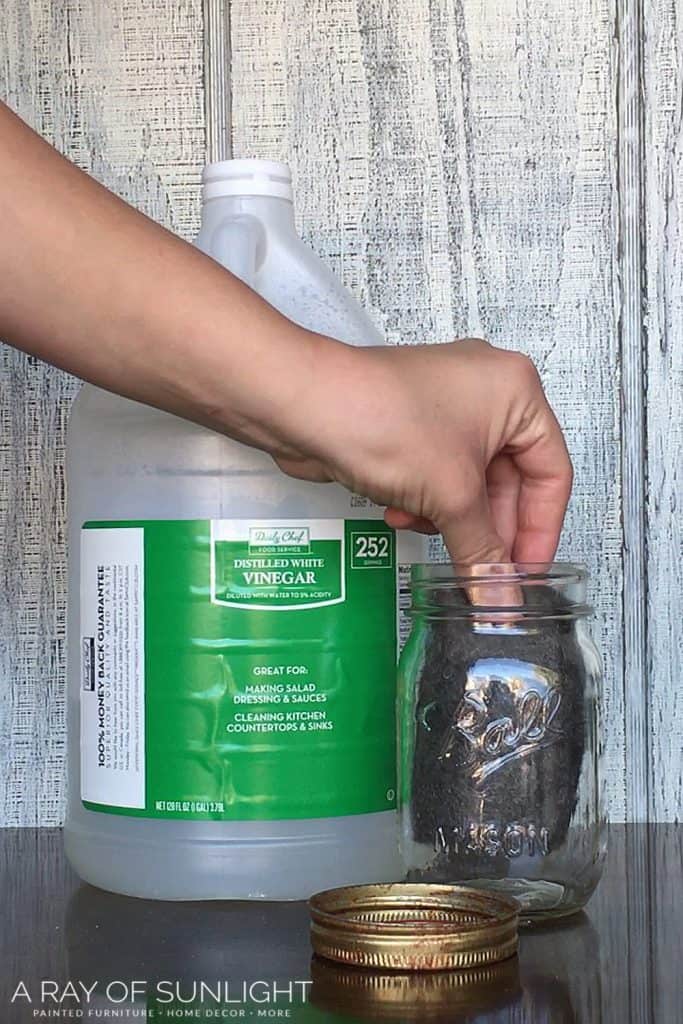
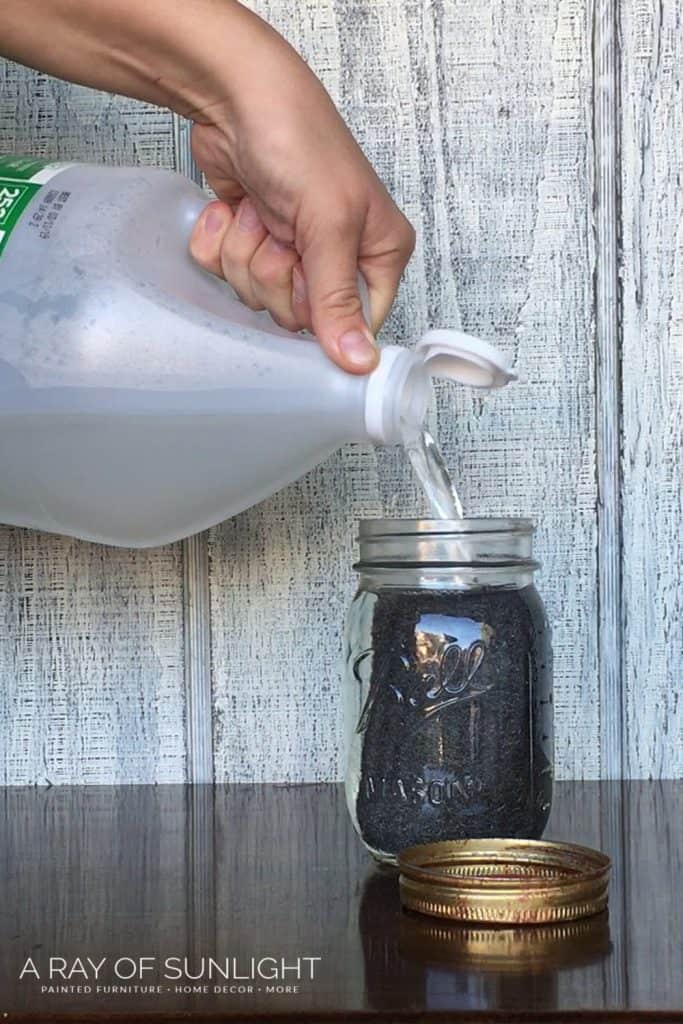
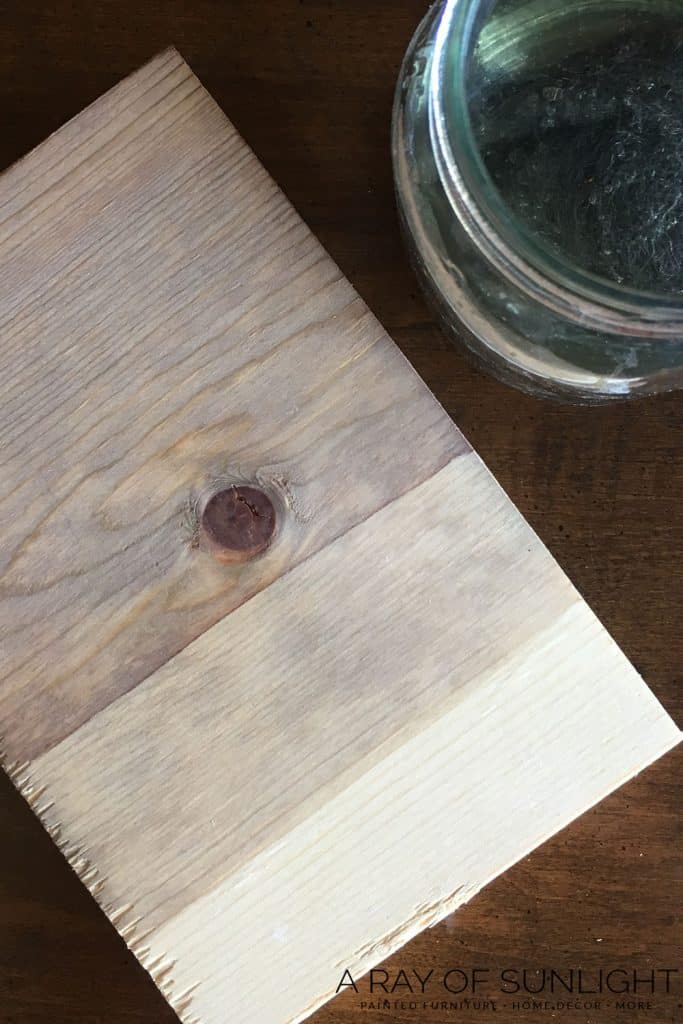
Put a pad of steel wool into an empty mason jar (I used a pint sized jar).
Would you like to save this?
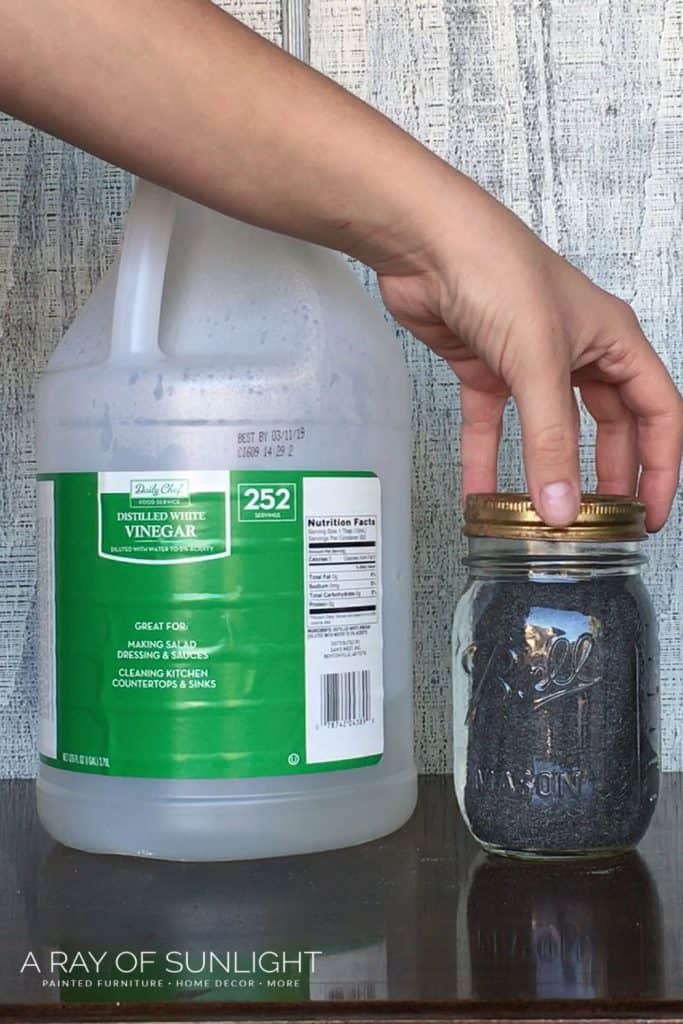
Pour your distilled white vinegar into the jar, making sure to cover the steel wool completely. Grab the lid to the jar and LOOSELY screw on the lid. You don’t want to screw it on tightly because of the chemical reaction taking place inside of the jar.
Now the hardest part – let it sit for 15-24 hours. The longer it sits, the darker it will get. I did this before bed one night so I could easily be patient. After waiting patiently, grab your homemade mixture, some gloves, your wood, and a cheap paintbrush.
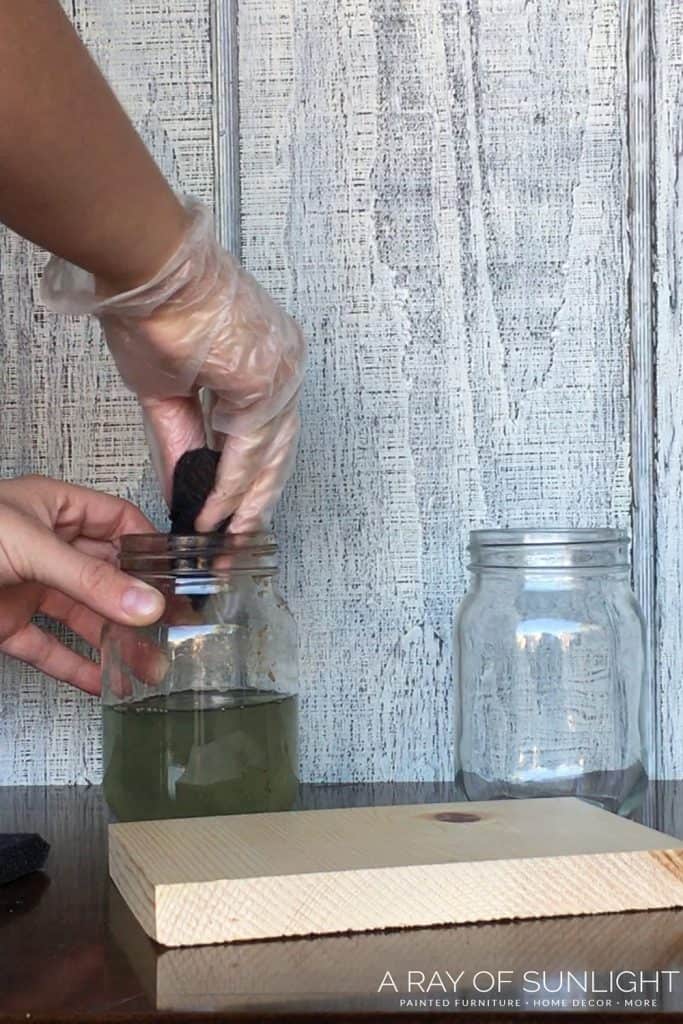
Remove the steel wool pad from the jar. Don’t throw it away until you have tested the stain and know that it is the right shade for you. If you want it darker, place it back into the vinegar and wait a few more hours. Keep repeating this process until it is just right.
Once you know it is just right, you can dispose of the steel wool.
**Just a reminder – before applying the stain all over, test it out on a scrap piece of the same type of wood.


How to Stain Weathered Wood
Apply your new stain just like you normally would, except you don’t have to wipe it off. Simply dip your brush into it and apply it onto your piece. Here’s a list of the best brushes for staining wood for our recommendations.
It will look clear and it might seem like it didn’t work. Don’t worry! It has to react to the wood, and this usually takes about 15 minutes to complete.
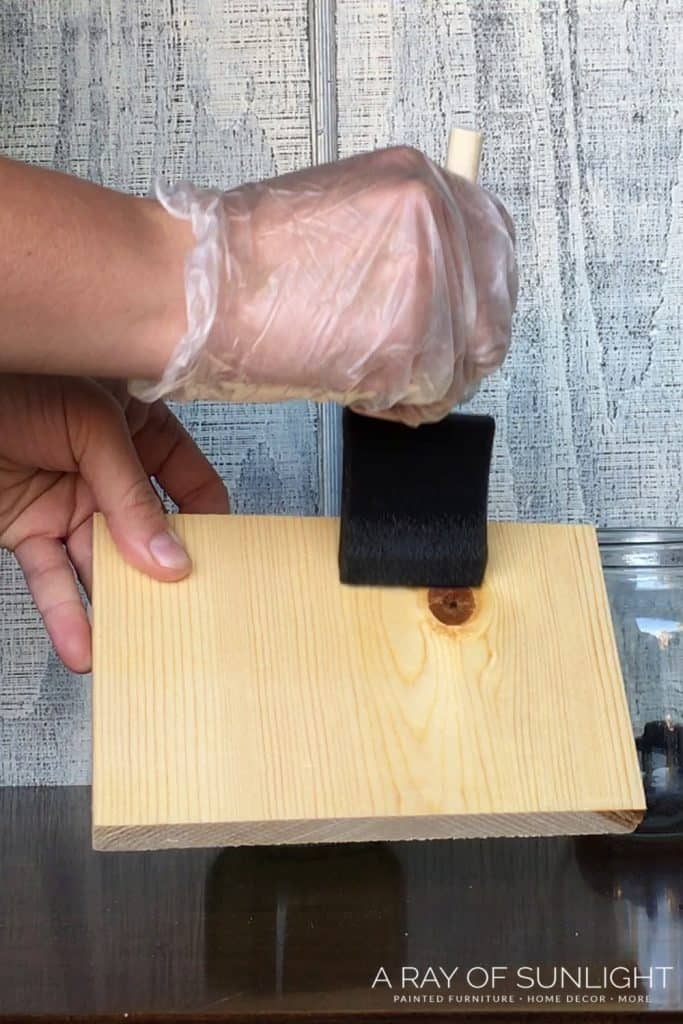
Let it dry completely and then add more coats if desired. That’s all there is to it! Get all the tips and tricks on how to stain wood furniture in this post.
I found it fun to see what different shades I could get by trying it at different stages. Once I found a shade that I liked, I poured some of it into a new jar (without any steel wool) and kept the rest of the vinegar with the steel wool to see what new shade I could get in a few hours.
There are many other recipes out there just like this. They use the same principle, vinegar and some form of metal to produce different colors. Try using balsamic or red cider instead of distilled white vinegar and rusty nails instead of steel wool to get different colors!
It really does give the appearance of the popular barnwood finish! Let me know if you’re going to try it or if you already have! I can’t wait to hear from you!

The Best Stain for Weathered Wood Look
If you love farmhouse and rustic, you’re probably also wanting the best stain for weathered wood look too! Learn how to give wood a weathered look right here, right now!
Materials
- Vinegar
- Steel Wool (0000)
- Gloves
- Wood Project
Instructions
- Put a pad of steel wool into an empty mason jar.
- Pour distilled white vinegar into the jar and make sure to cover the steel wool completely.
- Cover the jar with its lid but just loosely screw it on.
- Let it sit for 15-24 hours. The longer it sits the darker the stain will get.
- Afterward, test the stain to see if it's the shade you want. Get some gloves and remove the steel wool from the mason jar filled with vinegar. Don't throw the steel wool away just yet.
- Brush the stain onto wood to test. Let the stain react to wood, around 15 minutes. Let it dry completely and then add more coats if desired.
- If you still want the stain to be darker, place the steel wool back into the vinegar and wait a few more hours. Keep repeating this process until it is just right. You can dispose of the steel wool once you decide on a shade.
- If you finally have a stain shade you like, you can now stain your furniture for that weathered wood look!
Recommended Products
As an Amazon Associate and member of other affiliate programs, I earn from qualifying purchases.


More Weathered Wood Ideas
- White Painted Coffee Table
- Refinishing an Old Dresser
- How to Whitewash Wood
- French Provincial Nightstands Makeover
- How to Bleach Wood Furniture

Follow us on YouTube to get more tips for painting furniture. Or share your project with us on our Facebook Group and be part of our community. See you there!
That’s brilliant. I wonder what would happen with a bit of paint in it.
Did you do any kind of protective coating to protect the surface from moisture rings?
Hey Kathy!
Yep I would put 3 coats of water based poly on it to protect it.
I would like to try this for my shiplap walls. Have you receied any other feedback since you published this?
That would be a great project! I would just recommend trying out the stain on the wood first so you know what it’s going to do. It will look different depending on the type of wood.
I think I’m going to go through a lot of vinegar…This information is priceless. I’m intrigued with the idea of using different elements like rusty metals, steel wool, and different kinds of vinegars. to achieve custom colors and shades. Thank you.
I tried using water based polyurethane but the finished product does not look the same as the original did before the poly. Any suggestions ? The original distressed wood look I achieved looks great but I am disappointed in how the polyurethane makes it looks. These are pantry shelves so they really should be protected
I have the same question. I hope someone answers it for you 🙂