Refinishing an Old Dresser


Do you want to give your bedroom a facelift, but don’t have the budget for new furniture? A DIY dresser makeover is a great way to go. Refinishing an old dresser is both cost effective and time efficient.
With the right supplies, refinishing furniture techniques and preparation, you can transform an outdated dresser into something entirely different – without putting a huge dent in your wallet. In this blog post, we’ll walk you through the steps and provide some helpful tips for making your refinishing project a success.
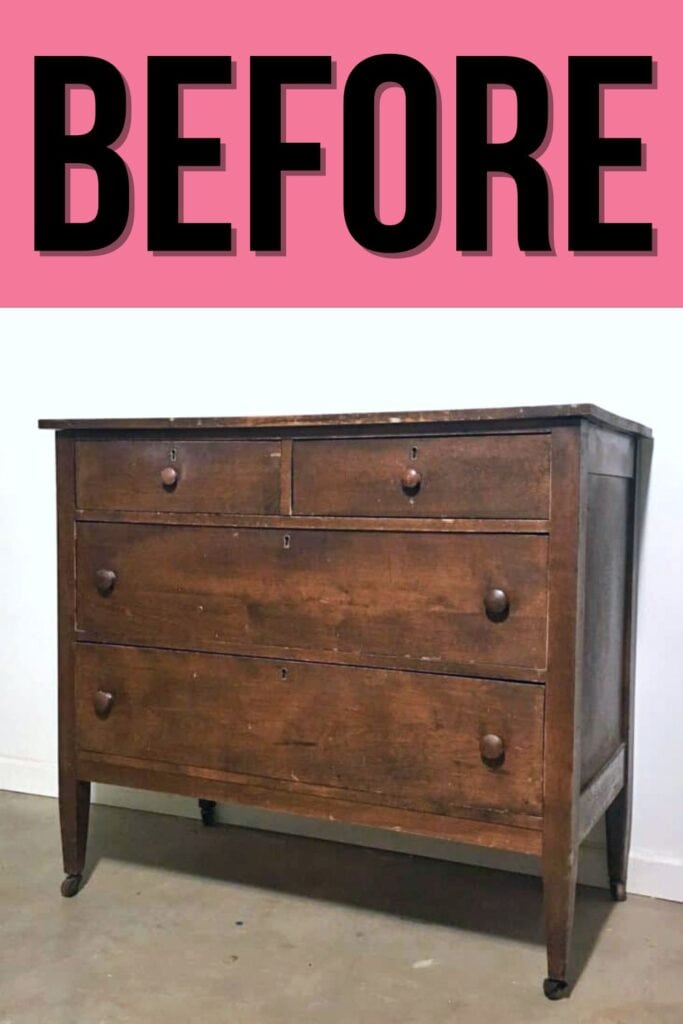
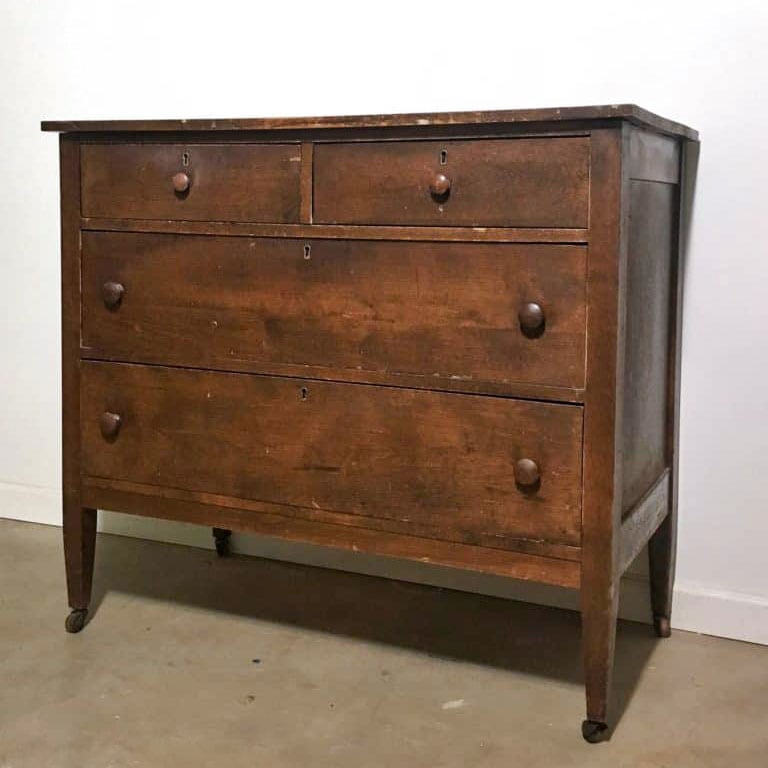
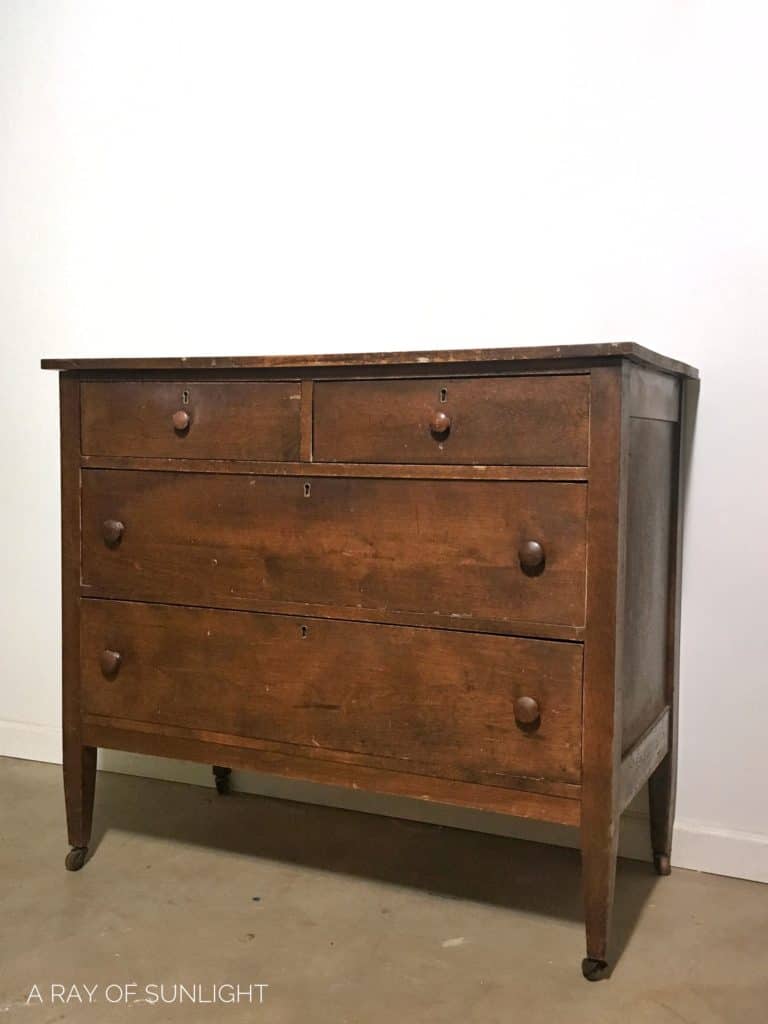
Above is what the old wooden dresser looked like before. The natural wood finish is such a popular style of furniture these days! You can see more of these farmhouse style dressers in our list of rustic dresser ideas here.

We love to paint old vintage or antique furniture that is worn out. It’s a cheap way to furnish your home on a budget and can do wonders for your decor. But this dresser got the natural wood dresser look instead, and I couldn’t be more happy with how it turned out.
If you’re into the rustic or farmhouse vibe, this dresser is perfect for you! It has stunning wood grain and a beautiful finish that gives it so much character. And with some simple refinishing techniques, we can enhance its beauty even more.

Supplies Used For Refinishing a Dresser
As an Amazon Associate, I earn from qualifying purchases. I also may earn from other qualifying purchases with other companies or get free product to review and use. All opinions are my own.
- Power Sander and Sandpaper OR Citristrip Stripper (choose your method of sanding or stripping)
- Respirator
- Shop Vac
- Tack Cloth
- Gloves
- Cheap Paint Brush
- Plastic Wrap
- Plastic Scraper
- Mineral Spirits
- Fine Steel Wool
- Country Chic Paint in Sunday Tea
- Country Chic Paint Painting Sponge
- General Finishes High Performance Top Coat in Flat
- Waterbased Polyurethane
Now that you know what supplies to use, let’s dive into how to refinish your old dresser.
How to Refinish Dresser
First, remove the hardware. So, remove knobs, drawer pulls, and hinges (hinges can be a pain to put back on, so sometimes I leave them. Then protect the floor where you are working with some cardboard. It’s gonna get messy in here. And then you can start removing the stain from your dresser.
Remove Wood Stain From Dresser
There are a couple of different ways you can remove old wood stain. You can sand it off, use a chemical stripper, or use a carbide scraper to scrape it off.
I started by sanding, and then I decided that it was too much work to sand, and I used stripper for the rest of it. If you watch the video at the bottom of this post, you can see how the two methods made the wood look different in the end.
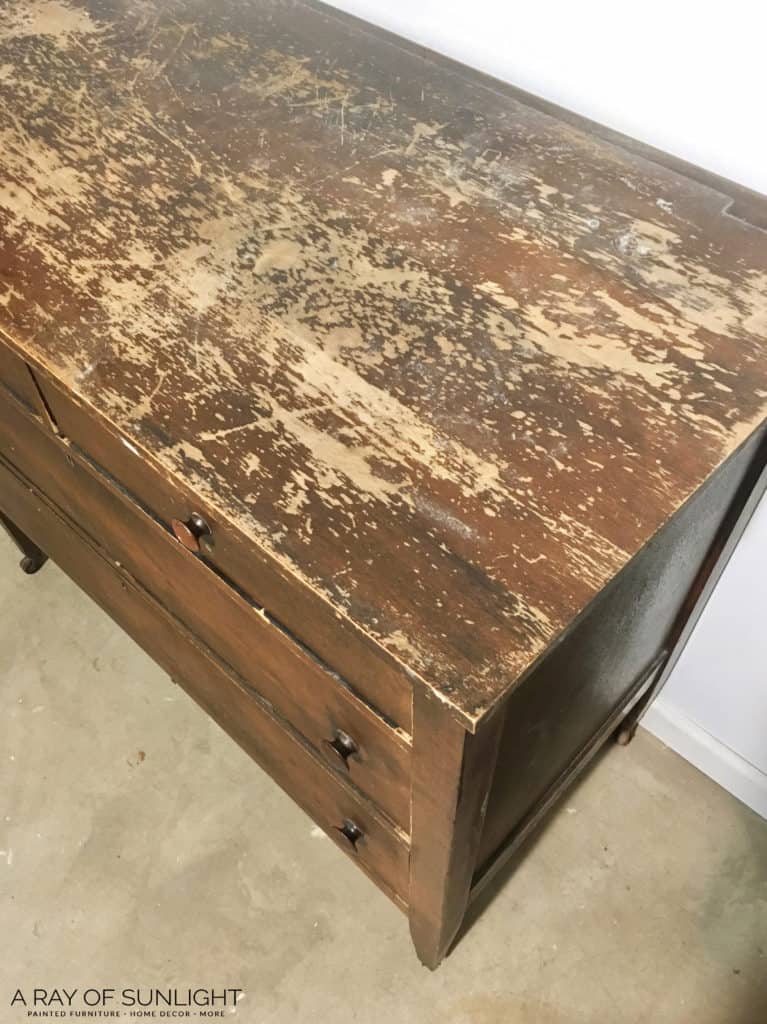
If you can, stick to one method. Why? Because you’re going to want your wood to look cohesive on the whole entire piece. Otherwise, when you go to stain or color wash the wood, the finish is going to look different in each of those places.
So choose to either sand off or strip off the old finish and stick to that method the whole way through. Here’s how to refinish wood furniture without stripping for a detailed guide if you don’t want to strip off the old finish.
How to Remove Wood Stain by Sanding
You’ll want a power sander to do most of the work for you, but these sanders have a really hard time getting into detail. So keep in mind that you’ll most likely have to do some hand sanding in the detailed areas.
Choose one of these sanders from this list of the best sanders to remove paint or old finish here. For sanders you can use for refinishing, here’s what kind of sander should I use to refinish furniture.
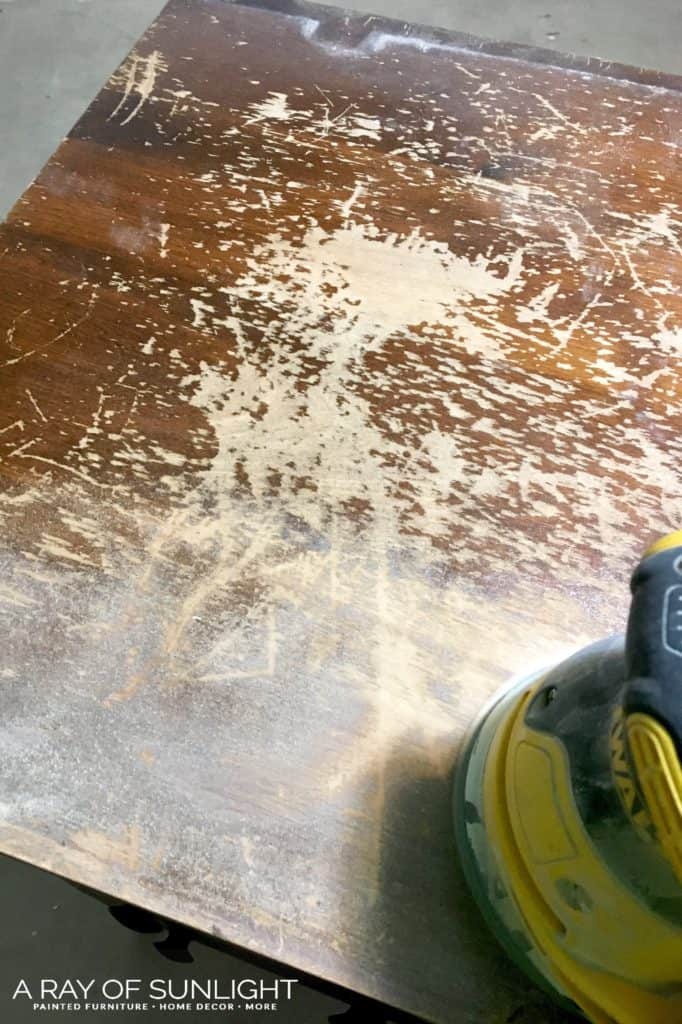
Be sure to wear a respirator, so you’re not breathing in all of the dust and old finish, and some eye protection.
How to Sand Dresser
- Start with 80 grit sandpaper on your power sander. This is course sandpaper that will eat through a thicker finish fast. Remove most of the finish with this step.
- Then move up to 120 grit sandpaper, and even 150 grit sandpaper after that.
- Sand by hand with 220 grit to smooth out the wood and help remove any sanding marks. This will get rid of some of the old finish, but it takes a lot longer for it to eat through a solid finish.
- Vacuum off the dust with a brush attachment, and then wipe it all down. Tack cloths were made for this, and do a great job at getting all of the dust particles off of the wood.
- Now you’re ready to stain or seal your wood dresser.
Learn more about how to sand down wood with my guide here.
Note: You really want to slowly work your way through sandpaper grits to get down to bare wood without any swirly sanding marks in the wood. Learn more about the best sandpaper for furniture painting and best sandpaper for refinishing furniture options here. For a full list of supplies you’ll need, be sure to check out this post on furniture refinishing supplies.

How to Remove Wood Stain With Chemical Stripper
This method is messier, but it’s definitely my preferred method for removing stain from wood when there are details to contend with. Make sure your floor is covered with drop cloths, broken-down cardboard boxes, or something to protect the floor from the stripper.

Also be sure to wear chemical resistant gloves, a respirator if you don’t have any ventilation, and some eye protection.
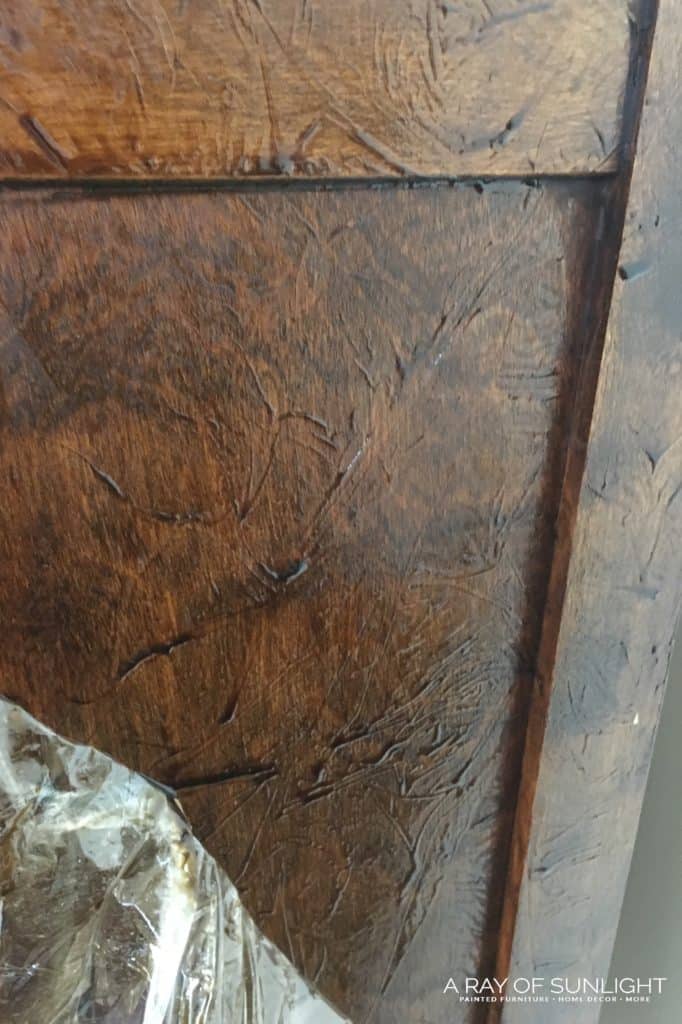
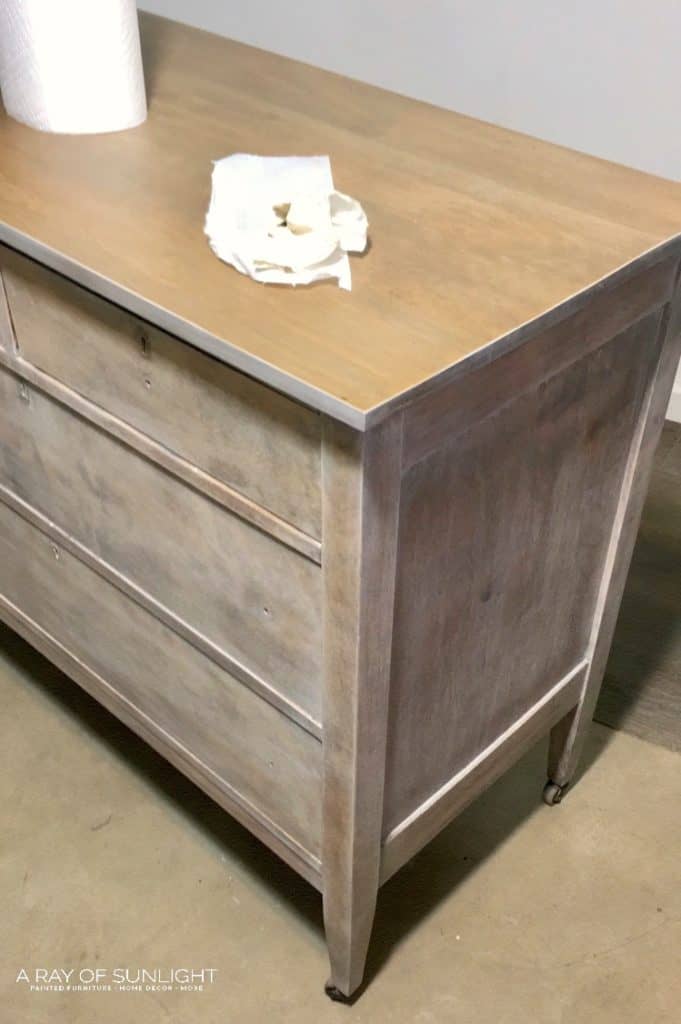
You may notice that your wood isn’t completely back to a natural wood look. There may be some light stain left, which is exactly what I was going for! I wanted to start with a little bit of color and not a completely sanded down piece of wood.
Learn how to remove wood stain and how to remove paint from wood furniture with a chemical stripper in these posts. And here are some more details about how to remove stain from wood!
How to Stain a Dresser
Now the dresser is ready for a stain or whatever you want! I wanted a natural wood dresser, so I went with a color wash in a natural wood color. Since I sanded the top and stripped the rest, the top looked a lot lighter than the rest.
So for the top of the dresser, I mixed up a little bit of very thinned-out brown latex paint. Then I washed it on the top like I did the color washing step. I did it before I sealed the paint so it would soak into the wood like a stain. But I thinned it out a lot so the color would be very light.
Would you like to save this?
This is completely optional! But in my case, I wanted to make the color of the wood on the top match the color of the wood on the bottom.
Sealing Stripped Wood
At this point I gave my freshly stripped wood a couple of coats of water-based poly. I sprayed the polyurethane on, but you can definitely use a painting sponge to apply it. Learn ALL of my tips and tricks on how to spray polyurethane here!
Why did I seal the wood before doing the natural wood color wash?? The layer of poly keeps the wash (or watered-down paint) from soaking into the wood super fast, making it easier for me to work with it and get a lighter coat of a wash.
After I gave it a couple of coats of poly, I sanded the poly with 400 grit sandpaper to make it super silky smooth.
How to Color Wash Wood
Now for the really fun part! Color washing is a version of white washing. But instead of using white paint, you can use whatever color your heart desires! Check out how to whitewash wood here and get more whitewashed furniture ideas here to see how white wash works.
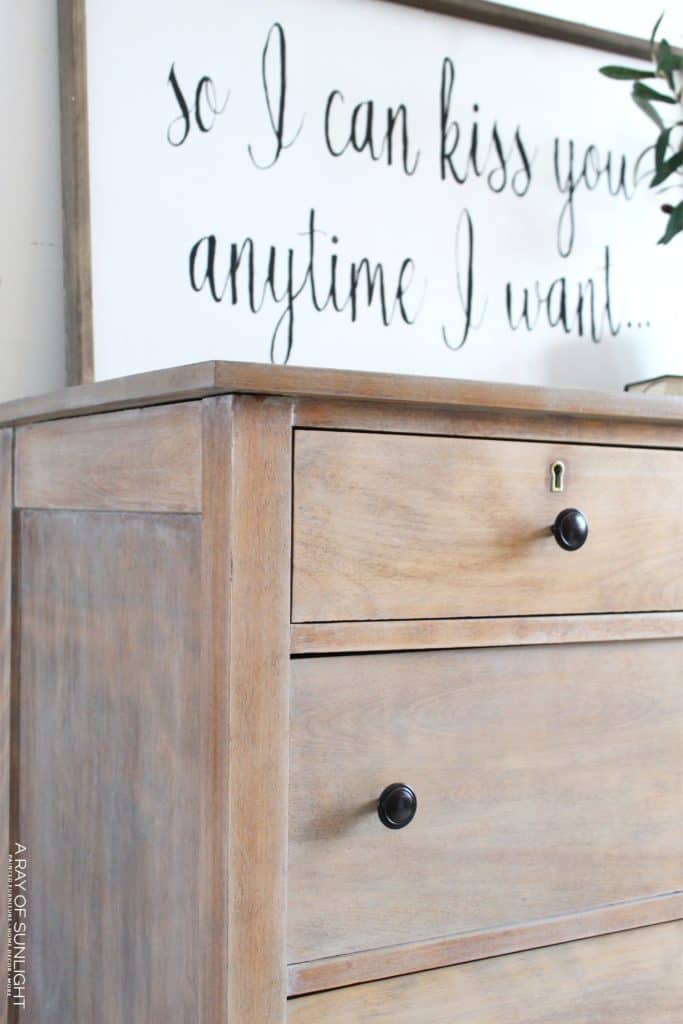
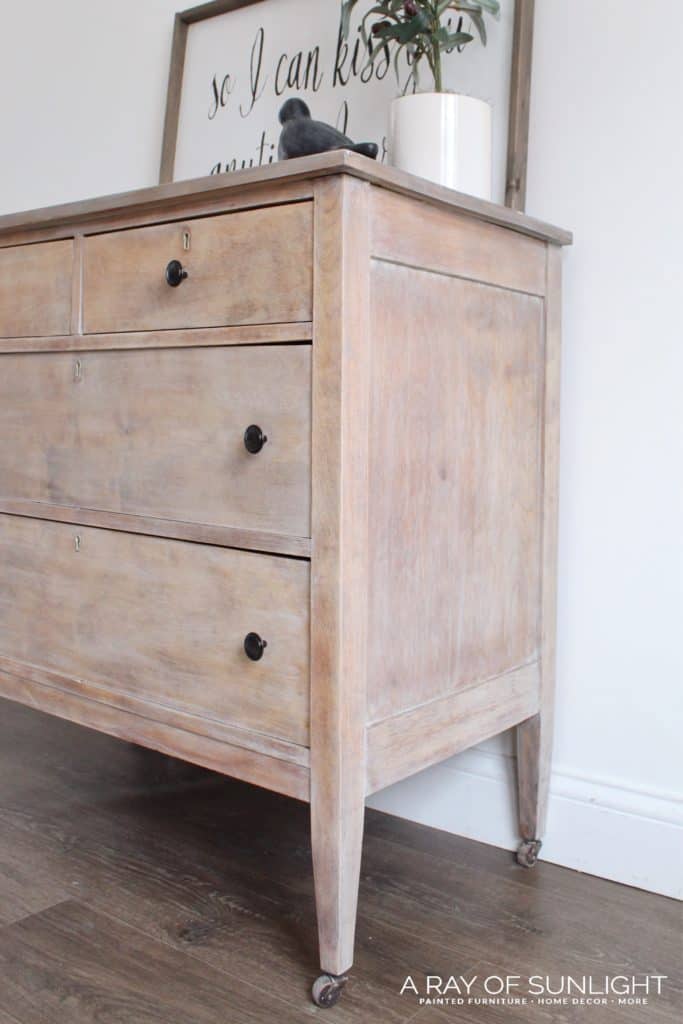
I used some Country Chic Paint in Sunday Tea that I had leftover (because you don’t need much for a project like this). Sunday Tea creates the perfect grey weathered wood finish!
Just mix some water with the paint, stir it up until it’s completely combined, and then you’re good to go! I’m going to guess that my ratio of water to paint was a 60/40 mix. So a little bit more water than paint. Then I put the color wash onto the wood. Simply wipe on, then wipe off.
- Working in small sections, I wiped on a whole lot of the wash, making sure to get it into every bit of detail and corner.
- Before it sat on the wood for more than 30 seconds, I wiped off the wash with a clean rag, always wiping in the direction of the grain.
- If the paint was too thick, I used a wet rag to wipe off even more paint. Once again, wiping in the direction of the grain.
- Then I painted another very thin coat of wash on top of that until I was happy with it.
I used paper towels for this since the color I was using was pretty close to white. If I were to do a dark color, I would use heavy duty lint free rags or old t-shirts. You could also use a cheap brush to brush on your first coat. You could also use this natural homemade stain for a weathered wood look.
I kept all of my drawers in the dresser until I was happy with the overall finish of the front, and then I took them out to apply the wash to the side and top of the drawer fronts as well as the inside of the dresser where the drawers sit. Once the wood was to my liking, I let it dry overnight.
Check out our blog post on this is what a damaged dresser can turn into for another makeover using color wash.
How to Seal Color Washed Wood
I typically spray my top coat on, but my spray booth was being used, and it’s not necessary for a weathered wood look. So I busted out my favorite brush, the Country Chic Paint painting sponge. This sponge is perfect for topcoats without the hassle of a brush!
I used General Finishes High Performance Top Coat in Flat because that’s what I had on hand for a matte finish. Check out the more best topcoat for painting furniture options here for more information on each product!
The final coats of poly are really important for creating a durable paint finish and protecting your finish from easily scratching.
Watch the full makeover on our YouTube video below, or keep scrolling to see the after photos!

More Before and After Makeovers
See All >
Click any of these “before” photos below to view the “after” of that makeover.


Refinishing Dresser Ideas
Now that you know how to strip wood and refinish it with a color wash, you can tackle a refinishing dresser project with confidence! Here are some more refinishing ideas for dressers to inspire you:
- Stain a dresser with a dark wood finish. The darker the stain, the more dramatic the finished look will be. Here’s how to stain wood darker to learn how to get that rich dark stain.
- Try a two tone finish by staining the top and painting the base of the dresser. The contrast will add interest and make the dresser stand out. Check out our post if you’re curious about, “is two-toned furniture in style?” You can also see two tone dresser ideas here for inspiration!
- You can also stain the top with a lighter stain and stain the base with a darker color for a different take on the two tone look. You still get the natural wood feel, but with a little more contrast.
Don’t be afraid to get creative and try new techniques, like white washing or color washing, to create a unique and beautiful look. Check out our post about the steps to refinishing furniture for a successful project.
If you’re working with an already finished piece, here’s all about refinishing painted furniture. If you’re working on antique pieces, here’s our guide on how to refinish antique furniture, and if you have a cedar chest, here’s how to refinish a cedar chest!
For more refinishing inspiration, here are refurbished dresser ideas, refinished dining table ideas, and armoire refinishing ideas. For antique pieces, check out these antique dresser refinishing ideas.


If you want a natural refinished look for your dresser, this makeover is easy to do and gives your dresser a beautiful, weathered wood finish. So, next time you’re looking to update your dresser or any piece of furniture, remember this simple and affordable refinishing method.


Refinishing an Old Dresser
Updating a dresser can completely change the feel of your room. And refinishing an old dresser doesn't have to be hard. Here's the step by step process.
Materials
Tools
Instructions
- Start by removing dresser hardwaree. Then protect the floor where you are working with some cardboard.
- Strip off the dresser's old finish. You can start by sanding, then use the stripper for the rest of it. For sanding, start with 80 grit sandpaper on your power sander, then move up to 120 grit sandpaper, and even 150 grit sandpaper after that. Sand by hand with 220 grit to smooth out the wood and help remove any sanding marks. Vacuum and wipe all the dust from sanding.
- Seal the stripped dresser wood with a couple of coats of polyurethane. Sand the poly with 400 grit sandpaper to make it super silky smooth.
- Mix up a color wash with your desired paint color and water. The ratio of water to paint is a 60/40 mix. Color wash the wood by wiping it on the dresser, letting it sit for 30 seconds then wiping it off. Always wipe in the direction of the grain. Let the color washed dresser dry overnight.
- Seal the final coats of poly on the dresser to create a durable paint finish and protect your finish from easily scratching.
- Add hardware to refinished dresser.
Recommended Products
As an Amazon Associate and member of other affiliate programs, I earn from qualifying purchases.


More Refinishing Furniture Resources
- How to Restain a Dresser Without Stripping: My $70 Thrift Flip Transformation
- DIY Whitewash Dresser
- How to Refinish a Dresser
- Buffet Turned Into Bathroom Vanity
- How To Stain Wood With Paint
Follow us on YouTube to get more tips for painting furniture. Or share your project with us on our Facebook Group and be part of our community. See you there!
Great job and I LOVE your framed “Sweet Home Alabama” quote!
Thank you so much Karen!
Your dresser looks amazing! I followed this step by step, except I used a little more of the Sunday tea color on mine. The water based flat top coat turned my dresser drawer yellow (I tested on a drawer first). I then bought chalk paint top coat in clear matte and it did the same thing. Would a wax paste work better for the chalk paint?
Thank you!!!!
I’m thinking the yellow is from the wood tannins and not the water based polyurethane. The only way I know to not have it turn yellow is to seal the wood with a few coats of clear shellac first. Sorry you’re having issues!