Buffet Turned Into Bathroom Vanity


Do you have a dream vanity you’d love to have in your home, but the price tag is too high? With a little bit of creative DIYing and thrifting, you can make that vision come true with this buffet turned into bathroom vanity makeover!
This blog post will explore how I transformed an old thrifted buffet into a modern bathroom piece with plenty of storage space – and how you can do it yourself. If you love furniture makeover ideas with a unique touch, keep reading!
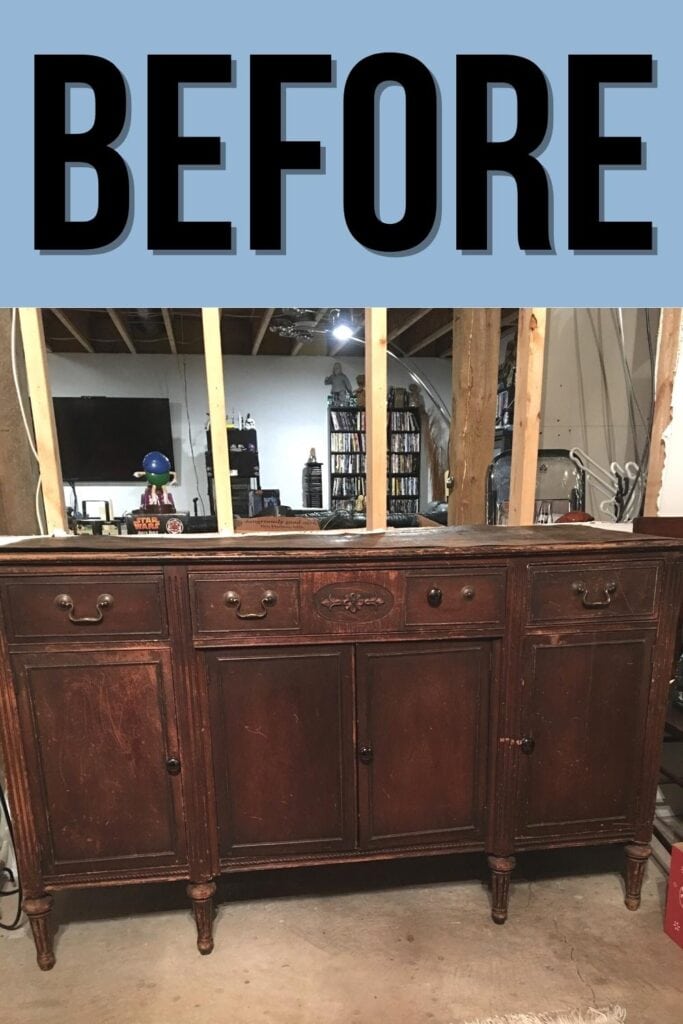
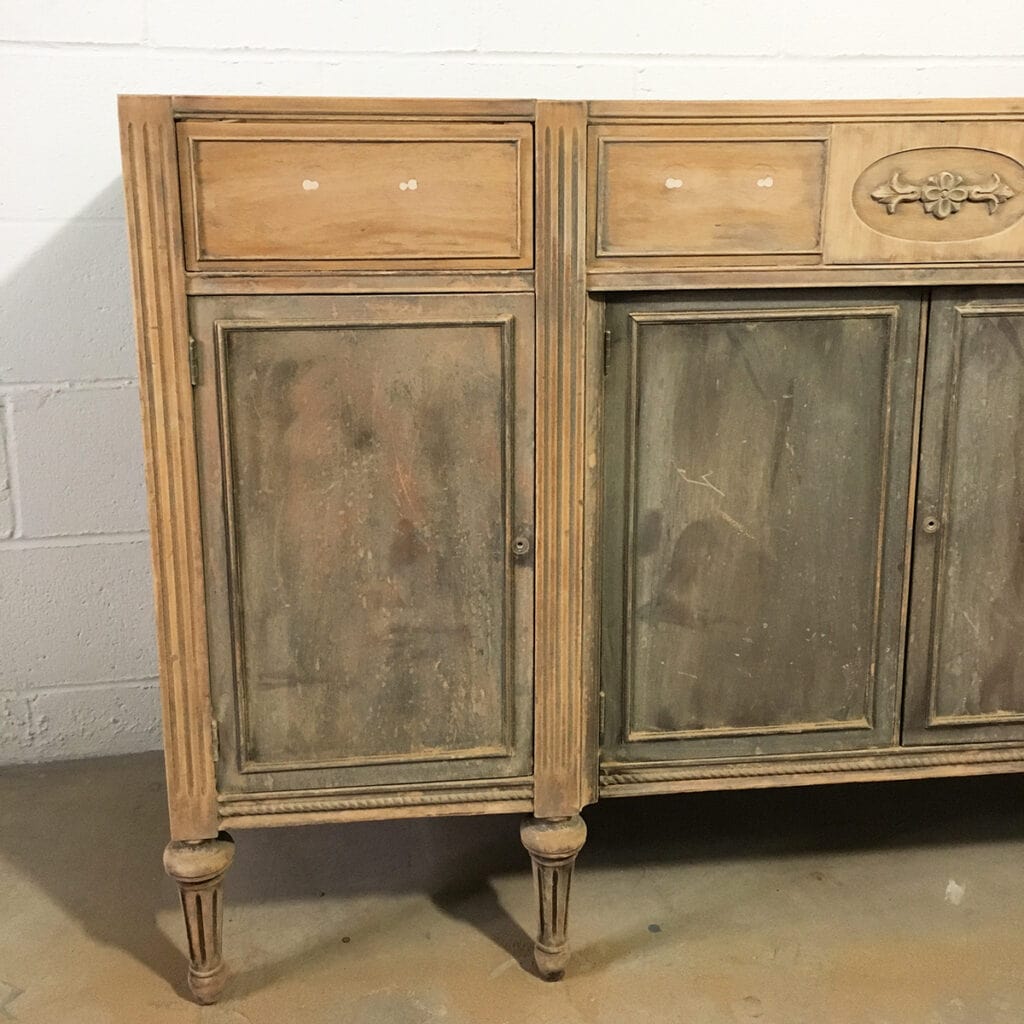
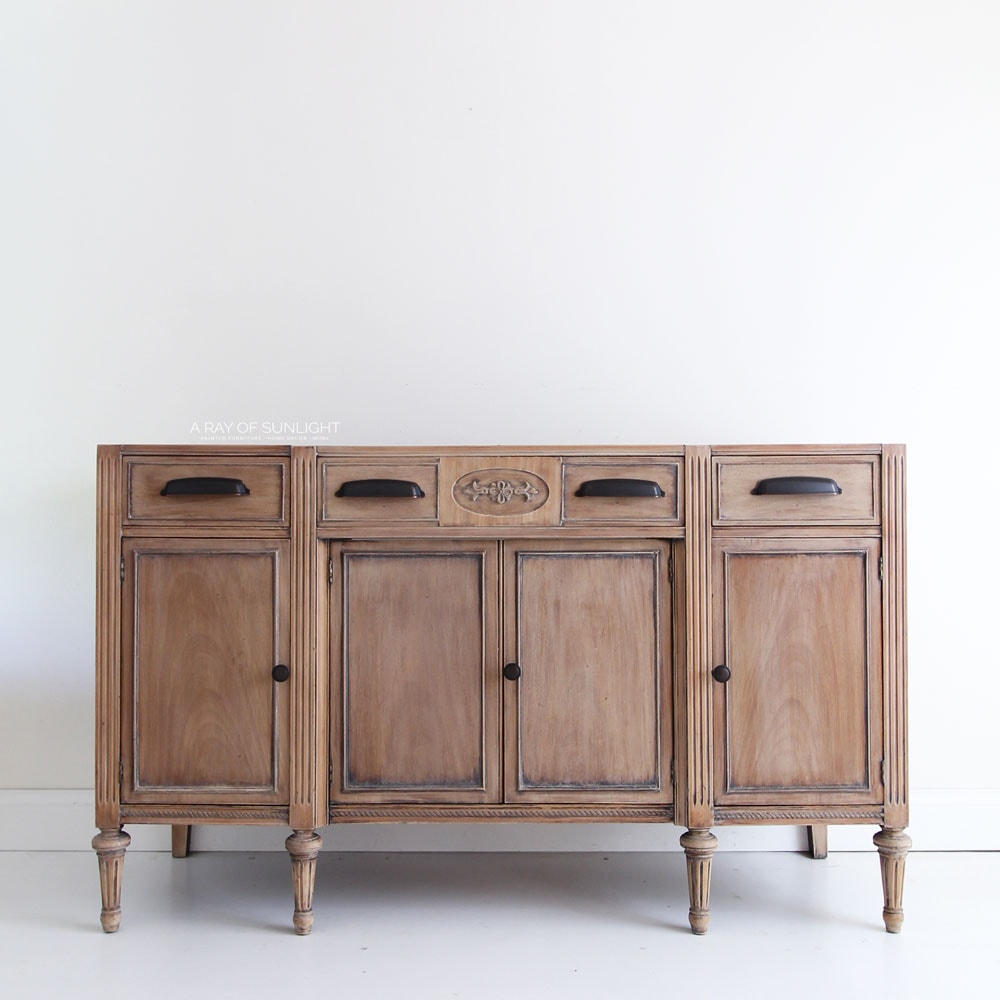
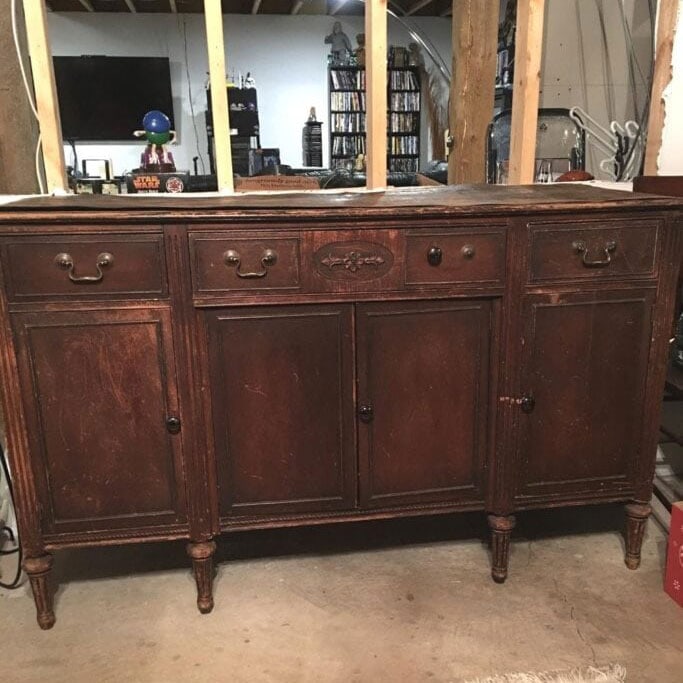
Above is what the piece looked like when I got it. It had some water damage on the top and the back, but overall was in good condition and was a great candidate for a bathroom vanity. It was great quality and just needed a little love.

A plain, large thrift store find seemed like an intimidating project at first, but some planning and patience proved that this DIY makeover was totally doable. With the right tools, materials, and a bit of elbow grease, I was able to transform this piecee on a budget – and so can you!
With this makeover, I was able to create a functional and stylish piece that adds personality and storage space to a shower room. Let’s dive into the details of how I did it!

Supplies Used for Buffet Turned Into Bathroom Vanity
As an Amazon Associate, I earn from qualifying purchases. I also may earn from other qualifying purchases with other companies or get free product to review and use. All opinions are my own.
- Screwdriver
- Hammer
- Flat Tool
- Drill
- Multi Oscillating Tool
- Plywood 1/4″ 2’x4′
- KwikWood
- 220 Grit Sandpaper
- Contour Sanding Grips
- SurfPrep 3×4″ Sander
- Bleach
- Mineral Spirits
- Tan Paint for Whitewash
- Couture Paint in Baltic Black
- Waterbased Topcoat
Check out our top 10 list of the best painting furniture supplies here so you can do beautiful transformations any time!
How to Turn Buffet into Bathroom Vanity
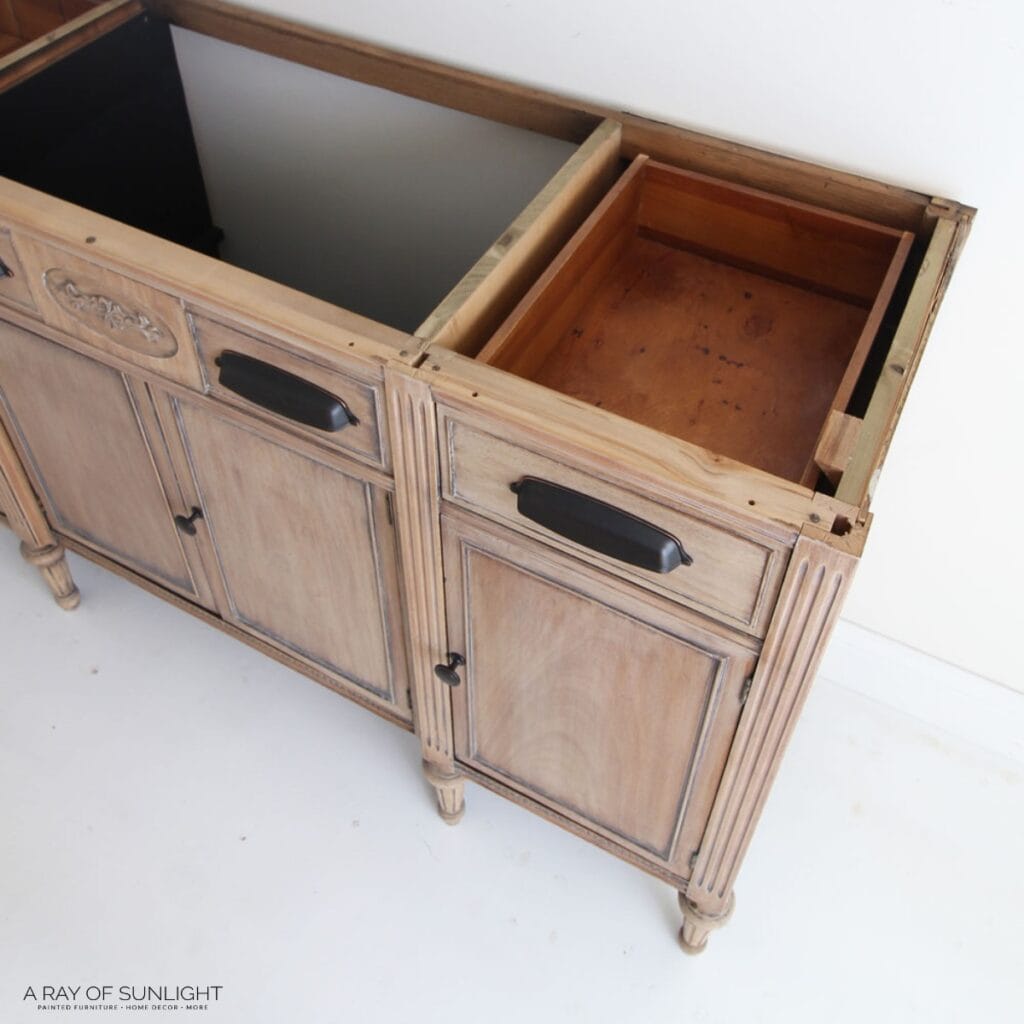
Alright, this piece had a lot of water damage on the top and the back. So, I pried off its back with my hammer and some flat tools. It was held on with nails around the edge. Check out our repair water damaged wood guide for more information.
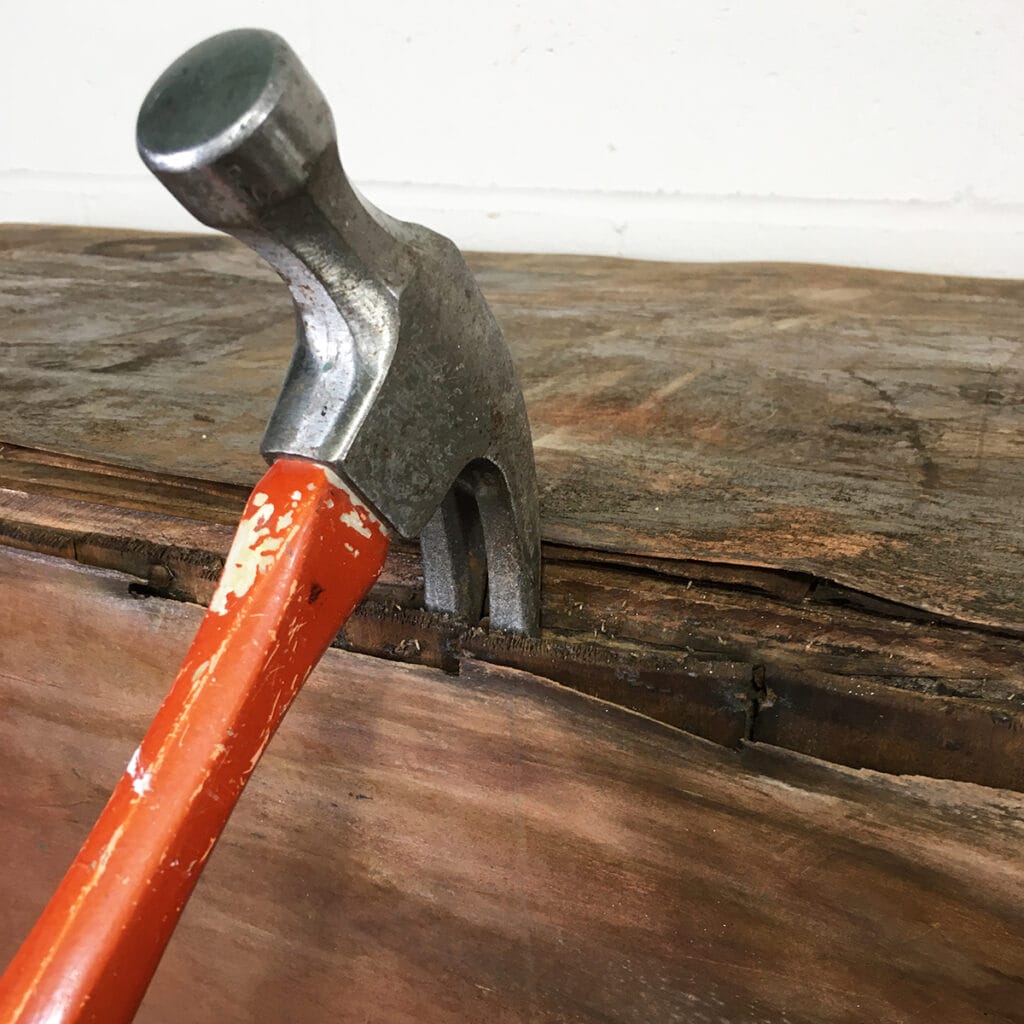
Then I found the screws that held the top to the rest of the piece. So I unscrewed those and the top came off. I ended up replacing the back, but just on the 2 sides (I left the middle open for plumbing.)
And I didn’t make a new top because if this was for me, I would want to put stone on the top. The tops of bath vanities get a lot of water, and water does not sit well on wood. Even if it is sealed really well, so a stone or formica top is better than replacing the top with more wood.
But if you’re looking at how to make a new wood top, check out my post on how to make a plank top dresser here.
I also cut out the shelf that the drawer sat on with my multi oscilating saw so the sink plumbing would be able to sit in this area.
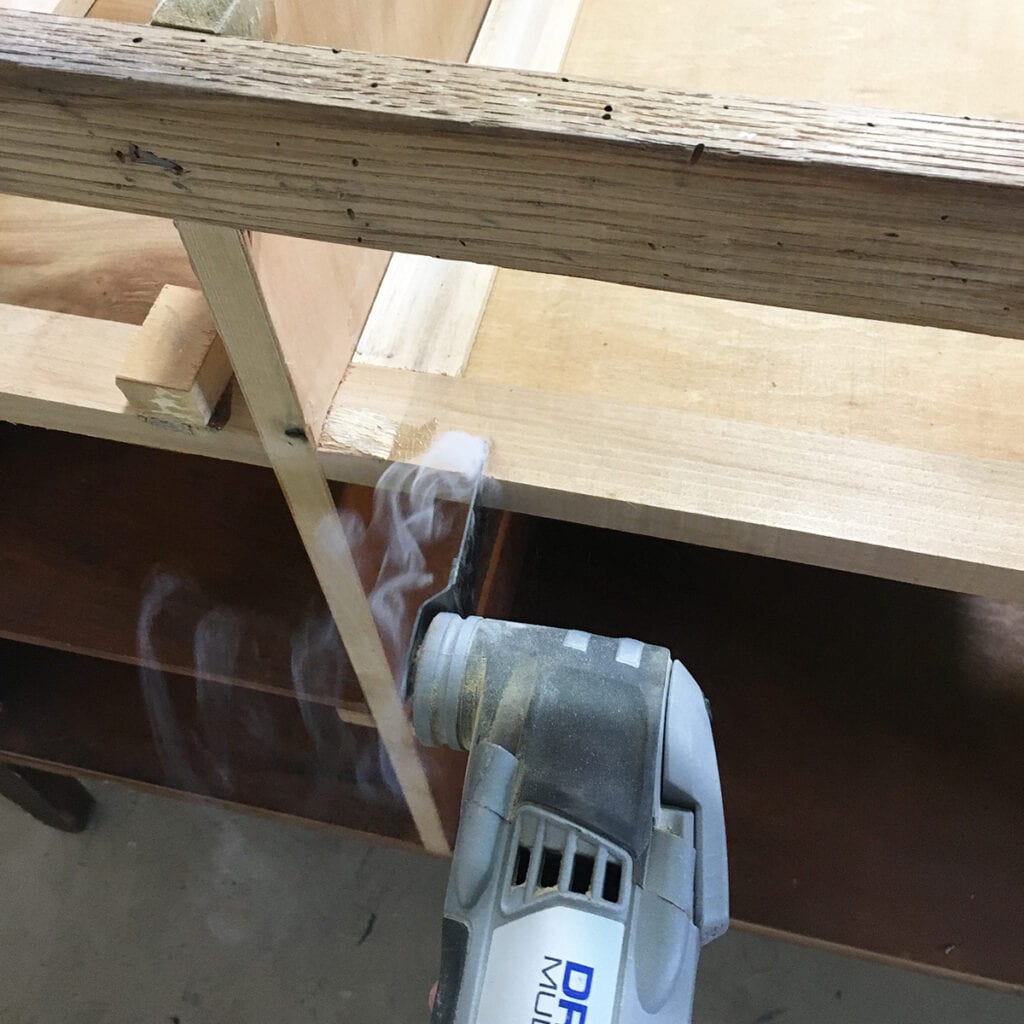
I filled the holes left behind with some KwikWood. If you haven’t used this product before, you can learn how to use KwikWood here.
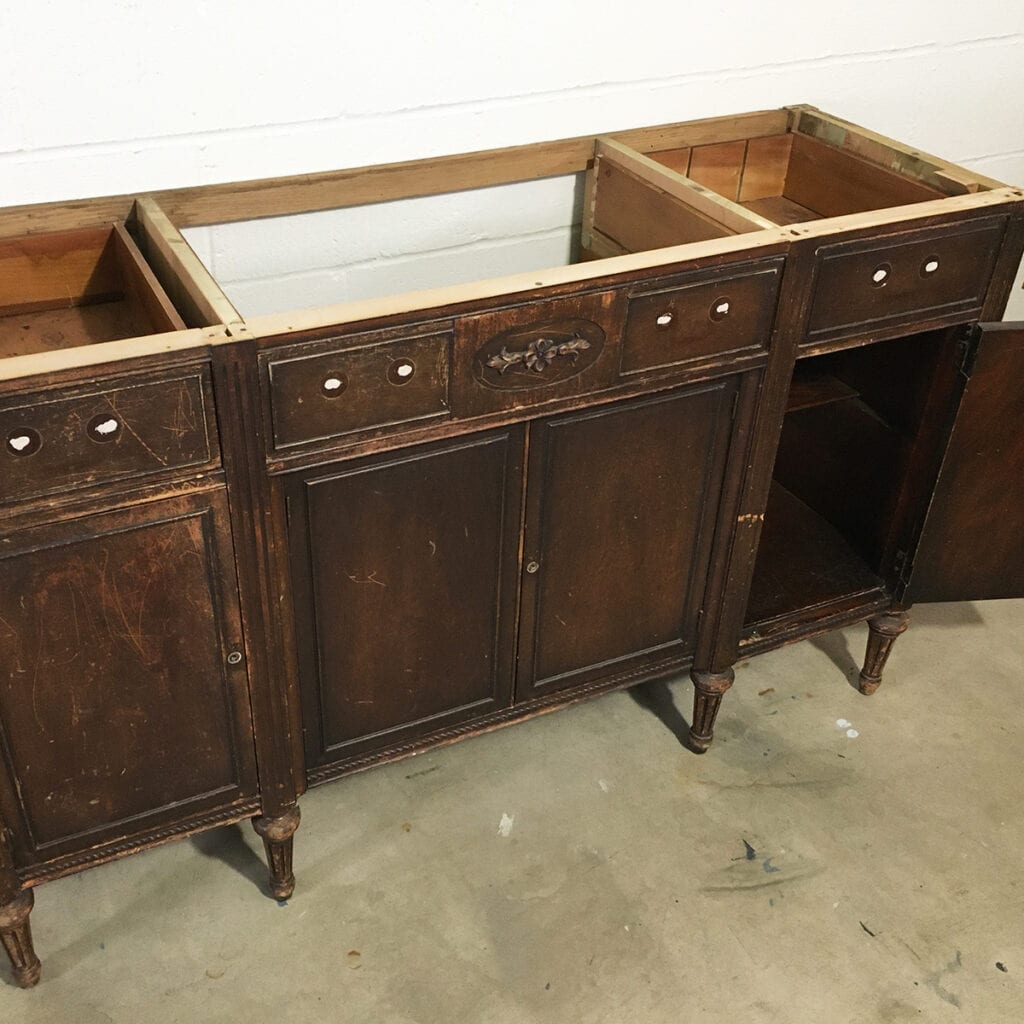
The last thing I did was break apart the middle drawer, where the sink will sit. I took off the back of the drawer so the bottom of the drawer could be removed. And then, I attached the sides of the drawers to the inside so that drawer was just a fake drawer.
But if you need a guide on dresser drawer bottom replacement, check out this post to learn how!
Now if the finish already looked good, it would have been ready to go. But, the finish was old, scratched and in need of a refresh.
Refinishing buffet Turned Bathroom Vanity
I filled the hardware holes on the drawers so I could change out the hardware to something new. Here’s more about filling holes when replacing hardware.
Then, I scuff sanded the surface to get it ready for the new finish… Learn more about the importance of sanding before painting furniture here.
How to Lighten Dark Wood
But when I started sanding, the old finish came off really fairly easily with 220 grit sandpaper. And because of that, I sanded it all down to bare wood, other than in the details. I left a little bit of the dark stain in the details for an added effect.
Learn all about the best sandpaper for furniture here, and check out our guide on how to sand down wood here.
Would you like to save this?
If you want to recreate this look, here are the best furniture refinishing tools and the best sanders for furniture you can use.
I could have also used this technique in how to remove the wood stain, but the stuff on this came off so easy that I didn’t need to. Stripwell is another product that is great for removing stains and old finishes safely and effectively – check out my Stripwell QCS review here for more about it.
Then, I cleaned off the dust and wiped down one section with mineral spirits to see what it would look like when I topcoated it.
It was much too dark for what I wanted, and the wood tones looked different, so I opted to bleach the wood to make it lighter. Here’s how to bleach wood! If the piece turned out orangey, here’s how to tone down orange wood furniture.
And here’s what it looked like after a couple of coats of bleach.
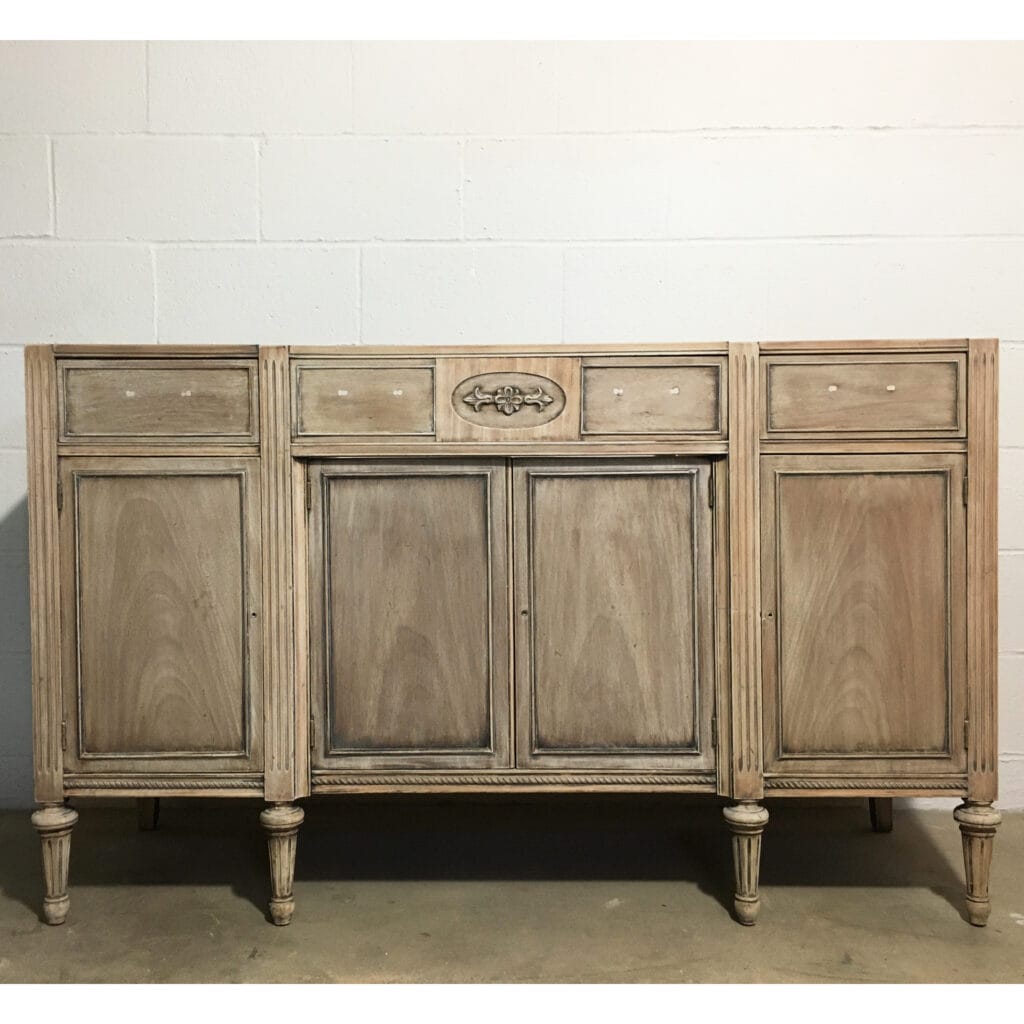
I could still tell that the wood tones were slightly different, so I applied a coat of whitewash but with tan colored paint. Learn all about how to whitewash furniture in this post.
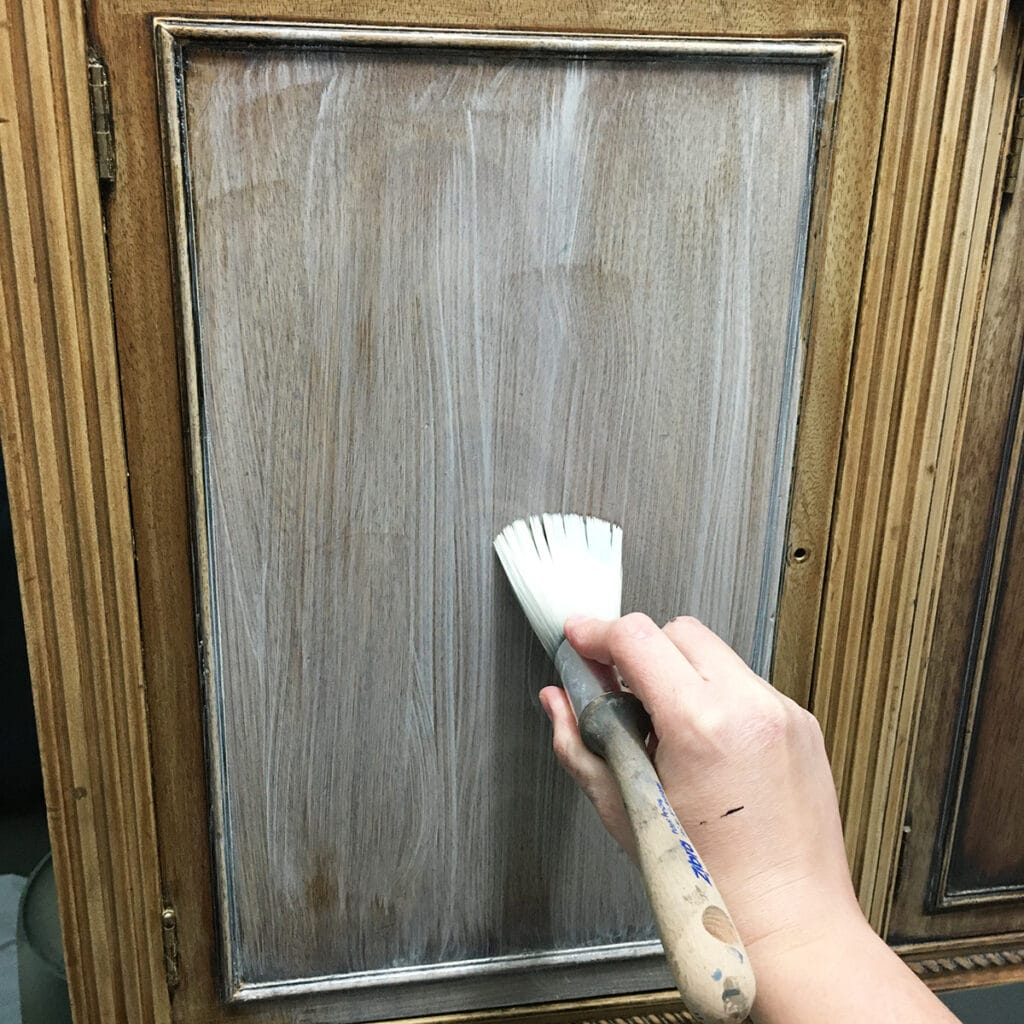
And just like in the post about whitewashing, I topcoated the wood to seal it and protect it from water.
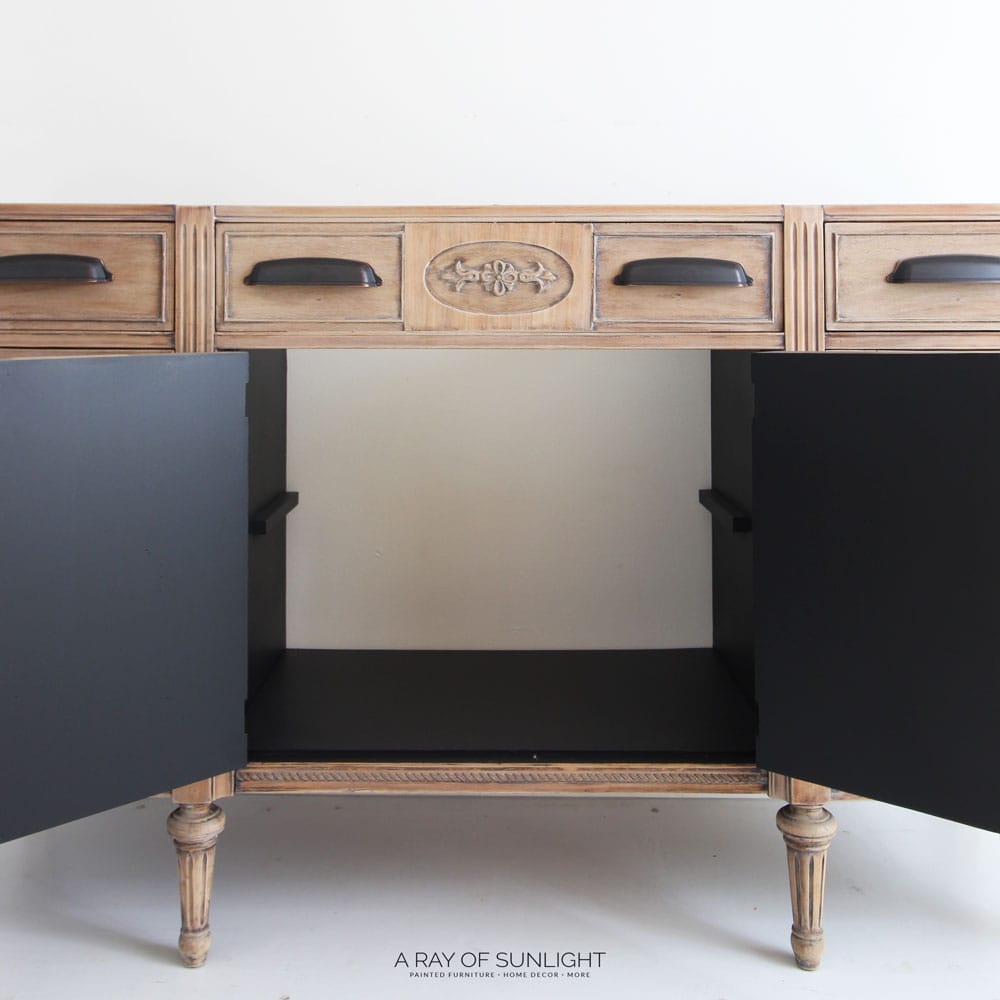
I also spruced up the inside to make it look nice there, too. I used Paint Couture’s Baltic Black paint and sealed it with waterbased polyurethane. Here’s how to apply polycrylic to painted furniture. Then I added new hardware, and voila.
Here is what the buffet turned bathroom vanity looked like after!
More Before and After Makeovers
See All >
Click any of these “before” photos below to view the “after” of that makeover.


This natural wood piece sold quickly for full price. I so wish that I had a space to put this because I would have kept it in a heartbeat! If you want to sell your own, check out my handy furniture painting price list to help you with pricing.
Get more ideas for your next DIY project with these armoire refinishing ideas. If you’re working with veneer, here’s how to refinish veneer.


How to Make a Bathroom Vanity Out of Furniture
The first step would be to find the perfect piece. Look for something with enough surface space for a sink and countertop, and make sure it has the right height for your desired sink.
You can use a buffet like we did, a dresser, or even a desk to make it a beautiful and functional space. Then, you can follow the steps in this guide! Get creative with different styles and colors to make yours truly unique. Here’s from tired cabinet to bathroom storage for a similar makeover.
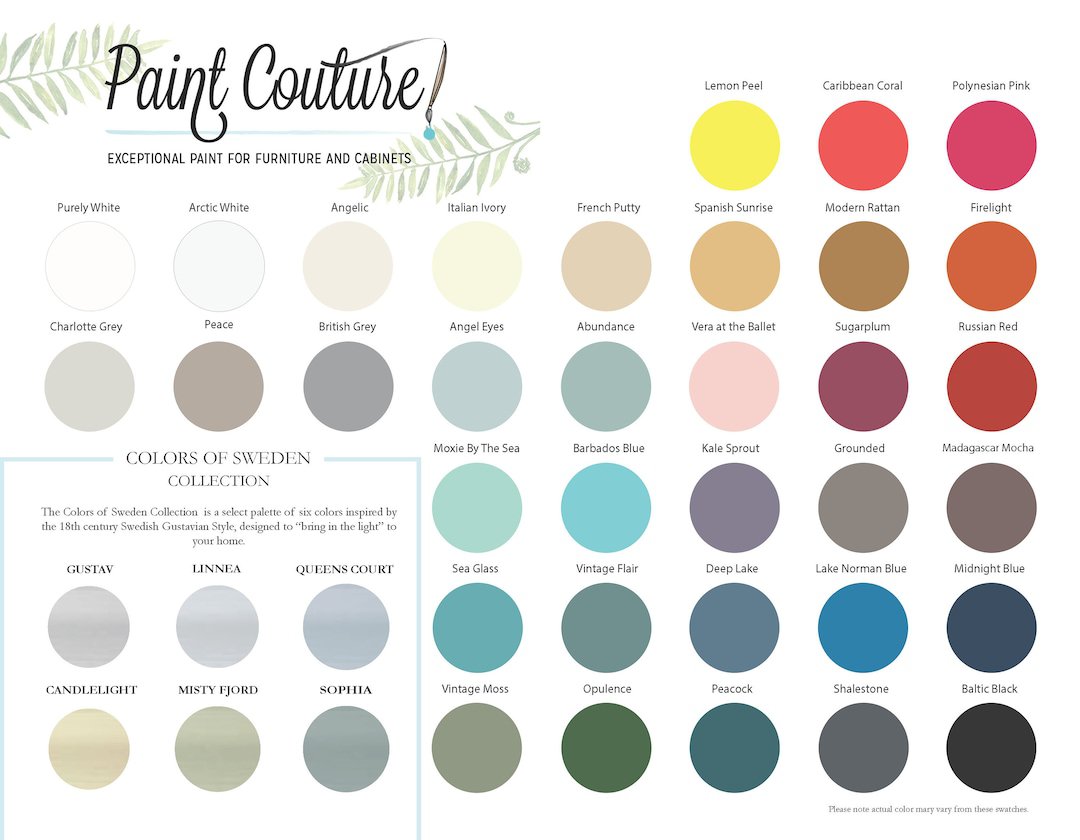
Choose a color that will complement your bathroom’s decor scheme. You can go bold with these bold furniture paint colors, or keep it simple with classic neutral furniture paint colors. You can even make your own custom shade if you can’t find the perfect one! Check out this guide on how to mix different colors of paint.
Hardware can also make a big difference in the overall look. You can choose from a variety of styles, from modern to rustic, to fit your desired aesthetic. You can also use the old hardware but refresh it with a new color – learn how to paint drawer pulls and how to spray paint drawer pulls in these posts.
Then you can install the rest of the fixtures to finish up the setup. And just like that, you have a one of a kind, stylish bath piece made from repurposed furniture!


Buffet Turned Into Bathroom Vanity
Looking for a way to add some extra storage to your bathroom? Check out this tutorial on a buffet turned into bathroom vanity.
Materials
- KwikWood
- 220 Grit Sandpaper
- Bleach
- Mineral Spirits
- Tan Paint for Whitewash
- Paint Couture Paint - Baltic Black
- Waterbased Topcoat
Tools
Instructions
- Pry off and unscrew the buffet's back and top. Replace the back parts but leave the middle open for plumbing.
- Now, cut out the shelf that the drawer sat on so the sink plumbing would be able to sit in this area.
- Break apart the middle drawer to make space for a sink, then attach the sides of the drawers to the inside of the buffet.
- Fill in hardware holes so you can change out the hardware to something new, then scuff sand the buffet surface to get it ready for paint.
- With the buffet looking too dark, you can bleach the wood to make it lighter.
- Mix some paint with water to make whitewash, then apply a coat of whitewash all over the furniture.
- Topcoat the wood with waterbased polyurethane to seal it and protect it from water in the bathroom.
- Paint the inside of the vanity then topcoat it with some more poly.
- Add your new hardware to the new vanity.
Recommended Products
As an Amazon Associate and member of other affiliate programs, I earn from qualifying purchases.

More Buffet Makeovers
- Painted Antique Buffet Makeover
- Black Painted Antique Buffet
- How to Add Legs to a Buffet
- Antique Blue Sideboard Buffet
- Painting a Sideboard
Learn the Art of Updating Furniture!
If painting furniture feels overwhelming or your past attempts didn’t go as planned, this course will guide you step by step.

Follow us on YouTube to get more tips for painting furniture. Or share your project with us on our Facebook Group and be part of our community. See you there!
Love following you two.
Aww thank you so much Lori! This is so sweet!
Thanks for the great instructions and photos. I have a cabinet set aside to do this but am concerned it’s too tall. How tall is your vanity?
Anywhere between 30-34″ is the normal height for bathroom vanities. Make sure to include the thickness of the countertop in that measurement. Hope that helps!
Friends of mine have a taller than typical bathroom vanity, it wonderful! I think it’s like a kitchen counter height, 36″. I’m 5’8″ and I’m considering doing the same.