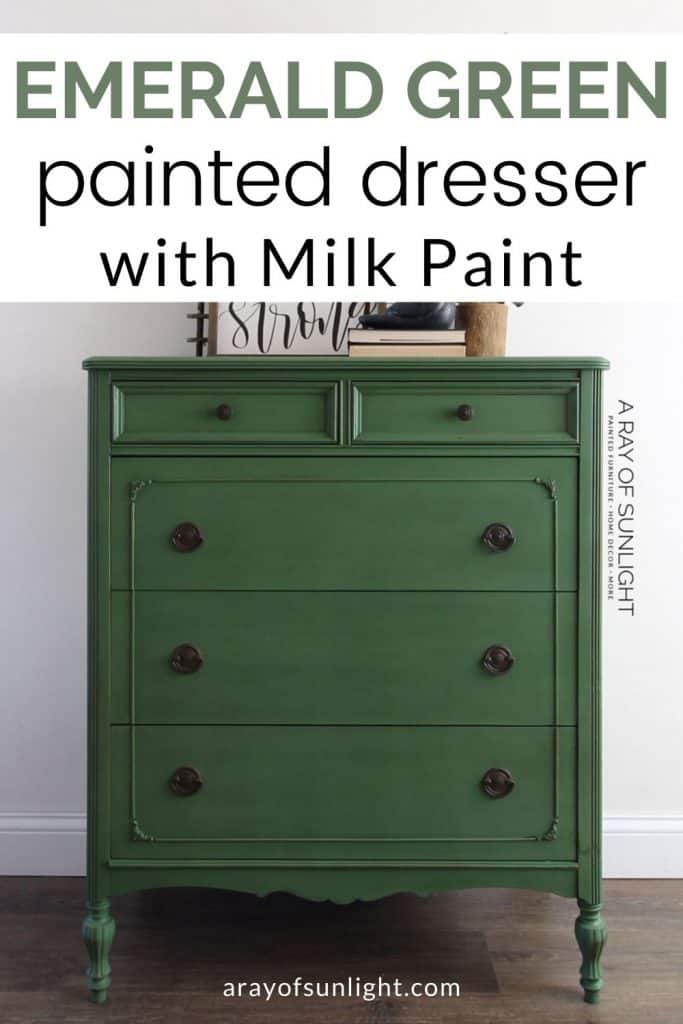
Emerald Green Painted Dresser: How to Paint with Milk Paint
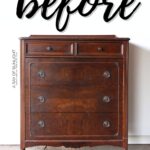
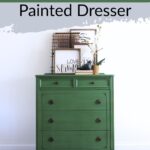
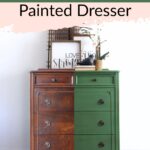
If you have an old dresser that needs a fresh new look, why not create your own emerald green painted dresser with these tips and tricks! We’re sharing how to paint with milk paint, a super easy way to paint a vintage dresser emerald green.
This is one of the many green painted furniture ideas that has become popular in recent years, as people are embracing bold and unique colors for their furniture. Plus, milk paint is a great option for getting that rich and vibrant emerald green finish. So let’s get started!

Emerald green is a rich and luxurious color that will instantly add a touch of elegance to any piece of furniture. It’s a bold choice, but when done right, it’ll be such a stunning statement piece. Whether you’re going for a modern or rustic look, an emerald green painted dresser would be a perfect addition to your space.
This dresser was painted with milk paint, a powdered paint that you mix with water. It creates a beautiful matte finish as well as a slightly distressed look, so if you want that vintage vibe, milk paint would be the way to go.

It’s also non toxic and environmentally friendly, making it an awesome choice for those who are conscious about using chemical free products. Plus, it dries quickly, so you won’t have to wait long before seeing the final result!
Emerald green and milk paint – let’s see how this combination turns out. Keep reading for the steps and our transformed dresser!

Supplies Used for the Emerald Green Painted Dresser
As an Amazon Associate, I earn from qualifying purchases. I also may earn from other qualifying purchases with other companies or get free product to review and use. All opinions are my own.
- Old Dresser
- Real Milk Paint in Lily Pad
- Krud Kutter
- Zibra Paint Brush (My fav!)
- Sanding Sponges or (Sandpaper) for distressing
- Waterbased Poly to seal the milk paint
- Shop Vac
- Tack Cloth
The Difference Between Chalk Paint and Milk Paint
But first, how does milk paint differ from chalk paint? Milk paint is different than chalk paint in that it comes in a powder form. It is known for its chippy and old finish, the variations in the finish and how it has a mind of its own.

I did a few things to help make the paint on this dresser chip, but it didn’t. There are other times that I try to get it to not chip, and it still chips anyway. That’s what I mean by it having its own mind. If you’re looking for a paint that will stick well to your furniture, and not create any surprises, then you’ll want to stick with chalk paint.
Here’s a tall green painted modern dresser that was done in chalk paint. Can you tell the difference? You can definitely achieve a worn painted look with chalk paint (the different options with chalk paint are endless!). But milk paint makes it so easy.
Read through my comparison between milk paint vs chalk paint to learn more about these two paints side by side. You can also check out my list of the top chalk paint brands here if you choose chalk paint over milk paint.
Honestly, I used to chalk paint about every piece of furniture, but now I find myself using milk paint because it’s even easier than chalk paint! And I love to see what the milk paint decides to do differently on each dresser.
Milk Paint on Slick Furniture
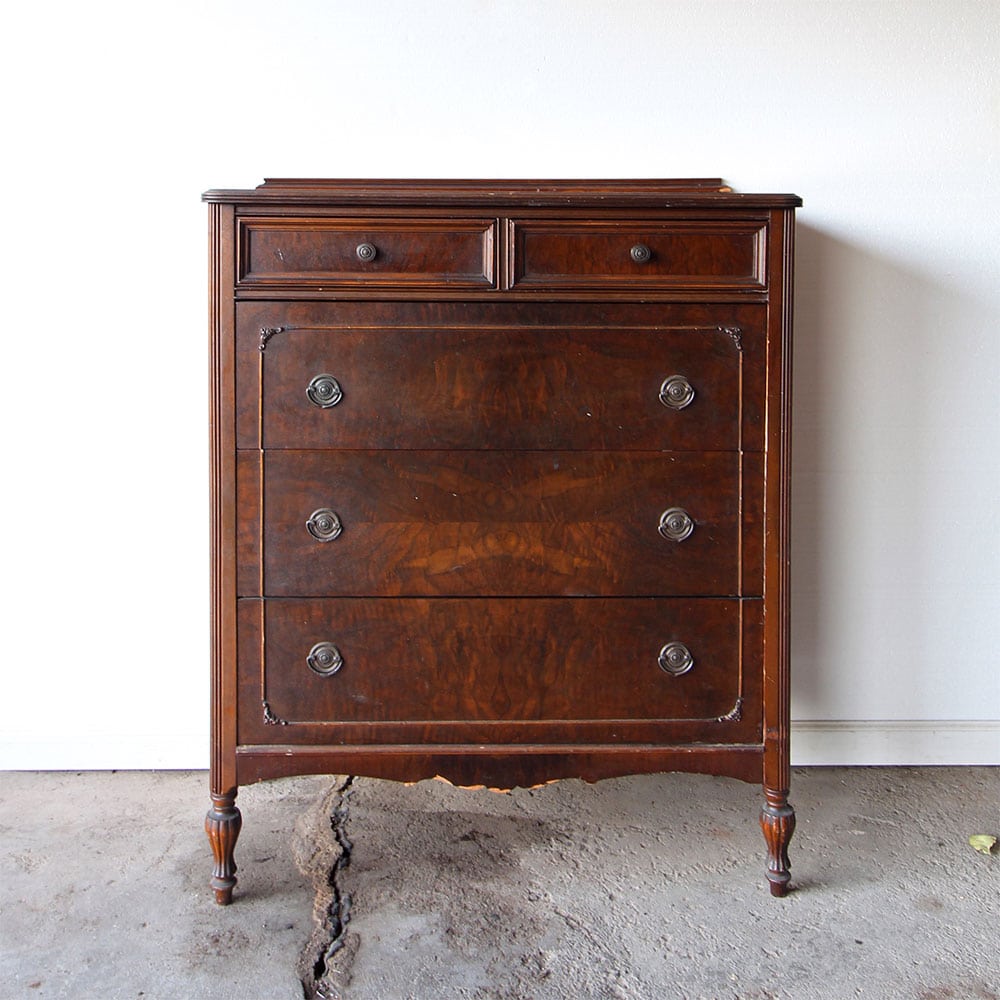
Another huge difference between chalk paint vs milk paint is that milk paint doesn’t work on a slick surface. This dresser was old, the finish was rough, crackled, and dry.
Milk paint works really well with raw wood or finished wood that is very old and dry. It works by soaking into the wood or the finish, so if the finish is super slick (like laminate), then it will just fall off once it’s dry.
I would recommend using this tutorial on how to paint a laminate dresser if you’re painting a dresser that is shiny and slick. You can also do a little scratch test to make sure the milk paint will work with your dresser. Paint a small square on each side of your dresser, let it dry overnight, and then scratch it with your fingernail.

If it comes off easily, then you need to prep really well and do another scratch test or use chalk paint instead. Each milk paint company has a product that you can mix with the milk paint to help the milk paint stick, but it’s not always guaranteed that it will stick. Even if you prep really well.
But if you have an old wood dresser that you want to have some fun with, milk paint is where it’s at! This dresser had an old dry and crackled finish – perfect for milk paint. I’ve fallen in love with green painted furniture, and this dresser was the perfect candidate for some green milk paint!
How to Mix Milk Paint
You want to start out by mixing the milk paint. It needs to sit for about 15 minutes so it can dissolve and start to thicken up before you paint with it.
The Real Milk Paint company makes it easy to mix up milk paint though! They include a paint container so you don’t have to find your own container.

Just pour equal parts water and milk paint powder into your container, and drop the included marble inside. Close the lid on tight and then shake the milk paint for a couple of minutes.
*Note: Only mix what you will need for your project. Mixed milk paint doesn’t have a long shelf life.
Let the milk paint sit for 15 minutes. Learn more about mixing milk paint here.
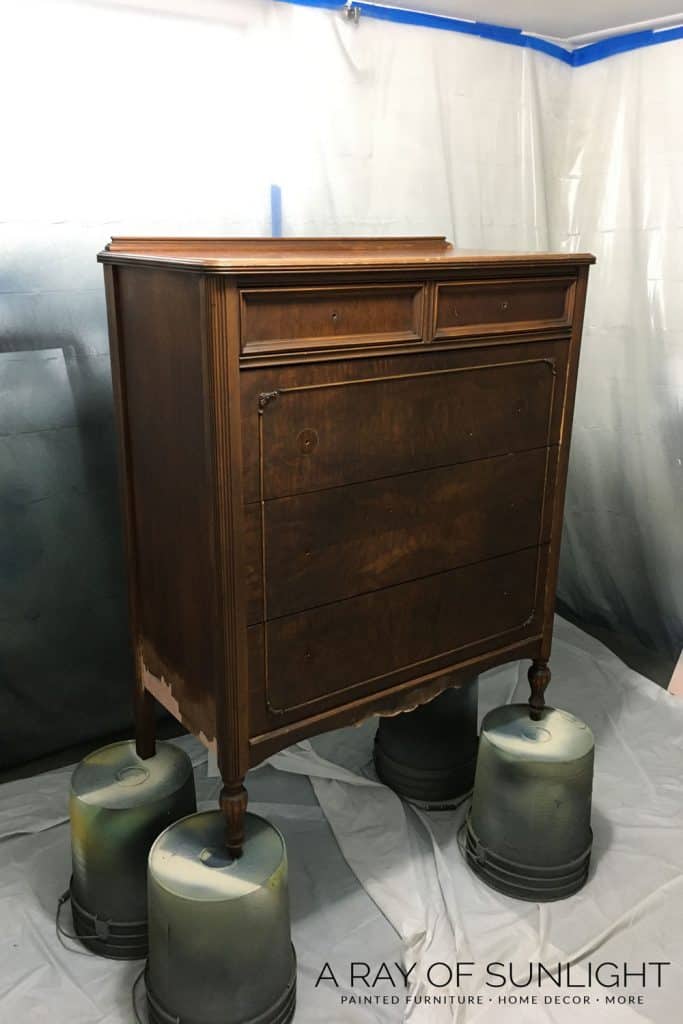
Clean the Dresser
While you wait for the milk paint, clean the dresser. Now I’m usually a huge advocate of how to prepare furniture for painting properly. You don’t want your paint to easily scratch or peel off! But, milk paint is different than other paint.
I was hoping that the milk paint would chip a bit, so I didn’t prep the dresser, other than cleaning it off. If you don’t want your paint to chip very much, you can scuff sand after cleaning the dresser to help the paint stick. With milk paint it’s not a guarantee though!
I cleaned this dresser with Krud Kutter, my go to cleaner for furniture. It cuts through grease, grime and wax, so it’s a great cleaner for prepping furniture for paint. Just spray the Krud Kutter all over the dresser and then wipe it down with a damp rag. If your dresser is really dirty, rinse your rag out as you go.

Check out how to clean furniture before painting here to learn a lot of tips and tricks on doing it. If you’re worried about germs, bacteria, and musty odors, here’s our post about how to disinfect wood dresser to help you.

Paint the Dresser with Milk Paint
Now it’s time to get painting! Bust out your paintbrush and start painting your dresser with milk paint. I find that long strokes are the best since the milk paint has so many variations in it.
I love Zibra paint brushes because they come in different shapes. The round paintbrush is my absolute favorite for painting furniture because it helps get into details and is so good for painting spindles. The square and triangle brushes are close contenders.
Check out the best paint brushes for painting furniture you can use here. But, if you’re anything like me… You might like to spray paint!
Can You Spray Milk Paint?
Yes! If you have a paint sprayer, you might want to try to spray milk paint! I love to spray paint furniture with my paint sprayer. I’ve sprayed milk paint through both my Wagner Double Duty paint sprayer and my professional Fuji Q4 Platinum paint sprayer. Both handled it great!
Here’s how to use a Wagner Double Duty paint sprayer and how to use the Fuji Q4 paint sprayer if you also have these sprayers. The Double Duty sprayer has been discontinued though, and here’s its new model: the Wagner Control Spray 250 sprayer. You can find other best HVLP paint sprayers for furniture here if you want more options.

Would you like to save this?
Just be sure to filter the milk paint through a mesh filter before spraying it. I sprayed this dresser, and it was so easy! Each coat took about 10 minutes to spray, and then I could rest while the paint dried.
You can learn more about using a paint sprayer to paint a dresser here. We also answer this “can you spray milk paint?” question in detail in our post here!
How many coats of milk paint should you apply?
When using milk paint, it’s a good idea to apply at least two coats for full coverage. That said, the number of coats can vary based on factors like color and paint thickness. For lighter colors, you may need to apply more coats, and some milk paints are more pigmented than others.

Keep in mind that milk paint is unique in that it can be unpredictable and may chip or crack in certain areas. This can add to the distressed look, but if you prefer a more solid finish, you might want to apply an extra coat or two.
How to Distress Milk Paint
After the milk paint is dry, distressing milk paint is easy! Distressing milk paint just makes it so you can see hints of the wood finish on the edges of the dresser and on any raised detail. It creates a more worn look. If your milk paint is going to chip, now is the time to see!

Grab a 220 grit or 400 grit piece of sandpaper and rub it all over the dresser. I found Real Milk Paint to have a grittier texture than I’m used to, but a quick hand sand took the roughness away and distressed the edges a bit.
I recently tried out using sanding sponges, though, and I’m in love with them! They are basically sandpaper with some foam inside. And they honestly make sanding and distressing so much easier!! I actually don’t dread sanding now. Learn more about the best sandpaper for furniture painting you can use here.

After you’re done distressing, use a vacuum with the hose attachment to get the dust off, then wipe it down with a lint free rag or tack cloth. You can learn more distressing furniture techniques aside from sanding here.
How to Seal Milk Paint
Since milk paint is very porous, it has to be sealed. Otherwise, it will stain really easily. You can wax milk paint, but I find wax to be a pain and high maintenance.
Instead, I spray on a few coats of waterbased poly. Learn ALL of my tips and tricks on how to spray polyurethane here! If you don’t have a sprayer you can brush the poly on.

You can also use hemp oil to seal milk paint. Hemp oil dries hard and creates a nice seal. It’s not as durable as poly, but it’s less intense to use than wax.
For this dresser, I mixed about half and half of the matte poly and the satin poly to create a really nice sheen. Then I sprayed it with 3 coats of poly. Check out your other options of topcoats for painting furniture here.
You’re all done!! Put the old hardware back on the drawers and enjoy your new emerald green dresser! If you’re feeling inspired now, you can get more milk painted furniture ideas here and emerald green painted furniture ideas here.


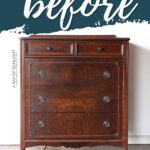
More Before and After Makeovers
See All >
Click any of these “before” photos below to view the “after” of that makeover.


For more tall dresser makeovers, here’s our list of tall dresser ideas! If you need color inspiration for painting your dresser, here’s our list of painted dresser color ideas. Check out these hand painted dresser ideas for that DIY touch.
How durable is milk paint compared to other types of paint?
Before topcoating, milk paint may not be as durable as these other types of paint for furniture, such as latex or oil based paints. Its porous nature means it can stain and chip more easily, especially in high traffic areas. However, with proper application and sealing, milk paint can still provide a long lasting finish for your furniture.
In terms of durability, when it sticks, it sticks well. But there may be areas where it chips. But milk paint can also be affected by the type of topcoat used. These sealants can protect the paint from daily wear and tear and help it withstand moisture and stains. So make sure to choose a high quality topcoat for longevity of your milk painted piece.
So while milk paint may not be as durable as other types of paint in some cases, it offers a different kind of durability and charm, especially if you want the natural, distressed look that only milk paint can provide.


Emerald Green Painted Dresser: How to Paint with Milk Paint
Turn your vintage furniture into something beautiful like this emerald green painted dresser. Here's how to paint with milk paint.
Materials
Tools
Instructions
- Mix the milk paint with equal parts water and powdered milk paint on your container, close its lid on tight then shake the milk paint for a couple of minutes. Let it sit for about 15 minutes so it can dissolve and start to thicken up before you paint with it. Only mix what you will need for your project since mixed milk paint doesn’t have a long shelf life.
- While you wait for the milk paint, remove hardware and clean the dresser to get rid of any grease, grime, and gunk. Just spray the Krud Kutter all over the dresser and then wipe it down with a damp rag.
- Spray or brush a few coats of milk paint onto the dresser.
- Once the milk paint is dry, distress parts of the painted dresser with a sanding sponge or sandpaper if you want that worn look. After you’re done distressing, use the vacuum to get the dust off, then wipe it down with a tack cloth.
- Seal the milk painted dresser with about 3 coats of waterbased polyurethane.
- Put the old hardware back on the drawers and enjoy your new emerald green dresser!
Recommended Products
As an Amazon Associate and member of other affiliate programs, I earn from qualifying purchases.


More Milk Paint Makeovers
- Blue DIY Dresser Makeover
- Chippy Gray Milk Paint Dresser
- Dark Green Buffet Makeover
- Rust-Oleum Milk Paint Review
- Painted Display Cabinet
Follow us on YouTube to get more tips for painting furniture. Or share your project with us on our Facebook Group and be part of our community. See you there!