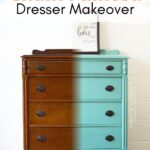
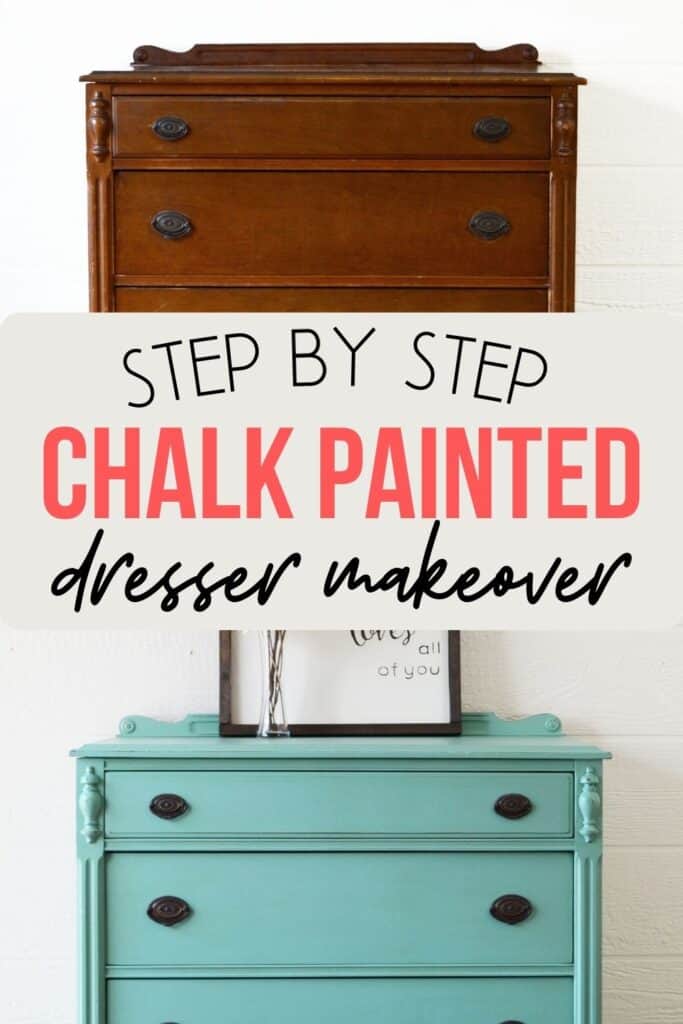
Teal Chalk Painted Dresser Makeover


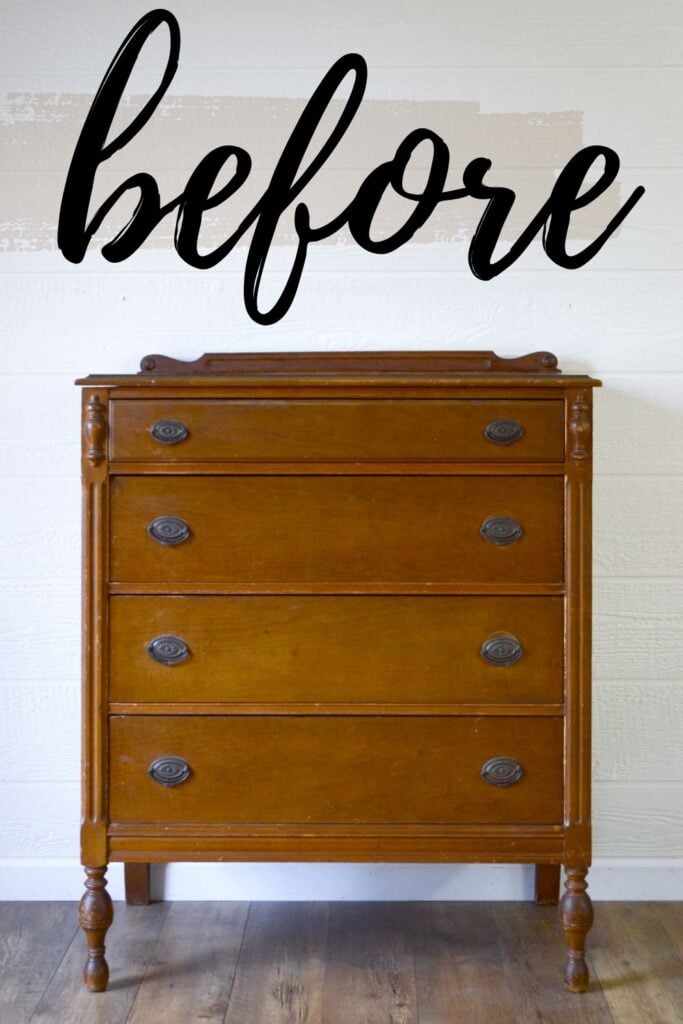
If you want some inspiration to spruce up your old dresser, check out this teal chalk painted dresser makeover! This antique thrift store dresser was refinished in stunning teal blue distressed paint and dark wood stained legs. This pop of color is so much fun for any room in your home, and is so much fun on a dresser!
This is one of the trendy DIY dresser makeover ideas you can do and the best part is, it’s super easy and affordable. Let’s dive in and see how you can transform your old dresser into a statement piece!
Every time I look at this dresser, I can’t help but smile! And I hope you feel the same way! This one was a custom order for a client who knew exactly what she wanted, and we were over the moon happy to make her imagination a reality.

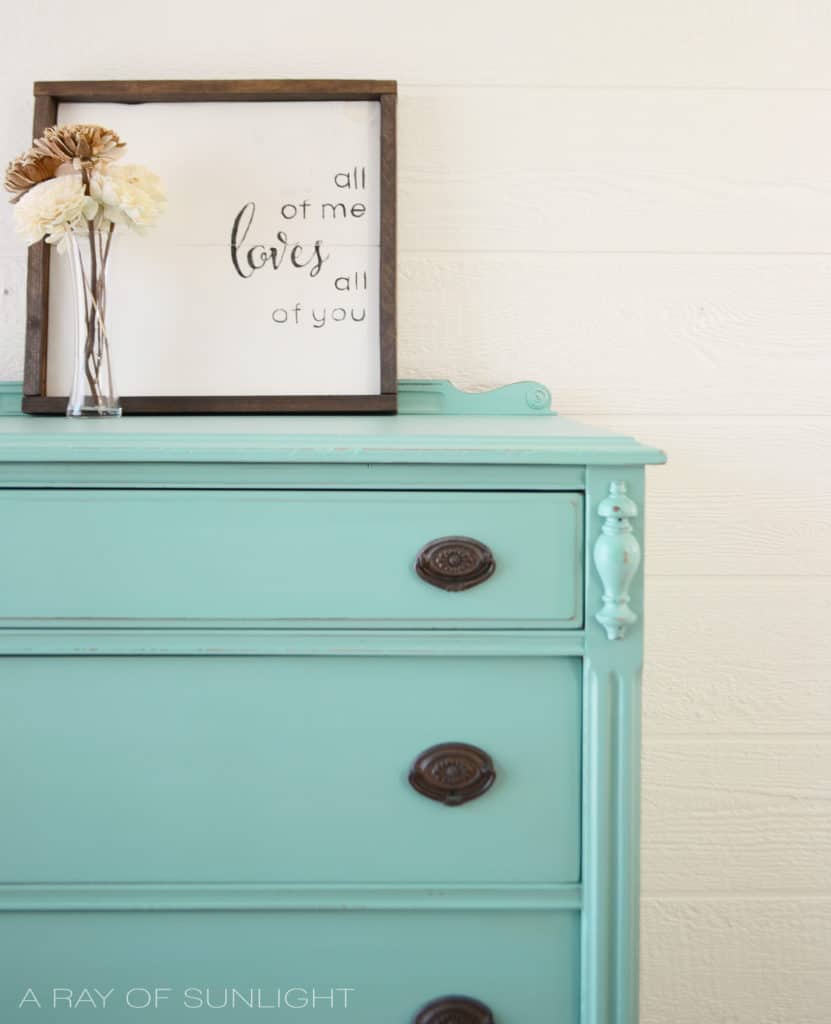
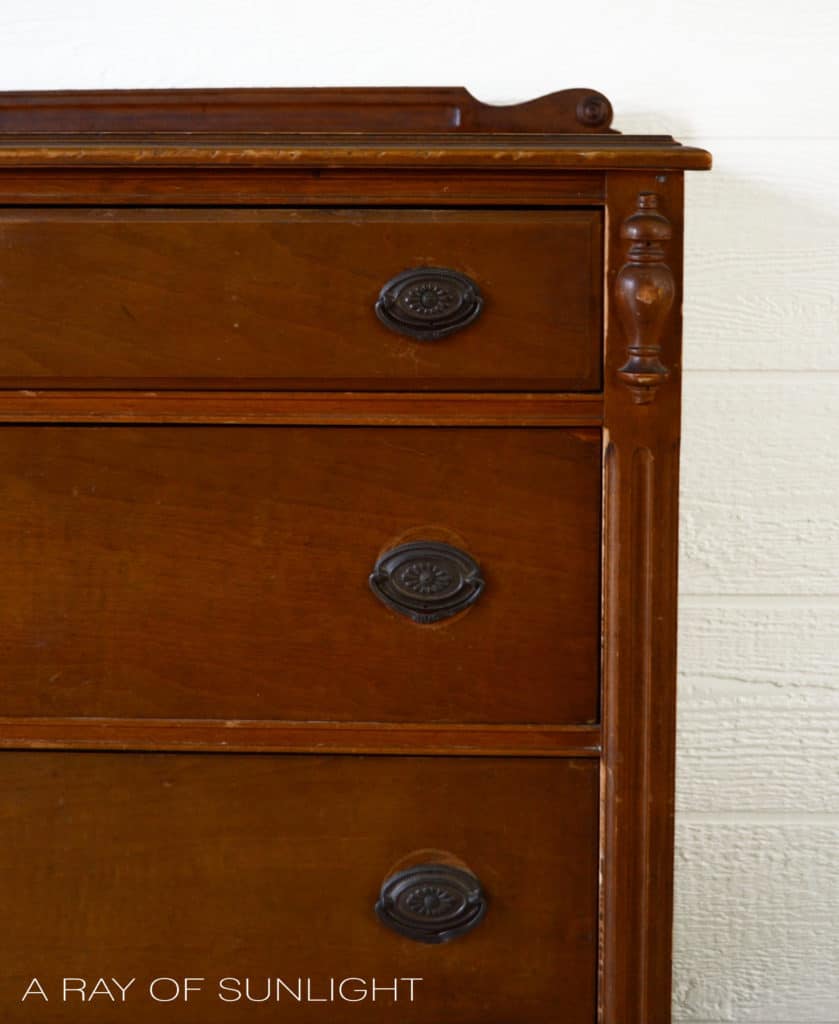
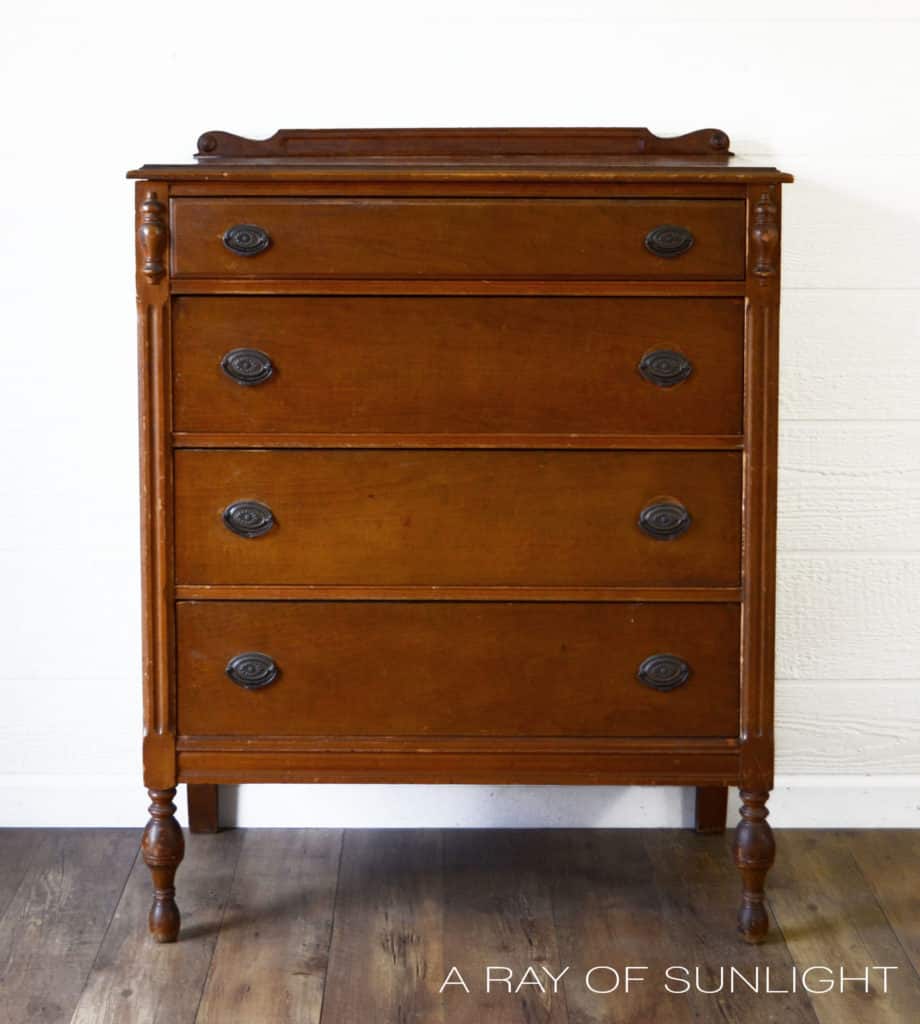
After she contacted us, we were so lucky to find this beautiful antique dresser listed on craigslist over at a local thrift store! What do you think? Our client picked this amazing shade of teal and asked for the legs to be stained. I’ve said it before, and I will continue to say it! Clients always pick the best colors!
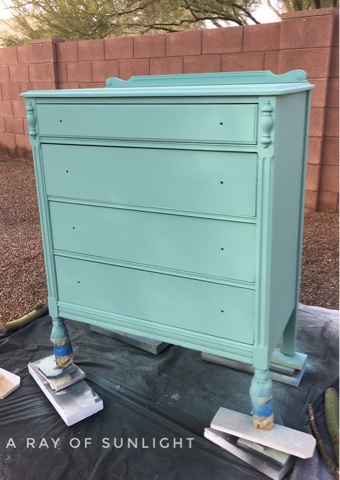
This one is called Summer Dragonfly by Behr. It’s a beautiful and fun shade of teal. In some light it shows more green and in others it shows more blue. I love that about it!

Supplies Used for Teal Chalk Painted Dresser Makeover
As an Amazon Associate, I earn from qualifying purchases. I also may earn from other qualifying purchases with other companies or get free product to review and use. All opinions are my own.
- Thrifted Dresser
- Flat Latex Paint – Summer Dragonfly by Behr
- Calcium Carbonate Powder
- Krud Kutter
- 220 Grit Sandpaper
- Painters Tape
- Brown Paper
- Paint Sprayer or Paint Brush
- Walnut Gel Stain by Minwax
- Cheap Foam Brush
- My favorite Waterbased Polyurethane
Prepping Dresser for Teal Furniture Paint
Repairs and prep work are the least fun part of any painted dresser makeover, but it’s also the most important. If repairs aren’t made before paint, you risk ruining the new paint job. And if the surface isn’t prepped to take paint, you can end up with paint that easily scratches or peels off. Nooooooo!
Get Our Secrets!
Grab this super convenient How to Repair Furniture Ebook with all of our secrets on how to repair furniture for only $14.
You can print it out and have instant access whenever you come across damaged furniture, and know exactly how to fix it!
Click on the picture of the book to purchase!

So, once all of the repairs were made, I wiped down the dresser with Krud Kutter to get rid of any dirt, grease, or grime that was on the surface. Read more about how to clean furniture before painting with Krud Kutter and other cleaners here!
Then I lightly sanded the whole dresser with 220 grit sandpaper. Lightly sanding (no need to sand off the old finish. Just rub the sandpaper over everything just a couple of times) really really helps the paint adhere to the old stained wood finish.
Yes, chalk paint is made to stick to “any” surface, but I don’t like to leave that to chance. (It takes a lot longer to remove a crappy paint job than it does to prep correctly the first time. 😉 ) Learn more about the best sandpaper for furniture painting here and the importance of sanding before painting furniture here!
If the surface is too shiny or slick it can easily peel or flake off still. If a piece is really shiny and slick then I make sure to prime it first as well. You want the finish to last years and years. Check out the best primers for painting furniture (and learn how to choose the right one) here!
To prevent these scratches, here’s a more detailed guide on how to keep chalk paint from scratching. Read all about how to prepare furniture for painting here!
We also taped off the front legs with painter’s tape and brown paper to protect them from any paint. You can learn how to prevent overspray when painting furniture in this post so you don’t make any unwanted paint mess.

How to Make Chalk Paint with Latex Paint
I love how chalk paint distresses, it has better adhesion, and I love the finish it creates. Plus I’m just more comfortable with chalk paints, and you don’t HAVE to prime, unlike latex paint.
Since Behr doesn’t color-match chalk paint, we made the Behr latex paint into our own homemade chalk paint. Get our easy homemade chalk paint recipe here!
*UPDATE: Behr now has a chalk paint line, called Behr Chalk Paint and you can ask them to tint it any color!!
How to Paint Dresser With Teal Chalk Paint
This method of painting furniture is totally optional! But if you’re looking for a brush free finish on your furniture, you’ve got to spray the paint on instead of brushing it.
There are so many tips and tricks on how to get a brush-free finish with a brush… but let’s be honest. You’re still going to see brush marks if you use a brush. So don’t even get into the headache. Here’s more about how to paint furniture without brush marks, and you can learn tips and tricks on painting furniture with a sprayer here.
I bought this paint sprayer when we moved out of our apartment and into a home because I finally had a place where I could use it – in our backyard. The sprayer itself was cheaper than I imagined it would be, and it was sooooooo stinking fast compared to brushing! I absolutely love this paint sprayer for painting furniture.
*Update: I have since tried several other paint sprayers and I have a new favorite! Find out which paint sprayers I think are the best in this post about HVLP paint sprayers for furniture!
Simply thin out the paint using the little funnel tool provided with the paint sprayer, plug it in, and get to painting. Check out this tutorial about how to use a Wagner Double Duty paint sprayer. (Heads up that this Wagner sprayer has been discontinued, and here is the new model: the Wagner Control Spray 250 sprayer. We also have a Wagner Control Spray 250 review here for our experience with this model!)
To paint this dresser, we put it outside on a dollar store plastic shower curtain and some wood blocks.
If you’re not ready for a paint sprayer, I really recommend getting a nice paint brush that won’t break the bank. Check out more of the best paint brushes for painting furniture here!
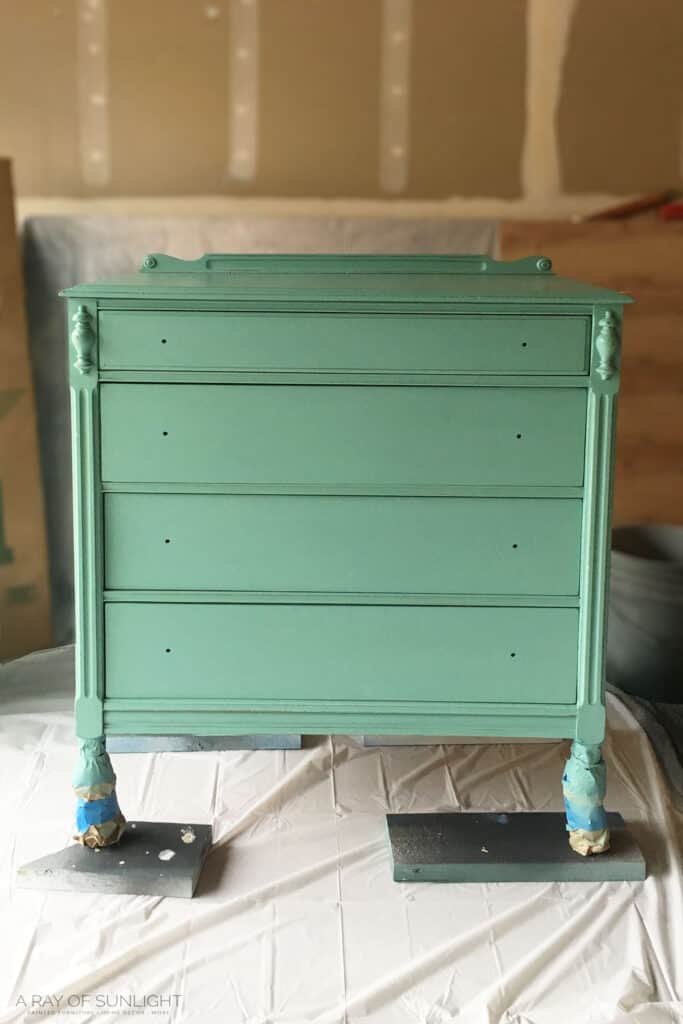
When all the paint was dry I removed the tape and paper around the legs.
How to Distress Chalk Paint
Then I lightly sanded everything down with 220 grit sandpaper just to lightly distress the edges. This is totally optional as well, but I think that distressing painted furniture brings out the details that you might otherwise miss.
Would you like to save this?
Plus, we know our kids are going to ding it up anyway. Why not make it intentional? Here are the 6 best techniques for distressing furniture you can do, including sanding!
A quick clean with a vacuum with a hose attachment and a damp rag cleaned the dust right up.
Refinishing Wood Legs
Instead of stripping or sanding the legs down to raw wood, and then staining the legs again, I used gel stain to freshen them up. The legs were in good condition and just needed a quick little refresh to bring them back to life.
Gel stain is different than the regular wood stain. Gel stain sits on top of the existing finish instead of penetrating into the wood. You don’t need to wipe gel stain back off. Just wipe or brush it on, and then let it dry. I just brushed the gel stain on with a cheap foam brush.
A really light even coat is the best way to apply gel stain. If you want it darker you can apply more coats of gel stain. But the streaks of a thick uneven finish make it hard to look like a real stained finish. See gel stain in action with this tutorial on how to stain wood darker.
Sealing Chalk Paint and Gel Stain
After the gel stain was completely dry, we sealed the paint and the stain with our favorite polyurethane. I waited 48 hours to seal the stain since the gel stain is oil based and the polyurethane is waterbased. Learn ALL of my tips and tricks on how to spray polyurethane here!
Chalk paint really needs to be sealed with either a wax or poly if it’s going to have any traffic on it. Waterbased polyurethane makes the paint extra durable, makes it easier to wipe things off of the paint and doesn’t make the paint turn yellow like oil-based poly does.
Read through this post to learn more about waterbased poly and other best topcoats for painting furniture.
Adding Hardware to Teal Dresser
The original hardware was lightly cleaned, leaving the dark antique finish that only years of sitting around can create.

More Before and After Makeovers
See All >
Click any of these “before” photos below to view the “after” of that makeover.


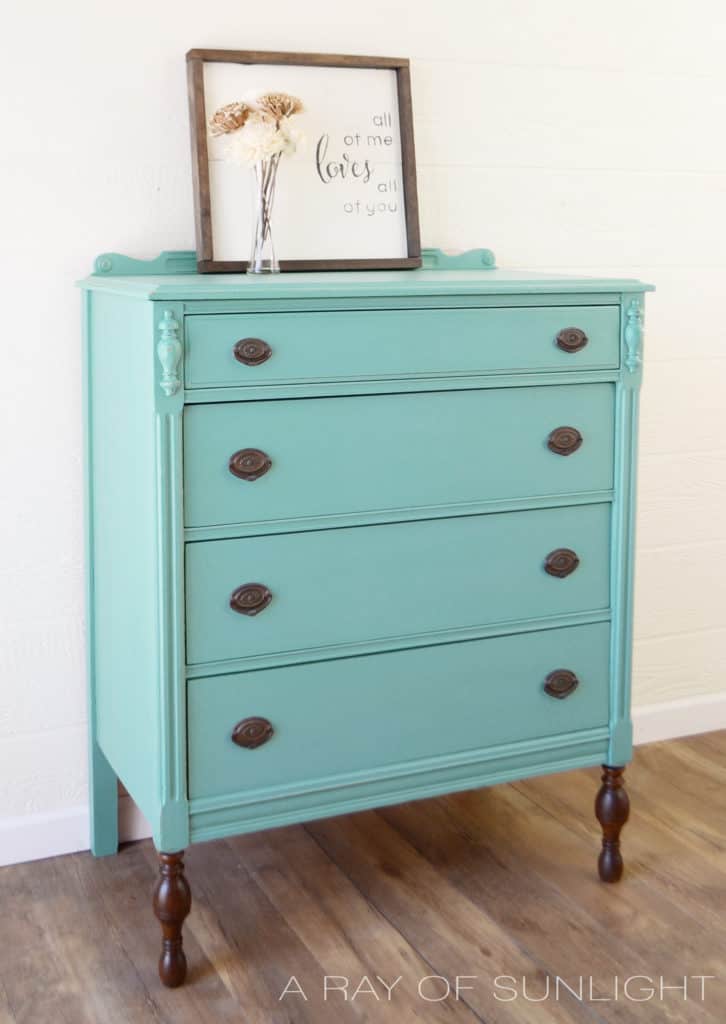
Isn’t it a stunner?? It couldn’t have turned out any better! Especially when our client came to pick it up and absolutely loved it! Check out this post if you want to know how to price flipped furniture.
This dresser will be a statement piece that will last years to come. See more teal furniture like this in these teal painted furniture and turquoise painted furniture posts. If you love to try more bold color dressers, check out these purple dresser ideas! And here’s our list of tall dresser ideas you can recreate with your own tall dressers.


Teal Dresser Ideas
Aside from this beautiful teal dresser project, there are plenty of other ideas you can try when incorporating this bold color into your furniture and space.
One idea is to create an ombre effect, using shades of teal on different parts of the dresser. This can create a more unique and eye catching piece. You could also try using teal as an accent color, painting just the drawers or legs of a dresser for a pop of color.
Another way to incorporate this trendy color into your space is by pairing it with complementary colors. Teal looks stunning alongside white or cream, creating a classic and elegant look. You could also pair it with gold or brass accents for a luxurious and modern feel. For more of this modern style, check out these modern chalk painted furniture ideas.
You can also try using different shades of teal on different pieces. For example, painting one dresser in a lighter shade of teal and another in a darker shade, creating a cohesive yet interesting look in your space.
And don’t be afraid to experiment with different textures as well, such as using chalk paint or distressing techniques like the ones mentioned earlier in this post. So whether you want to make a statement with a bold teal dresser or incorporate it in subtle ways, feel free to get creative and have fun with this versatile color!


Teal Chalk Painted Dresser Makeover
Make any antique thrift store furniture pop with this stunning teal blue color. Here are the steps for this teal chalk painted dresser makeover.
Materials
Tools
- Paint Sprayer
- Paint Brush
- Cheap Foam Brush
Instructions
- Remove hardware from the dresser. Prep the paint by fixing any damages then clean the dresser with Krud Kutter. Lightly sand the whole dresser after.
- If the surface is too shiny or slick, it's best to apply primer. Then tape off the front legs of the dresser with painter’s tape and brown paper to protect them from any paint.
- To make chalk paint from latex paint, mix Calcium Carbonate Powder with water then add in your latex paint. Then apply the teal chalk paint onto your dresser. When all the paint dries, remove the tape and paper around the legs.
- You can distress the edges of the dresser by lightly sanding everything down with 220 grit sandpaper. Clean all the dust with vacuum and damp rag.
- Refinish the wood legs by brushing gel stain on them then let them dry.
- After the gel stain dries completely, seal the teal paint and stain with polyurethane. Wait around 48 hours to seal the stain since the gel stain is oil-based and the polyurethane is water-based.
- Attach your clean hardware back to the dresser.
Recommended Products
As an Amazon Associate and member of other affiliate programs, I earn from qualifying purchases.


More Dresser Makeovers
- Grey Chalk Paint Dresser
- Painting a Dresser White
- DIY Slatted Wood Dresser
- Pink Vintage Dresser
- Painted Light Blue Dresser
Learn the Art of Updating Furniture!
If painting furniture feels overwhelming or your past attempts didn’t go as planned, this course will guide you step by step.

Follow us on YouTube to get more tips for painting furniture. Or share your project with us on our Facebook Group and be part of our community. See you there!
Thank you! Very beautiful piece!
Thank you!
I would have used the Wagner Double Duty on this one. But I would recommend the FLEXiO now. It’s way better than the double duty. Check out all of the sprayers I recommend here.
Behr DOES actually color match their chalk paint – at least they do at my Home Depot.
Hi Natalie,
Really loved looking @ your pieces. I also repurpose & refinish pieces, mainly for myself/hobby. We live in Rexburg. It was refreshing to find a post for a close neighbor:-)))
That’s so cool! Thanks for the love on our pieces Denise!