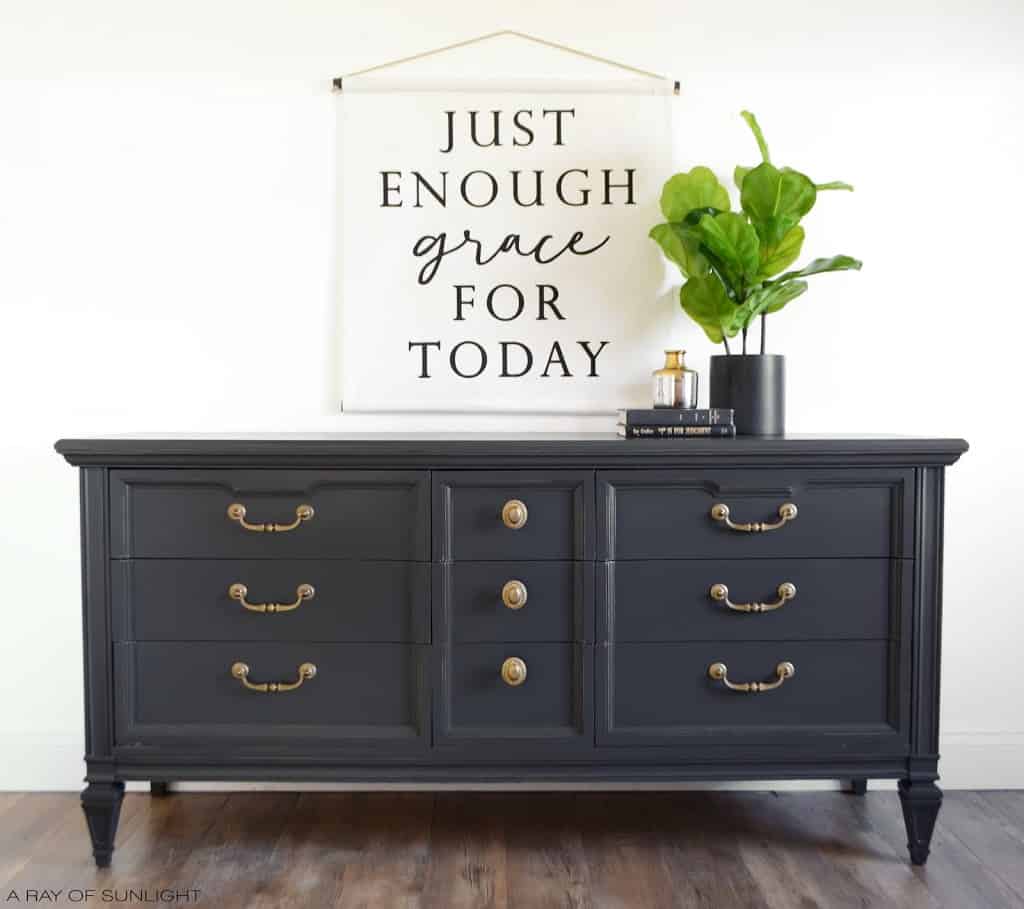
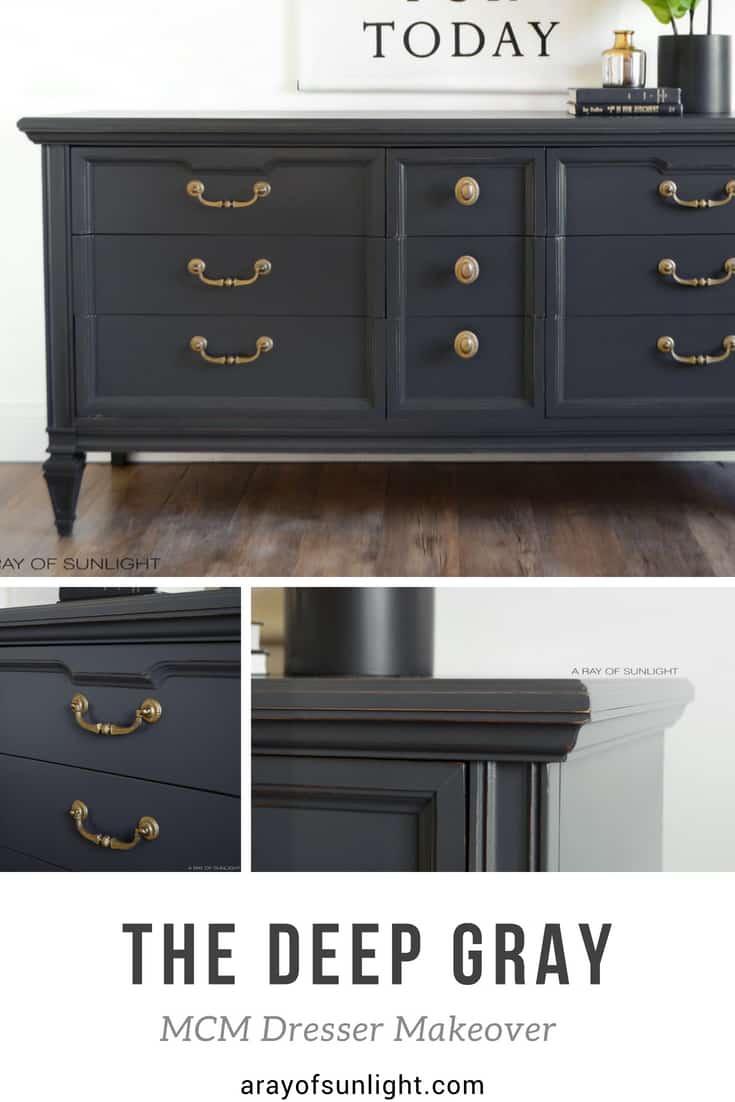
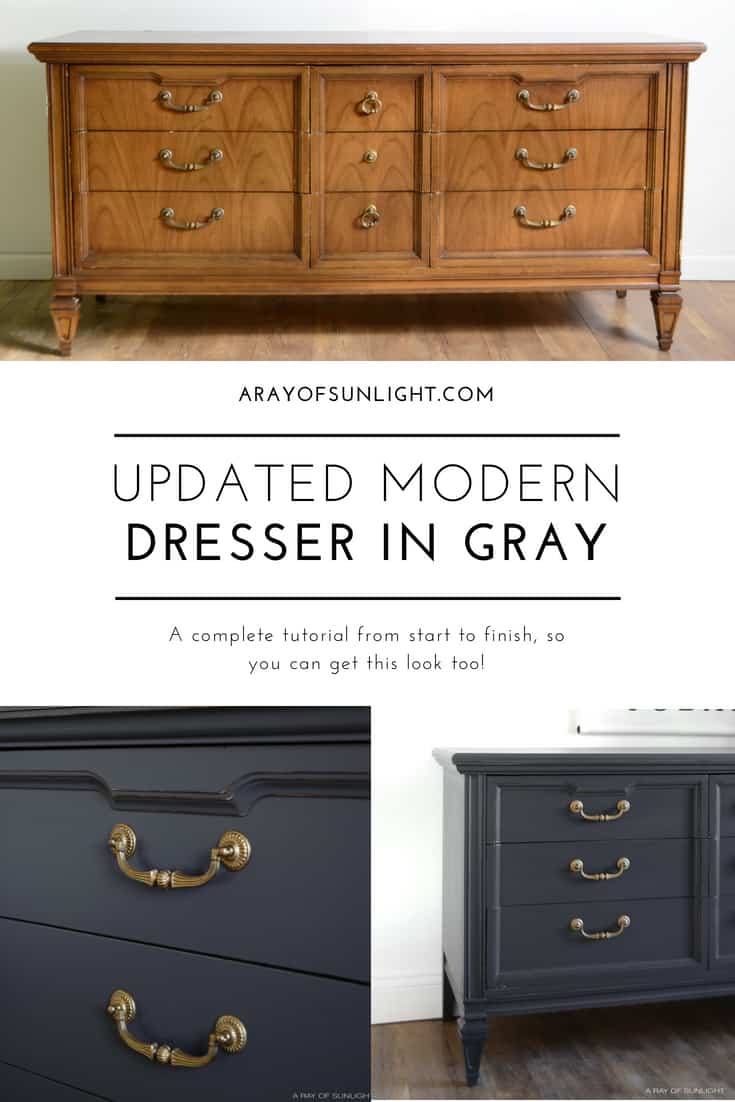
Grey Chalk Paint Dresser


Looking to paint your dresser but not sure what style to go for? Why not try this grey chalk paint dresser! Chalk paint is a versatile and easy to use option for transforming furniture, and the grey color adds a touch of elegance and modernity.
This dresser will be a great addition to your bedroom, living room, or entryway, bringing both style and functionality to your space. Let’s dive into the steps of creating this beautiful piece!
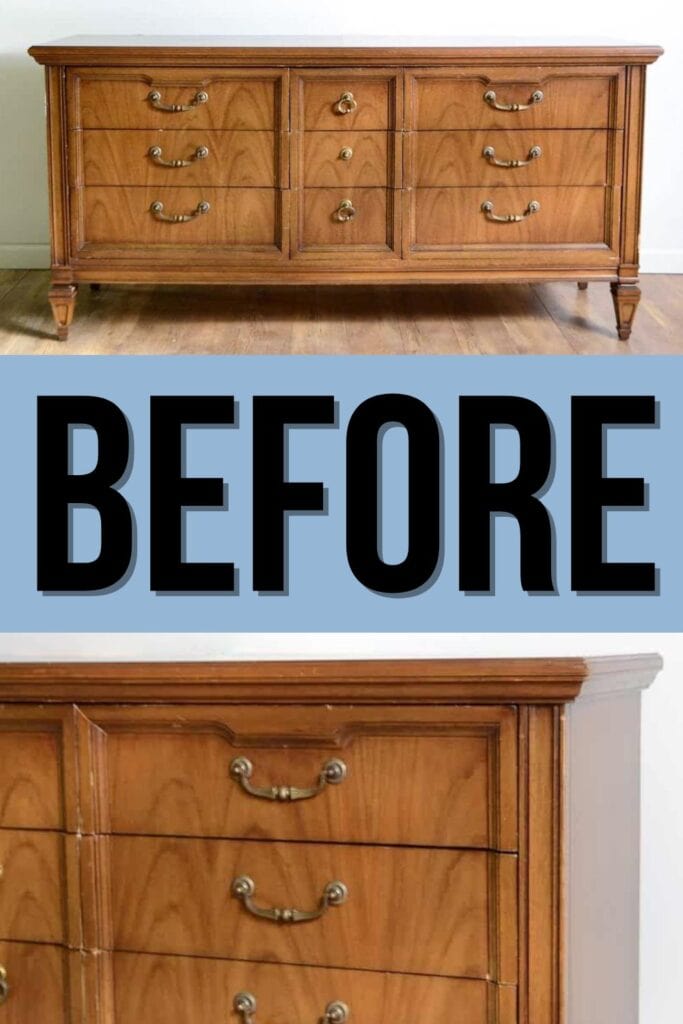
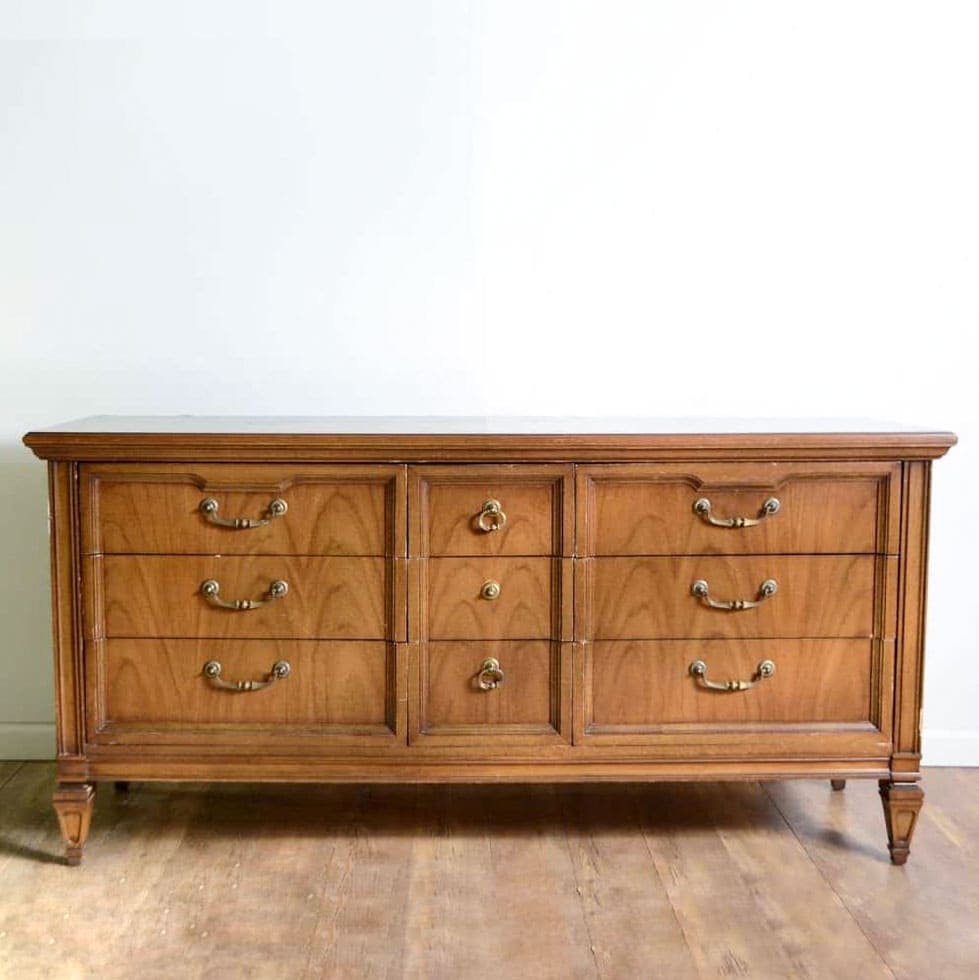
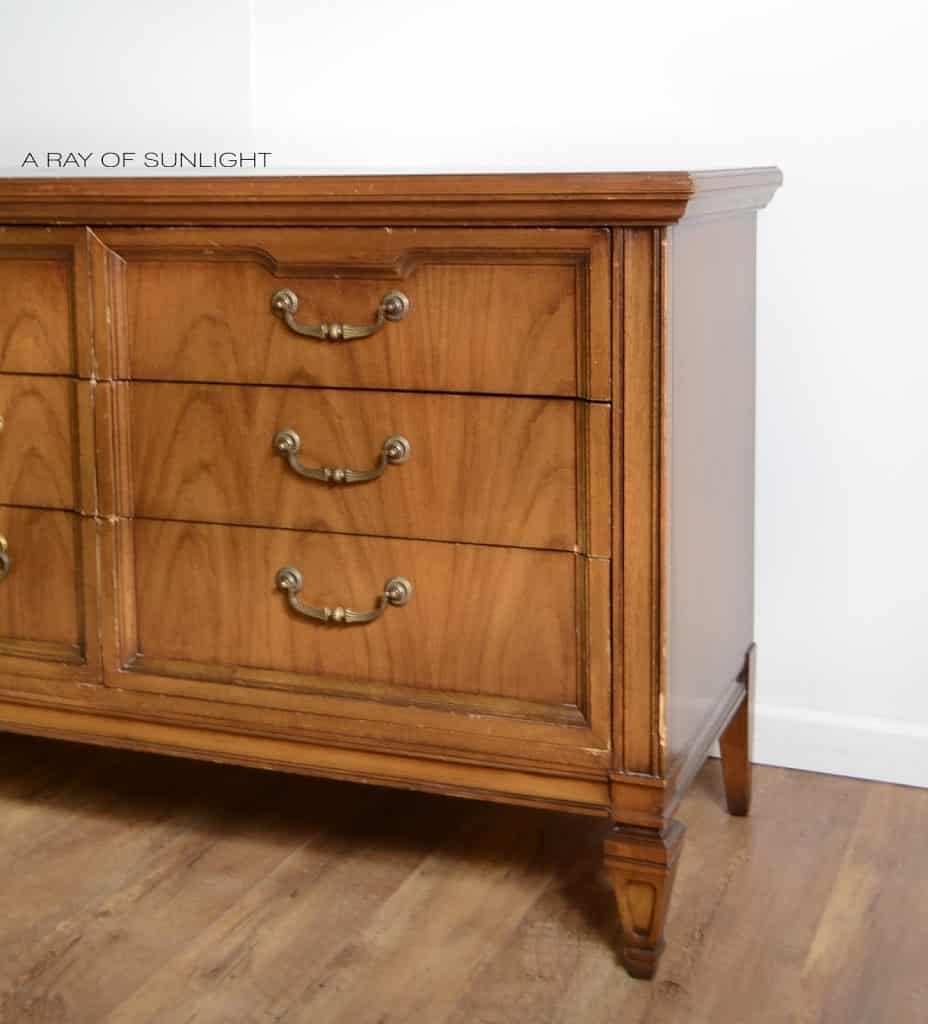
You can see above what the dresser looked like before the grey chalk paint. These vintage modern dressers are just the best! They are so sturdy and so well built, and those sleek modern lines are perfect for soo many different decor styles! Anyway, let’s dive into the makeover!

This dresser started out as the typical furniture find on Facebook Marketplace. It was beat up, cosmetically damaged, and basically left to fall apart until the owner decided to list it for sale to “get rid of it.”
If you also want to toss out your unwanted furniture, check out some great ways on how to get rid of a dresser here.

Supplies Used for Grey Chalk Paint Dresser
As an Amazon Associate, I earn from qualifying purchases. I also may earn from other qualifying purchases with other companies or get free product to review and use. All opinions are my own.
- Krud Kutter
- 220 Grit Sandpaper
- Bondo
- Dewalt Orbital Power Sander
- Stain Blocking Primer
- Paint Brush
- Behr Latex Paint
- Calcium Carbonate Powder
- Wagner Paint Sprayer
- Shop Vacuum
- Tack Cloth
- Waterbased Polyurethane
- Rub N Buff
- Country Chic Paint Hemp Oil
Prepare and Prime Dresser for Chalk Paint
First, I prepped it how I always do. You can head on over to our post on how to prepare furniture for paint to see the steps in detail.
Then I repaired the large gouge on the top with Bondo. Check out my Bondo wood filler review to learn more about this product and my personal experience using it.
You can also learn more about how to repair damaged furniture here so you can give new life to old, worn-out pieces.
Since I sanded down the top to some bare wood where the large gouge was, I primed the whole top with a stain blocking primer to seal in the wood grain and prevent bleed through stains.
This primer is a great stain blocking primer that is waterbased, so you can use it indoors without a bunch of fumes. Check out your options for the best primers to stop tannin bleed here.
Paint Dresser with Grey Chalk Paint
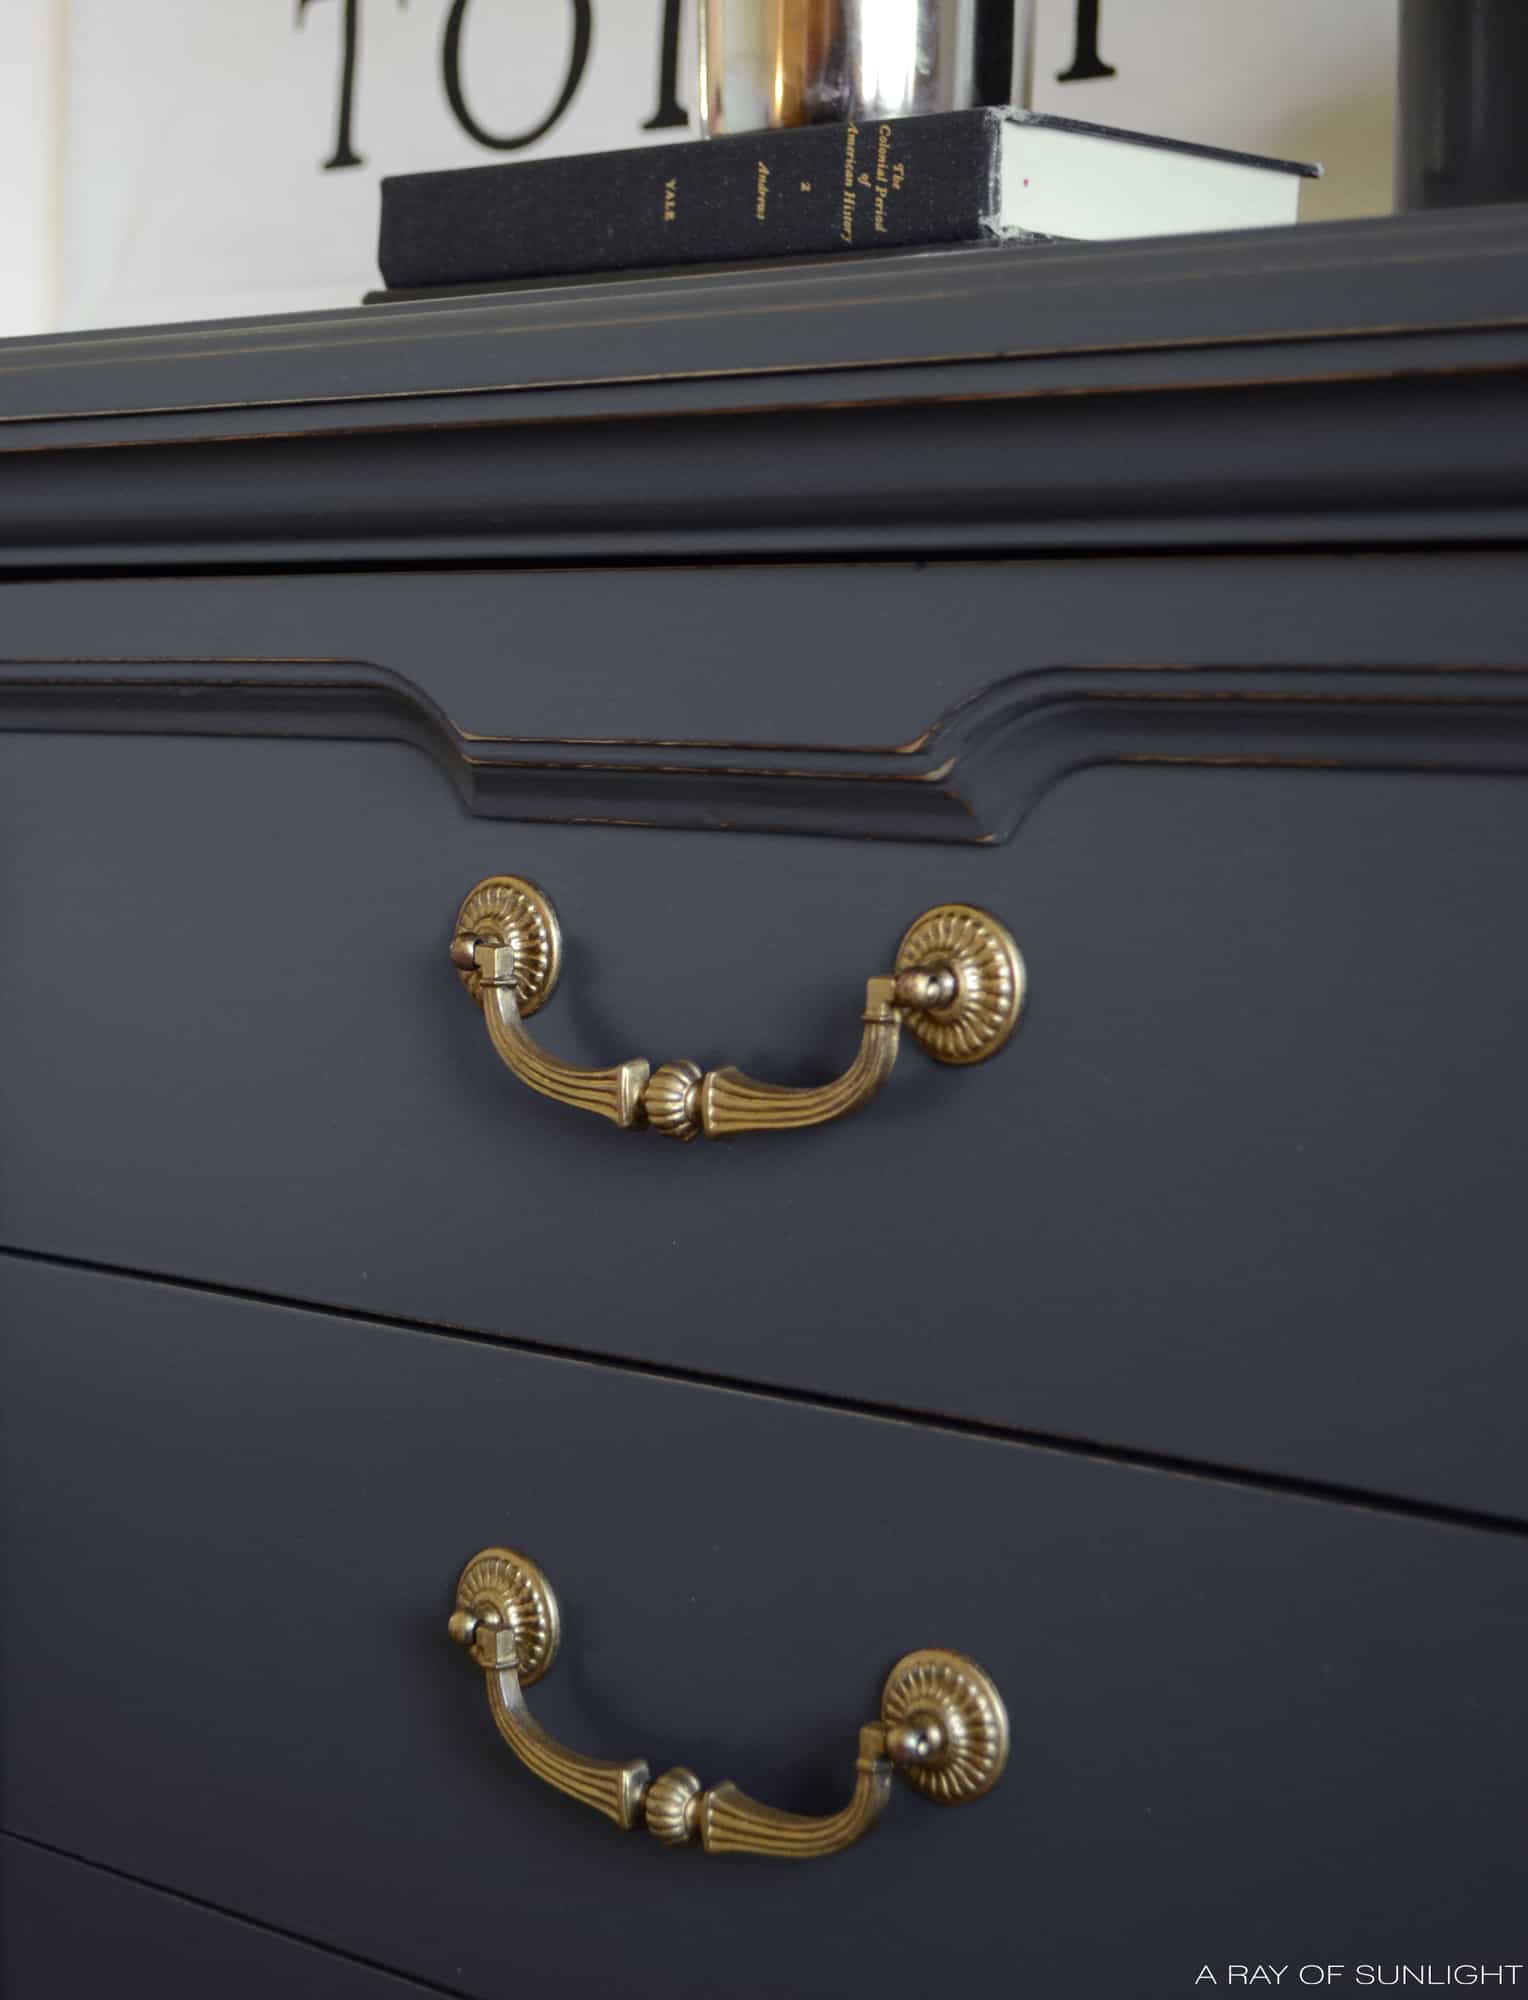
Finally, it was time for some paint. I used Behr latex paint mixed to Sherwin William’s Iron Ore. It’s a beautiful dark grey color that has been very popular. I turned it into homemade chalk paint with this homemade chalk paint recipe.
I like chalk paint better than latex paint because chalk paint sticks better, and when you sand it, it turns into a powder instead of balling up.
Check out my top chalk paint brands for your future furniture makeovers. Here are more chalk painted furniture ideas to inspire you!
Either way, latex paint and chalk paint both need to be top coated for durability, so it’s a no-brainer for me when I’m looking for a budget friendly paint for furniture. And if you’re on a budget, these cheap DIY dresser ideas should help you stick to your budget without sacrificing style.
Wondering what is chalk paint exactly and why it’s popular? Check out the blog post to learn more!
(I could have used Sherwin Williams Emerald Urethane Trim enamel, and I would have been able to skip the topcoat. Learn more about the process in this post on painting furniture with enamel paint.)
And then, I sprayed 2 coats of chalk paint with my paint sprayer for a smooth, even finish.
Check this post to learn more about best HVLP paint sprayers for furniture. And this post on how to use the Wagner FLEXiO 3000 to help you if you’ve never used a paint sprayer.
Check out this homemade chalk paint dresser makeover that I painted with the Homeright Super Finish Max sprayer. If you don’t have a paint sprayer, check out the best chalk paint brushes here.
Here are tips and tricks on how to paint a dresser for a successful makeover.
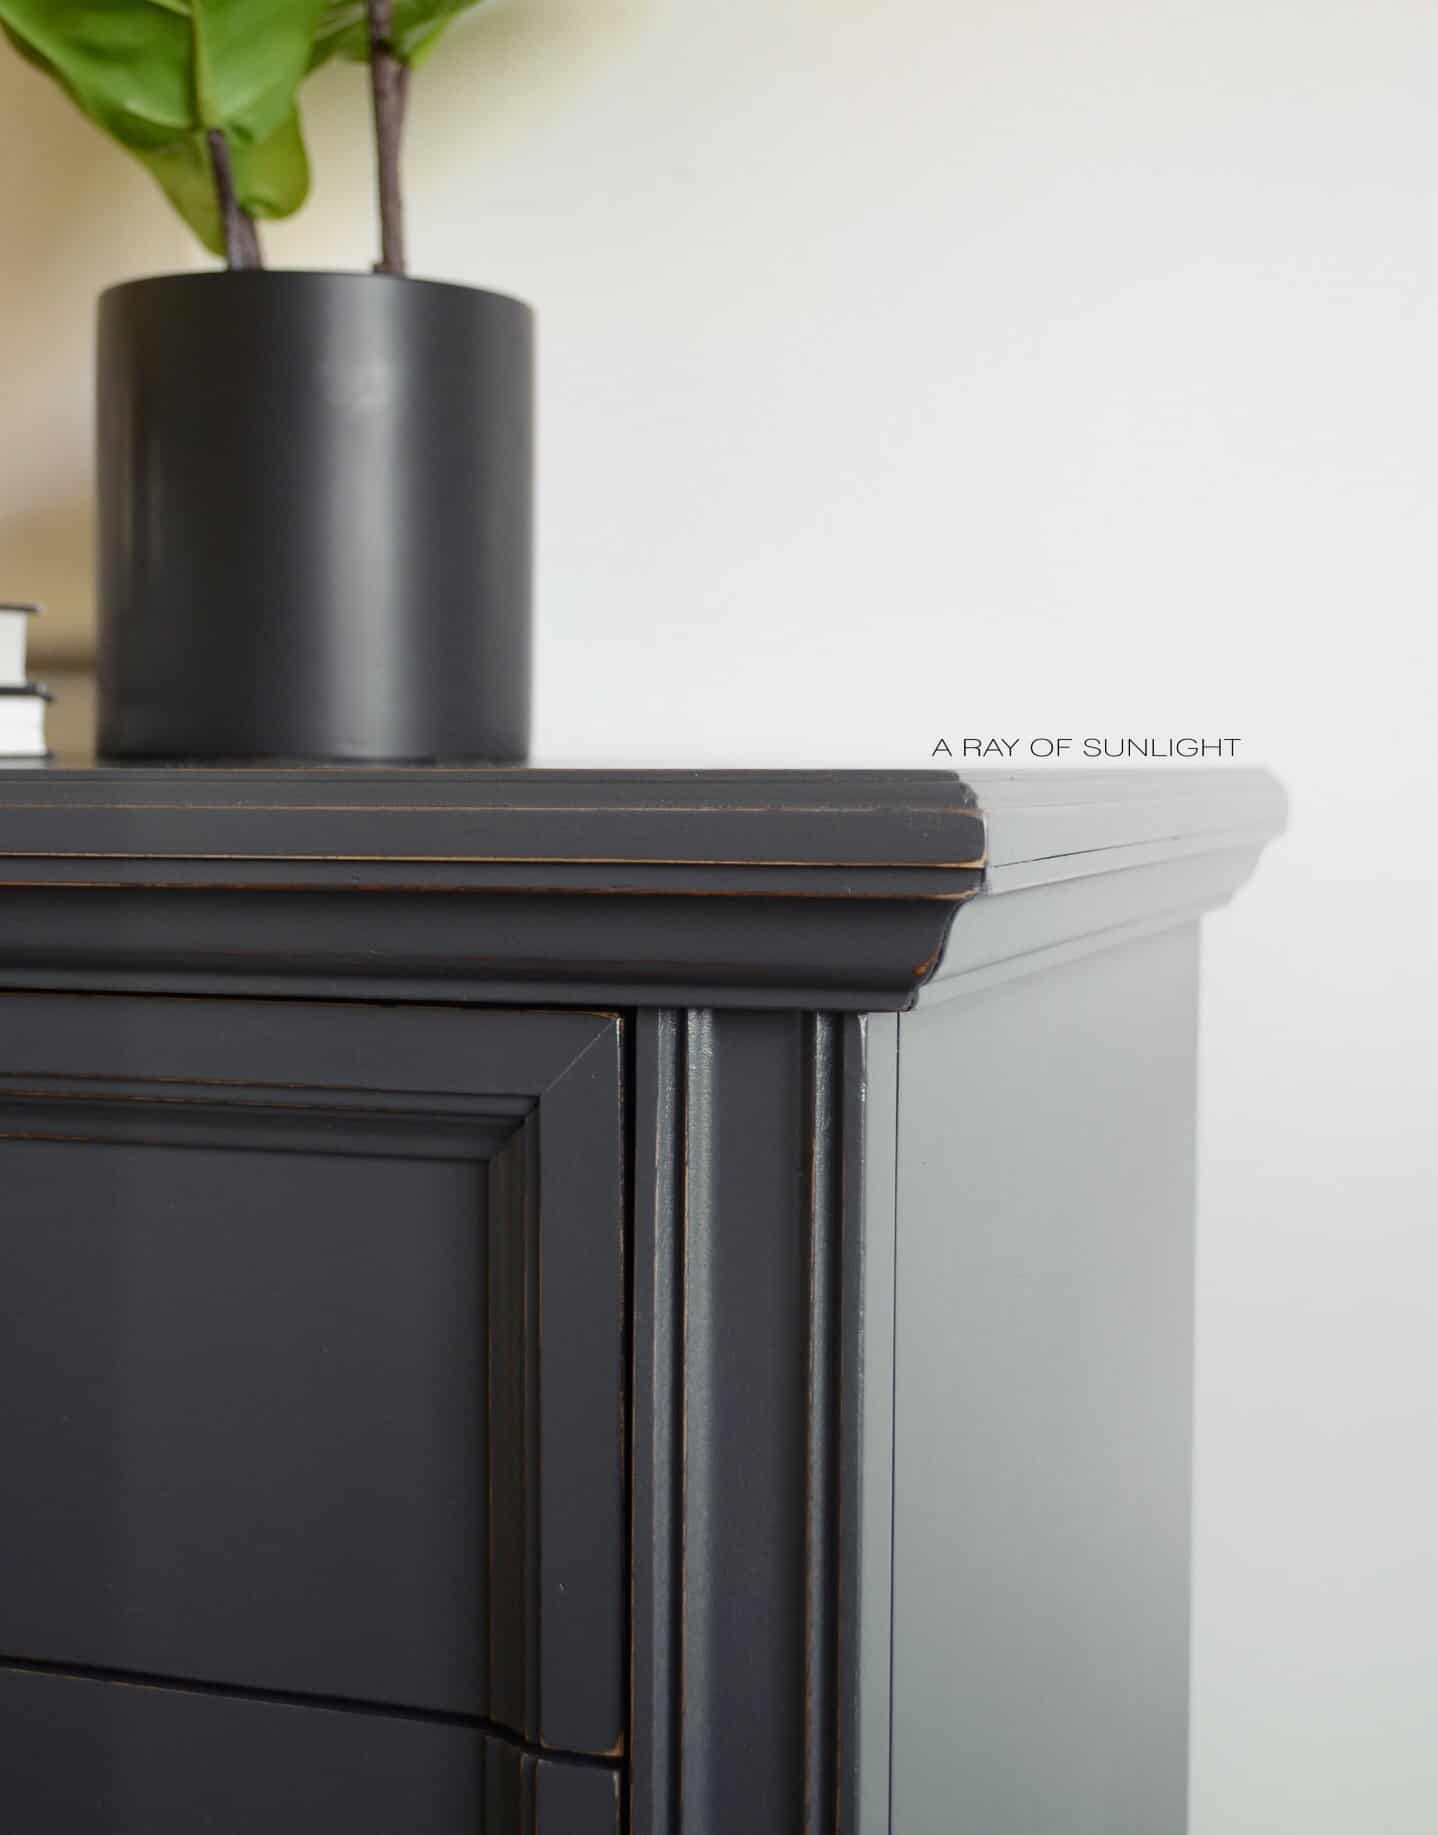
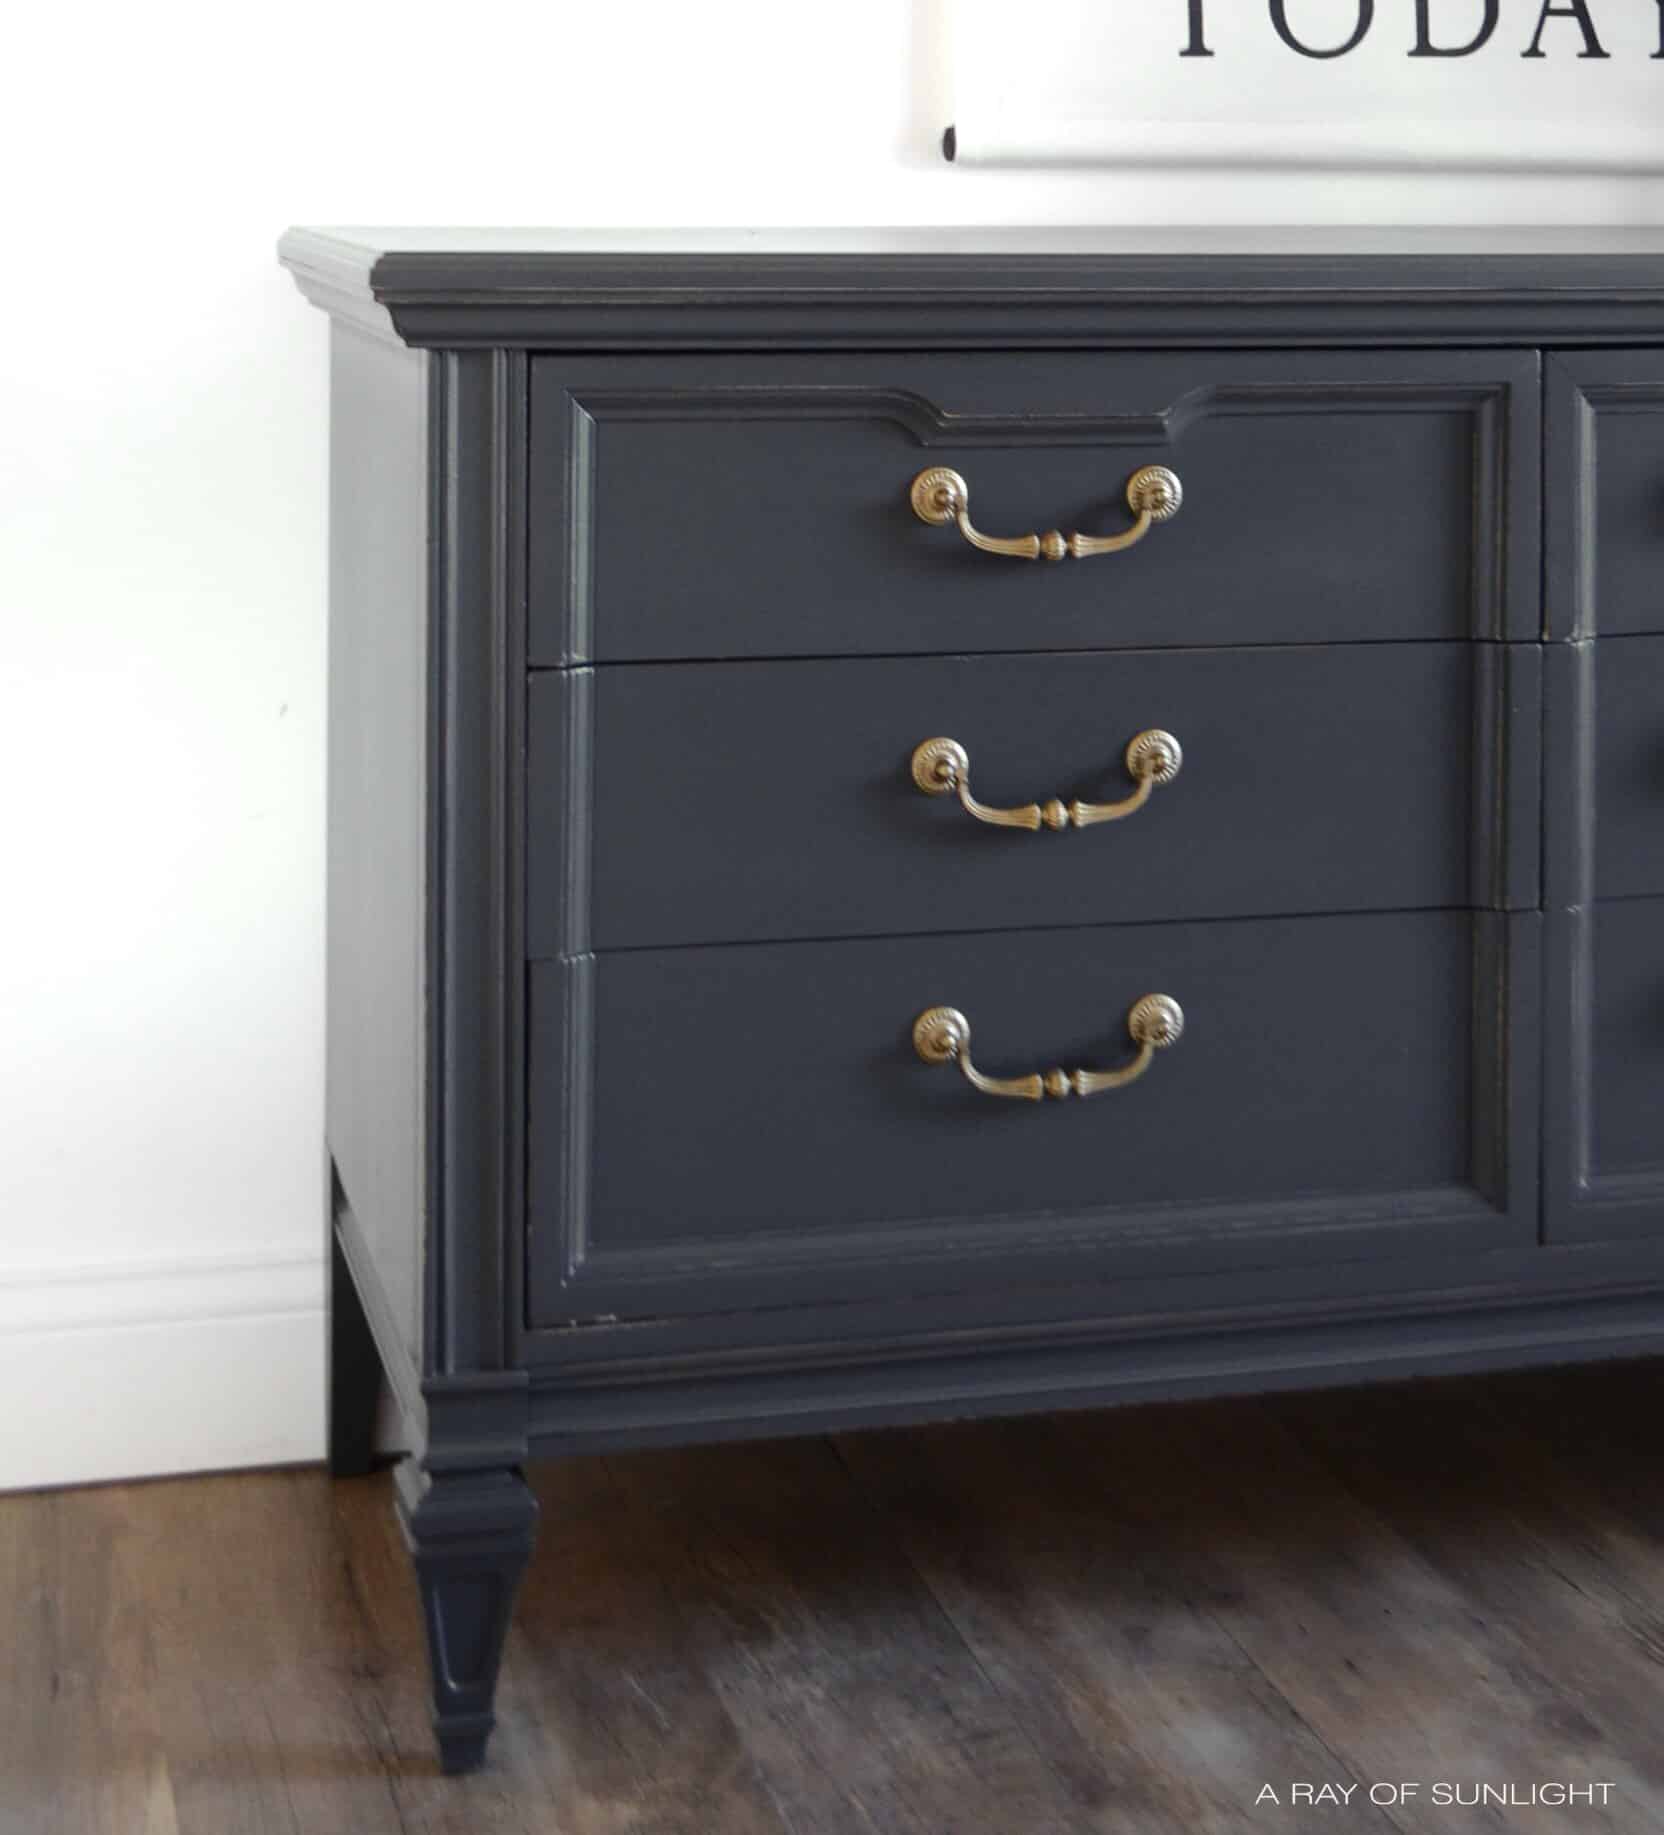
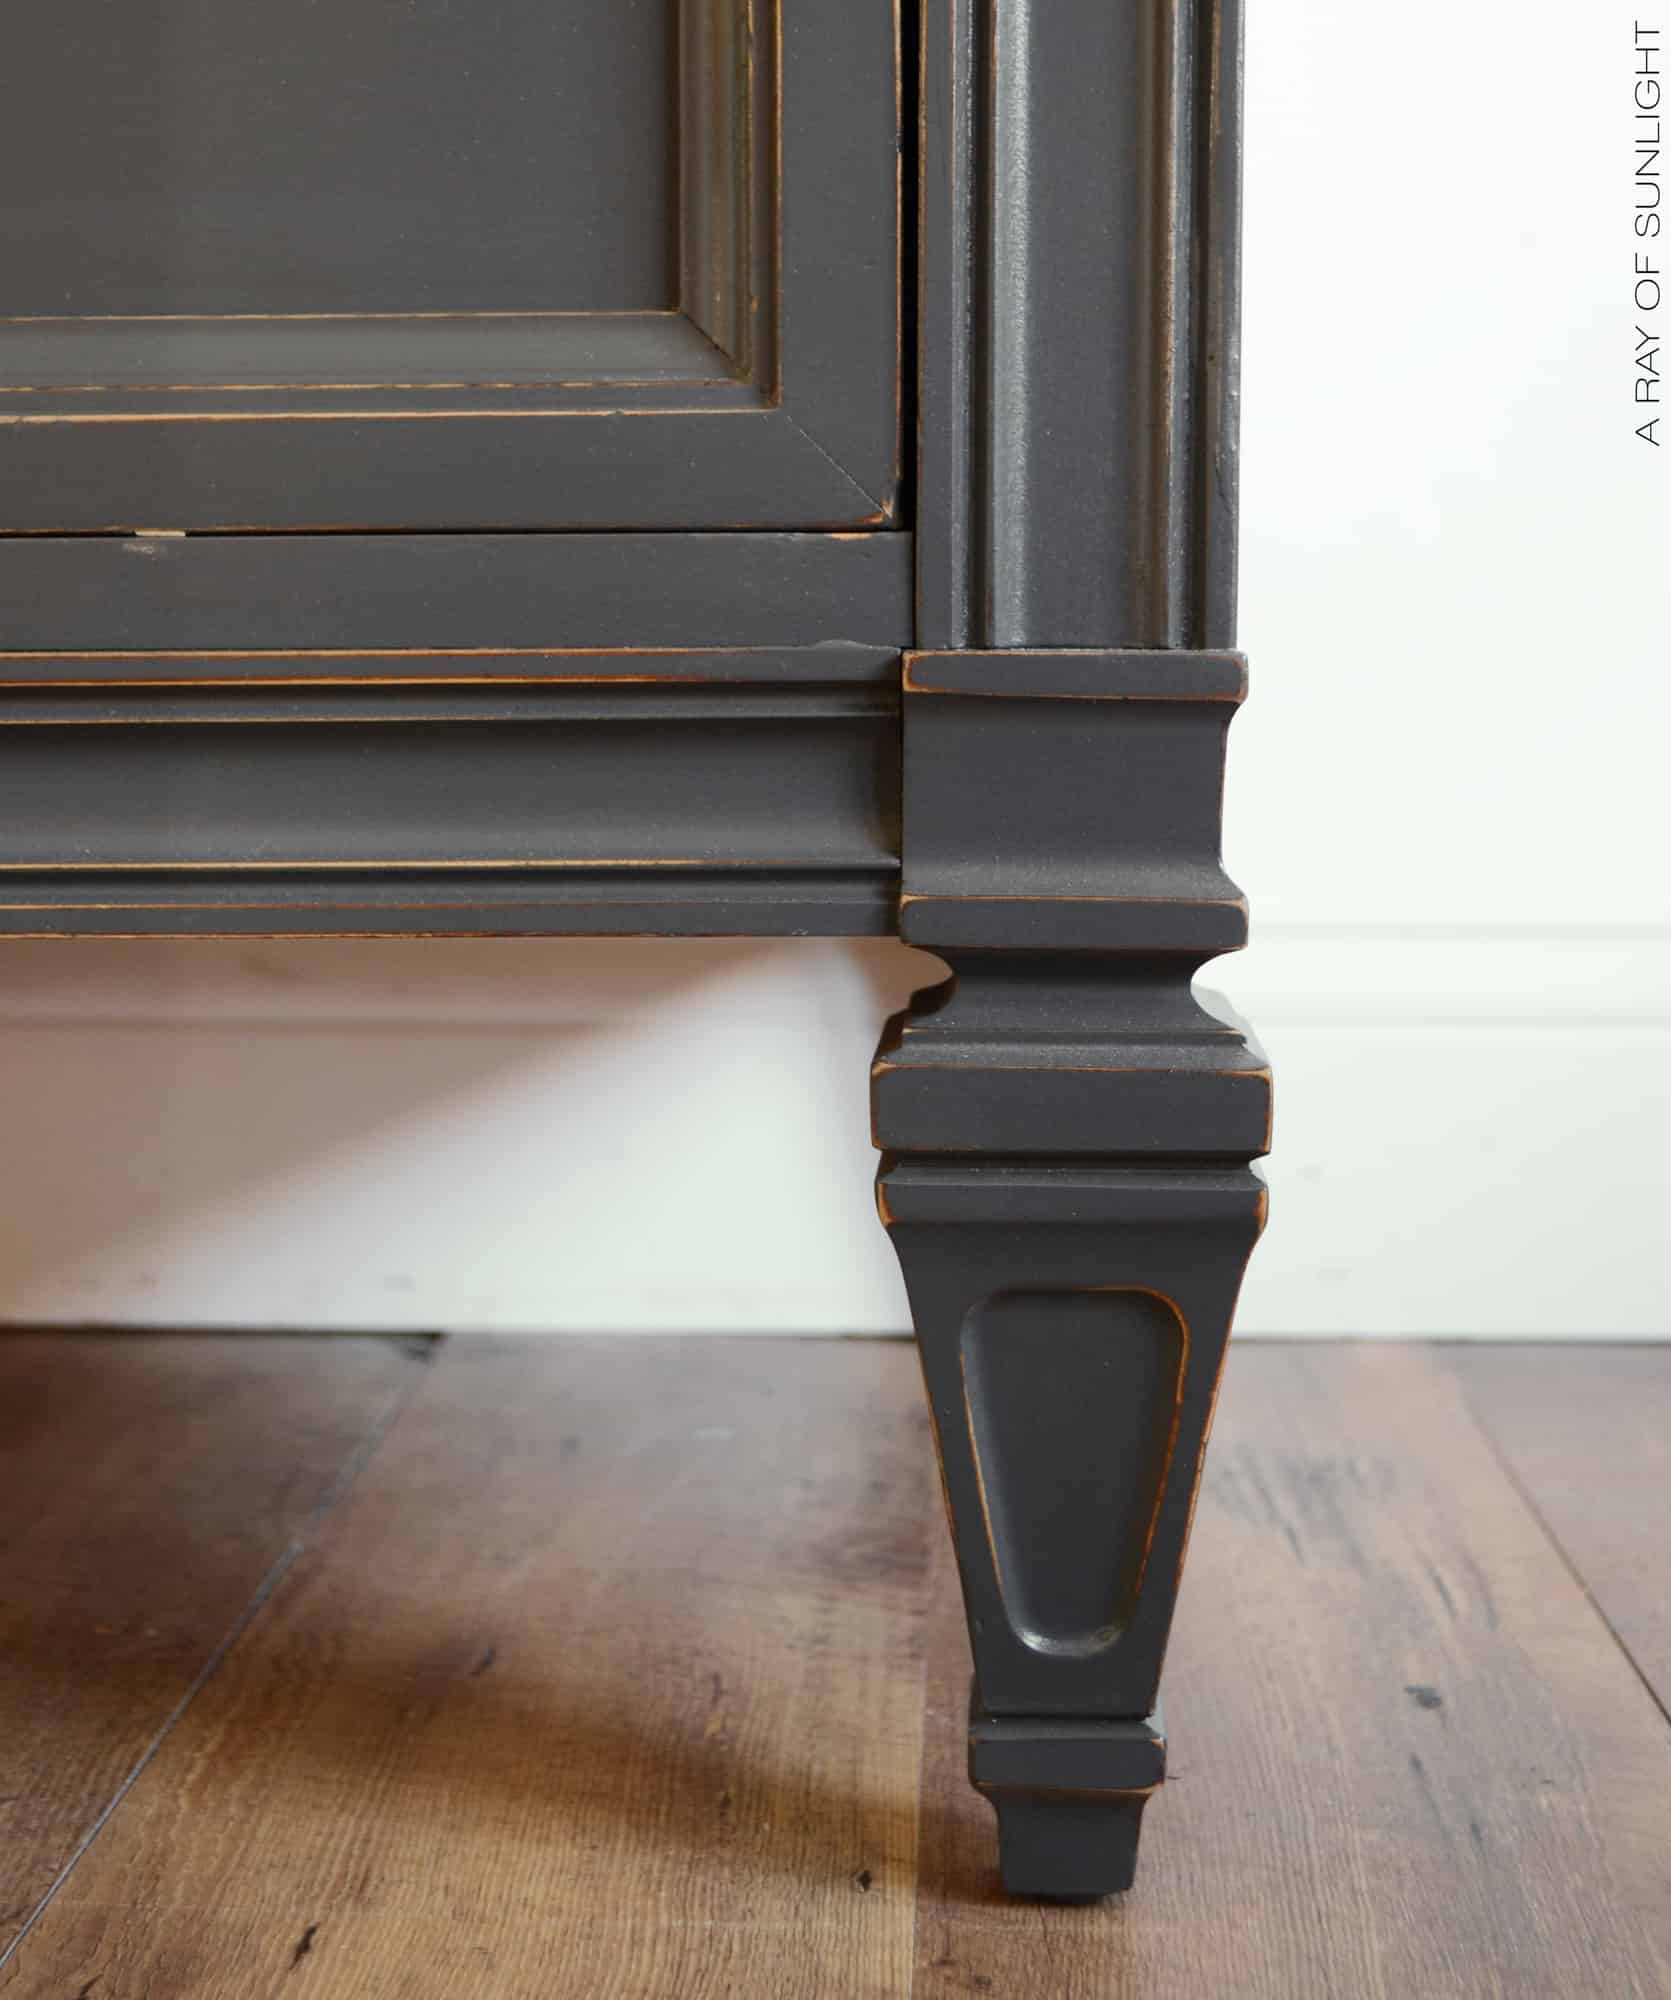
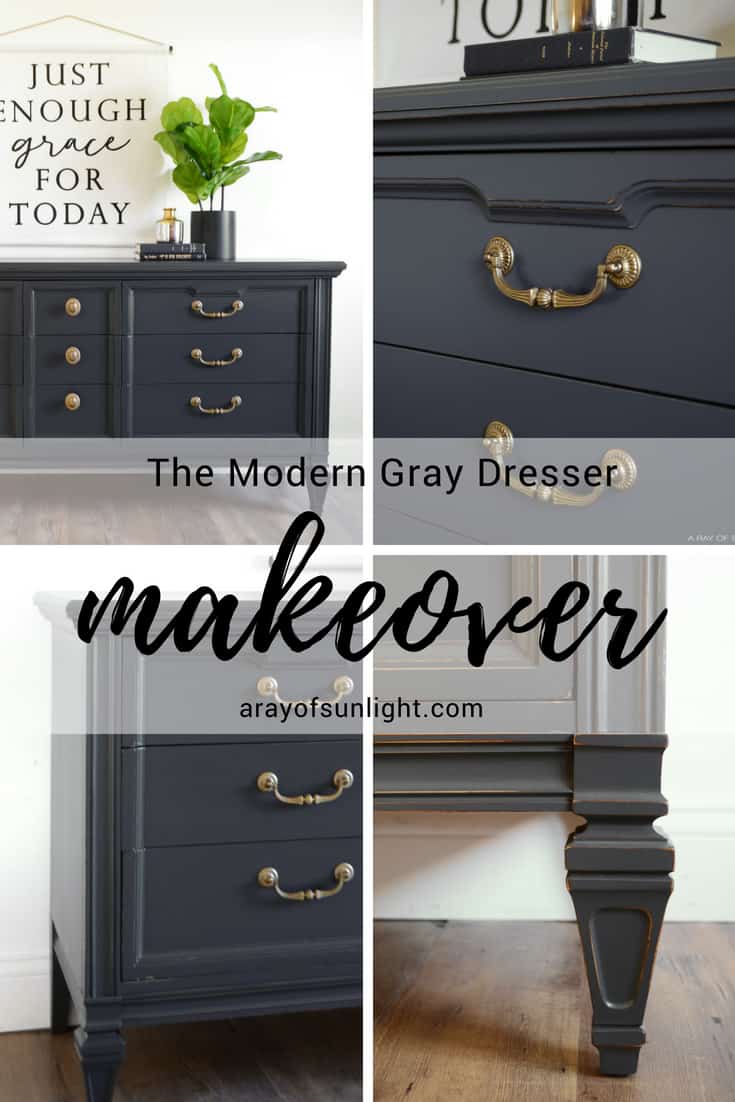
Distress and Seal Grey Chalk Painted Dresser
I lightly distressed all the edges with 220 grit sandpaper. You can learn more distressing furniture techniques here.
Then I cleaned up the dust with my shop vacuum and a tack cloth to make sure there wasn’t any dust left behind before moving to the next step.
Chalk paint has to be top coated with either polyurethane or wax if you want it to be durable and washable. Here’s our post on topcoats for painting furniture to help you decide which one is right for your project.
So I sealed the paint in with multiple coats of my favorite waterbased polyurethane. If you haven’t used polycrylic over chalk paint before, learn more about can you put polycrylic over chalk paint here.
Just another great reason to love painting furniture with a paint sprayer. Spraying water based polyurethane is the best and easiest way to make water based polyurethane look perfect.
Learn ALL of my tips and tricks on how to spray polyurethane here!
Would you like to save this?
Update and Paint Dresser Hardware
The hardware was updated with Rub N Buff, to give it that aged gold finish. This stuff is amazing to quickly update hardware. Just rub it on, and then buff it off.
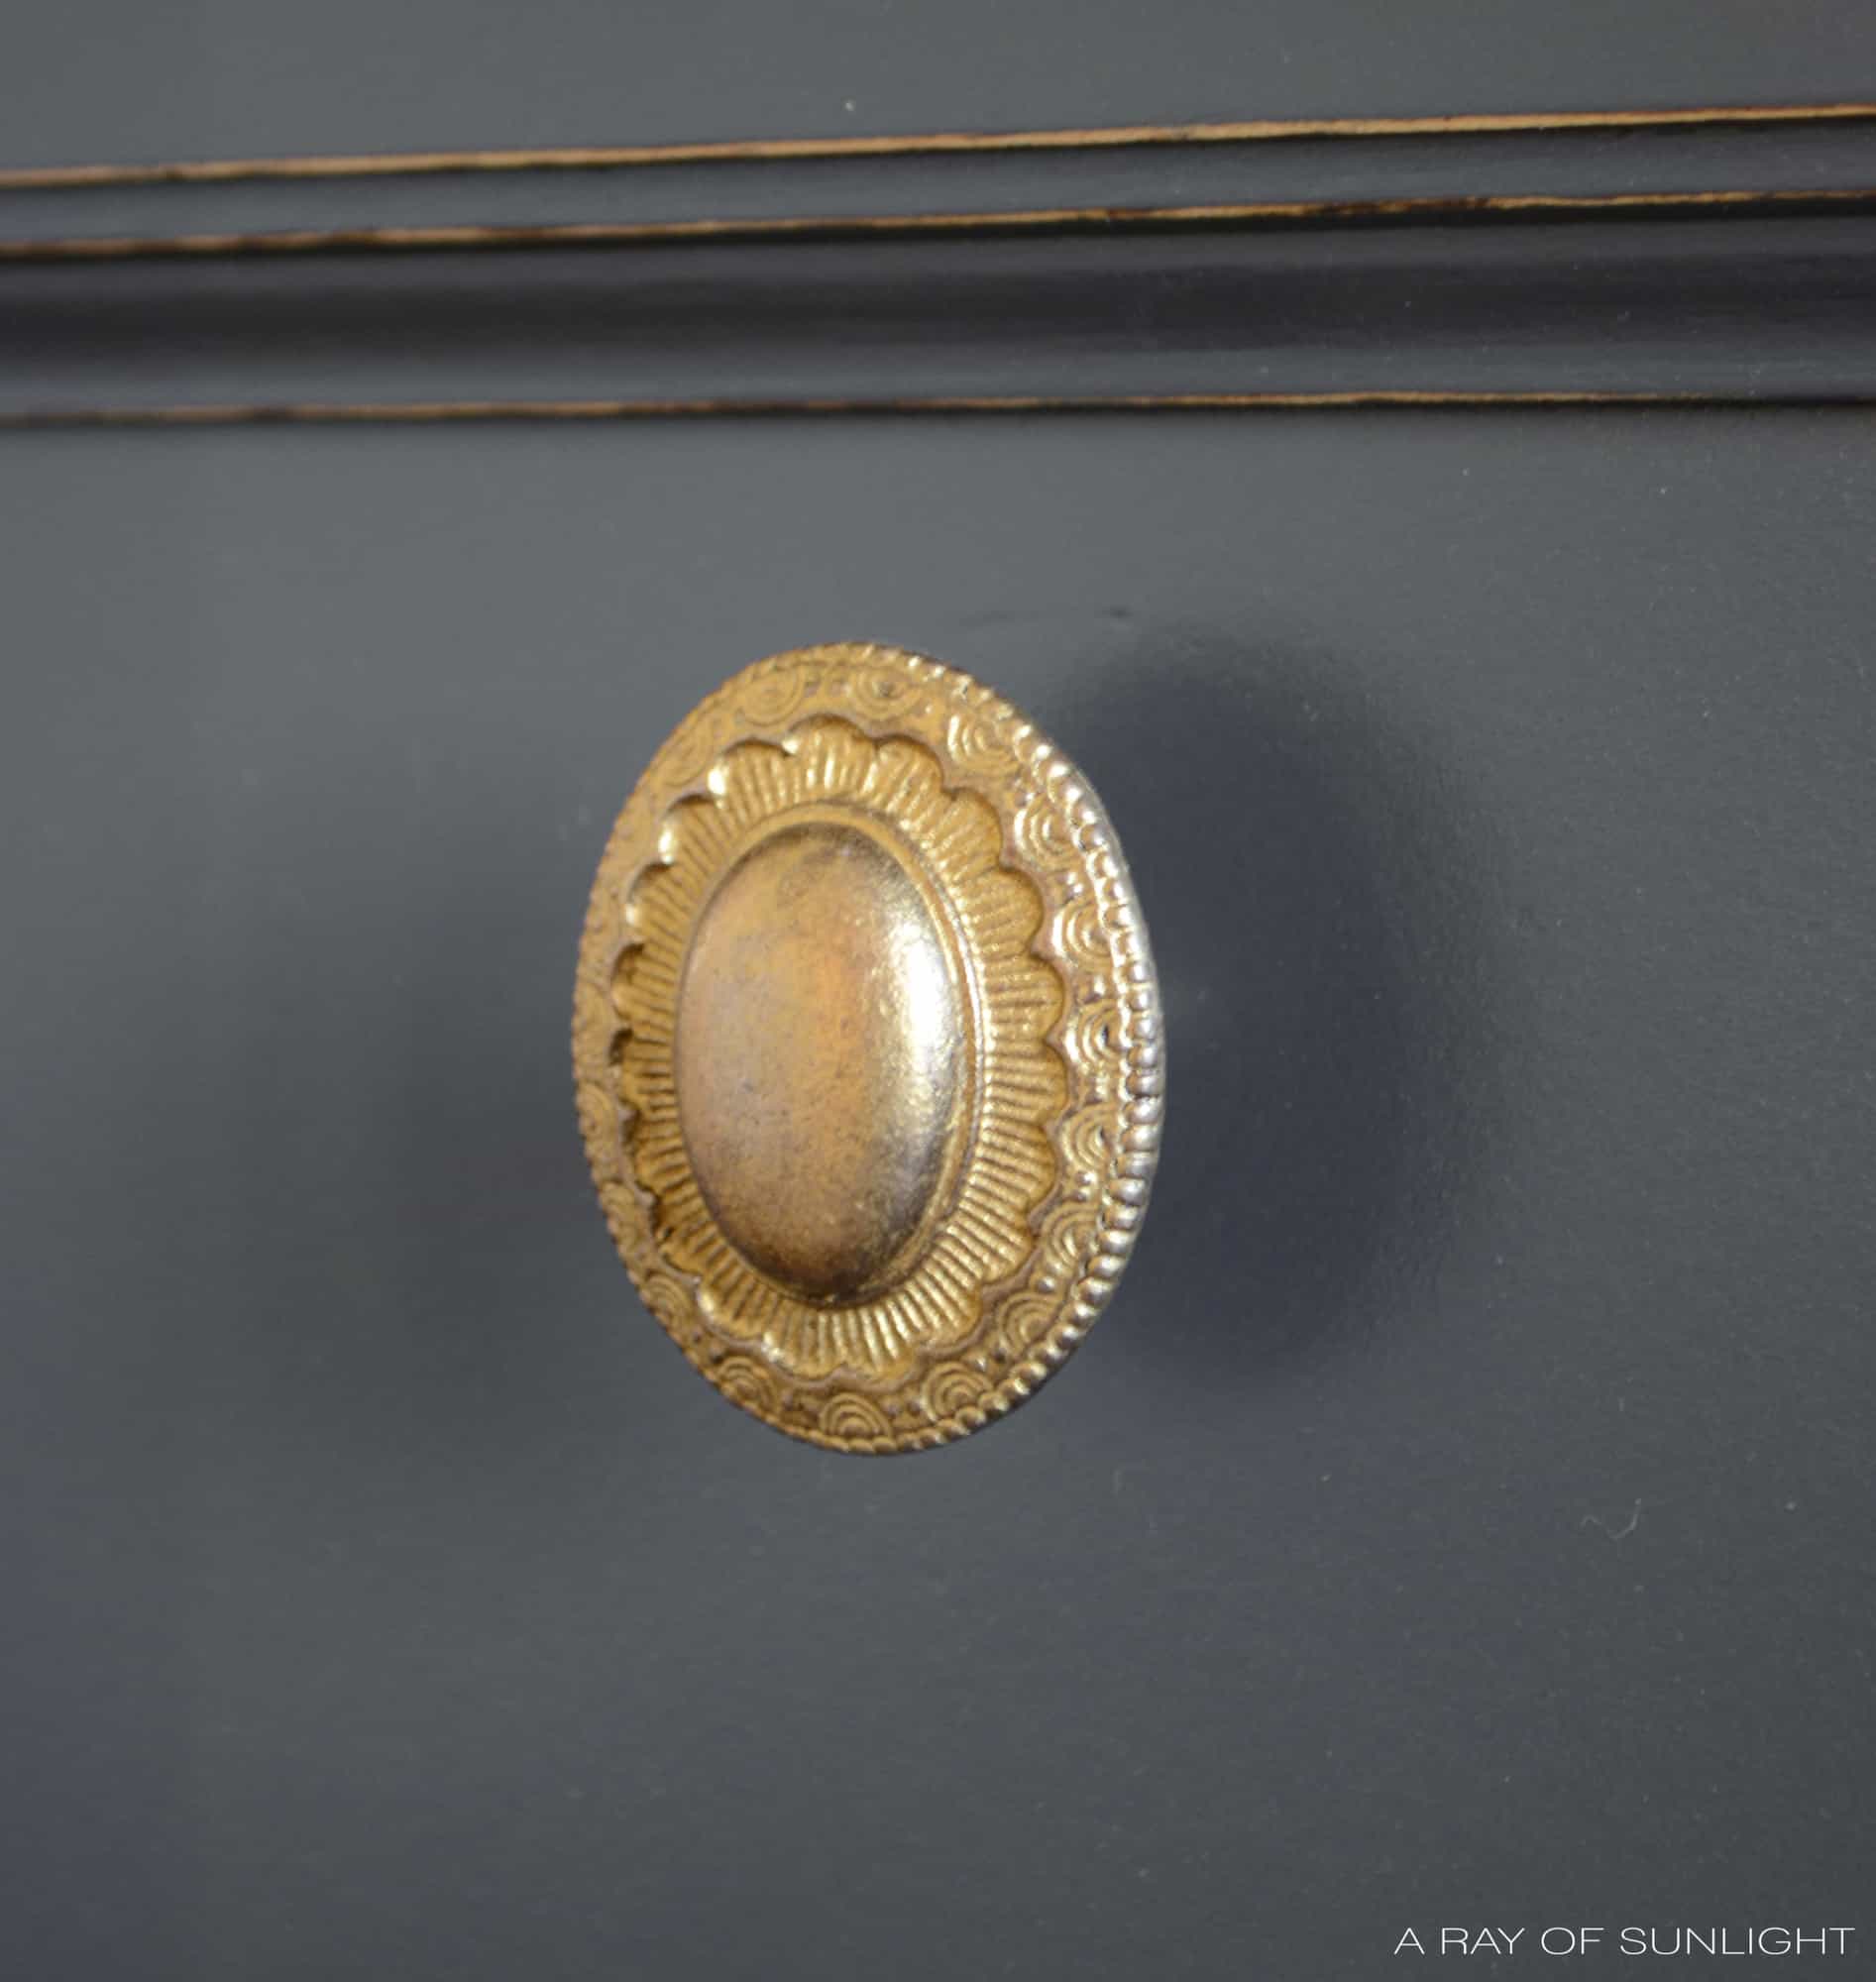
Weird.. that’s what it’s called. ha! Learn another way to paint drawer pulls here.
To finish it off I brushed Country Chic Paint hemp oil inside the drawers to make the wood look fresh.
After it soaked into the wood for a couple of minutes, I wiped the excess oil off and let it dry for a few days.

This is such a great tip if your drawers have any scratches. It helps hide the scratches to create a final fresh new feel to used furniture.
You can also line the inside to protect the drawers and make them look prettier – check out the best material to line dresser drawers here. And if you ever change your mind, you can always get rid of it. Here’s how to remove contact paper from wood.
More Before and After Makeovers
See All >
Click any of these “before” photos below to view the “after” of that makeover.


For more dresser makeovers, here are grey painted dresser ideas and painted dresser ideas. For more grey inspiration, check out these grey painted bedroom furniture ideas and dark grey chalk painted furniture. You can also check out these DIY 9 drawer dressers if you have the same dresser to update.
Does homemade chalk paint really work?
Yes, homemade chalk paint can definitely work and yield great results! Many DIYers swear by making their own chalk paint because it allows for more flexibility in color choices and can be a more affordable option.
While there may be some differences between store-bought and homemade chalk paint, as long as you use the right ingredients and follow a good recipe, it can be just as effective in getting a smooth, matte finish.
We have personally used homemade chalk paint, and we have chalk paint recipes that have worked out great for us. You can easily follow these recipes using common ingredients found at most hardware or craft stores and online too.


With this, you’ll also have total control over the ingredients and can customize it to your liking. You can experiment with different ratios of paint, water, and additives like calcium carbonate powder to get a thicker or smoother consistency.
Another great benefit of homemade chalk paint is that you can mix up small batches as needed, reducing waste and saving money in the long run.
And don’t worry about durability – our painted furniture pieces using homemade chalk paint have held up well over time with the right preparation, application and topcoat.
So if you’re thinking of trying out homemade chalk paint for your next project, go for it! You may just find a new favorite DIY hack.
We hope this grey chalk painted dresser makeover has inspired you to try it out for yourself and see the amazing results.


Grey Chalk Paint Dresser
If you are into modern furniture, this is the perfect makeover idea for you. Here's how to paint a grey chalk paint dresser.
Materials
Instructions
- Prepare your dresser for paint and do any repairs with Bondo. Then prime with a stain-blocking primer.
- Mix calcium carbonate powder with some water, then mix with grey latex paint together to make homemade chalk paint.
- Spray 2 coats of grey chalk paint onto the dresser. Once dry, lightly distress edges with 220 grit sandpaper. Then clean up the dust with a shop vacuum and a tack cloth.
- Seal in the chalk painted dresser with multiple coats of waterbased polyurethane.
- Update dresser hardware with Rub N Buff to give it that aged gold finish.
- To finish it off brush hemp oil inside the drawers to make the wood look fresh. After it soaks into the wood for a couple of minutes, wipe the excess oil off and let it dry for a few days.
Recommended Products
As an Amazon Associate and member of other affiliate programs, I earn from qualifying purchases.


More Grey Chalk Paint Furniture Makeovers
- Embossing Furniture
- Grey Painted Dressers
- Gray Chalk Painted End Tables
- Painting Furniture Grey
- Painted Hutch Makeover
Follow us on YouTube to get more tips for painting furniture. Or share your project with us on our Facebook Group and be part of our community. See you there!
Hi! Thank you for the really good tutorial. Can you tell me how much paint did you use for this dresser makeover? I’m planning to do one but don’t know how much paint to buy without buying too much. Thanks in advance for you reply.
Hey Tricia! You shouldn’t need more than a quart for this size of dresser, and this same color. You would probably need a little more than a pint though.