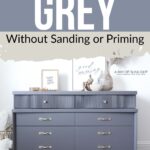
Painting Furniture Grey Without Sanding or Priming (Yes It Works!!)
If you want to try a trendy color for easily updating your piece, painting furniture grey without sanding or priming is definitely a good choice. Grey is also versatile and can look modern, rustic, or elegant, depending on the shade and finish.
In this makeover, we’ll be using Heirloom Traditions Paint! The best part is you don’t need to sand or prime beforehand! Just follow our simple steps, and you’ll have a beautiful grey piece in no time. So, let’s get started!
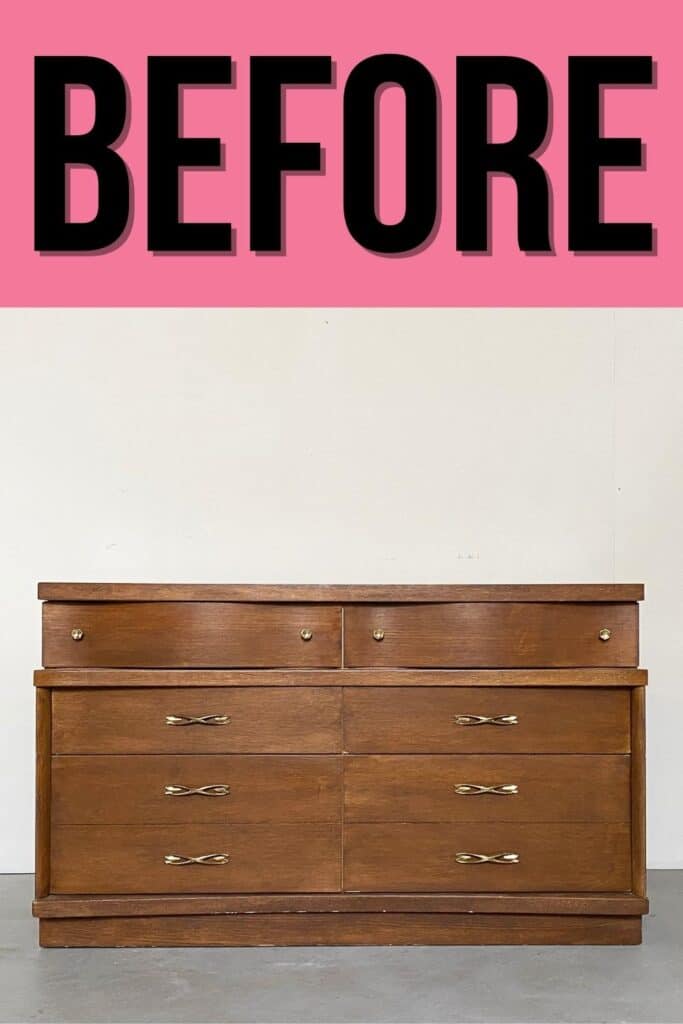
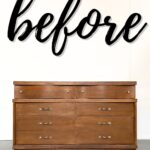
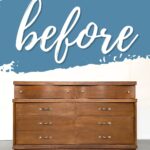
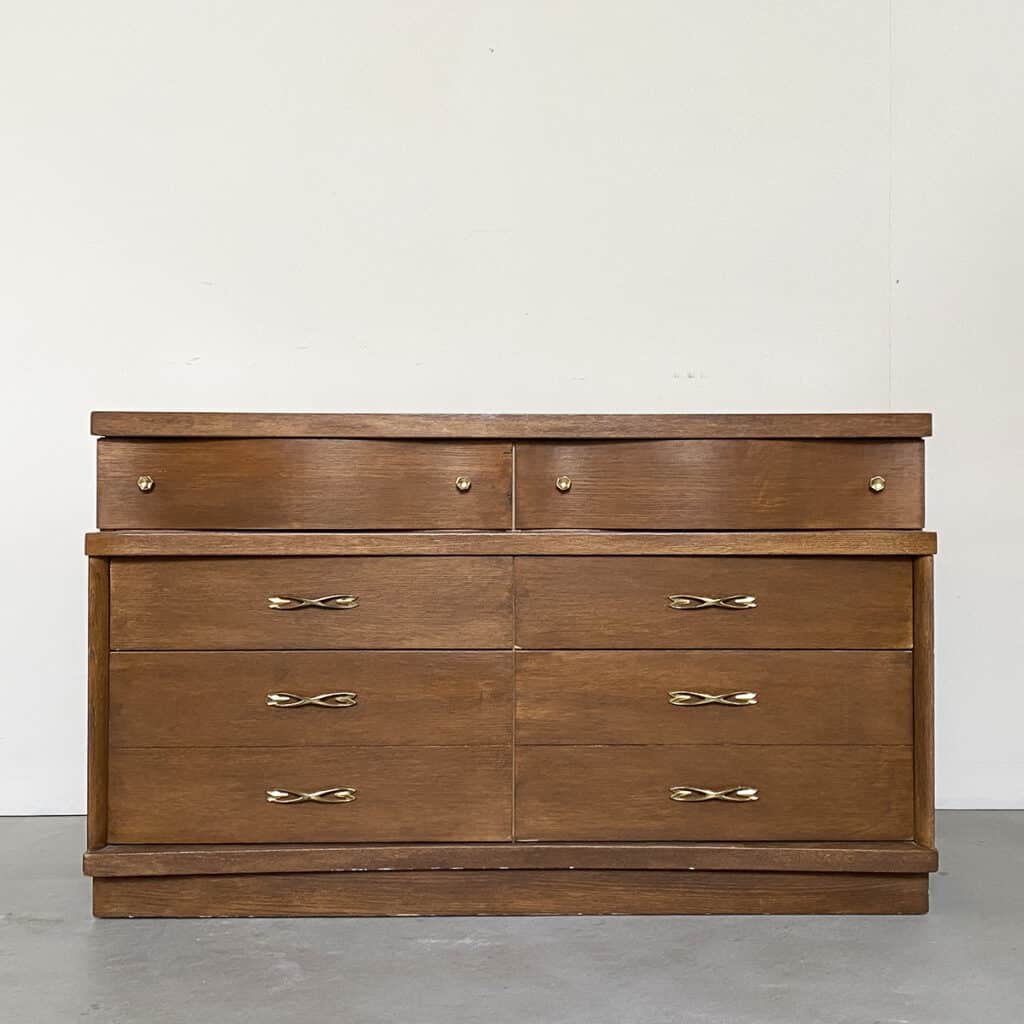
We bought this piece from Facebook Marketplace for, I think, around $75. It’s a Bassett made dresser and has some good bones… and it was in pretty good shape as well. I wasn’t in the mood to do a bunch of sanding or priming. I wanted to get right into a makeover and have fun with it.

I added some dowels to the top 2 drawers. It wasn’t the easiest or fastest thing to do, but it was a lot of fun for me. Even though I worked on adding them at the same time, I’m going to show you the process for each of them separately.
If you’ve never thought about painting furniture grey, it might be time to give it a shot! It’s such a versatile neutral that works with pretty much any decor style. Plus, it adds a nice touch of sophistication and elegance to your pieces. So, keep reading to learn how to paint a dresser grey!

Supplies Used for Painting Furniture Grey
As an Amazon Associate, I earn from qualifying purchases. I also may earn from other qualifying purchases with other companies or get free product to review and use. All opinions are my own.
- Electric Screwdriver
- Shop Vacuum
- Krud Kutter and an Old Rag
- KwikWood
- Heirloom Traditions Paint in Abbey
- Wagner FLEXiO 3500/595 Paint Sprayer
- Paint Filters
- Respirator
- Zibra Square Paintbrush
Supplies Used for Wooden Dowel Drawers
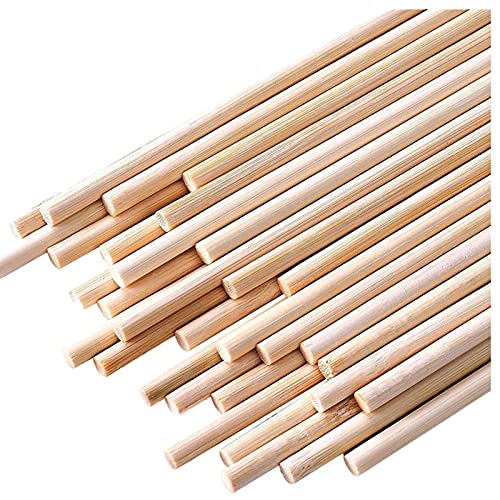
- 1/4″ Dowels
- Miter Saw
- Instant Super Glue
- Power Sander (Use code RAY10 to get 10% off your order)
- 80 Grit Sandpaper (Use code RAY10 to get 10% off your order)
- Medium Grit Foam Sanding Pads (Use code RAY10 to get 10% off your order)
Preparing Dresser for Paint
First things first, we have to prep. But with this paint, prep is super easy! First, I removed the hardware, like always, with my electric screwdriver. If I wanted to change the hardware to new ones, I would have filled in the old hardware holes like this post on how to change hardware on a dresser explains.
My husband cleaned the the piece inside and out for me with a shop vacuum and then with Krud Kutter and an old damp rag. Learn more about how to clean furniture before painting here.
Then, I repaired a few small chipped veneer spots.
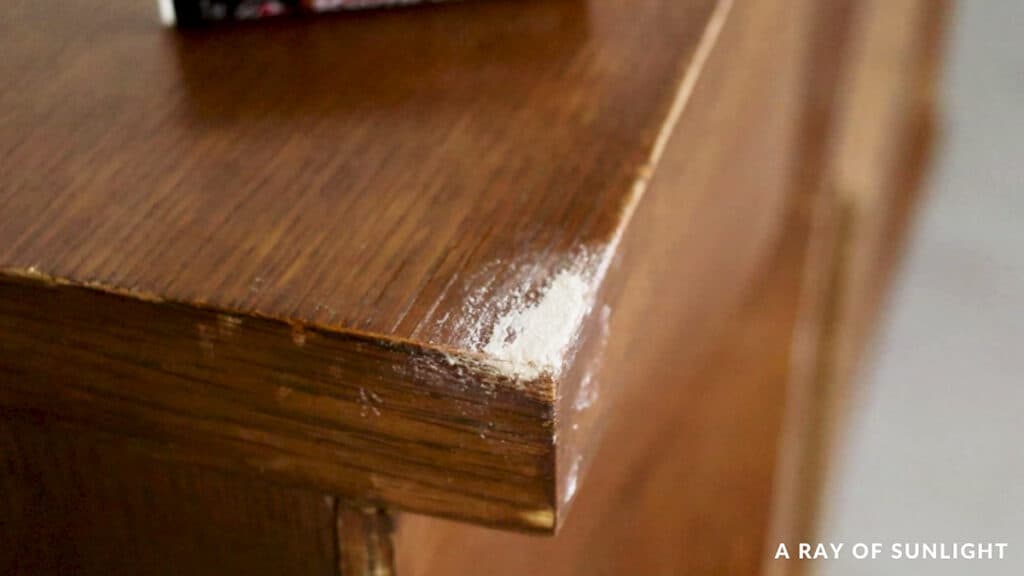
I used water to help shape the Kwikwood, so I wouldn’t have to do much sanding, if any, once it was dry. Learn more about how to use KwikWood here.
About an hour and a half later, the Kwikwood was dry. I lightly sanded it with 150 grit sandpaper while my husband mixed up the paint. To be honest, though… I didn’t sand more than a couple times back and forth over the Kwikwood.
Painting Furniture Grey with Heirloom Traditions Paint
Since I didn’t want to mess around with sanding and priming the whole thing, I used Heirloom Traditions Paint. It sticks better than any other I have used. Get more tips on painting finished furniture here.
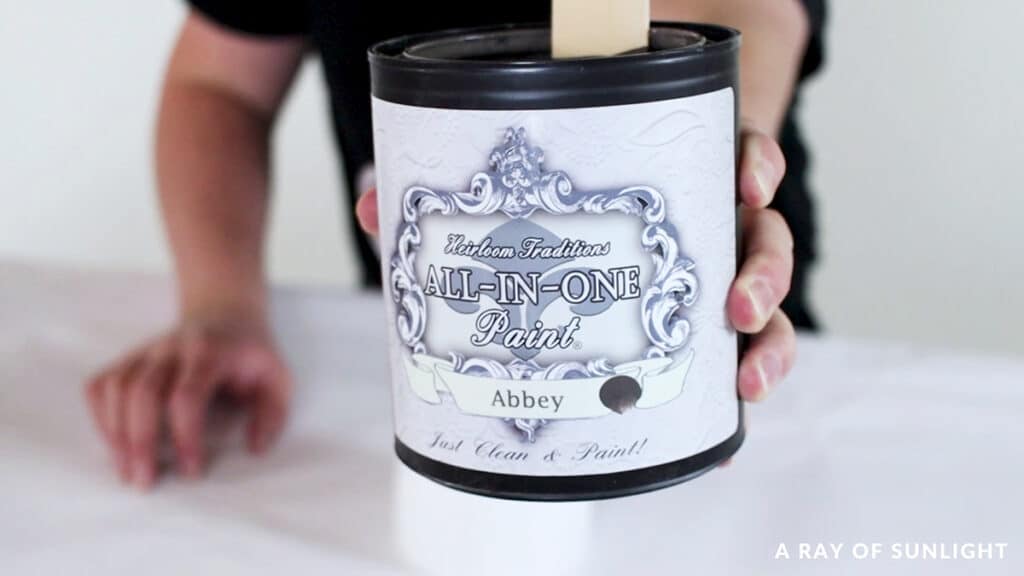
We went with Heirloom Traditions Paint called Abbey. It’s dark and one of the best grey furniture paint on our list! Check out my Heirloom Traditions Paint review here, and our post on painting furniture with Heirloom Traditions Paint for more information on using this product.
Here’s another painting furniture without sanding or priming makeover. And check out these Fusion Mineral Paint VS Heirloom Traditions Paint and Beyond Paint VS Heirloom Traditions Paint comparisons to learn about how it compares to other brands.
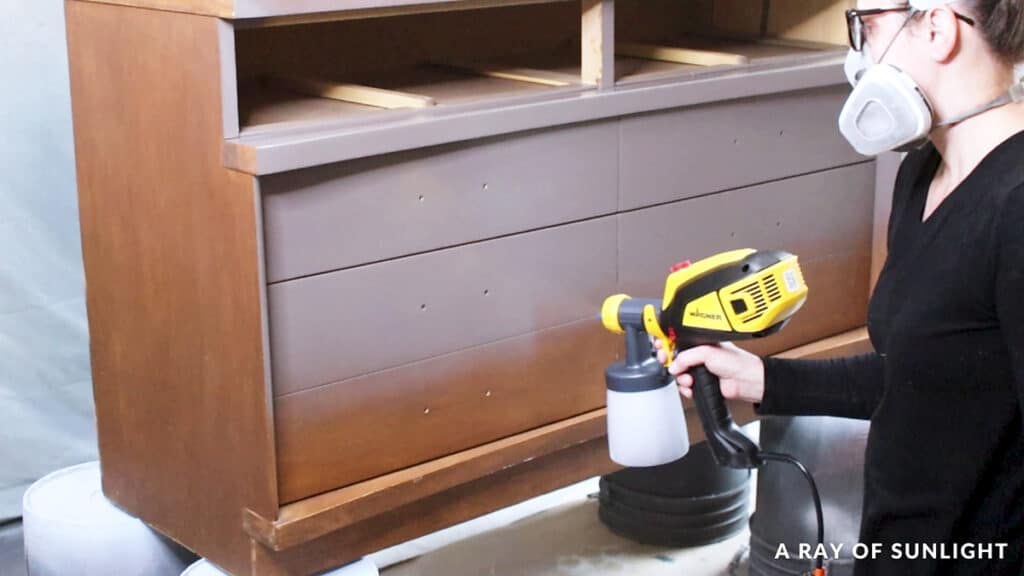
Spraying Heirloom Traditions Paint
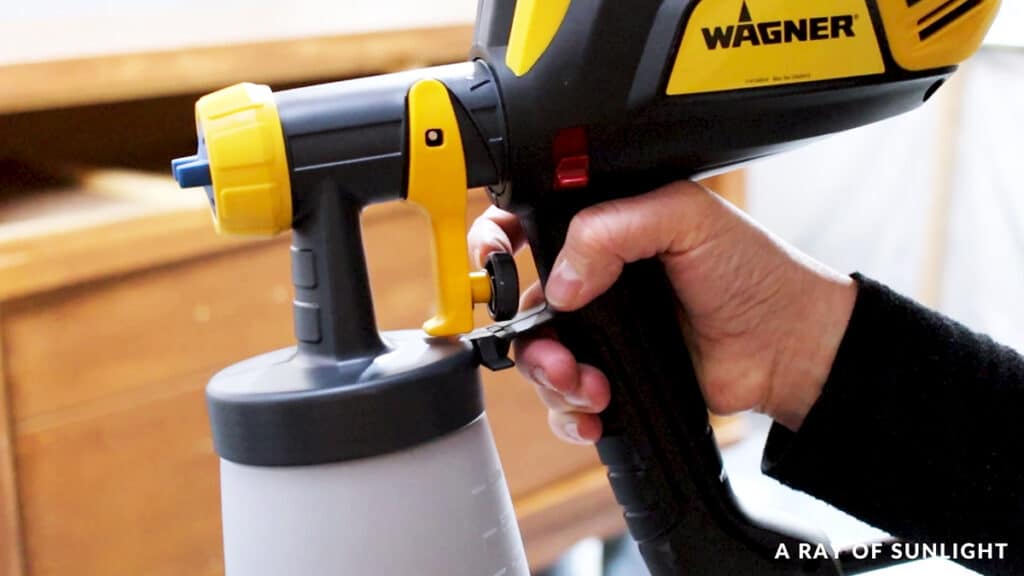
We poured it into our Wagner sprayer and mixed it with 20% water to help it spray into a perfectly fine, texture free finish. Learn more about how to thin paint for Wagner sprayer here.
Oh, and I got a new one (the Wagner FLEXiO 3500/595)! Check out my honest and detailed Wagner 3500 Paint Sprayer review here.
It’s just a slight upgrade from my older Wagner FLEXiO 3000 that I love… and that I will still use. But, since they came out with a new model, I decided to try it and see how different it is, and let you know if it’s good or not.
Check out my guides on how to use the FLEXiO 3000 and how to use Wagner FLEXiO 3500 if you have these models. Check out my list of the best Wagner paint sprayers for furniture here.
So we got the dresser into the spray room (a room in our unfinished basement that has a window and plastic on the walls and floor), and I tested the spray settings.
I set the Xboost power setting to 5 and the trigger paint flow setting in about the middle… but closer to the trigger. I tested the spray on some cardboard and felt good about how the coating came out, so I moved on to the dresser.
The biggest difference I noticed with the Wagner 3500 is that there is an on/off switch that keeps the motor and air going. So, it helps reduce splatters when you first pull the trigger.
But with the older model, you just pull the trigger part of the way to get the motor going, and then all the way to start spraying. Everything else felt the same. See other best HVLP paint sprayers for furniture here!


After 6 minutes, I had a full grey coat on the dresser, and I left it to dry for about an hour.
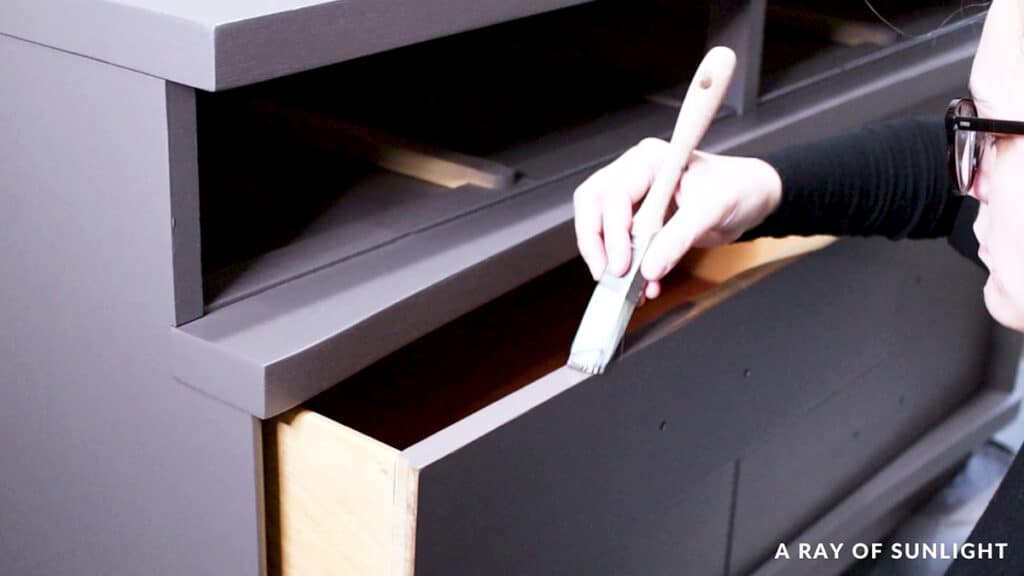
Painting Inside the Drawers
When that coat dried, I opened up the drawers and brushed some paint onto their edges and then on the inside of the dresser.
I usually tape them with plastic as one of the ways how to prevent overspray when painting furniture, but I was feeling lazy… which didn’t save me anytime at all. haha
I don’t usually worry about the inside parts, but the way this dresser was made, you can see all these wood braces and things when you open the drawers, so I painted it to make it look nicer.
I ended up doing this for 2 separate coats. And then, before I went to bed, I added one last coat on to make sure everything had full coverage.
Then I cleaned the sprayer. I wouldn’t let the paint sit in it overnight. Learn about how to clean a Wagner paint sprayer here. It takes about 5-10 minutes and is really simple.
Cleaning Furniture Hardware
To finish it all up, I cleaned up the hardware before putting it back on. For the top 2 drawers, I used the same ones, but I put the knob in the middle instead of on the sides. Here’s how to clean old furniture hardware.
I love how simple painting the dresser grey was. Now, let’s dive into the more complicated process of how to add dowels to the drawers.
Would you like to save this?
Cutting Dowels to Size
I bought 125 of these quarter inch dowels on Amazon, and then I cut them to the size of the top drawers.
I’m not going to lie, this part stressed me out because I was cutting smaller pieces, and some of them went flying. But I managed to get them all cut without cutting myself.
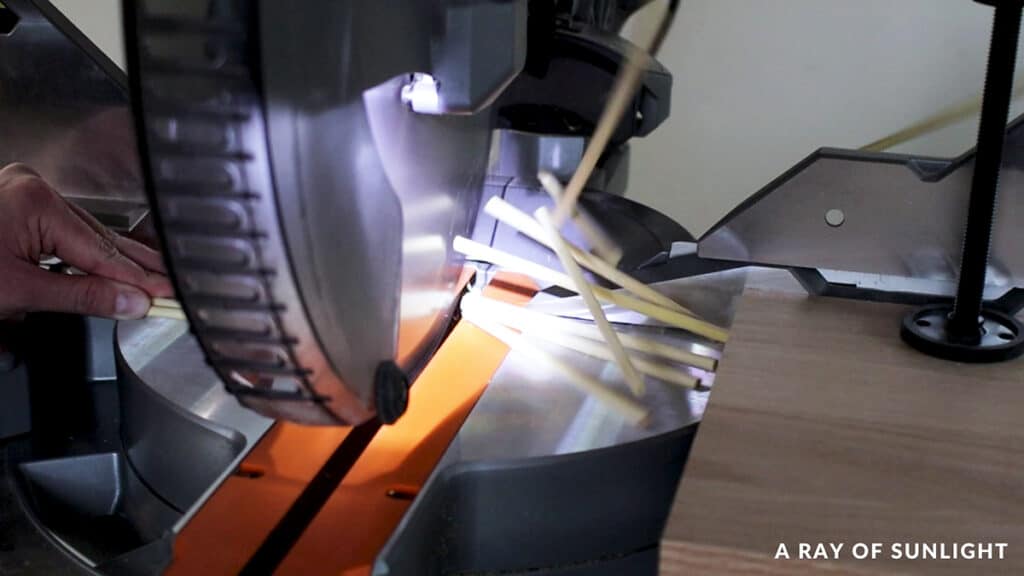
I probably should have used a hand saw for this instead. But I moved on and I quickly sanded the top two drawers to help the dowels stick, but also, in case there were gaps that showed between them, I wanted the wood behind them to be lighter.
Yeah, that ended up not being necessary. But oh well. Check out this DIY fluted dresser makeover where I made something similar. Here are more DIY fluted furniture ideas for inspiration!
How to Glue Dowels to Furniture
Then, I worked on gluing them. I used a piece of wood and clamps to help me line them up straight, and I used some instant super glue to glue them on. With this glue, I poured it onto the drawer, and then I sprayed the dowel, and then put them together.
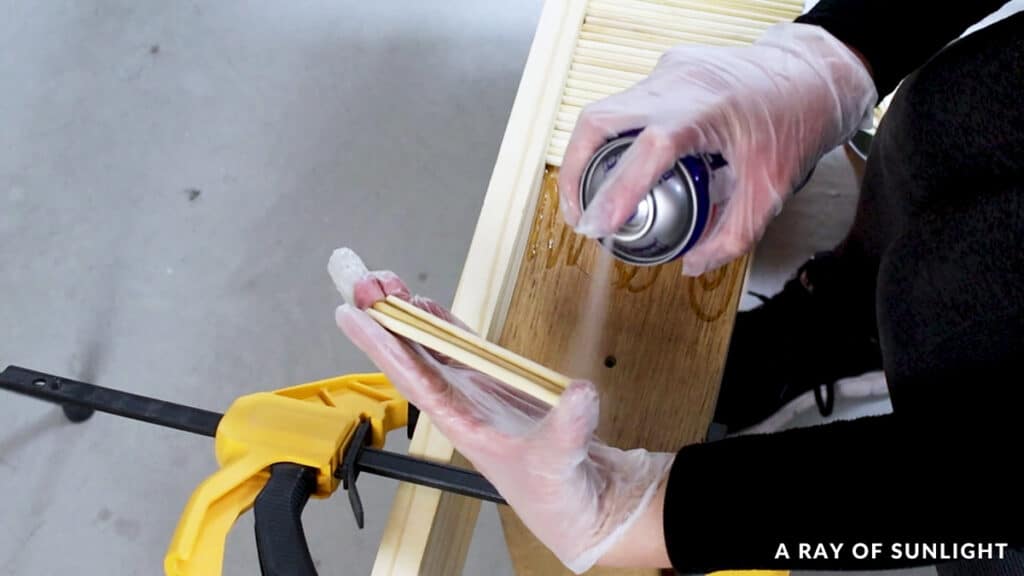
Once the spray comes in contact with the glue, it all dries within seconds. It has a super strong smell, though, so my windows were all open, and I wore my respirator as well.
The next day, I had to cut the dowels on one drawer with my multi tool saw because I didn’t cut those to the right size on the saw.
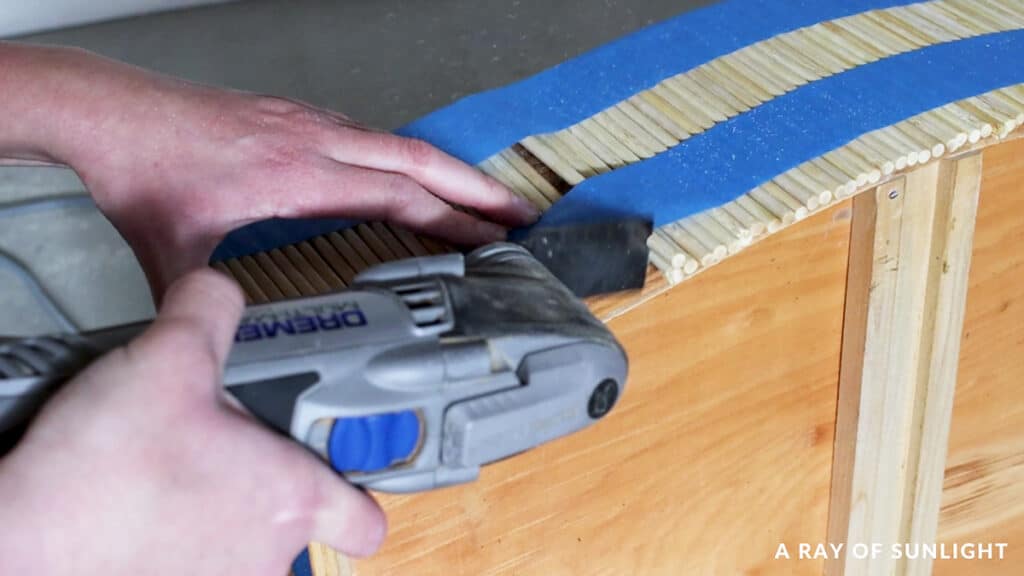
Since this drawer is curved, I couldn’t clamp a board to it to keep the dowels from vibrating off when I cut them… so I tried tape and put pressure… that didn’t work so well, and a lot of them came loose. So, I had to glue them back on.
Check out this all in one paint for furniture post where I glued popsicle sticks to make a cheap herringbone accent on a cabinet. I had a similar issue with that one.
Sanding the Dowels
Then, I sanded their edges to make them all flush with the drawer and make them look nice. I used my SurfPrep sander with 80 grit sandpaper for the edges and then medium grit foam sanding pads for the face of the dowels. Read our SurfPrep sander reviews to learn more about why it’s my favorite!
I’m not going to lie, this whole dowel process was really tedious. And I questioned my sanity a few times through it all.
I had to glue them back on a few times through it all… Then I put the drawers back in the dresser… thinking I was going to keep them as is… but I hated the look of the wood on those top drawers. So… I decided to make them match the rest of the piece.
Drilling Holes for New Hardware
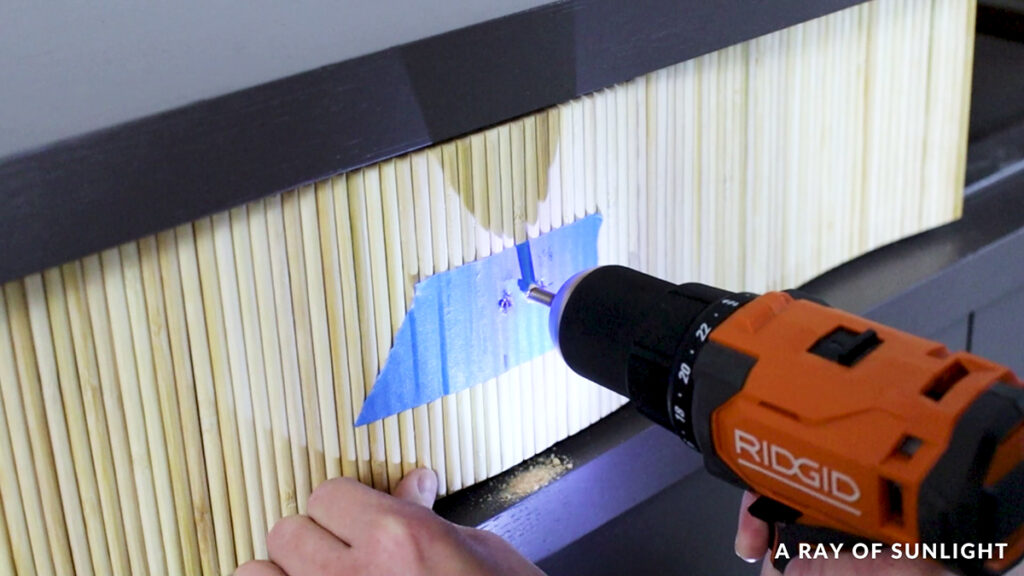
But I thankfully thought about drilling the hardware holes first. So, I did that by measuring the exact center of the drawer and drilling a hole. But then realized that the way these drawers sit in the dresser, the hardware needed to be offset a little to line up with the ones below.
So I redrilled after measuring 50 billion times.
And then I filled the wrong hole with more KwikWood. I shaped it with my metal scraper and some water so I wouldn’t have to sand it to shape it after it was dry.
Painting the DIY Dowel Drawers
When the KwikWood was dry, I applied a few grey coats on the drawers. This time, I had to wrap them in tape and pre taped plastic to keep the paint from getting all over them.
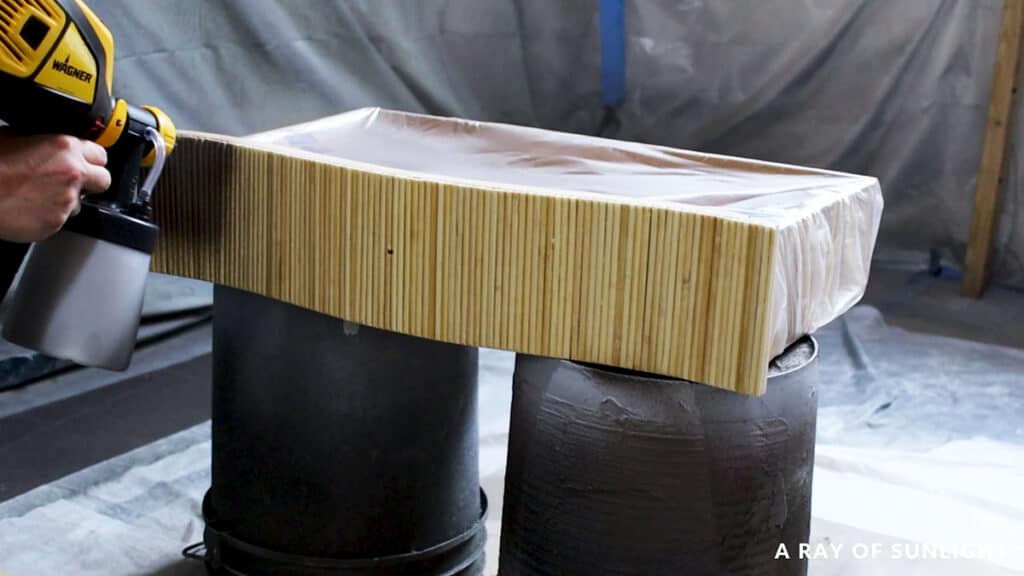
Typically, I would have primed, but with this dark color, I hoped for the best. And Heirloom doesn’t need a topcoat, so I wasn’t as worried either. They turned out excellent, though!!
The finish looks exactly the same as the rest of the piece, and there aren’t any bleedthrough stains. Learn more about how to stop stains from coming through paint here.
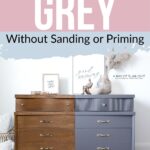
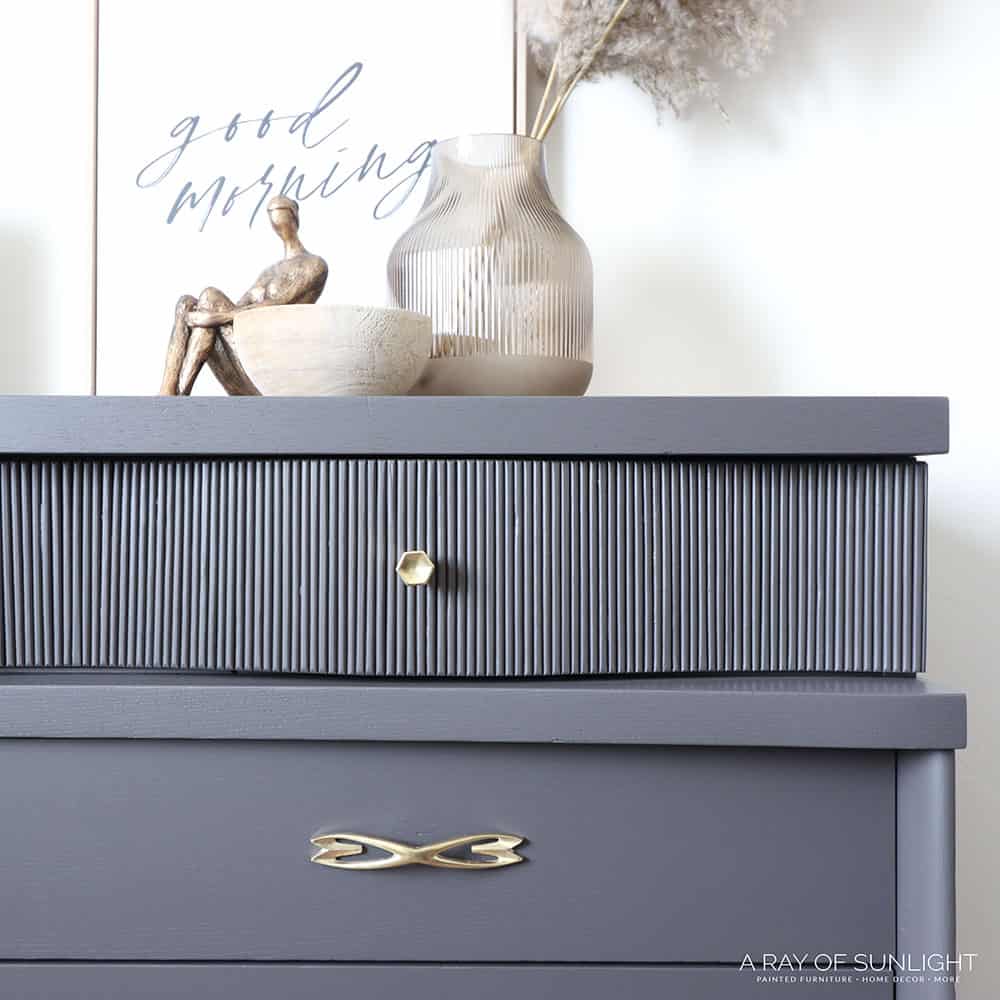
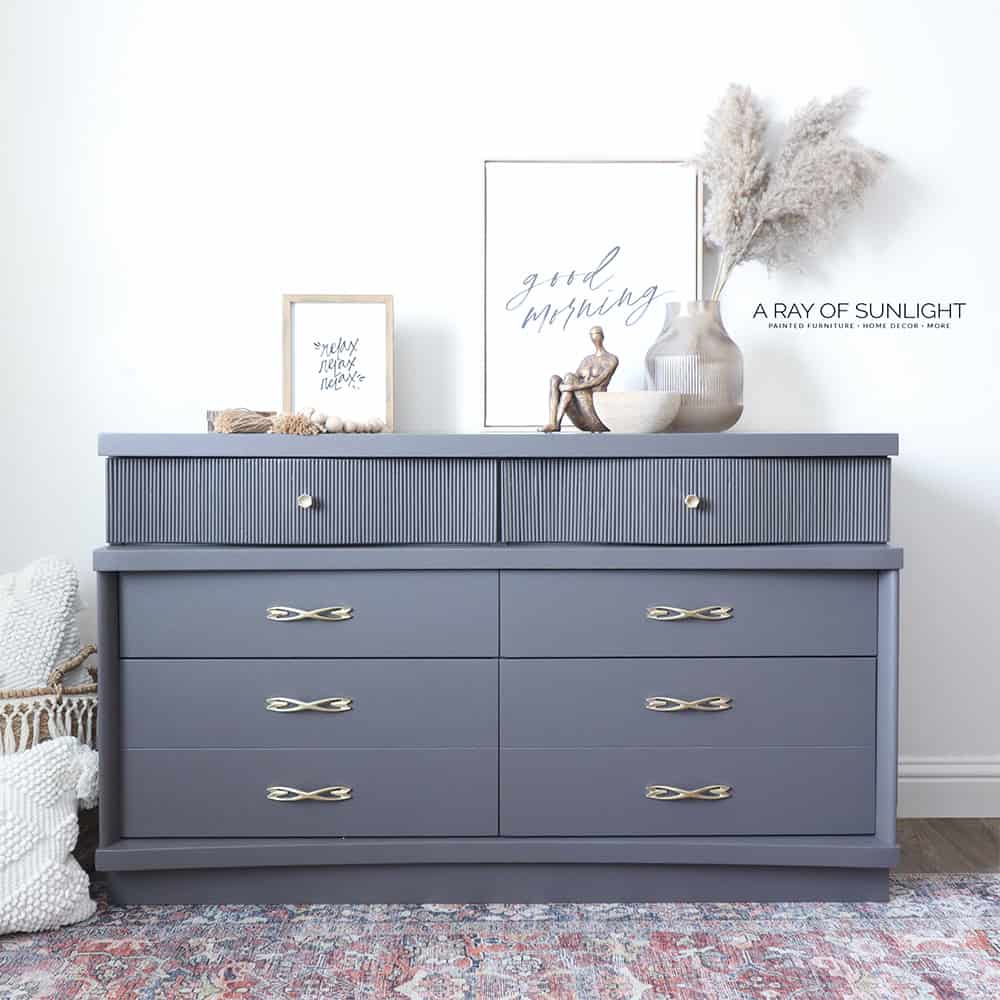
And here’s what the grey painted dresser looks like now! For more similar projects, here are grey painted dresser ideas and grey painted bedroom furniture ideas. If you are into neutrals, you can try out these other neutral furniture paint colors, too! For more colorful makeovers, check out ombre chalk painted furniture.
More Before and After Makeovers
See All >
Click any of these “before” photos below to view the “after” of that makeover.


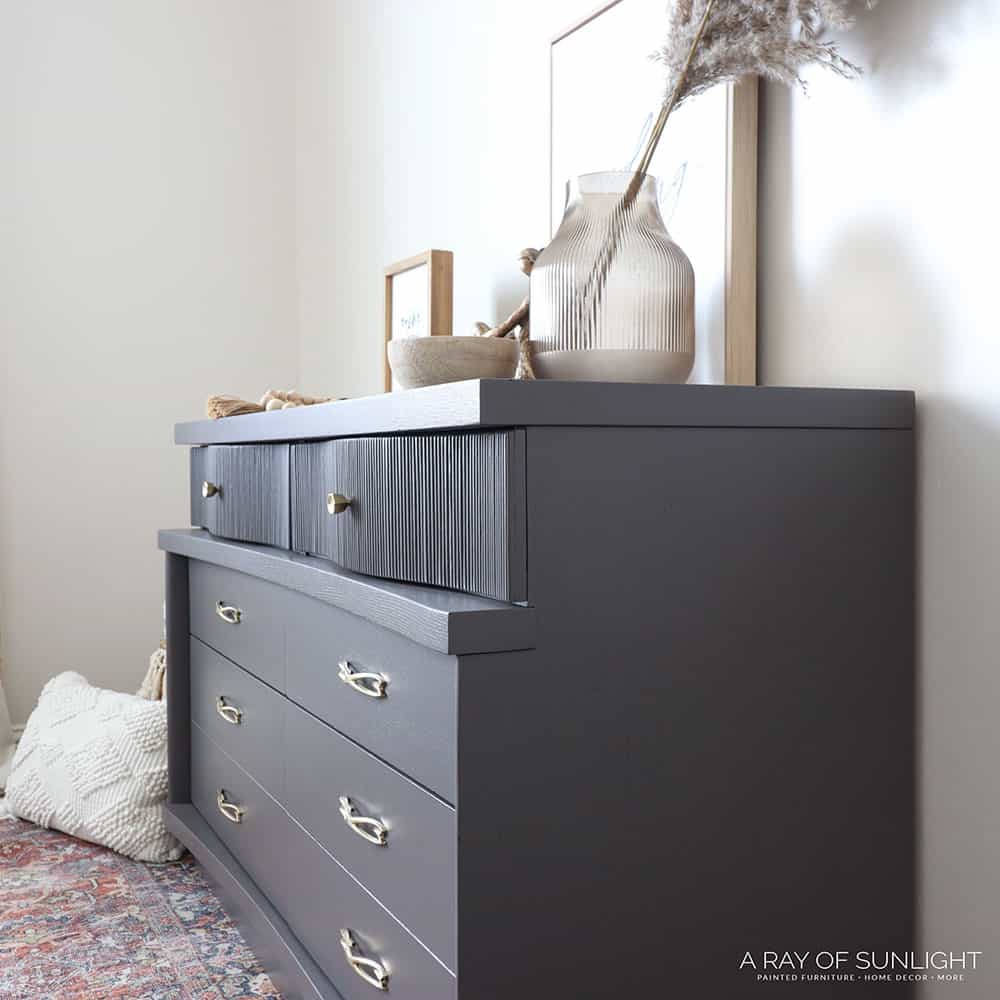
I love the new look! The dowels add some subtle texture that I absolutely love! I’m so glad I painted them; it was worth the extra work.
The original hardware… I’m not 100% sure about it. I think it’s interesting, but if I were to keep this dresser for myself, I would change it out for something a little simpler. Check out these amazing furniture makeover ideas, and if you want to be more creative, check out these creative dresser ideas.


How to Paint a Dresser Without Sanding
Here are more tips if you want to skip the sanding process and still want a successful makeover:
- Clean the surface thoroughly: Make sure to wipe down your piece with a degreaser to remove any dirt, grime, or grease buildup. This will help with adhesion of the new coating.
- Use a good quality primer: You’ll need to use primers like clear shellac and BIN shellac to make sure the coating adheres well, especially on slick laminate pieces. Here’s more on how to paint laminate furniture without sanding.
- Choose a good quality paint: We recommend these best paints for furniture without sanding and best no sand furniture paint options. You can learn the pros and cons of each one in these posts, but ultimately, you can’t go wrong with any of them!
- Topcoat the final finish: While some do not need one, using it adds an extra layer of protection and durability to your piece. It also helps change the sheen to make it more easy to clean and maintain. Get more tips on sealing painted furniture in this post.
Learn more about how to paint wood furniture without sanding or priming here.
What do you think? Do you like the hardware? Is the dowel look worth all of the work?? Let me know in the comments!


Painting Furniture Grey
Painting furniture can be easy with the right paint so you can skip sanding and priming. Painting furniture grey is a great option!
Materials
Instructions
- Prep furniture for paint by removing hardware then clean it inside and out with a shop vacuum then with Krud Kutter and an old damp rag.
- Repair any chipped veneer spots and fill them with KwikWood. Lightly sand the Kwikwood with 150 grit sandpaper.
- Use Heirloom Traditions Paint so you won't sand and prime the whole dresser. Pour it into your paint sprayer and mix it with 20% water for a perfectly fine, texture-free finish. Spray a full coat of paint onto the furniture and let it dry for about an hour.
- Now, open up the drawers and brush some paint onto the edges of the drawers and then on the inside of the dresser.
- Spray another coat of paint on the dresser for full coverage. Clean your sprayer after.
- Clean hardware and put them back on.
- For adding dowels to furniture, cut them to the size of the drawers then use some instant super glue to glue the dowels on. Sand the edges of the dowels to make them all flush with the drawer and make them look nice. You can then paint the dowels to match the rest of the dresser.
Recommended Products
As an Amazon Associate and member of other affiliate programs, I earn from qualifying purchases.


More Grey Painted Furniture Makeovers
- Grey Painted Dressers
- Grey Chalk Paint Dresser
- Embossing Furniture
- Painted Hutch Makeover
- DIY Modern Grey Dresser
Follow us on YouTube to get more tips for painting furniture. Or share your project with us on our Facebook Group and be part of our community. See you there!
I really love how this turned out. You created something really beautiful. I love that you didn’t have to sand it. I’m happy to tell you I’ll be featuring this post at Thursday Favorite Things tomorrow, starting at 10:00 a.m. CST. 🙂
Pam
anartfulmom.com
As I was reading this post I saw where you referred to a project that you used popsicle sticks to create a herringbone pattern. Now I can’t find the link to explore it. Would you forward it to me? Thank you.
Hey Kim, here is the post you’re looking for. All in One Paint for Furniture + Cheap Herringbone Accent