DIY Fluted Dresser Makeover


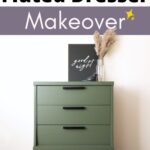
Check out this DIY Fluted Dresser makeover with a thrifted Art Deco style dresser, paint, and some wooden half dowels to give a fresh and modern look.
Get more green painted furniture ideas here!
This week, I did something I’ve been wanting to do for a while now. I can’t wait to show you what I did!
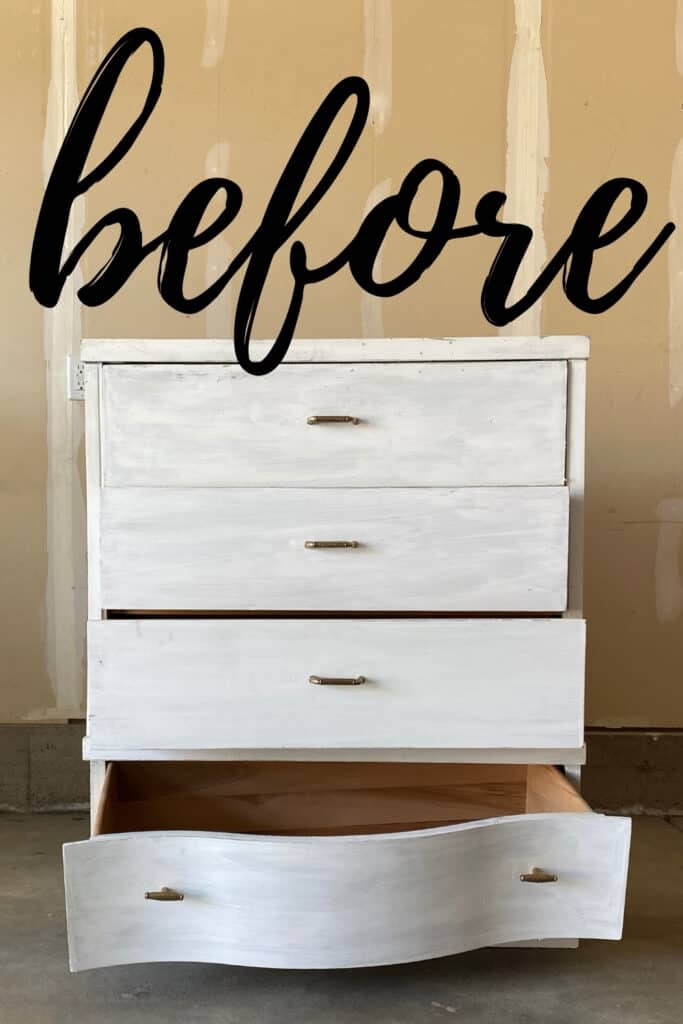
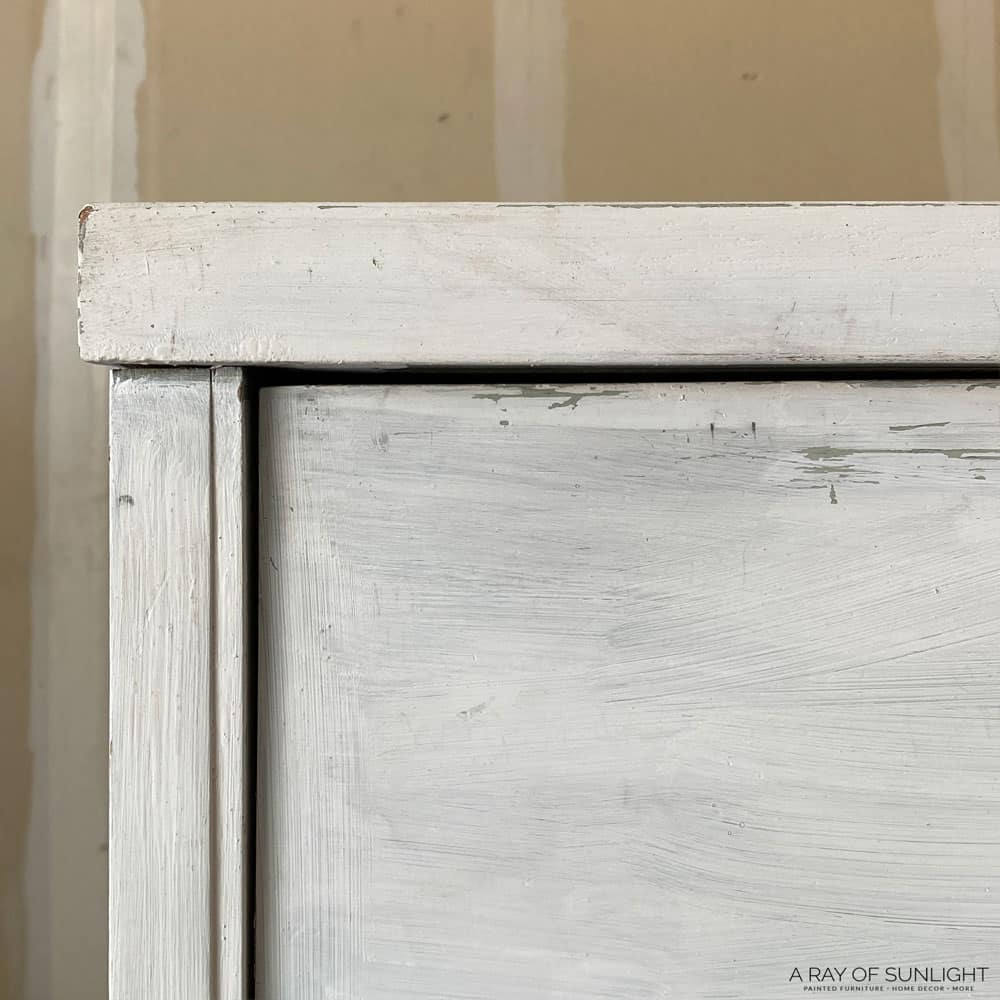
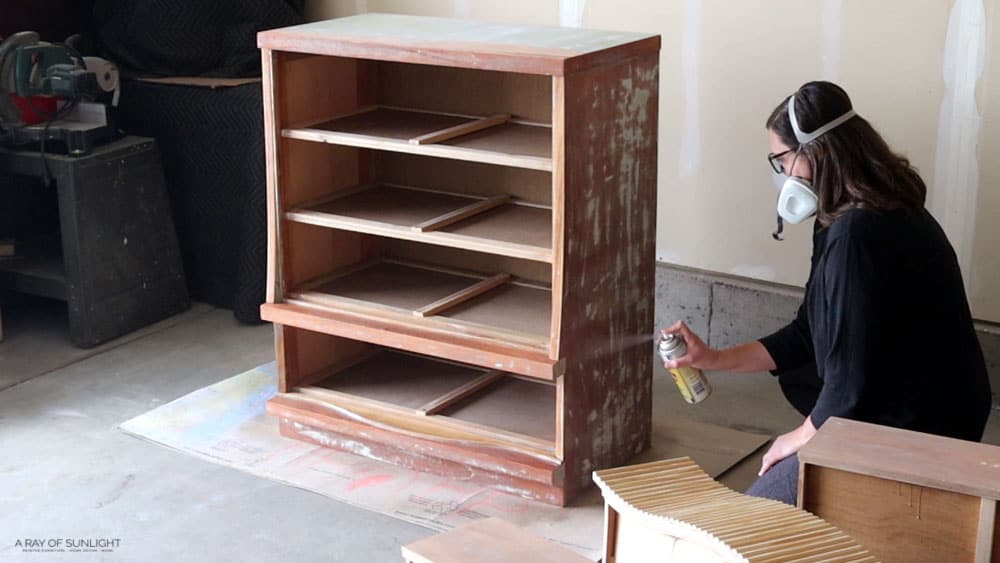
Here’s the piece that I started out with. It’s an art deco-style dresser with a really sad paint job that was scratching off in some spots.
I was really curious to see if it was painted with lead-based paint because that would change how I could remove the paint from it.

One drawer also had a broken drawer track that needed to be repaired. But I loved that curved drawer on the bottom. So let’s dive into the makeover!

Supplies Used for this DIY fluted dresser makeover
As an Amazon Associate, I earn from qualifying purchases. I also may earn from other qualifying purchases with other companies or get free product to review and use. All opinions are my own.
- Thrifted Art Deco Dresser
- Lead Paint Test Kit
- Electric Screwdriver
- KwikWood to fill in the old hardware holes
- Citristrip Chemical Stripper
- Wood Filler
- Half Round Dowels
- Miter Saw
- My favorite Sandpaper
- Gorilla Glue
- Glue Brush
- Clamps
- Orbital Sander
- Shop Vac
- Tack Cloth
- Clear Shellac (Primer) in a Spray Can
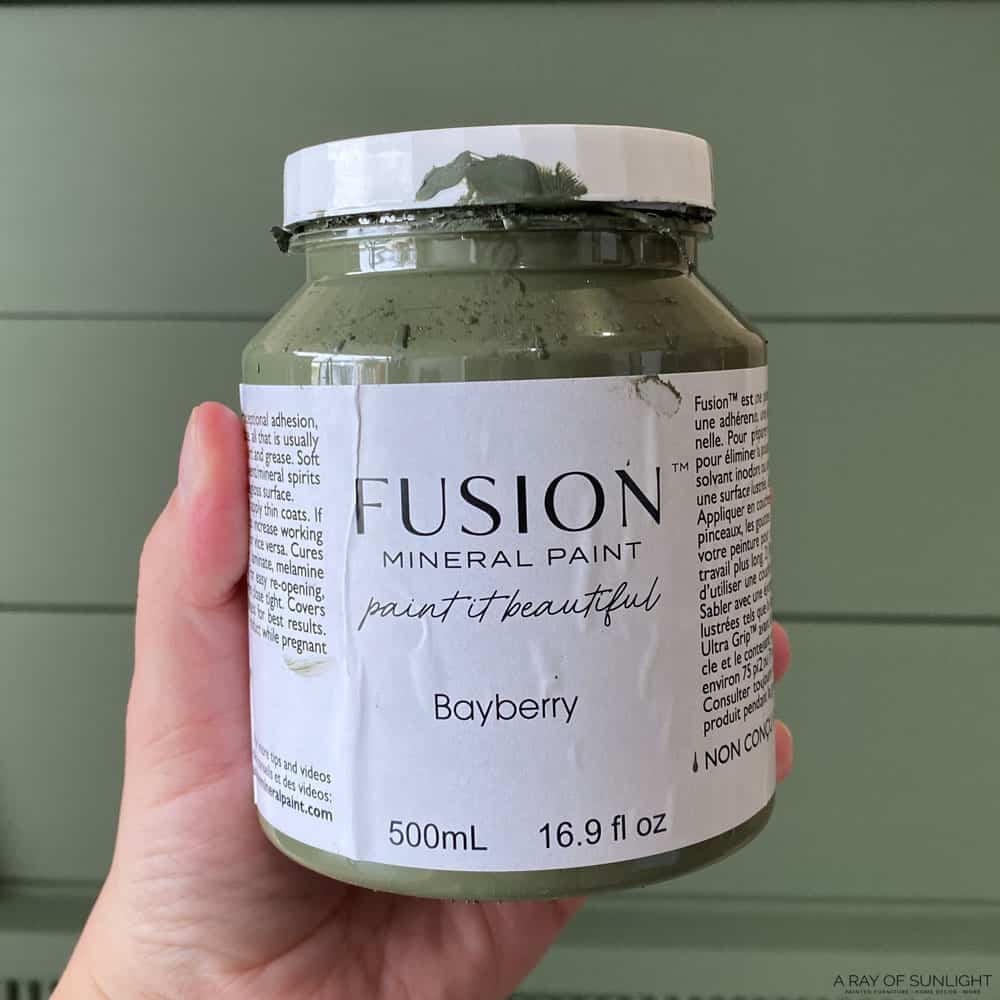
- Fusion Mineral Paint in Bayberry
- Staalmeester Paintbrush
- Fine Misting Bottle
- 123 Gray Tinted Primer
- Spackling
- Zibra Paint Brush
- New Drawer Pulls
- New Drawer Knobs
Grab our list of 10 must have painting furniture supplies too!
Fixing Dresser Drawer Tracks
First I worked on repairing the broken drawer track.
I found some simple scrap wood, cut it to size, and glued it into place. And then I added some weight on top of the wood to help it stay in place while the glue dried for 24 hours.
And then I found out that the bottom drawer’s track wasn’t attached to the dresser. It looked like the screws were loose and fell out.
I tried to screw the screws back in, but they wouldn’t grip anything. So I grabbed some larger and longer screws from my stash and screwed the drawer track back into place.
Learn more ways on how to fix broken dresser drawer tracks here.
Testing For Lead Paint on Dresser
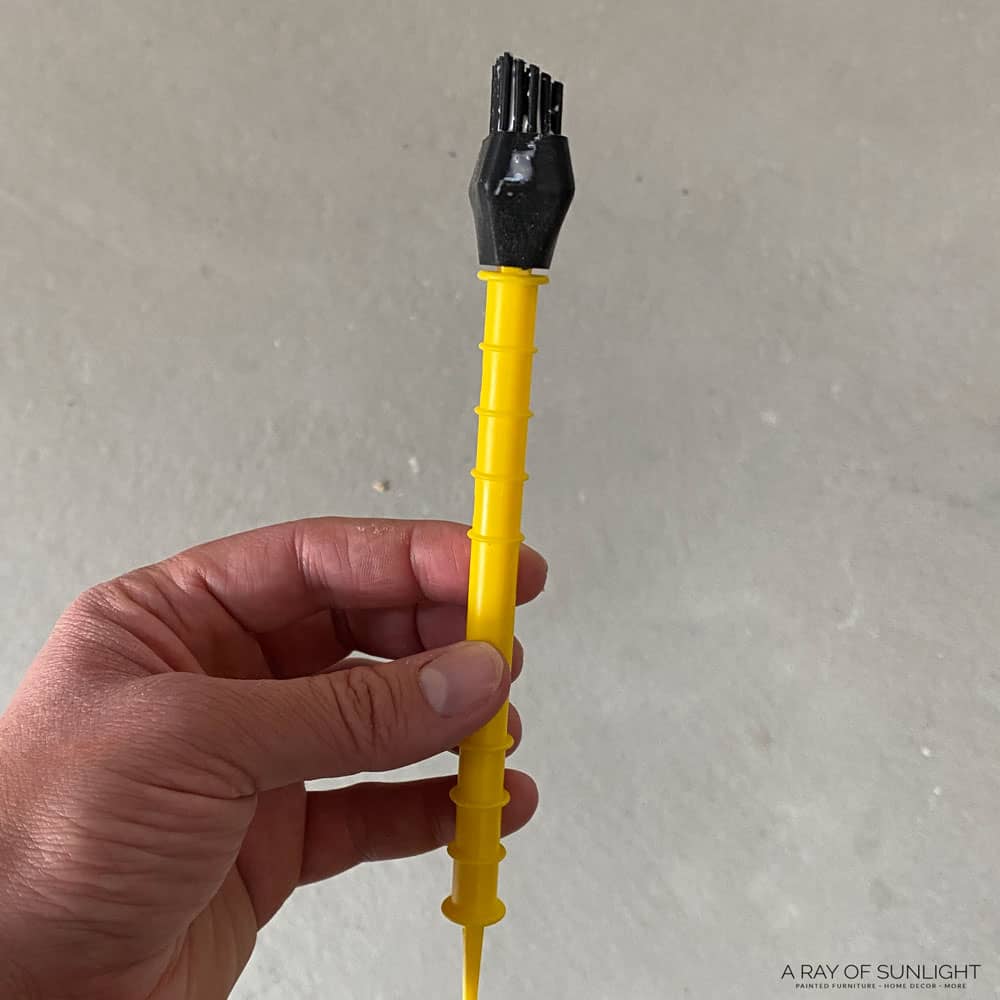
Then I used a lead check test to test the paint and see if it was lead-based paint. These things are super easy to use!

Literally, within a minute you know if the paint is lead-based or not. All you do is basically squeeze the tube, shake it up and rub it on.
Check out my post on how to test for lead paint on furniture with a lead paint test kit to learn more.
Anyway, after that, I knew that the paint didn’t have any lead in it. So I could remove the paint any way I pleased.
You can also check this guide on how to repaint a dresser.
Removing Dresser Hardware
While I thought about how I wanted to remove the paint, I moved on to removing the drawer pulls from the drawers.

And then since I planned to change out the hardware, I filled the old hardware holes with my favorite filler and wood repair product, KwikWood.
Learn more about how to use KwikWood to change hardware holes here.
Removing Paint From a Dresser
If you’ve been to my blog or seen my videos before, you might have noticed that I like to try new things.
Removing Paint with a Heat Gun
So, I borrowed a heat gun from my sister and tried my hand at using a heat gun and metal scraper to remove the paint.
I scraped at the paint a little bit with just the scraper to see how hard it would be to scrape it off without heat. And it came off… a little bit.
So I plugged in the heat gun and held it a few inches away from the paint to heat up the paint. Then I used my metal scraper to scrape off the paint.
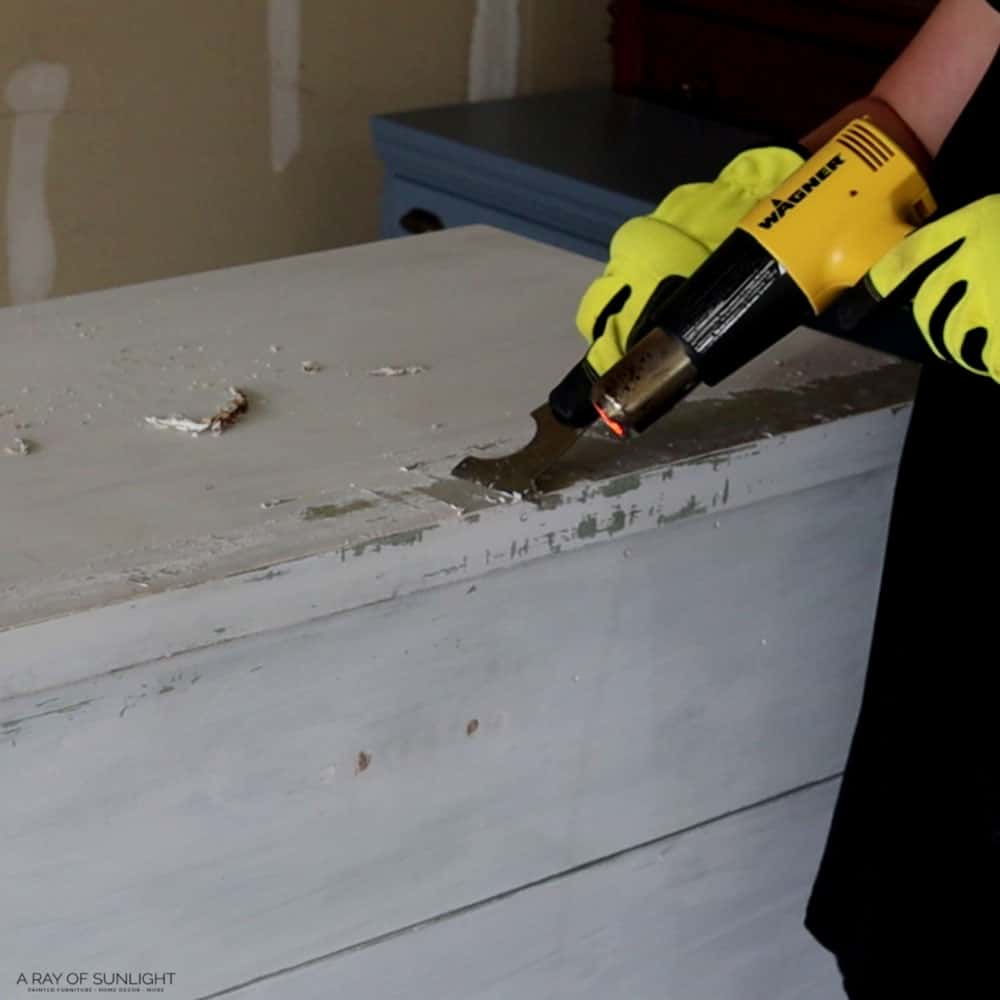
And then after 7 minutes of it, I decided it was too much for me. Haha I’m not sure if I totally did it wrong, but I didn’t love how much I had to put into it to get the paint scraped off.
Update: It would have been so much easier to use this carbide scraper to remove the paint!
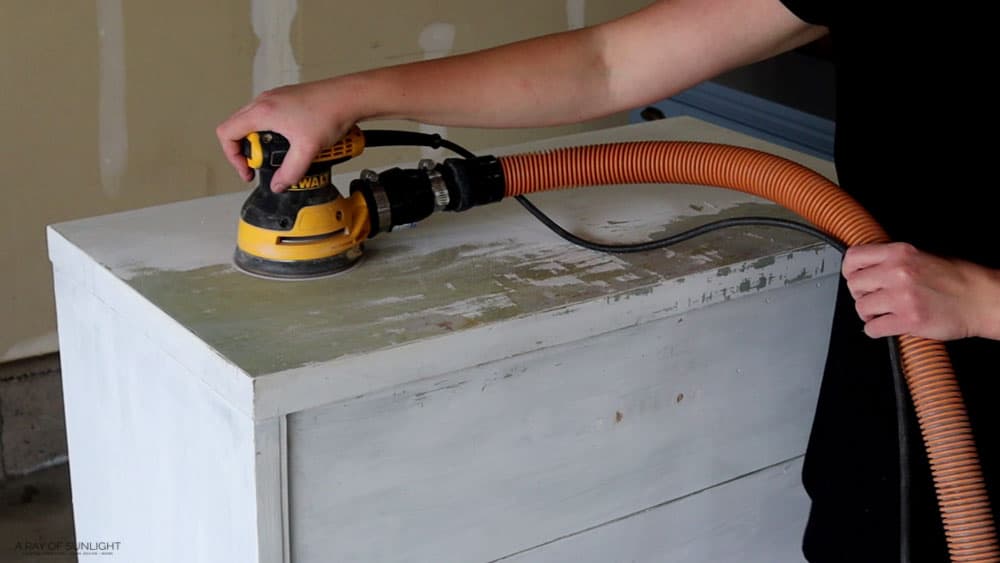
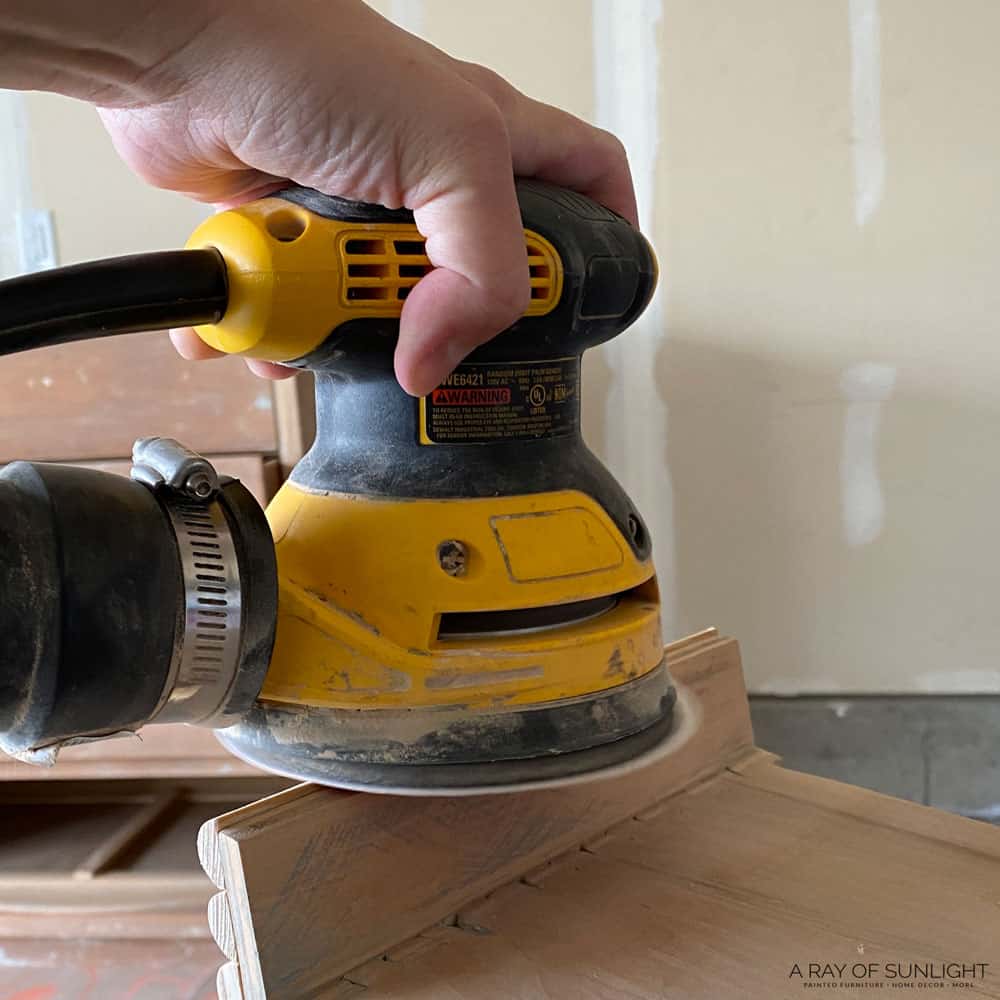
Removing Paint with a Sander
Sooo then I tried sanding it off. I used 100 grit sandpaper and my Dewalt orbital sander. And in about 10 minutes I was able to finish sanding the top of the dresser.
Check out the best sanders to remove paint here.
Removing Paint with a Chemical Stripper
But I honestly didn’t love just sitting there.
I had some other things to get done right then, like making dinner and getting the kids ready for bed, and I wondered if it would be easier, in the end, to strip off the paint.
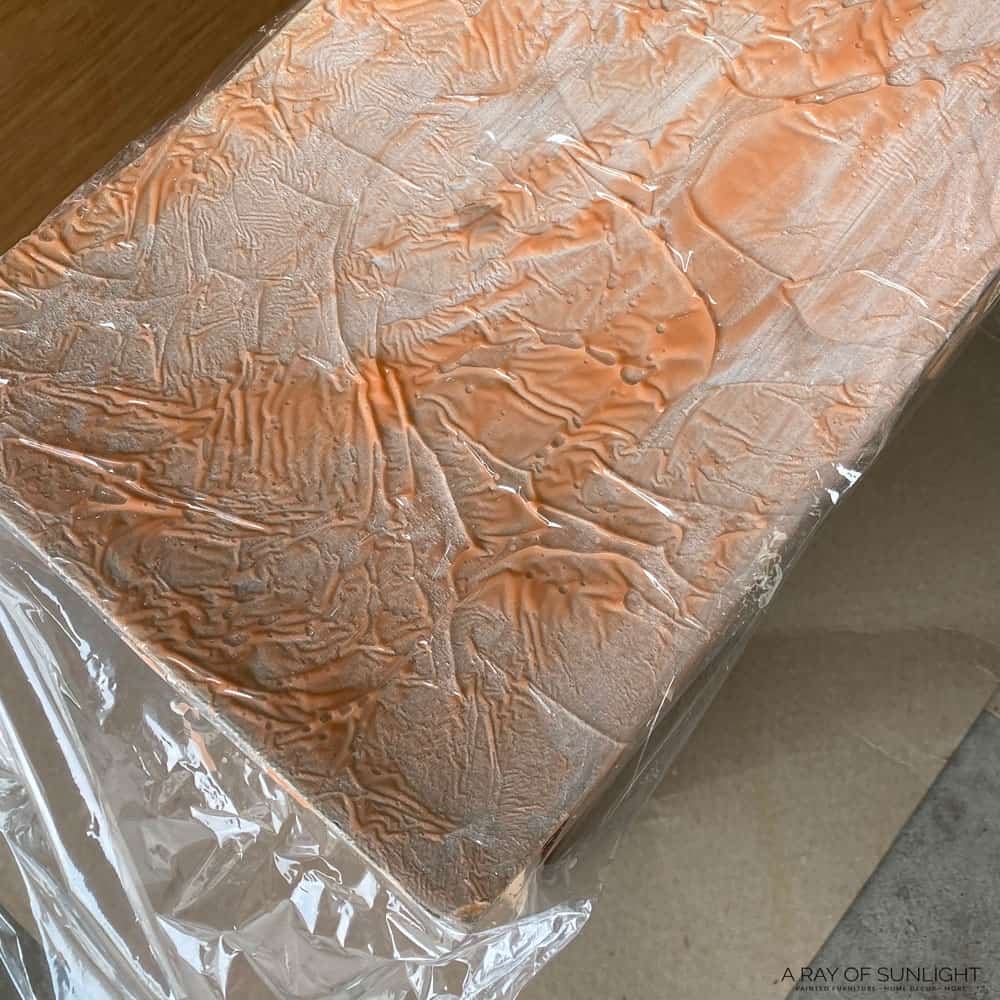
So I laid down some cardboard and brushed my favorite stripper all over it and put plastic wrap over the stripper to keep it from drying out.
I’ll spare you from all of the details here, but if you’re curious, here’s how I like to strip paint from wood furniture with a paint stripper.
The Fastest Way to Remove Paint From Furniture
I’m a numbers girl, so just for kicks and giggles, I looked at how long it took me to strip vs sand…
In the end, it took me just over 2 hours of actual work to get the paint and most of the old finish off, including sanding it with 220 grit sandpaper after everything was dry.
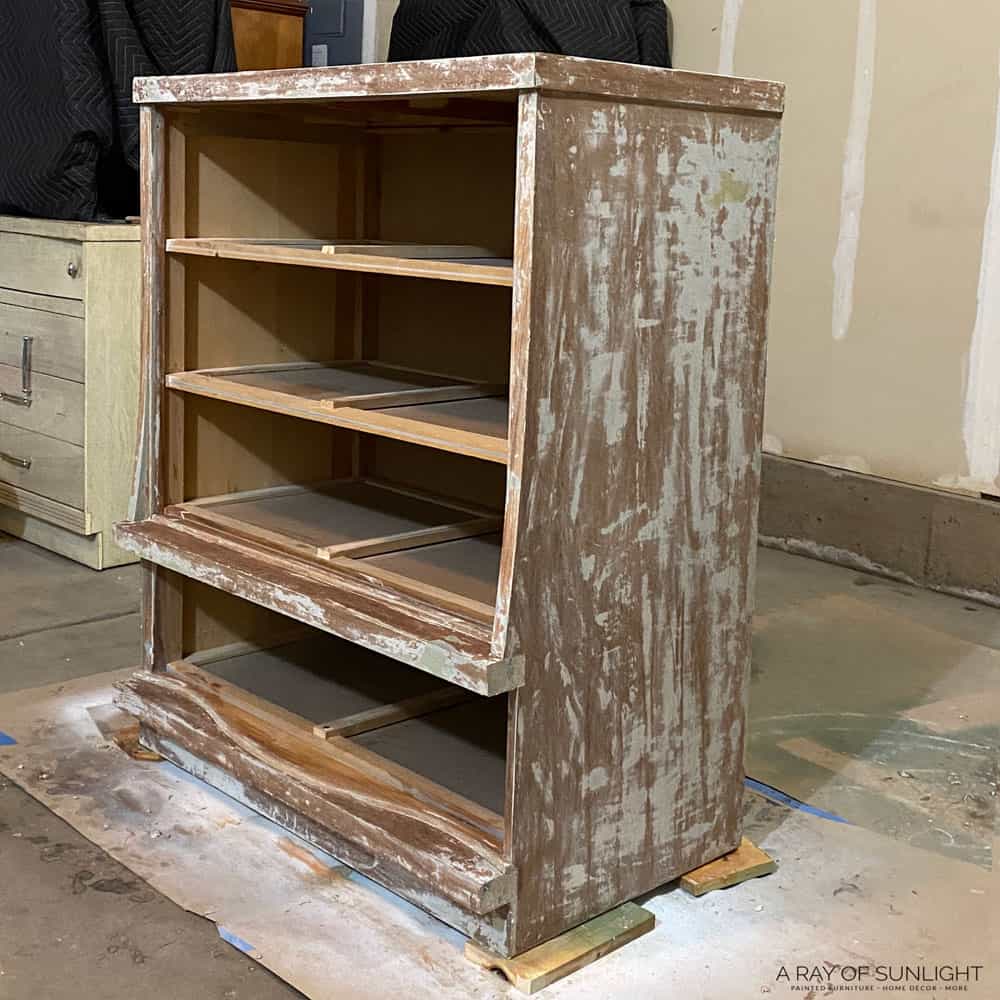
I’m not sure, but I’m going to guess that it would have taken an hour and a half to sand it all down to just the old finish.
Plus I would have had to sand it again with 150 and 220 grit to smooth it out after the rough 100 grit sanding got most of the paint off.
So in the end I think stripping off the paint was the fastest!
Learn more about the best tools for removing paint from wood here.
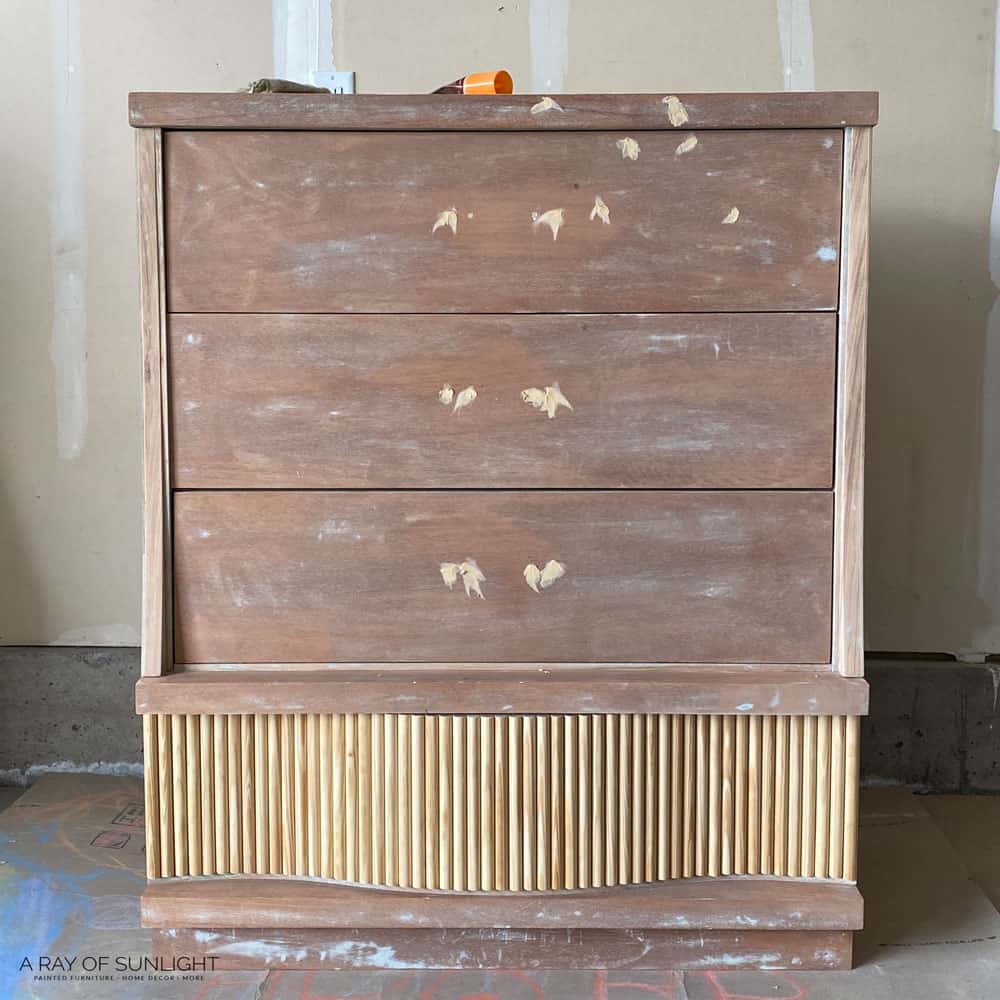
Filling Small Knicks and Dings
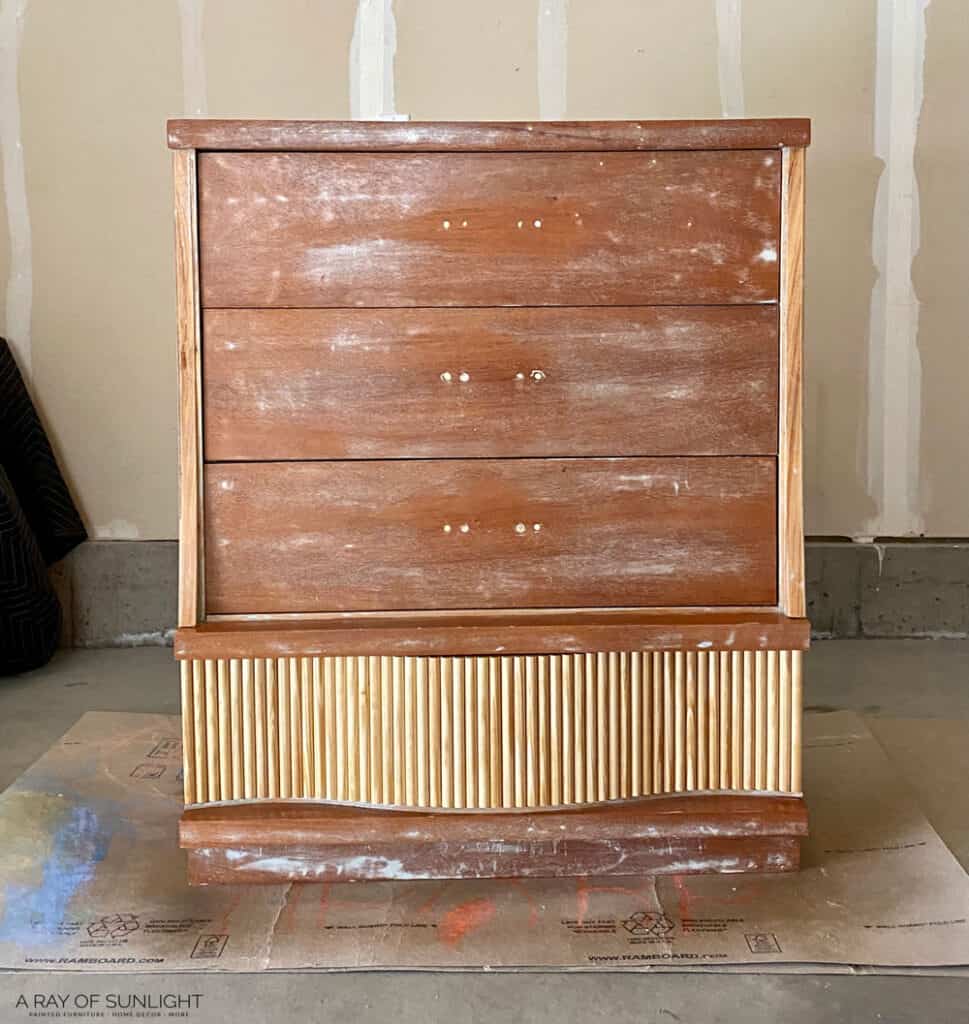
Anyway, after I was done sanding everything smooth, I filled in some small holes with wood filler and touched up the KwikWood since the stripper removed some of it.
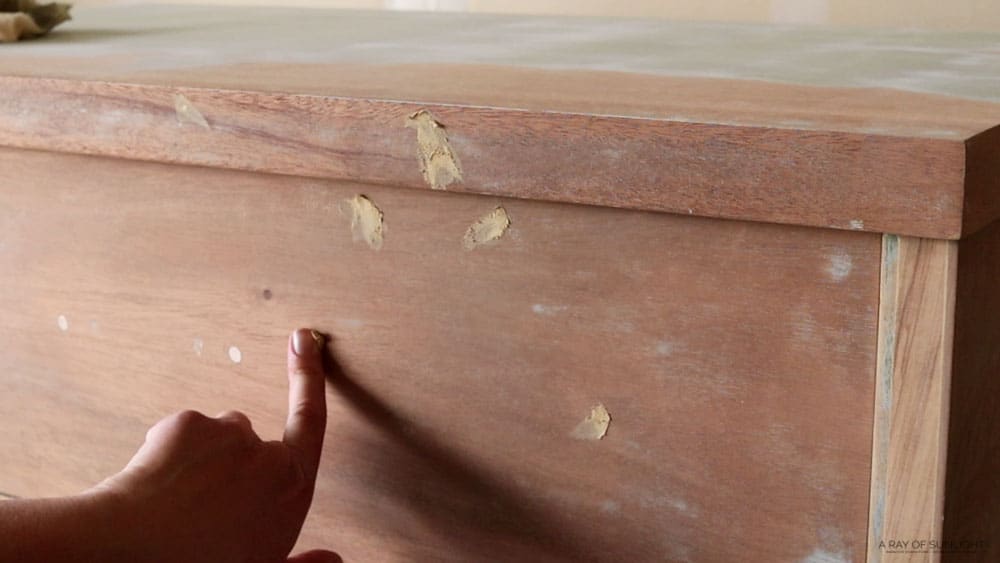
Then I sanded it all down so it was smooth with the wood once it was dry.
Adding Half Round Dowels to the Bottom Drawer
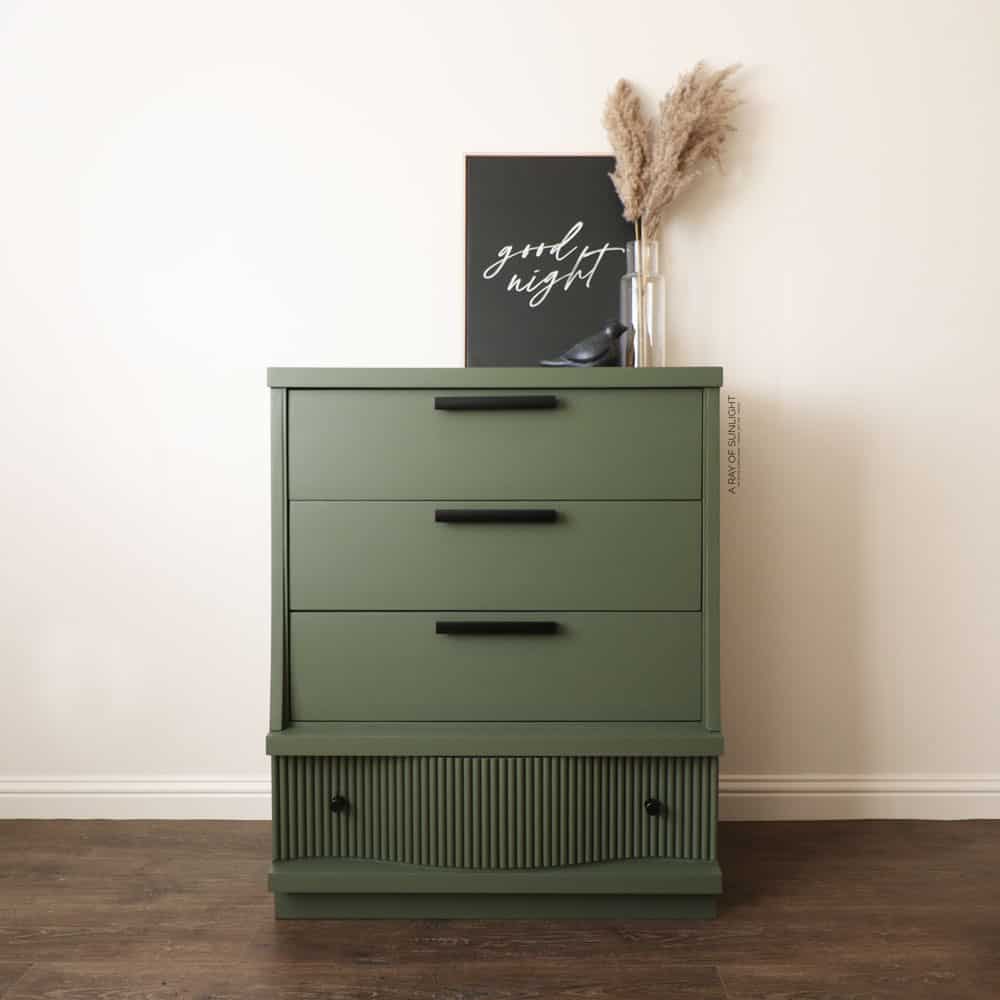
Have you seen the fluted furniture and reeded décor trend going on recently?
I’m absolutely loving the trend, including the West Elm inspired dresser that my friend Katie from Salvaged by K Scott created a few months ago.
((I’ve learned that what I created is actually a ribbed dresser and not a fluted dresser. But most people I know actually refer to it as fluted.))
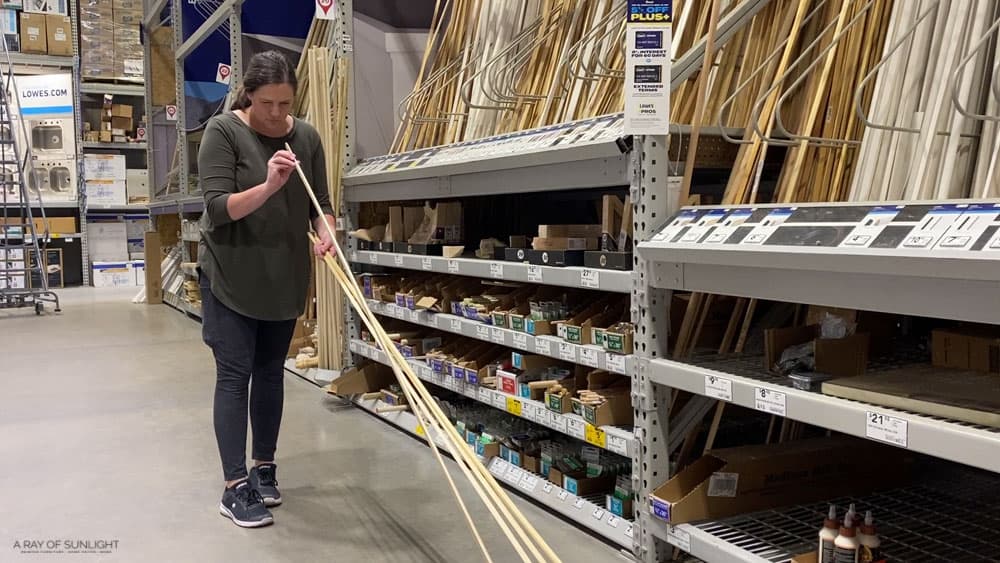
Picking Out the Half Round Dowels
So I went to our local Lowes Hardware store and picked out some half-round dowels to recreate the look in my own way.
You can also use square dowels if you want a slightly different look like we did with this DIY slatted wood dresser.
Half of them were warped like none other, so I had to be careful about the ones I picked.
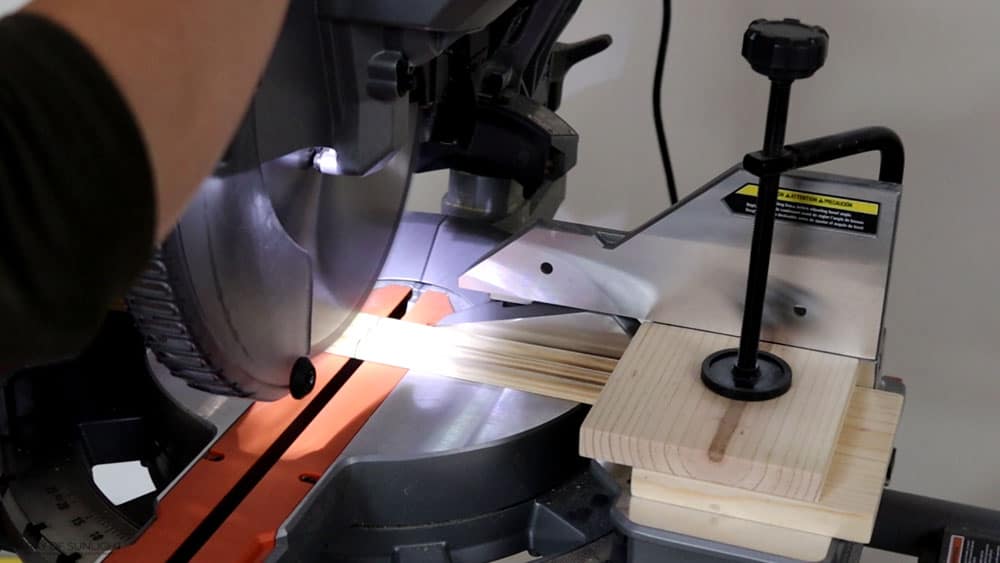
Cutting the Dowels
Then I measured the height of the drawer and cut 3 of the dowels at a time to get enough to cover the drawer front. I used a block to make sure that I cut them all the same length.
Actually, my drawer was 1/8 of an inch taller on one side, so I had to adjust the cuts a little bit from one side to the other side.
Would you like to save this?
And as I cut the pieces I laid them on the drawer to make sure they would fit right.
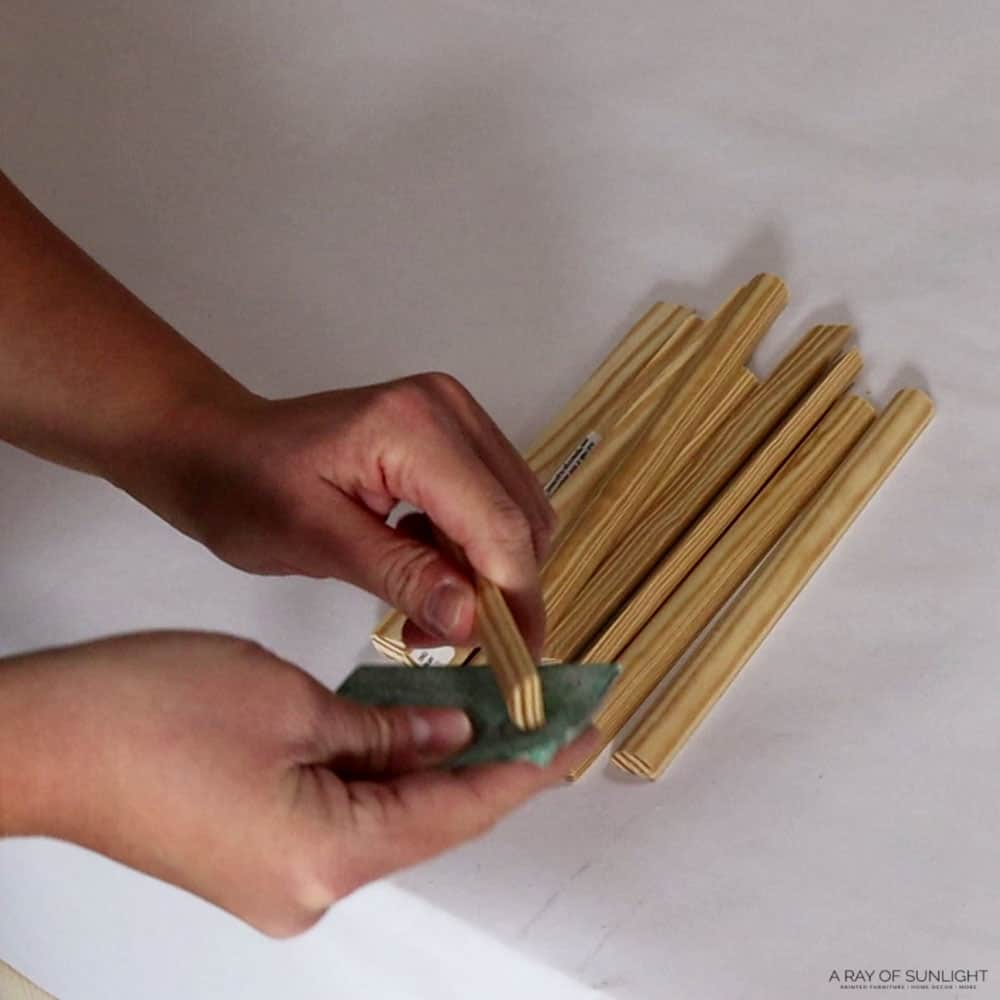
Sanding the Dowels
Then I sanded each piece with 220 grit sandpaper to smooth out the splinters and rough edges.
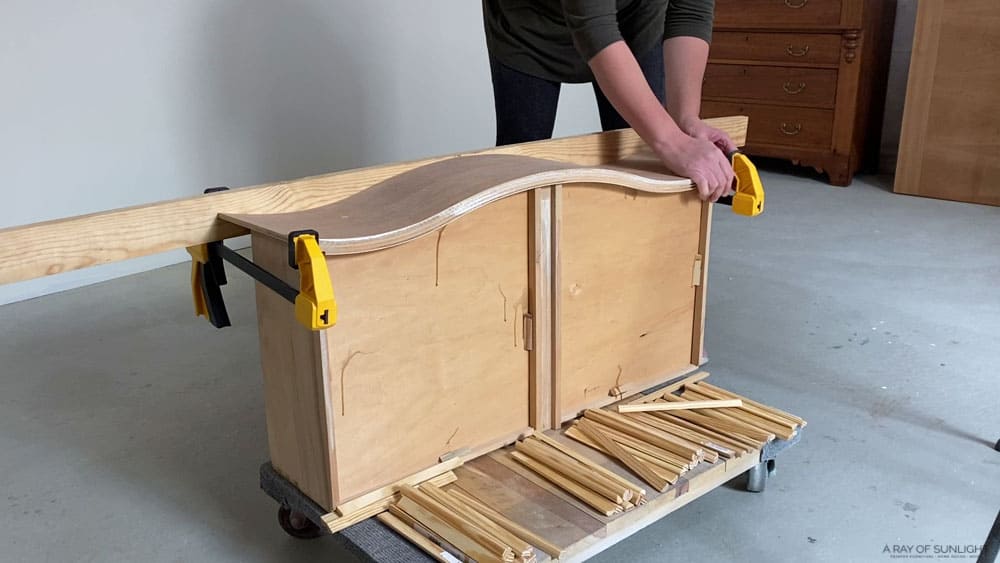
Creating a Straight Edge
When it was time to attach the dowels, I clamped a piece of wood to the top of the drawer so all of the pieces of wood would line up with the top of the drawer.
Gluing Dowels to Drawer Fronts
And then I found the middle of the drawer and started gluing the wood dowels to the drawer front with some gorilla glue. I used this awesome rubber glue brush to spread out the glue. (Yeah, it was really awesome!)
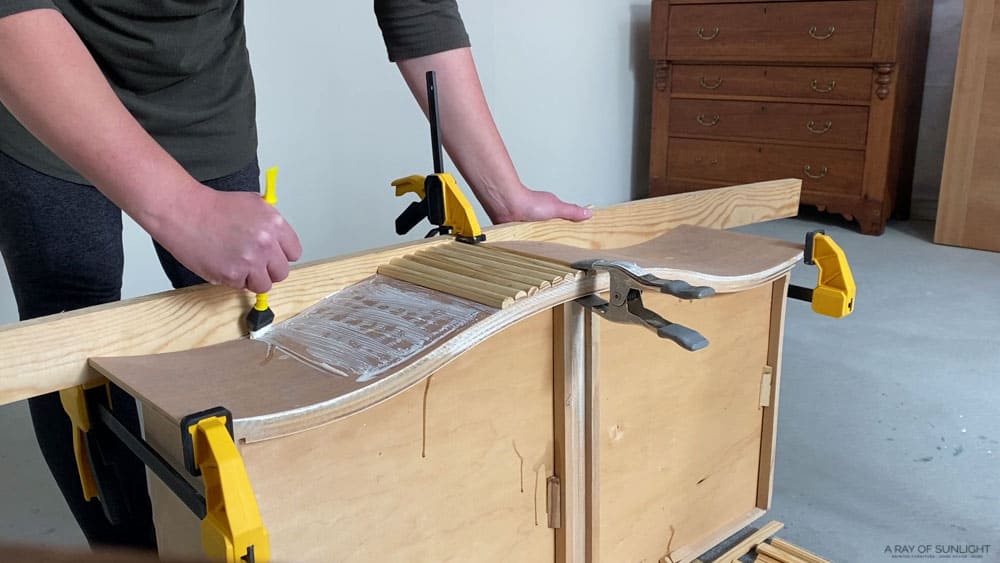
And then I put the dowels in place. It actually went faster than I thought it would, taking about an hour to cut and glue all of the pieces to this one drawer.
(Is that bad that I thought that was fast?! haha)
Then I let it dry until the next day. And then I sanded down the uneven bottom edge of the dowels with my orbital sander and 220 grit sandpaper.
I also had to sand down the edges of the drawer where the dowels overhung on each side a bit. And then I put the drawer back in place and holy moly, I loved the added texture!
We used this same technique, but used square dowels to add some trendy detail on these painted wood end tables too! For more fluted design for furniture, here are DIY fluted furniture ideas.
Get more ideas for your next DIY project with these boys dresser ideas!
Prepping and Priming Dresser For Paint
So I got ready to paint it! Get all the nitty-gritty details on how to prepare furniture for painting here!
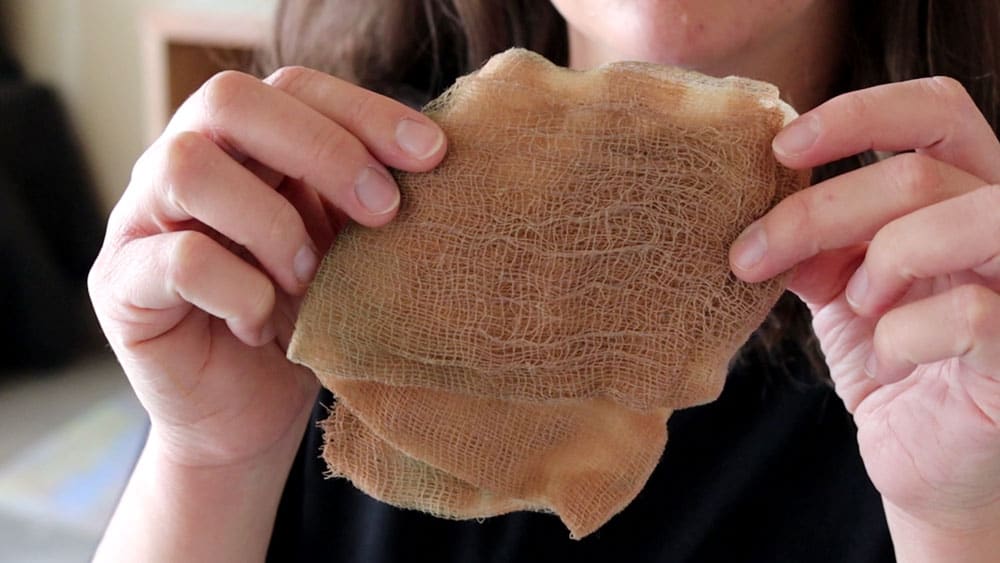
First I vacuumed everything off. And then I wiped everything down with a tack cloth to pick up the remaining dust. Look at how much dust the tack cloth still picked up!
And then I sprayed 2 coats of clear shellac on everything.
This stuff is my go-to primer to block bleed-through stains from coming through the paint, and with almost raw wood, I definitely was going to need help from a really good stain blocker.
Read this post to learn more about how to stop stains from coming through paint.
I like to let the shellac dry at least overnight to help it really block stains, so I didn’t get painting until the next morning. Check out the best primers to stop tannin bleed here.
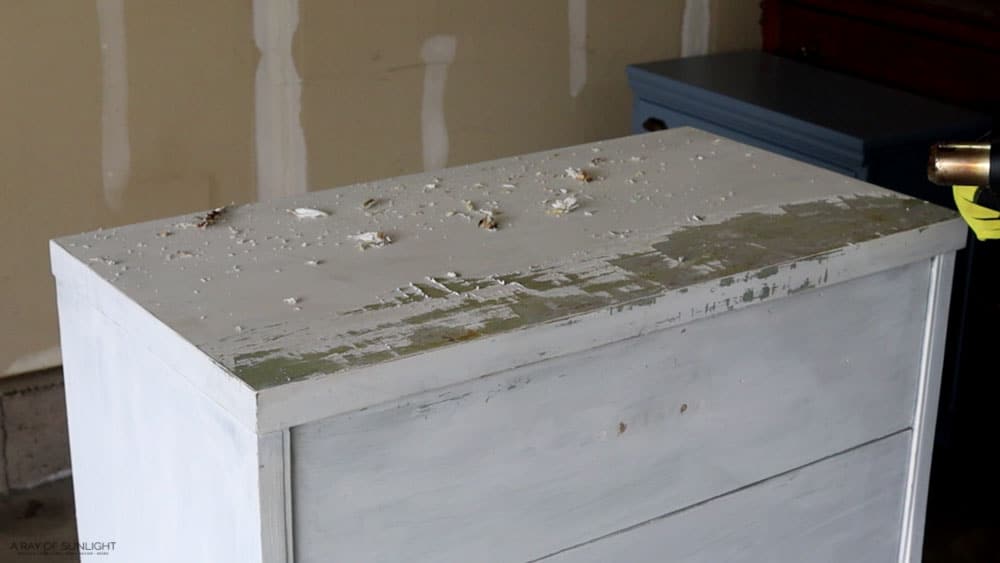
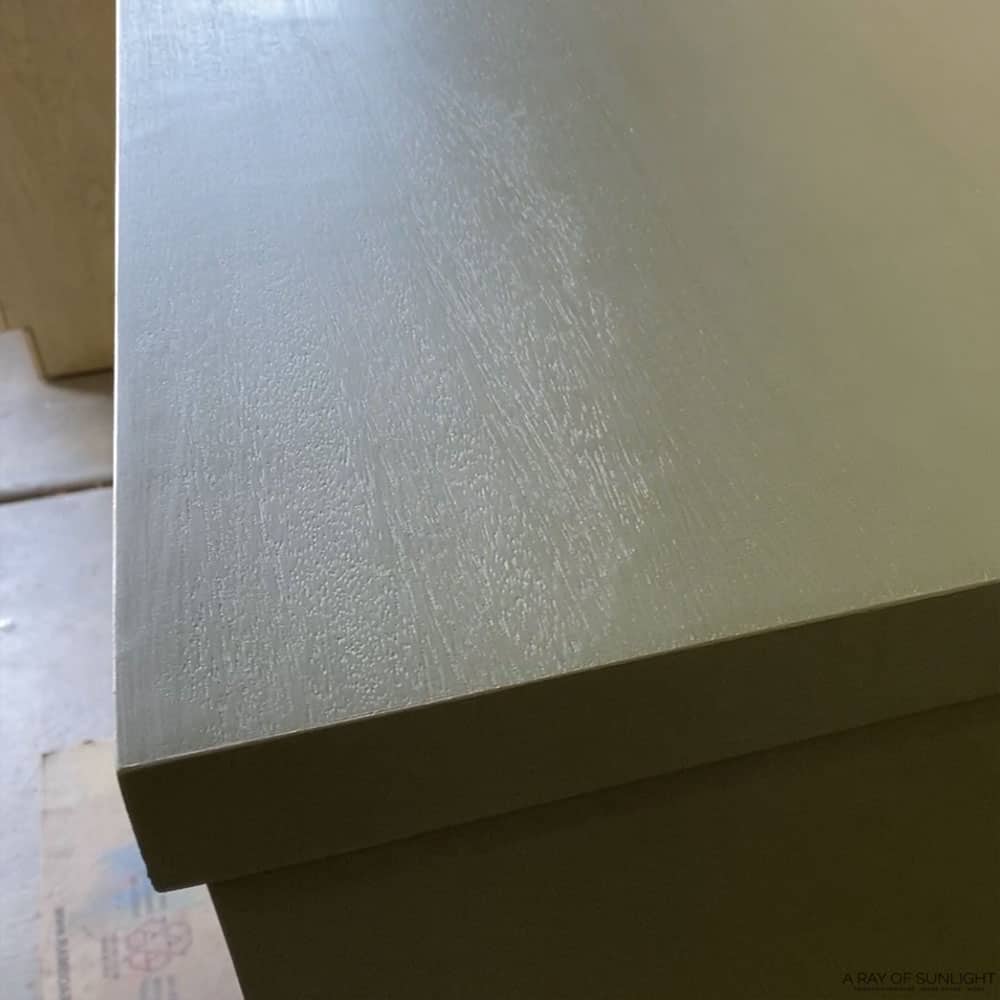
**See how the top of the dresser has most of the old finish left on it, but some of it was sanded all the way off?
Yeah, I should have done something to that before I started painting. I’ll show you what happened in a bit!
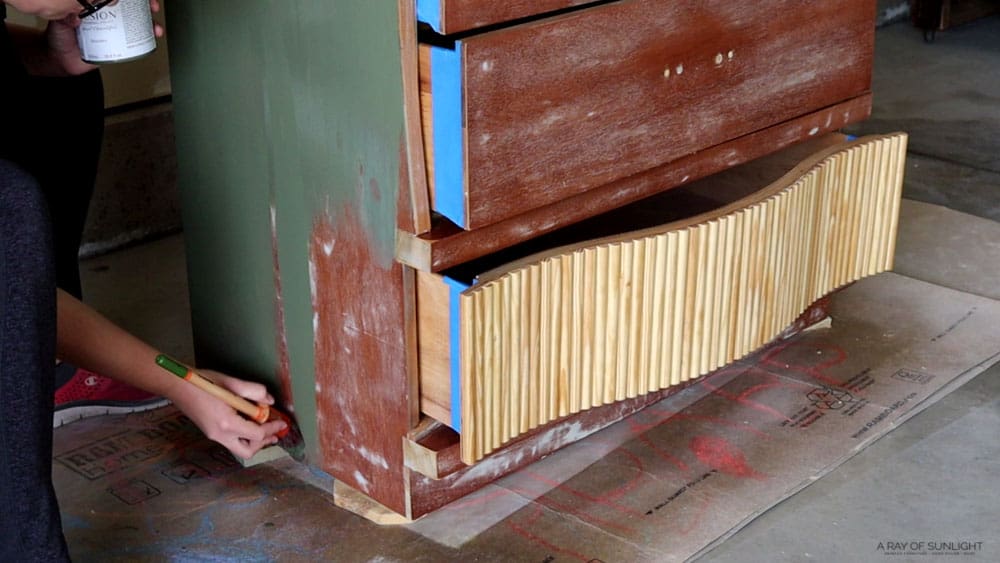
Painting Dresser with Fusion Mineral Paint
I used Fusion Mineral Paint’s color Bayberry and brushed it on with the amazing Staalmeester paintbrush.
( I received the Fusion Mineral Paint and Staalmeester Paintbrush from Melanie at Lost and Found Decor. They are a family-owned business that has a great assortment of paint supplies for your projects.)
I didn’t thin the paint out at all, but I did spray a mist of water on the dresser before brushing on the paint to minimize brush marks. Here’s more about how to paint furniture without brush marks.

The awesome thing about this paint is that it doesn’t require a topcoat to be super durable. I’m pretty picky when it comes to making sure paint is durable, but this stuff is good!
It dries to a matte finish, and this time I decided that I was happy with the matte look, so I didn’t bother top coating it.
((Update: Yeah, I ended up top coating it because the matte finish gets marked up really easily.)
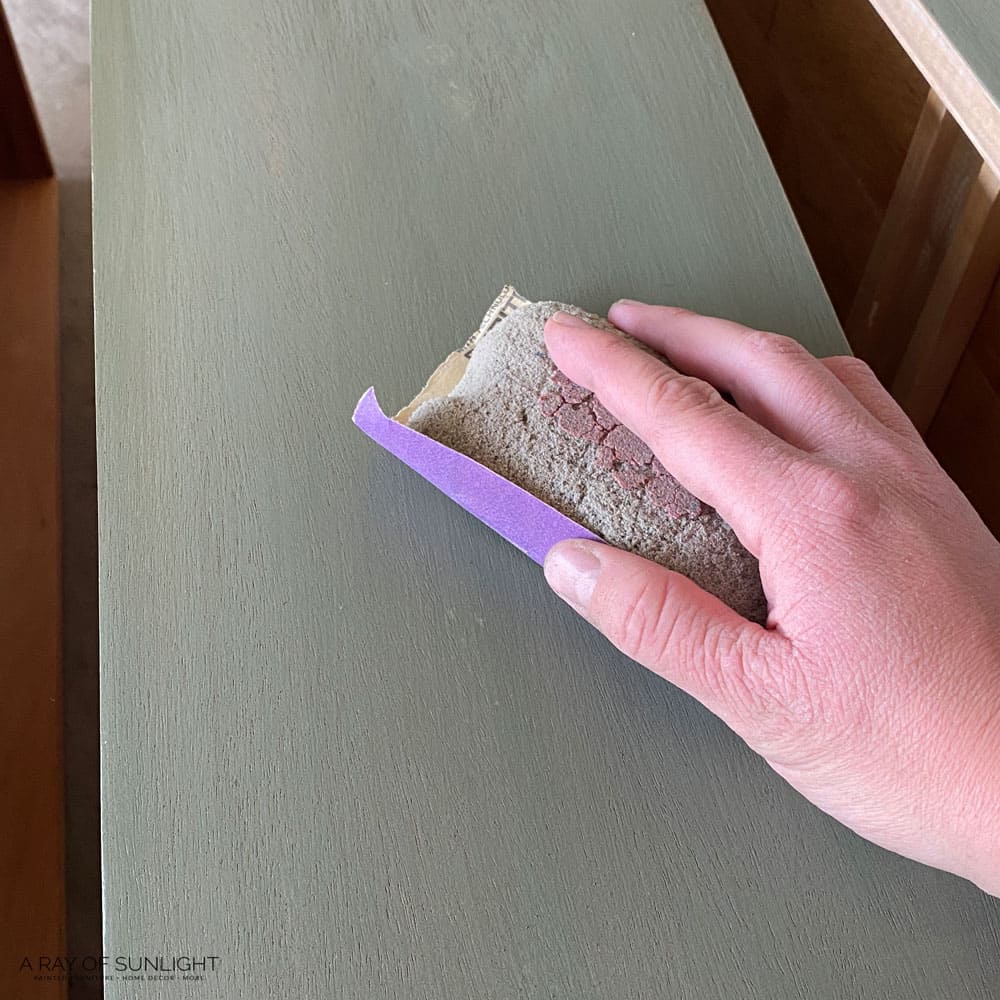
In between coats I sanded it smooth with 220 grit sandpaper.
Check out this Fusion Mineral Paint review for more of my experience and honest thoughts on this paint. We also feature Fusion Mineral Paint as one of the best mineral paint for furniture here.
Fixing Dresser Top and Filling in Wood Grain
And then after the 2nd coat of paint was dry, I noticed that in the right lighting, I could see a line where the old finish hadn’t been completely sanded off the top.
So, I brushed on some 123 grey tinted primer all over the top of the dresser to give it better coverage.
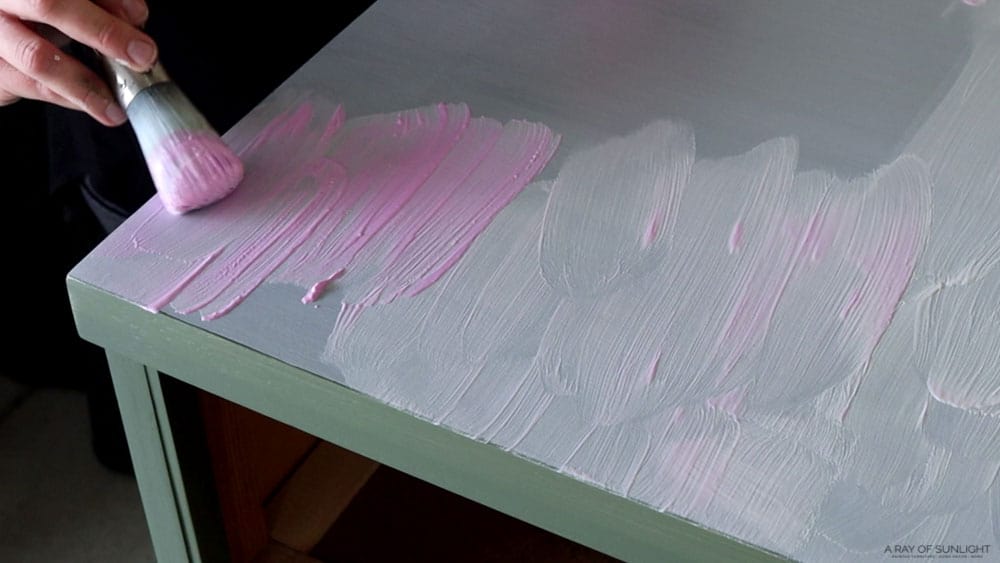
But as that was drying, I thought I should also make sure that the wood grain was filled in to help with the difference. Learn more about how to hide wood grain when painting here!
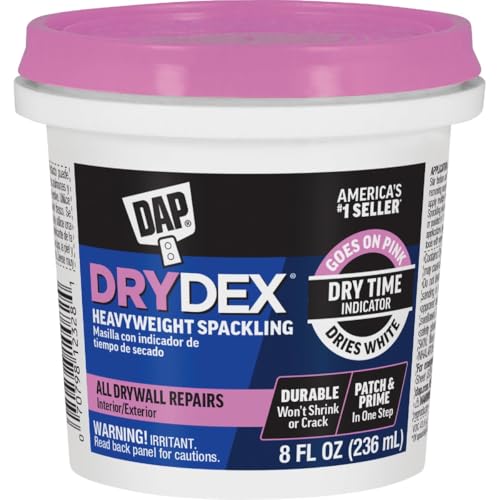
So, after the primer was dry, I thinned out some spackling and brushed the spackling all over the top of the dresser.
Thinning it out makes it easy to brush on, and it makes it really easy to get it into the grain of the wood. This is a genius tip that I learned from Dani at JustPaintItByDani.
After the spackling dried, I sanded it smooth with 220 grit sandpaper. And then I cleaned off all of the dust. And sprayed more clear shellac over it.
I’ve learned in the past that the spackling in the grain can create bleed-through issues, so I didn’t want to take any chances.

The next day I painted the top again with a couple of more coats of paint. The paint dried in about an hour or so, so it was a pretty quick process!


Adding New Dresser Hardware
Last, but not least, I finished it off with new hardware.
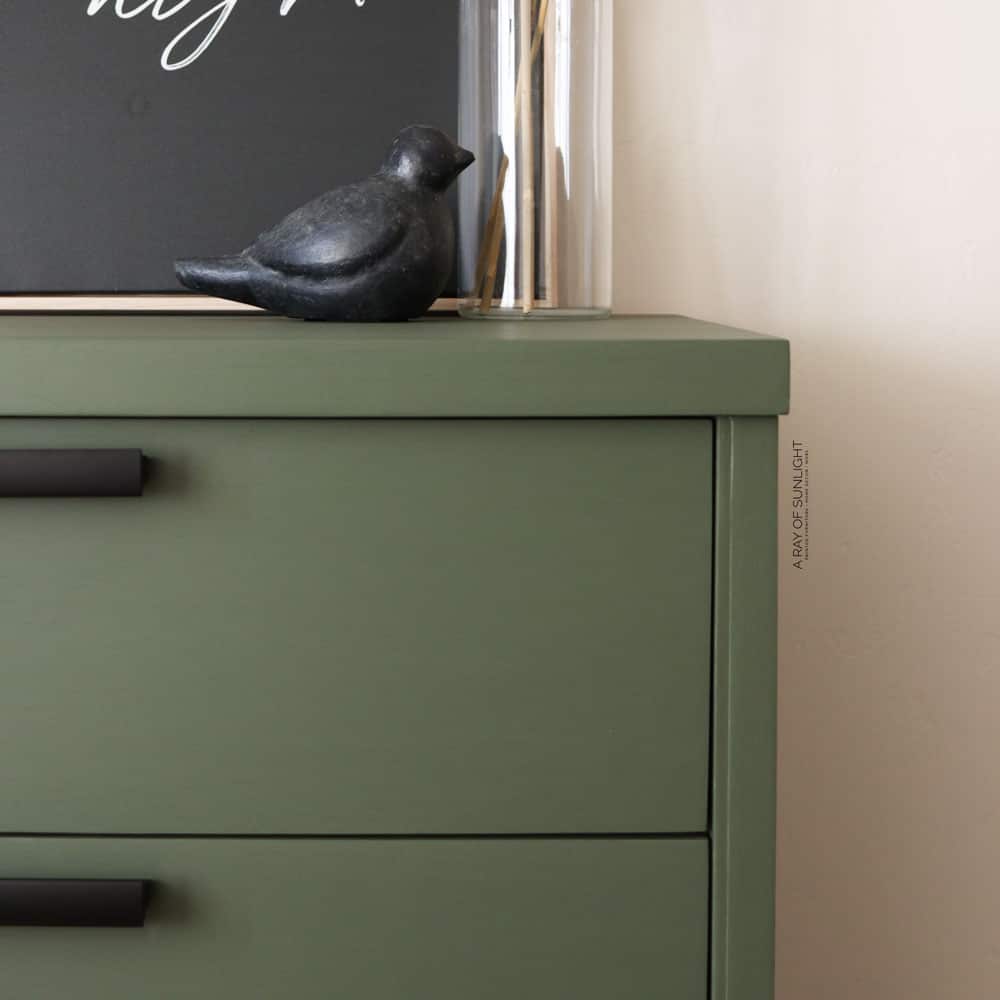
I noticed on West Elm’s site that the hardware on some of their dressers was attached closer to the top of the drawers, and I really really love that look!
So I measured, drilled new holes for the hardware, and attached the hardware up towards the top and middle of the 3 top drawers. And then I added knobs to the bottom drawer. Read this post to learn more about how to change hardware on a dresser.
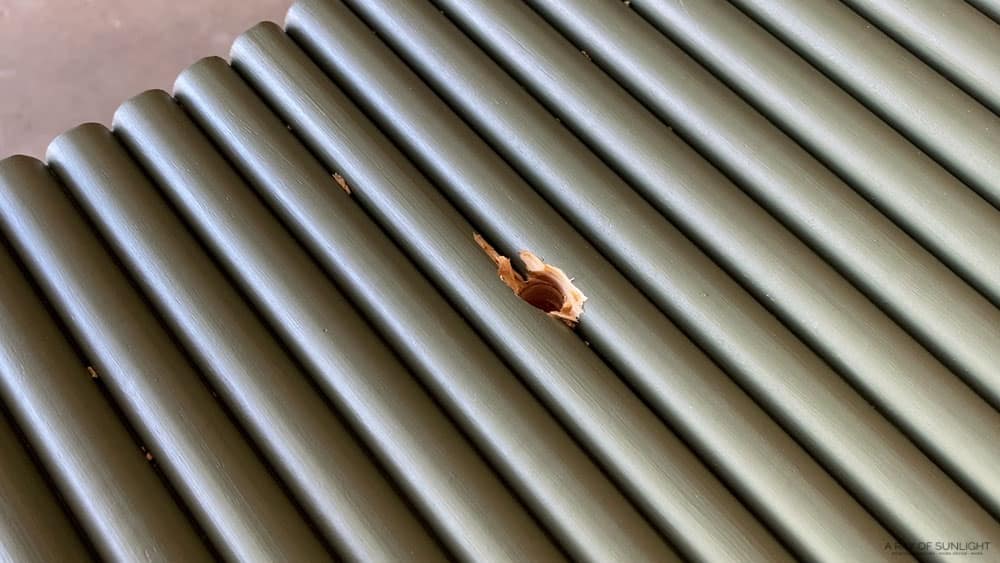
Now I know why most people opt for hardware that goes on the edge instead of putting it on the textured drawers. When I drilled into the dowels, the wood split really badly.
So before I could attach the new knobs, I had to fill in the damage and paint the drawer again.
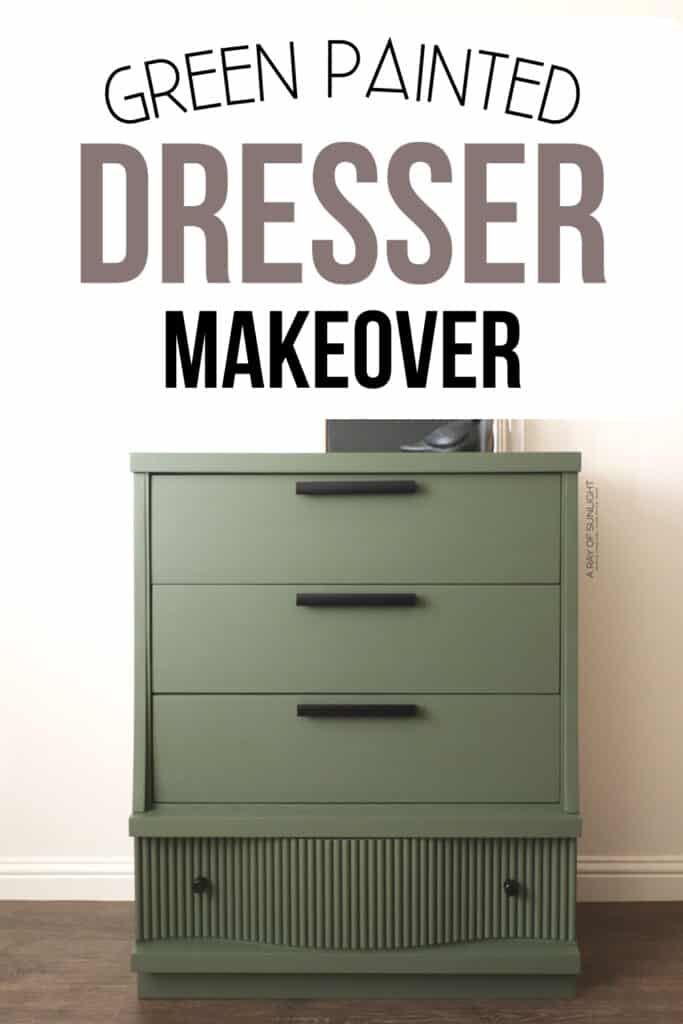
And here’s what it looks like now! If you want to add more green pieces to your home, here’s our list of green painted dresser ideas, and for more modern styles, these modern dresser ideas are for you. Get more ideas for your next DIY project with these hand painted dresser ideas and boho painted furniture ideas.
More Before and After Makeovers
See All >
Click any of these “before” photos below to view the “after” of that makeover.


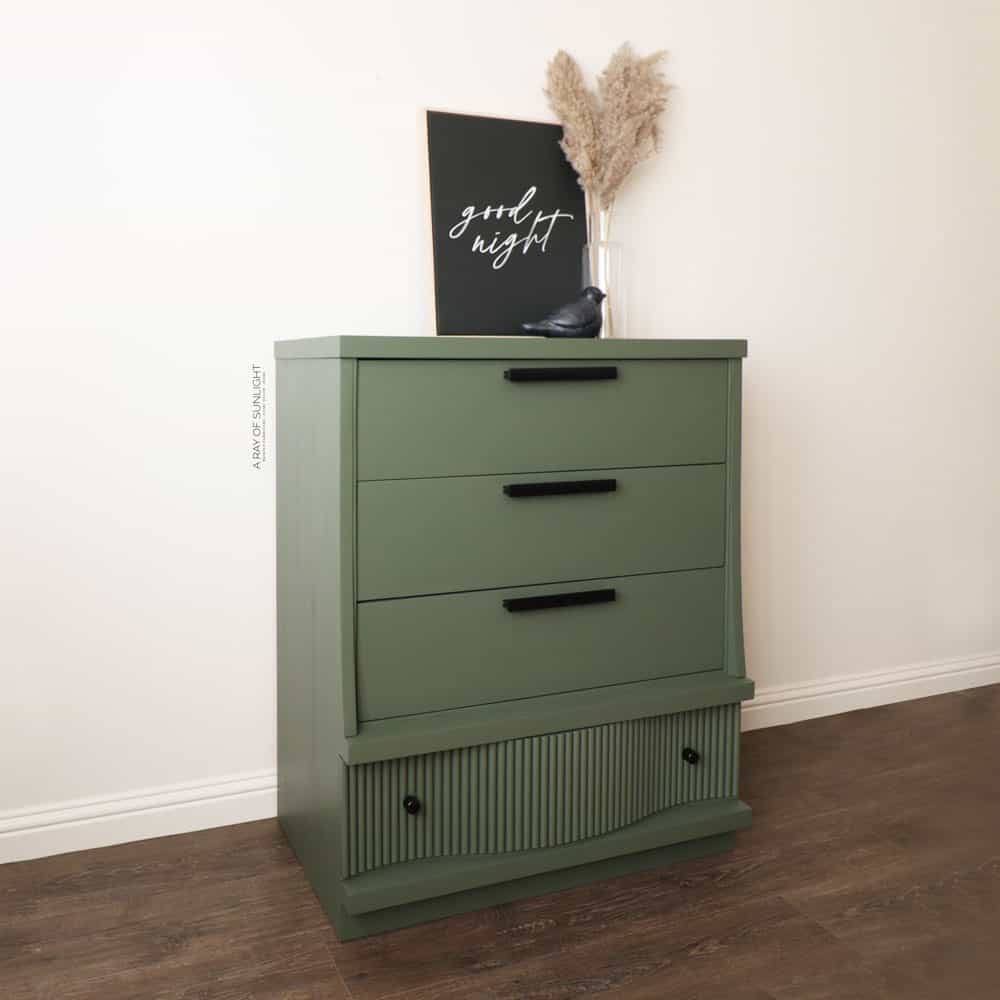
I don’t know about you, but I LOVE the detail on the bottom drawer! I absolutely love this Bayberry color, and I love the offset hardware. The extra reeded detail cost about $25 extra for the one drawer.
And since I loved the shape of this dresser, and how well it was made, it was totally worth it to me to spend some time stripping off the old paint so I knew that the new paint could stick really well.


DIY Fluted Dresser Makeover
Give your furniture a fresh and modern look with some paint and wooden half dowels. Here are the steps to recreate this DIY Fluted Dresser.
Materials
Tools
Instructions
- For a broken drawer track, fix it by using some scrap wood, cutting it to size, and gluing it into place. Add some weight on top of the wood to help it stay in place while the glue dried for 24 hours.
- Then test for lead paint with a lead paint test kit.
- Remove the old hardware and fill the old hardware holes with KwikWood.
- Remove the old paint with Citristrip. Brush the stripper all over the dresser and put plastic wrap over the stripper to keep it from drying out. Sand the dresser down to the old finish after.
- Fill in any knicks and dings with wood filler. Then sand everything down smooth once the filler dries.
- Now, cut up the wooden dowels to the height of the drawer front. Sand each piece with sandpaper to smooth out the splinters and edges.
- Clamp a piece of wood to the top of the drawer so all of the pieces of dowels would line up. Start from the middle of the drawer front and glue the wooden dowels. Let dry until the next day then sand down the uneven bottom edge of the dowels and the edges of the drawer where the dowels overhung on each side a bit.
- Vacuum and wipe the dresser to remove all dust. Then prime the dresser with 2 coats of clear shellac. Let the shellac dry at least overnight.
- Paint a couple of coats onto the dresser. Spray a mist of water before brushing on the paint to minimize brush marks. Sand the dresser smooth between coats.
- Fill in any visible wood grain with some spackling and sand it smooth after it dries. Spray some more clear shellac, and apply a few more coats of paint.
- Drill new holes for the hardware and add them to the dresser.
Recommended Products
As an Amazon Associate and member of other affiliate programs, I earn from qualifying purchases.


More Green Painted Furniture Makeovers
- Dark Green Dresser Makeover
- Green Painted Modern Dresser
- DIY Emerald Green Bedside Table
- Olive Green Painted Furniture
- Hexagon End Table Makeover
Follow us on YouTube to get more tips for painting furniture. Or share your project with us on our Facebook Group and be part of our community. See you there!

I just love how you made over this dresser. Even green paint is beautiful. “ greens not my fav”
But hey, it works.
Great Choices !!!
Such a pretty green. This shade could fit in almost everywhere.
But…. the fluting, and offset hardware steal the show ! Absolutely beautiful.
I really appreciate how detailed you were in describing the fluting process.
( I’m definitly a novice when woodworking – but I love trying )
Thanks for sharing 🙂
Good morning: I already follow you and enjoy your videos that you email me. But: I had your selling price guide before and printed it and now it’s no where to be found. Would you please send me your guide.
I am new at refinishing and you are teaching me so much. You have know idea how much I appreciate your straight forward tutorial. I would hope to sell some pieces, if not, I enjoy the creativity it brings.
Thank you again.
Aww we appreciate all the kind words and we’re so glad to know you’ve learned so much through our tutorials. Here is our Pricing Guide for you! Best of luck to you!
So far my favorite!
Ahh thank you so much! That makes me so happy to hear!
Great post! I love your very detailed description of the process. I especially appreciate your sharing the missteps and recovery. The finished product is amazing! I’m a big fan of the soft greens, too.
Aww thank you so much! I’m so glad you enjoyed the process. I try to share even the things that go wrong so we can all learn together!