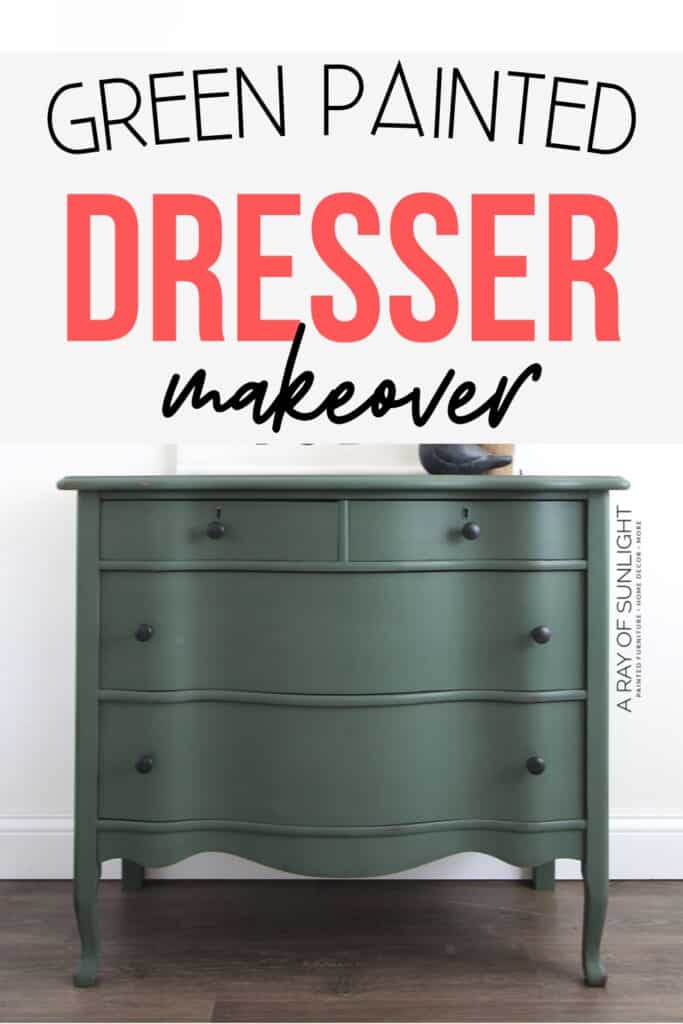
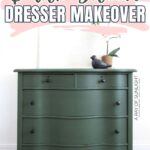
Dark Green Dresser Makeover


Are you looking for a bold piece of furniture to elevate your bedroom or living room? Check out this before and after dark green dresser makeover with a vintage dresser and some green chalk paint! Green is a popular color choice when it comes to painted furniture, and this transformation will show you why.
This is one of the best green painted furniture ideas you can try for your own home. If you’ve also been hesitant to use bold colors in your home decor, this dark green dresser might just change your mind.
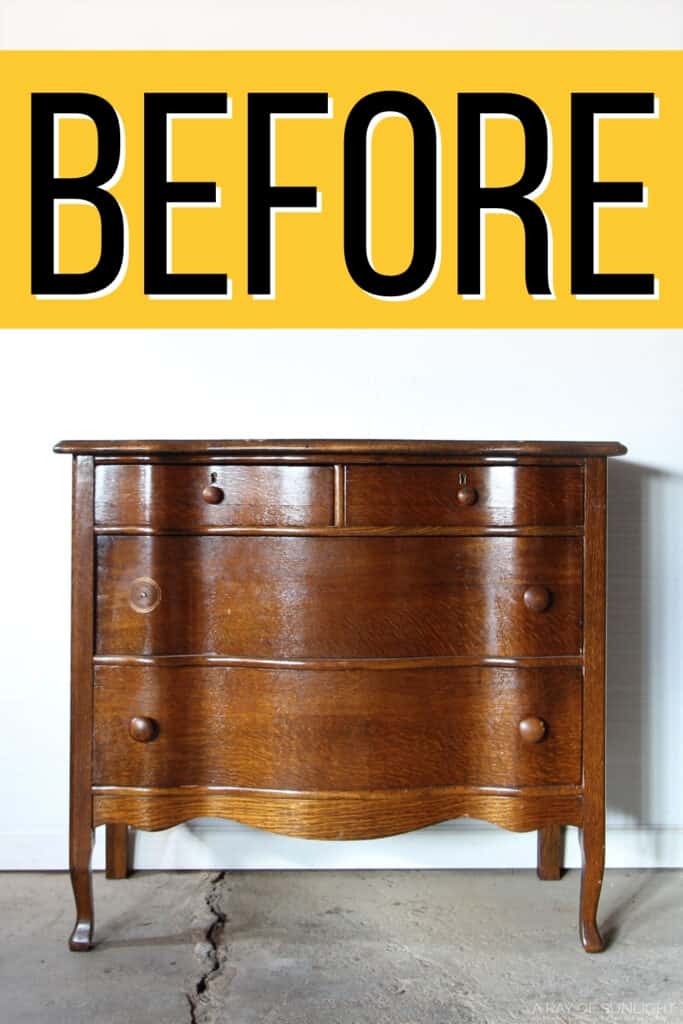
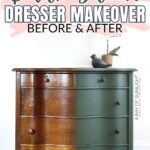
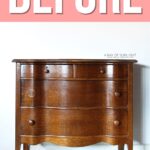
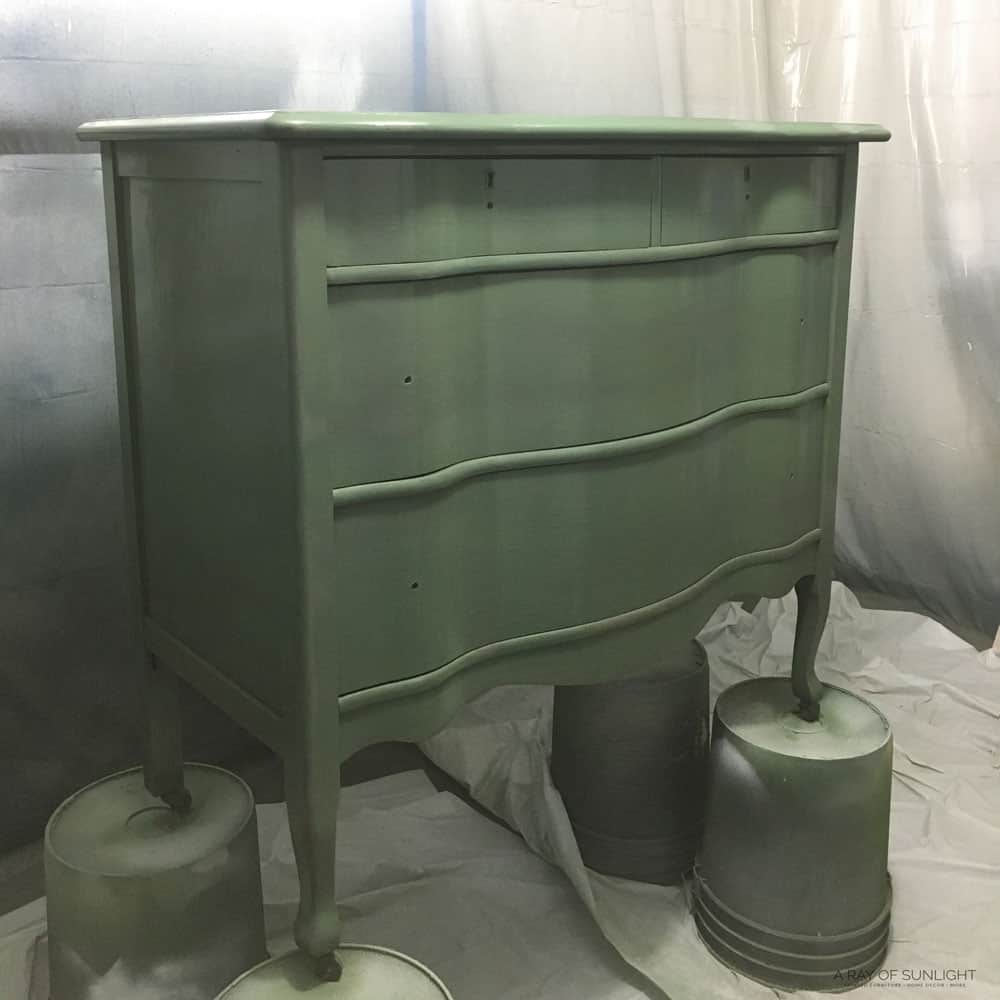
Here’s what the dresser looked like before! I just love these old curvy dressers! They are small enough to fit in almost any room, and the curves make this piece stand out!

The beauty of painting furniture is that you can completely transform the look and feel of a piece with just a few coats of paint.
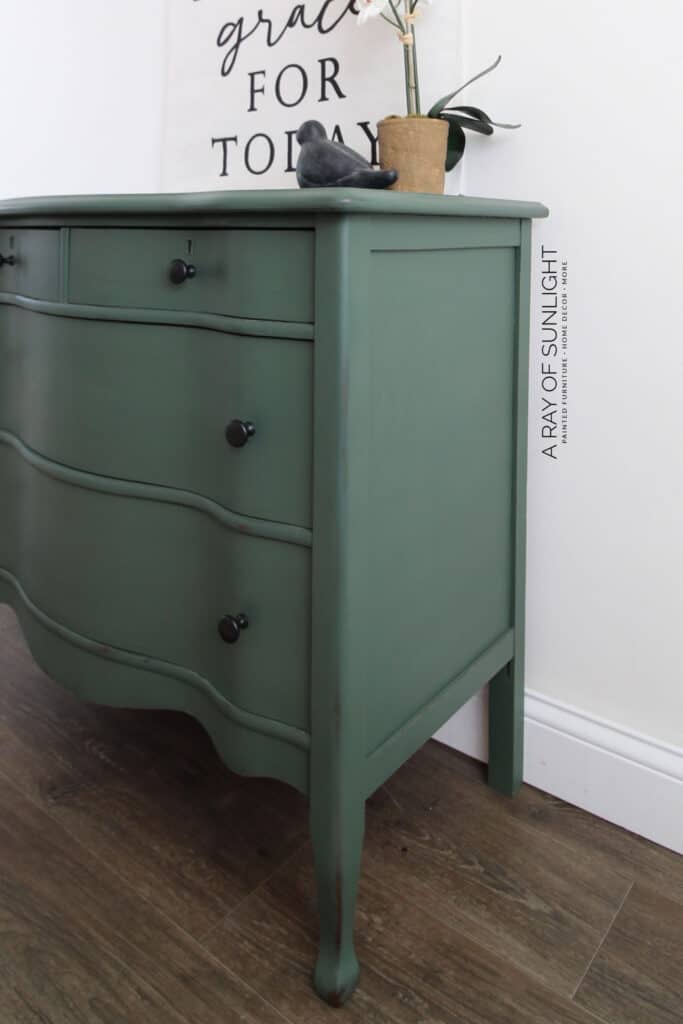
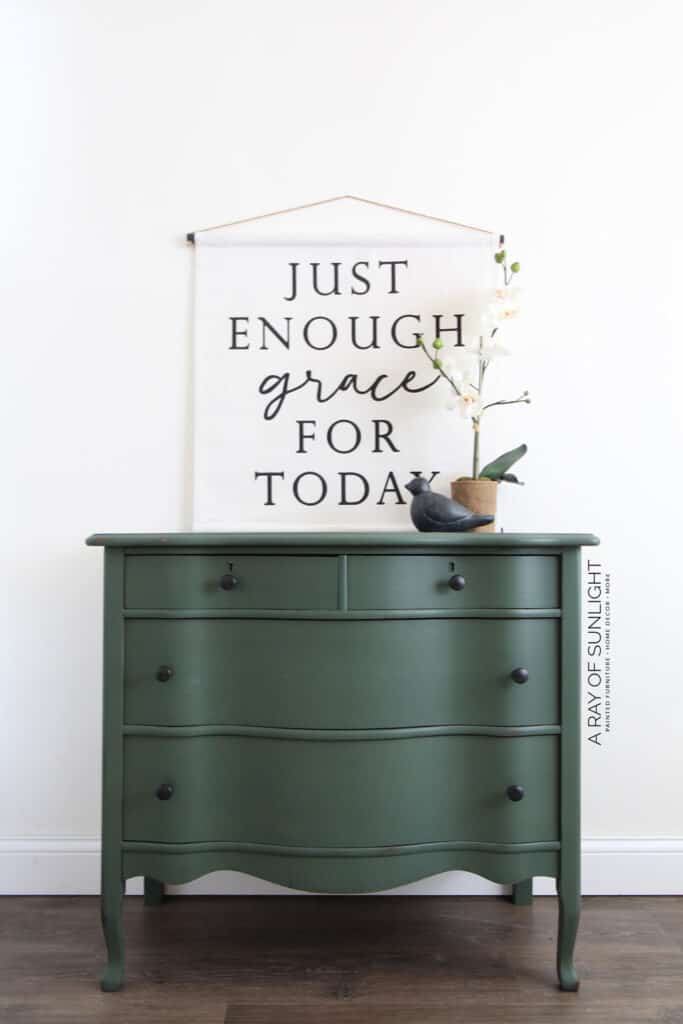
And with this one, we’re going bold with a dark green color. This shade of green is rich, deep, and sophisticated, and it adds a touch of drama to any room. Here’s the step-by-step process of how we painted this dresser with green chalk paint.

Supplies Used For Dark Green Dresser Makeover
As an Amazon Associate, I earn from qualifying purchases. I also may earn from other qualifying purchases with other companies or get free product to review and use. All opinions are my own.
- Krud Kutter Cleaner Degreaser
- 220 Grit Sandpaper
- Shop Vac with Hose and Brush Attachment
- Tack Cloth
- Clear Shellac
- Hollow Hill Chalk Paint
- Fuji Q4 Paint Sprayer
- Paint Filters
- Respirator
- The Best Waterbased Topcoat
- New Hardware
Grab our list of the 10 must have painting furniture supplies too!
Prepping Dresser For Paint
First and foremost, prepping for paint is super important to make a paint job on any piece of furniture look good, but also last a long time.
I know it’s so easy to want to skip right to the paint, but man oh man, whenever I have skipped the prep, I always regretted it! For more details, visit our post on how to prepare furniture for paint.
Cleaning and Sanding Dresser
Dirt, grime, oil, and grease don’t get along with any type of paint. So if you want the paint to really stick, you’ll want to remove them.
A good cleaner like Krud Kutter can easily cut through grease and grime and leave you with a nice clean surface.
I personally like to spray Krud Kutter on all over and wipe off all of the grime with a damp old rag. And then I like to wipe the whole piece down again with a clean rag to make sure I got everything off.
Get the nitty-gritty details of how to clean furniture before painting here!
You might be worried about bacteria, germs, and musty odors lurking inside your furniture, check out how to disinfect wood dresser here.
Scuff sanding is just lightly sanding the surface to create a surface that the paint can really grab onto. Seriously, scuff sanding can be a really quick process with 220 grit sandpaper to lightly scuff up the old finish on your furniture.
It’s especially important on slick and shiny furniture, but every single piece of furniture can benefit from a quick scuff sanding. Learn more about why you need to sand before painting furniture here.
You don’t want to sand through the old finish, but you do want to lightly sand it, enough to remove the shine.
And then the easiest way to remove the dust that you created from scuff sanding is with a shop vac with a hose and brush. The vacuum sucks up most of the dust in all the details.
And then I use a tack cloth to wipe off the rest of the dust that gets left behind.
You can also use a damp lint-free rag to wipe up any remaining dust, but it definitely doesn’t pick up the leftover dust like a tack cloth does.
Making Repairs to Dresser
Most old furniture has some sort of repair that needs to be addressed.
I might be a little weird, but making repairs to furniture is one of my favorite things to do! This dresser in particular needed some veneer fixed before we could move on to the next step.
Here’s a great resource I have put together that shares exactly how to fix damaged wood furniture.
Get Our Secrets!
Grab this super convenient How to Repair Furniture Ebook with all of our secrets on how to repair furniture for only $14.
You can print it out and have instant access whenever you come across damaged furniture, and know exactly how to fix it!
Click on the picture of the book to purchase!

Priming Before Painting Dresser
Even though we’re using chalk paint on this dresser, I still like to prime it before painting. Not necessarily to make the paint stick better, though the primer does help. The primer that I use on almost every single makeover is a primer that will stop stains from coming through paint.
Bleed-through shows up in your paint job (sometimes not even until you topcoat the paint!) with splotchy red, brown, or yellow stains.
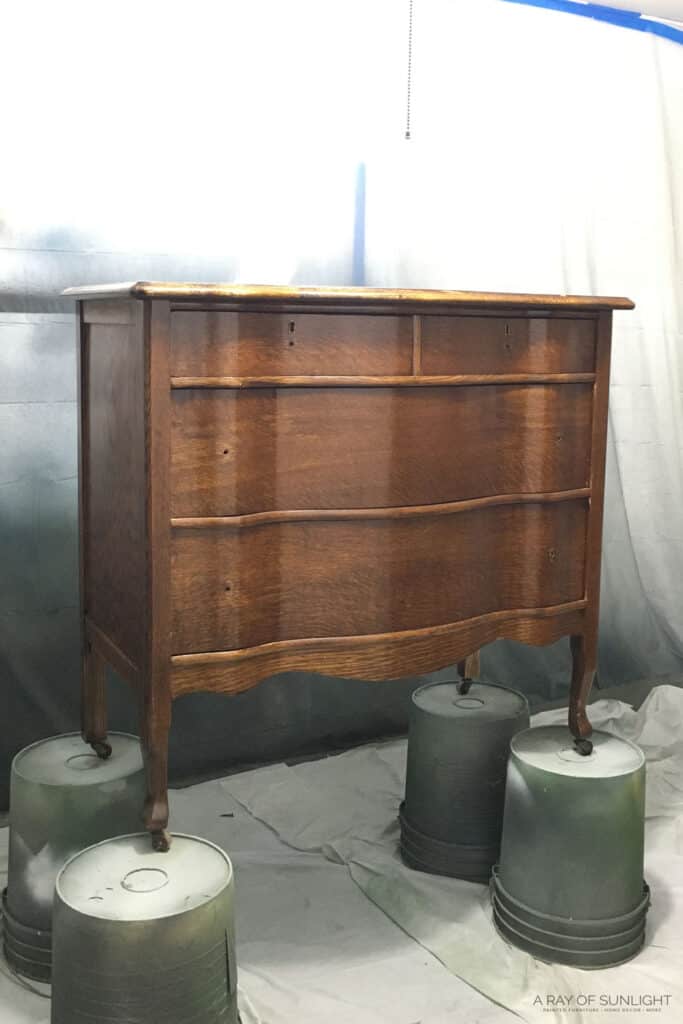
Anyway, the primer that I use is clear shellac. It’s actually not advertised as a primer, and it’s usually used as a top coat, but it’s really an amazing primer to block bleed-through issues!
So, I sprayed on 2 coats of the clear shellac primer and then let it dry overnight before I painted over it. Read more about the best primers for painting furniture here!
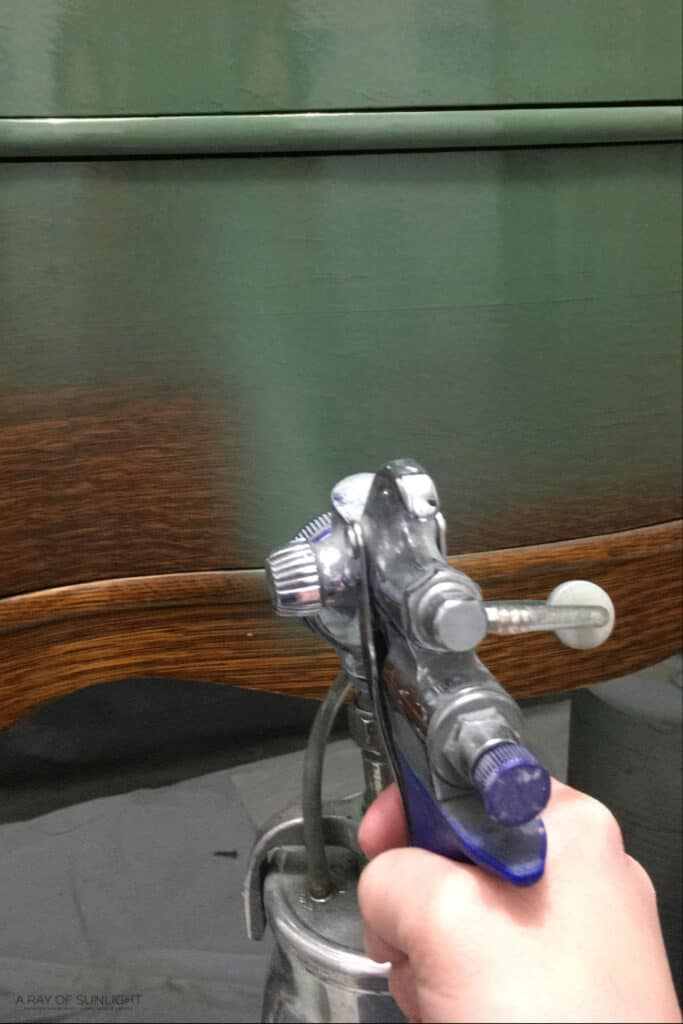
Painting Dresser Dark Green
The next day I painted the dresser with 3 coats of this deep green chalk by Country Chic Paint paint called Hollow Hill. Check out my list of the best green chalk paint for furniture here. Check out my honest and detailed Country Chic Paint review here.
Would you like to save this?
I personally love to use a paint sprayer to paint my furniture. This specific paint sprayer that I used on this dresser though is the Fuji Q4 sprayer. Here’s how to use the Fuji Q4 paint sprayer and my honest review and thoughts on the Fuji Q4 paint sprayer. (Spoiler alert: I’m in love with it!)
Check out more of the best HVLP paint sprayers for furniture in this post.
I also distressed the chalk paint a little bit after the last coat of paint. If you love the distressing, here are 6 ways of distressing furniture.
Topcoating Dark Green Dresser
Then I put my very favorite topcoat in my paint sprayer and sprayed 3 coats of it onto the dresser, letting the topcoat dry in between coats. If you’re curious whether polycrylic works well as a topcoat for chalk paint, read our post on can you put polycrylic over chalk paint?
Learn all about the different types of topcoats for painting furniture and the different methods to apply them here!
One of my very favorite ways to topcoat furniture is by spraying it on with a paint sprayer. Here are my best tips for how to spray polyurethane.
Replacing Dresser Hardware
After the topcoat was dry, I replaced the old knobs with these dark round knobs. Learn more about how to change hardware on a dresser in this post. Now it’s ready to enjoy!
I make extra sure not to put anything on our painted furniture for a day or two, and then I am super extra careful with it for a month until the paint and topcoat have a chance to completely cure.
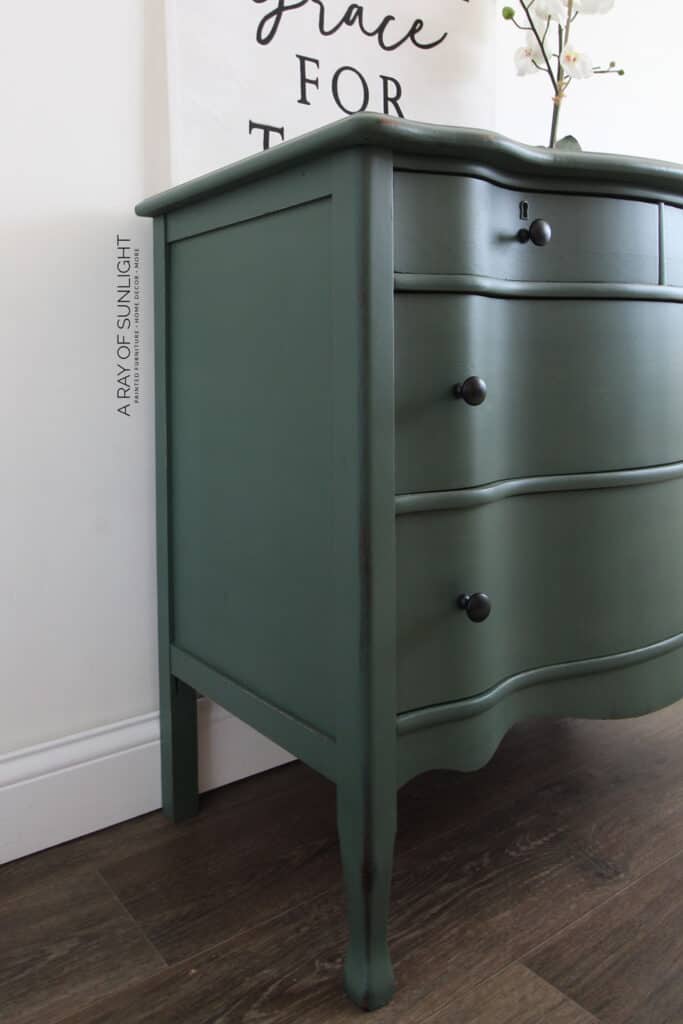
Here’s what the dresser looks like now! You can check out more green chalk painted furniture and green painted dresser ideas and inspiration here. For antique pieces, get inspired by these painted antique dresser ideas and chalk painted antique furniture.
More Before and After Makeovers
See All >
Click any of these “before” photos below to view the “after” of that makeover.


Update your room pieces with these small bedroom dresser ideas and chalk painted bedroom furniture. For other chalk paint inspiration, check out these chalk paint nightstand ideas.
Can I customize the shade of dark green paint for my dresser?
Yes, absolutely! Most paint stores or brands offer a variety of shades in a specific color, including dark green.
But if you can’t find the perfect shade you want for your dresser, you can also custom mix colors to create your own unique shade. You can start by purchasing different shades of green and mixing them together or you can also have them mixed in the store for a more precise color match.
However, it’s important to note that not all brands and types of paint will mix well together. It’s best to stick with the same brand and type of paint when mixing colors for a smooth and uniform result.
Additionally, keep track of the color ratio so you can easily recreate the shade if needed in the future.


Can I change the color of my dresser again in the future?
Yes, you can always repaint your dresser if you want to change its color. But first, you have to consider the condition of the existing paint.
If the paint is still in good condition, you can simply sand it down a little bit to create a rough surface for better adhesion of the new paint. However, if the existing paint is chipping or peeling, you may need to strip it off completely before repainting.
We have our repainting furniture guide that details the steps and tips for this, so head on over there if you need more information! For more repainting makeovers, here’s our list of repainting dresser ideas.


Dark Green Dresser Makeover
This vintage serpentine dresser was painted with green chalk paint. Here are the steps for this dark green dresser makeover.
Materials
Instructions
- Prepare the dresser for paint by cleaning, scuff sanding, vacuuming off the dust, and making any repairs.
- Afterward, prime the dresser with 2 coats of clear shellac to prevent bleedthrough issues. Let it dry overnight.
- The next day, spray 3 coats of dark green chalk paint. You can distress the chalk paint a little bit after the last coat of paint.
- Spray 3 coats of waterbased polyurethane and let the topcoat dry between coats.
- After the topcoat is dry, replace the old hardware with the new one!
Recommended Products
As an Amazon Associate and member of other affiliate programs, I earn from qualifying purchases.


More Green Dresser Makeovers
- How to Paint Laminate Furniture – Olive Green Painted Dresser
- Dark Green Chalk Painted Dresser
- Green Painted Modern Dresser
- Furniture Makeover – Modern Green Dresser
- Painting Furniture with Lilly Moon Paint
Get Our Secrets!
Grab this super convenient How to Repair Furniture Ebook with all of our secrets on how to repair furniture for only $14.
You can print it out and have instant access whenever you come across damaged furniture, and know exactly how to fix it!
Click on the picture of the book to purchase!
Follow us on YouTube to get more tips for painting furniture. Or share your project with us on our Facebook Group and be part of our community. See you there!