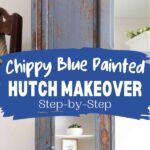
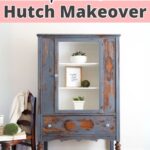
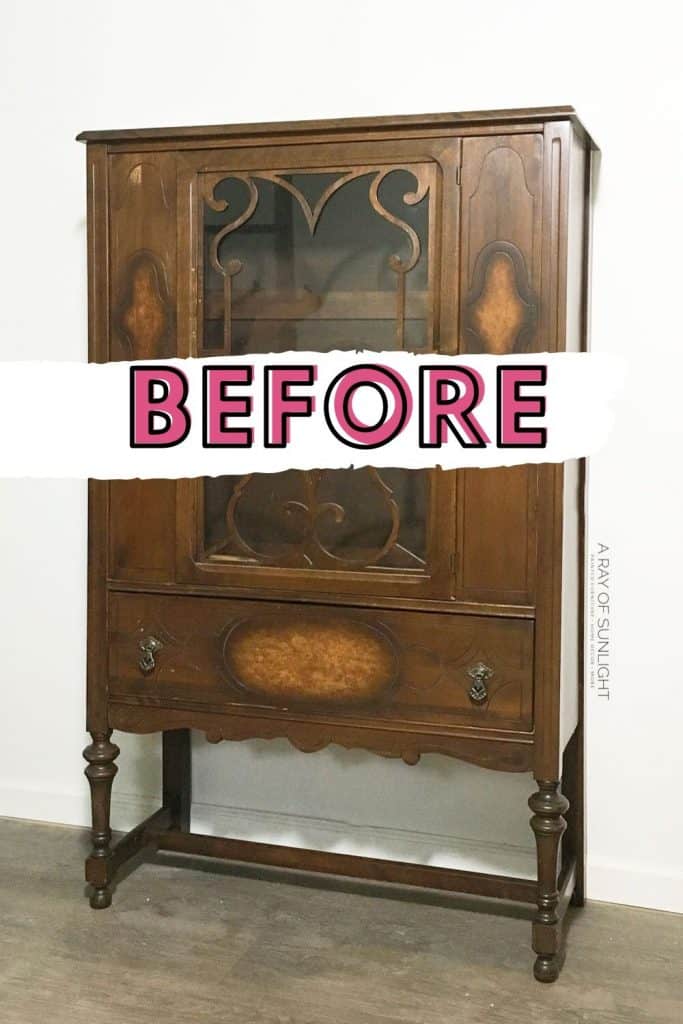
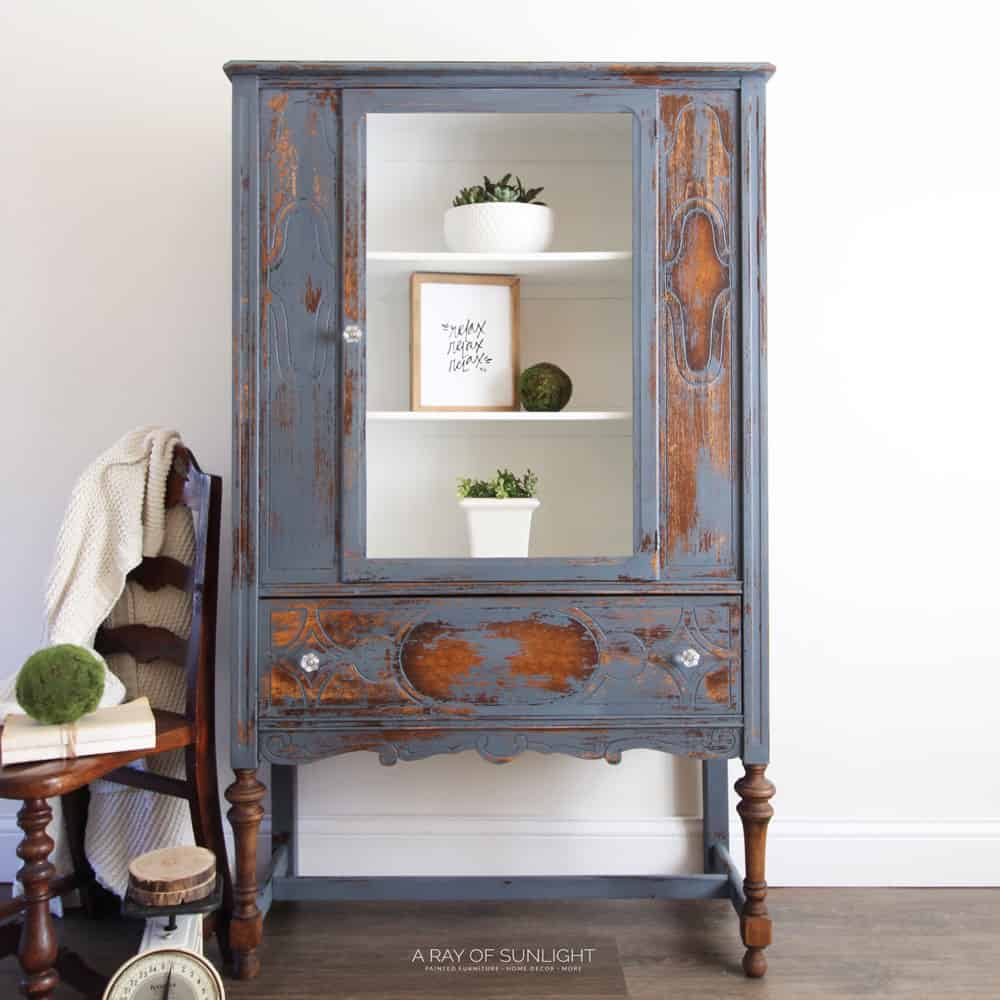
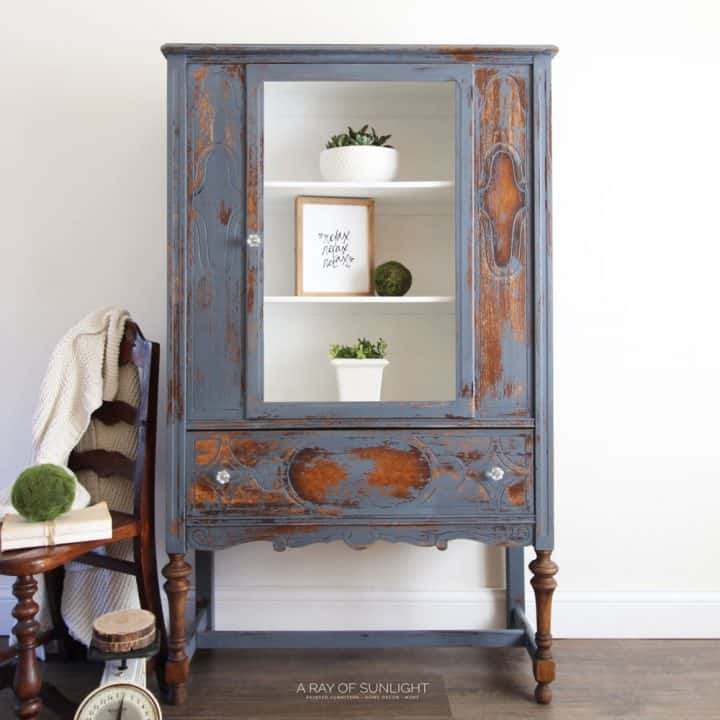
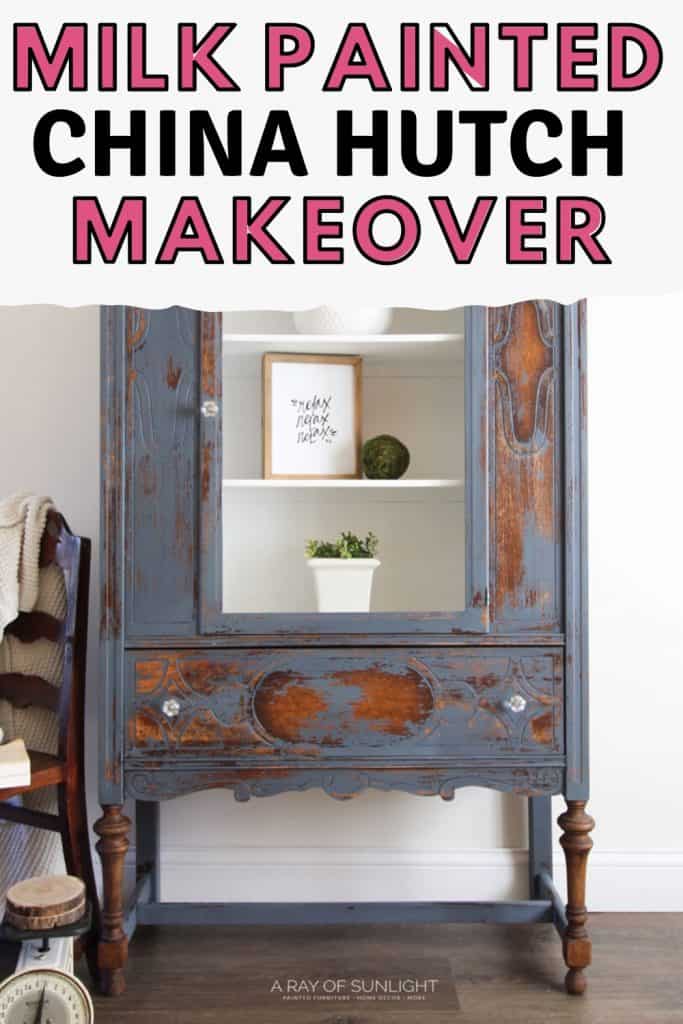
Chippy Blue Painted Hutch Makeover
Are you looking for a fun and creative way to spruce up your old furniture with a rustic farmhouse touch, or looking for blue painted furniture ideas? Look no further than this chippy blue painted hutch makeover! This simple project is perfect for giving your outdated furniture a new lease on life.
By simply adding a couple of coats of specific paint, you can easily transform an ordinary hutch into something completely unique and beautiful. In this blog post, we’ll discuss everything you need to know about how to paint a china cabinet, in a farmhouse style.
It’s no secret that I love a really chippy painted piece of furniture. The real secret though is how to get a chippy painted finish every time. Using milk paint is the easiest way to create an authentic looking chippy paint.

This type of paint finish is perfect for those who love a rustic and farmhouse style. The chippy results add character and charm to any piece of furniture, giving it a beautifully aged look. But sometimes milk paint needs help.
Recently I accidentally found out that a product I use reacts to milk paint in a way that makes it chip a lot, every single time! Keep reading to learn more about this 1 step that will give you a chippy painted finish every time. Plus, get more painted china cabinet ideas here!

Supplies Used for Chippy Painted Hutch Makeover
As an Amazon Associate, I earn from qualifying purchases. I also may earn from other qualifying purchases with other companies or get free product to review and use. All opinions are my own.
- Old China Hutch
- Citristrip
- Cheap Paint Brush
- Chemical Resistant Gloves
- Drop Cloth
- Steel Wool
- Toothbrush
- Mineral Spirits
- Krud Kutter and Old (Damp) Rag
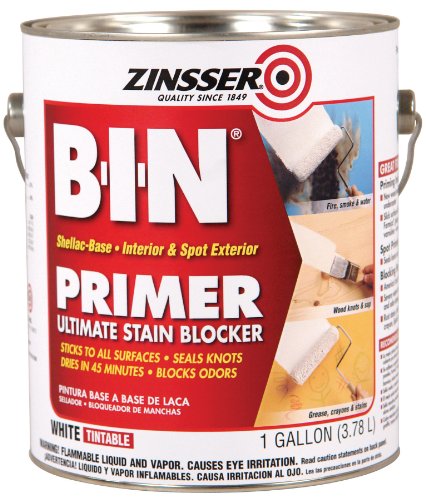
- BIN Shellac Primer
- White Paint (if you have a sprayer, this is the BEST! but they have a brushable version here)
- 220 Grit Sandpaper
- Waterbased Poly (my favorite kind!)
- Paint Brush or Paint Sprayer
- Dixie Belle BOSS Primer
- Powdered Milk Paint (colors mixed: Coolidge Blue, Harbor Blue, Blue Moon, Coastal Fog, Sand – get the exact recipe below.)
- Plastic Cup
- Paper Towels
- Wax Brush
- Annie Sloan Dark Wax
Grab my list of the top 10 must have painting furniture supplies here so you’re ready to tackle any project any time. Now, onto the chippy painted hutch makeover!
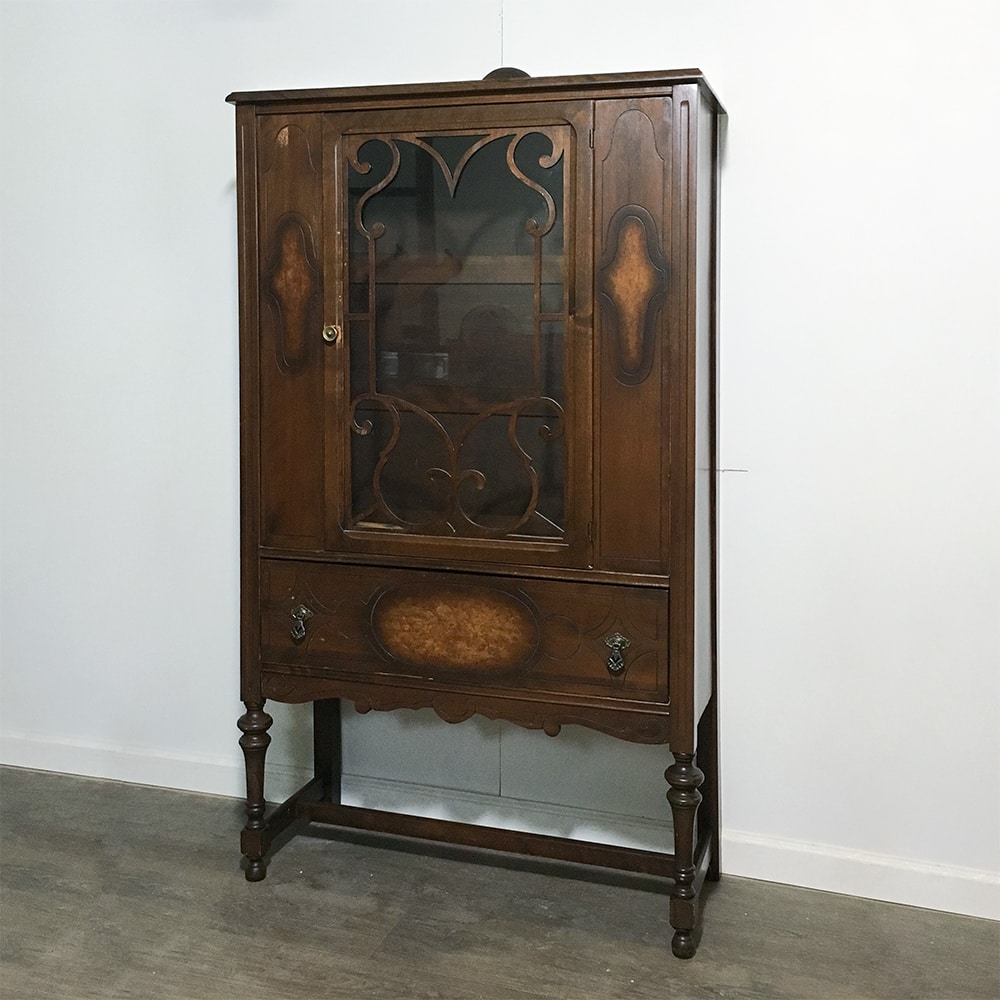
Strip Wood Legs
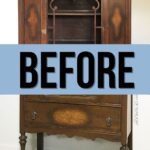
This is the messiest part of the makeover, so I did it very first! If the legs on your piece of furniture are in good condition, you might want to skip this step. Or you can freshen them up easily like this tutorial on how to restain wood furniture. But I went all in and stripped these legs to raw wood.
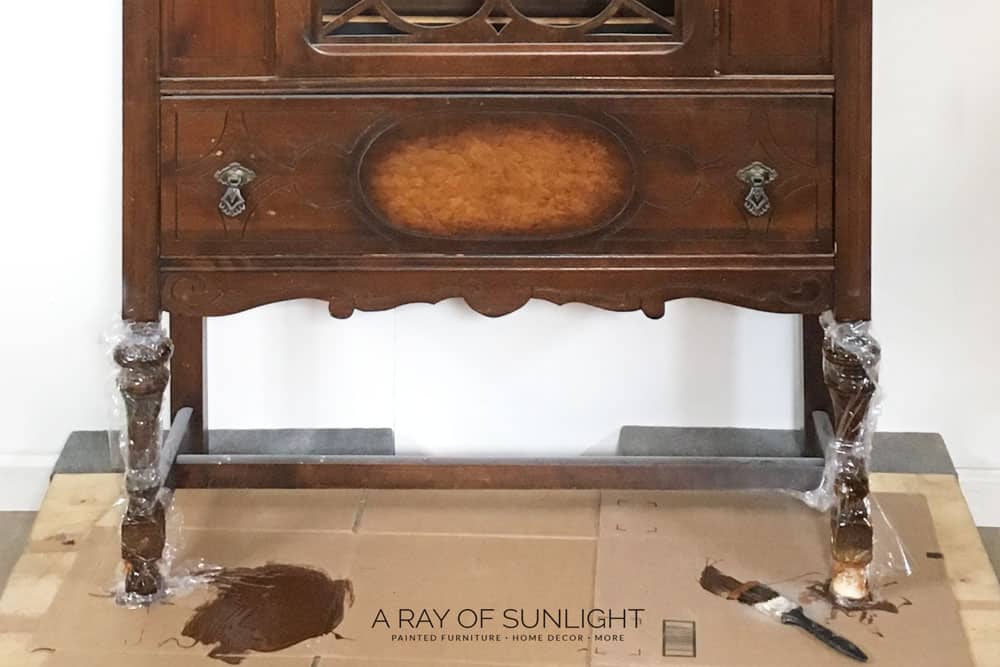
If you need an in-depth tutorial, this tutorial on how to remove stain from wood will walk you through how to strip the old stain off of your furniture. You obviously can skip this step too if you want to paint the entire china cabinet.

Clean Hutch Before Painting
With that out of the way, we can get to the fun part. After removing all of the hardware, clean your piece of furniture down to remove any dirt, grime, or oil. All of those things will repel the paint and mess it up. Learn exactly how to clean furniture before painting here.
Painting Inside of Hutch White
Next up, I worked on the interior of the china cabinet. I feel like it’s easier to work on the inside before getting the outside painted.
I LOVE the look of a white interior for antique china cabinet makeovers. The white interior just gives it a bright, clean look and it helps the things that you put inside of it pop. (Unless you have white china you want to display.)
First up, I primed.
Do I really need to prime before painting?
No matter what paint companies suggest, it is ALWAYS best to prime before painting. A lot of no-prep paint claims that you don’t need to use primer (because of their paint’s great adhesion.)
They don’t take into account laminate furniture which is really hard for paint to stick to. Check out how a good primer will help paint stick to laminate furniture with this how to paint laminate furniture tutorial.
But what most paint companies don’t tell you is that painted wood can cause bleed through (red, yellow or orange spots) that won’t go away, no matter how many coats of paint you paint. Learn more about how to stop stains from coming through paint here!

Plus, primer will also help your paint get better coverage, and if you use a white primer under white paint, it helps you get full coverage. That’s why I primed before painting the inside of this hutch.
BIN dries fast and can be painted over after only 30 minutes! I painted 2 coats of BIN on the inside of this hutch. Learn more about BIN shellac primer and other best primers for painting furniture here!
So after the primer dried I painted it white. You can use chalk paint, or honestly whatever paint suits your fancy. Here’s a great tutorial on painting furniture white, and you can learn more about chalk paint and other best paints for furniture here.

The BEST Way to Paint Furniture White
If you have a paint sprayer, the very best (fastest and easiest!) way to paint furniture white is with this product called Enduro Poly. It comes in black or white (or you can tint it to any color you want!) But it has to be sprayed. Trust me on that! Here’s my painted display cabinet makeover, where I used Enduro Poly in white.
Need to get a paint sprayer? Here are the best HVLP paint sprayers for furniture you can invest in! But Endure Poly does have a brushable version (I haven’t tried it, but I’ve heard good things about it!)
It dries fast, sprays beautifully, doesn’t have to be thinned, and truly has a durable topcoat built in, so after 3 coats, you are done! Learn more about how to paint with Enduro Poly in this post about how to paint furniture black.
How to Paint a Hutch with Blue Milk Paint
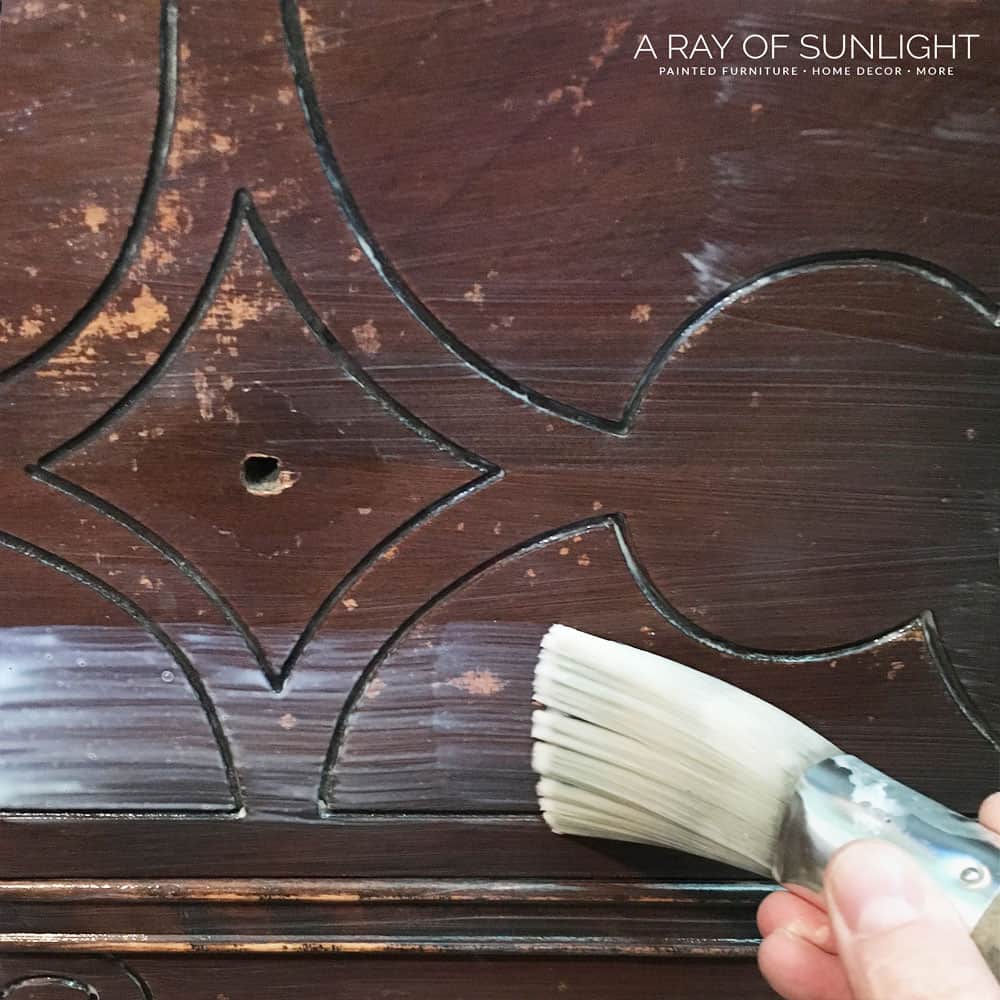
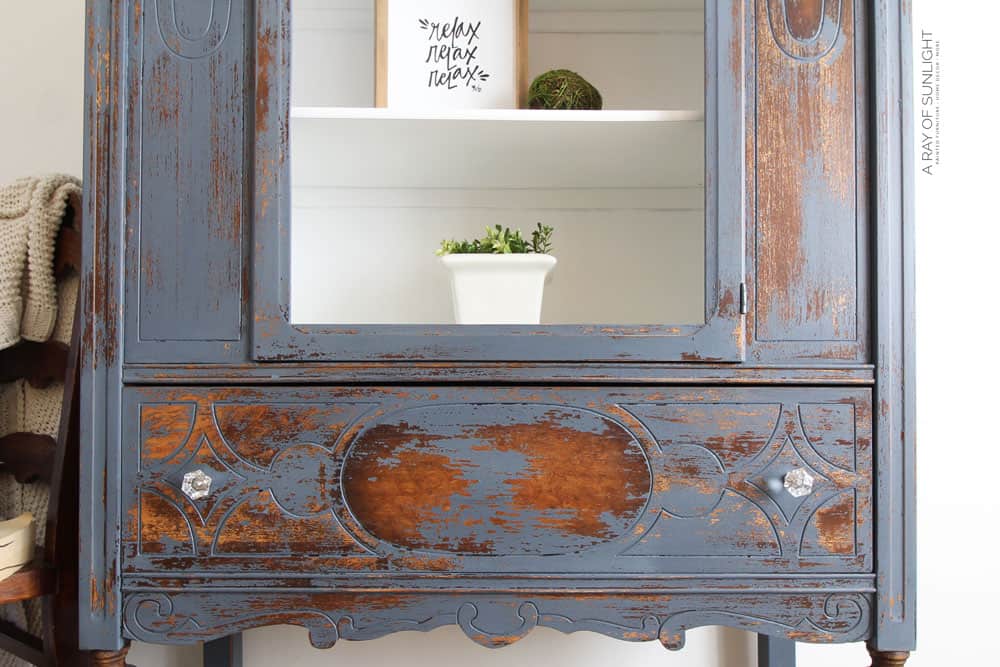
Once the inside was painted, it was time to move on to the outside! I knew I wanted a chippy painted finish, and honestly, I had already scuff sanded this hutch before I really knew what I wanted to do with it.
How to Get Chippy Paint Finish with Milk Paint
So I knew that the chance of getting a chippy painted finish was really really low. (Sanding will help the milk paint stick instead of chip!) So I busted out my secret weapon. Dixie Belle BOSS primer. This is the stuff that makes powdered milk paint create a chippy paint finish every time.
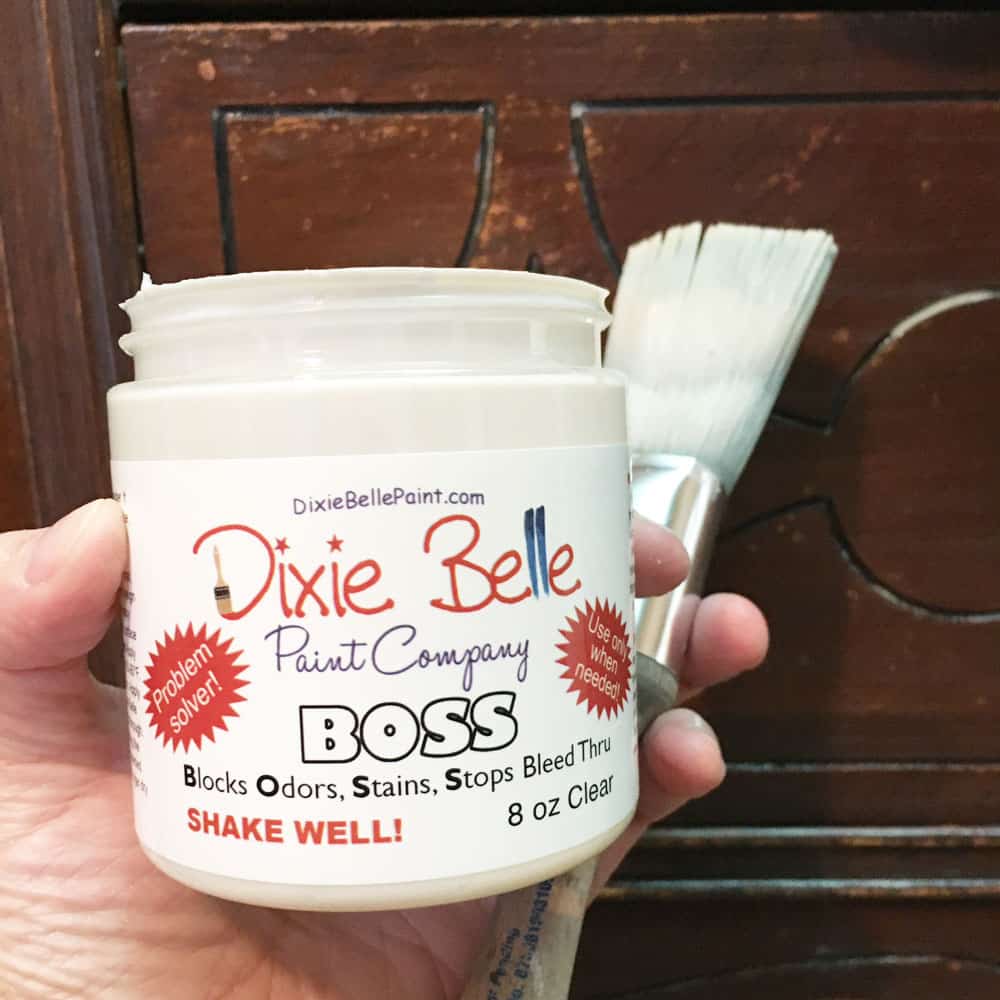
BOSS is a water-based primer that was created to prevent bleed-through (we talked about bleed through above when we painted the interior white). Sometimes I use it in the winter when I am inside instead of shellac primers (because shellac-based products have a very very strong smell!)
Check out this DIY painted chippy farmhouse dresser which I primed with BOSS and decided to milk paint a few months later. It chipped all over, really really well! Then I tested it on a few other pieces and got the same results. Every single time the milk paint chipped really well!
So, I brushed on two coats of Dixie Belle BOSS on the hutch, letting the second coat dry overnight.
Would you like to save this?
How to Mix Milk Paint Colors
While I waited for the primer to dry, I mixed up a few different colors of milk paint to create this dusty blue milk paint color.
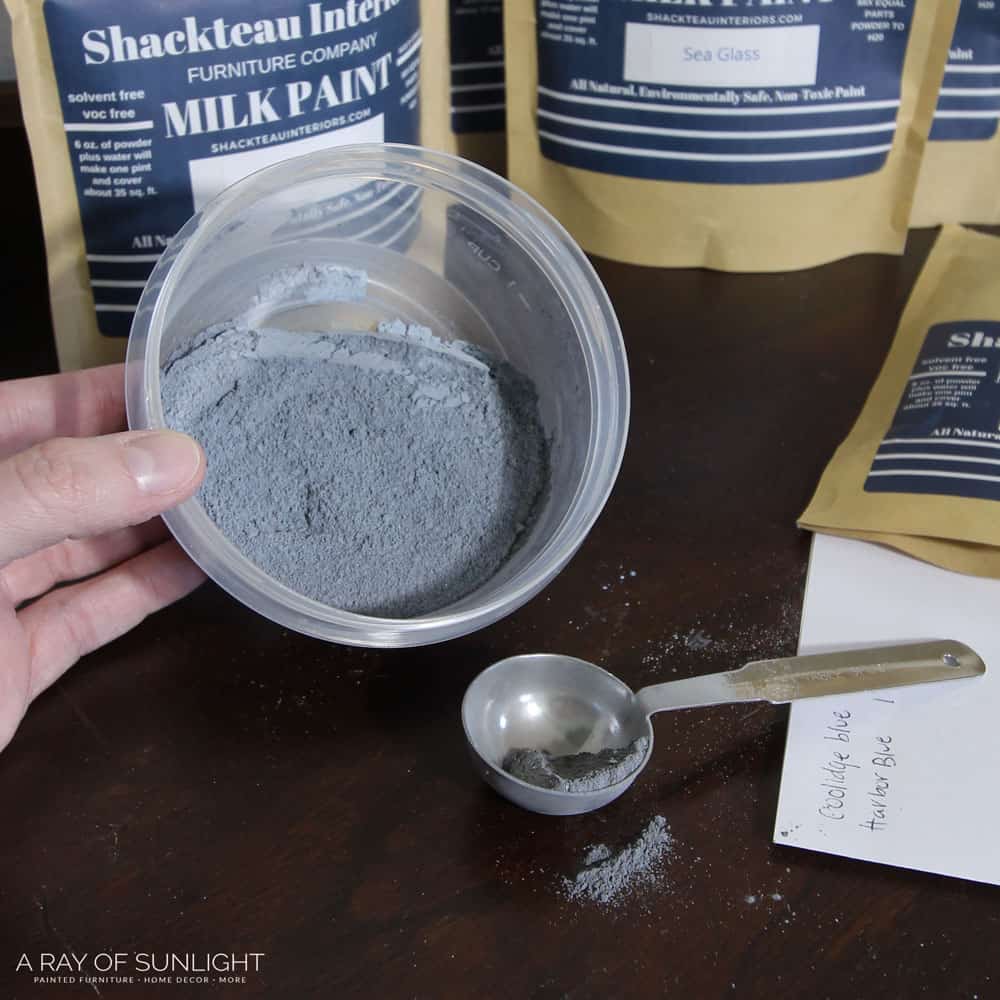
Here is the recipe for this color.
Custom Blue Paint Recipe
- 4 Tablespoons Coolidge Blue
- 2 Tablespoons Harbor Blue
- 2 Tablespoons Blue Moon
- 1 Tablespoon Coastal Fog
- 1 Tablespoon Sand
After the primer had enough time to dry, I mixed the powdered milk paint with water and brushed on a couple of coats. Check out our detailed guides on how to mix milk paint and mixing milk paint colors together to learn about this process.
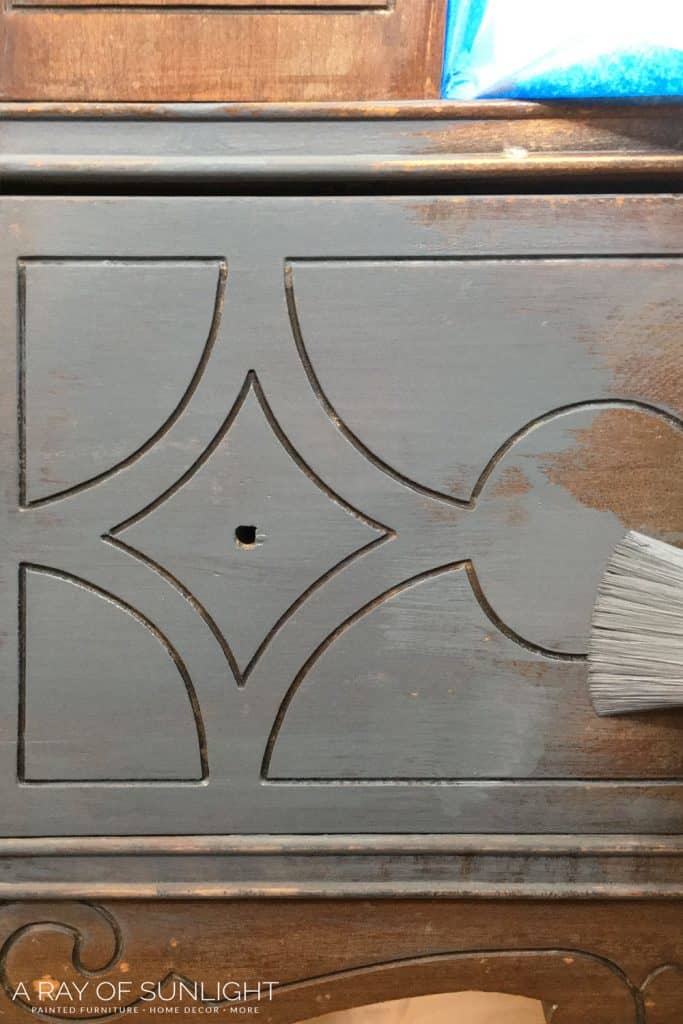
Before the paint dried, I used a hair dryer on its hottest and highest setting to speed up the drying process. The heat makes the paint chip even more!
Once both coats were dry, I sanded the milk paint down with 220 grit sandpaper to make the paint chip off even more. Learn more tips and tricks from these posts on how to use milk paint on furniture and painting furniture with milk paint!
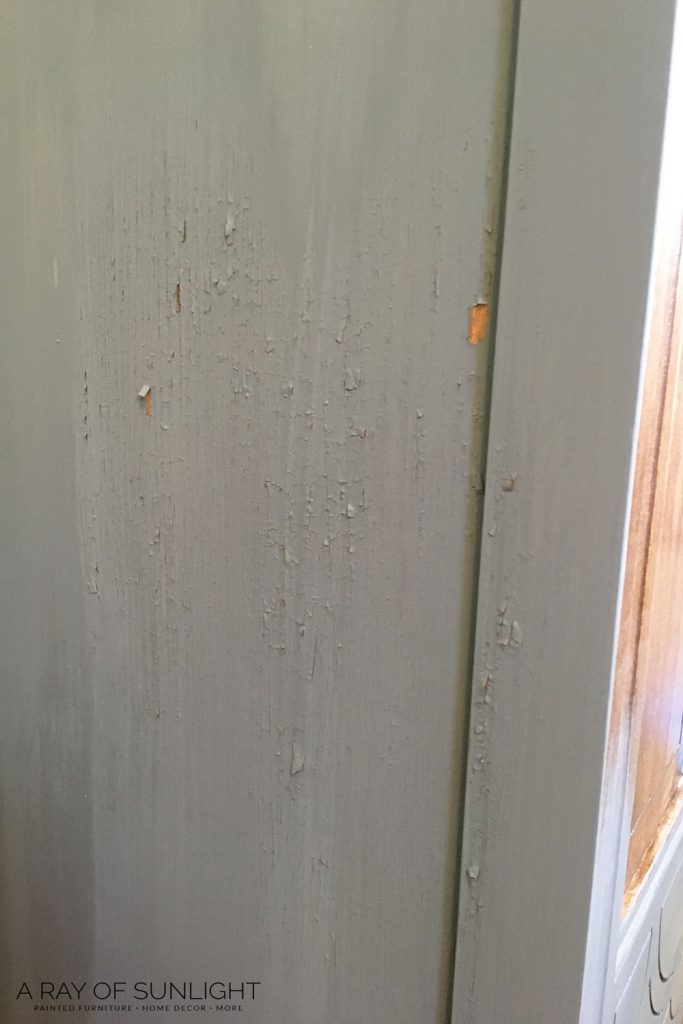
How to Seal Milk Painted Hutch
Milk paint has to be sealed, and my favorite sealer is this water-based poly. I like to spray it on, especially with chippy paint! (Beware, the paint will chip even more when it reacts to the water-based poly!)
Learn ALL of my tips and tricks on how to spray polyurethane here! You can brush it on too. Here are more great ways to sealing milk paint for options other than waterbased poly. You can learn more about using topcoats for painting fu rniture here as well.
If you use Enduro Poly or the Brushable Enamel, you don’t need to seal the inside. But if you used chalk paint on the inside of the hutch, you’ll need to seal your paint.
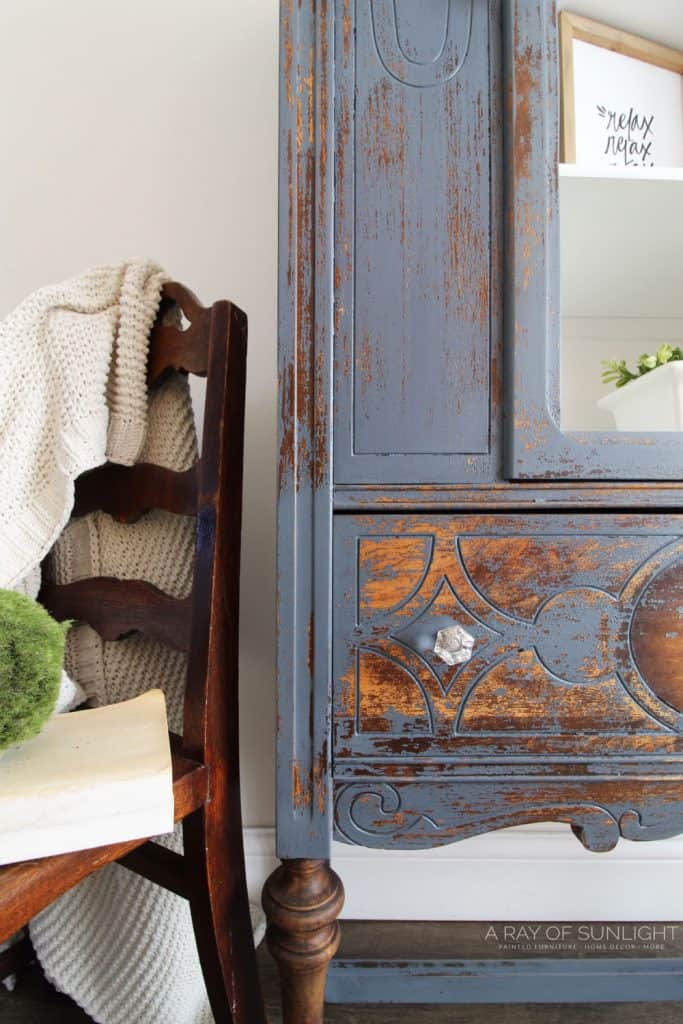
How to Stain Wood Legs with Wax
Instead of using an actual wood stain on these legs, I opted to brush on dark wax.

Dark wax is basically wood stain mixed with furniture wax, so I am still staining, right? haha I just used a wax brush and brushed a little bit of dark wax all over the legs. Check out the best brushes for staining wood here for the best results. After the wax was dry, I “buffed” the wax with a lint-free rag to make them nice and smooth.
I like using dark wax on the legs because the wax adds a level of protection to the stain. But it’s almost a one step process instead of staining and then applying some polyurethane for protection.
Polyurethane is much more durable than wax though, so I don’t use dark wax to stain the top of my furniture. (Remember, if you want to use wax and polyurethane, wax ALWAYS goes on last.) I just like to use it on the legs that won’t get much traffic or wear to them.
If you decide to use stain, check out these best wood stains for refinishing furniture here. Or check out how to stain wood darker if you didn’t strip the legs down to bare wood and want a darker finish.
Add New Hardware to Painted Hutch
Finally, attach your new hardware (or put the old hardware back on.) Let your paint dry at least 24 hours before putting anything on the paint. Be extra careful with your furniture for at least 3 weeks (until the paint cures all of the way.)
And here’s what it looks like now!
More Before and After Makeovers
See All >
Click any of these “before” photos below to view the “after” of that makeover.


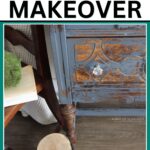
Man, I LOVE this chippy look. This hutch is actually in my bedroom, and I enjoy it every day. If you like how this hutch turned out, you should check out more rustic painted furniture here! If you have a corner piece, here are painted corner cabinet ideas you can do!
Hutch Makeover Ideas
There are so many different ways to paint and style a hutch. Whether you prefer a classic farmhouse look or something more bold and modern for your space, there’s a hutch makeover out there for you! Here are some ideas to get you started:
- Classic farmhouse: Paint the hutch in a creamy white or soft gray, and add some distressing for a rustic touch. Check out more neutral furniture paint colors here that would work well for a farmhouse style hutch.
- Bold and colorful: Go for a bright, eye catching color like coral, navy blue, or emerald green. You can also add some fun patterned liners to the drawers or shelves for extra fun. Check out these bold furniture paint colors and these dresser drawer liner ideas for inspiration.
- Two toned: Paint or stain the body of the hutch in one color and the legs or drawers in another like the makeover we just did! These make for a unique look that can fit a variety of styles. We have two tone dresser ideas here so you can see more examples.
- Glossy and gold: For a sleek and modern look, consider using a high gloss paint in a bold color like black or navy blue. You can also add some gold hardware for an extra touch of glam. Here are high gloss painted furniture ideas that can convince you to take the plunge.
You can also use other types of paint for furniture, like in these chalk painted hutch ideas and painted hutch ideas. You can also update your piece with these hutch refinishing ideas!

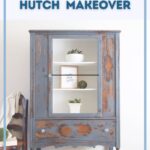
If you want your old hutch to get that new but chippy look, this tutorial has shown you how to create just that with a few easy steps! This chippy blue painted china cabinet makeover using milk paint and other techniques is a fun DIY project that will give your hutch a unique and rustic look.

Chippy Blue Painted Hutch Makeover
Give your antique china cabinet an update with this chippy blue painted hutch makeover.
Materials
- Citristrip
- Cheap Paint Brush
- Chemical Resistant Gloves
- Drop Cloth
- Steel Wool
- Toothbrush
- Mineral Spirits
- Krud Kutter
- Old (Damp) Rag
- BIN Shellac Primer
- White Paint
- 220 Grit Sandpaper
- Waterbased Poly
- Dixie Belle BOSS Primer
- Powdered Milk Paint
- Plastic Cup
- Paper Towels
- Wax Brush
- Annie Sloan Dark Wax
Tools
Instructions
- Strip the wood turned legs down to bare wood.
- Clean the whole piece to remove any dirt and grime.
- Now, start working on the interior of the hutch. Prime with 2 coats of BIN shellac primer and after 30 minutes, paint it with 3 coats of white paint.
- For the outside of the hutch, prime with Dixie Belle BOSS primer. This makes powdered milk paint create a chippy paint finish every time. Apply 2 coats and let dry overnight.
- While waiting for the primer to dry, you can mix a few different colors of milk paint to create the paint color you like. Then mix the milk paint with water.
- Apply 2 coats of milk paint onto the hutch, and once both coats are dry, sand the milk paint down with 220 grit sandpaper to make the paint chip off even more.
- Seal the paint inside and out with waterbased poly.
- For the bare wood legs, stain them with dark wax.
- Attach hardware to the painted hutch.
Recommended Products
As an Amazon Associate and member of other affiliate programs, I earn from qualifying purchases.


More Hutch Makeovers
- Antique China Hutch Makeover
- Painting a China Cabinet
- Painted Hutch Makeover
- DIY Blue China Hutch
- Corner Cabinet Makeover
Learn the Art of Updating Furniture!
If painting furniture feels overwhelming or your past attempts didn’t go as planned, this course will guide you step by step.

Follow us on YouTube to get more tips for painting furniture. Or share your project with us on our Facebook Group and be part of our community. See you there!
Hi Natalie! This piece is just perfect. I tried the BOSS on a candlestick and then used MMSMP and it didn’t chip. Maybe i did something wrong. I will try it on a piece of furniture . Thank you for the all of your tips and tricks an inspiration. It really means a lot.
Oh no! How many coats of BOSS did you apply first? I wonder if it has to do with the amount of coats of BOSS, or if it doesn’t work well with MMS? Another thing that can help the paint chip is to help the paint dry faster with a hair dryer on it’s highest and hottest setting. Hope that helps!