The Best Paint for Furniture


There’s chalk paint, latex paint, 2 types of milk paint, and enamel paint too. With these many types of paint for furniture, it’s so easy to get confused when it comes to picking paint for your dresser, table or nightstands. So here is a breakdown of the best paint for furniture, to get the best results.
Choosing the right paint is important – not only does it determine the final outcome, but it also affects the durability and longevity of your newly painted piece. So let’s check out these top paint options!

Your old furniture may still have good bones, but a fresh coat of paint can give it new life! Whether you’re looking to modernize an antique piece or add a pop of color to your space, you’ll need to choose the right paint for the job.

You can use any paint, but it might not give you the results you want. If you want your furniture to look beautiful and even professionally painted, it’s important to pick the right type of paint. Plus, using the wrong type of paint will not give you a durable and long lasting finish.
So we’ve done our research and with our experience in painting furniture, we’ve narrowed it down to this list of best paints for furniture! Each paint has its own unique qualities that make it perfect for different types of furniture and projects, so keep reading to find your perfect match.
What is the Best furniture paint?
Picking the right paint can really make or break your furniture project. In the furniture painting world there is:
- Latex Paint
- Chalk Paint
- Acrylic Paint
- Powdered Milk Paint
- Pigmented Poly
- Alkyd Paint (Waterborne paint that is Oil)
- One Step Paint
*This is not an exhaustive list. But a list of the most popular combined with the ones I’ve tried.
They all can work for wood, or laminated (the plastic feeling stuff) furniture, but the way they work, and how to use them may differ. On top of that, the end result (the finish or style) can really change depending on what paint you use.
(You’ll want to pick a different paint for a sleek traditional shiny finish vs a matte chippy paint look.)
To figure out what the best paint for furniture for you is, I’m breaking down:
- the different types of paint
- pros and cons about each of them
- tips for each paint
- and what type of finish you can get from each paint
Let’s dive in!
(I’ve been refinishing and selling furniture as my job since 2014, and these are all types of paint I have used for my own furniture projects.)
As an Amazon Associate, I earn from qualifying purchases. I also may earn from other qualifying purchases with other companies or get free product to review and use. All opinions are my own.
Latex Paint
Latex paint is the paint that you would usually buy for the walls inside your home. You can pick it up at any hardware store and it usually comes in flat, satin, semi-gloss, and gloss. The store usually has an area where they will tint it any color you want (or match it to a swatch you have) for free.
Honestly, I have only used latex paint on one furniture project, and that was one of my very first paint projects. I have however used latex paint a lot as the main ingredient to make homemade chalk paint.
Looks You Can Get With Latex Paint
- It is best for a solid finish.
- Once turned into chalk paint, it can be used to create any of the chalk paint finishes.
Pros of Latex Paint:
- Latex paint is easily accessible at your local hardware store
- It is water-based for easy clean up.
- You can get it tinted to any color you can imagine, and you can even get it color matched to a color swatch you have on hand.
- Latex paint is the cheapest option.
- Can be made into homemade chalk paint.
Cons of Latex Paint:
- Latex paint doesn’t stick to many surfaces very well. It must have a adhering primer and very good prep before painting.
- If you want to make it into chalk paint, you have to mix it, instead of it being ready to go out of the can.
- It is also best to seal latex for durability (and I don’t like the feel of plain latex paint.) To seal latex paint I use this waterbased polyurethane.
- Latex doesn’t distress or sand back very easily, so a farmhouse or shabby chic look isn’t as easy to get as with chalk paint. (Once it’s made into chalk paint, it will distress nicely)
Tips and Tricks to Use Latex Paint on Furniture
- I prefer making latex paint into homemade chalk paint for better adhesion (and distressing if you want that.) Here’s my homemade chalk paint recipe I’ve used in a lot of furniture makeovers.
- Latex paint isn’t made to stick finished wood surfaces. Use a primer like Bullseye 123 (or this really good stain blocking primer) over finished wood before painting to give the latex paint something to hold onto.
- “Paint and primer in one” will not provide good adhesion. The primer in this type of latex paint is only good for extra coverage. Not to help paint stick to finished wood. It also isn’t good for making homemade chalk paint.
Best Latex Paint for Furniture
- I prefer to buy the interior flat latex paint in Behr Premium Plus to make chalk paint.
Chalk Paint
** Chalk paint has a HUGE stigma about being a “no prep” necessary paint. This honestly is NOT TRUE. I mean, I love the sound of not having to clean, lightly sand, or prime furniture before painting, but if you want your project (not to mention the hours of time you spent on it) to last a long time, it’s really best to prep.
Chalk paint has made a big name for itself in the furniture painting world. Mainly because it requires less prep (notice I didn’t say “no prep”), there are so many things you can do with it, and it dries quickly. And I’ve found that it sticks way better than latex, even when using a primer under both latex and chalk paint.
Why is chalk paint good for furniture?
Chalk style paint is easy to use for those who are new to painting furniture. It requires less prep than other paint, and it sticks very well. It is waterbased so it cleans up easily with soap and water. And it can be used for so many different finishes (from modern to aged and distressed.)
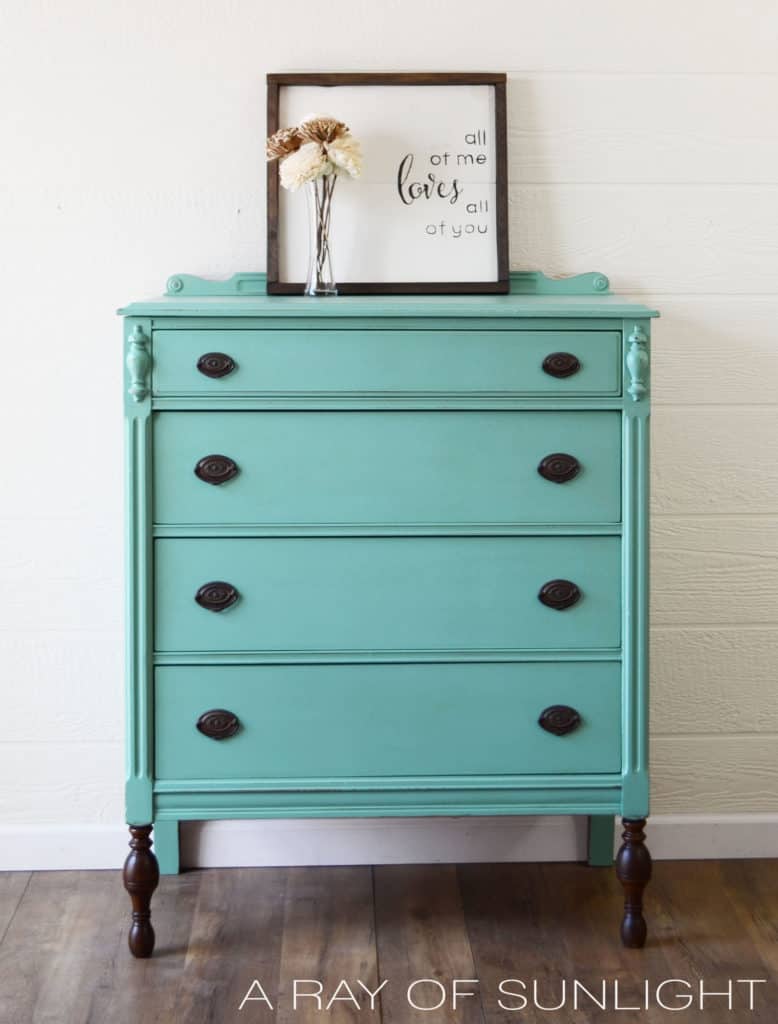
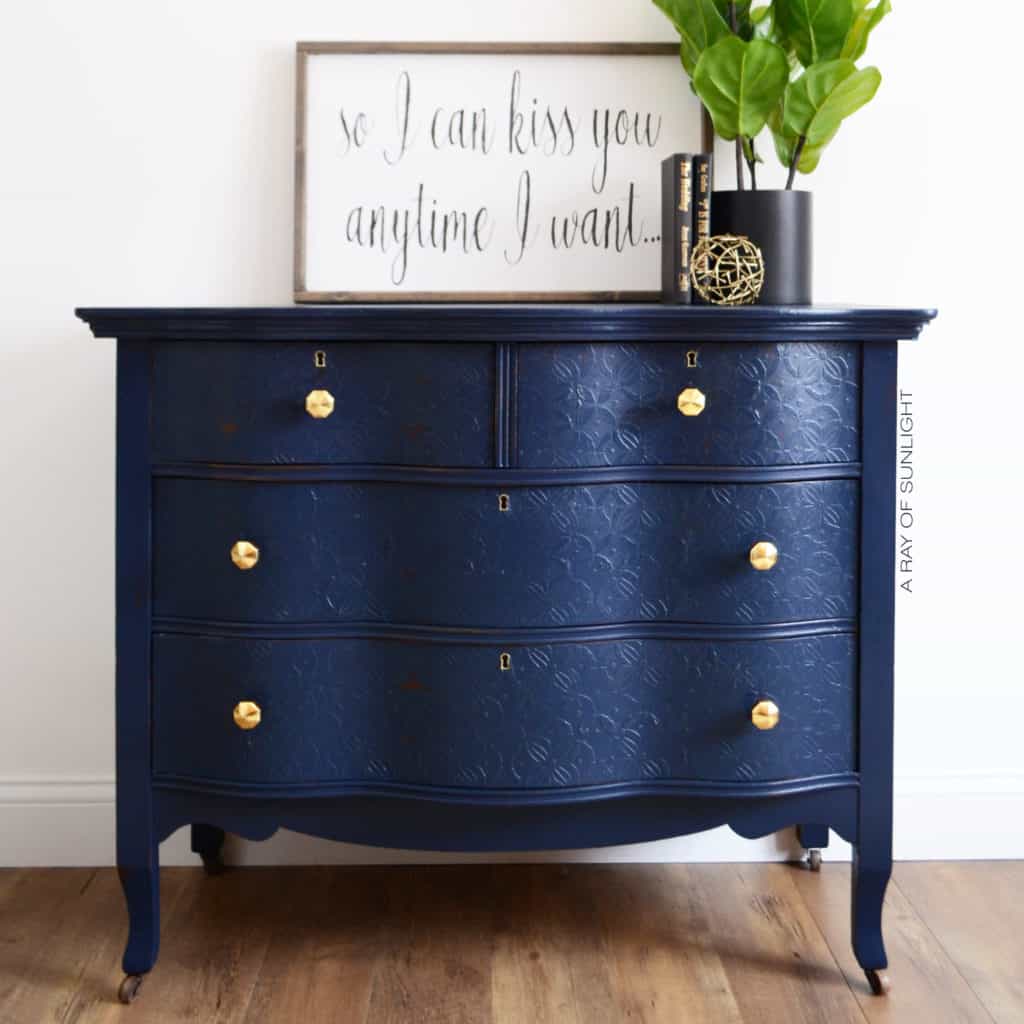
Looks You Can Get With Chalk Furniture Paint
- Distressed, blended, worn and antiqued looks are the easiest to achieve with chalk paint.
- Shabby chic with a lot, little or no distressing.
- Blending or dripping with multiple colors of paint.
- Water down the paint for a thin washed effect.
- Glaze or dark wax chalk paint for an antiqued look.
- Classic solid finish with no distressing.
- Combinations of the above finishes.
Pros of Chalk Paint:
- It sticks to furniture (primed and not primed) a lot better than plain latex.
- Cleanup is easy with chalk paint.
- A lot of brands are eco friendly and VOC free.
- You can create multiple different finishes with chalk paint.
- Chalk paint is easy to use with a paint brush or paint sprayer.
- It’s ready to paint straight from the can.
Cons of Chalk Paint:
- It must be sealed for durability and to be able to wipe it clean. (I prefer to seal with water-based polyurethane instead of wax.)
- If you don’t seal it, it collects dust and it’s hard to remove the dust.
- It’s more expensive than most latex paint.
- Only some brands are available at local hardware stores.
- Most chalk paint companies have a limited line of colors.
Tips and Tricks to Use Chalk Paint on Furniture
- Really shiny, smooth surfaces need to be scuff sanded really well, and possibly primed for best adhesion. (read some tips at the end of the post.)
- Add a little bit of water for better leveling and fewer brush marks. Here are more tips on how to paint furniture without brush marks!
- Chalk paint can be sprayed in a paint sprayer. This post explains how to spray paint with chalk paint! And check out these best paint sprayer for chalk paint options.
- Seal chalk paint with waterbased polyurethane instead of wax for the most durable, long lasting finish. If you used wax and want to repaint it, this guide explains the process on how to paint over chalk paint that has been waxed.
- You don’t want to make these five biggest furniture painting mistakes! And here are the common chalk painting mistakes to avoid.
Best Chalk Paint Brand for Furniture
- Country Chic Paint
- Waverly Chalk Paint
- Dixie Belle Chalk Mineral Paint
- Annie Sloan Chalk Paint
- Rustoleum Chalked Paint
- Melange Mineral Paint
Check out my top chalk paint brands post where I list down the pros and cons for each brand.
Acrylic Paint
This one is confused a lot with the milk paint we talk about after this (the powdered kind). The way it works and the finish it creates is totally different than powdered milk paint! This paint creates a super smooth finish and is super easy to work with! I absolutely love acrylic paint!
Looks You Can Get With Acrylic Paint
- Acrylic paint is great for a classic solid finish.
- But it can also be distressed to create a farmhouse worn look.
- Worn look with a lot, little or no distressing.
- Blending or dripping with multiple colors of paint.
- Water down the paint for a thin washed effect.
- Glaze or dark wax chalk paint for an antiqued look.
- Combinations of the above finishes.
Pros of Acrylic Paint:
- It sticks to furniture a lot better than plain latex.
- Acrylic paint doesn’t have to be sealed for low traffic surfaces!
- Cleanup is easy and it is low VOC.
- Acrylic paint levels really well!
- It also sands and distresses well.
- Acrylic paint is easy to use with a paint brush or paint sprayer.
- It’s ready to paint straight from the can.
- It also dries really smooth, so you don’t have to sand it to make it feel smooth (unlike chalk paint and powdered milk paint).
Cons of Acrylic Paint:
- For the best durability, it needs to be sealed. (I prefer to seal with water-based polyurethane instead of wax.)
- It’s more expensive than most latex paint.
- It’s not available at local hardware stores.
- There is only a limited amount of colors in the paint line.
Tips and Tricks to Use Acrylic Paint on Furniture
- For best results, prime before painting.
- Use a high quality paint brush and /or roller to get a brush free finish.
- Mix colors together to create new colors!
- Acrylic paint can be sprayed, but it’s pretty thick so it needs to be thinned for spraying.
Here’s all about painting furniture with acrylic paint! Check out my comparison between chalk paint vs acrylic paint here too if you’re considering these two types of paint.
Best Acrylic Paint for Furniture
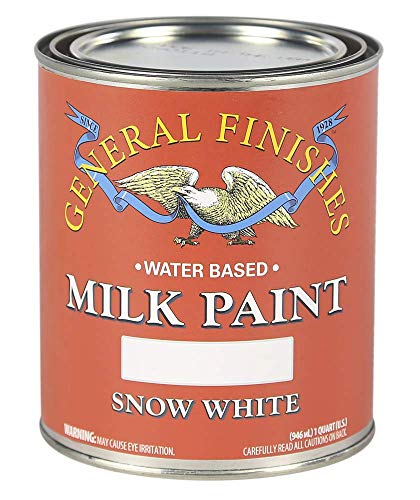
- General Finishes Milk Paint
- Paint Couture Paint
- Amulent Paint (This is ceramic based, but acts very similar to acrylics)
Check out my General Finishes Milk Paint review here to learn more about this paint brand, and here’s our feature post on the best acrylic paint for furniture options to get more information on these acrylic paints.
Powdered Milk Paint
Milk paint creates an old fashioned finish, and is perfect to create a chippy finish or a solid finish with no chipping. It has a mind of its own though, so I wouldn’t recommend it if you have an OCD specific idea of what you want it to do.

Looks You Can Get With Powdered Milk Paint
- Milk paint is best for an old fashioned chippy finish (or not chippy).
- It also is really known for having color variations, so don’t expect it to look perfect.
- You can also get a solid painted finish with powdered milk paint. Just add bonding agent to the milk paint.
- And you can thin it out to create a wash or a stain.
Pros of Powdered Milk Paint:
- Milk paint is water-based for easy cleanup.
- Real milk paint is all natural and VOC free.
- Milk paint creates a completely unique finish that can’t be easily made with other paints. The finish usually has color variations in it.
- Milk paint is easy to use, and is perfect for raw wood.
- You can mix “bonding agent” into the paint to make it stick even better. (Available from the milk paint retailers)
- It’s fun to use, because it can have a mind of its own.
- It’s also easy to sand and distress.
Cons of Powdered Milk Paint:
- Milk paint comes in a powdered form and has to be mixed with water before use.
- It has a mind of its own (chipping here or there, not chipping at all, or chipping more than expected.) The finish also can have variations of color in it.
- Milk paint also has to be sealed for durability and wipe-ability. (Hemp oil or water- based poly are my favorite top coats for milk paint.)
- Only mix up what you need for the day because it goes bad quickly.
- It’s not found at local hardware stores usually.
- Most milk paint companies have a limited line of colors.
Tips and Tricks to Use Powdered Milk Paint on Furniture
- Relax and have fun!
- If you don’t want any chipping, add bonding agent to the paint, and make sure you scuff sand the wood really well.
- To create extra chipping with a hair dryer to heat up certain places of the paint while it dries.
- Shellac will make milk paint crackle.
- The color will really deepen once you apply hemp oil or poly.
- It’s a surprise what will happen! Sometimes it doesn’t chip when you want it to, and sometimes it chips when you did everything to not let it chip. Lose control and let it do it’s thing.
- If you really want the paint to chip, here’s a tip for how to get milk paint to chip in our post on getting a chippy paint finish with milk paint every time!
Best Milk Paint Brands for Furniture
- Shackteau Interiors Milk Paint
- Miss Mustard Seed Milk Paint
- Sweet Pickins Milk Paint
- Rustoleum Milk Paint (This one is kind of in between powdered milk paint and chalk paint. I’m sharing more about it on my Rustoleum milk paint review here.)

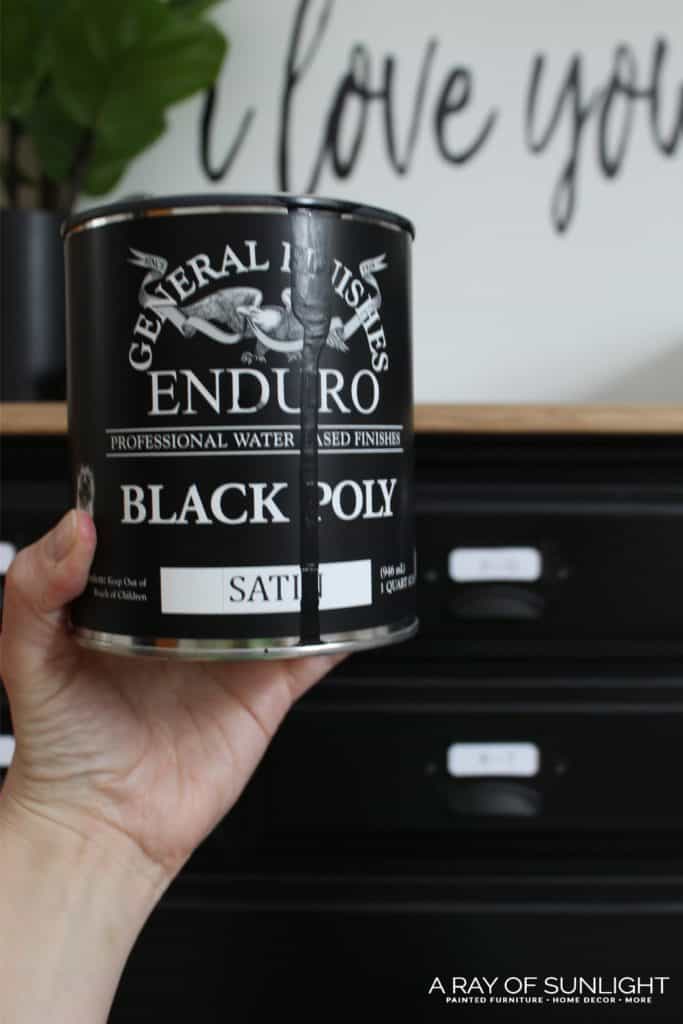
Pigmented Poly
General Finishes Pigmented Poly is quickly becoming one of my favorite paints to use on furniture. It doesn’t need a topcoat (the name says it all, it’s poly!), and it’s super durable. It levels really nicely and comes in a really nice satin sheen (also available in semi-gloss).
Check out this blog post about painting oak furniture black where we used General Finishes Pigmented Poly. We used the white version in this painted display cabinet.
Looks You Can Get With Pigmented Poly
- The easiest finish to get with pigmented poly is a super smooth classic finish with no distressing.
- You can definitely distress it, but it should be sealed once distressed.
Would you like to save this?
Pros of Pigmented Poly:
- Pigmented Poly doesn’t need to be sealed for durability or wipeability.
- Cleanup is easy and it is low VOC.
- Dries fast and can recoat after 1-2 hours!
- Pigmented Poly levels really well and distresses well.
- Pigmented Poly sprays on like a dream.
- It’s ready to paint straight from the can.
Cons of Pigmented Poly:
- It wasn’t made to be brushed on – though I have heard of some having good results with brushing and rolling it on quickly.
- Pigmented Poly is currently hard to find in quart size (quart sizes available on Etsy- linked below)
- The poly comes in black or white (or clear), but you can tint it (for an extra fee) to your color of choice.
- If you distress it, it will need to be sealed with the Enduro Clear Poly.
- Not available at local hardware stores usually.
Tips and Tricks to Use Pigmented Poly on Furniture
- For best results, prime before painting.
Read this post about how to paint furniture black for the complete “how to” on General Finishes Pigmented Poly.
Pigmented Poly Brands
Alkyd Paint
Alkyd paint is a waterborne paint that has the properties of oil based paint. Honestly, I don’t understand the science behind it. But we don’t need to know the science to be able to use it. 😉
It doesn’t need a topcoat (actually, you shouldn’t topcoat it), and it’s super durable (just like oil based paint). It levels really nicely and comes in every sheen you could want.
Looks You Can Get With Alkyd Paint
- The easiest finish to get with alkyd paint is a super smooth classic finish with no distressing.
Pros of Alkyd Paint:
- No topcoating!
- Cleanup is easy with soap and water.
- Alkyd paint is easy to apply with a paint brush or paint sprayer.
- The color options are endless.
- It levels very well so there aren’t many brush marks or texture left behind.
- It’s ready to paint straight from the can.
- Very durable, long lasting finish.
- Comes in every common sheen.
Cons of Alkyd Paint:
- It’s more expensive than most latex paint.
- Some require a 16 hour dry time before painting the next coat. (Others require 4 hours of drying between coats.)
- It can be a little bit more finicky than chalk paint, and may take a little getting used to.
Tips and Tricks to Use Alkyd Paint on Furniture
- For best results, prime before painting.
- Follow the instructions on the back of the can.
- Use a high quality paint brush and /or roller to get a brush free finish.
- Alkyd paint can be sprayed, but it’s pretty thick so it needs to be thinned for spraying.
Read this post on painting furniture white for my experience with Sherwin Williams Emerald Trim Enamel.
Best Alkyd Paint for Furniture
- Benjamin Moore Advance (Here’s my Benjamin Moore Advance Paint review for my experience and thoughts on this paint.)
- Sherwin Williams Emerald Trim Enamel (Here’s our list of the best Sherwin Williams paint for furniture to know which Sherwin Williams paint is worth considering for your next furniture project.)
One Step Paint
One step paint is usually marketed as a paint with primer, that doesn’t need to be topcoated.
The primer part I always laugh at, because I really truly believe that using a primer before painting is the best way to get the best looking paint job. But obviously we’re always looking for an easy way out or to skip some steps. I totally get it.
I love that it has a topcoat built in, but some of them are a matte finish, so I like to still topcoat them to achieve a wipeable surface. And to add extra durability.
I like to think of one step paint as chalk paint with a less chalky finish. But that’s not true for all one step paints! Some come in a satin finish so I don’t feel the need to topcoat them… and then they seem like they are closer to the alkyd or pigmented poly. Anyway…
Looks You Can Get With One Step Paint
- The easiest finish to get with one step paint is a super smooth classic finish with no distressing.
- Just like with others though, you can distress it. You’ll just need to topcoat it.
- I would think that you could blend the paint as well.
- Water down the paint for a thin washed effect.
- Glaze or dark wax chalk paint for an antiqued look.
- Combinations of the above finishes.
Pros of One Step Paint:
- No topcoating needed (though you might want to depending on the sheen you want.)
- Cleanup is easy with soap and water.
- One step paint is easy to apply with a paint brush, roller or paint sprayer.
- Some brands levels very well so there aren’t many brush marks or texture left behind.
- Very durable, long lasting finish.
- It’s ready to paint straight from the can.
Cons of One Step Paint:
- It’s more expensive than most latex and chalk paint.
- The color options are limited.
- Some come in only a matte finish. Others come in only a satin finish.
Tips and Tricks to Use One Step Paint on Furniture
- For best results, prime before painting.
- Use a high quality paint brush and /or roller to get a brush free finish.
- Mix colors together to create new colors!
- One step paint can be sprayed, but it’s pretty thick so it needs to be thinned for spraying.
- Follow the instructions from the company.
- Use a brand that dries to the sheen you want.
Best One Step Paint for Furniture
- Heirloom Traditions Paint (Satin sheen and amazing durability)
- One from Melange (I love this one!! Dries to a satin sheen)
- Fusion Mineral Paint (Dries to a matte sheen)
Here’s our Heirloom Traditions All In One Paint review for more of its features and a guide on how to use it. For Melange and Fusion Mineral Paint, you can also check out our Melange One Paint review and Fusion Mineral Paint review.
So, What is the Best Paint for Furniture?
Well, you’ll have to make that decision.
First, figure out what finish you want. Then see what is available in the color you want. If you’re considering grey, find the best grey furniture paint to transform your pieces here. Or in your area if you don’t want to wait for shipping.
You honestly can’t go wrong with any of these that I have mentioned. Of course, though, there are certain brands and types of paint that we all prefer more. And honestly, I think that is going to be different for everyone. So, pick one of the options and try it out. It’s just paint. 😉
If you’re just starting out, check out your options for the best type of furniture paint for beginners in this post.
Overall Tips and Tricks for Painting Furniture
Here are a few when it comes to painting your furniture. If you’re just getting started with DIY projects, start with our guides on painting furniture for beginners and how to paint furniture for beginners.
How to Prevent Bleedthrough on Furniture
Wood can “bleed through” waterbased paint. It shows up as yellow, red or orange stains, but no matter how many coats of paint you use, they don’t go away. 🙁
And sometimes the bleedthrough doesn’t show up until the piece is totally done. Noooooooooo! To prevent this from happening, always prime with a stain blocking primer before painting. Here’s how to stop stains from coming through paint to guide you.
You can also stop stains from coming through paint after you’ve painted your furniture. Our post on why is yellow coming through white paint? will help you with fixing any of these stains or spots.
How to Paint Laminate Furniture
You CAN paint laminate furniture (you know that super shiny, plastic-looking stuff) with any of these paints. You can learn more about your options in this best paint for laminate furniture post.
The trick is using a really good bonding primer before the paint. Bonding or adhesion primers stick to slick non porous surfaces, and they create a surface for any paint to hold onto as well.
So if you want to paint over laminate furniture, just be sure to prep (read the next tip), prime (STIX or BIN primers are perfect for laminate furniture), and then paint with your choice of paint.
Pssst. Recently I’ve been testing how to paint laminate furniture without sanding. Check it out if you don’t want to sand! And this little table makeover painting with General Finishes milk paint had laminate and wood on it. And I didn’t have to sand it at all. *mind blown*
How to Prep Furniture for Painting
Prep is the most important part of a good painted finish. Make sure to clean dirt, grime, oil and wax off first. Krud Kutter or a 50/50 mix of denatured alcohol and water works great!
Then scuff sand everything to give your paint or primer something to hold onto. I like to use 220 grit sandpaper for this. After sanding, vacuum up the dust, and wipe everything down with a tack cloth before painting. Learn all about how to prepare furniture for painting here!
Best Paint Brushes for Painting Furniture
Zibra paint brushes overall are very economical and do a great job with all of these furniture paints. They are synthetic paint brushes that come in all shapes and sizes (who would have thought!).
The round brush makes it easier to paint spindles and round things. (The round brush is my favorite!) The square brush is so good for getting into corners. The triangle brush is great for corners as well! And getting into details that most furniture has too!
Check out Zibra’s website for all of their paint brush options and see which one is right for you with their quiz. If you have a little bit more money to spend on a really really nice paint brush, the Staalmeester paint brushes and the Cling On paint brushes are spectacular!
Best Paint Sprayers for Painting Furniture
If you’re looking for a completely brush free and texture free finish, maybe you want to try out a paint sprayer! I love how much faster my projects go when I use a paint sprayer, and I love the nice finish it creates.
Check out this post to learn about the best HVLP paint sprayers for furniture (no air compressor required!)
Best Paint Finishes for Furniture
When picking the best paint finish for furniture, there are a few things to think about. First, consider the look you’re going for. Are you going for a glossy, shiny finish or something more matte and subtle?
Next up, think about how durable and functional the paint finish needs to be. Is your furniture going in a high traffic area that needs extra protection, or is it just for decoration? This will help you decide on the right type of sheen and paint finish to use.
Some popular paint finishes for furniture include satin, semi gloss, and high gloss. Satin has a nice, subtle shine, perfect for adding some depth to a piece without being overly flashy. Plus, it’s durable and easy to clean, making it a great option for busy areas.
Semi gloss has a slightly higher shine than satin, giving furniture a more noticeable sheen, while high gloss finishes are the shiniest and most reflective option, adding a sleek and modern look to furniture.
High gloss is perfect for accent pieces or creating a statement in a room – just keep in mind that high gloss finishes can be harder to maintain. If you want a more casual and easy to maintain option, go for a satin or semi gloss finish.


In the end, the best paint for your furniture is the paint that creates the finish you are looking for, in the color you are looking for. These are all types of paint that I have used and would be happy to use on a regular basis. I would hate to be limited to only one of these for all of my furniture painting projects!
More Furniture Paint Resources
- Chalk Spray Paint
- Painting Furniture with Enamel Paint
- How to Use Spray Chalk Paint
- Best Paints for Furniture Without Sanding
- Best Matte Black Paint for Furniture
Follow us on YouTube to get more tips for painting furniture. Or share your project with us on our Facebook Group and be part of our community. See you there!