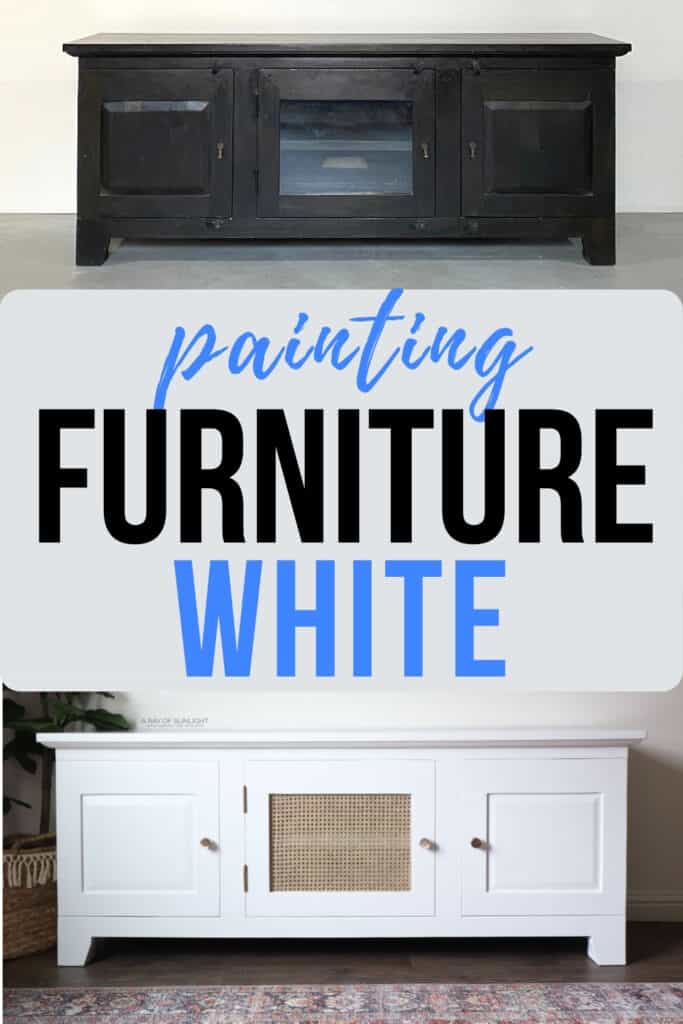
Painting Furniture White

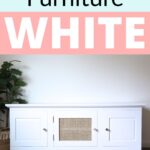
If you want white furniture, this post has got you covered. Painting furniture white is a simple yet effective way to transform any dull piece into something fresh, modern, and stylish. Whether you are looking to upgrade or want to try out some new painting furniture ideas, our guide has you covered!
With the steps and tips here, you can easily create that crisp, clean, and smooth look. Keep reading to learn all about painting furniture with white paint!
White painted furniture is a popular choice for many reasons. It can brighten up any room, make your space feel bigger, and add a bit of elegance. It also goes great with farmhouse and shabby chic decor styles.

This color can come in pure white, off white, or even shades of cream. So, you still get a lot of variety while still creating that classic look. Plus, if you ever feel like making a change, it’s super versatile and fits in with pretty much anything.
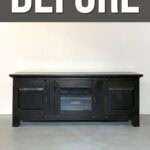
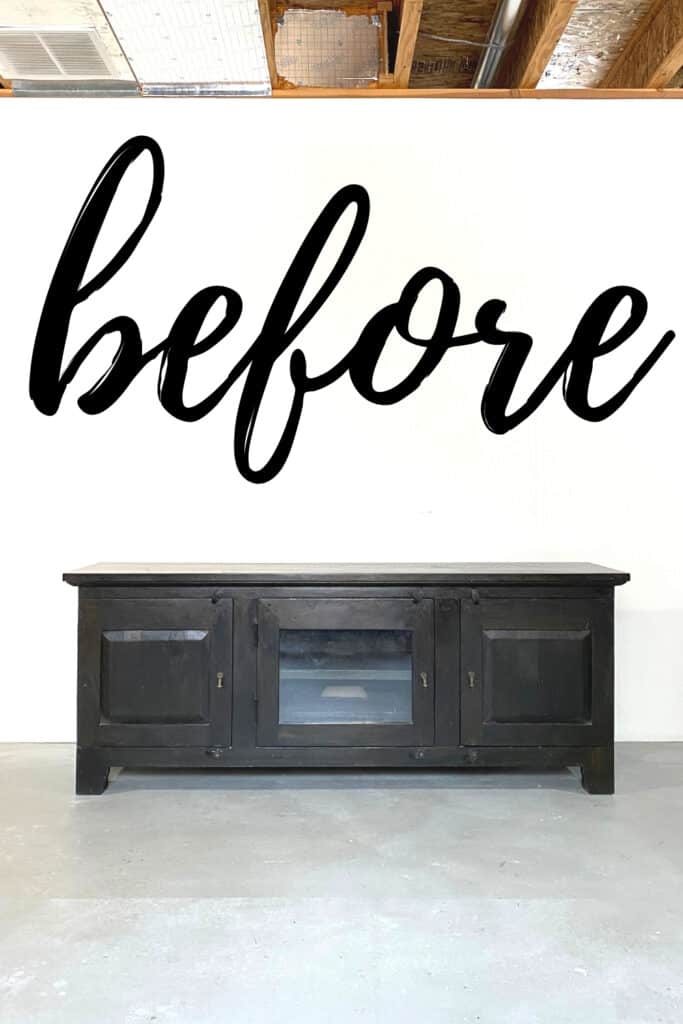
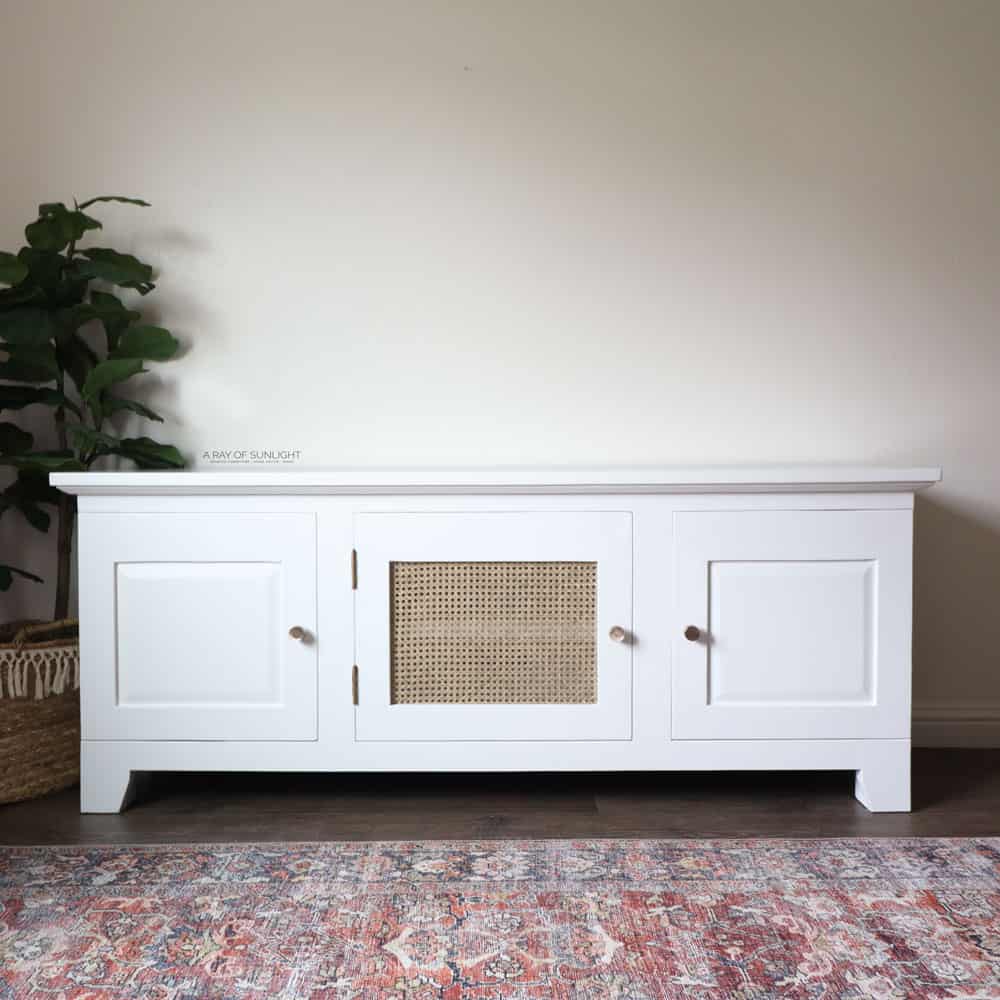
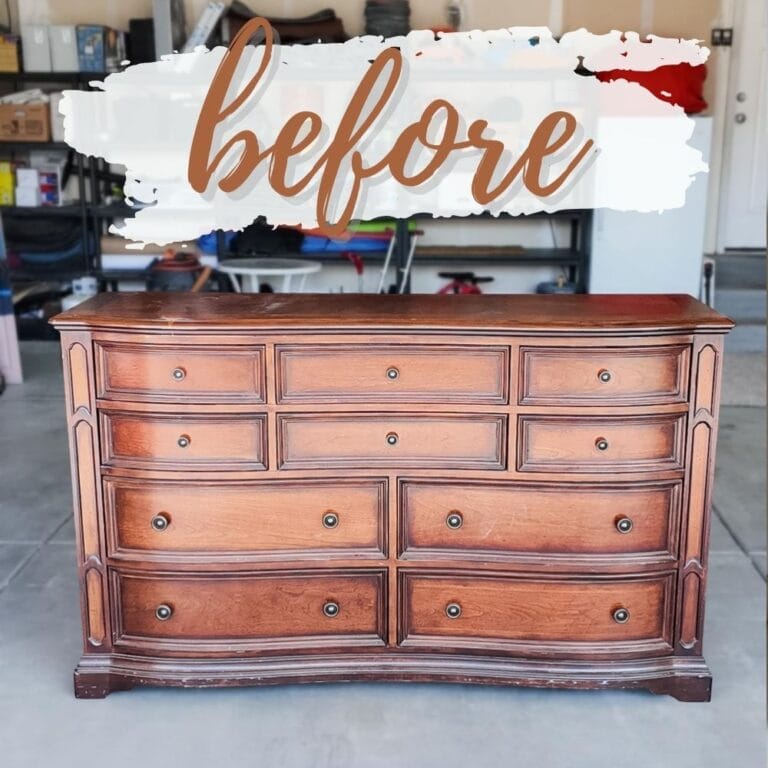
Okay, I’ll be honest; this can be a bit of a process. Especially if you’re working with dark wood! This TV stand makeover wasn’t the quickest project I’ve ever done. But I’m sharing my mistakes and wins so your project can be as easy as possible.

Supplies Used for Painting Furniture White
As an Amazon Associate, I earn from qualifying purchases. I also may earn from other qualifying purchases with other companies or get free product to review and use. All opinions are my own.
- Krud Kutter Cleaner Degreaser
- A LOT of the Best Stain Blocking Primer
- Respirator
- Favorite 220 Grit Sandpaper
- 400 Grit Sandpaper
- Shop Vac with Hose and Brush Attachment
- Tack Cloth
- Paint Rollers, Brushes, or a Sprayer
- Sherwin Williams Emerald Urethane Trim Enamel Paint
- Wood Filler or Paintable Caulking (optional, depending on the piece)
Prep Before Painting Furniture White
Let’s dive into the makeover now! We started by prepping this piece just like we always do! The prep work is one of the most important things to do if you want to have a durable and lasting finish. Learn all about how to prepare furniture for painting here.
Remove Any Hardware
First, remove the knobs, hinges (or tape them off so paint doesn’t get on them), and glass if you want… Basically, remove anything that you don’t want to get painted. Or tape it off to prevent any color from getting on it.
Learn how to paint drawer pulls to give your old hardware a brand new look! Or here’s how to clean old furniture hardware to make it shine like new!
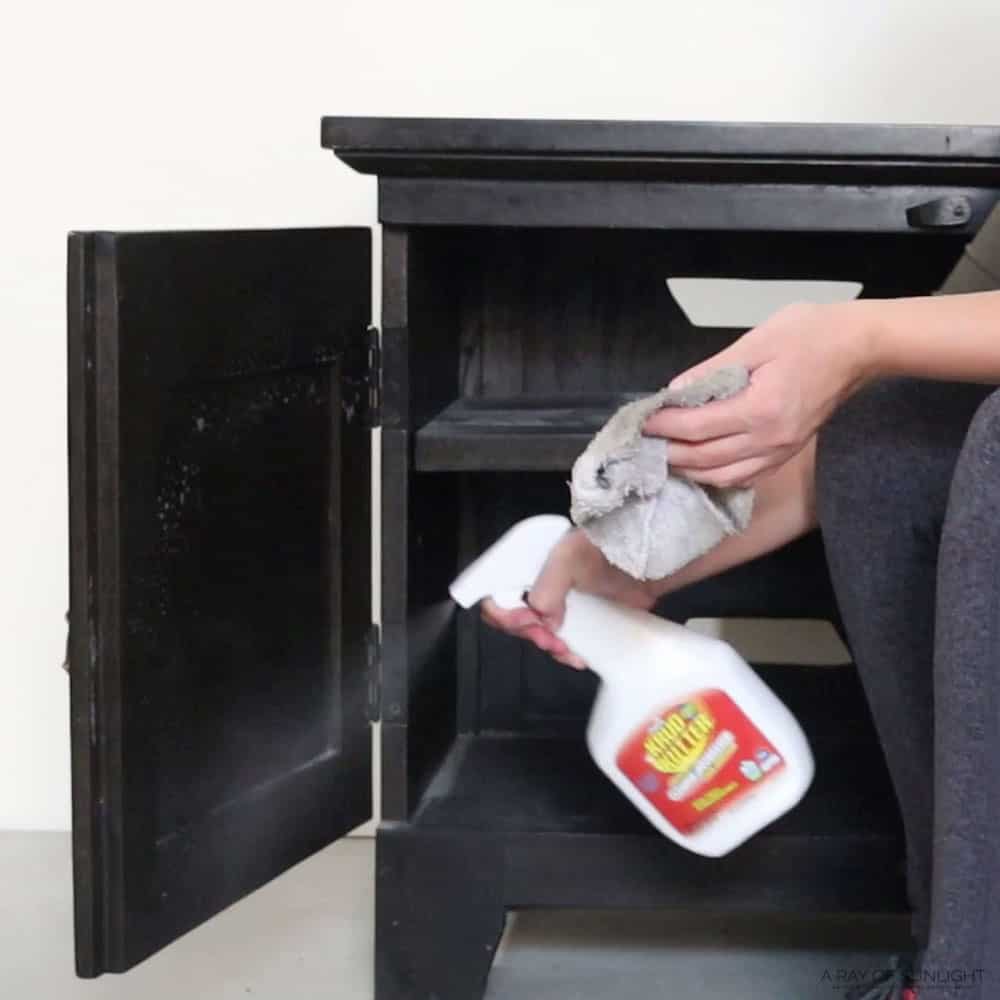
Cleaning With a Degreaser
Then, clean your piece with a degreasing cleaner. Dawn dish soap can work for this if you’re on a tight budget. But I prefer to use Krud Kutter. It’s an amazing cleaner that cuts through grease and grime!
Bonus points: it’s great as a cleaner around your home, too!
Just spray it on and scrub the surface with a wet rag. I also like to go back with a clean, wet rag and rinse it all off, just to make sure everything is off. Then let it dry. Learn more on how to clean furniture before painting here.
Priming with a Stain Blocking Primer
Next, get comfy with a lot of stain blocking primer. Yeah, you’re gonna need a lot of it. Again, especially if you’re working on dark wood. This product has a couple of purposes.
- It helps with coverage.
- It blocks stains from coming through the paint.
- It helps the finish to adhere.
A really good one will do all 3 of those things. Read all about the best primers for painting furniture and how to choose the right one here!
A basic, waterbased primer will basically be a cheap white coating and might help the color adhere better. My favorite type is a shellac based one. Specifically for this project, it’s a white-tinted shellac-based primer.
And even more specifically, I recommend the BIN shellac-based primer. (NOT the advance, synthetic kind.) BIN Shellac will do it all. We feature it as one of the best spray primer for wood options in this post.
Check out Cover Stain VS BIN Shellac Primer to learn more about the similarities and differences between these two.
How to Apply BIN Shellac Primer
My favorite way to apply BIN Shellac is to spray it from the spray cans. But, if that’s not a possible option, the next best way is to roll it on with a mini roller.
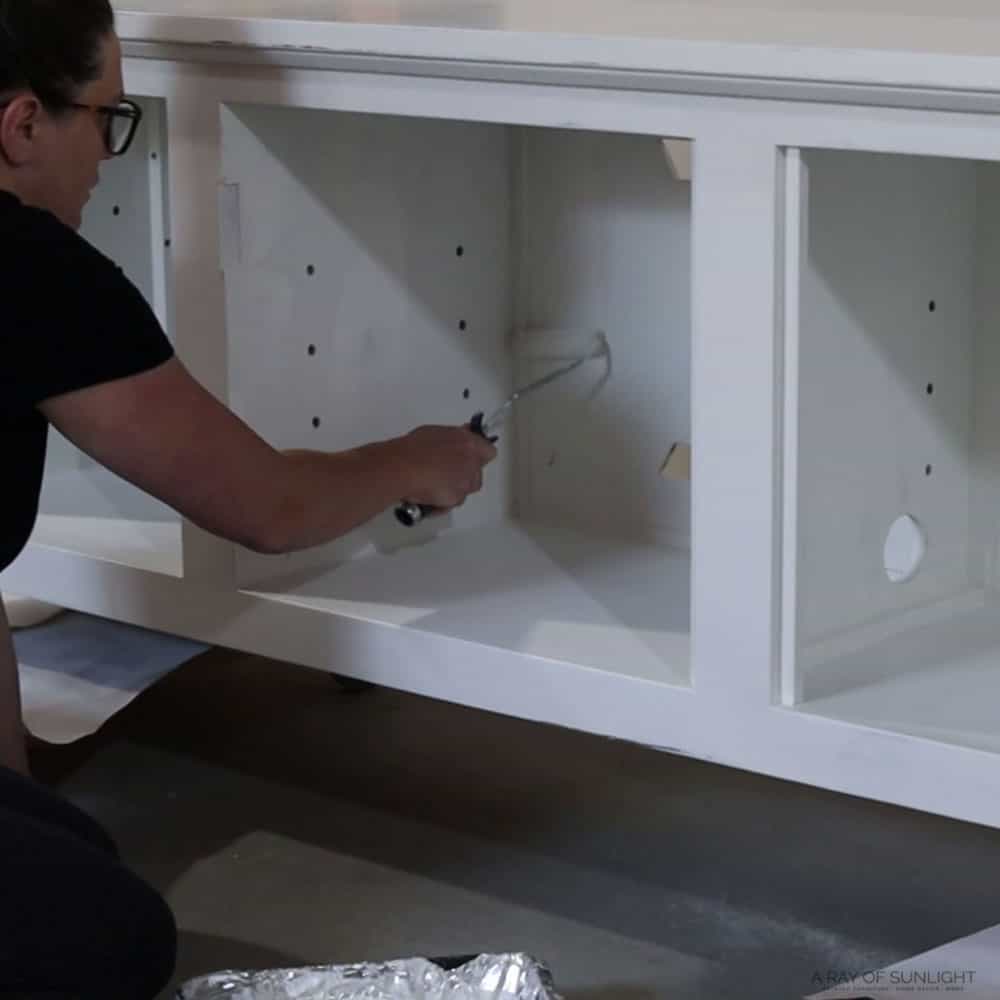
I use a 3/8 nap roller or a foam roller. But beware that a roller will leave bumps. And when you spray it, it will be more rough. You can also brush it on. But it’s really thin, so brushing is the last option, in my opinion.
Should I Scuff Sand Before Priming?
Nope. If you’re using a shellac-based primer (like BIN) you can skip the scuff sanding step. Shellac has AMAZING adhering properties. It even sticks to laminate without any scuff sanding.
So, whether you’re working with laminate or wood, you can follow the steps in this post. For laminate, here’s how to paint laminate furniture to guide you further.
How to Prevent Yellow Stains Coming Through White Paint
BIN will also prevent yellow stains or bleedthrough from coming through the light colored layer.
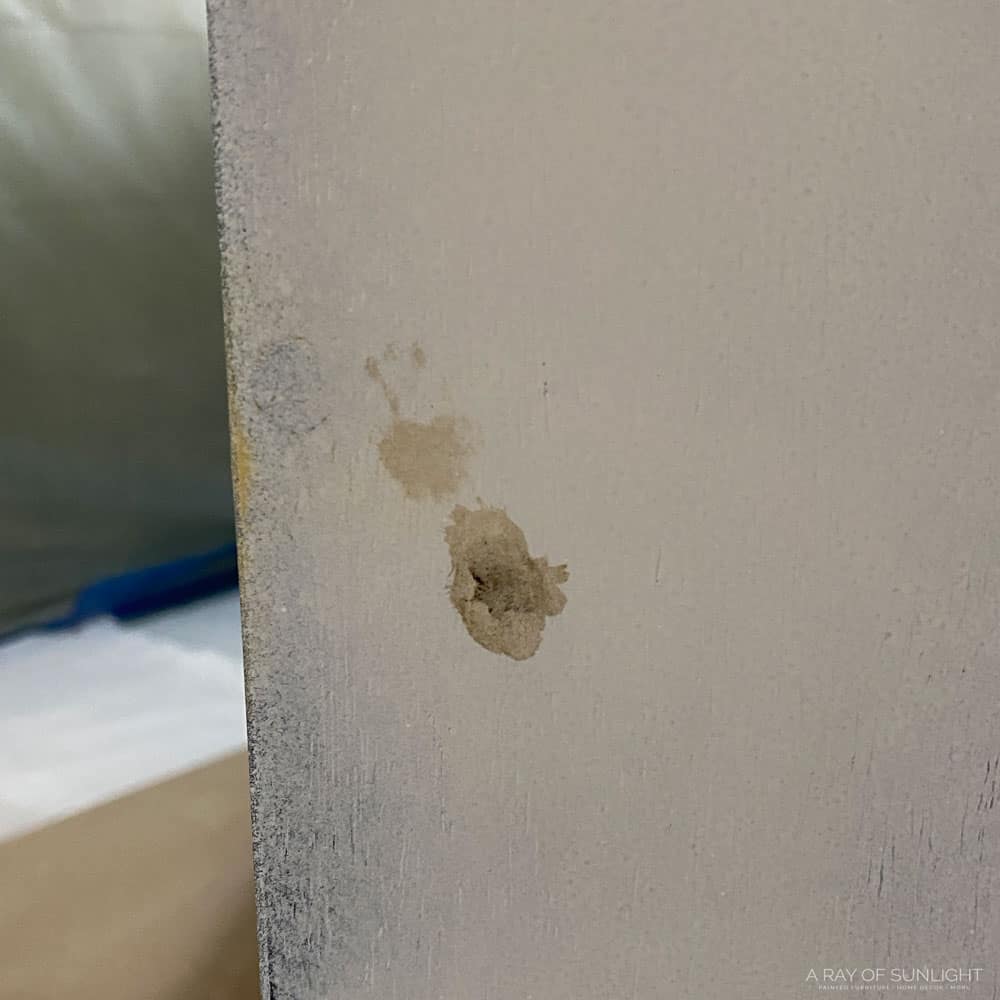
It might take a few coats to completely block the stains (whether they’re pink, orange, yellow, black, or brown stains). Shellac and oil-based products do the best job of preventing these stains. Here’s why is yellow coming through white paint to know the reason behind this common problem and help you prevent or fix them.
You can check out the best primers to stop tannin bleed here and learn more about how to stop stains from coming through paint here.
How Many Coats of BIN Shellac
You’ll most likely need at least 3 coats to get full coverage. If you sand it back down to bare wood in some spots, you’ll need to get those areas to full coverage with primer before painting because:
- Paint is usually more expensive than primer. So it’s cheaper to apply more coats of primer.
- Primer blocks stains. The more coats you apply, the less chance you’ll have stains appearing at the end.
- A lot of times primer is better at covering the previous surface than paint is.
BIN Shellac Based Primer Dry Time
I love how fast it dries! Actually, when I’m rolling it on, I hate how fast it dries, because it’s really easy to overwork it because it dries so fast. It’s usually dry to the touch within 15 minutes. But it’s ready for another coat of shellac or the new finish after 45 minutes.
If you’re trying to block stains, it’s best to let it dry overnight before painting over it.
Once it’s dry (30-45 minutes usually) it’s time to sand it smooth. BIN shellac sands really easily and into a fine powder (make sure to wear a respirator!)
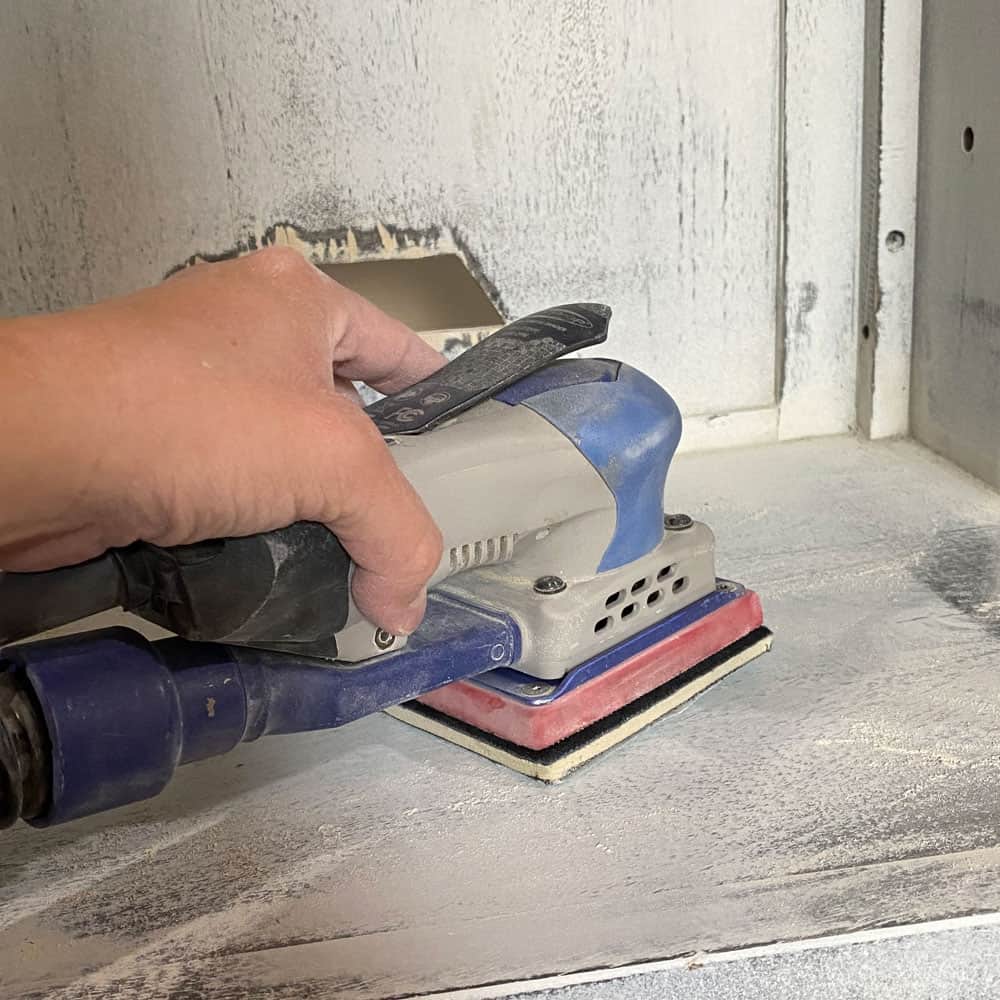
If you sprayed it on, it will be pretty rough. If you don’t sand that smooth before you apply the new finish, then the results will be just as rough. If you rolled it on, it probably will feel decently smooth. BUT it will most likely have a lot of bumps and texture from the roller.
I personally don’t like the texture, so I like to sand it down to remove that texture. Read about the best sanders for furniture here and how to choose the one that’s right for you!
Can I Skip Sanding Between Coats of Primer?
Yeah, you can. I don’t believe that it will make the final finish less durable by any means. But, if you don’t do the sanding, you’ll end up with a lot of texture or a rough surface for the new color.
If you really don’t want to sand, you could try to get away with sanding just after your last coat of primer. Learn about the best sandpaper for furniture painting you can use here.
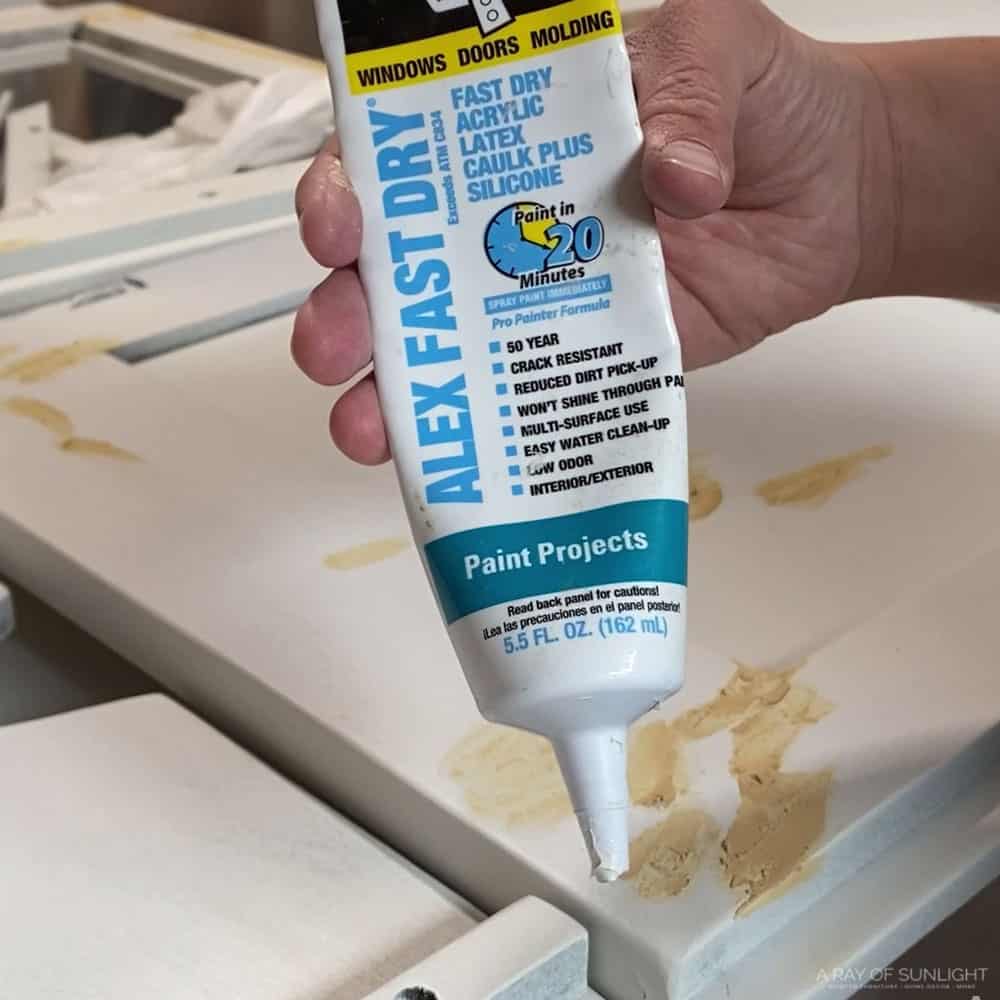
Now is also a great time to fill in the cracks, seams, details, dings.. basically anything that looks black against the white primed layer.
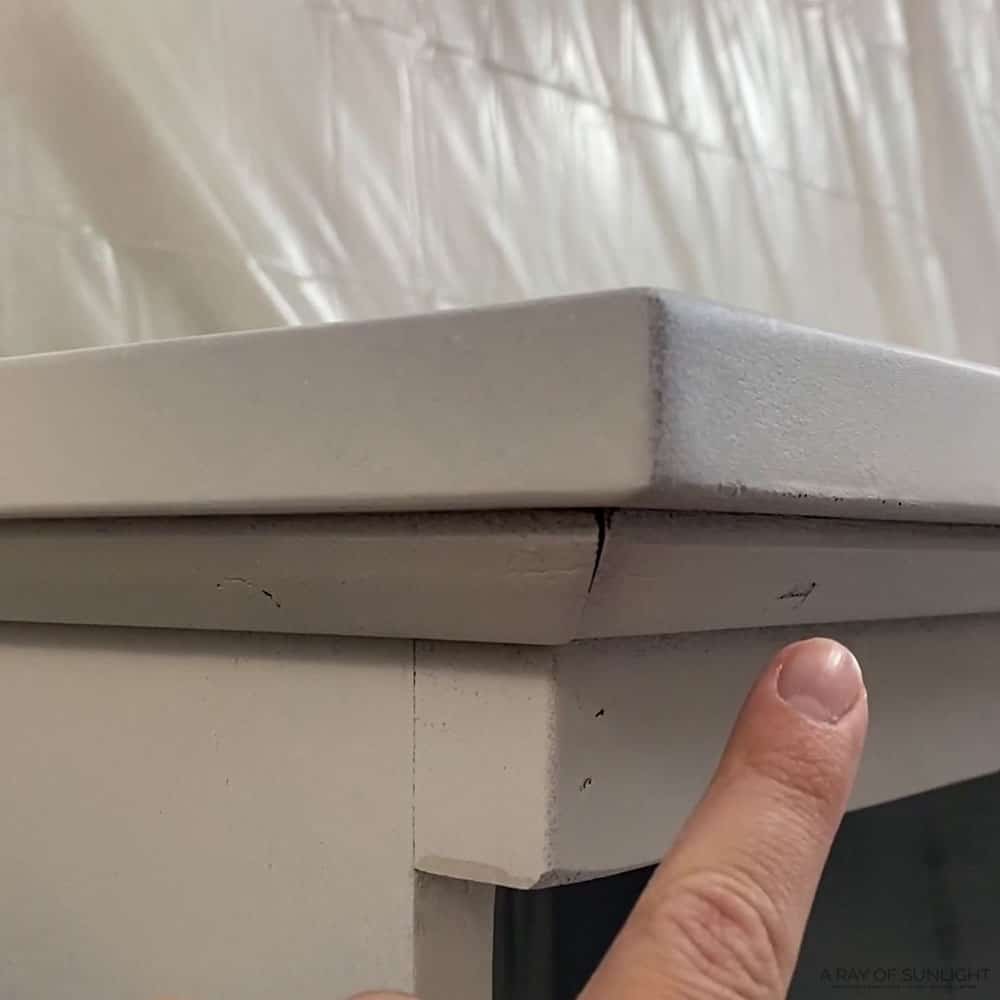
These things usually don’t show much when it’s just the wood. But once you put a coat of white, all of these spots show up. You can fill a lot of it with wood filler. Check out the best wood fillers for furniture here. The seams can be easily filled with paintable caulking.
After you’re done sanding, easily clean up the dust you created with a vacuum hose and a brush attachment.


Then, wipe off any remaining dust with a tack cloth. Tack cloths are super sticky, and dust can’t help but cling to them!
How to Clean Up BIN Shellac
No matter how you apply it, you can clean it up with ammonia, denatured alcohol, or acetone. Do not try to clean it with water. It won’t work.
Would you like to save this?
How to Paint Furniture White
After your piece is nice and primed, these layers have dried overnight, and you don’t see any stains… Then it’s time to paint it white! Wahoo!!
Sherwin Williams Emerald Urethane Trim Enamel is an awesome white option – it’s one of the best enamel paint for furniture we recommend. If you haven’t tried using this type of paint, here’s painting furniture with enamel paint for what to expect.
Here’s my list of the best white paint for furniture if you want to check out other options.

Why is Sherwin Williams Emerald Urethane Trim Enamel a Great Paint?
It’s waterbased but is durable like the oil based version. It’s a trim and door paint, so it’s really durable. More durable than latex. It’s also an alkyd paint but waterbased. That basically means that when you’re using it, it acts waterbased.
But as it dries and cures, the water evaporates (I think?), and it basically becomes oil based. So it ends up being durable like oil based paint is! Since it’s durable and can handle wear and tear, it’s even considered the best paint for dining room table.

But you don’t have to deal with it like you would have to deal with oil based products. Awesome right?
Another thing that I absolutely love is that it’s self leveling! That means that you can brush it on, and you won’t have brush marks left behind! Yep! It’s pretty amazing!
Learn more about this best Sherwin Williams paint for furniture in this post, and here’s my honest Sherwin Williams Emerald Urethane Trim Enamel review for more of my thoughts on it. You can also check out this painted armoire makeover where we used it.
Painting with Emerald Urethane Trim Enamel
You can brush it with a nylon or polyester paintbrush (or a synthetic brush). Check out the best paint brushes for painting furniture here.
Or you can roll it on with a roller (a 1/4 to 1/2 inch nap woven roller). These Mohair rollers are great! Read through this post to learn more about the best rollers for painting furniture.

You can even spray it on. Sherwin Williams recommends using an airless sprayer. But I sprayed it with my Fuji Q4 paint sprayer using a 1.3 tip and thinning it out a little bit (more on that below). I know other furniture painter friends have sprayed it with their stage 2 sprayers, too.
Since it’s self leveling, you can brush it on, and it won’t leave brush marks. Especially if you follow these tips in my post about how to paint furniture without brush marks.
You can also get a really smooth, fine finish with a roller as well. Either way, be careful not to overwork it when you add it on. Apply it and leave it alone.
Thinning Sherwin Williams Emerald Urethane
Can you thin Emerald Urethane Enamel? You can! Technically, Sherwin Williams says you don’t need to thin it. But that doesn’t mean that you can’t.
Yeah, you might lose some of the durability factor if you thin it an excessive amount. But it’s pretty typical to be able to thin it 10-20% without messing up its properties. Check out this post to learn more about how to thin paint for a paint sprayer.
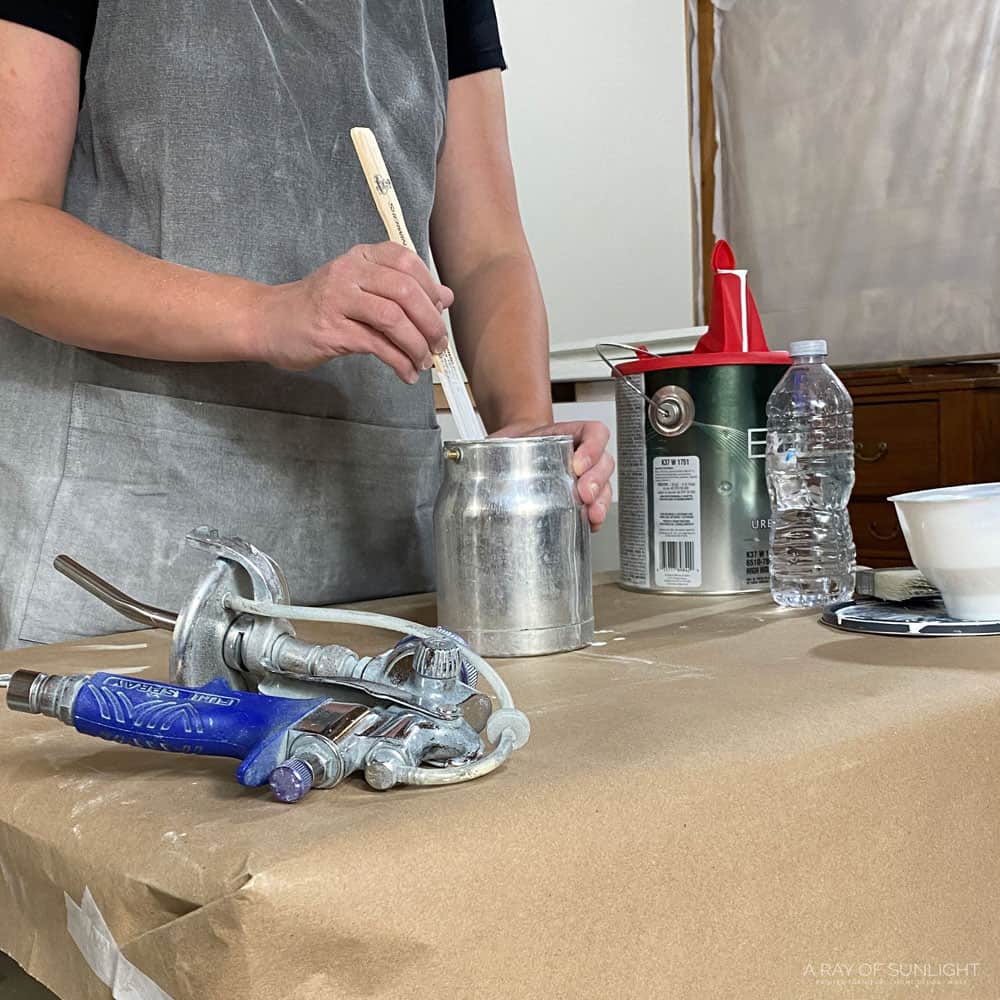
I have thinned it about 10-15% for my Fuji Q4 HVLP gun and gotten beautiful results. I also used a 1.3mm tip and needle when I sprayed it. The 1.3mm tip is my all-time favorite. I use it for everything. haha
Another friend (Sarah at Sitting Pretty Decor) had success with her Fuji Semi Pro 2 and thinned it by probably around 20%, I think she said. And she thought she would have used the 1.3mm tip. Read this post to learn about the best HVLP paint sprayers for furniture and their features.
How Many Coats of Sherwin Williams Emerald Urethane Trim Enamel
Sherwin Williams recommends 2 coats over the primer.
Sherwin Williams Emerald Urethane Sand Between Coats
Do you need to sand between coats? Nope. But, just like with the primer, sanding between coats will only help you get a better looking finish.

I recommend sanding with a 400 grit piece of sandpaper. Especially right before the last coat. 220 grit sandpaper can leave a lot of scratches.
Topcoating Sherwin Williams Emerald Urethane Trim Enamel
Move over chalk paint! If you’ve ever topcoated, you know that the struggle can be real. This brand doesn’t need any of these topcoats for painting furniture to make it wipeable and durable.
Actually, you shouldn’t topcoat it! If you put a waterbased topcoat on it, it can crack and create a mess as the finish cures.
Sherwin Williams Urethane Trim Enamel Dry Time
Sherwin Williams Emerald Urethane Trim Enamel has a dry time of 2 hours and a recoat time of 4 hours. This is assuming the conditions are 77°F (25°C) and 50% relative humidity.
Sherwin Williams Emerald Urethane Trim Enamel Cure Time
It’s usually cured after 30 days. Darker colors will take a longer time to cure. Lighter colors should be cured in 30 days.


Sherwin Williams Emerald Color Options
Sherwin Williams Emerald Urethane Trim Enamel choices are endless. Aside from white, you can have it tinted to whatever color your heart wishes!
What I Don’t Like About Sherwin Williams Emerald
My biggest complaint is the sheen and how some felt kind of chalky. The high hide white base and satin finish have a chalky or velvet feel when it’s dry. But, the deep base and the ultra deep base feel more like a satin sheen usually feels like in my opinion.

So, when you’re using any color that uses the high hide white base, go up a sheen to the semi gloss sheen, and you shouldn’t have issues with the finish feeling chalky.
I’ve also heard a lot of complaints that the sheens are off. So, the satin sheen is more like a matte sheen, and the semi gloss sheen is more like a satin sheen. I felt like it was more in between than a whole step down to the next sheen.
But the deeper the base, the shinier it gets. So, the ultra deep base seems like it has a true satin sheen when you get the satin sheen. It’s weird how it’s so finicky. But that was my experience with it.
How to Install Cane on Furniture
For the cane detail, here’s how to install cane webbing to a door. If you’re worried about damaged cane and wrapping, check out this guide on cane furniture repair and how to repair rattan wrapping. And for refinishing cane, here’s how to lighten cane furniture.
That’s all there is to it! Here’s my DIY TV stand if you want to make your own. And watch our YouTube video below for the whole process:
More Before and After Makeovers
See All >
Click any of these “before” photos below to view the “after” of that makeover.


Now, actually doing it on your own may be a whole other story. Sometimes, everything goes right. But usually, there is a bump or two along the way. But once you know the basics of painting furniture white, you can do it!


Painting Furniture White
Painting furniture white can be a bit of a process. Learn the step-by-step process and the best tips and tricks to make it go as smoothly as possible.
Materials
Instructions
- Prep the furniture for painting and start by removing the old hardware then cleaning furniture with a degreasing cleaner. Go back with a clean wet rag and rinse it all off, just to make sure everything is off. Then let it dry.
- Prime furniture with a stain-blocking primer, and once a coat dries around 30-45 minutes, sand it smooth. You can also fill in any cracks, seams, details, dings, or basically anything that looks black against the white primer. After you’re done sanding, easily clean up the dust you created with the vacuum and tack cloth. Prime furniture with at least 3 coats for full coverage. Leave the primer to dry overnight.
- After your furniture is nice and white from the primer and you don’t see any stains coming through the paint, paint your furniture with 2 coats of Sherwin Williams Emerald Urethane Trim Enamel. You can sand using 400-grit piece of sandpaper between coats of paint to get a better-looking finish.
- Let your white painted furniture dry and add your hardware. Note that Sherwin Williams Emerald Urethane Trim Enamel is usually cured after 30 days.
Recommended Products
As an Amazon Associate and member of other affiliate programs, I earn from qualifying purchases.


More White Painted Furniture Makeovers
- How to Spray Paint a Dresser with Chalk Paint
- How to Paint a Dresser White
- Painting a Dresser White
- How to Chalk Paint Furniture White
- Painting a Dining Table White
Follow us on YouTube to get more tips for painting furniture. Or share your project with us on our Facebook Group and be part of our community. See you there!
love all your info. thank you
I’m looking for the paint color you used – was there one? I love your blog by the way! I like how you teach people to do it right the first time. That’s always been my struggle with other diy blogs – they skip too many corners.
Hey Stephanie!
I didn’t tint it to any color. I just used the white base as is.
I’m so glad you love our blog! Thank you for being here!
what do you use to thin the urethane? water?
This specific paint is waterborne, so yep, I thin it with water.
Hi Natalie, great info on the primer. I have a large piece with orangey wood stain and want to do a white or gray wash to neutralize the orange. Should I prime first?
Are you only doing a wash over the original orange stain? You can prime with clear shellac. It’s never a bad idea to prime.
How disappointed will we end up if we didn’t get the higher sheen paint for furniture? My dd bought the satin SW enamel urethane but just stumbled across this today. We’ve already had it tinted a different shade of white to go over black furniture. Also, am I reading correctly to not use a top coat of any kind?
You’ll have to weigh that cost. Is it worth spending more money on paint to have a true satin finish? Do you worry about having a more matte finish on your furniture?
Yes that is correct, do not use any topcoat on this paint.