How To Paint Furniture For Beginners


Painting furniture can be a fun and rewarding hobby, and anyone can create beautiful pieces for their home. So here’s our guide on how to paint furniture for beginners, full of tips and tricks to get you started!
We will walk you through each step of the process, and we can’t wait for you to try out these painting furniture ideas yourself. Keep reading for everything you need to know, and sooner or later, you’ll be a pro!

If you’ve never painted furniture before, you’re probably wondering where and how to begin. That’s totally normal, especially if you’ve never done it before. But actually, you don’t need any experience or special skills to do it!

You’ll be amazed at how quickly you can transform any piece with just a new coat. It’s simple and budget friendly, and the best part is you can customize your project to any style or color you want. Plus, you’ll have the satisfaction of creating it yourself!
It’s a fun hobby to get into, and once you get the hang of it and get pretty good, you might even start selling your creations. So, if you’re ready to learn, let’s dive into this beginner’s guide on how to paint furniture!
As an Amazon Associate, I earn from qualifying purchases. I also may earn from other qualifying purchases with other companies or get free product to review and use. All opinions are my own.
Remove The Hardware
First things first, you’ll want to take off any hardware. Most of it is usually screwed in from the inside. If you’ve got doors, just open them up, and you’ll probably see a screw on the other side of the hardware. Same thing with drawers – open it up, and there will be screws on the other side or inside.

Hinges usually come off pretty easily, but here’s a disclaimer: they are a lot harder to put back on. When removing them, make sure you’re labeling everything with painter’s tape. Stick the tape onto the hinge so you can reattach them exactly how they were before. Because if they aren’t put on exactly the same, then sometimes, the door will get off a little bit, and it’s just a pain.
Another option is to tape around the hinge if you don’t want to take it off, but painting over a hinge isn’t a great idea. The coating will chip off pretty quickly, and it won’t look good for long. That’s why we remove the hardware, and it’s just a 5 minute task that’ll make everything so much better in the end.
This way, you can also change it out to something else, even without having to repaint your piece. Check out our post on how to change hardware here – you will want to do this process right after you remove the hardware and not wait until later. If you still want to use the old ones, here’s how to clean old furniture hardware to refresh their look.
Clean The Furniture
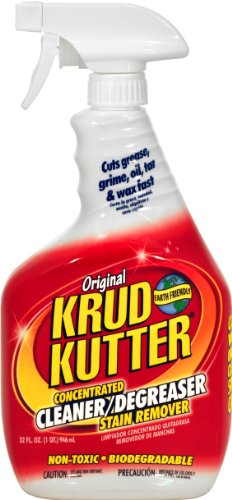
Then, we need to clean the whole piece. I use Krud Kutter to get all the oils, grease, grime, and dirt off. This stuff cuts through all of that easily. I just grab an old wet rag I don’t care about, spray the Krud Kutter all over, and wipe it all off, including scraping off any stickers, gunk, or leftover residue.

We want to clean everything off so the new color will look nice and fresh without any imperfections showing through underneath. Paint doesn’t stick well to oily surfaces, so take care of any grease or oil with a degreasing cleaner like Krud Kutter. Learn all about how to clean furniture before painting here.
Sanding Before Painting
After letting the piece dry, here’s where you can go one way or the other.
If you’re just looking for a super quick makeover and don’t care much about how well the paint sticks (which I wouldn’t recommend, but hey, it’s your call), you could basically get right into painting at this point.
But I am a huge advocate for prepping first – it makes the new finish last longer and look way better in the end. But if you really want to skip this step, feel free to jump to the priming or painting section below.
Sanding really isn’t a big deal. Just a quick, light scuff with 220 grit sandpaper is usually all you need. This means just grabbing a piece of sandpaper – I usually like to have a small piece of maybe 3×4 inches – fold it in half, and rub that all over the surface lightly.

You can also use a power sander if you want. Just be careful so you don’t accidentally go through the wood or veneer, depending on what type of material your furniture is made of. Learn why sanding before painting furniture is important here, and get more tips on sanding for paint prep in this post.
Then, you can just vacuum up the dust, wipe it off with a damp rag, or use a tack cloth, which is my go-to since it picks up the dust so easily. Here’s more on how to clean wood after sanding.
Priming the Furniture
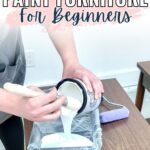
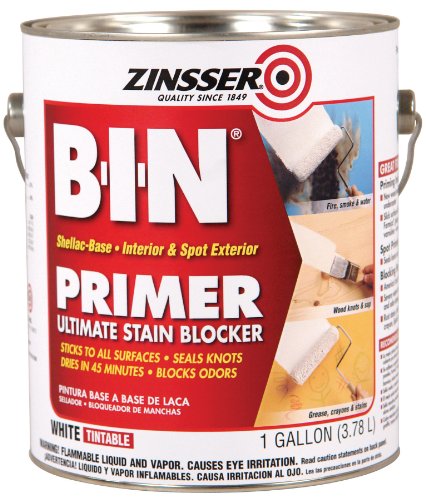
Now, what you’re gonna do is prime. And you don’t want to use just any primer, especially for wood surfaces. Go for a shellac based or oil based one. Personally, I like to use clear shellac – it dries super fast, so you can get back to your project in no time.

Would you like to save this?
I use the clear shellac spray can, which is super easy to just spray all over. Since it’s clear, there’s no mess to worry about. Again, it dries really fast, usually within an hour. I still like to leave it for a few hours, especially if there are spots where I’ve sanded down to raw wood.
Just like sanding, priming will help with adhesion. But there’s also this little thing called bleed through. Priming with shellac will make sure these stains do not appear on the new finish. And letting it dry for a few hours will go a long way in blocking bleedthrough. Learn more about how to stop stains from coming through paint here.

If you want to do just one prep step, make it the shellac. If you don’t feel like sanding, you can skip it, but definitely use a shellac primer. This way, you can make sure the new paint sticks better and any stains won’t affect the final finish.
Painting Furniture for Beginners
Now, the easiest way is to use Heirloom Traditions Paint. It’s an all in one product that supposedly doesn’t need any prep work other than cleaning. But they recommend using their Deglosser Surface Prep.

Then again, they say that you don’t need to prep your piece before using it. And I will say that I have used it on laminate furniture without much prep, and it’s a lot more durable than any other paints I’ve tried. Here are more options for the best type of furniture paint for beginners!
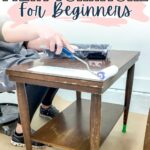
Heirloom Traditions comes in many beautiful colors. You can brush or roll it on or even spray it. Personally, I love spraying it on, but I get that it’s not the easiest option for beginners. But it’s the best option if you’re after a super smooth finish without any brush marks or texture. Learn all about how to use a paint sprayer here.
Otherwise, you can just use a regular paintbrush and roller. I like to use a Zibra brush, or if I’m rolling it on, I’ve used these mini 4-inch rollers, and they’ve all done about the same job. Check out your options for the best paint brushes for painting furniture and best rollers for painting furniture here.

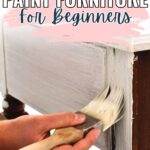
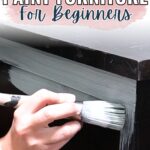
When you’re brushing or rolling, make sure you’re not getting any drips. You don’t want to apply the paint too thick, or it’ll start dripping and running down the sides. I like to brush it on first to get into all the details, then go over it with a roller to smooth everything out and get rid of brush marks.
Apply the first coat, let it dry for about an hour, and then you’re good to go with the next one. Keep in mind that lighter colors, like white, will need a few extra coats to fully cover up the dark wood underneath unless your piece is already white or a light color to begin with.

Light colors don’t have very good coverage – it’s pretty see through, so it’ll probably take 4 to 6 coats. For darker or medium colors, it’ll usually just take 2 to 3.
Put Hardware Back On
This Heirloom Traditions all in one product does not need a topcoat, which is fantastic. So, once you’re done applying the new color, you can put your hardware back on. Then, I’d recommend letting the finish dry for at least 48 hours before using your piece. This way, you won’t risk scratching it too easily.

And that’s all there is to it. Now that you have the basics down, we’re excited for you to start creating your own beautifully painted furniture pieces!
More Painting Furniture Tips
- Painting Furniture for Beginners
- How to Paint a Dresser
- How to Paint Particle Board Furniture
- How to Paint Kitchen Cabinets

Follow us on YouTube to get more tips for painting furniture. Or share your project with us on our Facebook Group and be part of our community. See you there!