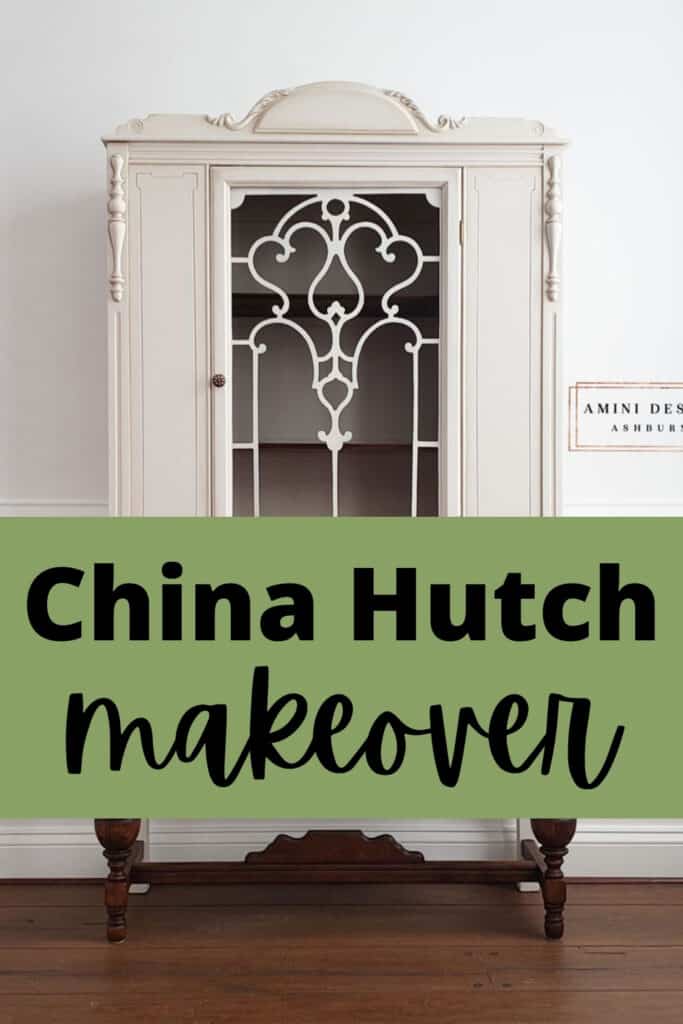
Antique China Hutch Makeover | Step By Step


Update your old china cabinet with a little bit of paint and stain! Here’s a great step by step antique china hutch makeover to get inspiration for your own china cabinet. With some simple steps, materials and a little bit of creativity, you can transform your old china hutch into something stylish and modern.
These best painted furniture ideas can breathe new life into seemingly outdated and uninspiring antique pieces of furniture, and a china hutch is no exception. Let’s dive into this tutorial on how to give your china hutch a fresh new look!
In this blog post, we’ll be taking you through the process of giving an antique china hutch a makeover, step by step. We’ll discuss what materials to use, painting techniques and more, so that you feel confident tackling your own project in no time!

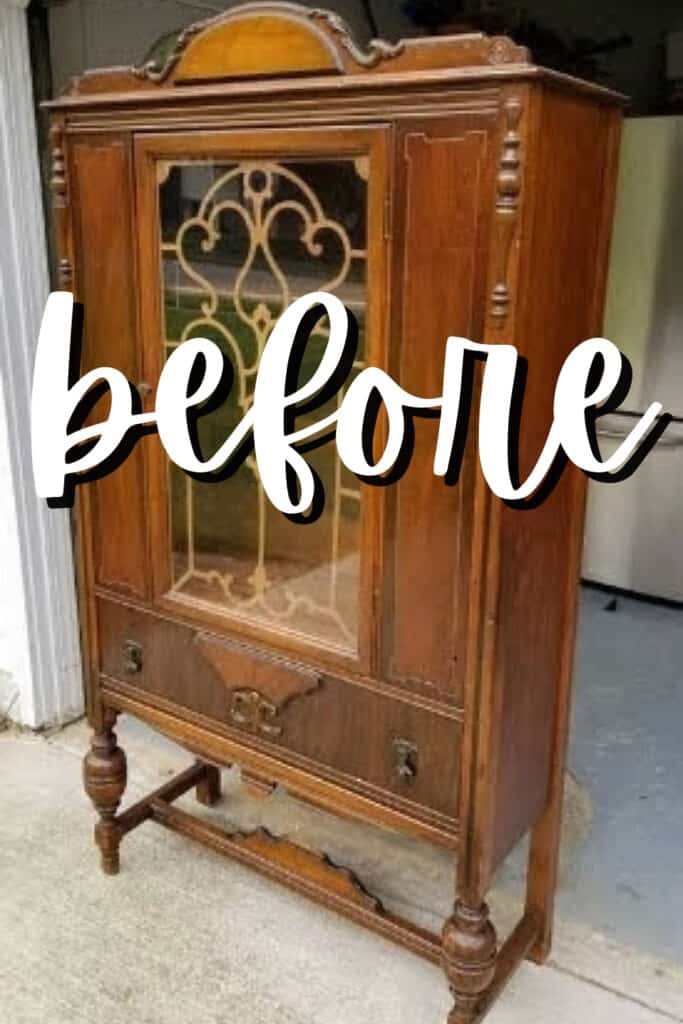
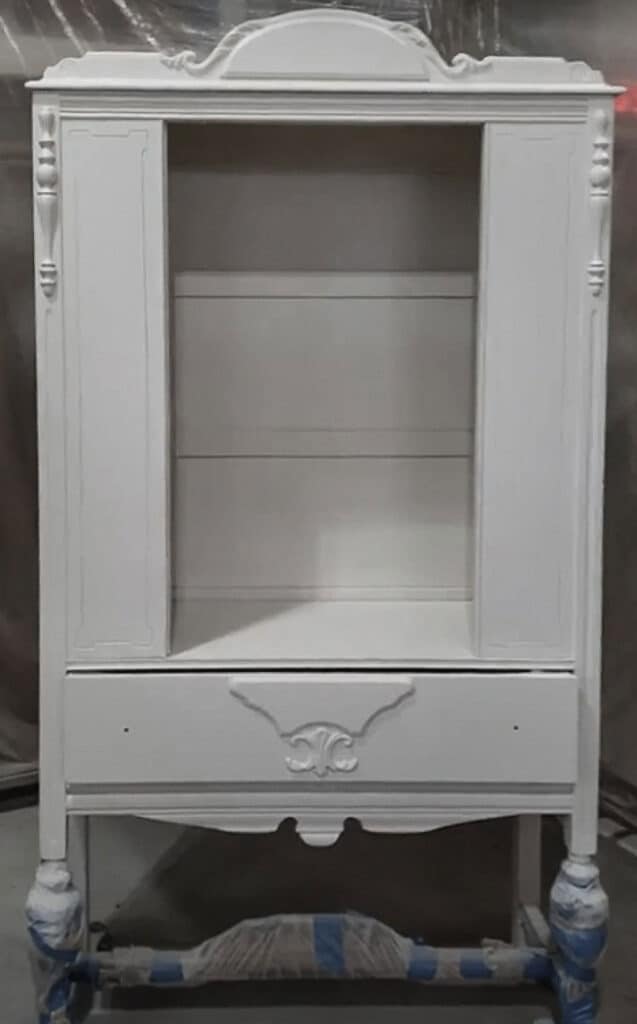
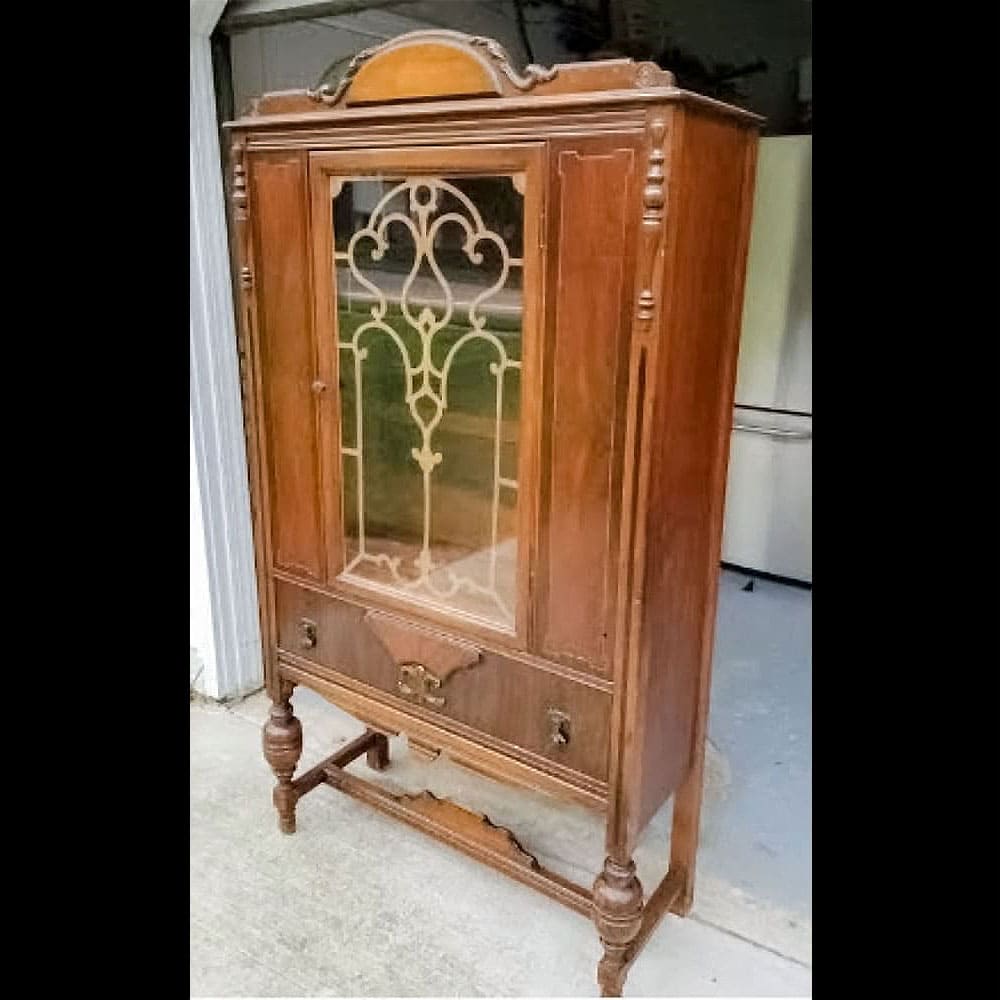
This is by far my FAVORITE style of furniture. There isn’t anything quite like Jacobean style pieces, their detail and round feet get me every time. (Check out this other Jacobean buffet that Natalie painted in this black painted antique buffet makeover! For another antique piece, here’s painting an antique buffet.)
This particular piece was sourced for a client that shares the same warm and cozy feelings for these depression era pieces that we do, so once we got this piece in our workshop, we couldn’t wait to get started.

Supplies Used for Antique China Hutch Makeover
As an Amazon Associate, I earn from qualifying purchases. I also may earn from other qualifying purchases with other companies or get free product to review and use. All opinions are my own.
- Krud Kutter
- Plastic Wood Filler
- Surfprep Electric Ray 3 x 4 (Use code RAY10 for 10% off your SurfPrep Order!)
- Tack Cloth
- Oil Based Spray Primer
- Sherwin Williams Emerald Urethane Satin Trim Enamel in Steamed Milk
- Spray Gun (I used the Fuji Semi-Pro 2)
- General Finishes Walnut Stain
- Annie Sloan Clear Wax + Dark Wax
- Wax Brush
- Lint Free Cloth
- Nylon Wire Brush
- Bar Keepers Friend
- Rustoleum 2x Ultracover Matte Clear
Here’s our list of the best painting furniture supplies that we use on every makeover. You can get them ready and handy for your next project, too!
Cleaning Antique China Hutch
The first and most important step in refinishing furniture is to clean and prep, so we grabbed our Krud Kutter, gloves, and a shop towel and got to work! I sprayed our favorite, Krud Kutter, and used a shop towel to wipe away the dirt and grime.
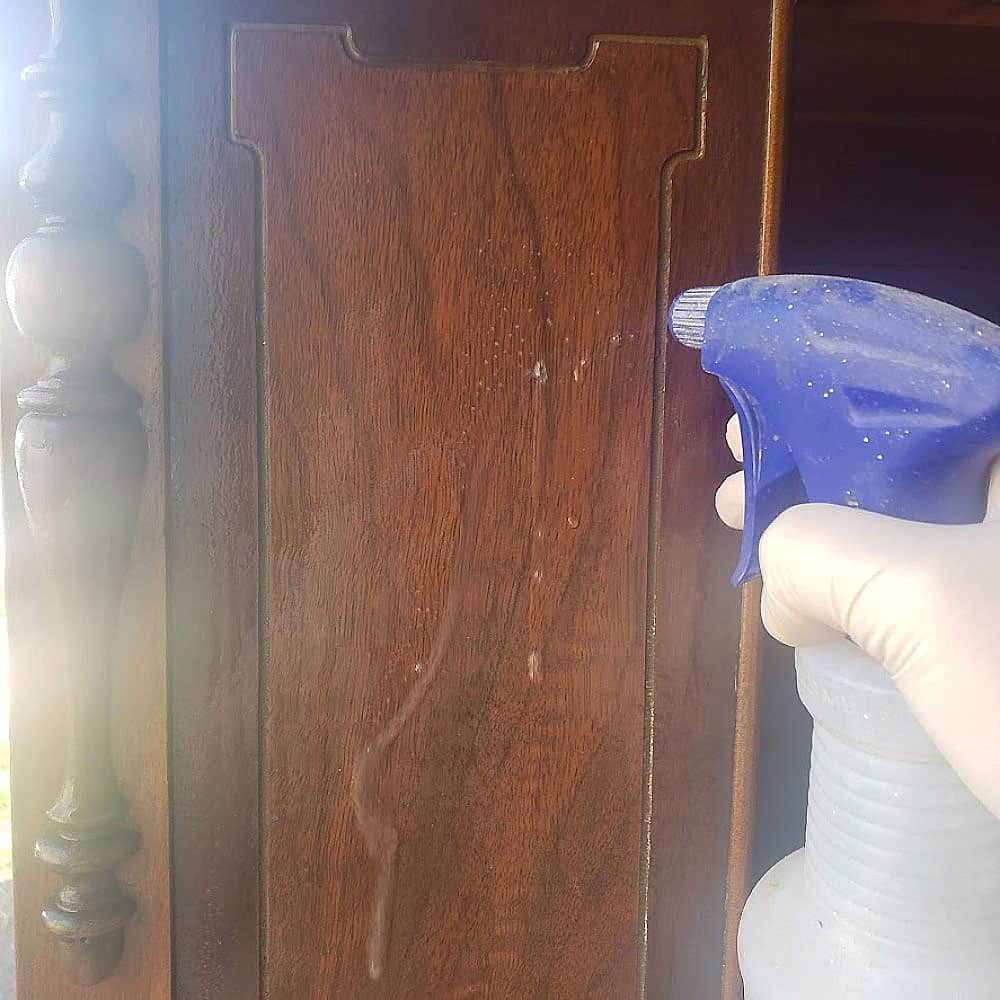
Then, we repeated this process a few times, making sure to rinse with clean water when we were sure the oils and leftover residue were removed from the surface. We then let the piece dry for a bit before moving on to the next step.
Here’s exactly how to clean furniture before painting! And check out this post to learn everything you need to know about how to prepare furniture for painting.
Fixing Damage on A China Cabinet
Working on older pieces, it can almost always be guaranteed that there will be some areas of cosmetic imperfections. While these are charming and nothing to shy away from, we used some plastic wood filler, applied with a small spreader to fill any small cracks that stood out after cleaning. Here are more ways on how to repair cracks in antique wood furniture.
Learn about all the best wood fillers for furniture that you can use here. If you have major damage to the veneer or chipped wood, check out the best way to fix chipped wood furniture here! And we have more tips and tricks for repairing old furniture here.
Get Our Secrets!
Grab this super convenient How to Repair Furniture Ebook with all of our secrets on how to repair furniture for only $14.
You can print it out and have instant access whenever you come across damaged furniture, and know exactly how to fix it!
Click on the picture of the book to purchase!

Scuff Sanding Before Painting Hutch
After it dried, I lightly sanded all of the repaired areas smooth with a 350 grit sandpaper since plastic wood is so easily smoothed and then continued to scuff sand the rest of the piece to ensure the paint would adhere.
For your future projects, you may check out our post about sandpaper for furniture painting for reference. You can also learn all about sanding before painting furniture here to better understand why it’s an important step in the painting process.
I used my favorite sander, the 3×4 vacuum compatible SurfPrep Sander. Read our honest SurfPrep Sander review here for more of our experience with this sander. You can also read about the best sanders for furniture here, aside from the SurfPrep.
The advantage of using the SurfPrep Sander is that it has flexible sanding pads that bend and mold to the shape of what you are sanding without damaging the profile of the piece. I started with a coarse sanding pad and worked up to a medium, making sure to remove all dust with the oil-free tack cloth.
Check out our post on foam sanding pads for electric sanders to learn how they differ to traditional sandpaper.
How to Sand Furniture Legs
Since the client requested stained legs and shelves with a painted body, the next step was to hand sand any recessed areas that had the old stain, which was minimal sanding since the SurfPrep Sander and flex pads get in the nooks and crannies pretty well.
Learn more ways to strip or sand furniture legs in this post on how to refinish wood furniture legs.
To protect the legs from primer, I covered them with 3M plastic tape, something I learned from Natalie, here at A Ray of Sunlight! Check out how to prevent overspray when painting furniture with the 3M plastic tape as well as other ways here.
Priming China Hutch before Painting
Next, it was time to prime. Since this piece was going from dark to light, I used oil based primer in the spray can and lightly sanded between coats. Then I made sure to remove dust with the tack cloth.
Check out my Zinsser Cover Stain Primer review here to learn more about this product. And here are the best primers for painting furniture you can use!
We did two coats to make sure there wouldn’t be any bleed through once painted. What is bleed through? Check out this post on how to stop stains from coming through paint to learn what bleed through is and why we prime to prevent it.
Oil and water based products can be used together, as long as the recommended dry time is observed. So, after 72 hours, it was time for the fun part, painting!
How To Paint a China Cabinet
We sprayed three coats of Sherwin Williams Emerald Urethane Trim Enamel in Steamed Milk using our Fuji Semi-Pro 2. If you haven’t tried using a paint sprayer before, you can also check out painting furniture with a sprayer to see how you can get a smooth, professional finish on furniture with this tool.
Check out my honest Sherwin Williams Emerald Urethane Trim Enamel review here, and for more Sherwin Williams paint options, here’s our feature on the best Sherwin Williams paint for furniture!
Would you like to save this?
You can also see Sherwin Williams Emerald Urethane Trim Enamel in action in this painting furniture white makeover. Here’s my list of the best white paint for furniture and you can get more white painted furniture ideas like this one here.
Making sure to lightly sand and remove the dust in between coats.

This paint has a long 4 hour dry time, so it is very important to keep that in mind when recoating.
Stain Hutch Legs and Shelves
I used General Finishes Walnut stain on the shelves and legs. I applied it with a foam brush and rubbed it back after each coat with a blue shop towel. Check out the best brushes for staining wood here, and here’s staining a dresser darker and how to restain wood furniture with General Finishes gel stain for more detailed tutorials.
How to Antique Painted China Cabinet with Wax
After everything was dry, even though this paint does not necessarily need a top coat, my client wanted it antiqued. So I used Annie Sloan clear wax as a base over the entire piece. I applied it with a wax brush, wiping it back with a lint free cloth.
Then while it was still wet, I used a smaller detail wax brush to apply dark wax to shade and antique in crevices and recessed areas as well as the corners and around any details.
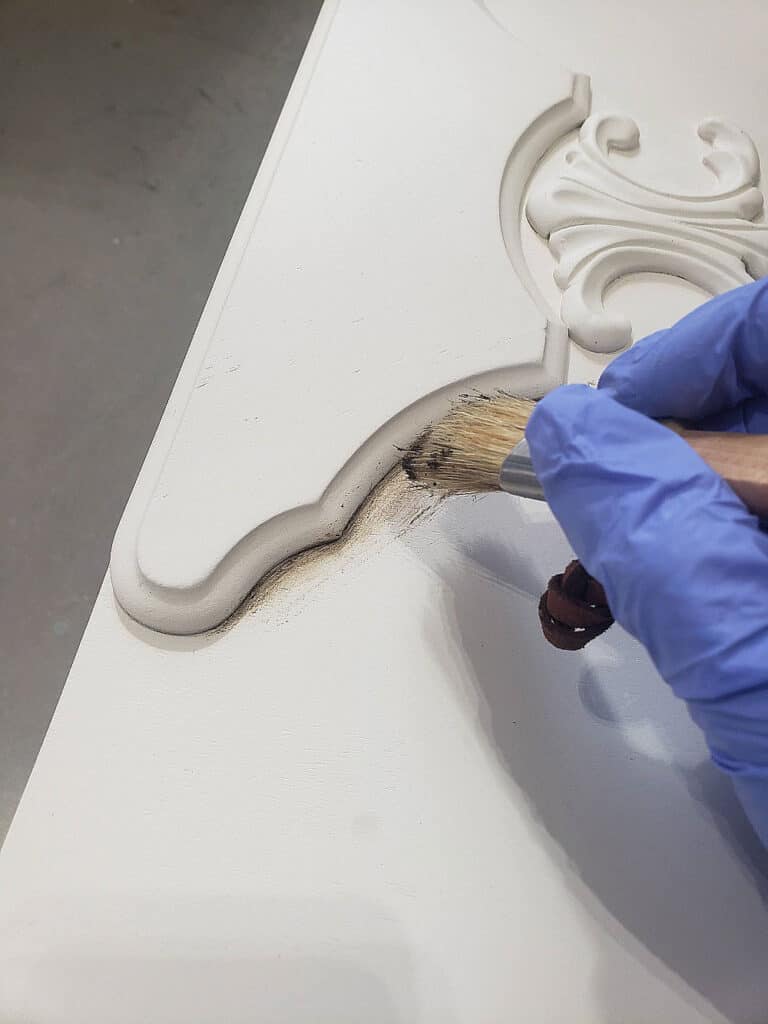
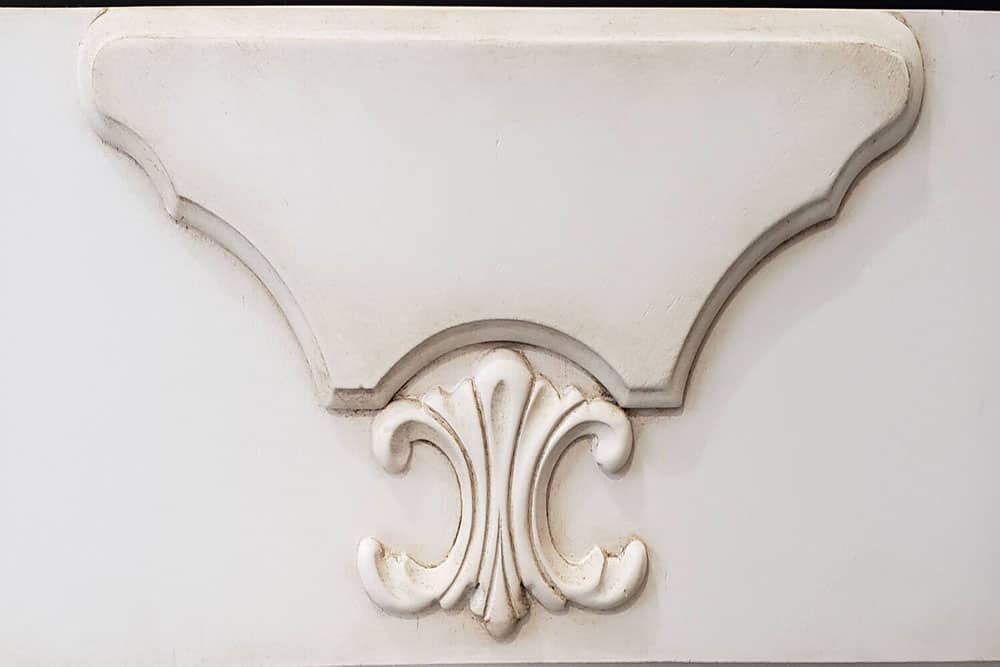
I used a lint free cloth to soften the dark wax and blend it into the clear wax making sure to remove the excess in the same direction to prevent streaking.
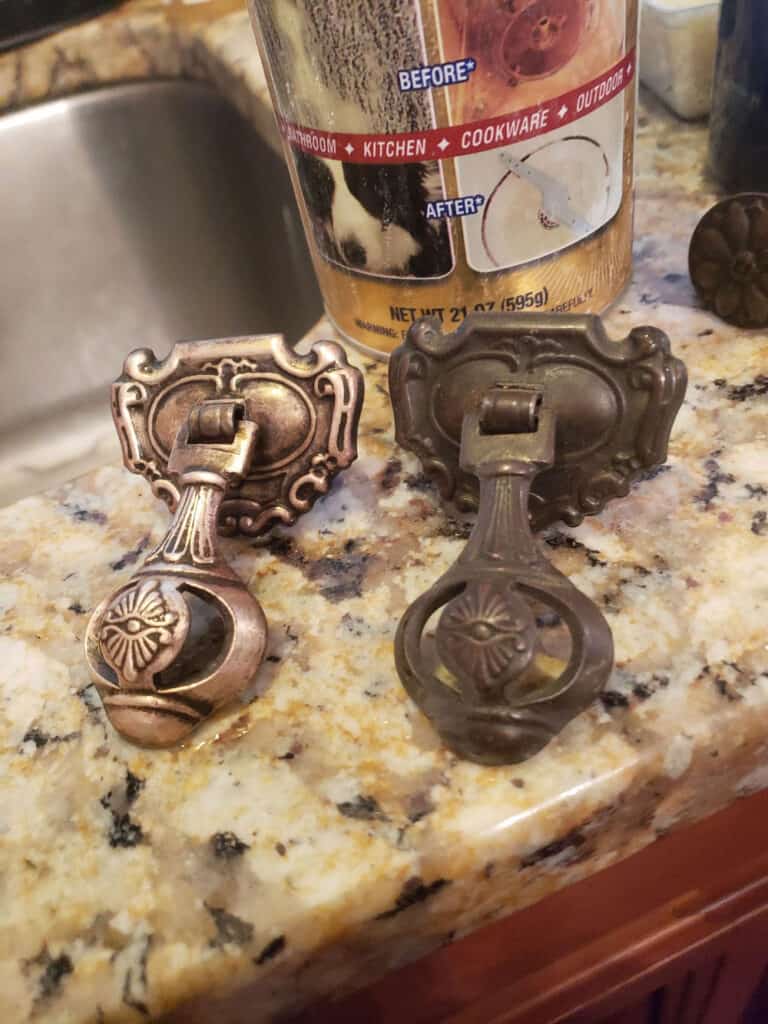
How to Clean Old Hardware
I used Bar Keepers Friend with a nylon wire brush to clean up the original hardware. Learn more about how to clean old furniture hardware to make it shine again. Then, I sealed it once it was clean and dry, using Rustoleum 2x matte clear coat to prevent any further tarnishing.
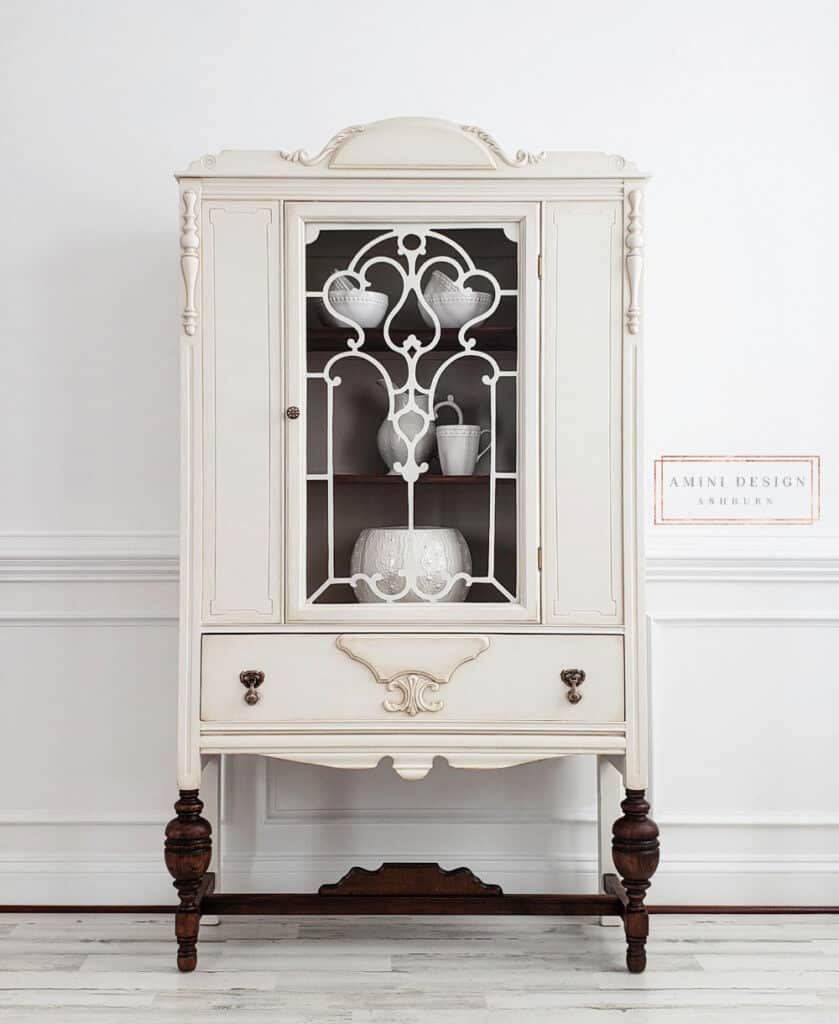
Here, it is looking so fresh and updated. Just what my client asked for! If you’re curious about how to price flipped furniture like this, check out my furniture painting price list guide here for pricing tips and tricks.
More Before and After Makeovers
See All >
Click any of these “before” photos below to view the “after” of that makeover.


You can also update your piece with these chalk painted hutch ideas and painted hutch ideas. If you want a more natural look, here are hutch refinishing ideas and antique dresser refinishing ideas you can try! Get more ideas for your next DIY project with these painted corner cabinet ideas.
Anne Michelle is a furniture artist in Northern Virginia that loves bringing beauty back to forgotten pieces. Her small business, Amini Design Ashburn, is a source for all things creative – furniture makeovers, artwork and small home decor items.
Go follow Anne Michelle’s amazing work on Instagram and Website and give her a Like/Follow to see what’s next!
How to Make a China Cabinet Look Modern
If you don’t love the traditional look of a china cabinet and don’t want any antiquing, you can also update your piece to have a more modern look.
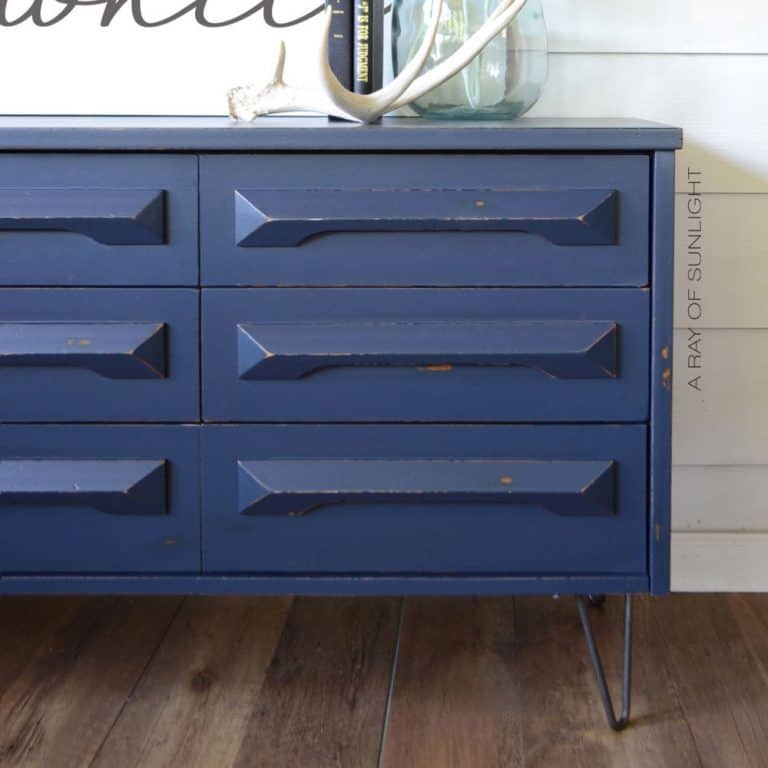
One way to do this is by using a bold and vibrant color for your paint, such as a deep navy or emerald green. This will instantly make your china cabinet stand out and give it a more modern and stylish feel. You can also choose to paint the interior of your china cabinet a contrasting color for an extra pop of color.
Consider swapping out traditional drawer pulls and knobs for more unique and modern options. Look for sleek, metallic hardware, or try out some fun and quirky crystal knobs to add personality to your piece. This may be a small change but it can make a big impact in updating the overall look of your china cabinet.


How to Repurpose China Cabinet
You can also repurpose your antique china cabinet if you feel it no longer fits your needs as a storage piece. Check out these repurposing china cabinet ideas for some inspiration:
- Turn it into a bookshelf: Remove the doors and shelves, then paint or stain the inside of the cabinet. This will create an open shelving unit perfect for displaying your favorite books or decorative items.
- Turn it into a bathroom vanity: Install a sink and use the top of the china cabinet for storage of bathroom essentials. This is a unique and stylish way to add storage to your bathroom.
- Turn it into a media center: Remove the shelves and doors, then add a TV mount to the back of the cabinet. This will give you a functional media center still with plenty of storage space for electronics and other entertainment necessities.
So, if you have a vintage china cabinet that you no longer use for its original purpose, don’t be afraid to get creative and repurpose it into something more suitable for your current needs! Check out this list of repurposed China cabinet ideas for inspiration.


Vintage China Cabinet Makeover
Update your old china cabinet with a little bit of paint and stain! Here are the steps for this antique china hutch makeover.
Materials
Instructions
- Prepare the china hutch for paint by cleaning it with Krud Kutter and a shop towel to wipe away the dirt and grime. Make sure to rinse with clean water as well.
- After the hutch dries, fill any damages or cracks with wood filler. Lightly sand the filled areas. Then scuff sand the rest of the surface and legs of the hutch.
- Tape off the legs then prime the furniture with an oil-based primer. Lightly sand between coats then remove dust with tack cloth.
- Apply three coats of paint onto the hutch. You should make sure to lightly sand and remove the dust in between coats here as well. Wait for paint to dry.
- Stain the legs and shelves of the hutch with gel stain. Apply it with a foam brush and rub it back after each coat with a blue shop towel.
- For antiquing, use a clear wax as the base. Apply it onto the hutch with a wax brush then wipe it back with a lint-free cloth. Use a smaller detail wax brush to apply dark wax to shade and antique corners, crevices and around any details. Use the cloth to soften the dark wax and blend it into the clear wax.
- Clean up the old hutch hardware with Bar Keepers Friend, let dry, then seal with the Rustoleum 2x Ultracoat Matte Clear to prevent any further tarnishing. You can now attach it to your newly painted hutch.
Recommended Products
As an Amazon Associate and member of other affiliate programs, I earn from qualifying purchases.


More Painted Cabinet Makeovers
- Farmhouse Cabinet Makeover
- Painting a China Cabinet
- Painted Display Cabinet: Before and After
- Painted Armoire Makeover
- Painted Hutch Makeover
Learn the Art of Updating Furniture!
If painting furniture feels overwhelming or your past attempts didn’t go as planned, this course will guide you step by step.

Follow us on YouTube to get more tips for painting furniture. Or share your project with us on our Facebook Group and be part of our community. See you there!
Thanks for sharing this! I have a very similar piece sitting in my garage, and this has inspired me to make it a part of our dining room! Random question—can you share the paint colors on the wall behind the hutch? I love the way all the whites contrast! Thanks!!
Wanting to update antique oak dining set. The hutch is so identical to mine. I liked the tutorial. Great steps with photos. Need to decide on a color..thinking Sandstone Cliffs. Thank you.
My mom had this entire set. I took her to buy it back in the 70’s at an estate sale. She loved it.
Was it hard to remove the wood and paint it in the glass insert? That’s been my only fear with my piece. Yours is beautiful!!
Natalie, what’s your tip for painting the wood on the door? I ended up breaking the glass on my Grandfather Clock while painting it
We remove the glass to get to that part. I’m sorry your glass broke!!
My insert is flexible enough to slide it out of the tracks that hold it in. It was just as easy to put it back in.
You have to remove the glass to get to the wood insert. There are usually wooden trim pieces nailed in near the edge of the glass.. and you can pop those out to get the glass out.
Why did you use chalk paint wax?
I prefer the brown look as it was meant to be. But younger people like the colored and white furniture appearance. You did a wonderful job to help others achieve the more modern look. I live in an arts & crafts style home. Older wood furniture pieces look better in my home with light walls, white wood trim instead of stained and high ceilings. Repurposed pieces done correctly cost a lot as it takes time to make it perfect. Well done.
How did you change the colour of the gold design on the glass to white? This step seems to be missing. What products were used?
Hey Pam, the same products were used on that part. If you have something similar, the glass may have to be removed to get to it. It’s usually just thin wood fretwork and can be treated the same as the rest of the wood.