How to Refinish Wood Furniture Legs
Are you looking for help to easily sand or strip wood furniture legs? Whether you’re refurbishing an old piece of furniture or giving a new one a makeover, you might be surprised at how easy it is to do it yourself. In this blog post, we’ll explore 3 options for how to refinish wood furniture legs and explain the necessary supplies and tools for each.
I’m sure you’ve been seeing it on a lot of refinished furniture lately. The pretty turned legs of a piece are either raw wood, freshly stained, or given a weathered wood look. Learn more about refinishing furniture here!
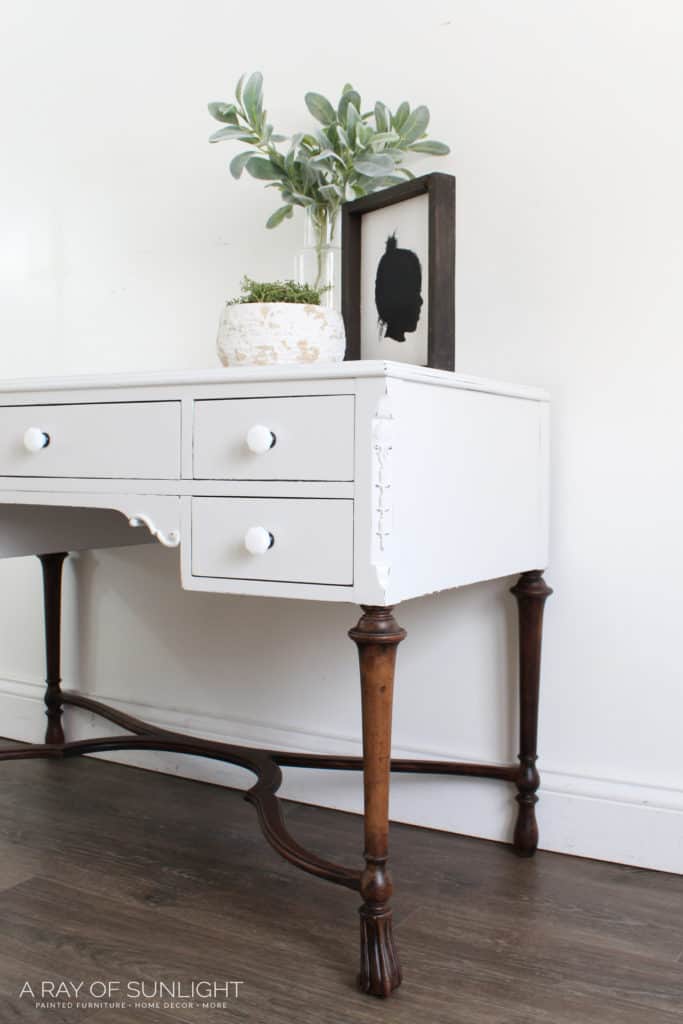
The body of the furniture is usually painted, but the legs are usually left in some sort of wood finish.

One of my very first blog posts, this black painted antique buffet, had this same style but holy moly, it has gotten so much more popular again!
And there is good reason! Those turned legs are so pretty! You want to show them off, and they sure make you stop scrolling.
But a lot of the time the finish on the legs aren’t in very good condition when we find them. And if the legs are, then they most likely are the wrong color or outdated.
Supplies Used to Refinish Wood Furniture Legs
As an Amazon Associate, I earn from qualifying purchases. I also may earn from other qualifying purchases with other companies or get free product to review and use. All opinions are my own.
- 220 Grit Sandpaper
- 400 Grit Sandpaper
- Minwax Gel Stain
- Topcoat for protection
- 80 Grit Sandpaper
- Sanding Contour Grips
- 1/2″ Foam Sanding Sponges (Use code RAY10 to get 10% off your order)
- Citristrip
- Plastic Wrap
- Mineral Spirits
How to Refinish Wood Furniture Legs
There are a few ways to get the look! Some with very little work, and others with a little more patience and elbow grease.
Over the years I’ve used these different techniques to create a wood finish on the legs of furniture.
- Use Gel Stain
- Sand with Sand Paper
- Strip off the old finish with a Chemical Stripper
How to Use Gel Stain
General Finishes has a great product called gel stain. It’s not like your typical wood stain that needs to soak into the wood.
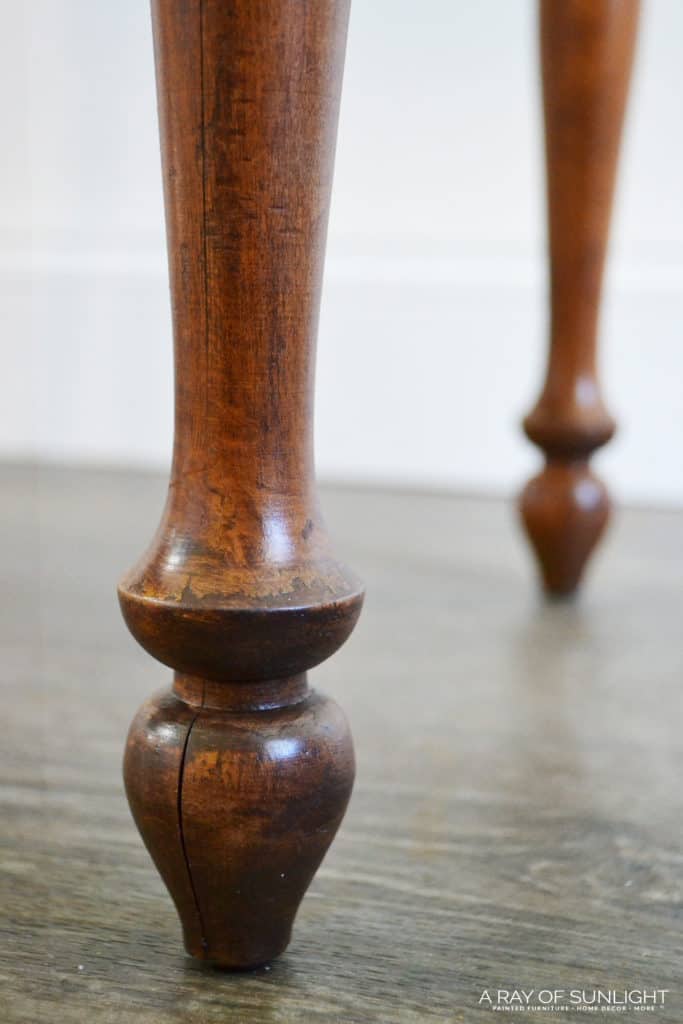
(On these legs we used a Minwax gel stain called Walnut. The darker areas are where the old finish had flaked off, while the lighter stain is where the old finish was still intact before we stained the legs.)
Gel stain (my fav is the “Java” color) sits on the surface of an old finish to give it a fresh finish. It usually shows more knicks, dings and scratches, but sometimes it can get rid of them as well.
Learn more about the best wood stains for refinishing furniture and how gel stain compares. It’s simple to use, but it may take a little bit of getting used to.
First, lightly scuff the old finish with 220 grit sandpaper, making sure to only sand with the direction of the grain. I like to go over the 220 grit with 400 grit sandpaper to get rid of any bigger scratches the 220 made in the old finish. Then wipe off all the dust.
I personally prefer to just wipe on the gel stain when I work with legs, but you could use a foam brush too! Wipe the gel stain on in an even coat.
Let it sit for about 30 seconds (depending on the temperature), and then wipe off the excess, and blend in the brush marks.
You should notice the wood color deepen just a bit, and you should notice the small scratches and dings almost disappear.
I like to build on thin layers of gel stain for a streak free / brush free finish. But I know others who like to brush it on thick, creating a very very deep wood stained color.
Make sure to let the stain dry for 24 hours between coats, or the fresh coat of stain will remove the layer before it. Once it’s all completely dry, I like to apply a few coats of poly for protection.
See gel stain in action with this tutorial on how to stain wood darker!
How to Sand Table Legs
Another option is sanding off the old finish. This definitely requires the most elbow grease and is the most time consuming way to remove the old finish from wood legs. Especially when they have extra details.
But, it creates a completely different look, as you can leave the old stain in the cracks and corners, leaving a very weathered looking wood.
Learn how to fix a broken table leg here first if the legs on your piece of furniture have some damage.
It’s pretty straightforward to sand down legs. You’ll need some 80 grit sandpaper and 220 grit sandpaper, cut into small pieces, about 3″ x 4″.
I like to fold the paper in half, and then wrap it around the leg and move it back and forth. Making sure that the sandpaper always goes around the leg (with the grain) and not up and down the leg.
80 grit sandpaper is course and will take off a finish much quicker than the 220 grit. The 220 grit will smooth down the deep scratches from the 80 grit and help with finer details. Learn more about sandpaper with this post on sandpaper for furniture painting.
So use the 80 grit sandpaper first, to remove most or all of the old stain, and then use the 220 grit sandpaper to smooth out the wood and remove any remaining residue. A sander like the SurfPrep sander will make sanding SO much easier!
When I sand down the legs, I like to skip the really tight details like the corners and edging. It gives it a pretty weathered look.
I like to fold the paper in half again for tight places and curves, without creasing the paper together. It creates a point where the sandpaper can get into small areas.
How to Sand Table Legs with Grooves
Sanding table legs with grooves can be a daunting task, but is made easier with the help of sanding contour grips.
Start by wrapping the sandpaper around the grip, then gently run the grip over each groove in the table leg. Make sure to hold the grip firmly in place as you go, and use even pressure for an even coat of sanding without any missed areas. Check out this post for different ways on how to sand in tight spaces.
Once all of the grooves have been sanded, move on to the rest of the piece. Repeat this process for all four legs, and then you can topcoat them, stain them, or paint them!
How to Sand Spindles on Chairs
Honestly, sanding spindles is a pain in the rear. You have to sand them by hand because they are usually too close to fit a sander in between the gaps.
If they are spaced out enough, you can use a power sander with 1/2″ foam sanding sponges to sand without ruining the shape of the spindles. (Use code RAY10 to get 10% off your order) Check out this SurfPrep sander alternative to see what I’m talking about.
It would be way less work to use a chemical stripper to remove the old stain from spindles.
Would you like to save this?
But, if you really want to sand the spindles, fold a 3″x4″ piece of course sandpaper in half, wrap it around the spindle, and move it back and forth to sand away the old finish. Check out this easy way to sand spindles for helpful tips and tricks in sanding spindles.
How to Strip Table Legs
If you’re looking to start with fresh wood, my favorite way to remove the old finish is to use a chemical stripper.
It may seem intimidating, but it really is a simple process, that doesn’t take much elbow grease at all! And stripping usually requires less time actually working, compared to sanding the wood.
You just have to wait for the stripper to do most of the work for you.
My go-to stripper is Citristrip! Simply brush on the stripper, cover the stripper with plastic wrap and then let it sit for at least 8 hours.
My favorite is to put the stripper on before I got to bed, and then let it sit overnight.
Once the stripper has done its magic of lifting off the paint, I wipe everything off of the wood and then use mineral spirits to remove any leftover residue.
If you’d like to learn more about this technique, head over to our post on how to remove stain from wood. You’ll need to let the wood dry before lightly sanding, then staining or top coating your fresh raw wood.
Can I use a chemical stripper on all types of wood?
Yes, you can use a chemical stripper on all types of wood!
Citristrip, for one, is a versatile and effective option that can strip multiple layers of paint or stain from different wood types, as well as metal and masonry surfaces.
This makes it a convenient and efficient choice for furniture or home renovation projects.
Before you go ahead with the complete stripping process, it’s also a good idea to test a small and inconspicuous area of the wood.
This will help you determine how the wood reacts to the stripper and if it can handle the chemical treatment.
Sanding vs Stripping Wood Furniture
Deciding between sanding vs stripping wood furniture comes down to your preference. Both are messy jobs, and both take time.
When I have timed myself sanding one part of a project, and using a chemical stripper on the other part of a project, they seem to take about the same time.
When you strip wood furniture, you have to let the chemical work on its own for a few hours a least, and then when you are done stripping off the layers of finish, you have to let the wood dry before you can move on.
Sanding for long periods of time can be very boring, and if you have a cheap sander, your hand may go numb because of the vibrations of the sander.
Tight details are easier to strip with a chemical stripper, and flat areas are easy to sand. But both can be done either way. It really just comes down to your preference.
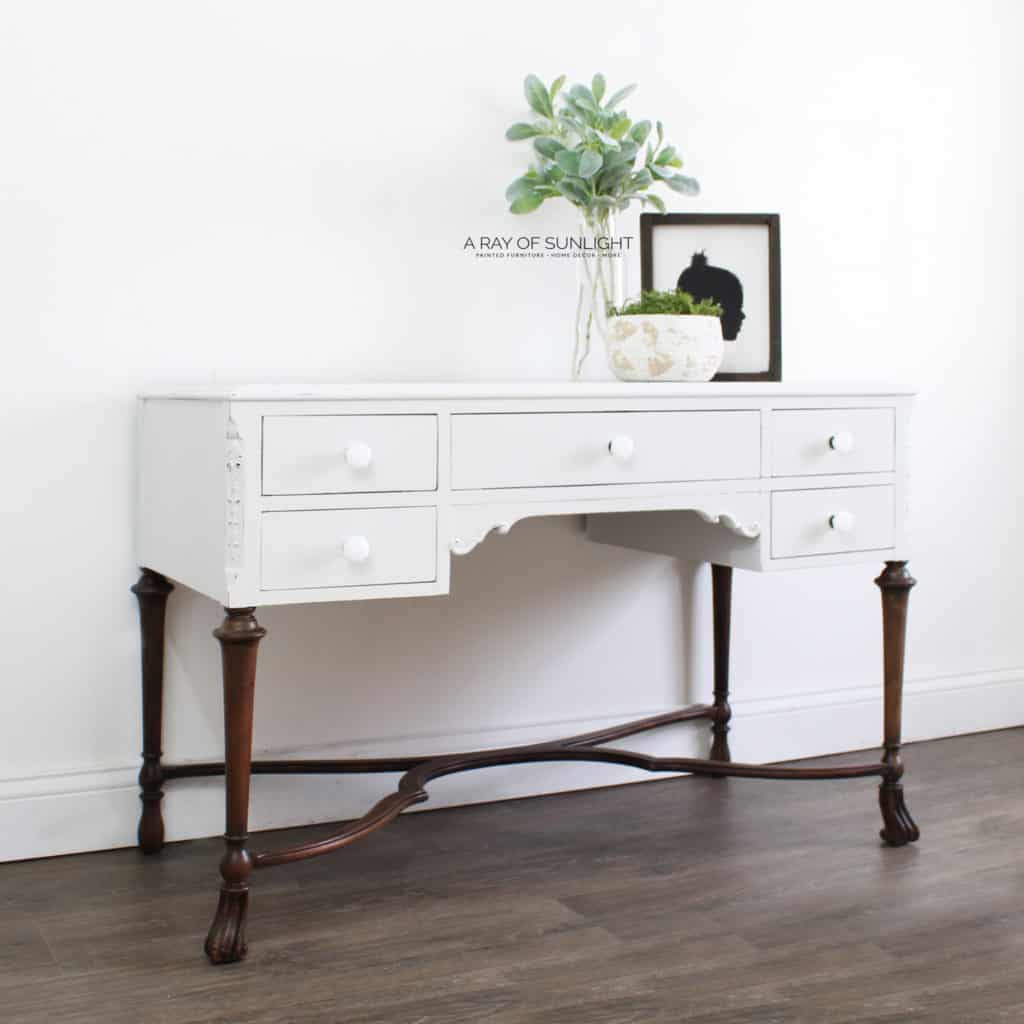
Go over to this chalk painted desk blog post to see how we finished this table.
Would you believe me if I told you that this is the natural color of these wood legs?? I just top coated them to protect them! So pretty!!
How to Stain Wood Furniture Legs
If the wood is too light for your liking, then you can stain the wood to make it darker.
Apply the stain with a cloth or brush. Then wipe the excess away. Once the stain is dry, topcoat the stain to protect the wood and the stain from getting beat up.
Here’s how to apply polycrylic to furniture and learn what’s the best polyurethane for furniture here.
Can I sand and re-stain furniture legs if I don’t like the finished result?
Yes, you can sand and re-stain furniture legs if you are not satisfied with the finished result. Sanding allows you to remove the existing stain and start fresh with a new color or finish.
So if your initial staining job did not turn out as expected or if you want to change the color of the legs, just sand off the old finish and start over.
You can also remove stain from wood without sanding using a chemical stripper if you prefer, or if the wood has intricate details that are difficult to sand.
Basically, you’re repeating the steps in this post to strip the old finish before sanding and re-staining the wood.
How to Bleach Wood
After you have sanded or stripped the legs, you can bleach the wood to make the wood lighter if that’s what you’re after!
Check out this post on how to bleach wood, to see how to bleach wood legs on an end table makeover!

Refinishing wood furniture legs can be done in a variety of ways, including sanding, stripping, staining, and bleaching.
Whether you want to preserve the natural color of the wood or change it to a different shade, follow the steps and tips in this guide to create beautiful, refreshed furniture legs. For more refinishing tips and tricks, especially with antique pieces, here’s how to refinish antique furniture.

How to Refinish Wood Furniture Legs
Materials
Instructions
Using Gel Stain
- Use a 220 grit sandpaper to lightly scuff the old finish.
- Clean off the dust and wipe the gel stain on the legs, or you can use a foam brush. Allow the gel stain to sit for around 30 seconds before wiping away the excess. Let the gel stain dry for 24 hours between coats.
- Apply a few coats of poly for protection once the gel stain is completely dry (24-48 hours).
Using Sandpaper
- Use folded 80 grit sandpaper to remove the old stain, and then work your way up through the different grits of sandpaper up to 220 grit sandpaper to smooth out the wood and remove any remaining residue. Fold the sandpaper in half again for tight places and curves.
- If the table legs have grooves, use sanding contour grips. Wrap the sandpaper around the grip and run the grip over each groove in the table leg.
- Repeat the process for all four legs, and you can now topcoat, stain, or paint them.
Stripping Table Legs
- Brush Citristrip on the wood, then cover it with plastic wrap and let it sit for at least 8 hours.
- After letting the stripper sit for at least 8 hours, scrape everything off the wood before using mineral spirits to remove any remaining residue.
- Let the wood dry before sanding, applying stain, or topcoating.
Recommended Products
As an Amazon Associate and member of other affiliate programs, I earn from qualifying purchases.


More Refinishing Furniture Resources
- How to Stain Already Stained Wood
- How to Refinish a Dresser
- Furniture Refinishing Tools
- How to Refinish Rattan Furniture
- Remove Stain From Wood Without Sanding
Follow us on YouTube to get more tips for painting furniture. Or share your project with us on our Facebook Group and be part of our community. See you there!
Lovely & thanks for all the tips. So it’s ok to use water based topcoat over oil based gel stain?
Hey Tracy!
You can use a water based topcoat over oil based products after letting the oil based product dry for at least 48 hours.
It is truly a nice and helpful piece of information. I’m satisfied that you just shared this useful info with us. Please stay us informed like this. Thank you for sharing.
Thanks a lot for the blog post. Awesome.