How to Fix a Broken Table Leg


If you have ever had the unfortunate experience of broken furniture legs, then you know how frustrating it can be. It not only affects the function of your furniture but also its overall aesthetic. And we know what you’re here for, so here’s the guide on how to fix a broken table leg!
With some know how on repairing old furniture and some basic tools, you can easily do it yourself! Don’t worry, we’ve got you covered.

When working on old pieces, you must first check for signs of damage. These can include scratches, dents, cracks, or even broken parts. In this case, we will focus on the leg, which can affect the stability of your piece.

Learning how to fix a broken table leg is also an important skill to have. It not only saves you money from hiring a professional but also allows you to restore and maintain your beloved pieces for years to come.
Keep in mind that each piece might need a different approach depending on its materials. Wood, for example, may need a different technique compared to metal or plastic ones. The steps in this post are for fixing wooden legs!

Supplies Used to Fix a Broken Table Leg
As an Amazon Associate, I earn from qualifying purchases. I also may earn from other qualifying purchases with other companies or get free product to review and use. All opinions are my own.
- Krud Kutter
- Damp Rag
- Wood Glue
- Glue Syringe
- Clamps
- Kwikwood
- Sandpaper
- Vacuum
- Tack Cloth
- Sunshield Oil
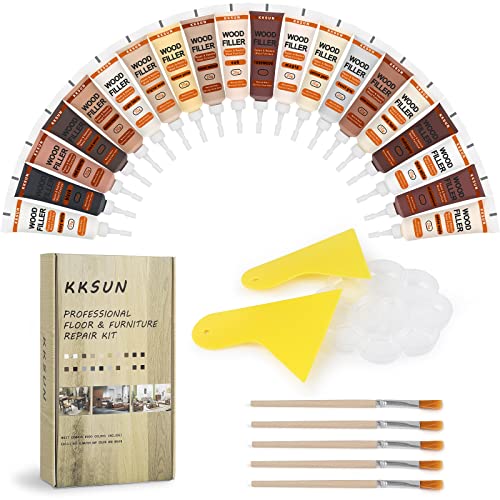
- Wood Stain Repair Kit
Clean the Table Before Repair
Before anything else, it’s important to first clean the piece. This may seem like an obvious step, but you’d be surprised at how many people overlook it! Dust and dirt can easily accumulate on your furniture, especially if it’s been sitting in storage for a while.
Our go-to cleaner is Krud Kutter – it’s gentle yet effective in removing grime and buildup without damaging the surface. Just spray it on, wipe it off with a damp rag, and you’re good to go. This makes sure the supplies we’ll use for the repair later will stick properly. Get more tips on how to clean furniture before painting here.
How to Fix a Broken Table Leg
Now it’s time to get started on the repair! Take another look at the leg – check the material and the extent of the damage. Once you’ve got a good sense of what needs to be fixed, here are a few options you can try.
Glue Loose Veneer
If it has some veneer, make sure to check for any loose pieces before anything else. These thin layers of wood can peel off pretty easily, and you can easily fix them back in place.

Apply some wood glue on the loose veneer. You can use a glue syringe to get the glue in the small cracks and crevices. Once you have applied the glue, use clamps to hold the veneer down while it dries. Here’s a more detailed guide on how to fix veneer that is lifting.

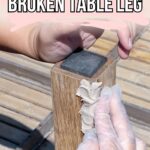
Fill in With KwikWood
For other gaps or missing chunks, use KwikWood to fill them in. Cut the amount of putty you need then mix it together with your fingers. It can harden pretty quickly, so make sure to only mix and apply the amount you need within 15 minutes.
Once the color is uniform, apply it to the broken area and let it dry for an hour. After it dries, you can shape it as needed with sandpaper to match the original surface. Learn more about how to use KwikWood in this post!
Would you like to save this?

How to Make Wood Filler Look Like Wood Grain
After cleaning up the dust from sanding with a vacuum and tack cloth, it’s time to match the filler to the rest of the surface. You just don’t want the repair to leave a noticeable spot that’s a constant reminder of the damage it used to have.

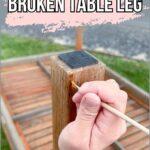
You can start by mimicking the wood grain by using the tip and edge of a sharp screw. This will help the filler blend in with the surrounding surface and give it a more natural look. Just follow the pattern you see, and don’t worry about making it perfect.

Match Filler to Wood
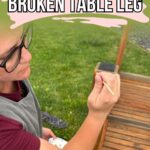
Now, it’s time to make it blend even better by matching the color with the rest of the piece. Apply this Sunshield Oil first to help protect the wood from weathering. This oil gives the filler a bit of color, so let it dry for a day or two to see how it looks.

Next, use a wood stain repair kit to do a more precise match. This kit comes in many colors, so you can mix and match to get the perfect shade. Start with the base color of the wood, then slowly mix in other shades until it’s as close as you can get.

Check out this kit in action in this wood stain repair post! And here’s the major patio table makeover where we fixed a broken leg using these same steps.
You can then move on to refinishing or painting the piece as you like. Here are painted kitchen table ideas and refinished dining table ideas for inspiration! But for now, you can enjoy your repaired piece with pride and confidence, knowing that you did it yourself!
This DIY skill can definitely come in handy for any future furniture repairs or projects. You’ll need to tackle these parts first before you can have some fun with painting or refinishing it! This way, you get to give it a fresh new color or stain while also making it strong and functional again.


How to Fix a Broken Table Leg
Materials
Instructions
- First, make sure to clean the table thoroughly using Krud Kutter to remove any dirt or grime that may affect the repair. Spray it on, wipe it off with a damp cloth, and let it dry before moving on to the next step.
- Next, assess the damage to the table leg. For loose veneer, use wood glue and clamps to secure it back in place. Use a glue syringe for hard to reach areas.
- For gaps or missing chunks, fill them in with KwikWood. Mix the putty and apply it to the broken area, then shape it with sandpaper once dry.
- Mimic the wood grain using a sharp screw. Follow the natural pattern of the wood, but don't worry about making it perfect.
- Apply Sunshield Oil to protect the wood and give the filler some color. Let it dry for a day or two to see how it turns out.
- Next, match the color of the repair to the rest of the table leg using a wood stain repair kit. Start with the base color and mix in other shades as needed.
- Once everything is dry, you can move on to refinishing or painting the piece as desired.
Recommended Products
As an Amazon Associate and member of other affiliate programs, I earn from qualifying purchases.


More Repairing Furniture Tips
- How To Add Legs To A Buffet
- How To Add Legs To A Cabinet
- How to Repair Pedestals
- Adding Legs to a Cedar Chest
- How to Repair Chipped Wood Furniture

Follow us on YouTube to get more tips for painting furniture. Or share your project with us on our Facebook Group and be part of our community. See you there!