How to Repair Chipped Wood Furniture


Learning how to repair chipped wood furniture doesn’t have to feel overwhelming. The trick is to recreate the details and make it look like the damage never even happened. These repairing old furniture tricks are easier than you think, and the results can be seriously rewarding.
With a few simple tools and techniques, you can repair chips and even detailed surfaces with confidence. This guide will take you through each step. You’ll be amazed at how your piece transforms from damaged to just like new.

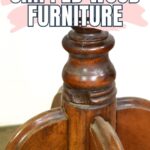
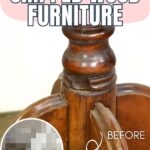
So this antique drum table had a little bit of a chip in some of the detail on the base. And so we need to fill this in, but we want it to look like the original and have the same shape and same form. We don’t want it to just be a flat area that looks like it was damaged in the first place. We want to make this look like there was never any damage.

There’s something really satisfying about knowing how to fix these chips and being able to restore the piece to its original state. It also saves you money from having to replace the item or calling in a professional when you can do it yourself!
The great thing is, you don’t need to be a pro. Just follow along, and we’ll show you how to repair chipped wood furniture in no time. If you’re ready, let’s dive in!
Supplies Used to Repair Chipped Wood Furniture
As an Amazon Associate, I earn from qualifying purchases. I also may earn from other qualifying purchases with other companies or get free product to review and use. All opinions are my own.
- Vaseline/Oil
- Hot Glue
- Bondo
- Razor Blade
- Sandpaper
- Paint or Stain
Make Hot Glue Mold
So what we’re going to do is we need some Vaseline or some cooking oil spray. We need to spray that on an area where the detail is exactly the same as the detail that is damaged.
So, for this piece, it’s just the opposite side of the end table of the base. The detail was exactly what it was on the other side, and it was a big enough area that we could create a mold. This way, we can shape the repair to be exactly like the original.
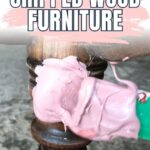
What we need to do is rub Vaseline or cooking spray onto that original area. Then, we can spread hot glue all over that area. The point of the Vaseline or oil is to keep the hot glue from sticking to the wood. We just want it to create the shape of the detail, but we want to be able to pull it off once it’s dry.

You want this hot glue area to be bigger than what the damage is. So you put the hot glue on, let it dry for a few minutes until it isn’t crystal clear anymore. Once the hot glue becomes cloudy you will know that it is cooled and dry. Just let it dry, and then you can peel it off.
Check Mold Fits Damage
Now, going back to the side where there is damage, Well, I guess first you’re gonna make sure that the hot glue mold covers it and that you know exactly which way is up and down, or basically which way you need to put it to make it look exactly like the original.
Play around with that first, and mark it up if you need to, so then you know exactly how to place it on. You will be placing the hot glue mold over the top of the damage with the filler and holding it in place to fix the chips.
Spread Bondo Over Chipped Area
Then, what you’re gonna do is mix up some Bondo. We like to use Bondo. It can be the all purpose or the wood filler one; it doesn’t really matter. The body filler version is great, too. Check out my in depth Bondo wood filler review here to learn more about this product.

For a golf ball size of Bondo, you squeeze like an inch or two of the hardener stuff, and you mix it together really well in like a bowl or on a scrap wooden piece. Mix it together really well, and then you have to work fast because this stuff starts to set up within a couple of minutes.
Spread it over the damage. Make sure you have lots of it on there that we’ll be able to squeeze out. You want to make sure that there is plenty to fill in the area and that the excess will be able to squeeze out of it.

Would you like to save this?
Put Mold Over Bondo
Once you have some Bondo on there, apply some Vaseline or cooking spray on the insides of the dried up hot glue mold. This will help the mold come away from the Bondo a lot easier later on.
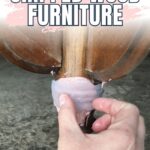
Then, put your hot glue mold over the top of the still wet Bondo, and you squeeze and you push it down so then it is exactly where it needs to be to create the original shape that is chipped now.

Hold the mold in place for a couple of minutes while the Bondo starts to dry, just make sure that it doesn’t move and to create the shape that was damaged. Yes, you will typically have it squeezing out past the molding. That is just fine because we can remove that pretty easily after.


Cut Off Excess Bondo
After just a couple of minutes, the Bondo should be starting to set up, and it should be in its place. It will look kind of funny and like a mess when you pull the mold off, but don’t worry. Grab a razor blade and cut off the excess, especially the parts that have squeezed out of the edges.
Cut that all off with a razor blade, and then you should be left with basically the shape of the detail that was missing or chipped.

Sand Bondo Smooth
After the Bondo has dried for about 30 minutes, you can use 100, 150, or 220 grit sandpaper to sand it. The edges where it meets the wood need to be smooth and flush with the original wood around it.
You don’t want a big bump. You want it to look like it’s just like the rest of the surface. So, sand it down, then finish shaping it with 220 grit to make it nice and smooth, so that it looks like what the wood detail was before. Learn about the best sandpaper for furniture painting to use here.
Paint or Stain Repaired Area
And then you can stain it to make it look like real wood. It’s best to use the wood filler Bondo, which is a natural wood color, so you can then stain it. Or you can use stain repair kits to make the area look like the rest of the surface. Check out our wood stain repair tutorial here for more on this!
You can also paint it. If you do, it doesn’t matter which kind of Bondo you use, but you’ll want to prime it first. We chose to paint. This was a custom order for someone that we made. Check out the makeover in this post on how to paint end tables.

So that’s how to repair chipped wood furniture, especially chipped pieces where there are details, like these round ones or anything that isn’t a flat surface. This is a great way to fix those, so then it doesn’t look like there was ever any damage to begin with.

How to Repair Chipped Wood Furniture
Materials
- Vaseline/Oil
- Hot Glue
- Bondo
- Sandpaper
- Paint or Stain
Tools
Instructions
- Use some Vaseline or cooking oil spray and apply it on an area where the detail is exactly the same as the damaged detail. Then, we spread hot glue all over that area, let it dry until it turns cloudy, and peel it off.
- Going back to the damaged side, make sure the hot glue mold covers the damage, and you know which way is up and down. Play around with it, mark it as needed, and get it ready to place perfectly over the damage during the repair process.
- Mix up some Bondo, using about a golf ball size amount with an inch or two of hardener, and mix it well. Spread it over the chipped area, making sure you have lots of it to fill the damage and allow excess to squeeze out.
- Apply Vaseline or cooking spray to the inside of the hot glue mold to prevent sticking, then place it over the wet Bondo. Hold it firmly for a couple of minutes, making sure it doesn't move while the mold shapes the repair.
- After a couple of minutes, the Bondo should start to set, and you can carefully pull the mold off. Use a razor blade to cut off the excess Bondo, leaving the shape of the original detail behind.
- After letting the Bondo dry for about 30 minutes, sand the edges where it meets the wood with 100, 150, or 200 grit sandpaper until smooth. Finish up with 220 grit sandpaper to shape it perfectly and make sure it looks like the original wood detail.
- Stain the fixed area to match the surrounding wood, or paint it with the whole piece to give it a new look.
Recommended Products
As an Amazon Associate and member of other affiliate programs, I earn from qualifying purchases.


More Repairing Furniture Tips
- How To Repair Damaged Particle Board Furniture
- How To Fix Nicks In Wood Furniture
- Can a Beginner Fix This Furniture Damage?
- Wood Furniture Repair Solution
- Can You Really Fix a Broken Dresser?

Follow us on YouTube to get more tips for painting furniture. Or share your project with us on our Facebook Group and be part of our community. See you there!