Can You Really Fix a Broken Dresser?


Wondering, can you really fix a broken dresser? The answer is yes, and it’s easier than you think! Repairing a chipped, scratched, or wobbly dresser can turn what seems like an outdated piece into a stunning addition to your decor.
With our guide on repairing old furniture and this step by step makeover, you’ll have everything you need to get started and fix your broken dresser with confidence. Keep reading to learn more about the process!
Welcome to Furniture Fixer Upper day, where we join 4 of our talented furniture friends and bring you brand new makeovers! I’ll link to my friend’s makeovers after our after photos at the bottom of this post! Don’t forget to check out their masterpieces!! Okay, back to our makeover!
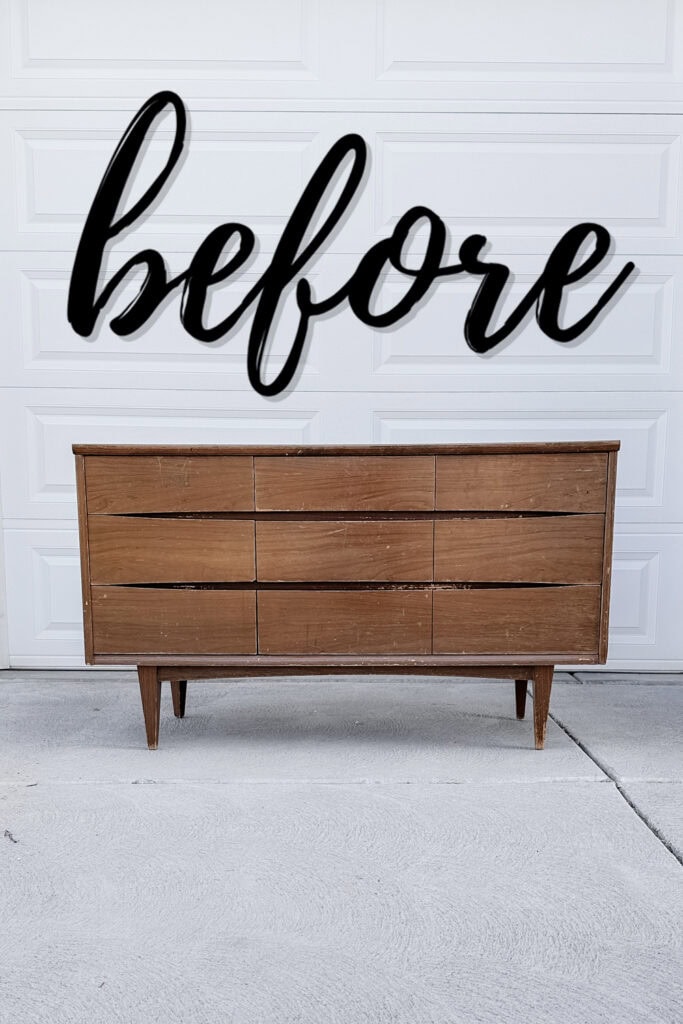
This was our MCM dresser makeover. The piece is made of laminate, particle board, and some real wood. It has a lot of damage on it, though, with scratches everywhere. So we still needed to do some work on it.

Now, my plan is to paint it a nice modern color, make it look like it came from West Elm, and sand the wood base on it. But again, I’ll need to repair the damage first before we can proceed with the painting process.
So, if you have an old and broken dresser, don’t give up hope just yet. I’ll show you all the steps on how to repair your piece, then how to give it a whole new look with paint. Let’s dive into this dresser makeover!

Supplies Used for Fixing a Broken Dresser
As an Amazon Associate, I earn from qualifying purchases. I also may earn from other qualifying purchases with other companies or get free product to review and use. All opinions are my own.
- Krud Kutter
- Damp Rag
- Bondo
- Elmer’s Wood Filler
- 150 Grit Sandpaper
- 150 Grit Sanding Sheets (Use code RAY10 to get 10% off your order)
- SurfPrep 3×4 Sander (Use code RAY10 to get 10% off your order)
- Tack Cloth
- Clear Shellac
- Black AquaLock Primer
- Paint Filter
- Respirator
- Paint Sprayer
- Sherwin Williams Paint in Rock Bottom
- Waterbased Polyurethane
- Fine Grit Sanding Pad (Use code RAY10 to get 10% off your order)
- Fusion Mineral Paint in Algonquin
Cleaning the Dresser
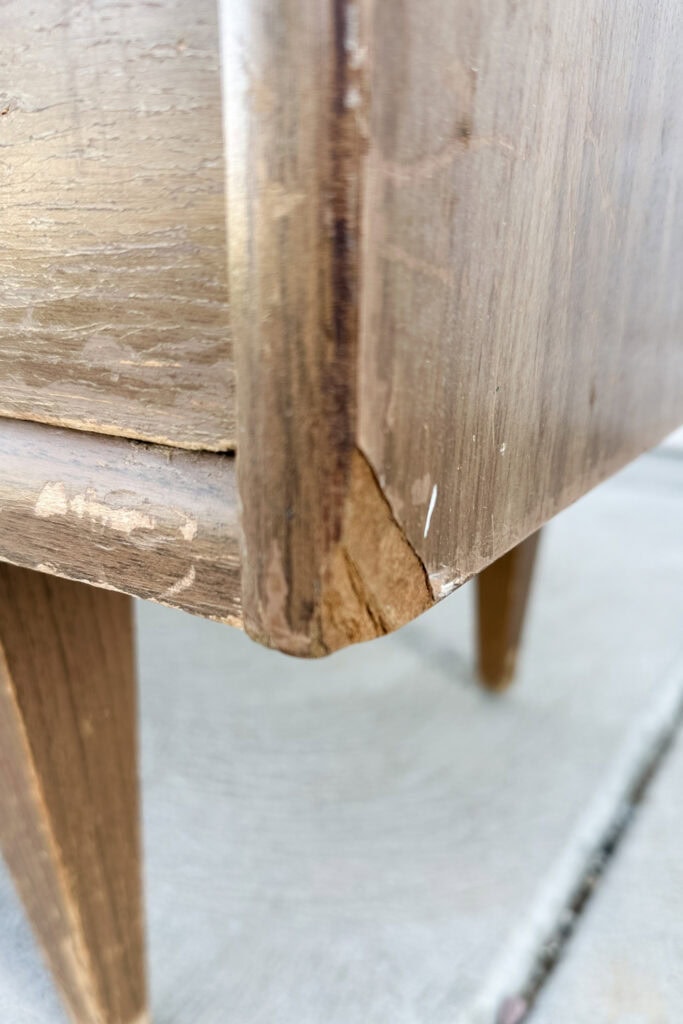
So, this dresser had a good amount of damage. One of the corners was busted, and a corner on a drawer was a little chipped off. We needed to fix this up because if we just painted all over this, we would be able to see all of this damage.
We didn’t have to remove any hardware because there was nothing on it, which was really nice. But this dresser was really dirty. We sprayed the Krud Kutter all over and wiped it down with a damp rag. The dresser was so gross that you could see the orange dirtiness in the Krud Kutter as it dripped down the drawer fronts.
If I had left all of that and just started working, the paint or primer finish would have looked terrible. It could also have caused them not to stick very well. So, we needed to get this piece nice and clean inside and out. Check out our guide on how to clean furniture before painting here.
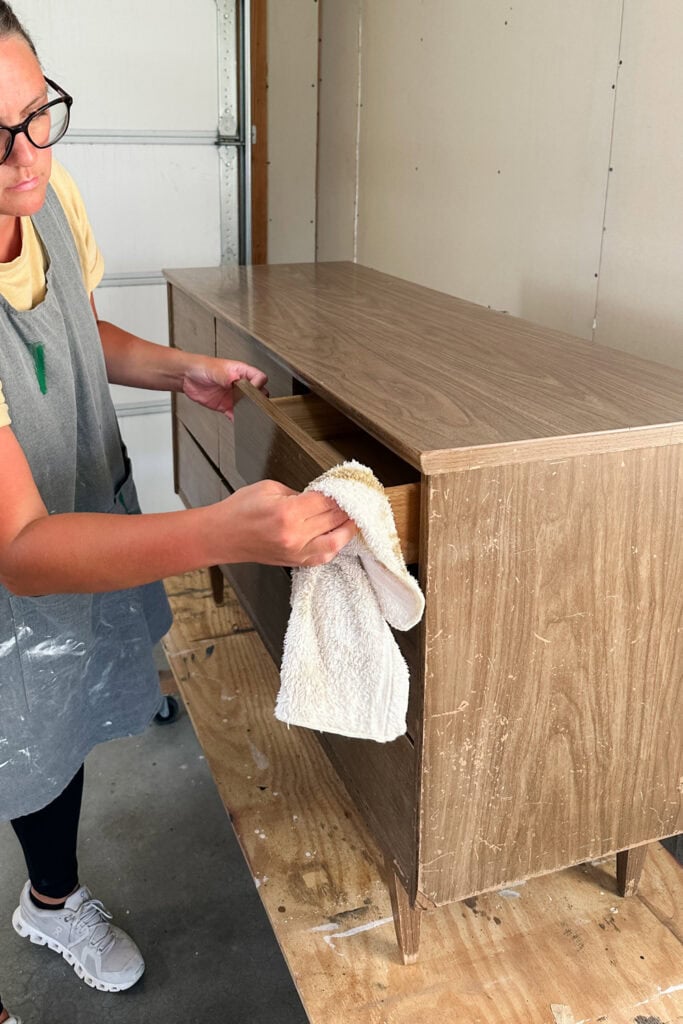
Krud Kutter does an awesome job cutting through the grease and grime. There were a few spots that I had to scrub a little bit because there was some gunk buildup, but it really helps cut through that fast, a lot faster than just Dawn dish soap and water.
How to Fix a Broken Dresser
Now we needed to fix the damage. The damage was big and varied enough that I used Bondo. This stuff is pretty stinky, so I only use it outside. It’s a two part epoxy, so you mix it together, apply it to the areas that need repaired, let it dry, and then you can sand it smooth into the shape that you need it to be.
Sometimes, you need to apply two coats of Bondo to build up the exact shape you want. That’s what we had to do here. We also worked quickly because the product dries within a couple of minutes. This time, I think, because it was so hot out, it dried within a minute. So we had to mix up a couple of batches. It’s best to work this way, in small batches. Learn more about Bondo wood repair here!
After we sanded down the Bondo with 150 grit sandpaper, there were some spots that weren’t completely filled in, like 1/8 inch deep at most. So, we used Elmer’s wood filler, just whatever we had on hand, to fill in these little spots.
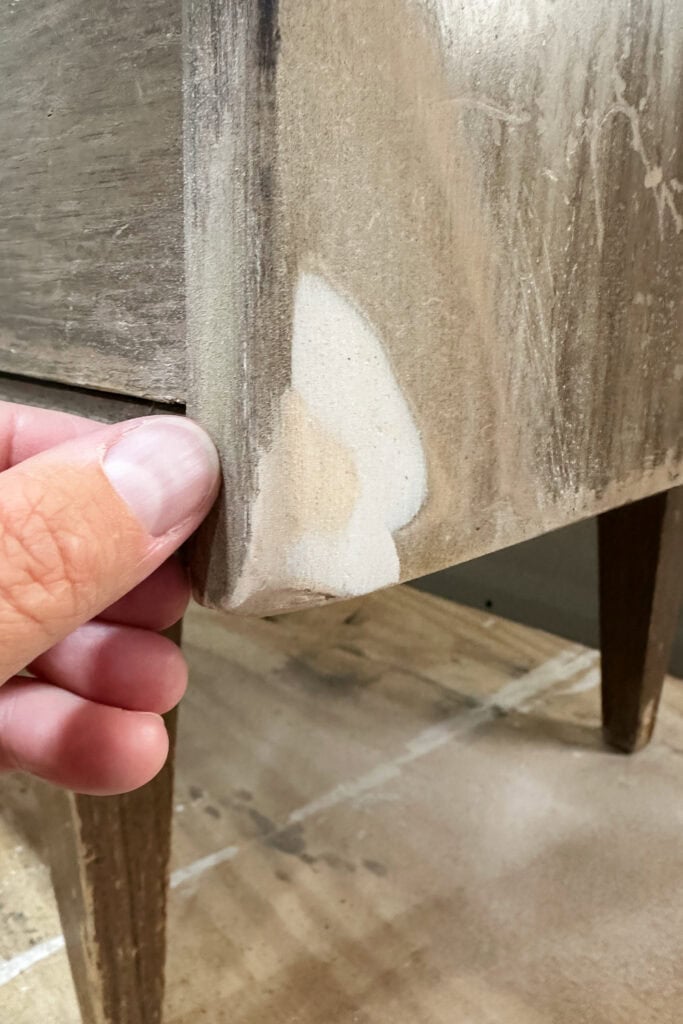
With wood filler, it’s pretty normal to have little tiny craters that, once you sand, you have some spots to fill. We filled those in, let them dry, and sanded them down to a smooth finish.


Sanding the Scratches
With the many scratches everywhere, if we just paint right over them, you will be able to see all of these through the paint. The paint will not hide them, so we either have to fill them in with wood filler or sand them down.
Since the scratches, for the most part, were very thin and not deep, it was best to just sand them down and smooth out the surface. Most of these wood fillers will not actually fill anything in because they are just not deep enough.
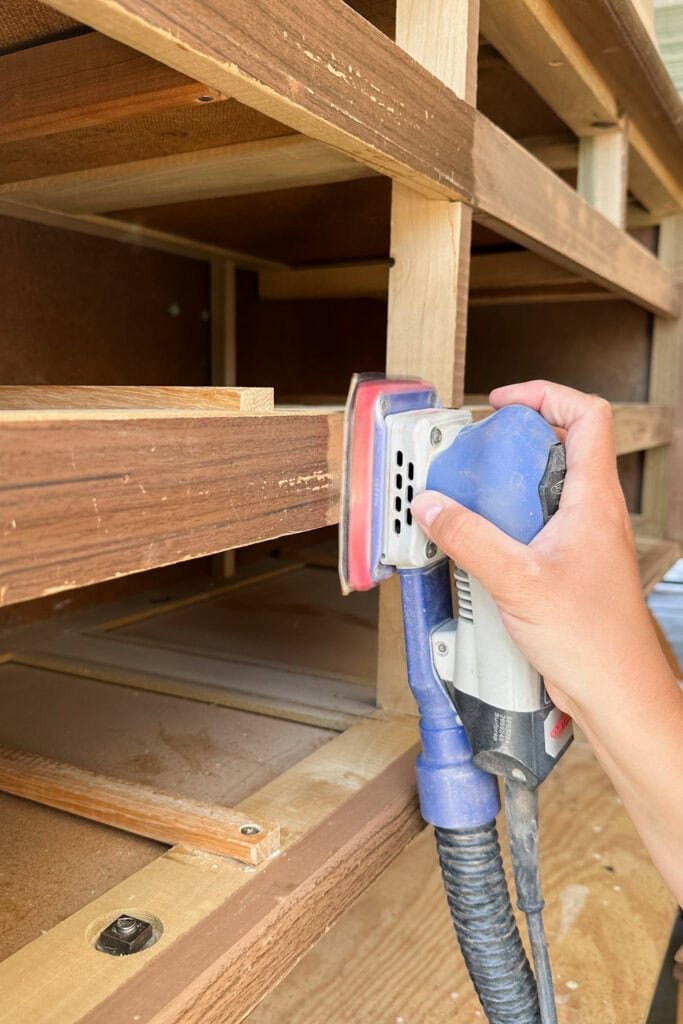
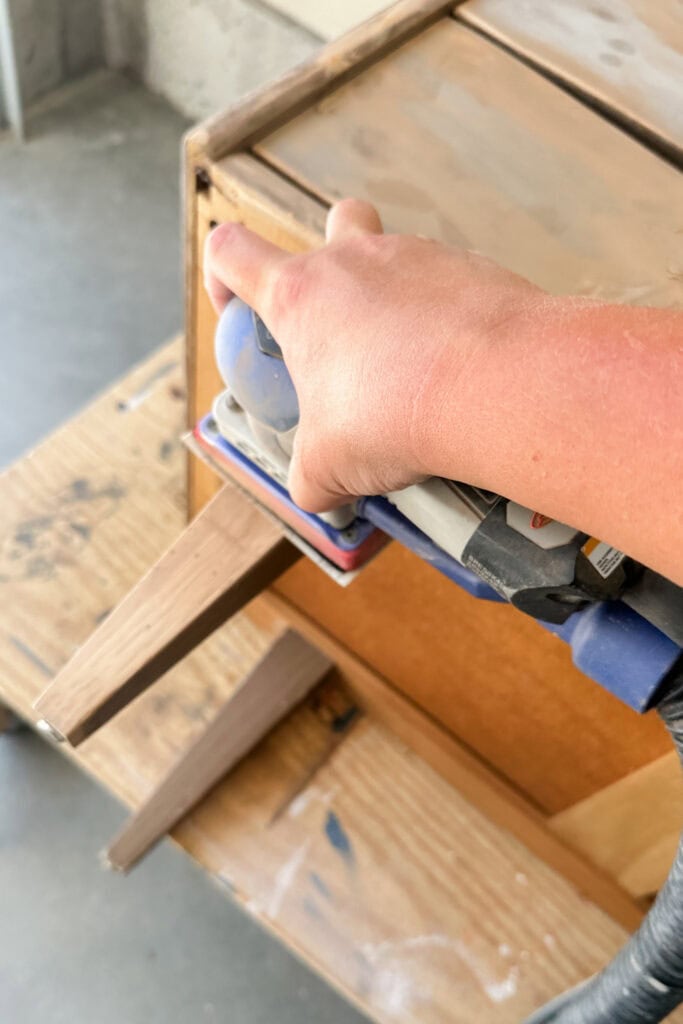
We used 150 grit sanding sheets on our SurfPrep 3×4 sander, and it was crazy how quickly and easily the finish came off. A lot of this dresser had a faux painted type finish to match the laminate and the particleboard sides.
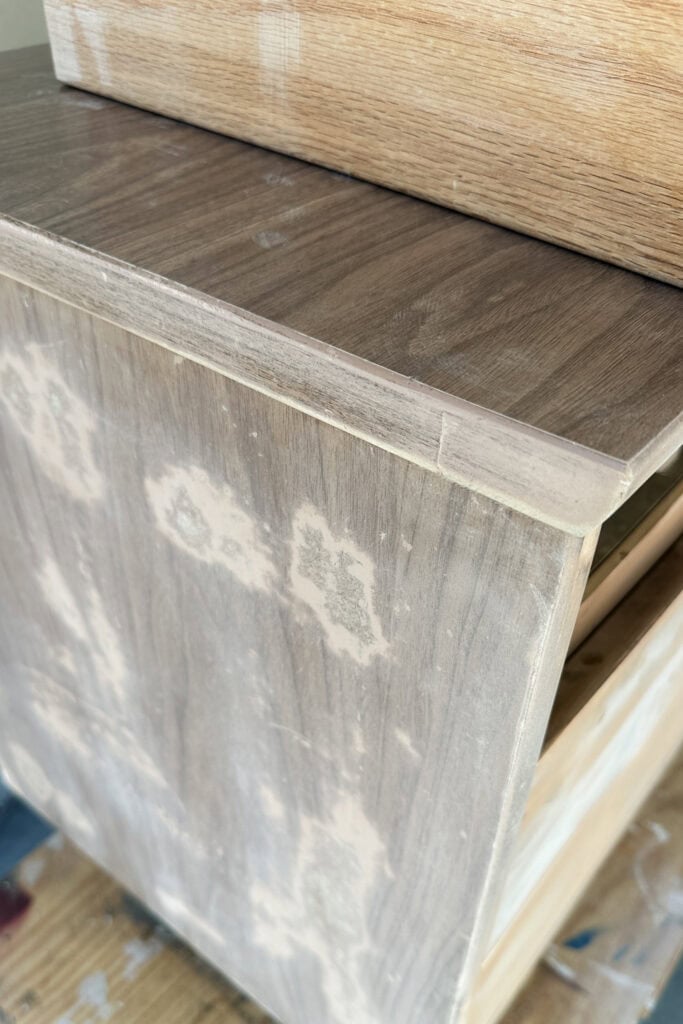
As I’m sanding, you can see a few different layers. It’s not the typical stained wood, and just really not very good quality furniture. I sanded it down, and it looked really spotty and splotchy, but overall, the scratches were gone.
But there were a couple of really deep scratches. I didn’t want to keep sanding too far, and so I went back with the Elmer’s wood filler and filled in the deep gouges that were still there.
Sanding the Dresser
I also sanded the laminate top with 150 grit sandpaper with my Surf Prep sander, and it’s kind of cool how you can see this laminate gets really white looking. That’s what happens when you’re sanding plastic or laminate. It doesn’t sand off the same way that wood does.
We also did a very light sanding on the sides, and we found the particleboard texture underneath the fake wood finish.
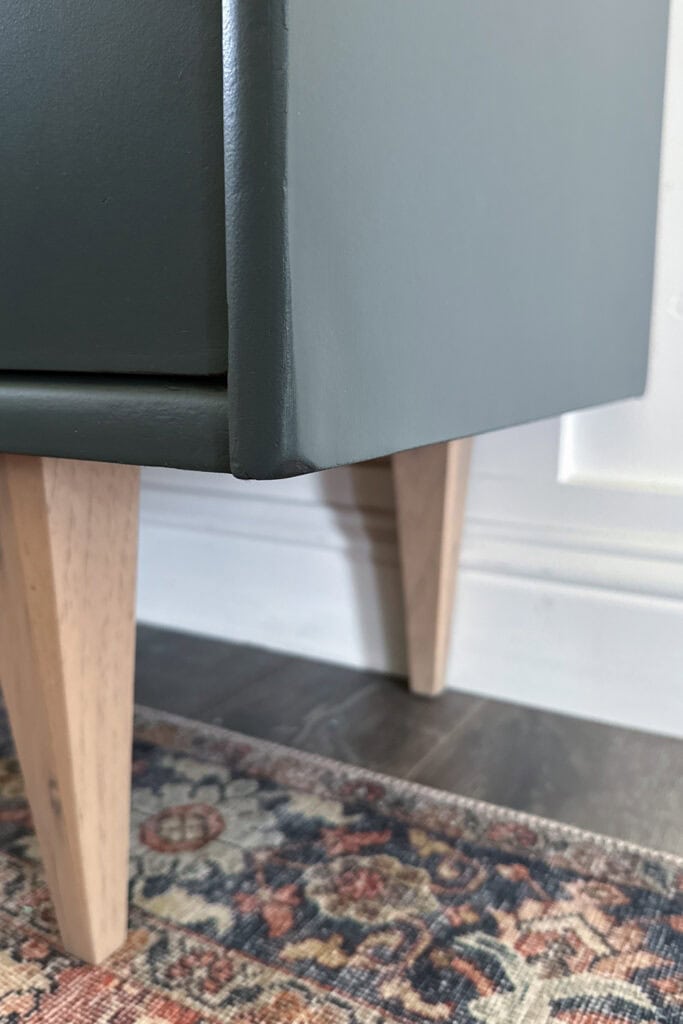
Then we sanded the legs and the base. I ended up removing them as I was working on them, and sanded them again with 150 grit sandpaper. And all of the base and legs were actually made of real wood, but the legs looked to me like they were walnut. And the little base piece looked like poplar wood.
So I was going to have to get creative to make these two different woods match, while leaving them with a raw wood look. But I ended up simply unscrewing the legs and that little base, and sanding everything down to raw wood.
And then we cleaned off all of the sanding dust. We vacuumed and used a tack cloth to remove the remaining dust, and it’s amazing how much dust the tack cloth can pick up, even after I’ve vacuumed everything off. Here’s more on how to clean wood after sanding.
Priming Before Painting
Before we can paint, we need to prime, and priming is not just to help the paint stick. It’s also to help cover up all of this splotchiness that I’ve uncovered. Also, if we put water based paint right over the particleboard, it would just make it bubble up with texture.
The primer is also needed over these spots where we went down to raw wood because of something called bleed through, where the stains will come through the paint. Also, most paints cannot stick to laminate, even scuffed up laminate like we had here. Learn the best paint for laminate furniture options here.
We have to prime all of these different types of materials that this furniture is made of. We want the new finish to look good and not spotty. If we don’t use a primer that gives really good coverage, covers all of the spottiness, and keeps the sheen the same, then our paint sheen will look different, especially where we have sanded down to raw wood versus where we haven’t sanded down all the way.
The areas where we sanded down to the particleboard would look different than the laminate and the places that had some finish over the particleboard. If we paint right over the particleboard, it will bubble up. If we paint right over the laminate, the paint will most likely just scratch right off. If we paint over the raw wood, we will probably have bleedthrough issues.
There are primers that do all of these different things. Check out the best primers for painting furniture in this post. Actually, there’s one primer that I like to use that does all of this. The problem, though, is that it’s tinted white. The paint I wanted to use was a dark color, and I didn’t want to use a white primer under that. Because if the paint chips or gets scratched, then you’ll just see it underneath.
So we decided the easiest thing for us in this case was to use clear shellac to prime the particle board, because we can’t use a water based primer on that. There’s a white tinted shellac, but I want a clear shellac so that there’s no white underneath my dark paint.
It helps seal in the particleboard so it doesn’t bubble up when I paint it. Clear shellac will also help paint stick really well, especially on laminate. And it will also help block bleedthrough stains from the raw wood. Get more tips on how to stop stains from coming through paint here.
Would you like to save this?
But the one thing that clear shellac will not do is create smooth coverage over these spotty areas. Because it’s clear, it doesn’t have that tint to help with the sheen and with creating full, even coverage across the furniture.
That’s where this black primer comes in. It sticks very well without shellac, but it is water based. That means we can’t use it on the particleboard without sealing it first. It sticks very well to laminate and wood and helps get that even coverage with the spottiness.
Priming with Clear Shellac and Aqualock Primer
We applied two good coats of clear shellac over everything. We let it dry overnight, and then we put the black AquaLock primer into our sprayer. I do like to thin this primer a little bit to help it spray out easier. With a flawless, smooth finish, it looks like it’s black paint, not primer.
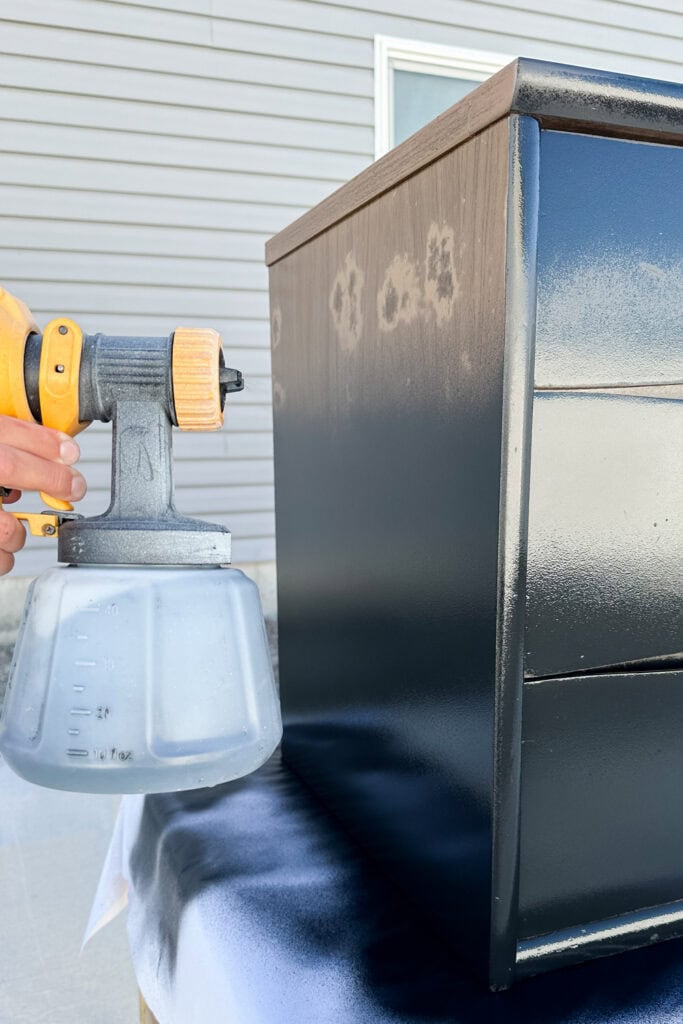
So, I thinned the Aqualock primer with about 15% water and added it to my paint sprayer. Fun fact: I made a huge mess when I poured it in. We applied two coats, and after the first one, I could see some deep gouges and dings that I had not sanded out.
I filled those with just some regular Elmer’s wood filler. I let those dry and then sanded them smooth before I applied the second coat of primer. I let that coat dry for an hour.
Painting with Homemade Chalk Paint
We used Sherwin Williams sample paint on this makeover. It’s a sample of satin acrylic latex paint, so it’s not as high quality as the regular Sherwin Williams paint that we typically use. It does say to topcoat it, and I planned on topcoating it anyway, after making it into chalk paint.
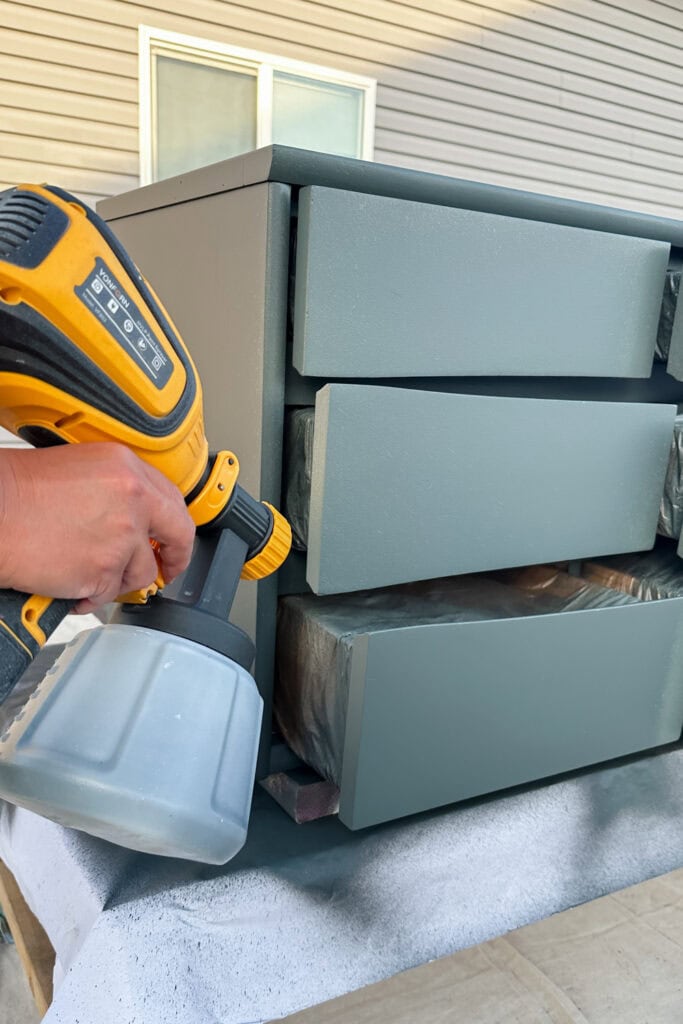
I mixed up some of the paint and turned it into chalk paint, following my homemade chalk paint recipe, and put it into our sprayer. It’s pretty thin to begin with, so I just thinned it out by about 10% at most. It didn’t need to be thinned out very much. Learn how to thin paint for a sprayer in detail here!
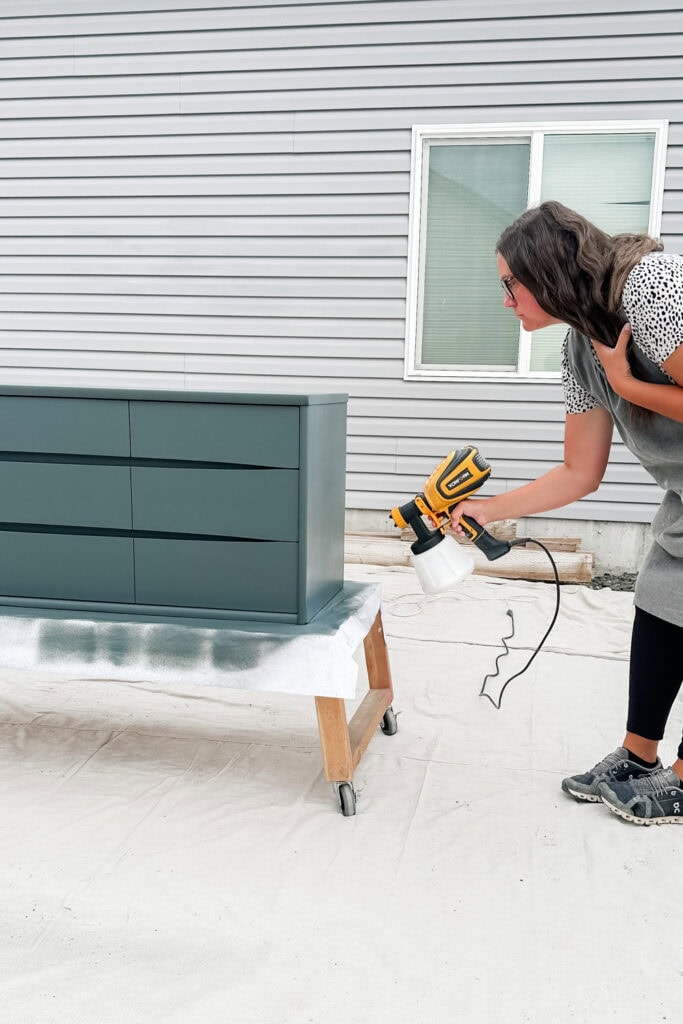
And then I sprayed on a coat of paint. It looked like it was going to leave a lot of texture behind, and I was really worried about that. But as it dried, it dried pretty smooth. Not perfect, but still smooth. It took two coats, and they dried very fast, especially out in the sun. We did remove the drawers so we could paint behind them.
Topcoating Painted Dresser
We let the paint dry overnight and waited until the next day to topcoat. We added some satin waterbased polyurethane to the sprayer, thinned it out with about 10% water, and sprayed on the poly.
It actually started to rain on us right after we finished spraying the first coat, so we had to bring it in and wait until the next day to apply the next two coats. But when I brought it in, there were a couple of spots from the rain that kinda made the finish look a little bit different.
I just sanded everything down very, very lightly with a fine grit sanding pad to smooth everything out, and then cleaned up the dust. Then I applied the last two coats of polyurethane. Here’s how to spray polyurethane for more tips for this step.
Whitewashing Wood Base
For the legs, we sampled a few different neutral tan colors of Fusion, Dixie Belle Silk Mineral, and Paint Couture that I just had on hand. I sampled them, let them dry, and put them up against the painted dresser to decide which color I liked best.
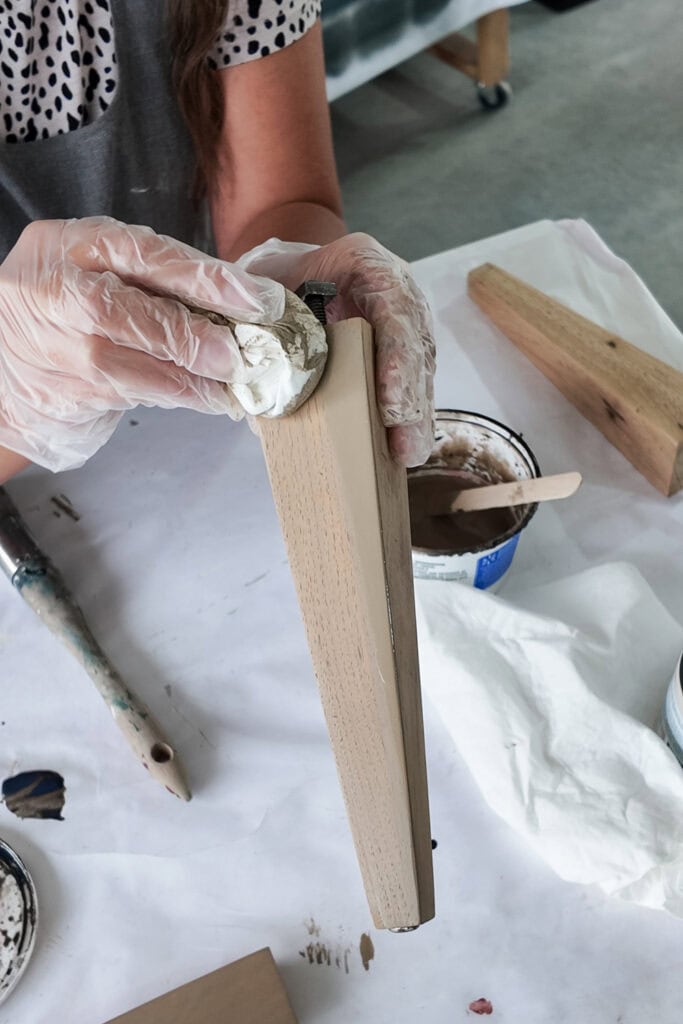
Out of all of them, I chose Algonquin from Fusion Mineral Paint. It just has a nice warm wood tone to it. So, I thinned it out with a lot of water. It’s mostly just tinted water.
I brushed the whitewash on the raw wood base and then wiped it back off very quickly before it could start to dry. I just applied that all over the raw wood spots.
This was mostly because the base for the wooden legs had a green streak in the wood. It was not the same type or color of wood as the rest, so I needed to kind of stain the wood to make everything match. Learn how to whitewash furniture here if you haven’t done it before.
That took about 5 minutes. It was super simple to do, and I love the new color of the legs. I also topcoated the legs after. Then I let it dry for a day or two before bringing it in and taking pictures of it.
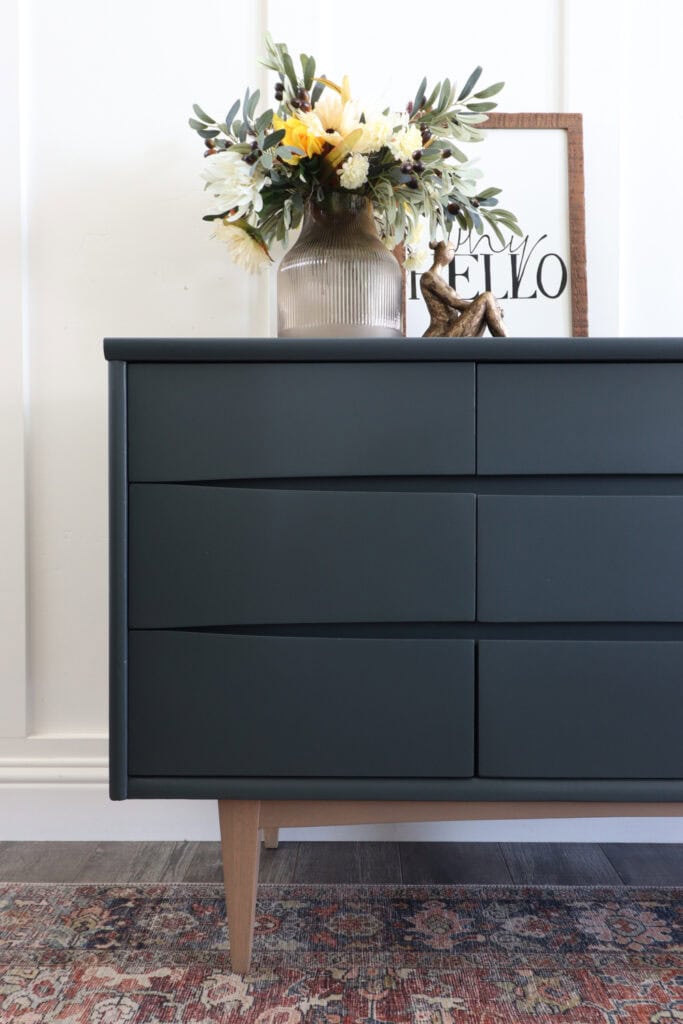
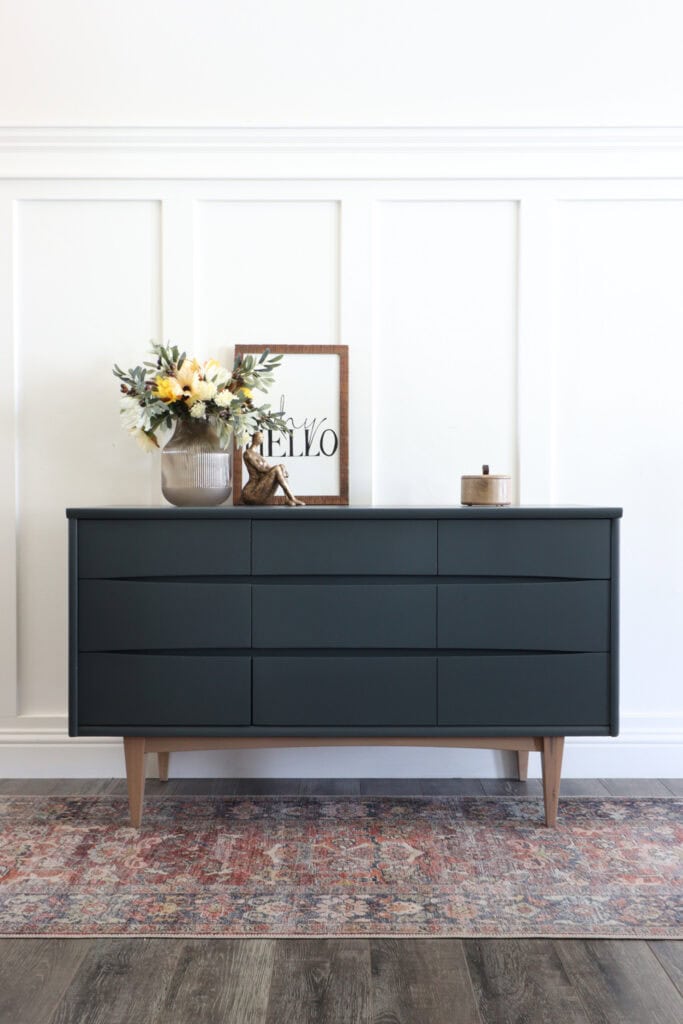
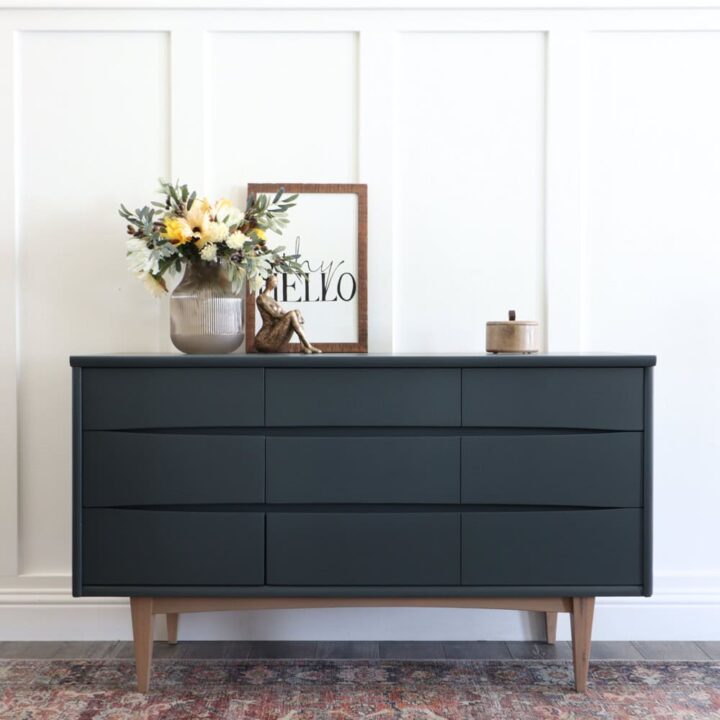
I really wanted to make sure that this paint had multiple layers of topcoat and that it dried for at least a full day or two, for the topcoat to cure and create a very durable surface. And here’s what it looks like now!
Watch the full repair and makeover on our YouTube video below, or scroll down to see the after photos!
More Before and After Makeovers
See All >
Click any of these “before” photos below to view the “after” of that makeover.


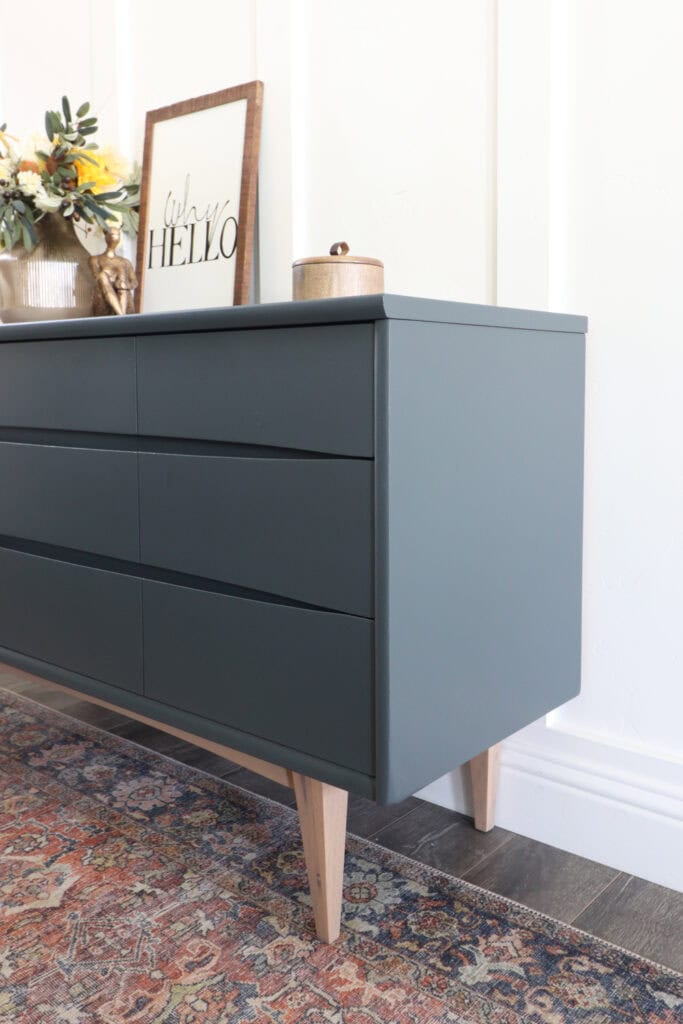
I absolutely love this new look. It looks so much better than before. You cannot see where it was damaged before, and you can’t see where we sanded through the particleboard, thanks to those two primers. It looks like it has one nice sheen, has smooth, even coverage, and like a piece you would buy from West Elm.
If you want more inspiration for your old, worn out piece, this is what a damaged dresser can turn into!
Personally, if I were to do this project again and didn’t have this paint on hand, I would choose not to make the homemade chalk paint with the Sherwin Williams sample. It’s totally possible to paint furniture like this, but if I didn’t have it already, then I would have used Sherwin Williams Emerald Urethane Trim Enamel. It’s a much more durable paint for furniture. Learn about it in my Sherwin Williams Emerald Urethane Trim Enamel review here.
Everything else, I would have done the same, but I would not topcoat the Sherwin Williams Emerald Urethane Trim Enamel. It does not need one, and actually, if you do, you can run into bigger issues, such as crackling. It’s just not worth topcoating it because it can cure hard on its own.
Or if you really want to use homemade chalk paint and you don’t want to pay for Sherwin Williams Emerald Urethane, just using regular latex paint and turning it into homemade chalk paint would be a better, more durable option than just using sample paint.
But I love this Rock Bottom color from Sherwin Williams. It’s such a pretty color, so personally, I wouldn’t go with a different color. I would stick with Sherwin Williams, so that I can have this color perfectly tinted into whatever paint line from them that I choose to use.

Don’t forget to check out these other awesome before and after furniture makeovers from my Furniture friends!! (Click the links below the photos!)
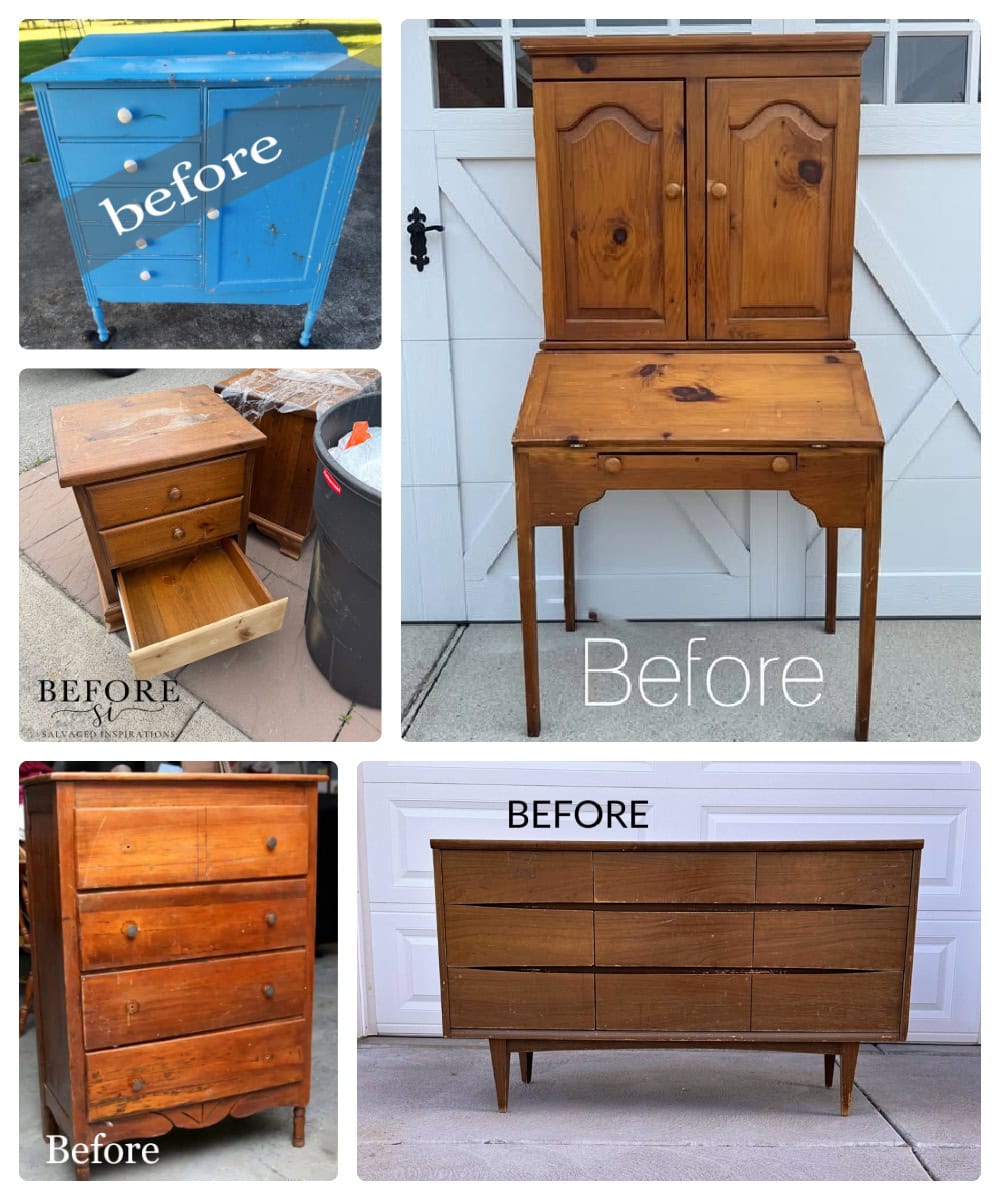
- Antique Wardrobe Makeover from My Repurposed Life
- Dark Nightstands Makeover from Salvaged Inspirations
- Painting A Secretary Desk from Confessions of a Serial DIYer
- Shabby Chic Coastal Dresser Makeover from Petticoat Junktion
Can You Really Fix a Broken Dresser?
Wondering, can you really fix a broken dresser? The answer is yes! Learn how to fix your broken dresser and give it a stylish makeover.
Materials
- Krud Kutter
- Damp Rag
- Bondo
- Elmer's Wood Filler
- 150 Grit Sandpaper
- 150 Grit Sanding Sheets (Use code RAY10 to get 10% off your order)
- Tack Cloth
- Clear Shellac
- Black AquaLock Primer
- Paint Filter
- Sherwin Williams Paint in Rock Bottom
- Waterbased Polyurethane
- Fine Grit Sanding Pad (Use code RAY10 to get 10% off your order)
- Fusion Mineral Paint in Algonquin
Instructions
- Clean the dresser thoroughly using Krud Kutter and a damp rag to remove dirt, grease, and grime. Pay attention to buildup and scrub if needed to make sure the surface is ready for repair.
- Repair any damage on the broken dresser by filling them with Bondo, and sand them smooth after they dry. Use wood filler to fill in tiny imperfections afterward.
- Sand the dresser using a sander with 150 grit sandpaper to smooth out scratches and remove faux finishes. For thin scratches, sanding is more effective than filling them in. For deep scratches, fill them in with wood filler.
- Prime the dresser with two coats of clear shellac and let it dry overnight. Thin the black AquaLock primer with about 15% water and apply two coats with your paint sprayer.
- Mix latex paint into homemade chalk paint and thin it by about 10%. You can remove the drawers so you can paint behind them. Spray two coats on the dresser and let the piece dry overnight.
- Apply 3 coats of a satin waterbased polyurethane topcoat to protect the paint. Sand lightly between coats for a smooth finish and allow it to dry thoroughly.
- Whitewash the wood base using a thinned paint solution to match its color to the rest of the painted dresser. Wipe back the paint immediately before it starts to dry.
- Topcoat the legs and base after finishing the whitewashing process. Let the entire dresser dry for at least a full day or two for the topcoat to cure and create a very durable surface.
Recommended Products
As an Amazon Associate and member of other affiliate programs, I earn from qualifying purchases.


More Repairing Furniture Tips
- How to Repair Rattan Wrapping
- How to Repair Chipped Wood Furniture
- Can a Beginner Fix This Furniture Damage?
- How To Fix A Drawer Bottom That Falls Out
Learn the Art of Updating Furniture!
If painting furniture feels overwhelming or your past attempts didn’t go as planned, this course will guide you step by step.

Follow us on YouTube to get more tips for painting furniture. Or share your project with us on our Facebook Group and be part of our community. See you there!
GORGEOUS Natalie! I love the new modern look and the warmth of the base looks awesome against the black! Pinned! XOXO
Thank you SO much Denise!
Wow that was a lot of work, but it looks absolutely stunning now!! That color suits the style so well! XOXO
Ahh thank you Christy!! It was a bit of a project for sure but I’m so happy with how it turned out!
I think you performed a miracle! You have given that dresser many many more years of life. Well done and very informative. Thank You
Oh wow! Thank you so much. I’m glad this was helpful for you too!
Natalie,
So much work, but well worth it. The result is stunning. I love the two-toned look. Now it looks like real wood all over!
Pinned!
gail
Ahh so glad to hear that Gail! Thank you so much, I really appreciate it!
Gorgeous! But I love MCM furniture. Love the colour and the contrast with the wood base/legs. You truly performed a small miracle here! Thank you for sharing your talent and all your advice.
Aw thank you so much!! Appreciate the kind words!