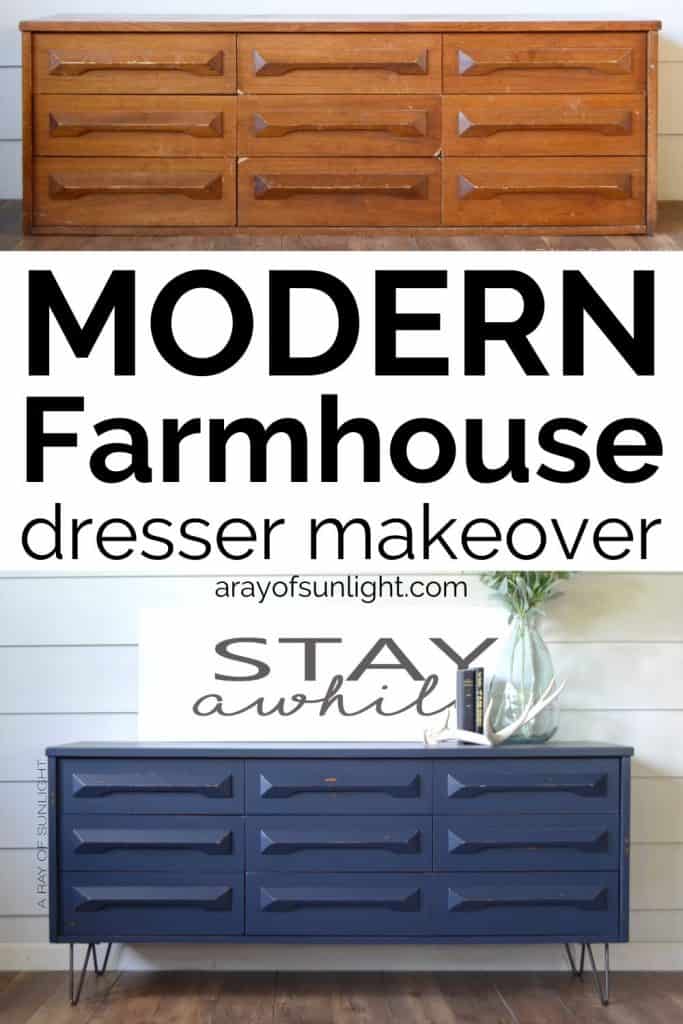
DIY Painted Mid-Century Modern Dresser: Farmhouse Style
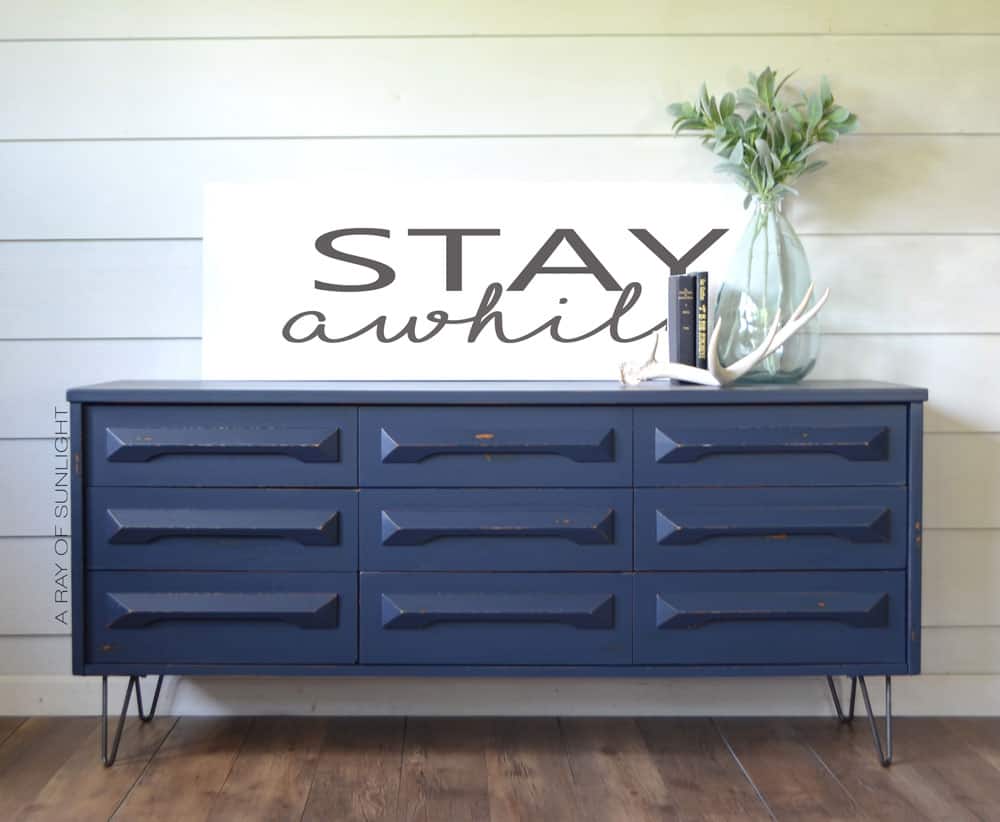
Mix painted farmhouse and a mid-century modern dresser together to create a modern farmhouse dresser. This DIY painted mid-century modern dresser even has hairpin legs to boost its style. Revamp your old furniture with this creative furniture makeover idea!
This project is perfect for those who love the rustic charm of farmhouse style but also appreciate the sleek lines of mid-century modern design. By combining these two styles, you get a one of a kind piece that is both trendy and timeless!
We recently moved across the country, sold most of our furniture, and literally packed all that we had into our two small cars, our pickup, and a 6′ x 12′ Uhaul trailer. Needless to say, we’ve been on the hunt for cheap dressers for our new home.
*Side note: Can I just say how freeing it was to get rid of so much junk that we had accumulated throughout the years? And since we sold so much, (and saved so much by not renting a huge moving truck), I have a tight budget (but a budget nonetheless) to redecorate our home. Yay!!!

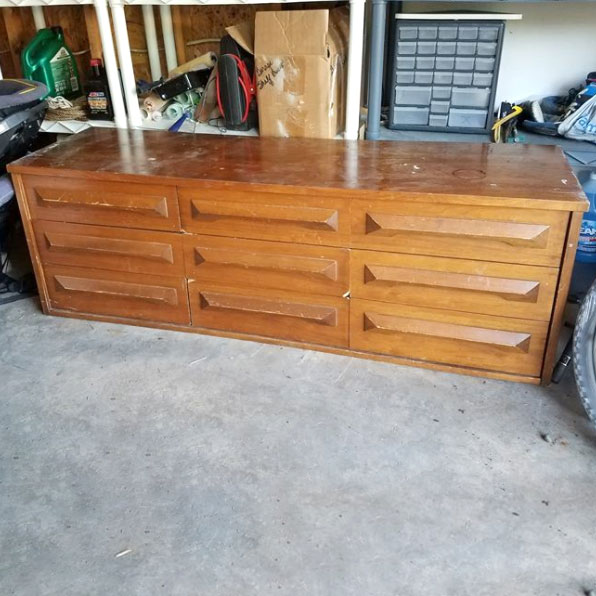
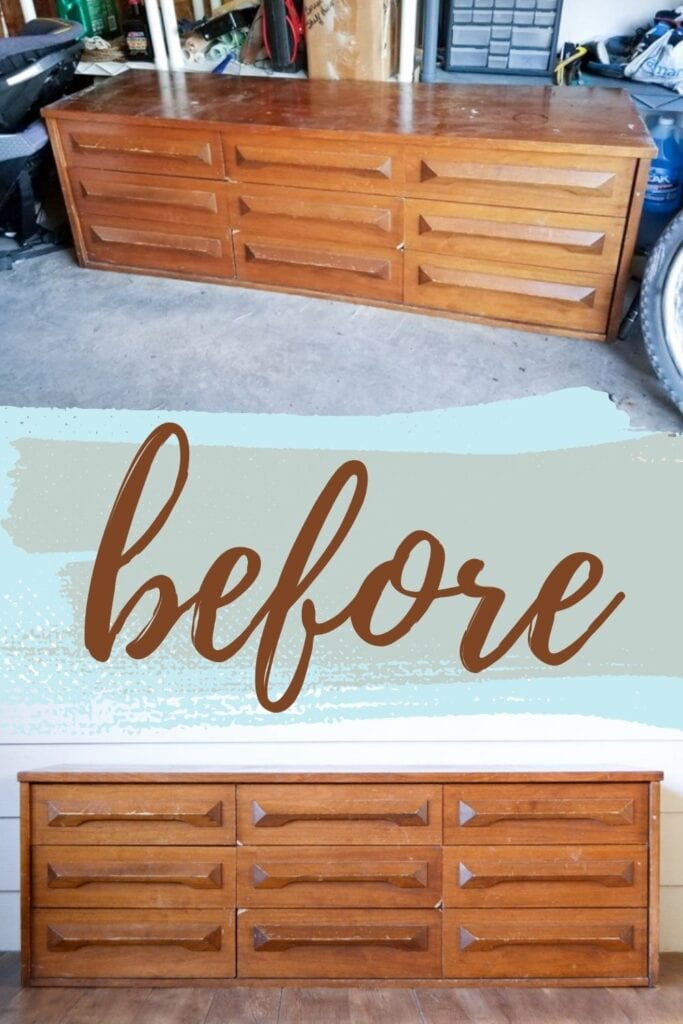
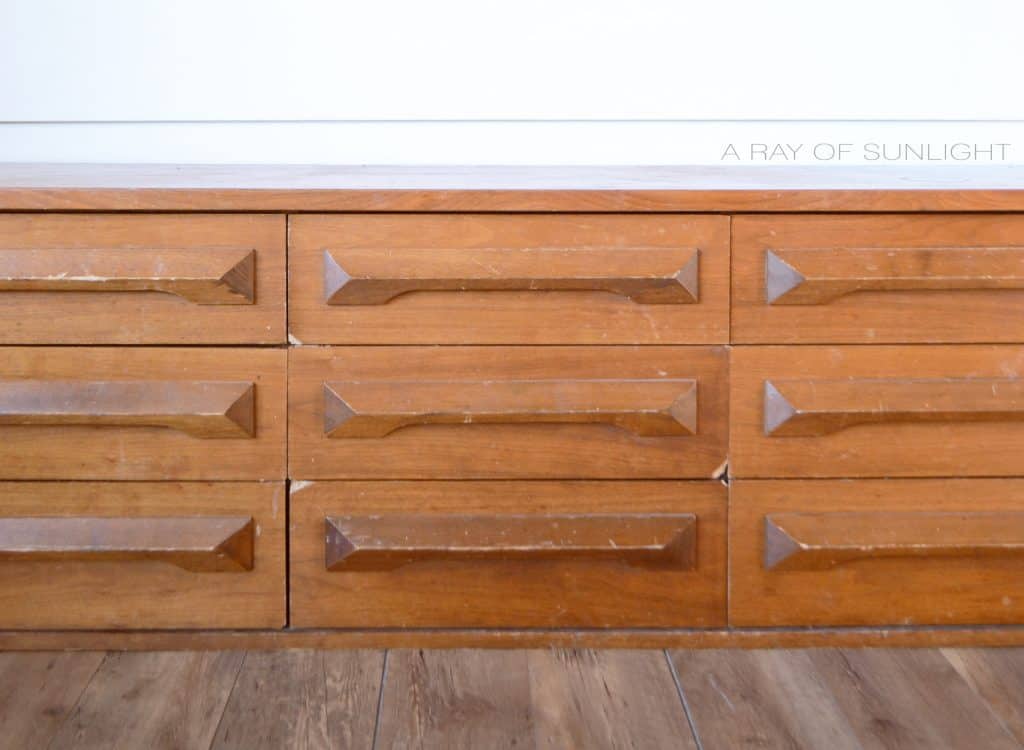
One of the first pieces we found was this mid-century modern dresser. Not only was it missing its legs, but it was also dirty, and sticky, and the corners of some of the drawers were broken off. But for $25, I couldn’t pass it up for my own home!
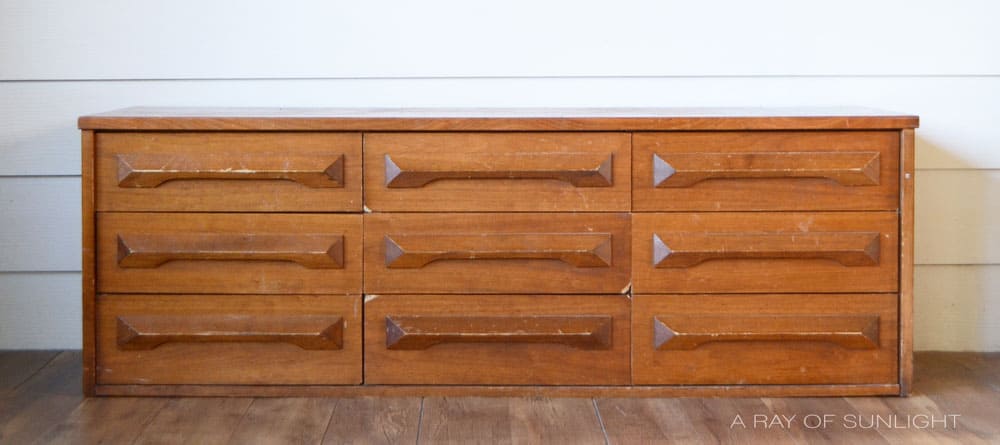
Originally I thought about removing the current drawer handles so it wouldn’t have a mid-century modern feel anymore, but the more that I looked at the dresser, the more I fell in love with the handles.

Supplies Used For Painted Mid-Century Modern Dresser
As an Amazon Associate, I earn from qualifying purchases. I also may earn from other qualifying purchases with other companies or get free product to review and use. All opinions are my own.
- Old Dresser
- Bondo Body Filler
- 220 Grit Sandpaper
- Krud Kutter
- Old Rag
- Shellac
- Midnight Blue Chalk Style Paint by General Finishes (Not sold anymore, Coastal Blue Milk Paint is the closest to the color now)
- Varathane Polyurethane
Before painting, I had to tackle the problems.
- First, the broken corners on the drawers and the scratches all over.
- Decide how to make the dresser taller. *I didn’t attach the legs until after the dresser was painted though*
- And finally, painting a mid-century modern dresser in a farmhouse blue finish.
How to Repair Wood Corners
If you look closely, the corners on some of the drawers were broken off. The drawer fronts were made of MDF, so they easily chipped off.
Bondo came to the rescue to fix the broken corners. Learn more about how to fix a chipped wood corner here and how to use Bondo with our tutorial on how to repair damaged furniture.
Get Our Secrets!
Grab this super convenient How to Repair Furniture Ebook with all of our secrets on how to repair furniture for only $14.
You can print it out and have instant access whenever you come across damaged furniture, and know exactly how to fix it!
Click on the picture of the book to purchase!

It is easy to use, dries fast, and it dries rock hard. Honestly, Bondo is a must-have product when working with furniture repairs. You can even use it to repair broken trim on furniture, fill in hardware holes, and repair chipped veneer furniture.
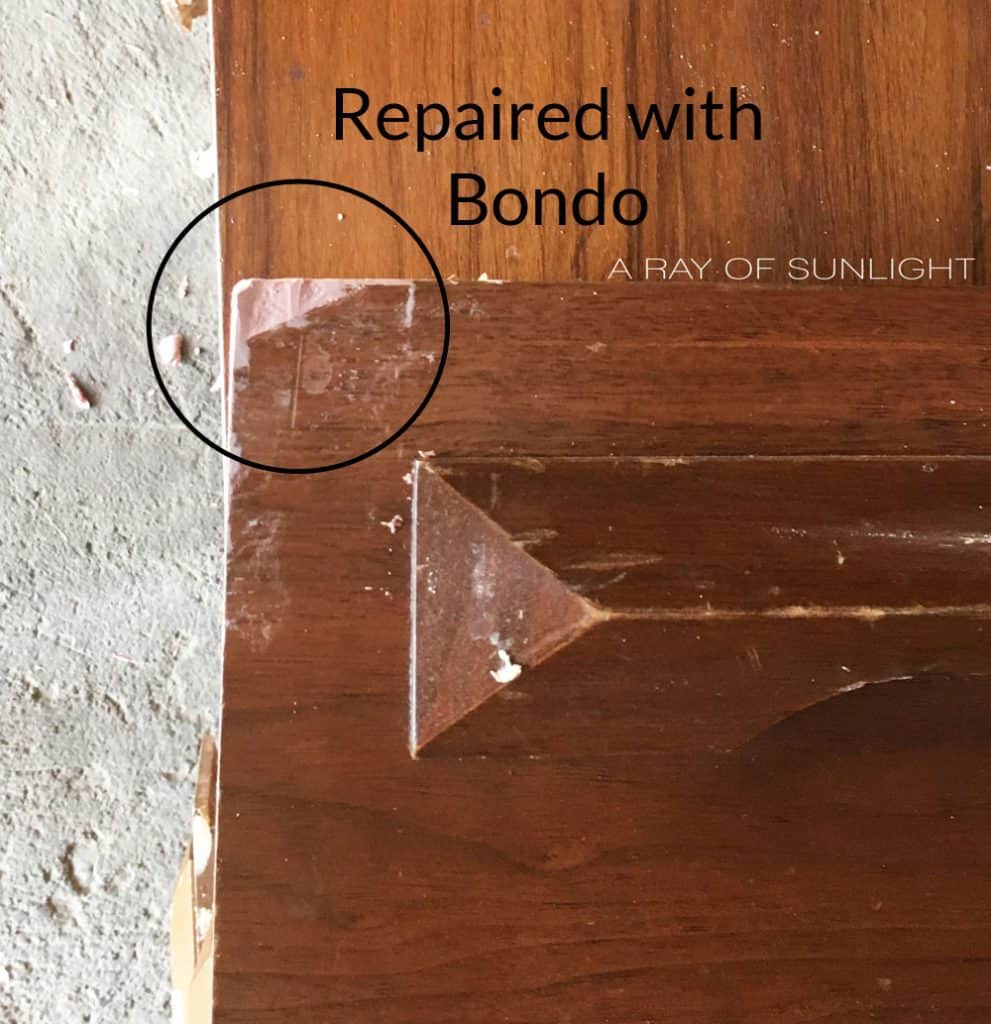
I also used some wood filler to fill the large scratches in the wood. Learn about the best wood fillers for furniture here. Once the Bondo hardened, we molded and sanded down the corners with 220-grit sandpaper.

Prepping Furniture for Paint
Then I scrubbed the whole entire dresser down with a wet old rag and Krud Kutter.
Thankfully Krud Kutter easily cuts through grease and grime, making it easy to clean up utterly disgusting furniture.. like this one. GROSS!
Learn more in this post about how to clean furniture before painting. I went through a whole container of this stuff when we moved into our new home!
Not only is it amazing with furniture refinishing, but it easily gets rid of those black built-up dirt/oil stains on fridge handles and trim by door handles and light switches. After the Krud Kutter, I scuff-sanded the entire dresser and wiped all the dust off with a tack cloth. Read this post to know how important sanding before painting furniture is!
And just for insurance against bleed through, we gave it two coats of shellac. Here’s more about how to stop stains from coming through paint so you avoid this problem altogether.
Painting Furniture Blue
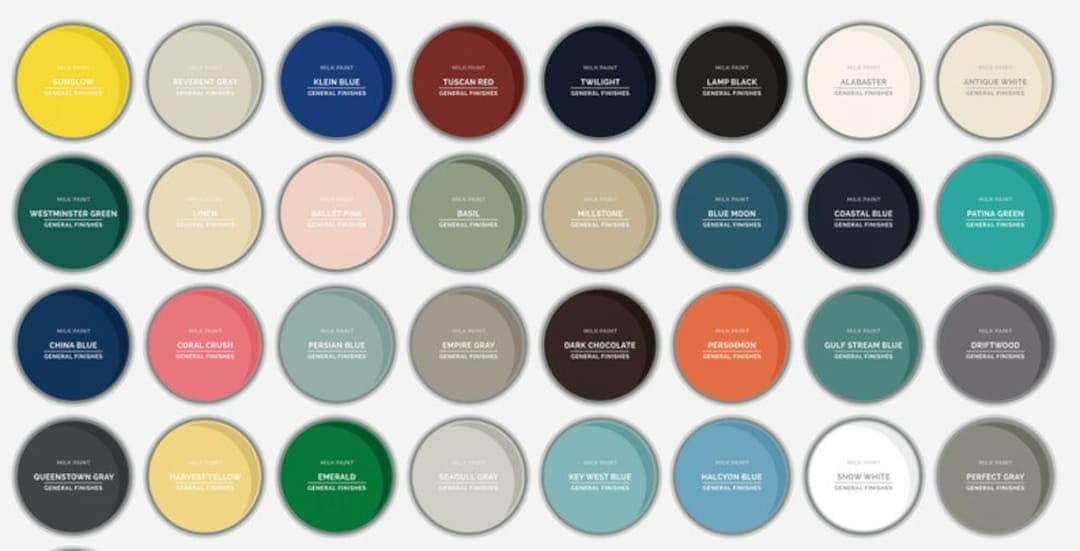
For the perfect shade of navy, we chose Midnight Blue by General Finishes in the Chalk Style Paint. Check out more navy painted furniture ideas here!
**General Finishes no longer makes Chalk Style Paint. Coastal Blue in their milk paint line is very similar though! You can go to General Finishes website and find blue painted furniture in their colors for inspiration on what color is best for your makeover.
Would you like to save this?
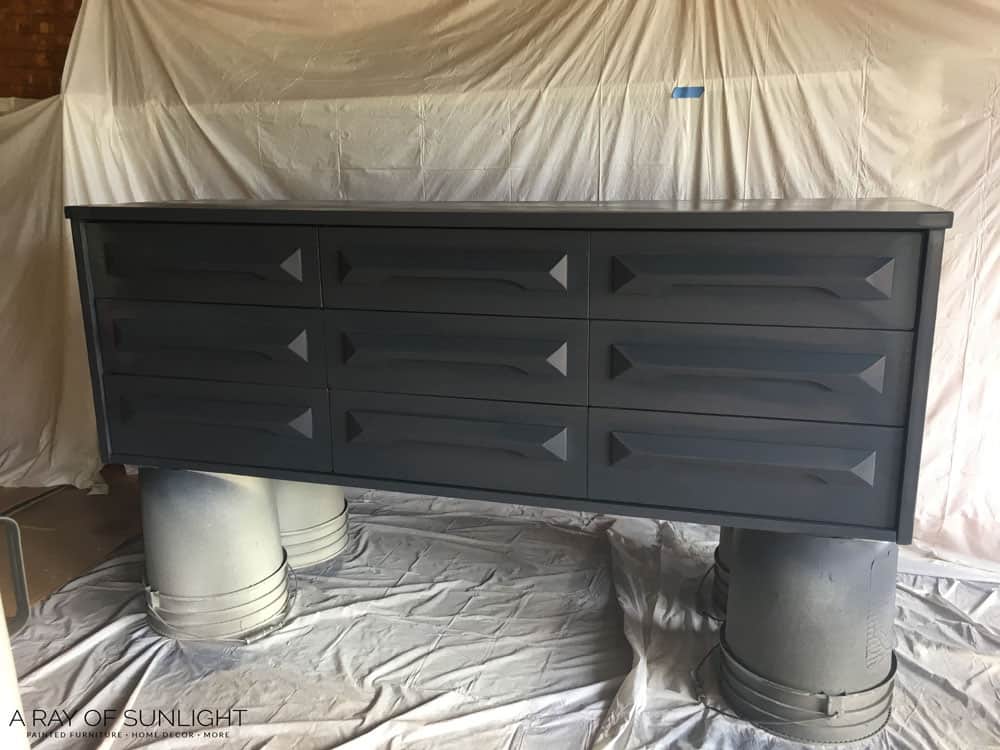
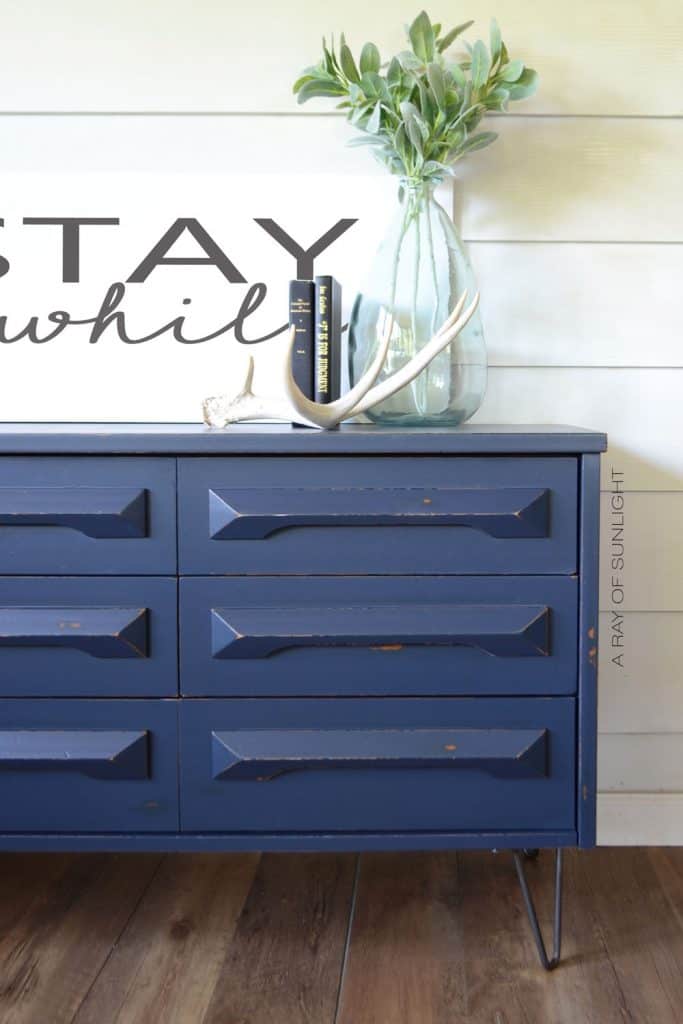
This color is so amazing and will go perfectly with my farmhouse navy blue decor plans. It took 2 coats to get even coverage, and then we heavily distressed the finish with 220-grit sandpaper.
If you love navy blue and modern furniture, be sure to check out this Mid Century Hutch from Gail at My Repurposed Life!
I really wanted more of a farmhouse look instead of a mid-century modern look, so heavily distressing was a must. Learn about the 6 best distressing furniture techniques here! If you like mid century modern painted furniture, check out this post for more inspiration.
To give the paint finish extra durability and make it easier to wipe down, I sprayed on 3 coats of my favorite top coat. I absolutely love spraying polyurethane with my paint sprayer! Learn all about how to spray polyurethane here!
And check this post to learn more about the best topcoats for painting furniture.
How to Make a Dresser Taller
This dresser originally had legs, but at some point, someone took them off. So this dresser was only 20″ tall, and I wanted it to be closer to standard height.
I ordered some hairpin legs and attached them to the bottom of the dresser. Here’s our tutorial on how to create a DIY dresser with hairpin legs. This dresser was ready to head to the landfill, but now it will be a centerpiece in our home for years to come!
More Before and After Makeovers
See All >
Click any of these “before” photos below to view the “after” of that makeover.


For the perfect farmhouse look, check out these DIY farmhouse drop cloth curtains to tie everything up. Here are more DIY 9 drawer dressers for your painting inspiration.
It never ever gets old to see how easily and dramatically paint transforms a piece of furniture. What have you saved from the trash? I’d love to hear!! Get more ideas for DIY dresser makeovers here if you’re feeling even more inspired to update your dresser.


How to update dresser into mid-century modern style
To update a dresser into a mid-century modern style, you can start by choosing the right color. Mid-century modern furniture often features bold colors such as mustard yellow, burnt orange, or teal blue.
Another option is to paint the dresser a solid color and add white accents or legs for a more minimalistic approach. Use clean, geometric hardware to give it a sleek and modern look. You can also add tapered legs to the bottom of the dresser for an authentic mid-century feel.
Another way is to keep the natural wood finish and add touches of black accents through details such as hardware or painted edges. You can also mix and match different wood finishes for a unique and eclectic mid-century vibe.
How to create farmhouse style dresser
To create farmhouse style furniture, start by selecting a color palette of neutral and earthy tones like white, beige, and brown. Painting furniture in these colors will give it a rustic and charming look. You can also do distressing techniques to create a worn and aged appearance.
Next, choose hardware with a vintage or rustic feel, such as antique knobs or pulls. These small details can make a big difference in creating the farmhouse style.
Finally, consider incorporating natural elements into your piece, such as using reclaimed wood or adding a natural wood stain. This will add to the true farmhouse feel. If you’re looking for more farmhouse style dressers, check out these rustic dresser ideas!
The merge of farmhouse style and mid-century modern design on furniture creates a unique and beautiful aesthetic. By incorporating elements from both styles, you can create a piece of furniture that is both charmingly rustic and sleekly modern. And you’re sure to have a piece that is yours alone!


DIY Painted Mid-Century Modern Dresser: Farmhouse Style
Mix painted farmhouse and a mid-century modern dresser together to create a modern farmhouse dresser. Follow this DIY painted mid-century modern dresser makeover!
Materials
- Old Dresser
- Bondo Body Filler
- 220 Grit Sandpaper
- Krud Kutter
- Old Rag
- Shellac
- Blue Paint
- Varathane Polyurethane
Instructions
- Start by repairing any broken corners of the dresser with Bondo.
- Once the Bondo hardens, mold and sand down the corners with 220-grit sandpaper.
- Then prep the furniture by cleaning it with Krud Kutter and a wet old rag. After the Krud Kutter, scuff-sand the entire dresser and wipe all the dust off with a tack cloth.
- Apply 2 coats of shellac to stop stains from coming through the paint.
- Apply 2 coats of blue paint then distress the finish with sandpaper for the farmhouse look.
- To give the paint finish extra durability and make it easier to wipe down, spray 3 coats of polyurethane.
- Attach hairpin legs to make the dresser taller.
Recommended Products
As an Amazon Associate and member of other affiliate programs, I earn from qualifying purchases.


More Farmhouse Style Makeovers
- Mid Century Modern Farmhouse Dresser in Olive Green
- Black Vintage Farmhouse Dresser
- DIY Painted Chippy Farmhouse Dresser
- DIY Farmhouse Dresser in Black
- DIY Distressed Painted Dresser
Follow us on YouTube to get more tips for painting furniture. Or share your project with us on our Facebook Group and be part of our community. See you there!