How to Stencil Painted Furniture


This step by step furniture makeover tutorial is packed with stenciling tips and tricks so you know how to stencil painted furniture. It’s a super easy and cheap way to make a statement piece!
I am super excited to share this dresser makeover with you today! Stenciling is one of the painting techniques for furniture that can truly transform a plain and simple piece into something unique and eye catching. So, let’s dive into the details of how you can create this look, too!
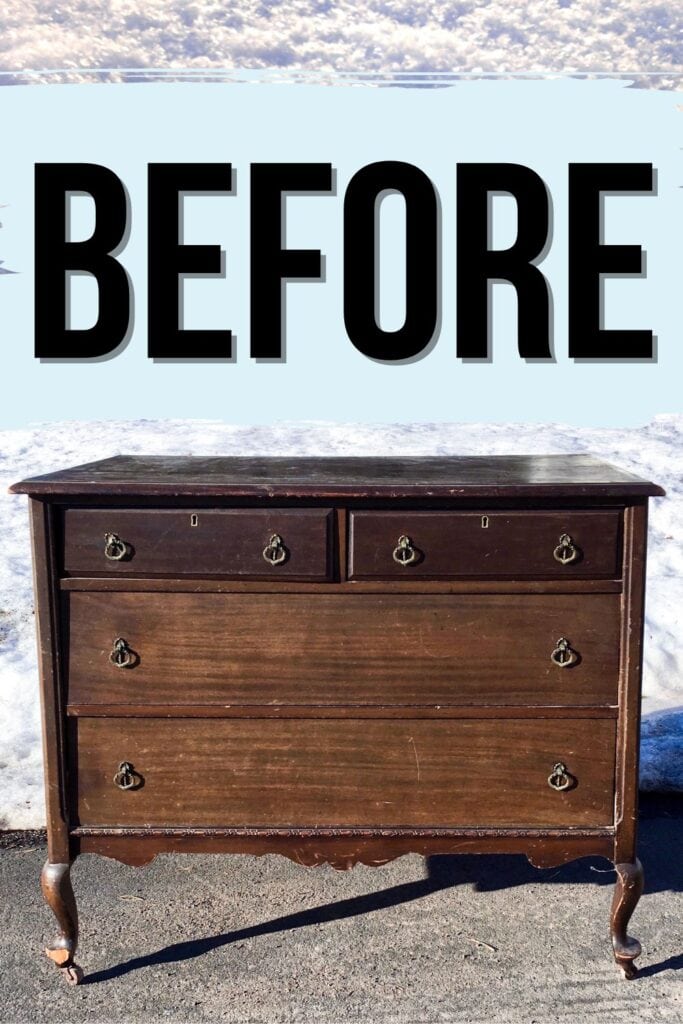
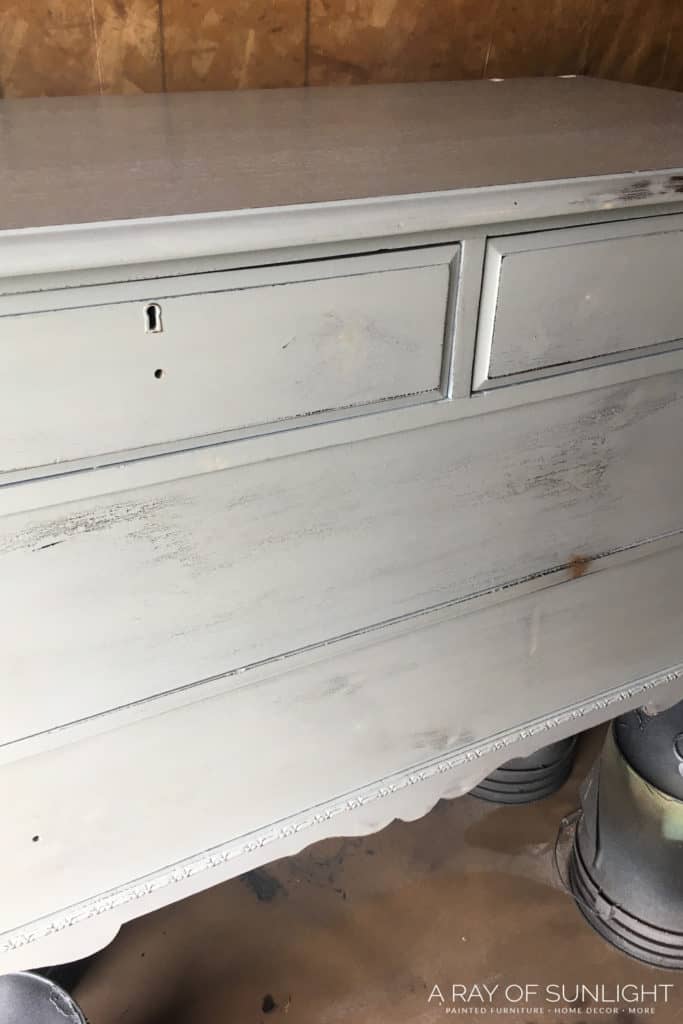
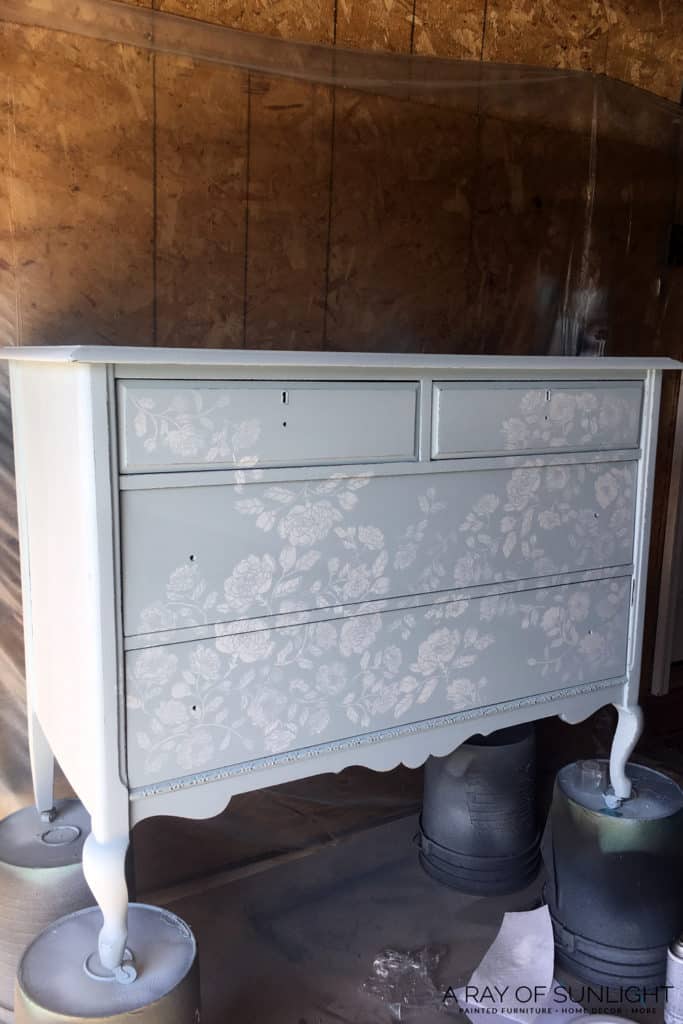
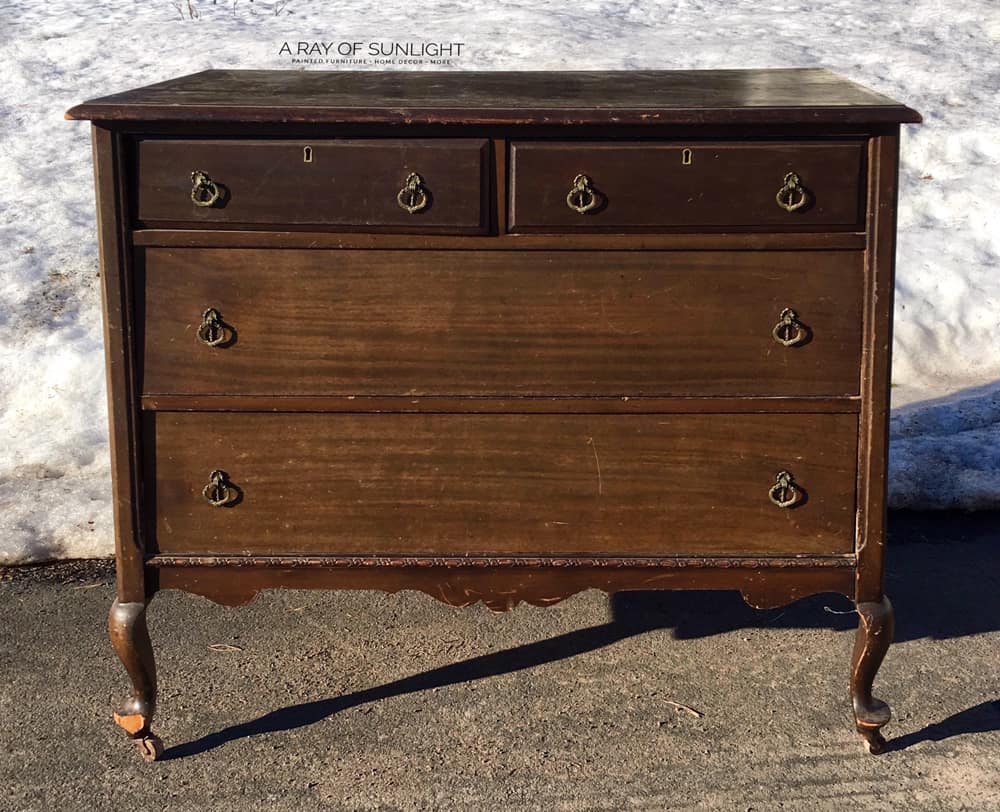
This particular dresser started out really sad. The drawers weren’t working very well, the little feet were broken off, and the old finish was wearing off. But I saw potential in this piece and knew that a little bit of TLC could bring it back to life.

We’re changing it to a new bright color and adding some fun decorative details to make it stand out. The new color is already a huge update, but the stenciling is what will really make this dresser pop.
The great thing about this is that you don’t need any special artistic skills. Designs come in geometric patterns, floral designs, and everything in between. You’ll also have complete control over the placement and size so you can customize them to fit your project perfectly.

Supplies Used to Stencil Painted Furniture
As an Amazon Associate, I earn from qualifying purchases. I also may earn from other qualifying purchases with other companies or get free product to review and use. All opinions are my own.
- Krud Kutter
- 220 Grit Sandpaper
- Vacuum
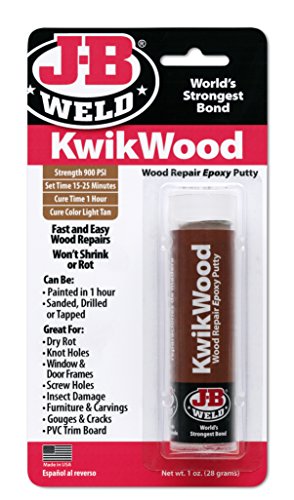
- KwikWood
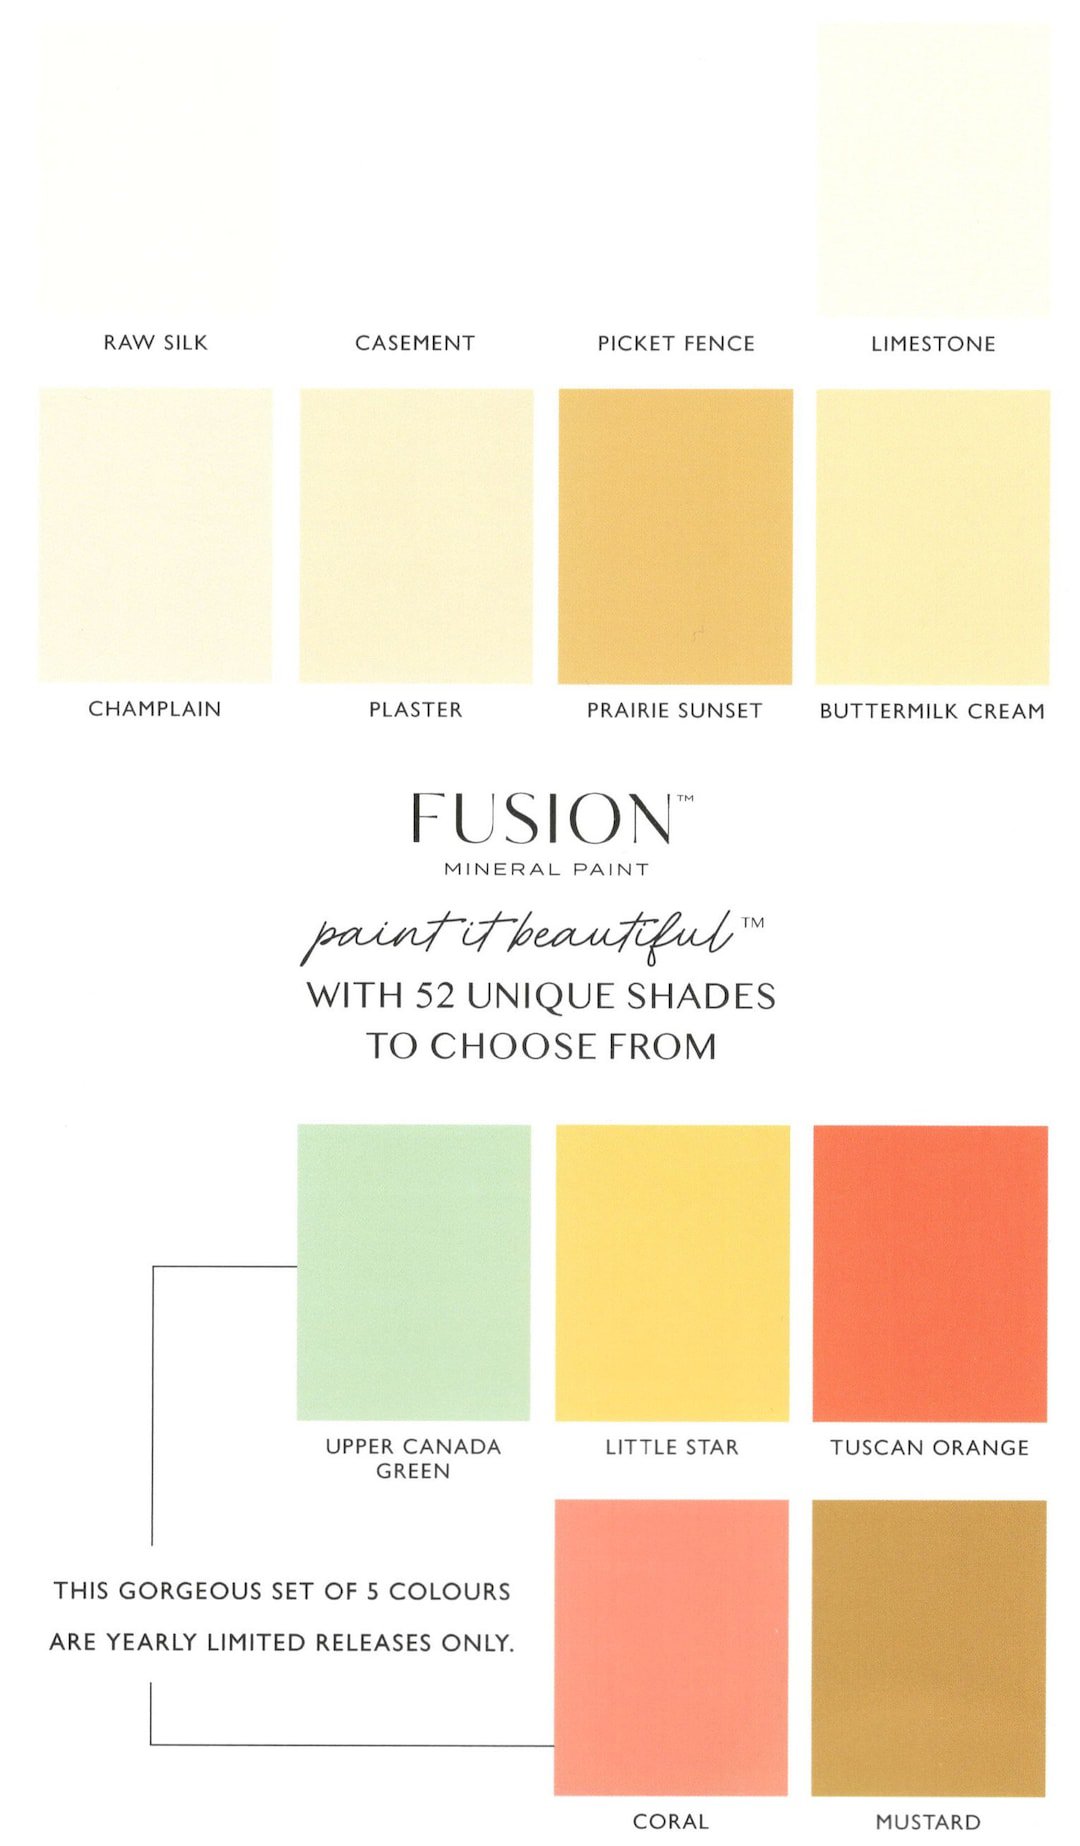
- Fusion Mineral Paint in Little Whale and Casement
- Paint Sprayer
- Floral Stencil
- Repositionable Adhesive Spray
- Paintbrush
- Waterbased Polyurethane
Repairing Dresser Drawers and Feet
So, first things first, I made the necessary repairs (fixing the drawers and the feet) before I even thought of anything else. The repairs were actually pretty simple!
The drawers just needed a good sanding down on the sides because the wood had swollen in the humidity out in the garage. We saw this a lot when we lived in Minnesota. I just kept sanding until the drawers easily fit back and forth in the dresser.
Then, I added wax to the bottom of the drawers where they slide and to the railing that the drawers slide on. The wax just gives the drawers some slip to make them open and close easier. Yay!
If you’re having issues with the runners, here’s how to repair worn drawer runners and old dresser drawers that won’t slide to help you. Check out these broken dresser ideas to inspire you to fix and transform your old pieces.
And for unique ideas to update your dresser drawer, here’s our list dresser drawer painting ideas.
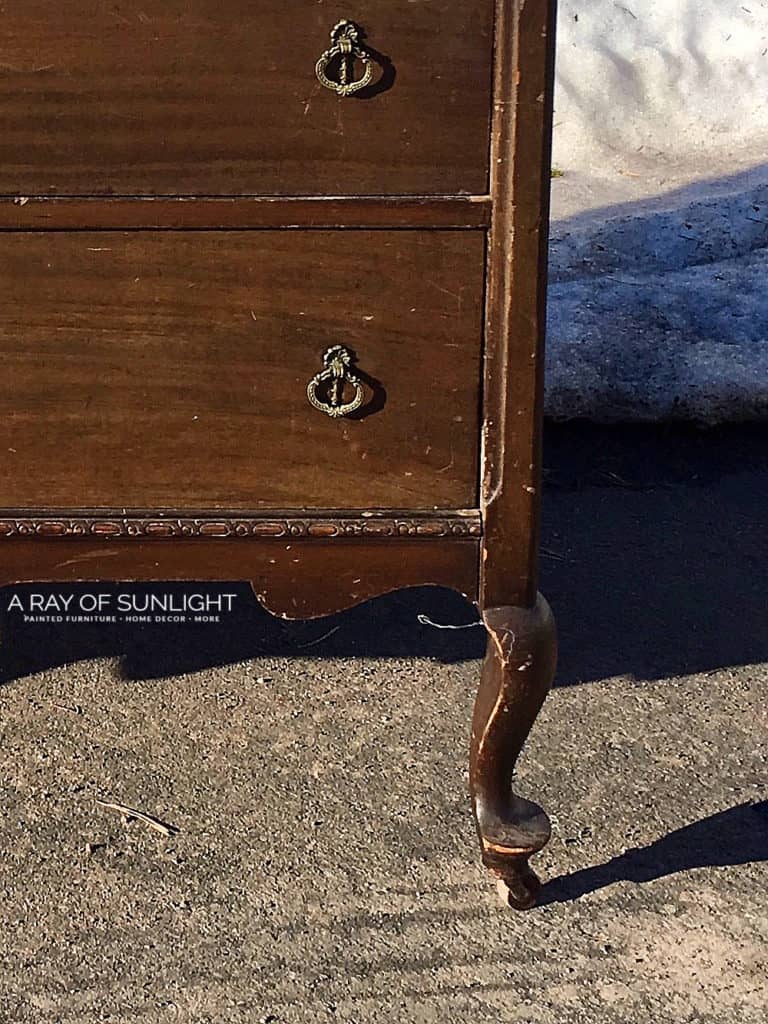
At first, I thought I wanted to replace the little flare on the feet by replicating the leg that was still intact and then adding it to the other leg. I was going to repair it with this trick here in this post on how to repair broken trim on furniture!
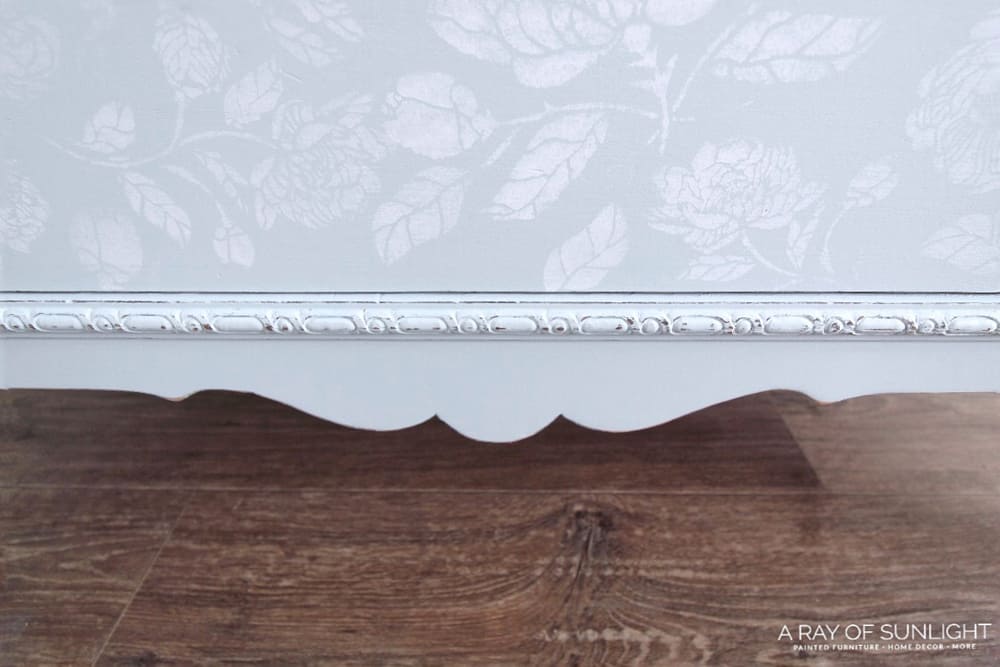
But then I noticed that the flares on the legs were separate pieces that were probably just glued onto the legs. It looked like a quick and easy fix to knock them off with a hammer and then sand the legs down into a smooth, rounded shape. So that’s exactly what I did!
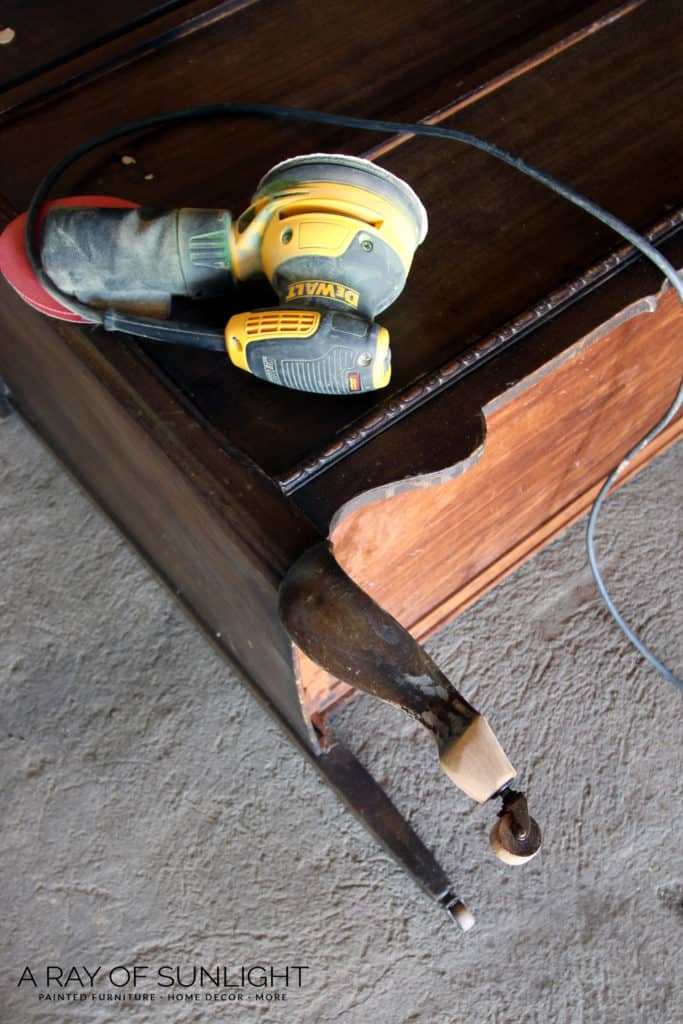
Just as I suspected, the little pieces of the flare came off easily with a few taps of the hammer.
Prep Dresser for Paint and Stencil
Once the repairs were done, it was time to prep the surface of the dresser. This part is the very most important part of any makeover. Dead serious. But it’s super easy! I promise!
If you don’t prep, you can have multiple problems show up before you even finish or a few days after you completely finish your project. Prepping should only take about 30 minutes or so on a piece like this, but it can save you hours of work if you end up with peeling or bleed-through issues.
Some paint companies claim that you don’t need to prep at all. This is sooo false, it’s not even funny. Yes, their brand can stick to a lot of surfaces, but not all surfaces. And if you are going to be setting things on that surface or using it at all on a daily basis, your finish is just not going to hold up.
It needs something to hold onto. If the finish of the surface is shiny, smooth, and/or glossy, you REALLY NEED TO PREP. I can almost guarantee that it will scratch off very easily, or it may even peel off if you don’t prep. Yikes!
Think of how hard it is to hold onto something that is super slick versus how easy it is to hold onto something that has grip to it. (Maybe your phone with a slick case, vs your phone with a grippy case). It’s the same way with paint.
It just can’t hold onto slick surfaces without some help. We need to make the surface more grippy so it can hold on and stay on.
- Clean the surface with a dewaxing, degreasing cleaner. I personally love Krud Kutter for this.
- Scuff sand the surface with 220 grit sandpaper. You don’t need to sand down to the bare wood. Just scuff up the finish so you can see tiny little sanding marks in the old finish. (Read more about the importance of sanding before painting furniture here).
- Vacuum and wipe off the dust with a damp rag (water).
Here’s all about how to prepare furniture for painting!
Filling In Hardware Holes
If you want to change the hardware on the drawers, you’ll want to fill in the old holes and drill new ones.
I filled the holes in the top drawer with my favorite hardware hole filler – KwikWood. It dries super hard, it doesn’t shrink or crack like wood filler, and it dries fast! Then, I drilled new holes in the middle of the top drawers.
How to Prevent Bleedthrough
What is bleedthrough?! Bleedthrough is a pain in the rear. It shows up as stains that come through the finish in the form of red, orange, or yellow spots. Sometimes, they are all over, and other times, they show up in just a few spots.
No matter how many times you cover them, they keep coming back once everything dries. And to make matters worse, sometimes you can’t see them at all until you seal your finish with a waterbased poly (my favorite and the most durable way to seal chalk coating).
So you’ll literally be completely done with your piece, just to start seeing ugly spots all over. Noooo!!
So, I always work to prevent bleedthrough from the beginning. Always. It’s easy to prevent it when you use the right products and give them some time to work. Learn the best ways to prevent bleedthrough with our guide on how to stop stains from coming through paint here.
Painting before Stenciling
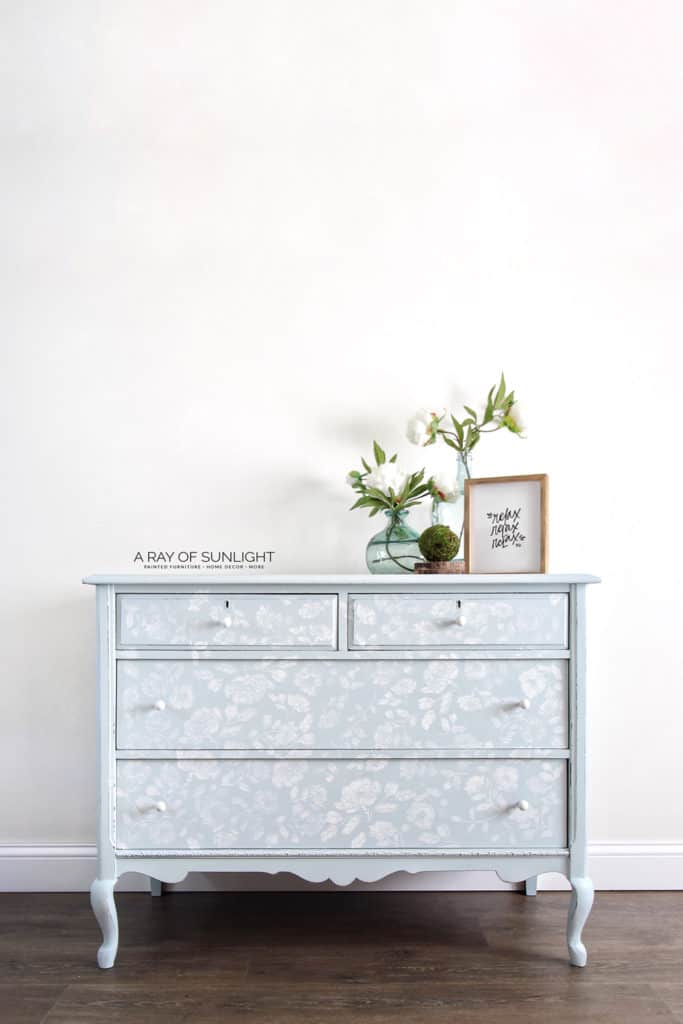
With all the repairs and prep done, it’s finally time to add some color! Yay!! For the base of this dresser, I used Little Whale. It’s a soft, light blue that is just perfect. If you like this shade, here are more light blue painted furniture makeovers to check out!
((IF you want to shop small and support a family business, you can find Fusion Mineral Paint here at Lost and Found Decor’s shop.))
I applied a couple of coats of Little Whale, and once the second coat was dry to the touch, I distressed the edges of the dresser with 220 grit sandpaper. Read more about the 6 best distressing furniture techniques, including sanding, in this post!
The coverage is amazing! A light color over a dark color should need multiple coats for the best coverage. All that was needed was 2 coats! Check out our Fusion Mineral Paint review for a more in depth look at this brand.
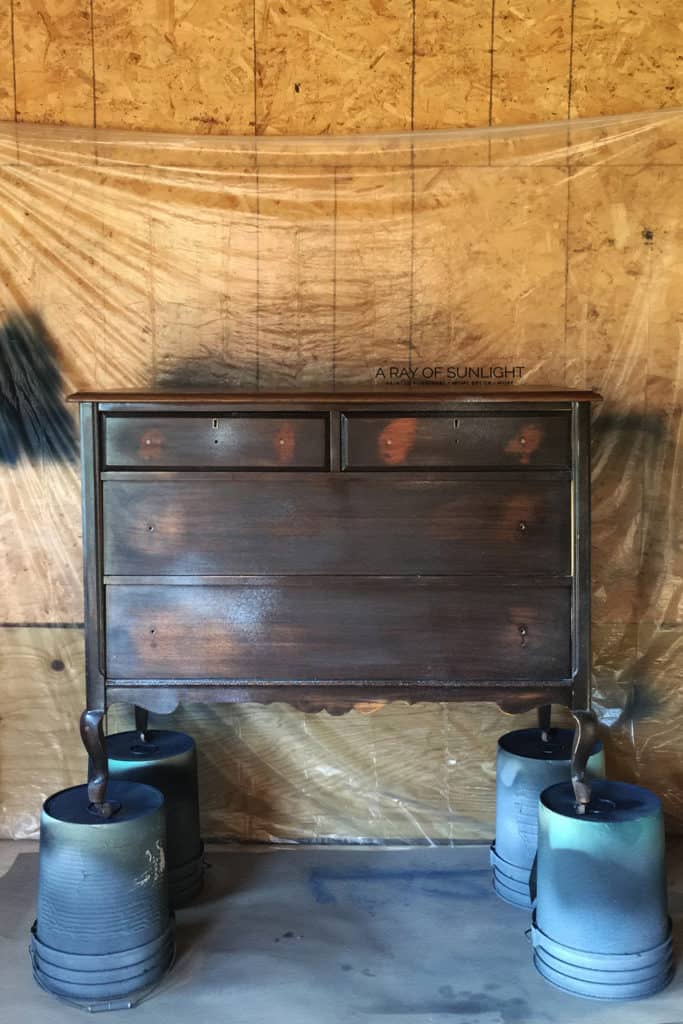
**After the first coat, I still had some bleedthrough coming through and some dings and scratches to repair that I couldn’t see before. So, I took a step back and addressed those issues before moving on.
Fusion Mineral Paint Review
This was actually my very first time using this Fusion Mineral brand. And to be very honest, I was very skeptical of their “built-in topcoat”. They say that you don’t need to prime and that the coating is durable – no need for a topcoat.
With chalk paint (my go-to), you have to topcoat it, or else it’s super porous and it’s not as durable. So this no topcoat required thing really sounded amazing! But I was blown away when I tested a couple of coats on a drawer front.
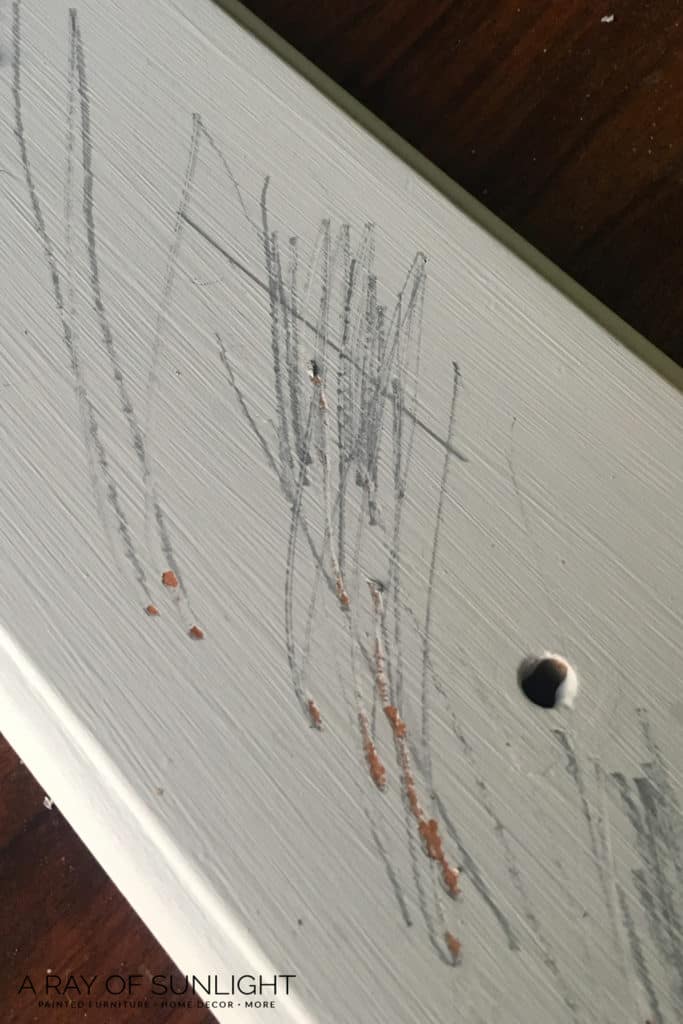
A few days later, I wanted to get some photos for a blog post about scratching off paint, so I went out to that drawer and used my car keys to scratch it off. I couldn’t get it to come off until I put a lot of force! That was only after a couple of days of drying!
Cure time (when it’s at its best) is 21 days! So I was blown away after only a couple of days! The gray scratches below are where I was scratching normally with my keys.
Since the finish wasn’t coming off, I started to dig and go really hard with the sharpest of all keys. That’s the only time I could get it to come off in small areas.
Now, no one in their right mind (except for kids haha), are going to be digging into it with all their strength. So, this was a huge deal for me to see how tough it is! Check out this list of the best paints for furniture to see how they compare.
Spraying Fusion Mineral Paint
My favorite method of application is with my sprayer. Of course, you can always brush it on, too, if you don’t have an HVLP gun, but I just love the brush free finish and how fast spraying goes!
Note: I have played around with Fusion Mineral Paint and a couple of brushes. Honestly, the very best finish was with the Staalmeester brush! It’s a little bit more pricey, but it’s such a good brush!! It’s heavenly, actually!
Read this post to learn more about the best paint brushes for painting furniture if you decide to use this method.
Would you like to save this?
Spraying Fusion Mineral was super easy. It sprayed like a dream, and it dried sooo smooth! I did add some water to it (more about how to thin paint for a paint sprayer here). Since it’s thinner than chalk paint, I didn’t have to add too much water.
The best way to make sure it is the right consistency for the sprayer is to spray it on a piece of paper or cardboard. You want to make sure it’s the right consistency BEFORE applying it on your piece, so you don’t end up with drips and runs or a very textured and splattered finish. If you do get some drips, here’s how to fix spray paint drips!
Having a nicer sprayer really helps, but you can definitely get a high quality finish with the Wagner Double Duty sprayer, this hobby tool that I used for years before upgrading to a better one like the Fuji Q4 paint sprayer.
(The Double Duty has been discontinued, and there’s a newer but similar model: the Wagner Control Spray 250 sprayer. You can learn all about it in our Wagner Control Spray 250 review here!)
How to Stencil Painted Furniture
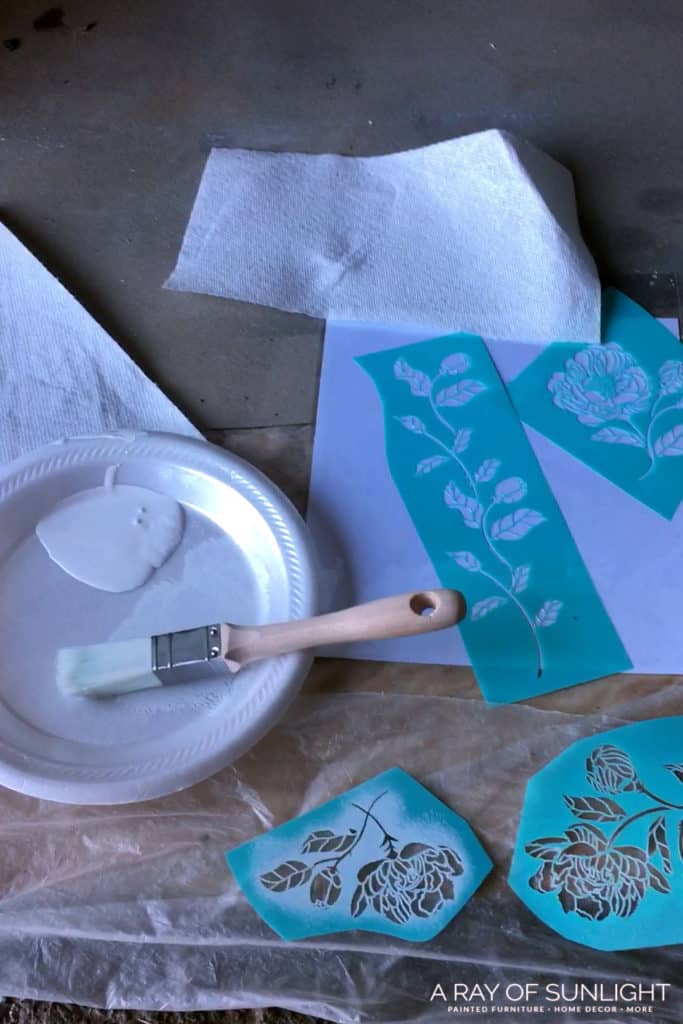
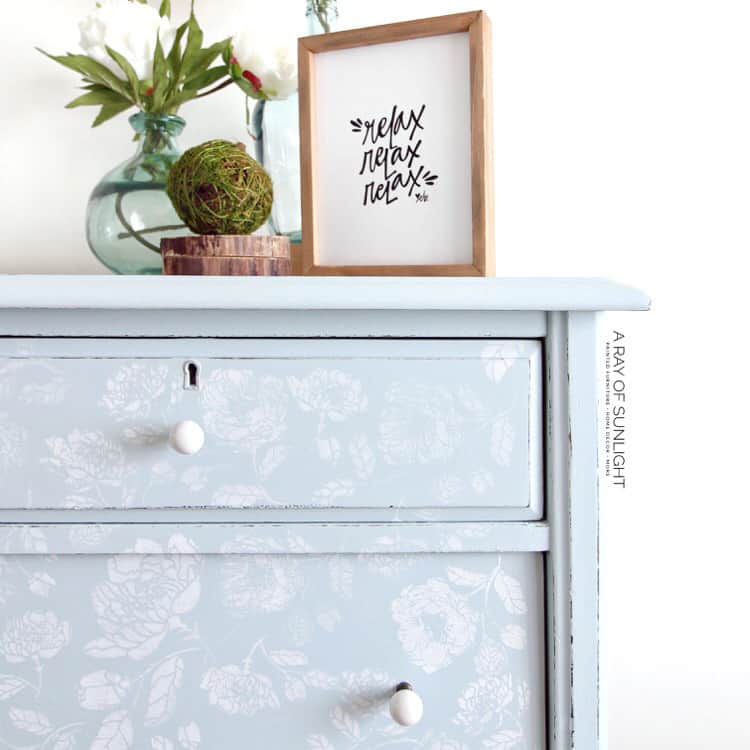
For the white flowers, I used Casement and a little set of floral stencils.
I won’t lie. I was a bit nervous about stenciling. I was worried that the finish would bleed, that I wouldn’t get the placement of the flowers right, and that it would just look terrible. So if I can do this, you can do it too!
This is the process I used to add floral designs to the front of this dresser. I didn’t use anything specific – I think this is just a craft stencil, and it’s very small. However, I was able to work with each pieceto make a unique floral pattern all over the front of the dresser.
- Cut around each flower so they are easy to work with and small.
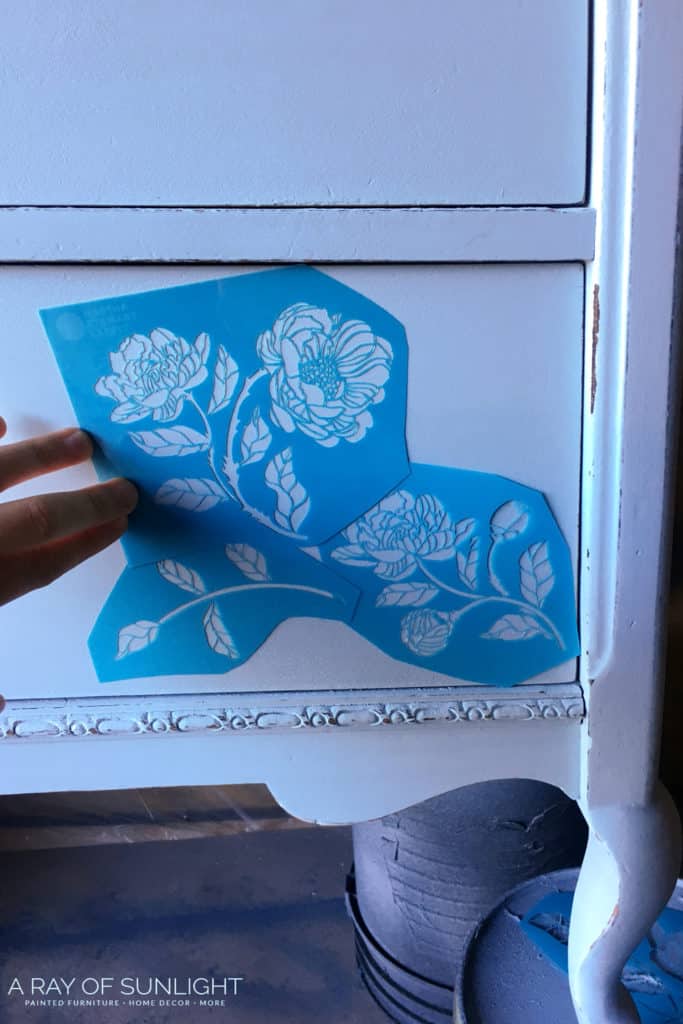
- Decide where you want to start (I started in the corners) and which direction you want the design to go.
- Lightly spray the adhesive on the back of the flower and let it sit for 1 minute to get tacky.
- Stick it in place and make sure it’s all sticking to the surface.
- Dab the paintbrush into the paint. Make sure to only get a very small amount onto the brush. Dab off the excess onto a paper towel. If there is too much, it will bleed under the design, and you won’t be able to see the tiny lines in each flower. Less is more!
- Lightly pounce it onto the stencil. DO NOT brush it on from side to side. Brushing it on can also make it bleed. Get more coating as needed.
- Peel it away to reveal your floral design!
- Repeat this process, filling the front of the dresser with flowers!
Tips for Stenciling Painted Furniture
Here are more tips and tricks for beautiful results!
Hold Design in Place
The adhesive is a game changer. It doesn’t leave any residue on the dresser when you pull off the design. You could just tape the pattern in place, but the tape won’t be able to hold all of the tiny parts still.
The adhesive makes it less likely for the paint to bleed under the design. If it does get underneath, your flower will just look like a blob. Not pretty. Learn more about how to stencil without bleeding here.
A little bit goes a long way. Just lightly spray the back and let it dry for about 1 minute to make it perfectly tacky. The tack is only good for one time. You’ll need to spray it again before placing it on the dresser again.
Paint for Stenciling Furniture
A little bit goes a long way. Seriously. Make sure there is only a small amount on your brush. If there is too much, it can seep under the pattern and make it look messy. You can always add more to your brush when you run out, but cleaning up a blob of color from your already finished dresser isn’t so simple.

The Best Brush for Stenciling
Technically, you should use a stencil brush. They are round and flat at the tip. I didn’t have any of it on hand, but I found a brush that had a flat tip, and it worked perfectly!
A small brush is also better than a large brush when you’re working with a small pattern. It helps keep the color within it and reach all the finer details.
How to Place Stencils on Furniture
I started in the corners of the dresser and worked my way into the middle. Actually, I had a different plan for the design than what it ended up as. But that’s okay! I love how it came out anyway!
I placed only one or two at a time so I could make sure to space everything well. I also turned them around a lot to make the flowers go in different directions.
It was the easiest to put them on a flat surface. The top drawers with different levels were hard to work with. So make sure to pick a dresser with very few details.
These drawers weren’t perfect by any means. They sit at a slight angle because of wear and tear over the years. So I pulled the drawers out where everything was flush in the area I was working in right then.
Sealing after Applying Stencil
Once everything was done, I lightly sanded the front down by hand with 400 grit sandpaper. The sandpaper made the stenciled flowers nice and smooth.
Since I distressed and sanded the finish, I topped it off with a coat of matte waterbased poly. Learn ALL of my tips and tricks on how to spray polyurethane here! And learn more about different topcoats for painting furniture here.
I switched out the old hardware for new white knobs that are just so adorable! Learn more about how to change hardware on a dresser here!
More Before and After Makeovers
See All >
Click any of these “before” photos below to view the “after” of that makeover.


I hope you’ll create a beautiful dresser with these tips! If you want more makeovers like this, here are stenciling furniture and dresser stencil ideas! For more unique and creative transformations, here’s our list of fun dresser paint ideas and creative dresser ideas.
If you want to add more charming vibes to your room, here are shabby chic dresser ideas and shabby chic painted furniture inspiration. For more colorful projects, check out ombre chalk painted furniture.
How to Fix Stencil Bleed on Wood
This issue can be frustrating, especially after putting in all that time and effort. But don’t worry, there are some easy fixes to get rid of those pesky smudges and uneven lines.
If you do end up with some bleeding, one way to fix it is by using a small artist’s brush and carefully touching up the edges with the same color as the rest of the piece. This will help cover any smudges or uneven lines.
If it’s a larger area, you might need to cover it up and try applying the pattern again once it’s dry. It can take a bit of time, but it’s worth it for a clean, crisp finish. This time, remember to use minimal paint and dabbing motion to prevent bleed.
You should use the spray adhesive we talked about earlier! It keeps everything securely in place and prevents any color from seeping underneath it. It may be an extra step and product, but it’ll save you a ton of time and hassle in the end.


We hope this guide on how to stencil painted furniture inspires you to try this fun and creative technique for your own DIY projects. Don’t be afraid to experiment with different designs and color combinations for a truly unique piece for your space.


How To Stencil Painted Furniture
This step-by-step furniture makeover tutorial is packed with stenciling tips and tricks so you know how to stencil painted furniture!
Materials
Tools
Instructions
- Check for any damage on the dresser and repair them.
- Once the repairs are done, prepare the dresser for paint by cleaning it with Krud Kutter and scuff sanding with 220 grit sandpaper. Clean up all the dust with the vacuum and a damp rag.
- Remove hardware and fill in the old hardware holes. Then drill new holes for your new hardware.
- Now, get your paint and apply around 2 coats onto the dresser. Once the second coat dries, distress the edges of the dresser with sandpaper.
- For stenciling flower stencils, cut around each one so they are easy to work with and small. Decide where you want to start and which direction you want each stencil to go.
- Lightly spray repositionable spray adhesive on the back of the stencil and let it sit for 1 minute to get tacky. Stick the stencil in place and make sure it’s entirely sticking to the dresser.
- Get your paint for the stencils. Dab a small amount of paint on your brush then lightly pounce the paint onto the stencil. Repeat this until you fill the parts of the dresser you want stenciled.
- Peel the stencils away to reveal your floral design!
- Do another round of scuff sanding after the stencil paint dries. Then finish it off by top coating the dresser with water based poly.
- Add in your new dresser hardware.
Recommended Products
As an Amazon Associate and member of other affiliate programs, I earn from qualifying purchases.

More Stenciling Furniture Resources
Follow us on YouTube to get more tips for painting furniture. Or share your project with us on our Facebook Group and be part of our community. See you there!
What a great transformation! Your blogs are always so inspiring and educational!! Those stencils really pretty!
Thank you so much Jess! I really appreciate it!
So informative! I think I need to try a stencil now, and when I do this will be my first stop for instructions. Amazing, as always, my friend!
Thank you so much Keegan! You are so sweet! I hope you try stenciling sometime!
This totally makes me want to stencil something now!
You totally should stencil a dresser Lauren! Even if it’s two light colors. I think it would be fun!
Gorgeous Natalie!! The stencil is so beautiful – I love the white over the blue!
Thank you so much Cait! I really appreciate it!
The stencil work on this piece is spectacular! I have to try this!
Thank you so much Amy! You definitely should try it!
Natalie,I love your blog!! You are so creative. Thank you for all the inspiration . It’s also good to know how to start a piece from the beginning . Thank you
You are so sweet Cheryl! Thank you so much!
so much fun!! inspiring me for my first attempt!
How long do you wait after the base coat paint before you stencil? I don’t want to mess up the new paint by sticking a stencil on to it. And what type of paint do you use for the stenciling?
It depends on the paint that I use. To be safe, wait 24 hours. You can use almost any type of paint for the stenciling.
So beautiful it makes me want to try this someday. You are such an inspiration 😍
Thank you SO much! I definitely encourage you to try out doing stencil painted furniture one day!
Love, love your work. I follow everything you do!
I’m ready to stencil some fun sea turtles and shells on a curved front of a painted table. Do I topcoat it before I stencil?
Aww I really appreciate the love! Thanks so much! In regards to your question, I usually topcoat after stenciling. Hope it helps and best of luck!
Love the floral stencil on this piece, it just fits so well!
Please join us over at the Creatively Crafty Linky Party every Wednesday through Sunday
Pinned!
Creatively, Beth