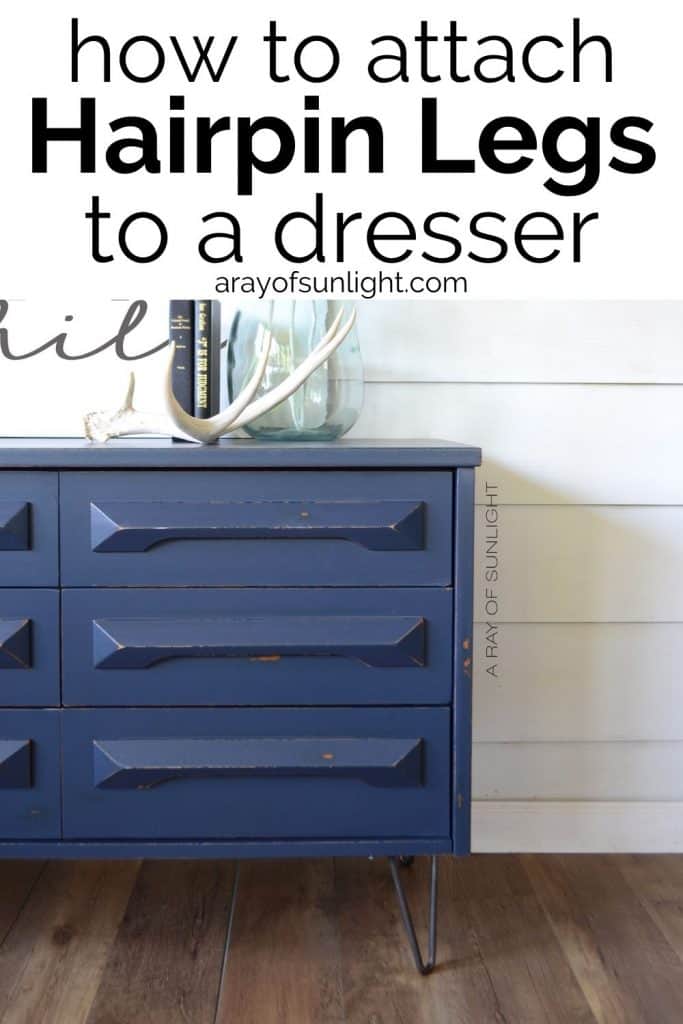
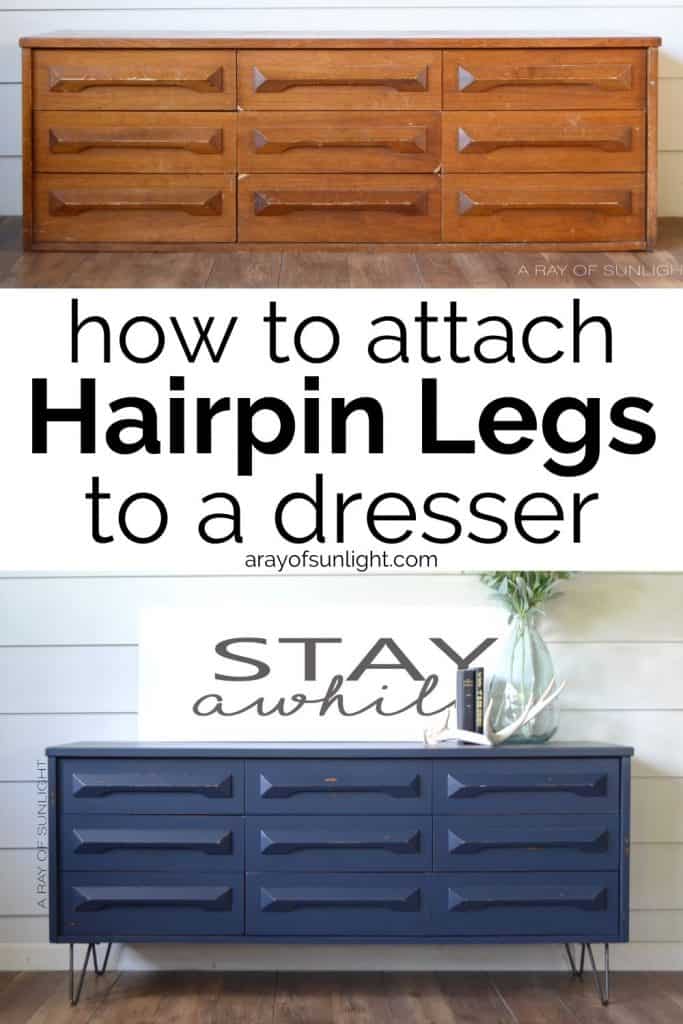
DIY Dresser with Hairpin Legs
Make any dresser, sideboard or chest of drawers taller by adding industrial hairpin legs to it! Follow these simple steps to create your own DIY dresser with hairpin legs! Not only will this project give your old furniture a new and trendy look, it will also save you money on buying a brand new piece.
Get ready for a DIY dresser makeover that is easy, affordable and fun!
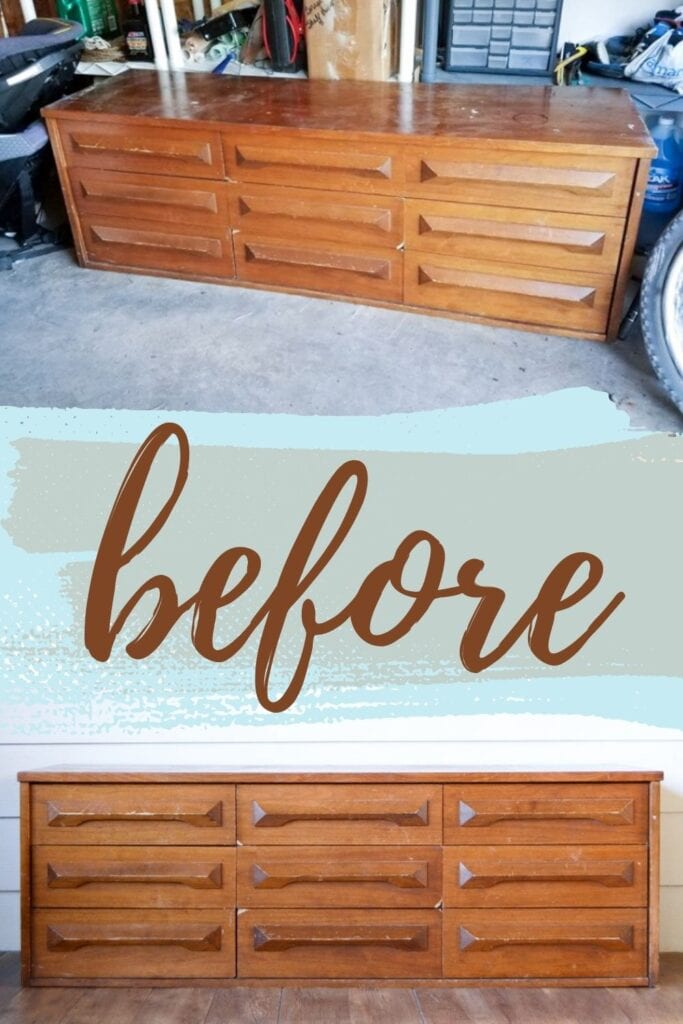
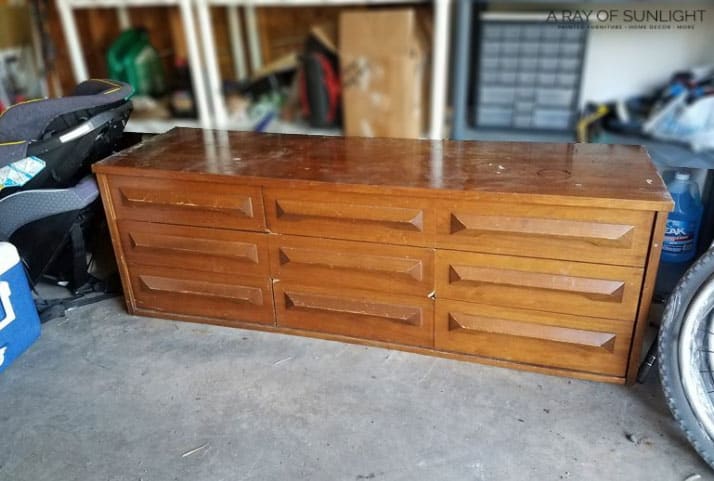
We found this dresser for only $25 on Facebook marketplace! There were a few issues with it, including the worn-out finish. But most of all, the dresser was way too short.

Somewhere along the way, someone removed the legs that it once stood on. And so we were left with a super short dresser (20″ tall). A normal dresser height is around 30-36″ tall.
We wanted it taller to better fit our space and also to give it a more modern look. And that’s when we thought of updating it.
So here’s how you can do it with your own dresser too!

How do you make a dresser taller?
You add legs of course! It’s much easier than you think! I mean, some dressers can be harder than others. And some are ready for you to attach legs to them.
If your dresser doesn’t have a flat surface on the bottom, check out these tutorials on dressers that we’ve added legs to.
(But skip the part of adding the legs onto the base. It’s a bit different for hairpin legs.)
- Hopefully, the old legs on your dresser will just unscrew and come off. Check out this post about how to add feet to a dresser to see how to remove the bottom of a dresser just by removing screws.
- If the sides of the dresser extend past the base of the dresser (when you flip over the dresser, you can see where the base of the dresser is) you can easily cut the wood flush with the base of the dresser. It’s easier than you think, you just need this handy tool! See how to cut the bottom of the dresser off in this post about how to easily add legs to dressers.
- If the bottom of your dresser has no detail and is just a box, you can create a support for the legs to attach to! Skip the cutting and just add a new base to the dresser like in this post about adding legs to a nightstand.
- Your dresser can also have a hollow bottom so you can attach pieces of wood to put your new legs to like in this post about how to add legs to a cabinet.
- There are also pieces where you can remove the skirting attached to the base, check out our post on how to add legs to a buffet and adding legs to a cedar chest.
**If you want to paint your dresser, paint it before you get the hairpin legs on it.
New to painting furniture? Read this tutorial on how to paint furniture before you paint! If you’re looking for creative ways to transform dressers into functional pieces like nightstands, check out this list of dresser as nightstand ideas.
Supplies Used For Adding Hairpin Legs To A Dresser
As an Amazon Associate, I earn from qualifying purchases. I also may earn from other qualifying purchases with other companies or get free product to review and use. All opinions are my own.
- Dresser
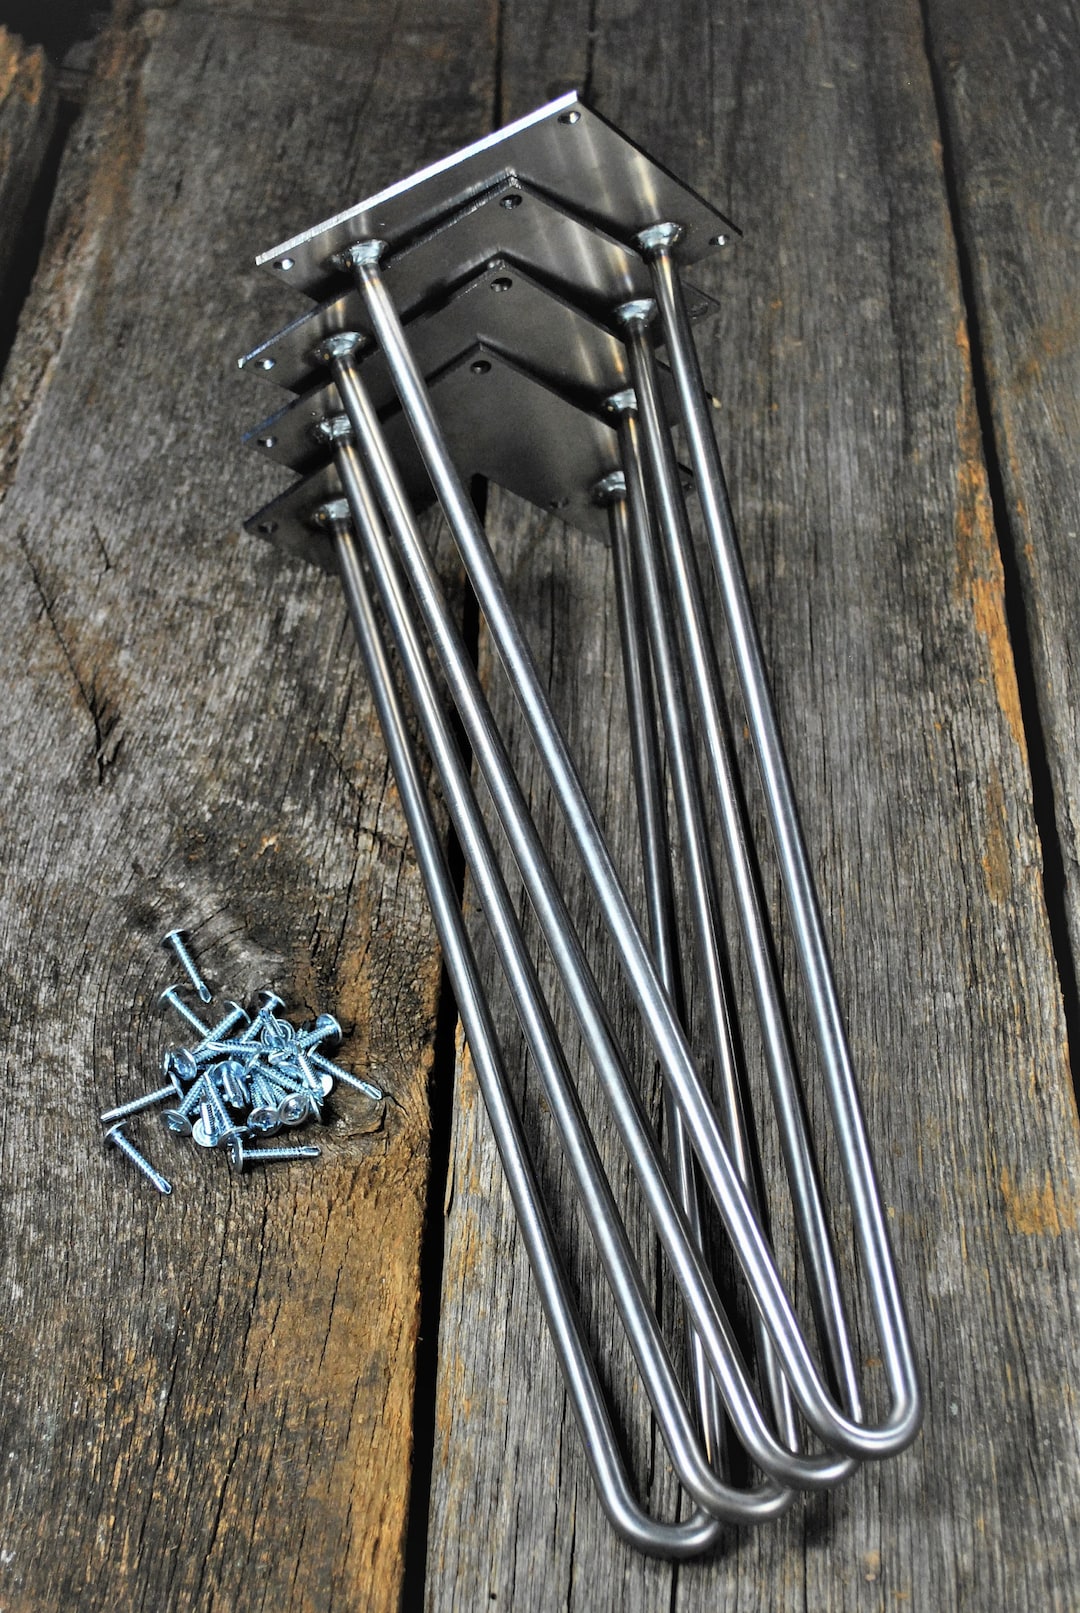
- Industrial Hairpin Legs and Screws
- Drill
- Small Drill Bit
- Phillips Bit
- Measuring Tape
- Pen or Pencil
Flip the Dresser Over & Remove the Old Legs
First, flip your dresser over and remove the old legs if you haven’t already. If you don’t know how, scroll back up just a bit to the 3 different tutorials on how to remove the bottom of your dresser.
These are all tutorials on how to add legs to a dresser, but each dresser was unique in how we created a flat base for the legs to attach to.
This particular dresser already had the perfect base to add legs to (because it once had legs that someone removed.)
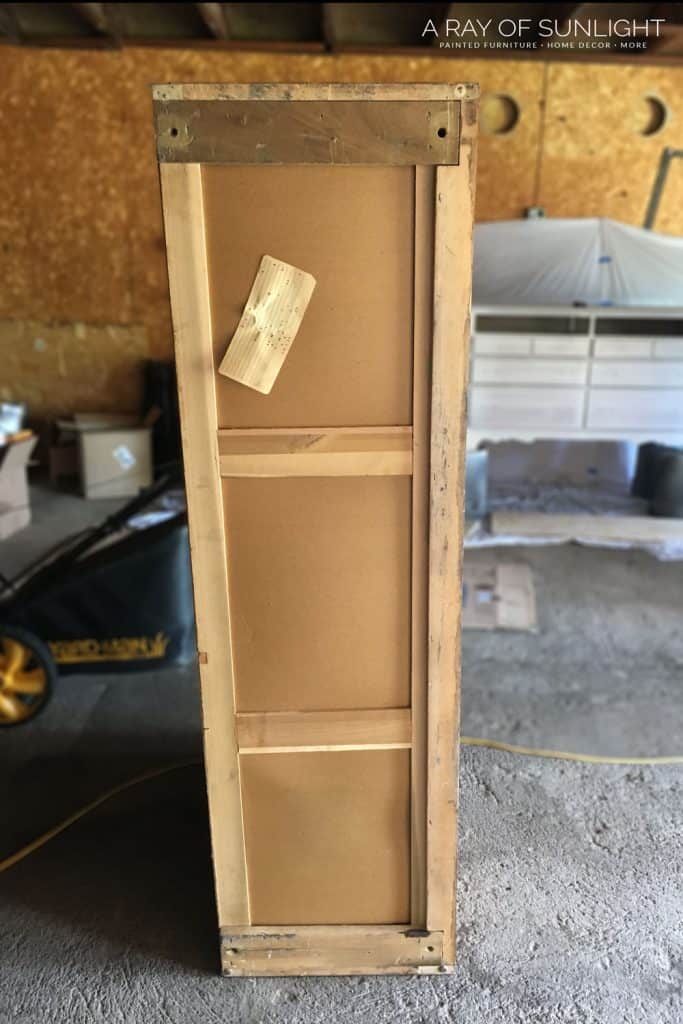
Create a Flat and Sturdy Surface in each corner for the Legs
Next, make sure there is a flat and sturdy area in each corner of the dresser to attach the legs to.
You may need to add a block or two to create a flat surface (like in the second tutorial above on removing the old base of a dresser).

Measure and Mark Each Leg
Now you can place each leg where you want it to go. Make sure to measure them so they are all equal distances from the edge of the dresser. Then mark the holes for each leg with a pen or pencil.
Attach the Hairpin Legs to the Dresser
Pre-drill each hole with a small drill bit (you want it to be slightly smaller than your screws). Then attach the legs with the screws! These industrial hairpin legs from Etsy come with self-drilling screws.
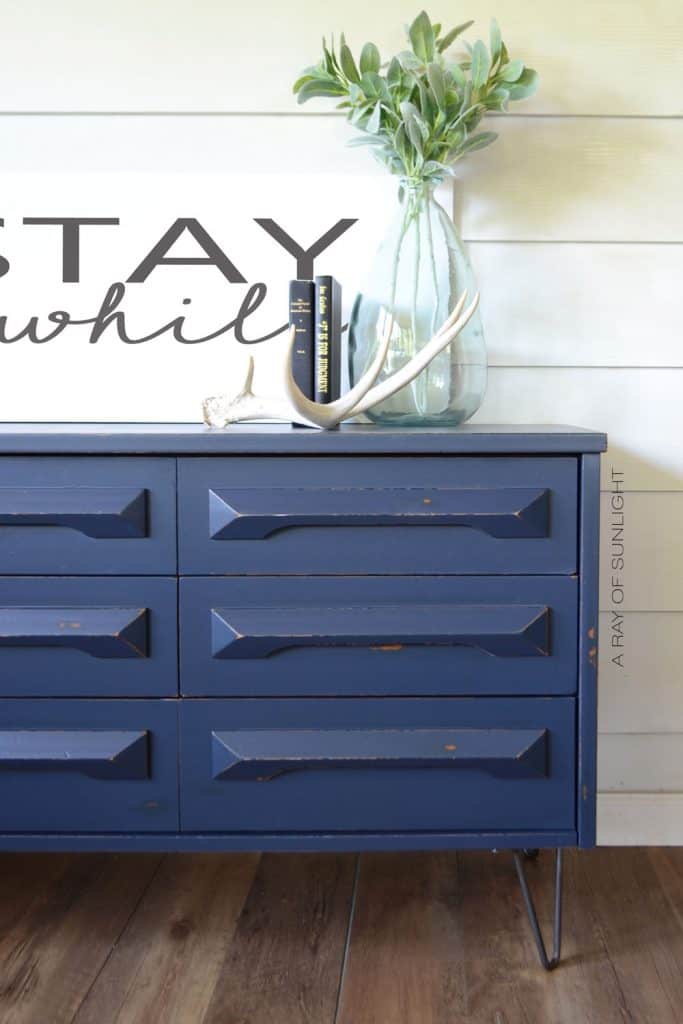
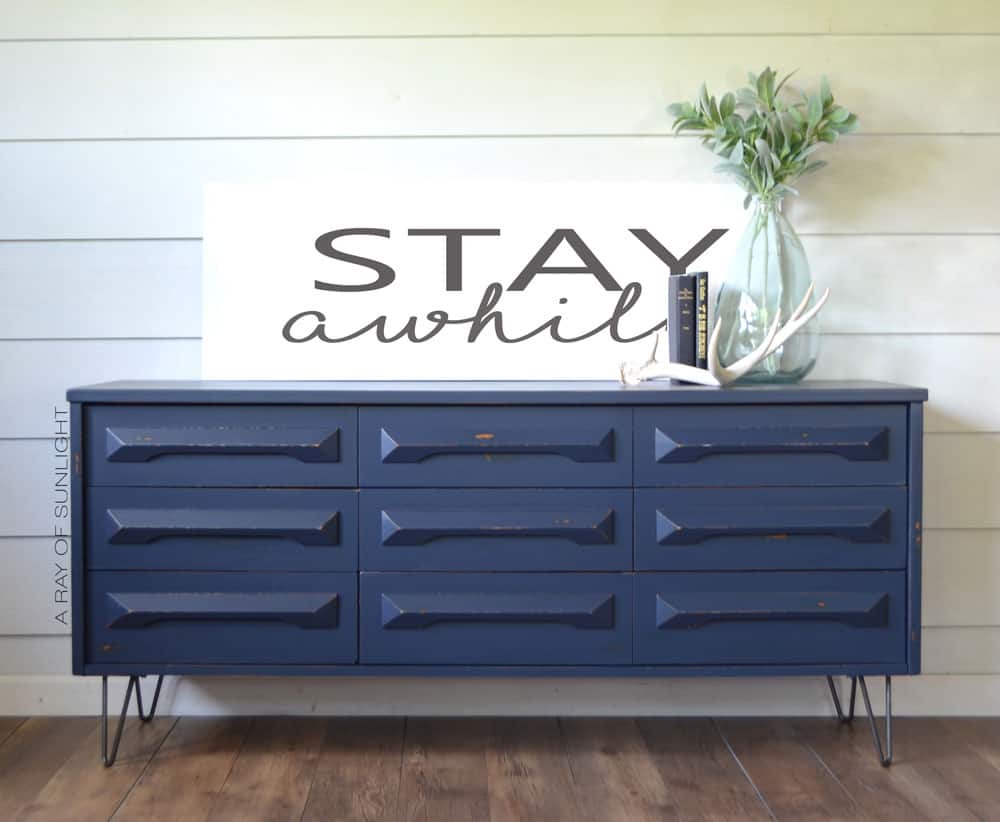
Flip the dresser onto its new feet, step back, and admire your work! Check out more DIY 9 drawer dressers here for more inspiration. If you want colorful dressers for your home, try out these colorful dresser ideas!
More Before and After Makeovers
See All >
Click any of these “before” photos below to view the “after” of that makeover.


What size hairpin legs should I buy?
I used the 7″ steel hairpin legs for this long dresser. I liked the idea of the legs being about 1/3 of the height.
This put the dresser’s height at 27″ tall (which is still shorter than most dressers, but I didn’t want the legs to overpower the dresser).
If you plan to attach hairpin legs to a tall dresser, go with short 4″ legs. If you plan to attach hairpin legs to a really skinny and short chest of drawers, you can definitely go with taller legs.
Are Hairpin Legs Sturdy?
Yes! These were really sturdy. Be very careful attaching hairpin legs to something skinny, uneven, or not structurally sound.
Would you like to save this?
If you attach hairpin legs to something big and skinny, or something, where to bottom is uneven, you run the risk of it falling over. So be sure to anchor it to the wall.
Do not attach legs to anything that is not structurally sound. You need to make sure they are attached and secured well.
How Much Weight Can Hairpin Legs Hold?
Each set of legs is different, but these particular ones say that a set of 4 can hold roughly 400lbs of weight. A long dresser of this size weighs roughly 100 pounds.
When buying legs, check the strength of the hairpin legs with the manufacturer.
Where can I buy Hairpin Legs?
Here are the hairpin legs I used on this dresser. They come in any size from 4″-34″ long and in either black or steel.
There are so many more options on Etsy as well! Here are more options that have great reviews on Amazon – plus they are Prime!
Looking for the paint color used on this dresser? Learn more about the DIY painted mid-century modern dresser here!
Can I remove the hairpin legs if I change my mind?
Yes, you can easily remove hairpin legs if you change your mind. Simply unscrew the legs from the dresser and voila! You’re back to your original piece of furniture.
However, just a heads-up, if you decide to take off the hairpin legs, you might end up with some holes at the base of your dresser from where the screws were.
If you want to switch back to the original base, you can fill up any holes with wood filler or putty. Read about the best wood repair putty in our post.


Other Types of Legs for Dressers
If hairpin legs aren’t your style, there are plenty of other options for adding legs to your dresser.
One popular choice is tapered wooden legs, which give a more sophisticated and traditional look to your furniture. You can also choose from different wood finishes and sizes to best fit your dresser.
Another option is adding casters or wheels to the bottom of your dresser, making it easier to move around.
This is a great choice for dressers that need to be frequently moved, such as in a child’s room or for cleaning purposes.
Just make sure the casters you choose can support the weight of your dresser and won’t damage your floors.
For a more modern look, consider metal legs or geometric shaped legs. These types of legs add an interesting visual element to your dresser and can come in a variety of colors and designs.
There are a bunch of other legs you can also choose from, we’ve listed all the best wood legs to add to furniture here.


How to Attach Hairpin Legs to a Dresser
Make any dresser, sideboard or chest of drawers taller by adding industrial hairpin legs to it! Follow these simple steps to create your own DIY dresser with hairpin legs!
Materials
Tools
- Drill
- Small Drill Bit
- Phillips Bit
- Measuring Tape
- Pen or Pencil
Instructions
- Flip the dresser on its top and remove the old legs if needed.
- Next, make sure there is a flat, solid surface to attach the legs to each corner. You may need to add a block or two to create a flat surface.
- Line up and mark where you want each leg to go. Make sure to measure them so they are all equal distances from the edge of the dresser. Then mark the holes for each leg with a pen or pencil.
- Pre-drill holes for the screws, and then attach the legs with the screws.
- Flip the dresser on its new hairpin legs and admire your work!
Recommended Products
As an Amazon Associate and member of other affiliate programs, I earn from qualifying purchases.
More Farmhouse Style Dresser Makeovers
- Blue DIY Dresser Makeover
- Mid Century Modern Farmhouse Dresser in Olive Green
- Black Vintage Farmhouse Dresser
- DIY Farmhouse Dresser in Black
- DIY Distressed Painted Dresser
Follow us on YouTube to get more tips for painting furniture. Or share your project with us on our Facebook Group and be part of our community. See you there!