Vintage Nightstands Makeover
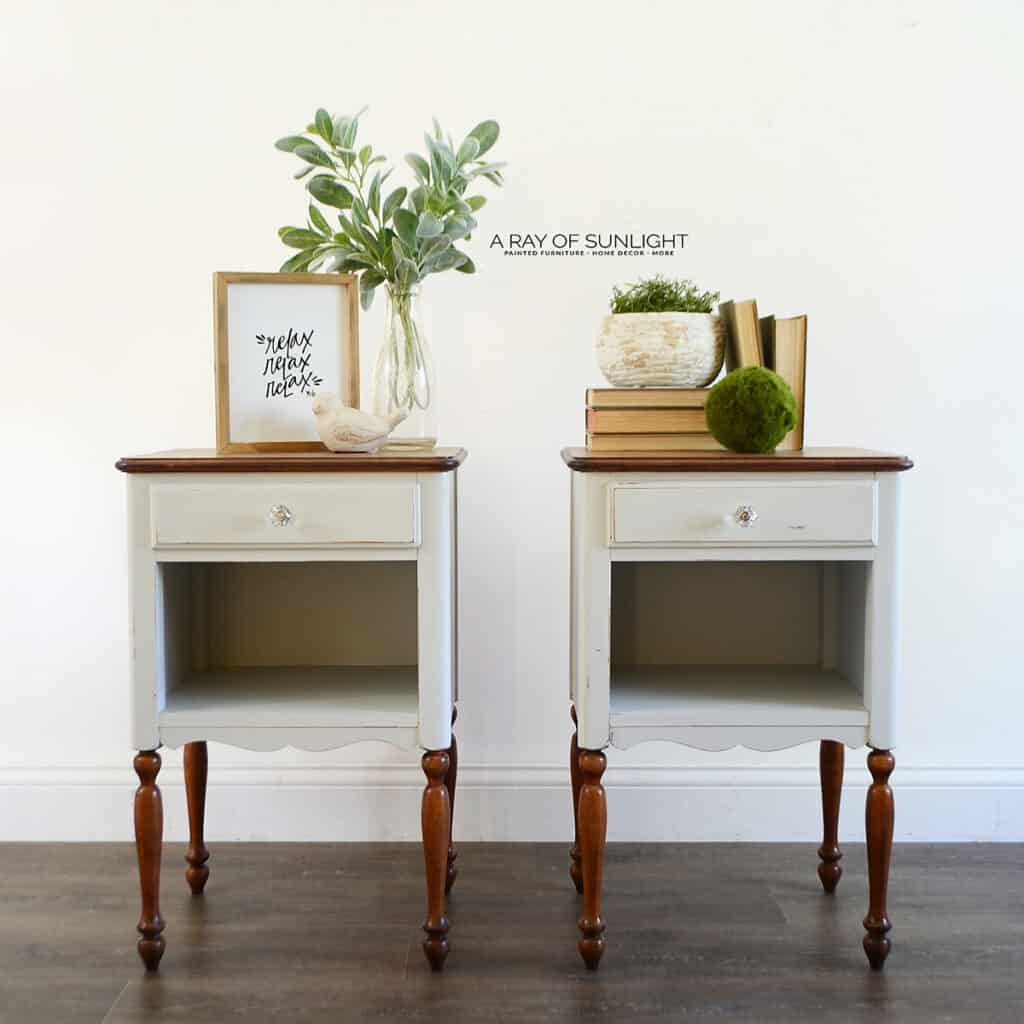
Check out this vintage nightstands makeover with some paint and stain. I’m so excited to share these light gray nightstands with you today! It’s another great project to add to our list of painted nightstands ideas.
We updated them with one of my all time favorite colors, and it’s not white! So, keep reading to find out how we transformed them into beautiful and elegant pieces and how you can, too.
Vintage pieces feature intricate details, quality craftsmanship, and unique designs that make them stand out in any room. However, they can also look outdated, especially if you’re going for a more modern look.

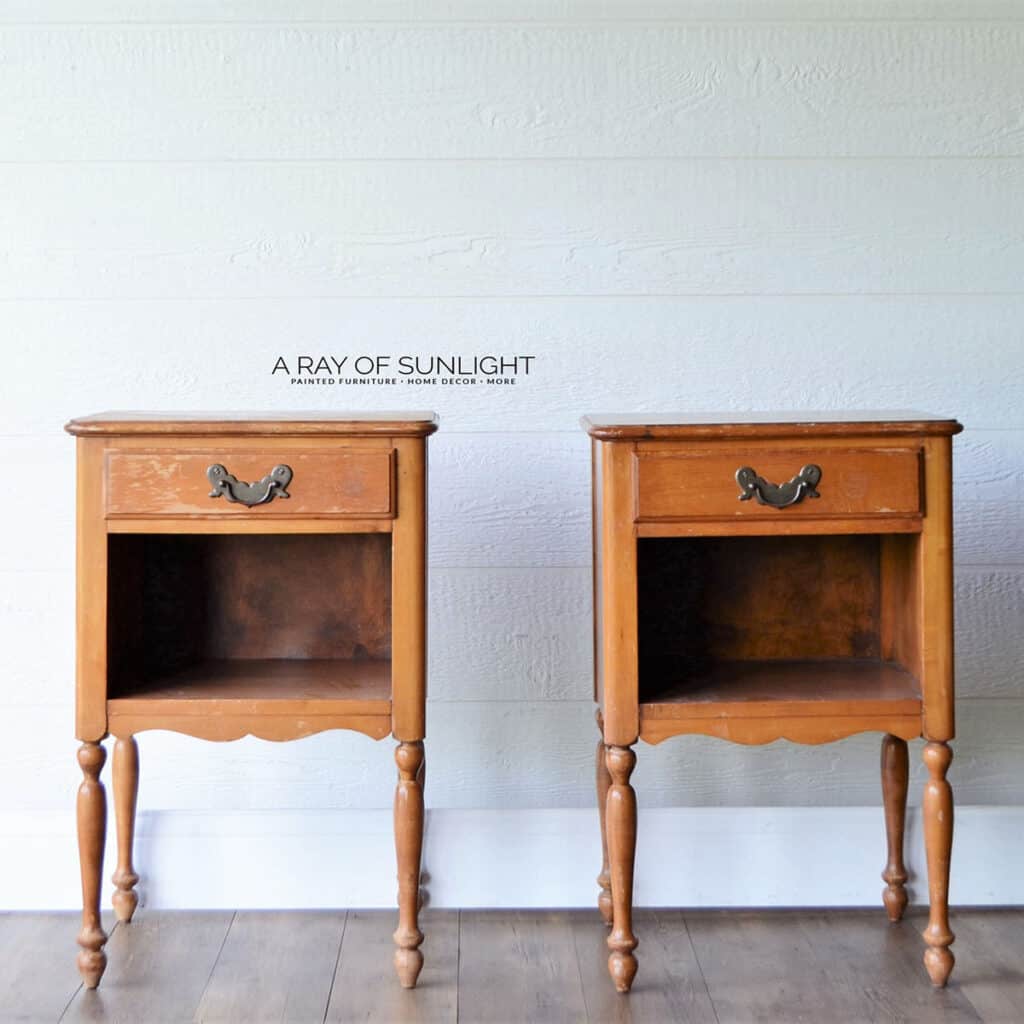
These wooden nightstands are so cute!! They had seen better days, but hey, that’s why we paint furniture, right? A fresh coat of color can turn any old piece into a stunning addition to your space. And that’s exactly what we did!
Choosing the right color for your DIY project can make all the difference. For these, we went with a light gray shade that adds a modern and elegant touch while still keeping the vintage charm. Now, let’s dive into the steps of this vintage nightstands makeover!

Supplies Used For Vintage Nightstands Makeover
As an Amazon Associate, I earn from qualifying purchases. I also may earn from other qualifying purchases with other companies or get free product to review and use. All opinions are my own.
- Sander
- Sandpaper (80, 220, 400)
- Bondo
- Wood Filler
- Pre Taped Plastic
- Painters Tape
- Shellac
- Paint Sprayer
- Country Chic Paint in Lazy Linen
- Walnut Gel Stain
- A Cut Up T-shirt for a stain rag
- Disposable Gloves
- Respirator
- Polyurethane
- Clear Knobs
Here are the 10 best painting furniture supplies you must have!
Prep for Vintage Nightstands Makeover
These cuties were definitely in need of a refresh and were pretty worn out! I started out by cleaning them up and prepping them. Learn exactly how to prepare furniture for painting here.
Sanding Tops and Legs for Stain
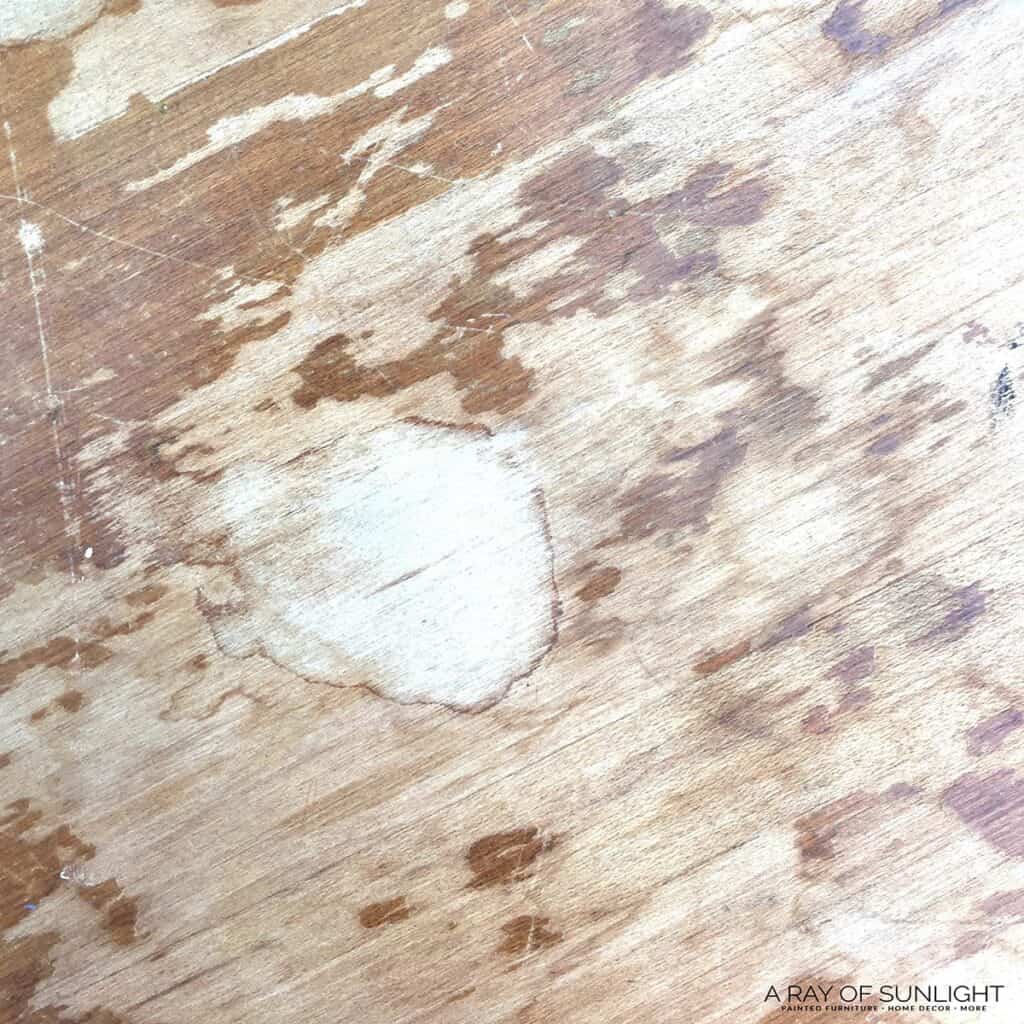
I sanded the tops down right away since the finish on the top of one of them was worn down (see picture). It would have been so much easier to strip them with a chemical stripper instead of sanding them because of the details on the edges.
I typically strip them instead, but something about a worn off finish makes me want to sand. Here’s more about how to remove stain from wood.
If I had my SurfPrep sander back then, it would have been a lot easier to sand the curved edges. Read our Surfprep Sander reviews here for more about this tool.
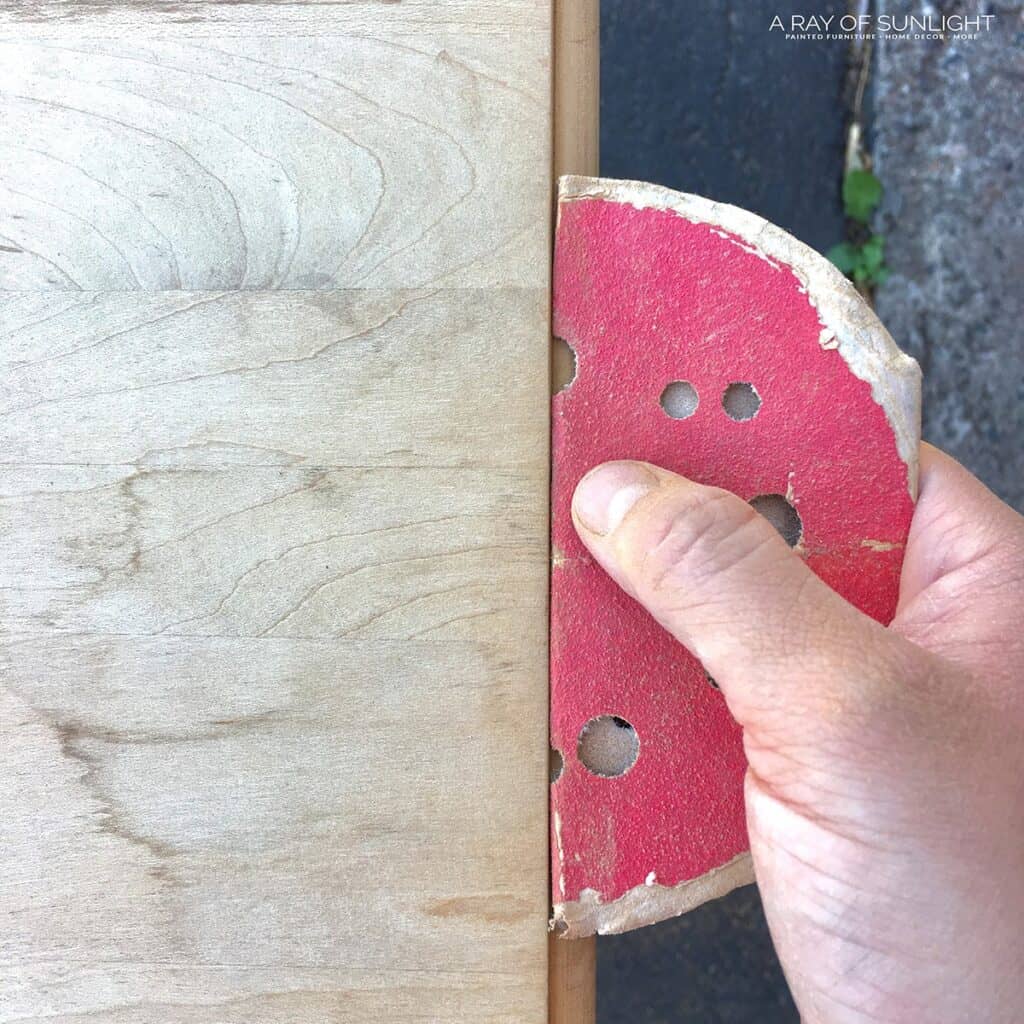
If you aren’t familiar with the different levels of sandpaper, the lower the number, the more coarse or rough the sandpaper is. So, it will be easier to take off a finish with lower grit. But, the wood will be rough after that.
So, it’s always best to work your way up to a higher grit sandpaper to smooth everything out and make that wood shine. Learn more about how to choose the right type of sandpaper for furniture painting here.
Protecting Tops and Legs from Overspray
Once the tops were completely sanded down, I taped them off with pre taped plastic and painters tape. I also taped off the drawers with the plastic and tape. Check out this post to find out what is the best painters tape that doesn’t bleed.
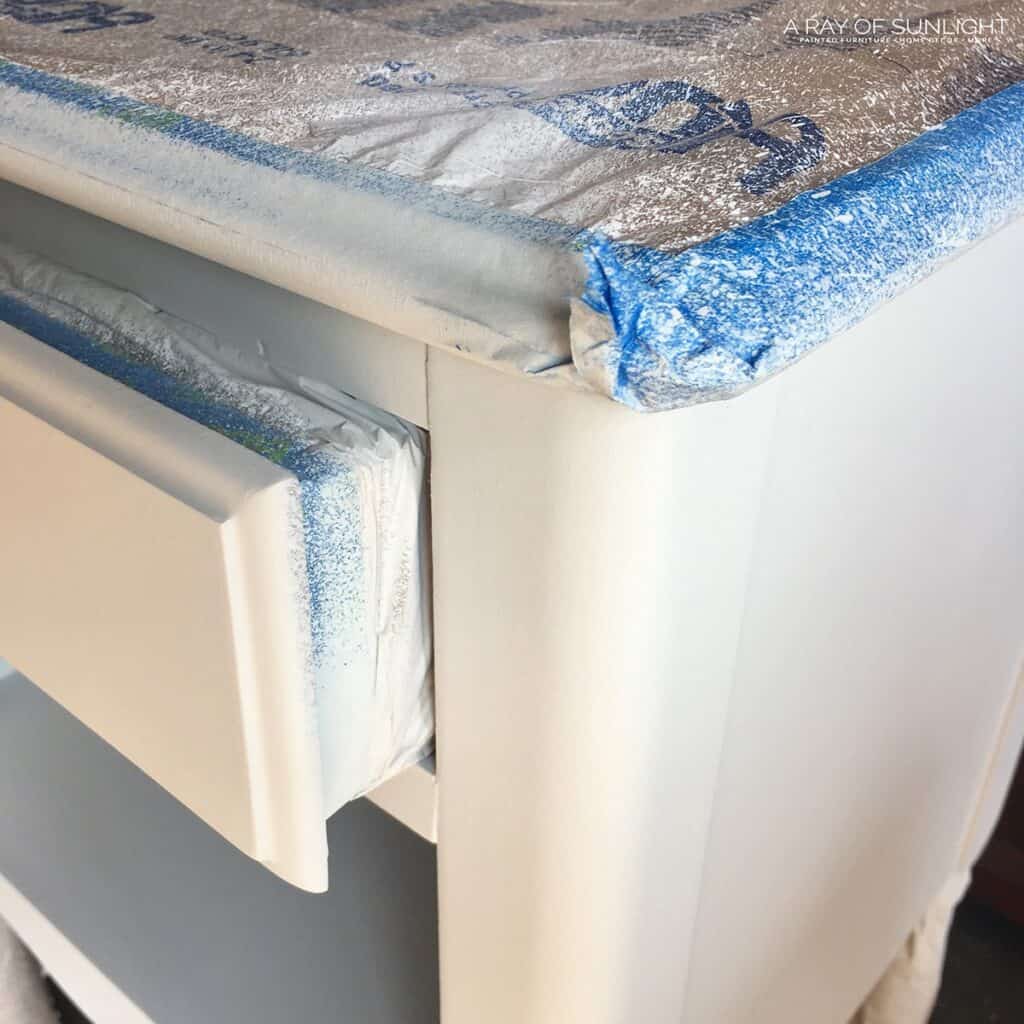
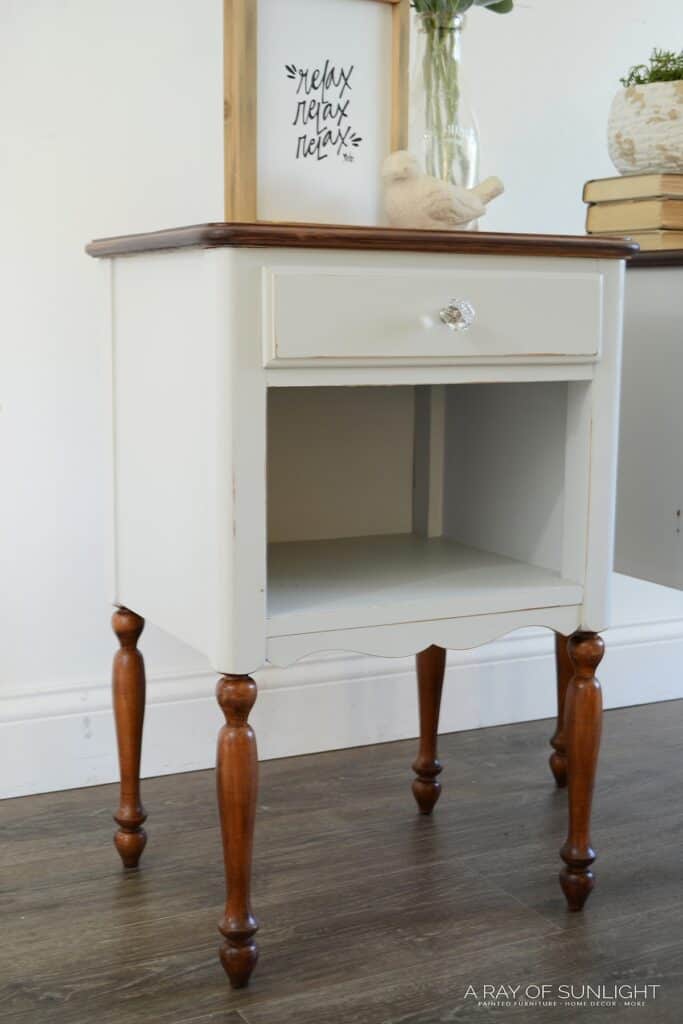
I lightly sanded the legs down and then wrapped some brown paper around the legs with tape (the pre taped plastic is also great for this!) to prevent overspray on them since I wanted to keep them stained. You can see more ways how to prevent overspray when painting furniture here.
Filling Holes for Changing Hardware
To update the hardware, I filled the holes in with Bondo. It’s a great alternative to wood filler since it dries super hard pretty quickly, and it doesn’t shrink and crack like wood filler does. Check out my Bondo wood filler review to learn more about the pros and cons of this product.
The biggest downside is how bad it stinks! Learn more about the best wood fillers and see our comparison of wood fillers for filling holes when replacing cabinet or furniture hardware here.
Priming Before Painting
Since it was nice and warm, I took the pieces outside. I simply laid down a few large cardboard boxes on the ground and then got to work. Before I went any further, I sprayed 3 coats of clear shellac onto them.
In the furniture painting world, there is this ugly thing called “bleedthrough”, and you really never know when it’s going to strike. But shellac really helps with that issue. So I shellac everything now. And I mean everything. But especially light colors that won’t hide the bleed through.
I let the clear shellac dry for at least a few hours but overnight is best. Here’s more on how to stop stains from coming through paint!
Painting Vintage Nightstands
I love to paint furniture with a paint sprayer. Mostly because I love the brush free finish, but also because I love how much faster it is!
(The Double Duty has been discontinued, and here is the new model: the Wagner Control Spray 250 sprayer.)
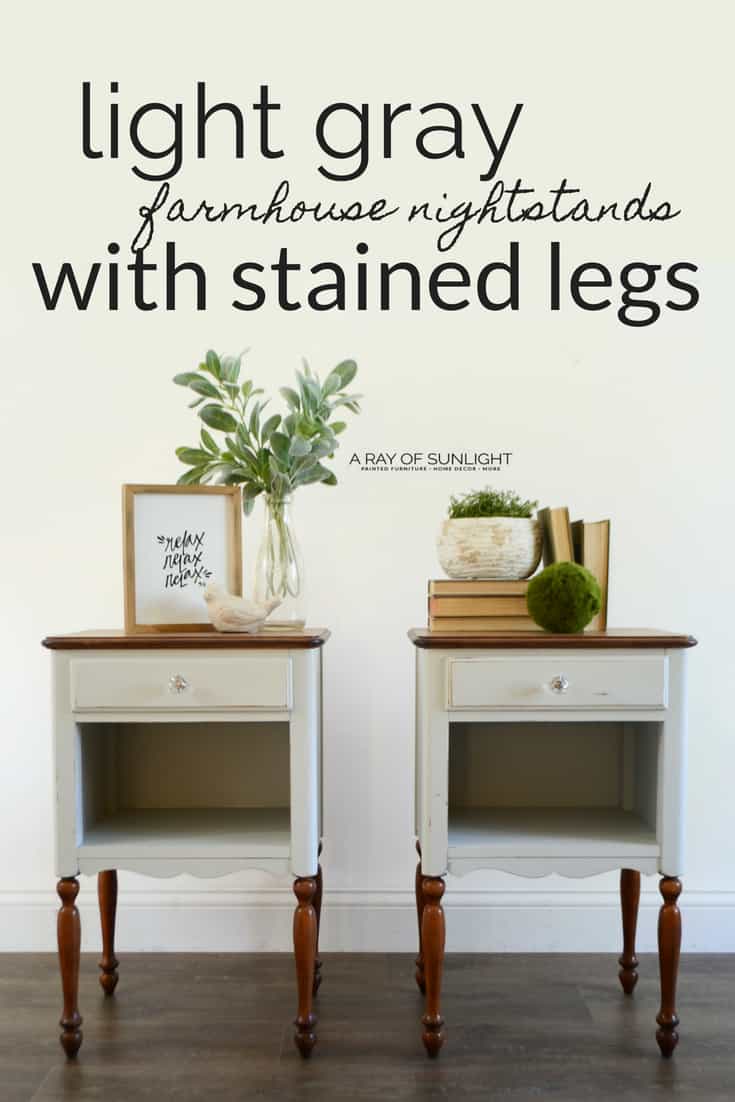
I used Country Chic Paint’s Lazy Linen – it’s the very best light gray chalk paint I have come across yet! It’s a warm grey or greige, and I just love the modern touch it gives any piece.
We feature it as one of the best grey furniture paint here. For more similar shades, here’s our list of neutral furniture paint colors! Check out my honest and detailed Country Chic Paint review here for more about this product. Here’s my list of the top chalk paint brands for your future projects.
So I thinned it out and applied about 3-4 coats of Lazy Linen. There is a little bit of a learning curve to thinning, but to help you with that, I wrote this tutorial on how to thin paint for a Wagner sprayer.
Would you like to save this?
I used 3-4 coats because of how light the coating is. Not because it doesn’t cover well, but because no light color covers very well. And when it’s thinned out for the sprayer, another coat is usually necessary because the coats go on thinner than if you were to brush them.
But, when you use a sprayer, and since the chalk paint dries so quickly, it all goes very quickly. Here’s more on how to use a Wagner Double Duty paint sprayer if you have this model.
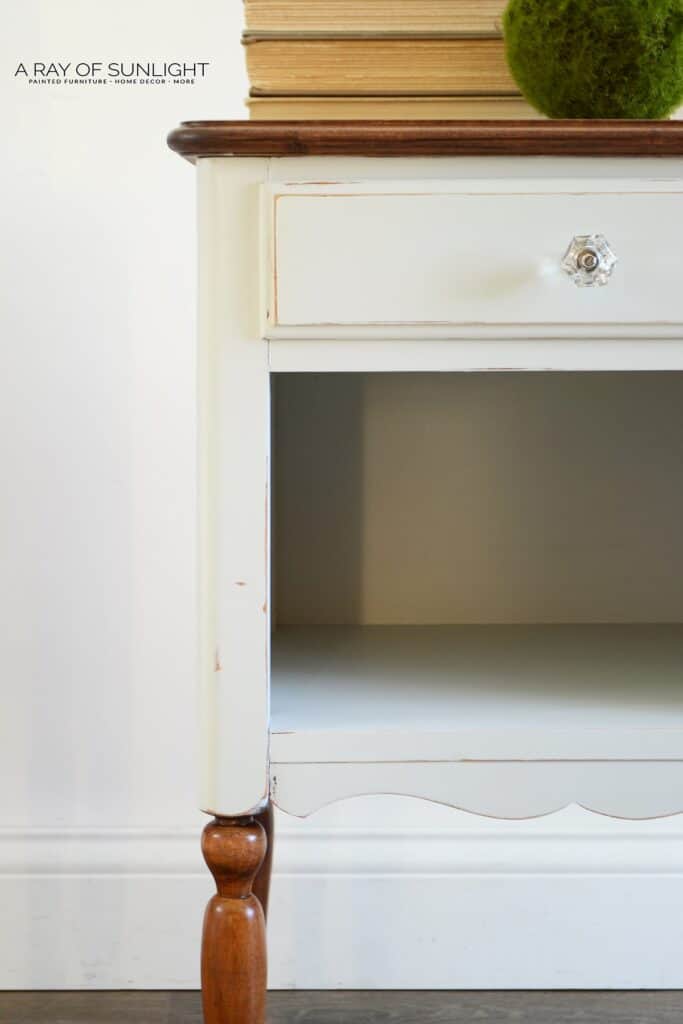
Distressing Painted Nightstands
After the final coat was dry, I lightly sanded everything down with 220 grit sandpaper. The sanding makes the finish feel smoother, and it also distresses at the same time.
For this vintage nightstands makeover, I wanted a more distressed and worn finish. So, I made sure to sand all the edges until wood started to show through. I also sanded a few areas on the flat surfaces to create a worn look. Learn more about the 6 best distressing furniture techniques here.
Staining Tops and Legs
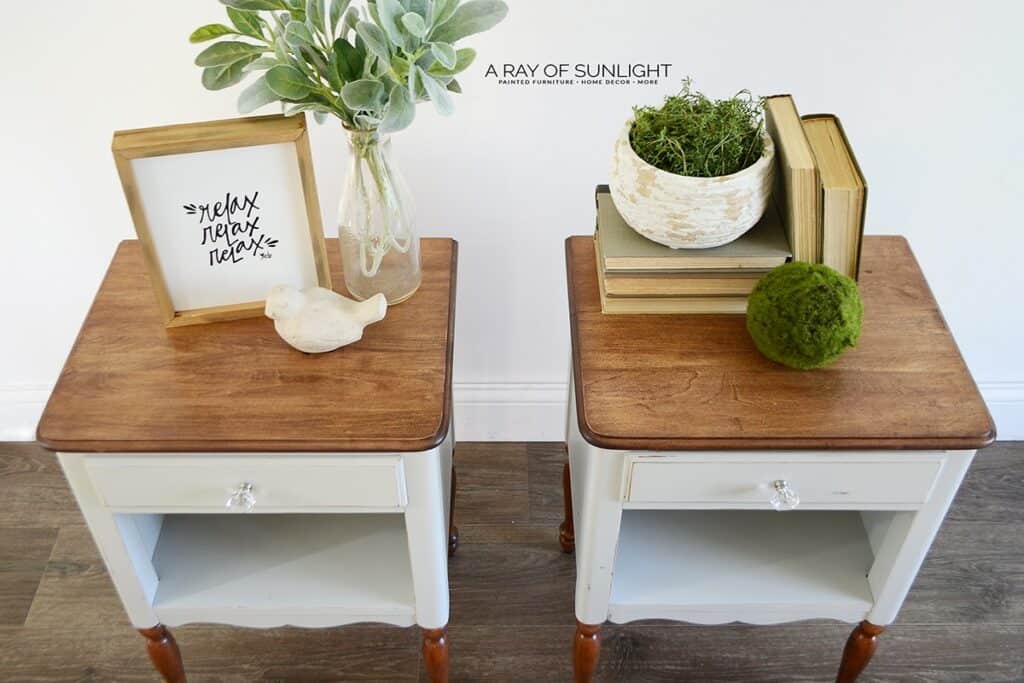
Once the body was coated and ready to be sealed, I took off the plastic on the tops and the legs. I stained the tops with walnut gel stain.
Gel stain is a stain that is usually used over an existing finish, like how these legs weren’t sanded down to bare wood. Check out more best wood stains for refinishing furniture here.
And then, I used an old cut up shirt to wipe it onto the legs. Gloves and a respirator are best for this process! When I wiped it on, I wiped around the legs, all the way from the top to the bottom. When in doubt, look for the grain pattern and follow it. I worked on two legs at a time.
See gel stain in action with these tutorials on how to stain wood darker and how to restain wood furniture.
Topcoating Paint and Stain
To finish up this makeover, I sealed everything with multiple coats of my favorite polyurethane.
If I used a sprayer for only one thing, it would be to topcoat paint and stain. A brush just leaves behind too many imperfections and streaks, but a sprayer makes it easy to get a smooth, even finish.
And poly is super important! Not only does it seal the chalk coating, but it also creates a strong, durable, and smooth finish. Learn ALL of my tips and tricks on how to spray polyurethane here! Here are more ways how to apply polycrylic to painted furniture.
A lot of people use wax to seal their chalk finish, but it really isn’t as durable as poly, and it takes so much longer to wax on and wax off. haha! But really. It takes forever compared to spraying the poly. Learn more about topcoats for painting furniture here.
Changing Nightstand Hardware
To finish it off, I drilled new holes into the center of the drawers and added some fresh new clear knobs to finish out the look. Learn all about the process of how to change hardware here.
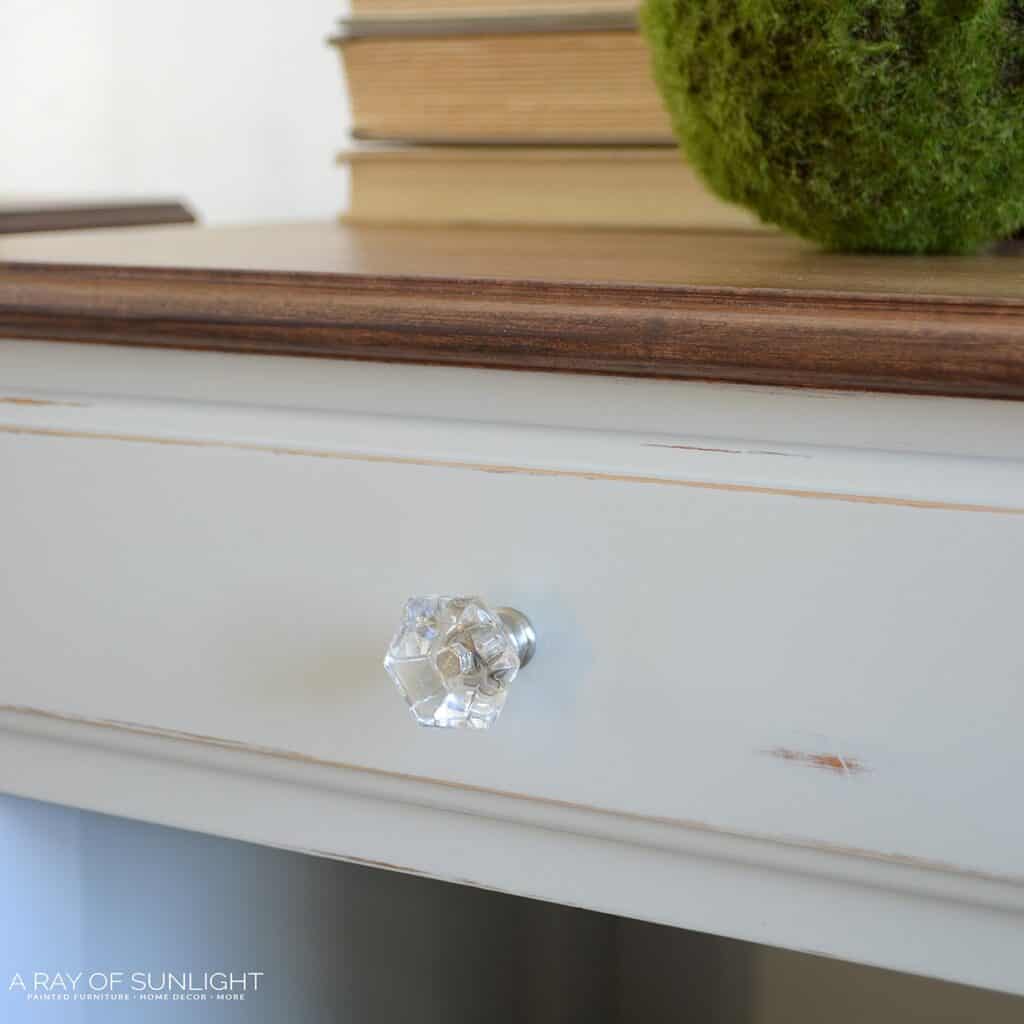
And here’s what they look like now!! Find more similar projects from these gray chalk painted furniture and chalk painted bedroom furniture ideas. If you’re still wondering is two-toned furniture in style, find out here!
More Before and After Makeovers
See All >
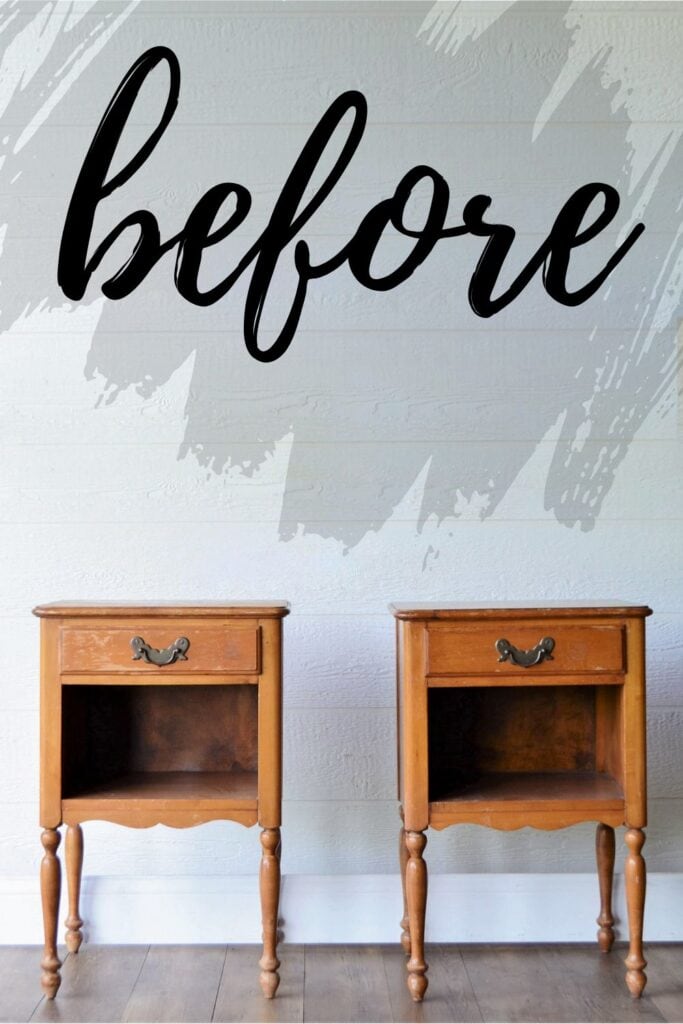
Click any of these “before” photos below to view the “after” of that makeover.


What a makeover! I know there were a lot of little pieces to this tutorial, and I hope that doesn’t overwhelm you! See more ideas for mixing and matching pieces with our list of mismatched nightstands ideas. You can also check out these small nightstand ideas and DIY nightstand ideas.
Please let me know how I can help and if you try doing something similar! I would love to see!


Nightstand Refinishing Ideas
You can also update your nightstand by keeping it natural. It’s a great option if you love the natural beauty and texture of wood or are going for a rustic or farmhouse vibe. There are plenty of wood stains to choose from, like light oak or dark walnut, so you can get the exact look you want. Get all the tips and tricks on how to stain wood furniture here.
If your piece already has a finish, you’ll want to remove it first. Learn from our guides on how to remove paint from wood furniture and how to remove wood stain. If you just want to refresh the color, here’s how to stain already stained wood!
You can also white wash, giving it a subtle and airy look. Check out how to whitewash wood in this post and these whitewashed furniture ideas for inspiration. These refinishing nightstand ideas show more of this natural style.


Vintage Nightstands Makeover
Bust out some paint and stain. Here are the steps for this vintage nightstands makeover.
Materials
- Sandpaper (80, 220, 400)
- Bondo
- Wood Filler
- Pre-Taped Plastic
- Painters Tape
- Shellac
- Country Chic Paint in Lazy Linen
- Walnut Gel Stain
- A Cut Up T-shirt for a stain rag
- Disposable Gloves
- Polyurethane
Instructions
- Clean and prep the nightstands for paint. Sand the tops and legs of the nightstands down to prepare them for stain. Once they are completely sanded down, tape them off as well as the drawers to prevent any overspray.
- For updating hardware, fill in the hardware holes.
- Spray the nightstands with 3 coats of clear shellac to prime. Let the clear shellac dry for at least a few hours, but overnight is best.
- Thin out your paint for the paint sprayer then apply 3-4 coats of paint onto the nightstands.
- Once the paint is dry, lightly sanded everything down with 220 grit sandpaper to make the paint feel smoother and to distress it at the same time.
- Take the plastic off the tops and legs and stain them with walnut gel stain.
- Seal the painted and stained nightstands with a few coats of waterbased polyurethane.
- To finish it off, drill new holes into the center of the drawers, and add your hardware!
Recommended Products
As an Amazon Associate and member of other affiliate programs, I earn from qualifying purchases.


More Painted Furniture Makeovers
- French Provincial Nightstands Makeover
- Grey Chalk Paint Dresser
- Blue Chalk Paint Coffee Table
- DIY Emerald Green Bedside Table
- Vanity Turned into Nightstands
Follow us on YouTube to get more tips for painting furniture. Or share your project with us on our Facebook Group and be part of our community. See you there!