How To Milk Paint A Buffet Cabinet
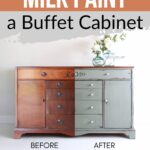
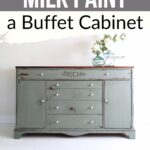
Milk paint is amazing for getting that perfectly chippy, rustic look on your furniture. Today, I’m gonna show you how to milk paint a buffet cabinet, and you can easily recreate this on your own. And you’re going to love how this transformation turned out!
With these painting furniture ideas and tips, you’ll learn how to use milk paint to transform your furniture into a gorgeous, one of a kind piece, and add a touch of vintage charm to your home. Let’s get started!

Welcome to Furniture Fixer Upper day, where we join 4 of our talented furniture friends and bring you brand new makeovers! I’ll link to my friend’s makeovers after our after photos at the bottom of this post! Don’t forget to check out their masterpieces!! Okay, back to our makeover!
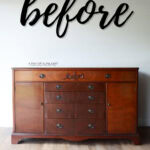
This was a really fun makeover! We got this antique buffet for $120 – it has great bones, but there were actually quite a few issues with this. That’s why this project took me a while to get around to, because I had to fix all these issues.

If you’ve got a piece of furniture sitting in your house that needs some love, you can do this, too! Minor damage or wear can be repaired and then refreshed with a new, fresh color to match your decor.
And if you’re going for a rustic, charming look, milk paint is a great option! If you’ve never used it before, now may be the perfect time to try it out. So when you’re ready, let’s dive into milk painting a buffet cabinet!

Supplies Used to Milk Paint A Buffet Cabinet
As an Amazon Associate, I earn from qualifying purchases. I also may earn from other qualifying purchases with other companies or get free product to review and use. All opinions are my own.
- Screwdriver
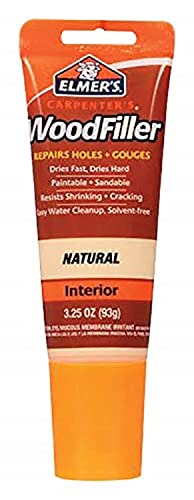
- Wood Filler
- Sandpaper
- Syringe
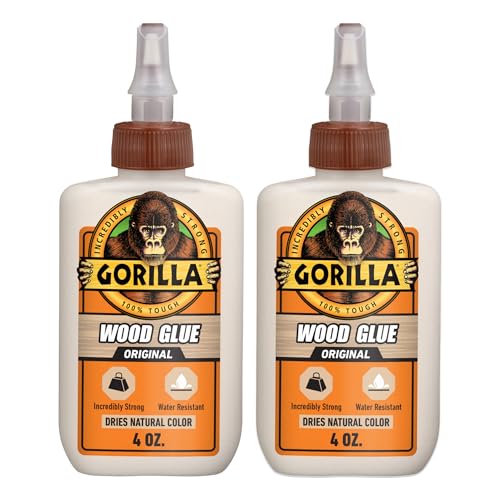
- Wood Glue
- Clamps
- Wood Applique
- Dixie Belle BOSS
- Shackteau Interiors Milk Paint in Coastal Fog and Clarke Pond Green
- Zibra Round Brush
- Space Heater
- Shackteau Interiors Hemp Oil
- Annie Sloan Dark Wax
- Glass White Knobs
Removing Detail and Filling in Damage
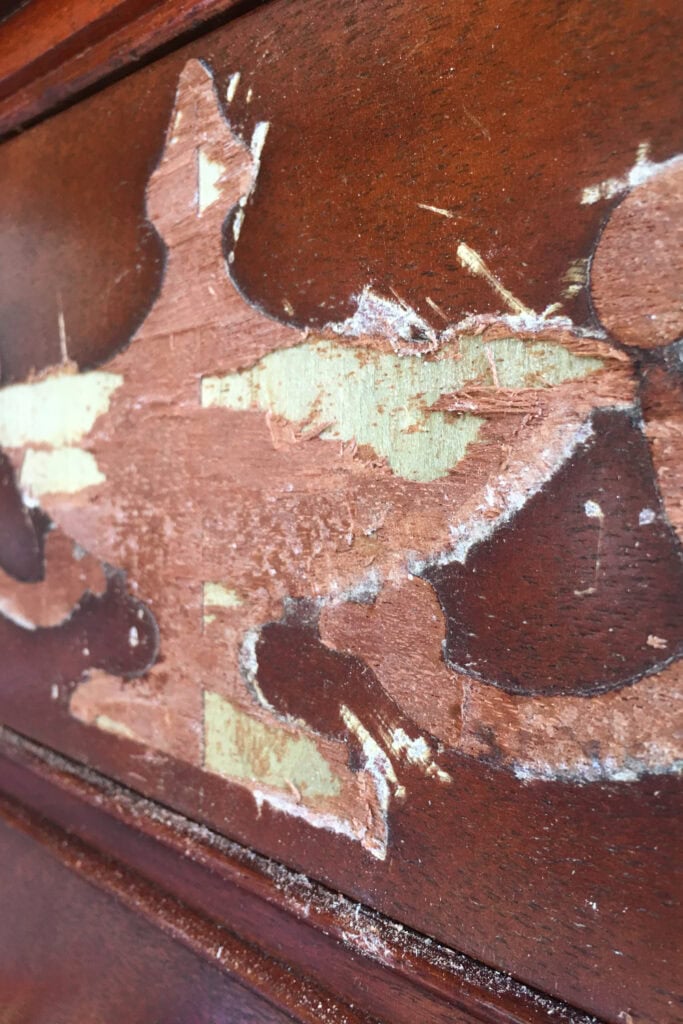
I did not like the detail on the top drawer. It looks like a magic lamp from Aladdin. It’s not my style, I think it’s way outdated, and it just had to go. So, the first thing I did was pry that off, and it left some good marks behind. It ruined the wood veneer a little bit, so I needed to fix that as well.
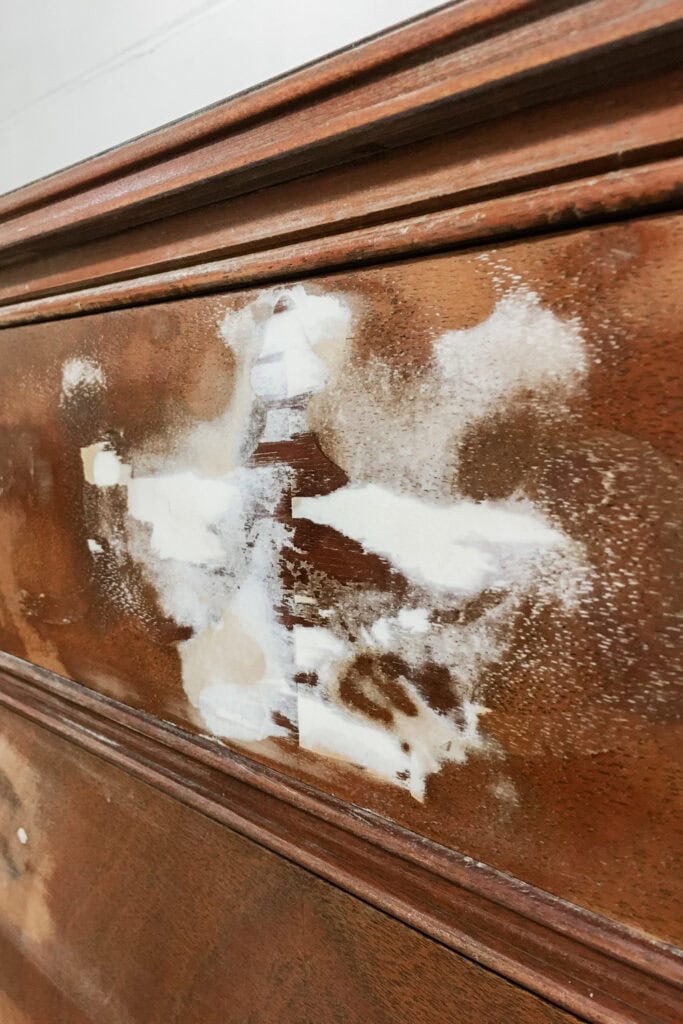
I removed the old hardware and filled in the old hardware holes, so that I could change them out. I did not want to keep it either. I wanted to replace them with knobs, so I filled in one hole of each of the existing hardware holes. Learn more about the ways of filling holes when replacing cabinet or furniture hardware here.

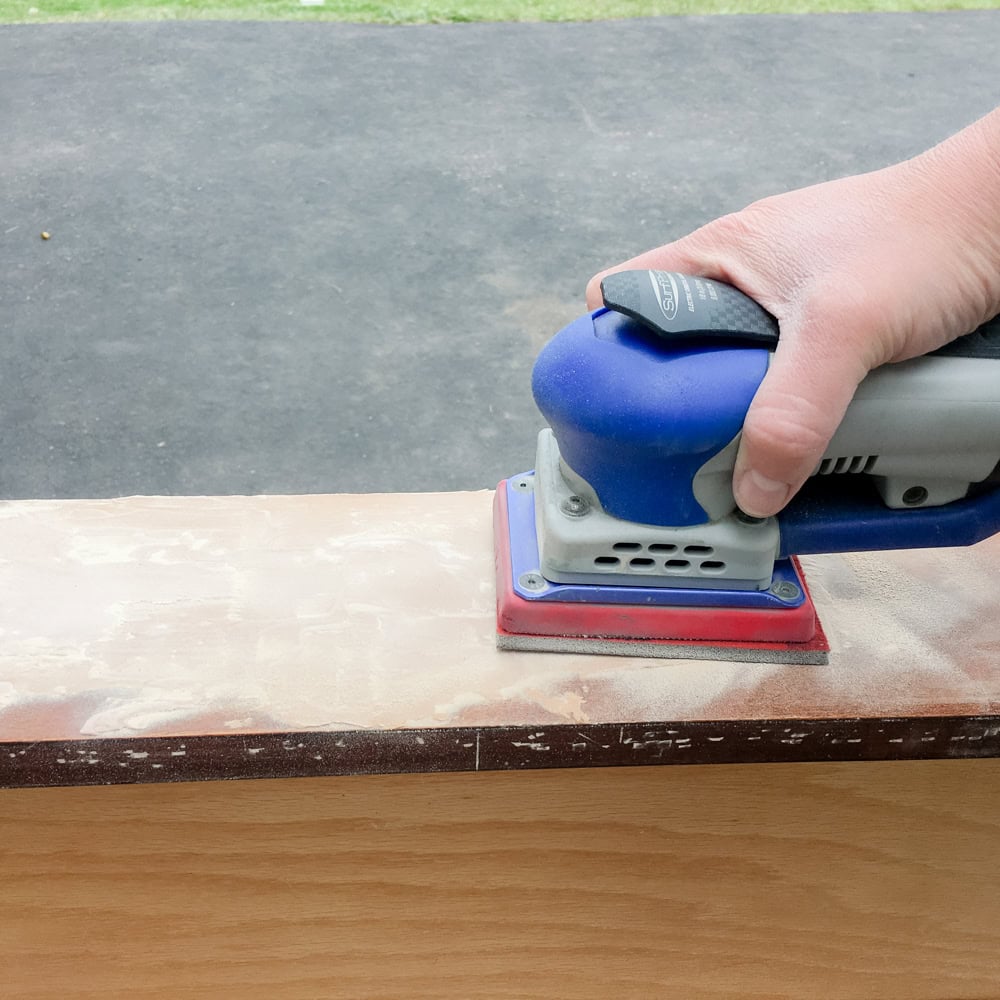
I also filled in the damage I caused to the top drawer from removing that lamp detail. I filled that in, and then I sanded everything once the filler was all dry. I sanded all that smooth, and then I scuff sanded the entire buffet. Then I started working on the drawers.


Fixing Wood Veneer
This furniture is made with wood veneer, and the veneer has gotten damaged over time, most likely from humidity. It has started to separate from the wooden construction, so it needed to be glued back on.
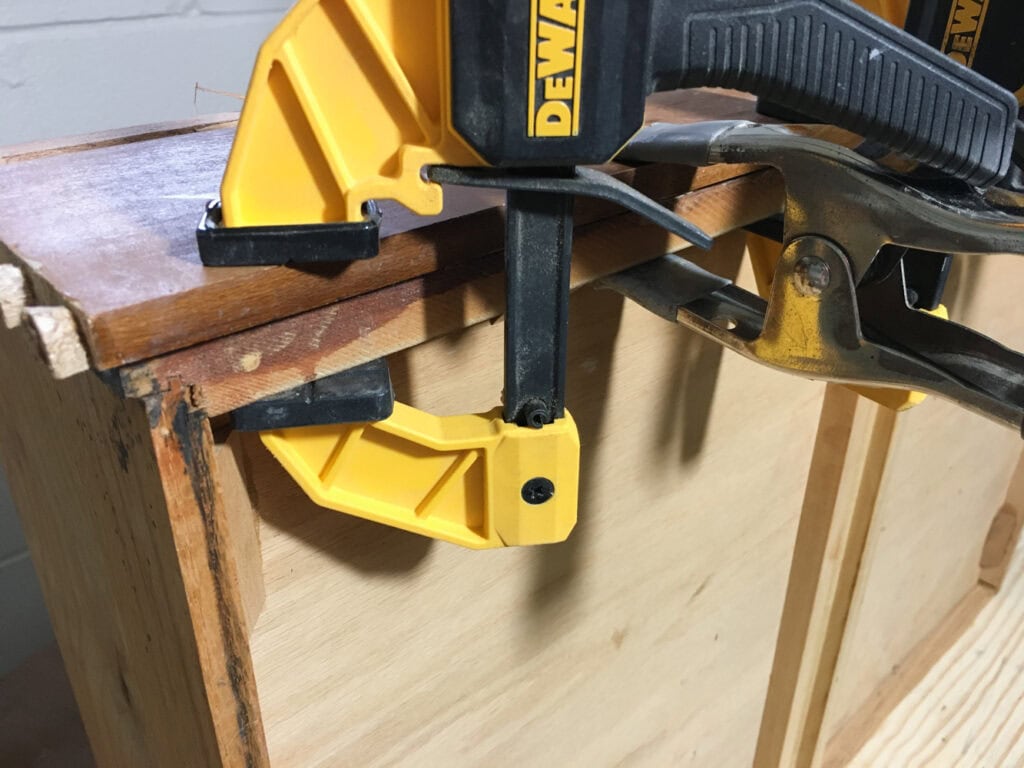
I used this syringe to put some wood glue in it and then glued the veneer back onto the drawers. And then I clamped everything together.
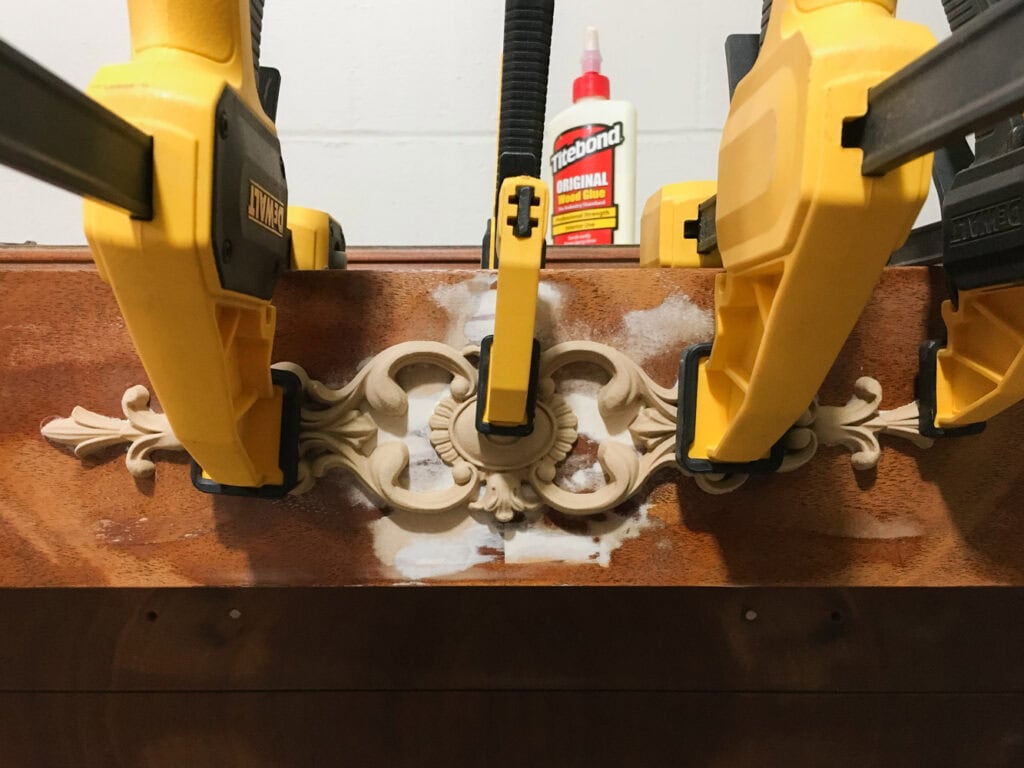
While I worked on that, I also got a new wood applique to put on the drawer. There was just so much damage, and I couldn’t get it to fill completely in without kind of leaving a scar and a shadow. So, I glued that applique over where the old one was.
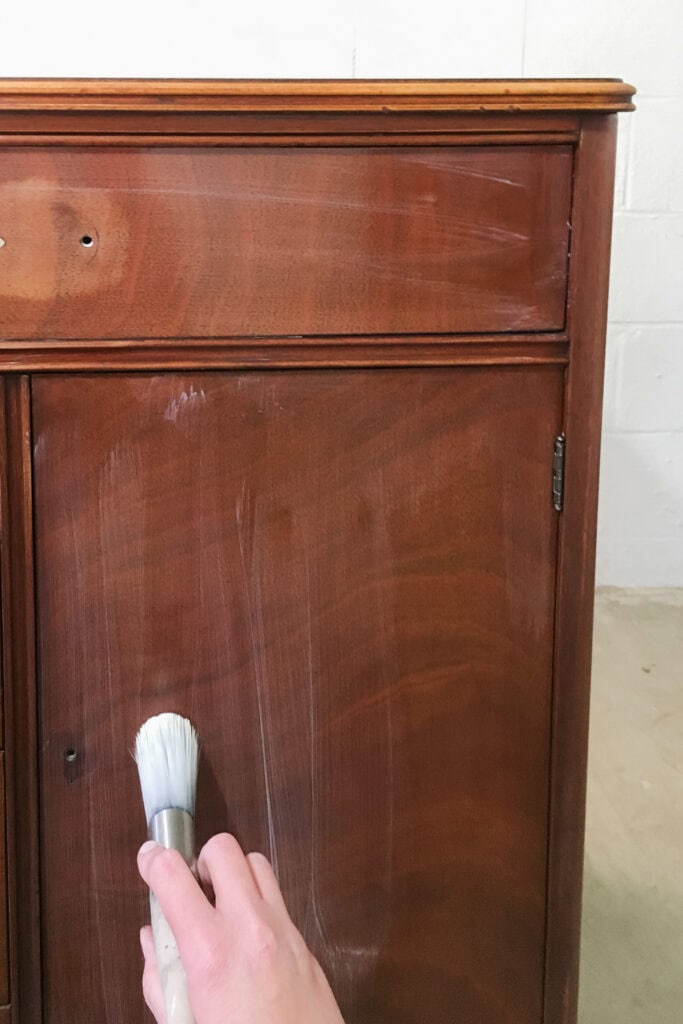
Priming Before Milk Paint
Before I painted, I brushed on some primer. It was a clear primer called Dixie Belle BOSS. I wanted a nice chippy look on this, and I have found that this helps milk paint chip. You can learn more about creating a chippy paint finish every time with this product in this post.


Milk Painting A Buffet Cabinet
I decided to use Shackteau Interiors Milk Paint. I wanted to use a sage green color for this. So I mixed the colors Coastal Fog with Clarke Pond Green. It was about a five-to-one ratio: five parts Coastal Fog to one and a half parts Clarke Pond Green.
Would you like to save this?
Check out our posts on how to mix milk paint and mixing milk paint colors together to guide you.
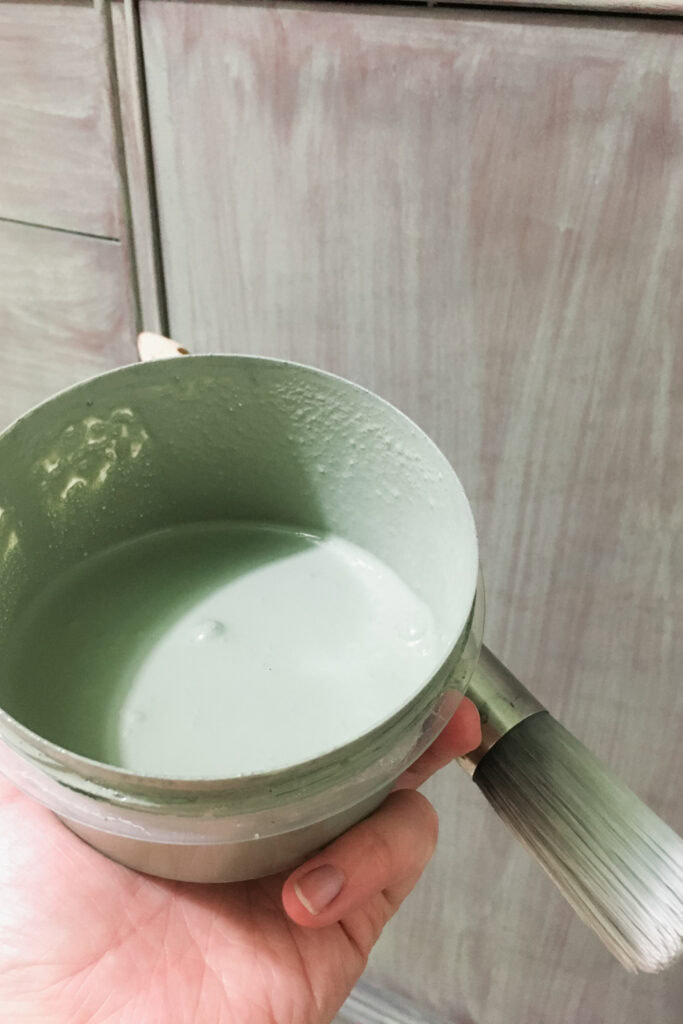
And then I applied it with our Zibra round brush. I love using this round brush because it gets into the details and the curves so much easier than a flat brush.

This buffet cabinet took a couple of coats of paint. The first coat looked really spotty and streaky. It did not look very good, but that’s usually the case. The second coat went on way better, with mostly full coverage. Get more tips on how to use milk paint on furniture here.
How to Make Milk Paint Chip
As the coats were drying, I did put a space heater close by to try to get the paint to chip a little bit more. Since I had scuff sanded this, the milk paint wasn’t going to chip as much, and I was kind of bummed about that. The electric heater did help with that.
I also scuff sanded the whole surface with 220 grit sandpaper to get the milk paint to chip a little bit more and smooth it out.
Topcoating Milk Paint
And then I topcoated the buffet with hemp oil from Shackteau Interiors. Milk paint is very durable on its own, so it doesn’t have to have a waterbased, oil based or really strong topcoat because it already adheres very well. When it adheres, it adheres. When it chips, it chips.
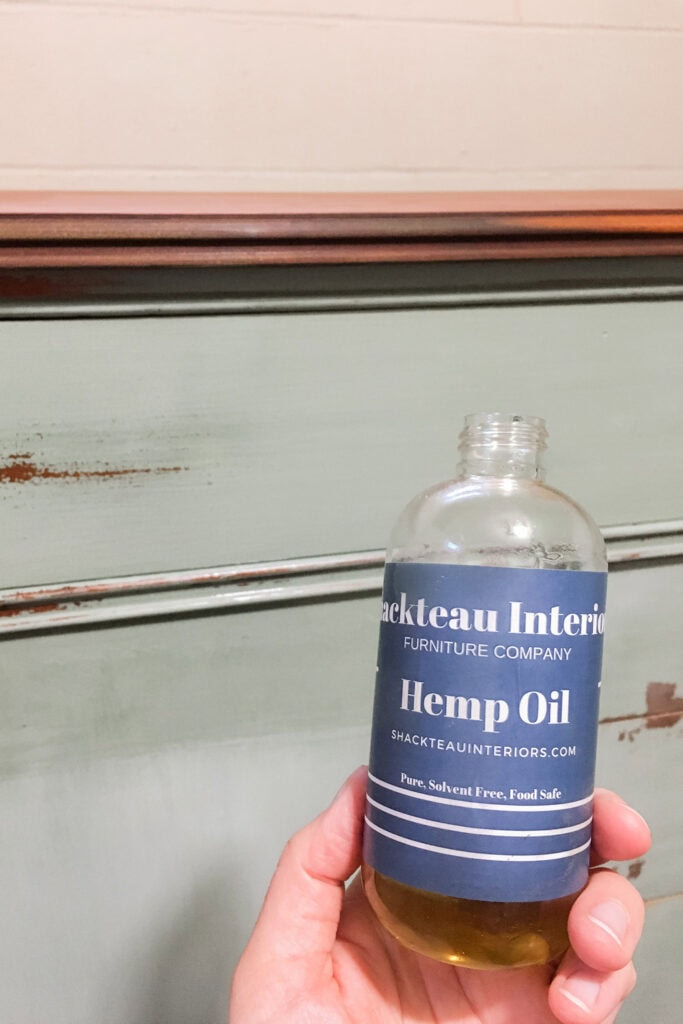
You can learn the 3 ways to seal milk paint here, including a more detailed guide on how to apply hemp oil.
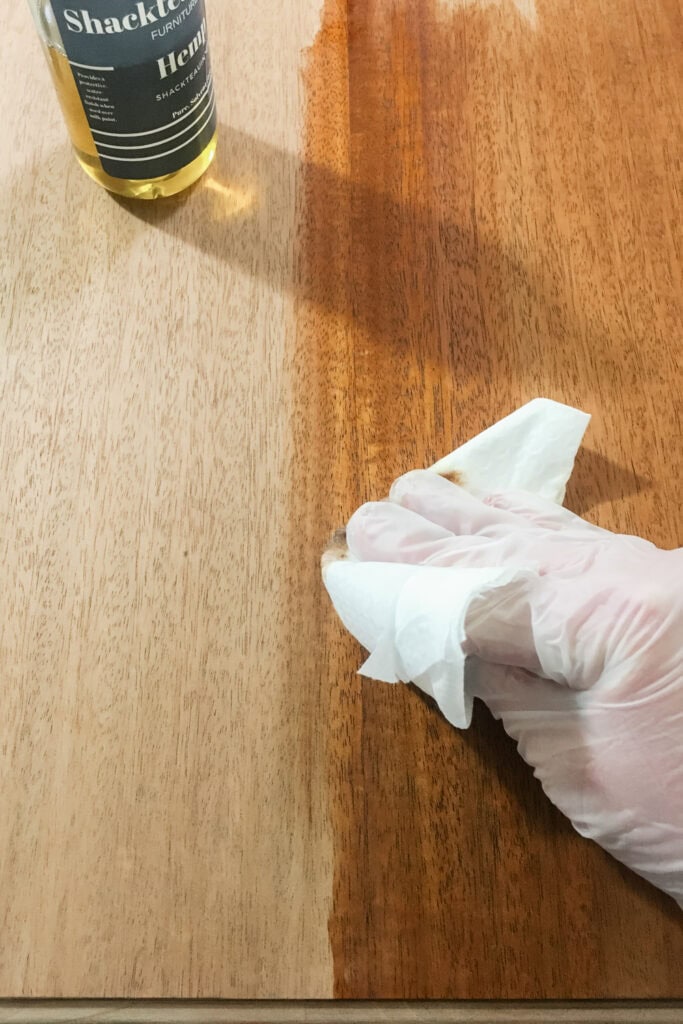
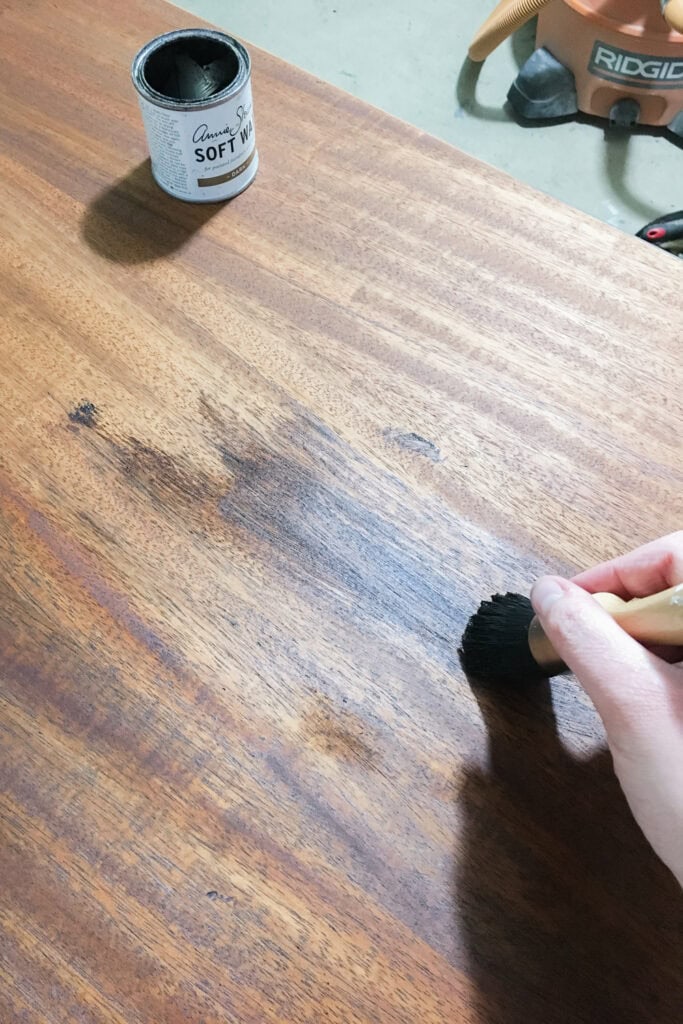
You might notice that I did not paint the top – I actually stripped it down. Then I applied hemp oil first, and added Annie Sloan Dark Wax next because it wasn’t as dark as I wanted it to be.
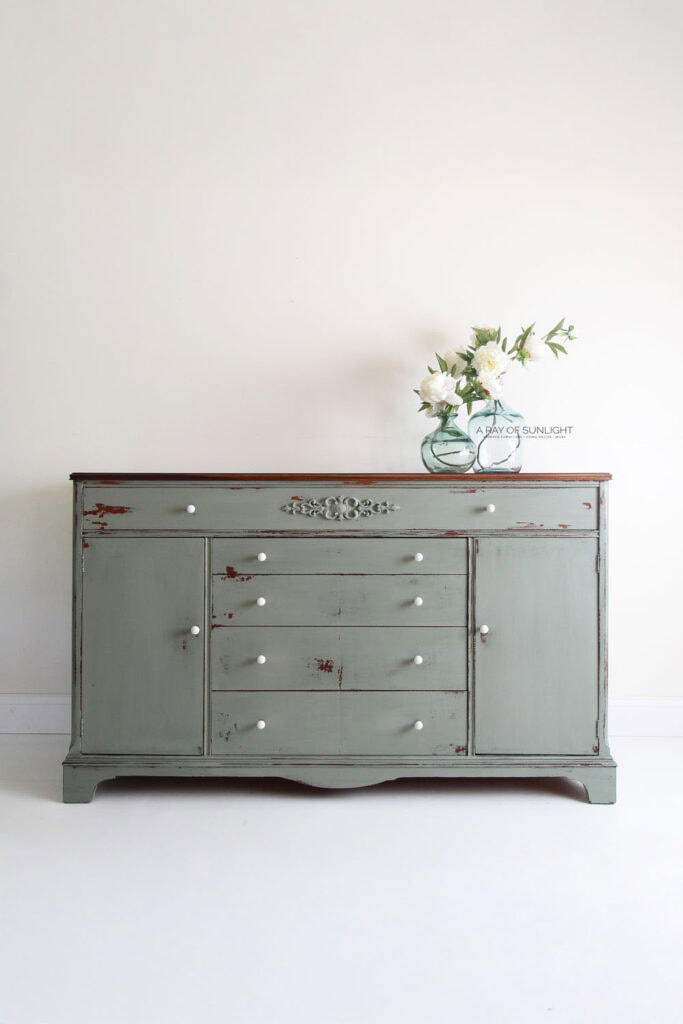
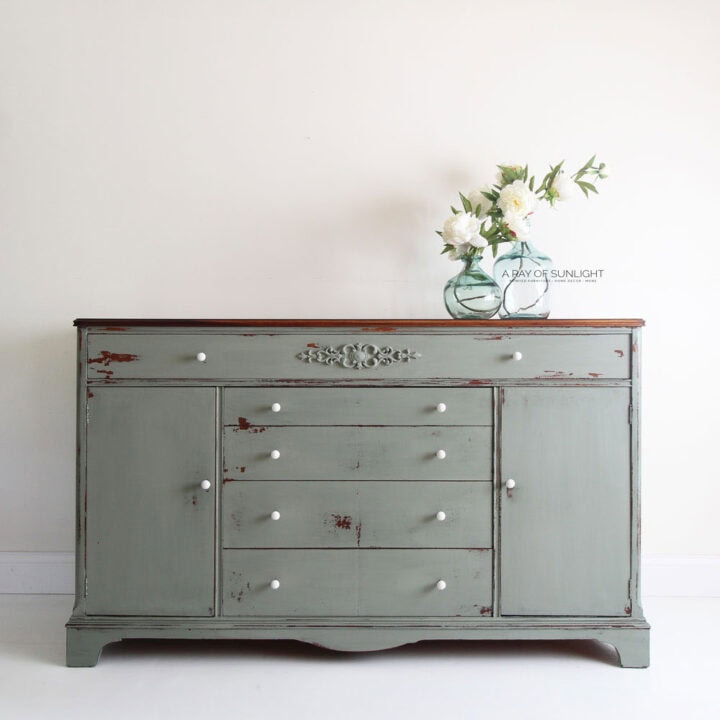
And once everything was dry, I attached these cute little glass white knobs. And here is what it looks like now!
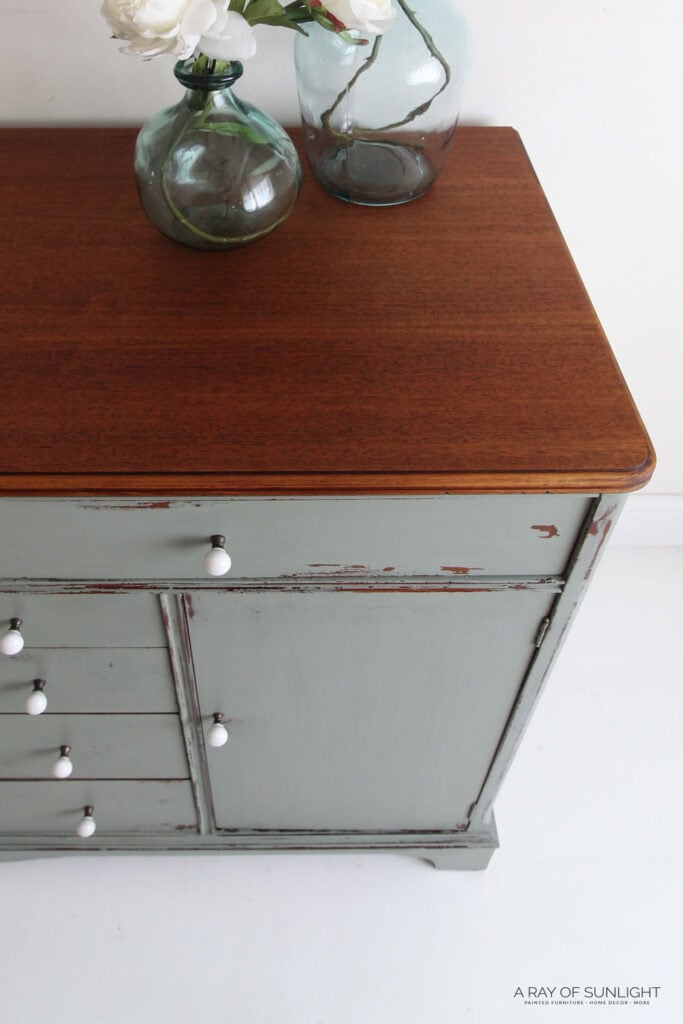
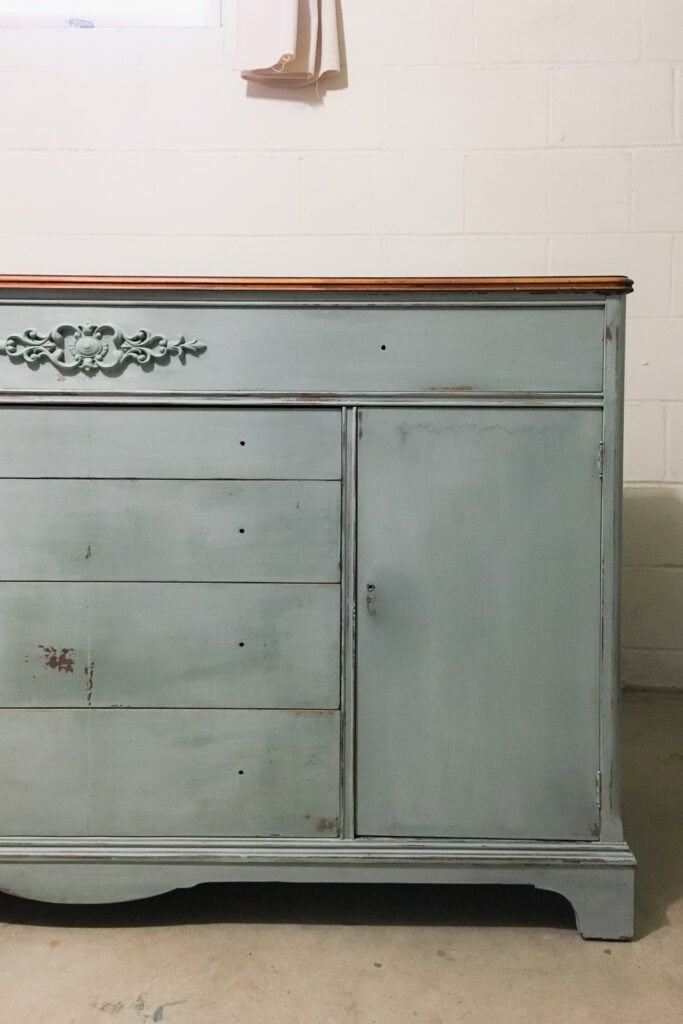
It’s a little bit rustic and a little bit feminine at the same time. I love this sage green color, it’s so pretty! It really goes well with the vintage rustic look of this makeover.
I also love how the top turned out. It turned out nice, deep and rich just like I wanted, where you can still see some of that pretty mahogany. And that is how to milk paint a buffet cabinet!

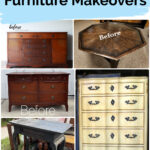
Don’t forget to check out these other awesome before and after furniture makeovers from my Furniture friends!! (Click the links below the photos!)
- Painted Dresser With a Stained Top Makeover from Confessions of a Serial DIYer
- Octagon Coffee Table Makeover from My Repurposed Life
- How to Highlight Furniture Details with Paint from Salvaged Inspirations
- Vintage Buffet Makeover – You are here!
- Paint Outdated French Provincial Dresser from Petticoat Junktion
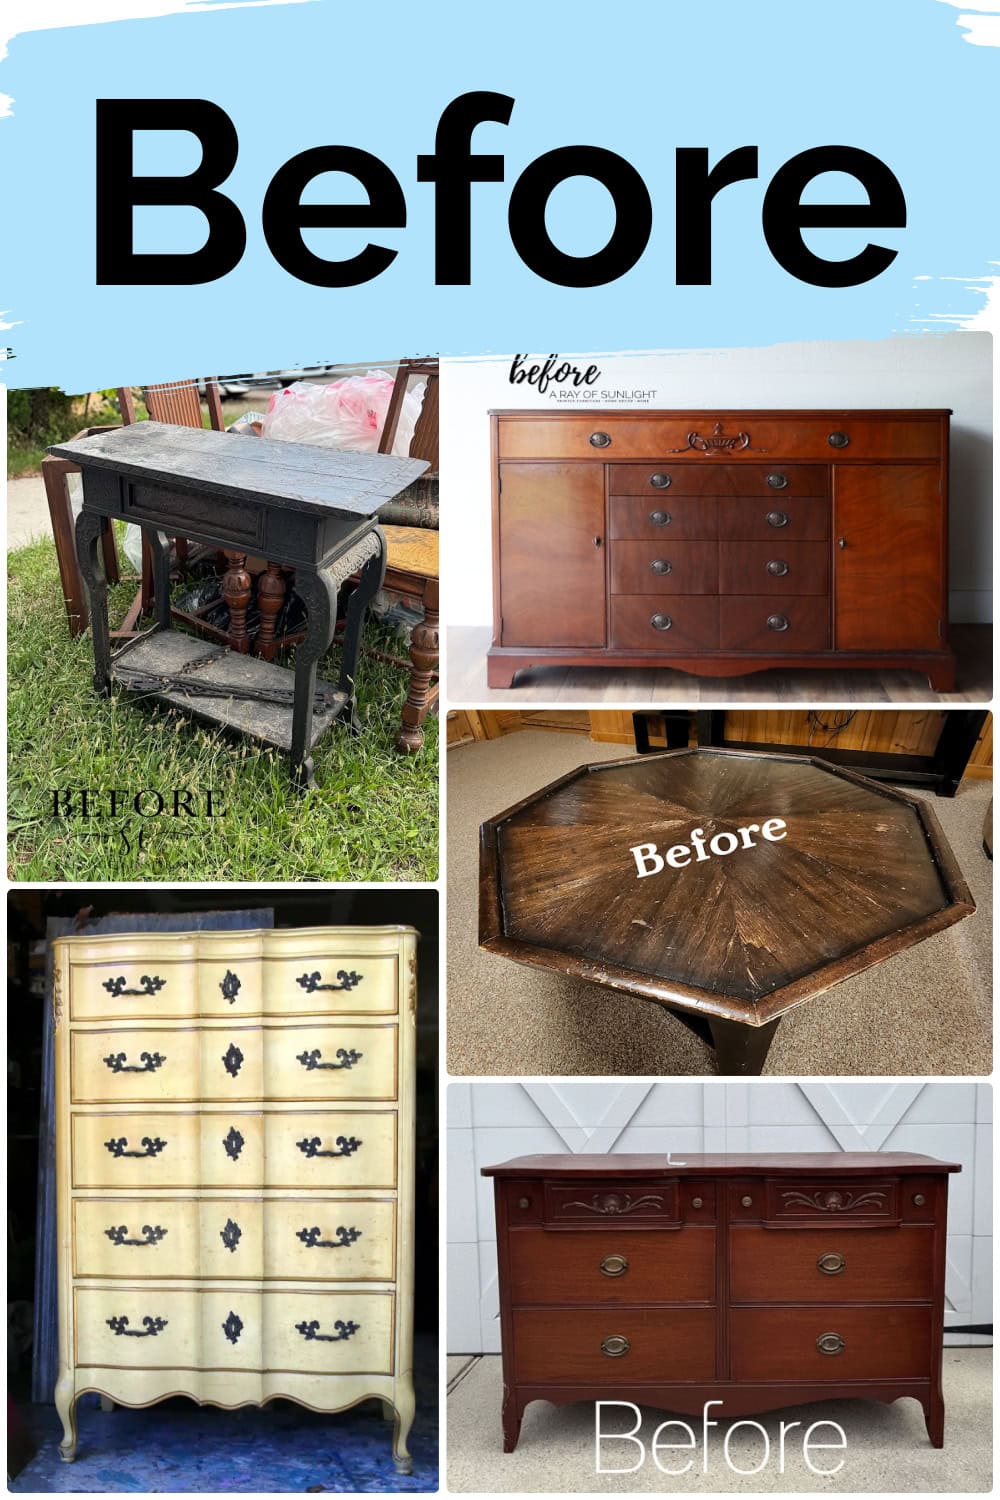
More Before and After Makeovers
See All >
Click any of these “before” photos below to view the “after” of that makeover.


How To Milk Paint A Buffet Cabinet
This makeover is gonna show you how to milk paint a buffet cabinet and get that perfectly chippy, rustic look on your furniture.
Materials
Instructions
- Begin by removing any decorative details and old hardware from the furniture. Fill in the hardware holes with wood filler to prepare the surface for new knobs or hardware.
- Repair any veneer damage by applying wood glue under any loose areas using a syringe. Clamp the veneer in place until the glue dries completely.
- Sand the entire piece to smooth out imperfections and give the surface a light scuff for better paint adhesion. Make sure the wood filler and repairs are also sanded smooth.
- Apply Dixie Belle BOSS in clear primer to the surface. This primer creates a base that helps the milk paint adhere and also chip more.
- Mix the Shackteau Interiors milk paint colors you need. Apply at least two coats of paint or more until full coverage using a round brush, letting the first coat dry before applying the next.
- As the paint dries, use a space heater to help create more chipping. Lightly sand the surface with 220 grit sandpaper to smooth the paint and highlight chipped areas.
- Milk paint is very durable on its own, but you can add more protection to the painted surface by sealing it with hemp oil.
- For the top of the buffet cabinet, strip the wood down to its natural finish, then apply hemp oil, followed by dark wax for depth and a rich tone. This enhances the wood’s natural beauty.
- Finish the piece by installing new hardware, such as glass white knobs, to update the look and add a touch of charm.
Recommended Products
As an Amazon Associate and member of other affiliate programs, I earn from qualifying purchases.


More Milk Paint Furniture Makeovers
Learn the Art of Updating Furniture!
If painting furniture feels overwhelming or your past attempts didn’t go as planned, this course will guide you step by step.

Follow us on YouTube to get more tips for painting furniture. Or share your project with us on our Facebook Group and be part of our community. See you there!
I forgot how lovely milk paint looks. This dresser is gorgeous, Natalie! Have a great weekend my friend. Pinned XOXO
Aww thank you Denise! You have a great weekend as well!
What an absolutely gorgeous redo, Natalie! The color you chose was just perfect! Love! XOXO
Ahh thank you SO much Christy!
Natalie,
I haven’t used milk paint in years. You have me rethinking that now. I am not usually a fan of green, but the color you mixed up looks fabulous with the stained and waxed top. I love the light chippiness of this buffet, and the applique is perfect!
Pinned!
gail
Aww thank you Gail! That means a lot. Maybe it’s time to try milk paint again! 😉