How To Paint A Buffet Cabinet


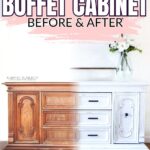

Is your buffet looking a bit outdated or worn out? Here’s a quick and budget friendly way to give it a fresh new look – we’ll show you how to paint a buffet cabinet. This step by step guide makes it easy to follow along, even if it’s your first DIY project!
With these painting furniture ideas, you can actually transform any kind of piece into a stylish and personalized addition to your home.

Oh, I love this makeover. This style of furniture is so much fun – it’s vintage and ornate, and when you paint it, it just looks so good. All of those pretty details just pop so nicely! Pieces like this already have so much character, and a new color just makes it stand out even more.

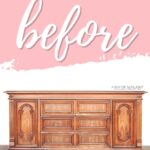
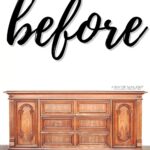
This piece didn’t come with any hardware, but we loved how it looked, so we bought it anyway. Overall, it was in pretty good shape. It just needed an update to make it look better and more like our style.
If you’ve got a buffet cabinet, dresser, or any other piece that could use a little love and a new look, why not try painting it yourself? It’s a great way to save money and add your own personal touch to your home decor.

Supplies Used to Paint A Buffet Cabinet
As an Amazon Associate, I earn from qualifying purchases. I also may earn from other qualifying purchases with other companies or get free product to review and use. All opinions are my own.
- Krud Kutter
- Bondo
- 220 Grit Sandpaper
- Clear Shellac
- Behr Pure White
- Calcium Carbonate Powder
- Wagner Paint Sprayer
- Painter’s Tape
- Waterbased Polyurethane
- Shop Vac
- Tack Cloth
- New Hardware
Prep Buffet Cabinet
First, we cleaned it up with Krud Kutter to remove any oil, grease, or grime. It’s super important to start with a clean, smooth surface. Here’s a more detailed guide on how to clean furniture before painting.

The hardware holes for the drawers were way too close together for the hardware I wanted to use. So, I filled them in with Bondo all purpose putty. This way, I could drill new holes to fit the knobs I planned to use. Learn more ways of filling holes when replacing cabinet or furniture hardware here.
Once the Bondo dried, we sanded it down until it was smooth and flush with the wood around it. Then, we gave the whole piece a light scuff sanding by hand using 220 grit sandpaper, just running it over everything to help the paint and primer stick. Learn all about sanding for paint prep here.

After that, we cleaned off the dust with a vacuum and a damp rag. Get more tips on how to clean wood after sanding in this post.
Prime with Shellac
We gave it two coats of clear shellac from a spray can, waiting about an hour between each coat to let it dry. The primer not only helps with adhesion but also prevents bleed through. These are those pesky stains in the wood that seep through waterbased finishes and just won’t go away until you seal them with shellac or oil based primers.

Learn all about priming wood for painting here and how to stop stains from coming through paint by priming here.
I also like using a shellac based primer because it dries really quickly, and I can move on with my project sooner. Plus, it comes in clear, so it’s super easy to distress and let the wood underneath naturally show.


Paint A Buffet Cabinet White
Once the primer dried, I mixed Pure White from Behr with calcium carbonate powder and water, following our homemade chalk paint recipe. You can check out more best chalk paint recipes for other alternative ingredients. If you’re not ready to make your own, here are the best white chalk paint for furniture options.

Would you like to save this?
I used my Wagner paint sprayer to get the job done, putting on about 4 to 5 coats. White paint always takes more coats to get full coverage, especially if you’re working with cheaper options, so it definitely needed a lot of layers. But honestly, the end result made it all worth it!
Plus, it’s so much easier to spray white instead of brushing it on. Brushing would’ve taken so much longer, especially around all of these details. Check out our comparison of spray paint vs brush paint furniture here.
We worked outside in the backyard. We laid down some plastic and used a few 5 gallon buckets to prop up the piece so we could spray it without making a mess. We also taped off the drawers to keep any paint from getting inside. Here are more ways how to prevent overspray when painting furniture.

Distress and Seal Chalk Paint
Once we had enough coats of white paint on, we cleaned out the sprayer and added waterbased polyurethane to it. We thinned it out a bit, about 5-10% with water. If you’re wondering, “Can you use a paint sprayer for polyurethane?” – get answers here!

But before spraying the polyurethane, we headed outside to distress the cabinet with 220 grit sandpaper. We sanded it a little bit to show the wood underneath through this white finish. Then, we cleaned off the dust with a shop vac first and then a tack cloth to make sure the piece was completely clean. Learn more ways how to distress chalk paint in this post.
Then we finished it off with three coats of waterbased polyurethane. It gave it a nice satin finish that’s easy to clean and just perfect for furniture. Check out more ways how to seal chalk paint in this post. Here’s spray polyurethane vs brush on polyurethane if you wanna see how these two application methods compare.
Then, we got some dark hardware and just put these knobs back in on the cabinet doors. I had to drill some new holes for them. Check out our more detailed guide on how to change hardware here.
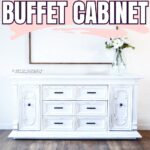
And now it’s done. Look at how beautiful this looks! It’s not heavy anymore – now it’s light, bright, and airy. A few fresh white coats made such a difference! If you want to use milk paint instead, learn how to milk paint a buffet cabinet here.


More Before and After Makeovers
See All >
Click any of these “before” photos below to view the “after” of that makeover.


How To Paint A Buffet Cabinet
We'll show you how to paint a buffet cabinet for a quick and budget friendly way to give it a fresh new look.
Materials
Tools
Instructions
- Clean the surface of your buffet cabinet with Krud Kutter to remove any dirt, grime, or grease. It's important to start with a clean, smooth surface.
- Fill in hardware holes with Bondo so you can drill new holes for the new hardware to fit perfectly. Sand down the Bondo until it's smooth and flush with the surface around it.
- Scuff sand the whole piece by hand using 220 grit sandpaper, just running it over everything to help the paint and primer stick. Clean off the dust with a vacuum and a damp rag.
- Spray 2 coats of clear shellac primer on the entire buffet cabinet. Allow it to dry for 1 hour between coats.
- Mix Behr Pure White with calcium carbonate and water to make homemade chalk paint. Prep your workspace by laying down a drop cloth and taping off any areas you don't want to get coating on.
- Spray 4 to 5 coats of paint onto the buffet cabinet. White needs more coats for full coverage.
- Once the paint is completely dry, use a fine grit sandpaper to lightly distress any areas you want to give a vintage look. Clean off the dust with a shop vac first and then a tack cloth to make sure the piece is completely clean.
- Spray 3 coats of waterbased polyurethane that is 5-10% thinned. This gives a nice satin finish that's easy to clean and just perfect for furniture.
- Drill and add new hardware or reattach the old ones if you're keeping the same look.
- Painting a buffet cabinet is now complete! Now, it’s light, bright, and airy, making it the perfect addition to your dining room or kitchen space.
Recommended Products
As an Amazon Associate and member of other affiliate programs, I earn from qualifying purchases.


More Painted Furniture Makeovers
- Vintage Buffet Makeover
- Painting an Antique Buffet
- Rolling Buffet Cart Makeover
- Dining Table Makeover Ideas
Follow us on YouTube to get more tips for painting furniture. Or share your project with us on our Facebook Group and be part of our community. See you there!