How to Thin Paint for a Sprayer
When using a paint sprayer on furniture, it’s important to know how to thin paint for a sprayer in order to get the best results. A paint sprayer can be a game-changer when it comes to painting furniture but you’ll need to make adjustments beforehand to make sure it works properly.
In this guide, we’ll go over the steps for thinning paint so you can use your sprayer with confidence and get a smooth, professional finish.
Painting furniture can be a tedious task, but using a sprayer can make it easier and give you better results. If you’re thinking, can a beginner use a paint sprayer? – read my take here! However, if you don’t know how to thin your paint, you may encounter some common issues.
Your sprayer may not spray the paint at all, or it may come out too slowly, resulting in an uneven finish. Your paint will also have a lot of bumpy texture in it if you don’t thin it properly.
Thinning your paint is especially important when using an HVLP (high volume, low pressure) paint sprayer. If you’re using an airless sprayer, you may not need to thin. So, we’ll walk you through the steps of thinning and provide some helpful tips along the way.
Supplies Used for Thinning Paint for Sprayer
As an Amazon Associate, I earn from qualifying purchases. I also may earn from other qualifying purchases with other companies or get free product to review and use. All opinions are my own.
- Water-Based or Oil-Based Paint
- Paint Thinner (Water or Mineral Spirits)
- Viscosity Cup
- Timer
- Measuring Cup
- Stir Stick
- Paint Filter
- Paint Sprayer
- Scrap Wood or Cardboard for testing spray consistency
Choose the Right Paint Thinner
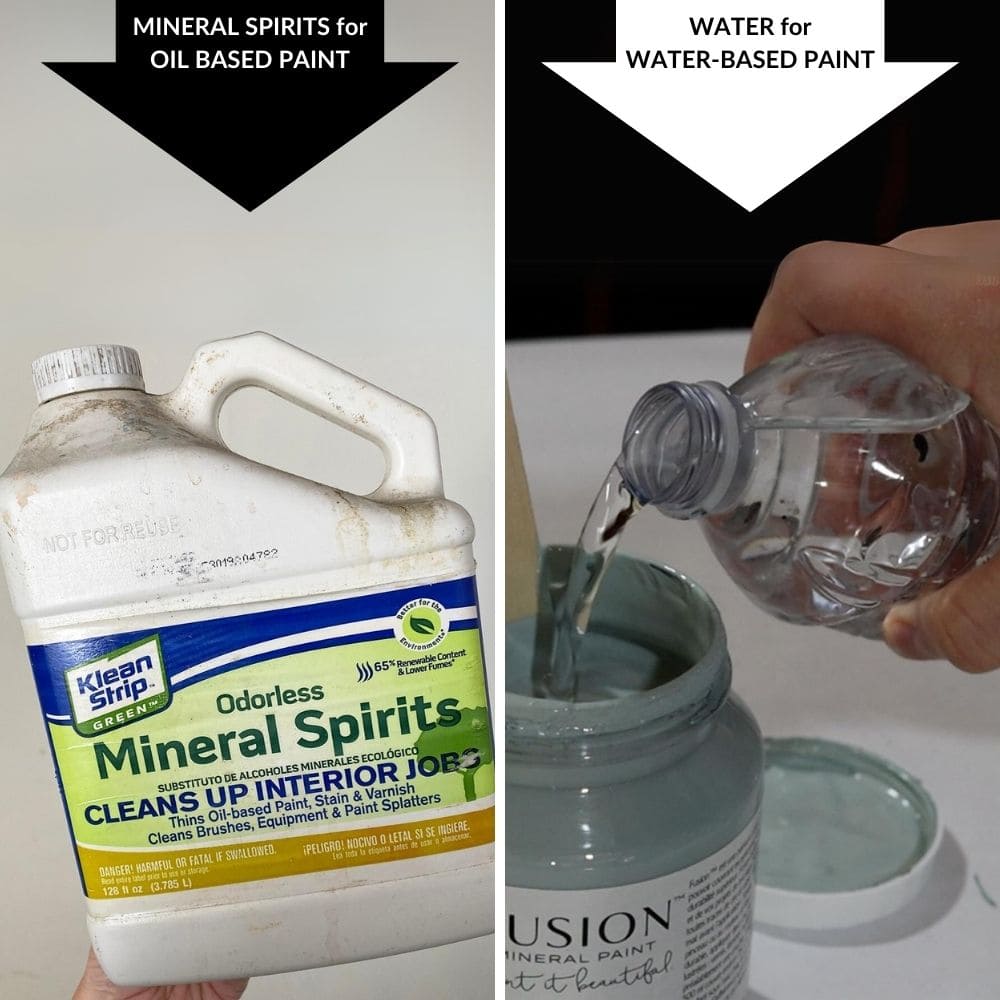
First and foremost, make sure you’re using the right paint thinner for your specific type of paint for furniture. Using any type of thinner will not do the trick. Using an incorrect thinner can not only prevent your paint sprayer from working properly, but it can also ruin the quality of your paint.
So, how do you know which paint thinner to use? It’s actually pretty simple. If you’re using water-based paint, you’ll want to use water as your paint thinner. On the other hand, if you’re using oil-based paint, you’ll need to use a mineral spirit or paint thinner.
You can also check the back of your paint container for specific instructions on what type of paint thinner is recommended.
This is important to follow because, again, using the wrong thinner can result in poorly thinned paint, causing issues with your sprayer and resulting in an uneven finish. So don’t skip this step!
Determine Thinning Ratio
So you’ve got your paint and thinner ready, now it’s time to determine the thinning ratio for your sprayer. If you have a viscosity cup included with your HVLP paint sprayer for furniture, you can use that as a guide for getting the perfect consistency.
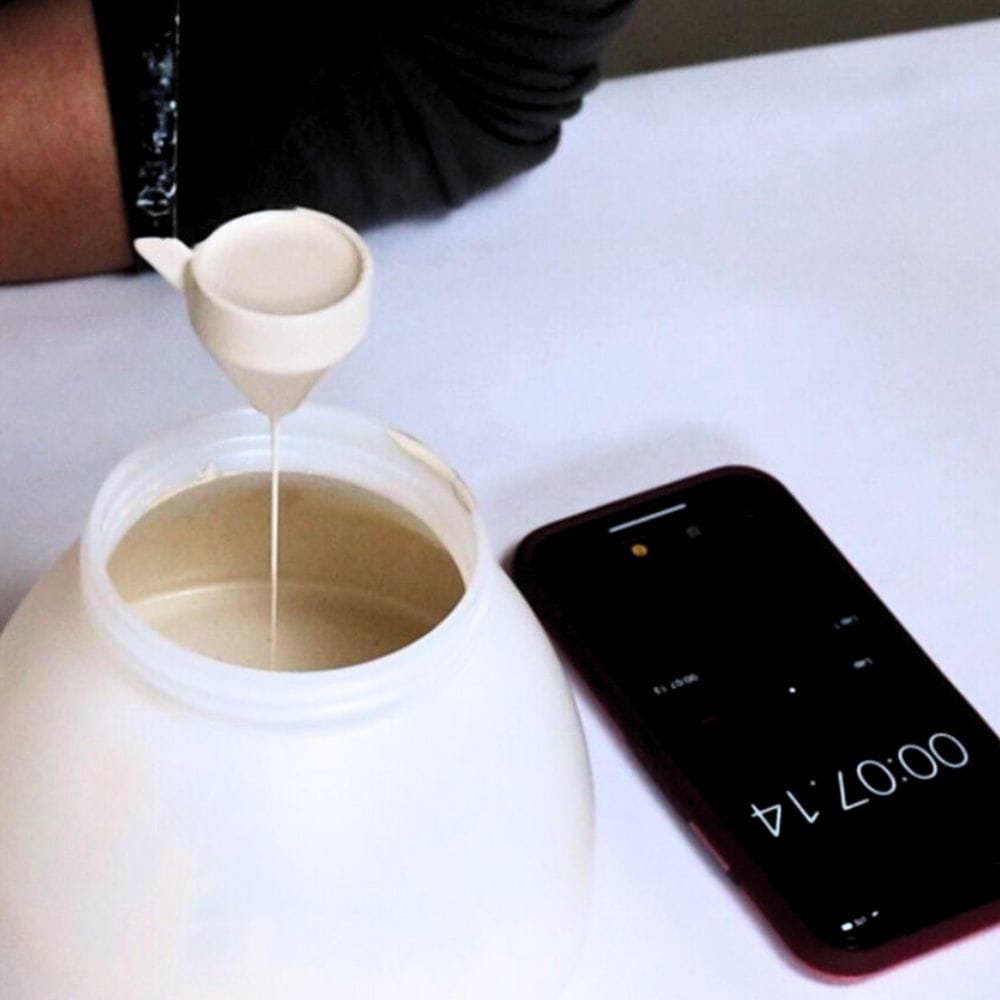
Shoot for a run out time of 30-40 seconds, meaning the paint should run out of the cup in that time frame. I have found this to be the best consistency for a smooth, even finish.
Don’t have a viscosity cup? You can start by adding 10% thinner to your paint and mixing it well. Then, test the spray on a piece of cardboard or scrap wood. If you like how it sprays, then you’re good to go!
But if not, I personally like to add another 5% more thinner. So for example, if you mixed 16 ounces of paint, add another 1.6 ounces of water. Just remember to not exceed a 20% thinner to paint ratio.


Check out our guides on how to thin paint for a Wagner sprayer and how to thin paint for Wagner FLEXiO Sprayer especially if you’re using Wagner models. If you’re using latex paint, here’s thinning latex paint for Wagner sprayer.
Mixing the Paint
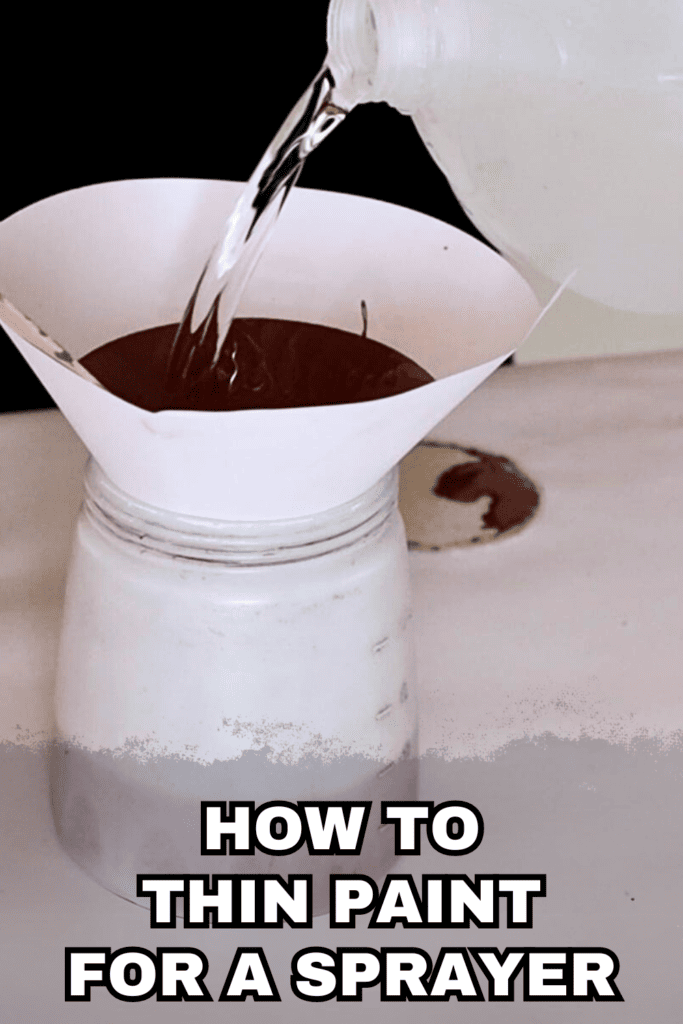
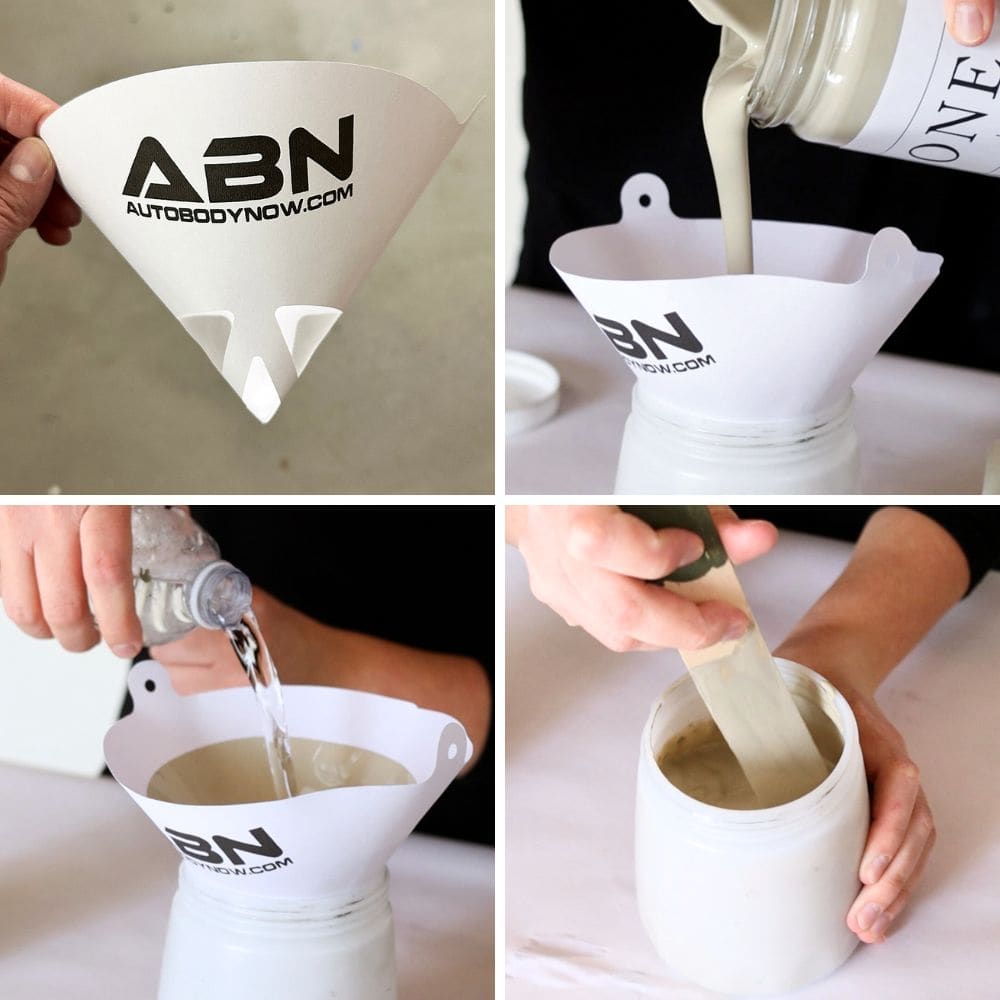
Now it’s time to mix the paint! Grab your paint filter and place it on top of the sprayer’s container. Filter the paint through the filter to remove any debris or dried paint. Trust us, this will save you from clogging your sprayer and wasting time cleaning it out.
Would you like to save this?
With the filter in place, add your thinning agent into the paint. This could be water or mineral spirits depending on what type of paint you’re using. Be sure to mix well with a stir stick. You want to make sure the paint and thinner are fully incorporated for a smooth consistency.
See, mixing the paint wasn’t so hard after all!
Testing the Consistency
Once you’ve mixed your paint, it’s time to assemble your sprayer. Before you start painting, it’s important to test out the sprayer so you can make any necessary adjustments. Spray the paint onto a piece of cardboard or scrap wood to see how it comes out.
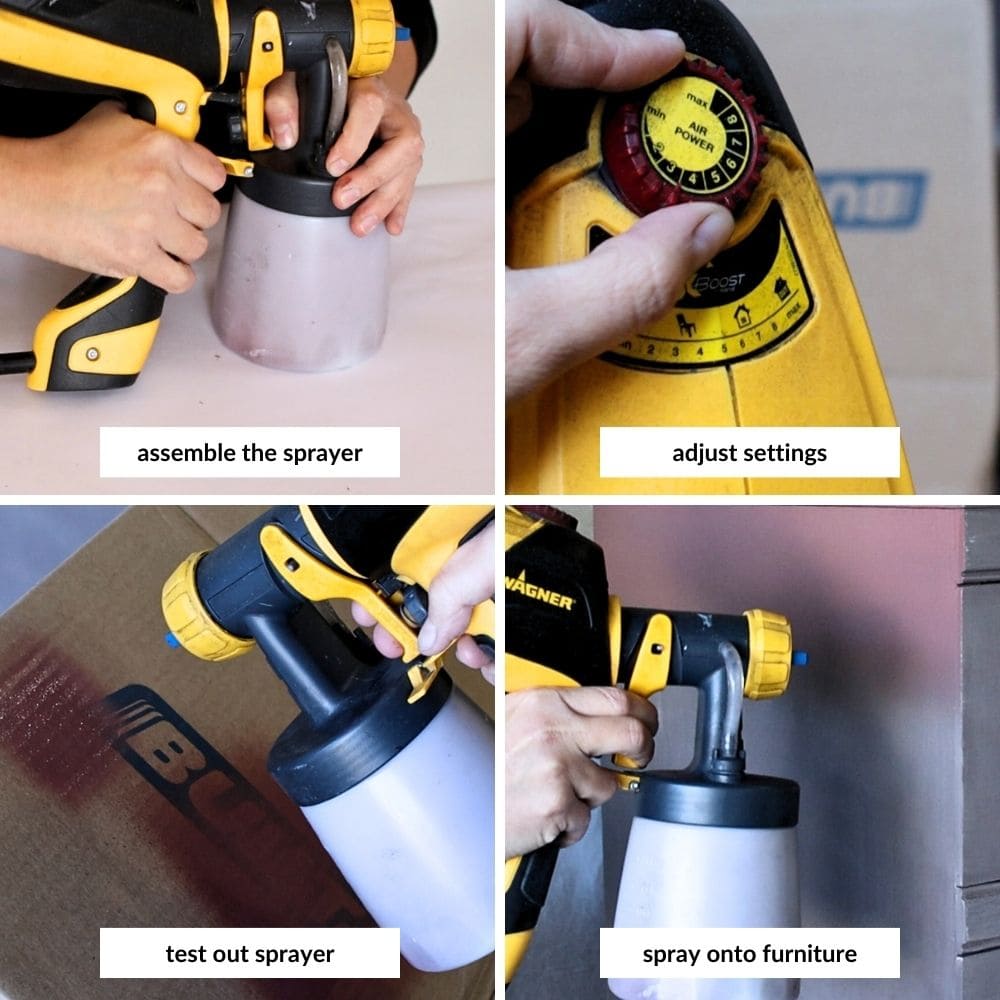
You can control the power, paint flow, and tip of the sprayer so the paint is coming out just how you want it. And again, don’t do this directly on your project, until you’re confident in the spray pattern. It’s better to take the extra time now than have to fix mistakes later on.
Adjust the thinning ratio if needed, and once you’re satisfied with the spray, you’re ready to start painting!
Adjustments and Final Tips
Alright, let’s talk about some adjustments and final tips for successful paint thinning and application!
First off, it’s important to not over-thin your paint. If you find that it’s coming out too quickly when you spray, and you have your paint flow settings on low, then that means it’s too thin. In this case, simply add more paint to your mixture to thicken it back up.
If the coating is not coming out at all when you spray, then it’s possible that it’s too thick. You can add some more thinner to the mixture and test it out to see if that solves the issue. It may take some trial and error to find the perfect consistency, but don’t worry, you’ll get there!
Here’s Wagner FLEXiO not spraying tackling more about this issue. You can also read our Wagner Paint Sprayer troubleshooting blog post for more tips and information on common sprayer problems.
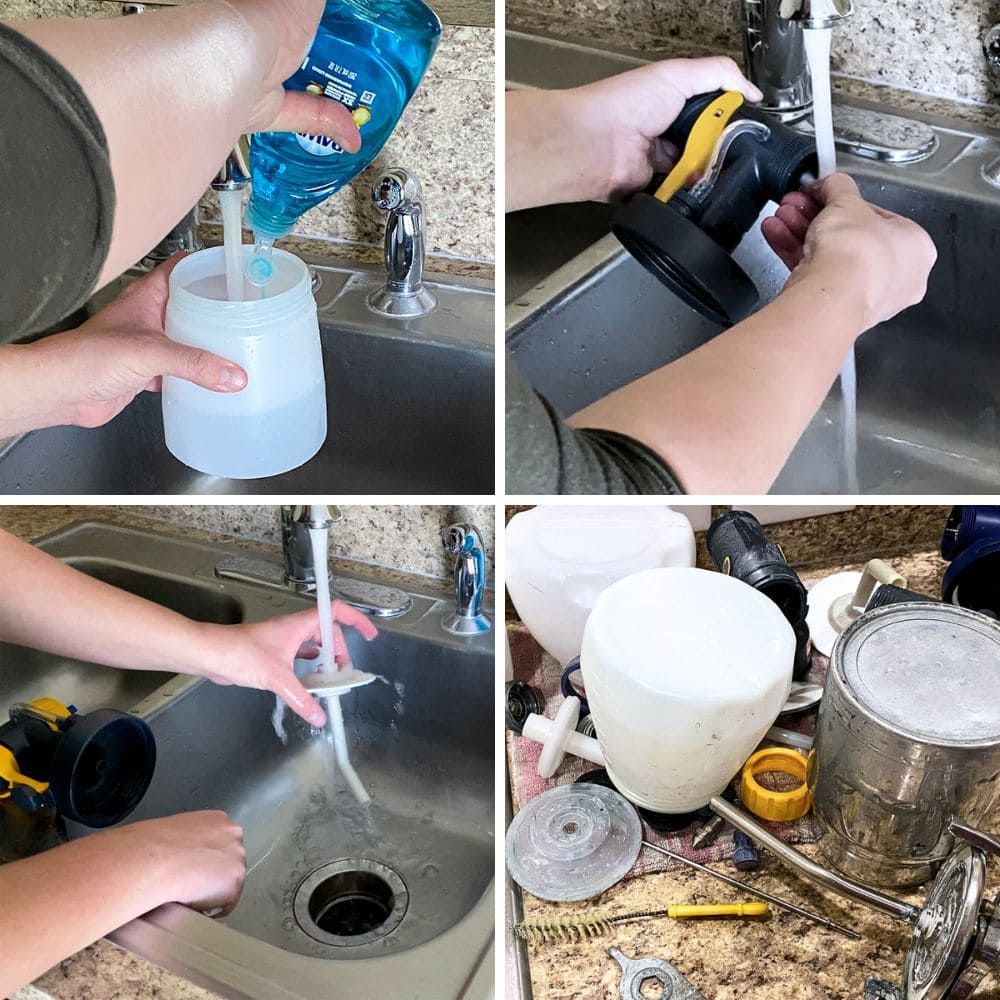
And don’t forget to clean your sprayer thoroughly after use for its longer lifespan and smoother operation for future projects. Here’s how to clean a paint sprayer and what to use to clean paint sprayer to guide you through the cleaning process.
Remember, practice makes perfect when it comes to using a paint sprayer, and don’t be afraid to make adjustments along the way. With the right thinning ratio and proper application techniques, you’ll definitely get that smooth, professional finish on your furniture.

How to Thin Paint for a Sprayer
It's important to know how to thin paint for a sprayer in order to get the best results when using a paint sprayer on furniture.
Materials
- Water-Based or Oil-Based Paint
- Paint Thinner
- Water or Mineral Spirits
- Paint Filter
Tools
- Viscosity Cup
- Timer
- Measuring Cup
- Stir Stick
- Paint Sprayer
- Scrap Wood or Cardboard for testing spray consistency
Instructions
- Determine the type of paint you are using and choose the appropriate thinner, such as water for water-based paint and mineral spirits for oil-based paint.
- Use a viscosity cup if available with your paint sprayer. Aim for a run out time of 30-40 seconds to get the ideal consistency for a smooth, even finish. If you don't have a viscosity cup, start by adding 10% thinner to your paint and gradually increase if needed.
- Filter the paint through a paint filter to remove any debris or dried particles. This will prevent cl ogging in your sprayer and save you time on cleaning.
- Mix the paint and thinner together thoroughly with a stir stick to make sure they are fully incorporated for a smooth consistency.
- Assemble your sprayer and test the consistency of the paint by spraying onto a piece of scrap wood or cardboard before starting your project. Adjust the paint flow, power, and tip settings on your sprayer as needed for a desired spray pattern.
- Make adjustments to the thinning ratio if necessary, but be careful not to over-thin the paint. Adding too much thinner can result in a runny consistency.
- When you're satisfied with the spray, start painting your project.
- Clean your sprayer thoroughly after use to maintain its lifespan and guarantee smooth operation for future projects.
Recommended Products
As an Amazon Associate and member of other affiliate programs, I earn from qualifying purchases.


More Paint Sprayer Tips
- Wagner Paint Sprayer Troubleshooting
- How To Use A Paint Sprayer
- Why I Use a Paint Sprayer
- Spraying Fusion Mineral Paint
- Wagner FLEXiO 595 vs 3500