How To Fix Nicks In Wood Furniture


Are you tired of seeing unsightly nicks and scratches on your beloved wood furniture? Because we are here to show you how to fix those pesky imperfections! In this guide, we will be diving into the world of repairing old furniture and providing an easy solution on how to fix nicks in wood furniture.
These small dings and damage in wood furniture can be a real eyesore, but don’t worry, we can totally fix them!
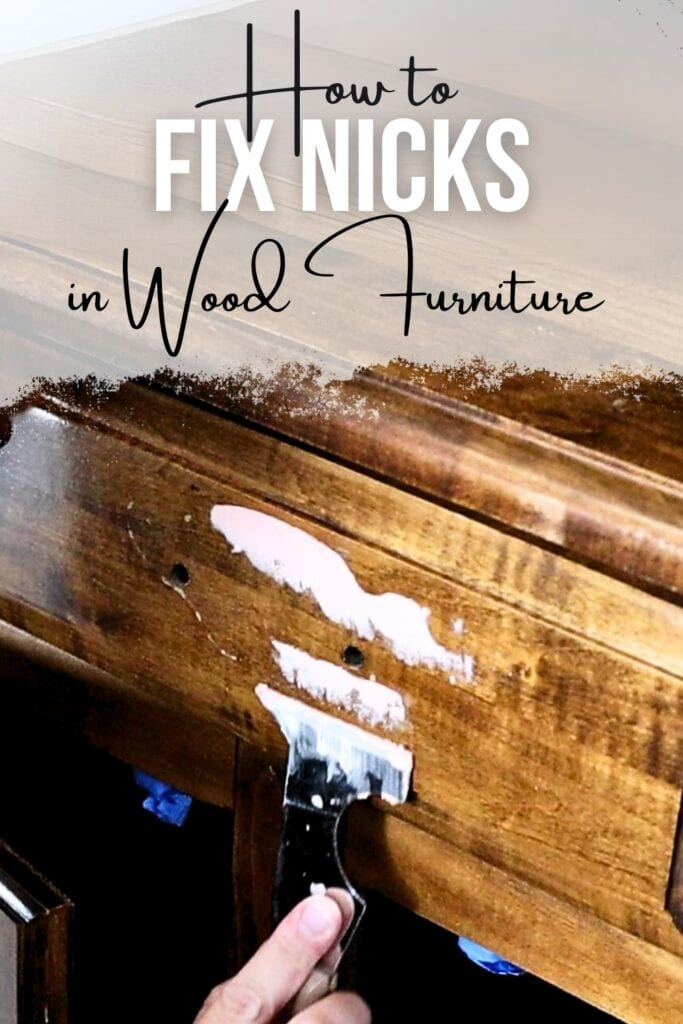
It’s no secret that wood furniture is used in most if not all homes. Its timeless aesthetic and durability make it a popular choice for many. However, even with the best care, wood furniture is bound to get nicks and scratches over time. These imperfections can make your once beautiful piece look worn out and aged.

Whether it’s a beloved heirloom or a new piece you just can’t bear to part with, knowing how to repair nicks in your wood furniture will surely come in handy!
Supplies Used to Fix Nicks In Wood Furniture
As an Amazon Associate, I earn from qualifying purchases. I also may earn from other qualifying purchases with other companies or get free product to review and use. All opinions are my own.
- Wood Filler/Bondo Wood Filler
- Putty Knife
- Sandpaper
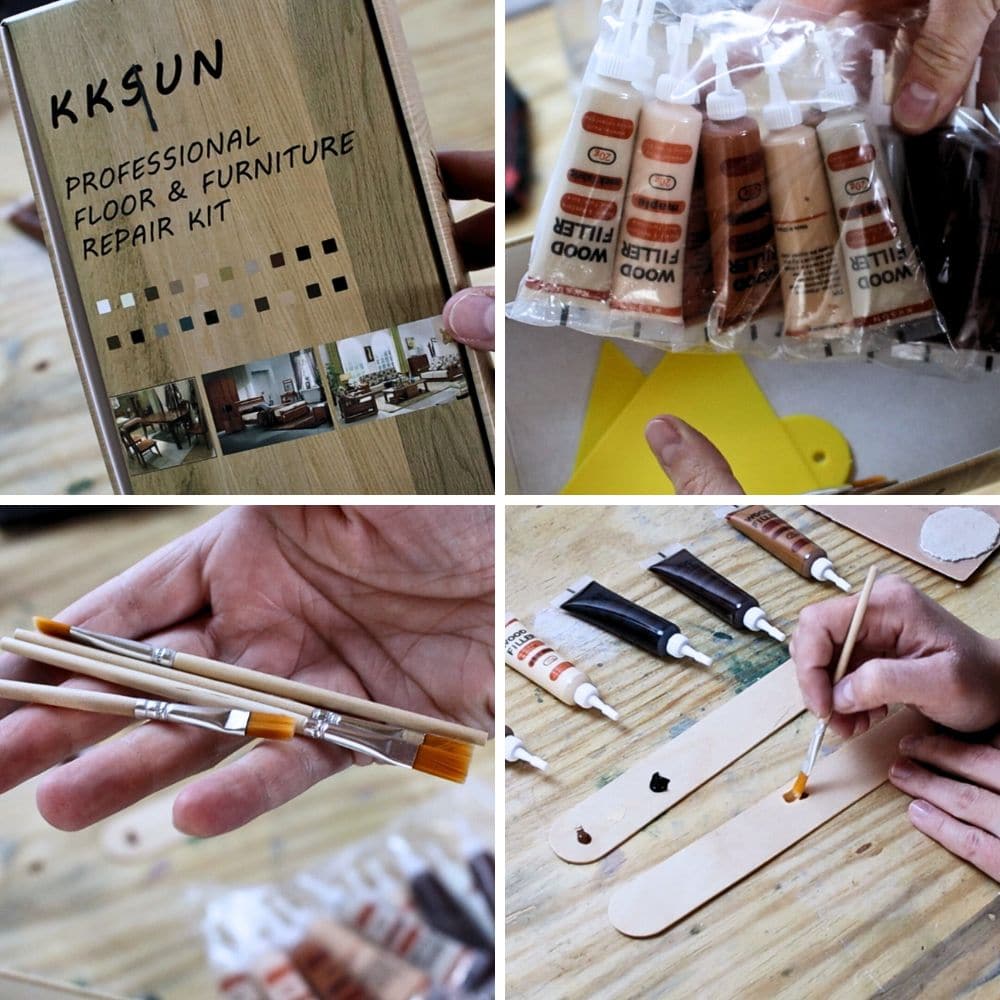
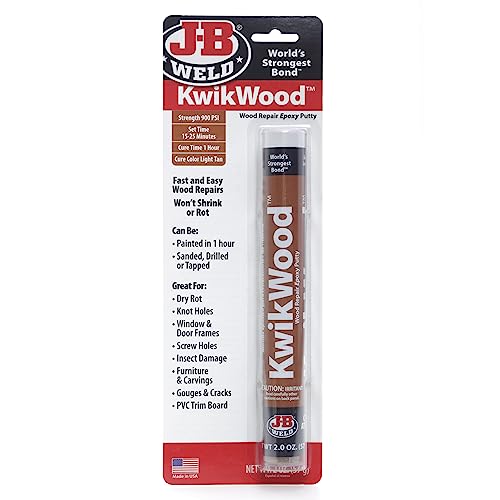
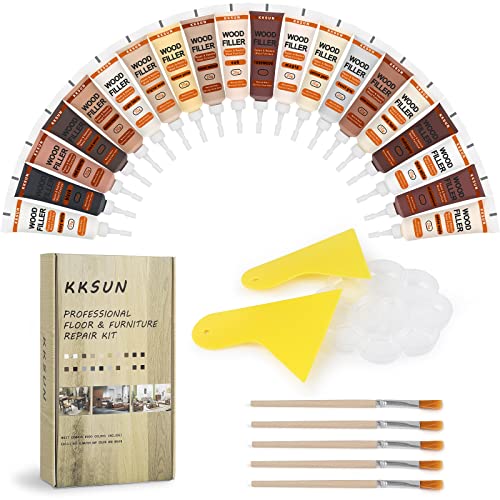
- Wood Repair Kit
- Old English
- Paint
- Brush/Painting Sponge
- Lint-Free Rag
- Topcoat
Fill Nicks with Wood Filler
When it comes to fixing nicks, wood filler is your best friend. This putty-like substance is specifically designed to fill in small holes and cracks in wood. But before using wood filler on your furniture, make sure the surface is clean and free from dust and debris.
You want the filler to properly adhere to the wood and create a seamless finish, so cleaning as well as sanding the area before application is important. Here’s our guides on cleaning furniture before painting and sanding before painting furniture to help you with the prep work.
To use the wood filler, simply scoop a small amount onto a putty knife and gently press it into the nick. It’s better to overfill the area slightly.
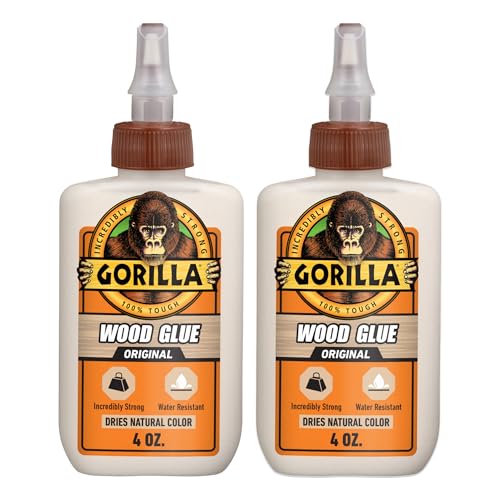
You can also use Kwikwood as another great alternative to wood filler! Read this post to learn more about How to Use KwikWood.
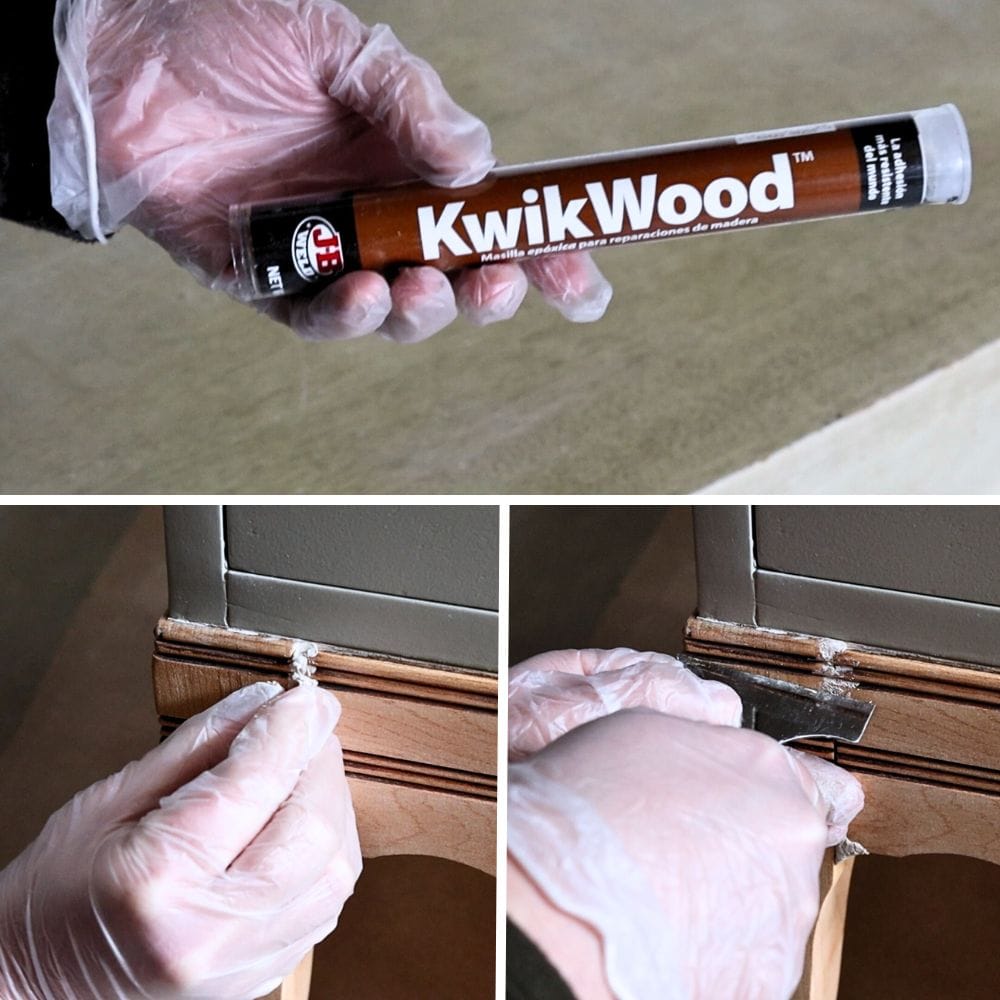
If you’re using Bondo Wood Filler, make sure to mix the base and hardener before application.
Work quickly as it dries fast, usually within 30 minutes. We have tried and tested Bondo wood repair so you can be sure it works! Don’t worry about overfilling the nick with wood filler – this allows for a smoother finish once sanded!
If there are cracks in the wood and you don’t know how to fix them, here’s how to fix cracks in wood before painting.
Sand Wood Filler Flush with Surface
After the wood filler has dried, it’s time to sand it down. Start by using medium grit sandpaper (around 150 grit) and gently sand the surface of the filler until it is smooth and even with the surrounding wood.
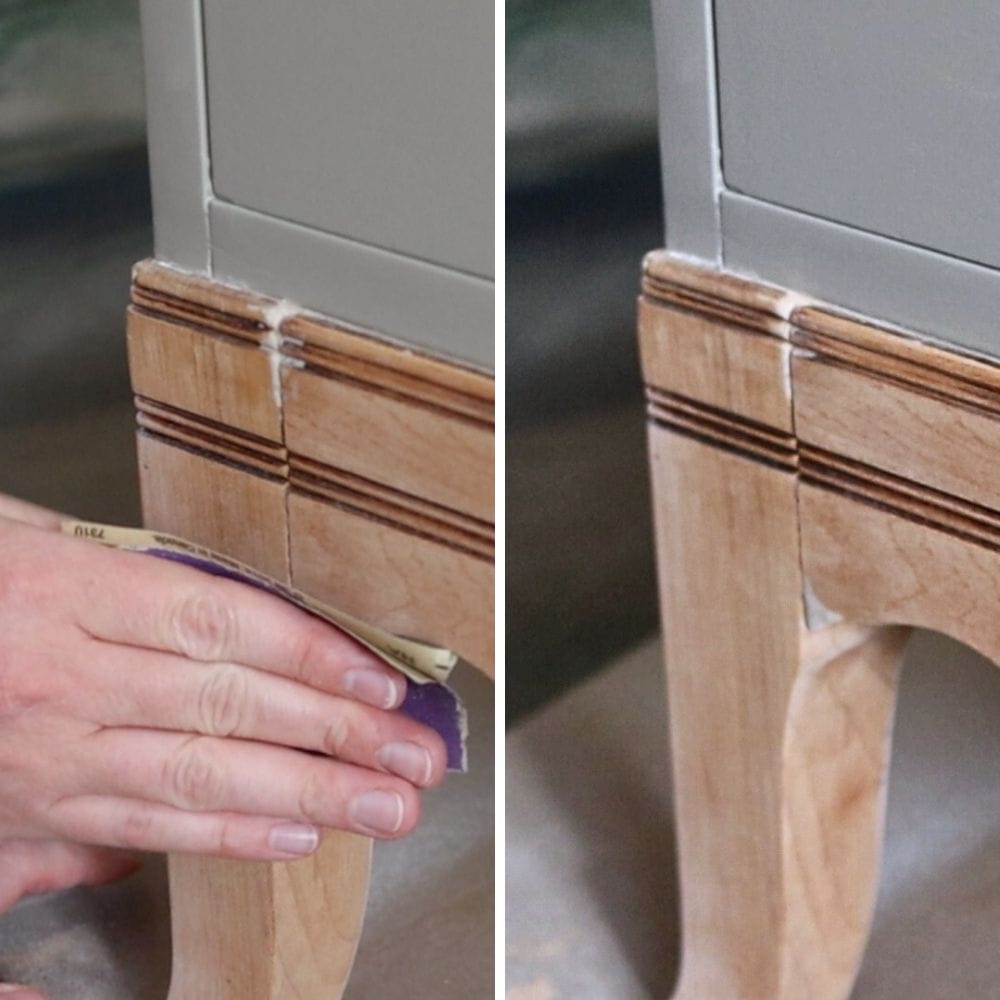
Make sure to keep checking your progress to make sure that the surface is completely flush. Once you are satisfied with the smoothness of the surface, clean up any dust or debris and you’re ready for the next step.
Paint or Stain Wood Filler
Painting or staining wood filler is an important step in repairing nicks and scratches on wood furniture. It not only helps to cover up the repair, but also blends it more seamlessly with the rest of the surface for a natural finish.
Using paint or stain that closely matches the original color of the wood will guarantee that the repair does not stand out. Here’s staining wood filler to learn more about the different techniques for staining wood filler and choose the best one for your project.
How to Stain Wood Filler
You can use a wood repair kit that offers a variety of colors to choose from or create your own custom color by blending different shades.
Would you like to save this?
Start with the lighter colors and gradually work your way up to the darker shades for a more realistic appearance. Use the brushes provided in the kit to blend the colors together and get the best result.
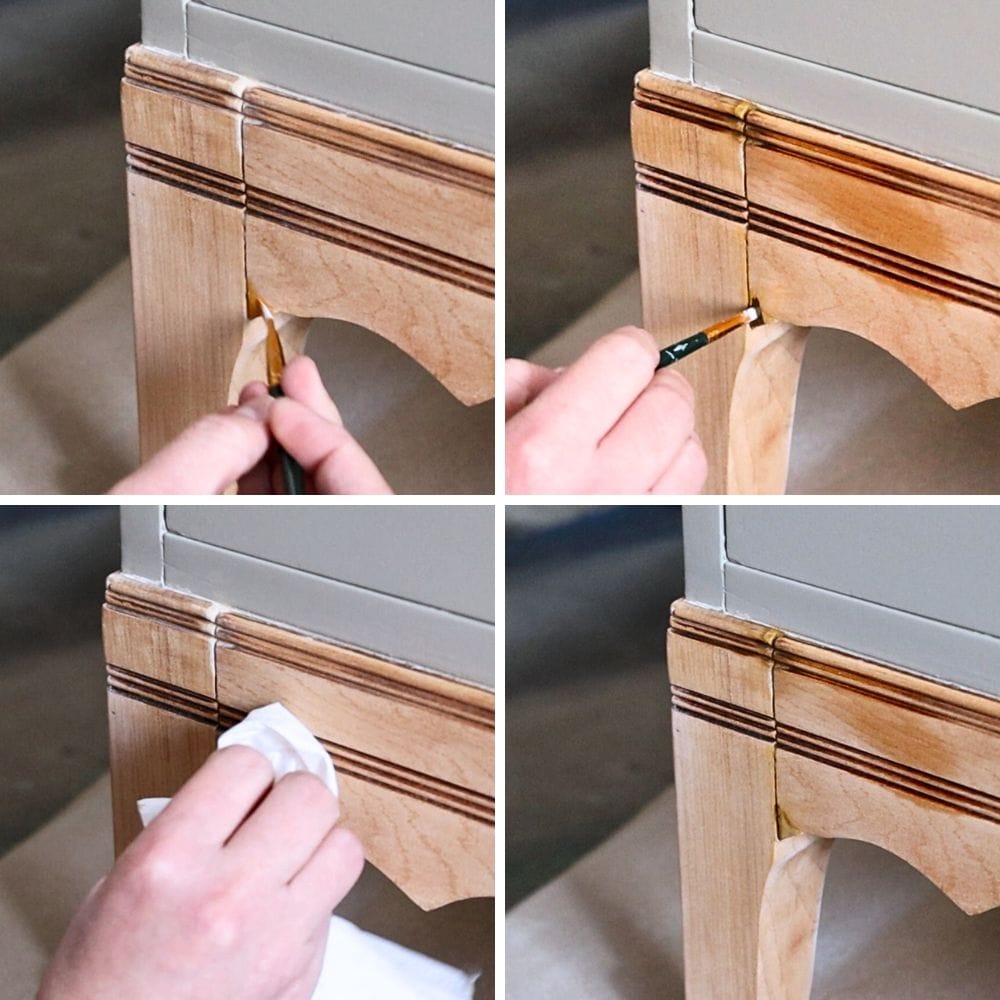
Test it on a popsicle stick or other scrap piece of wood first to make sure you have the right color before applying it to your furniture. Once you’re satisfied, carefully paint or stain over the filled area and let it dry completely. On top of the repair kit, you can apply Old English – it’s a dark oil that can be rubbed onto the wood.
This product helps to hide scratches and dings by staining them dark, making the repair even less noticeable. Simply wipe it over the repaired area for a more flawless finish. We have a wood stain repair tutorial you can easily follow, so check it out! For more details, here’s what does Old English do to wood, and here’s our antique dresser makeover where we used this product.

How to Paint Wood Filler
If you want to use paint instead of stain on your wood filler, there are a few things to keep in mind. First, choose a chalk paint or mineral type paint that can be thinned out without affecting its performance.
Once you have your paint, mix it with water at a 1:1 ratio until the consistency is similar to regular wood stain. Before starting to paint, make sure to mix enough for your whole project, as running out halfway through can result in an uneven finish.
Using a brush or painting sponge, apply the DIY stain onto the wood in thin layers, working quickly to avoid splotchy areas. Within a minute of applying the paint, use a clean lint-free rag to wipe off any excess.
Let each coat dry completely before adding more layers until you get your desired color and coverage. Our post on how to stain wood with paint will guide you further on this technique.
Topcoat Stained or Painted Wood
Once you have finished staining or painting your wood filler, it is important to topcoat the surface. This will not only protect the wood and paint from damage, but also make it easier to clean if it gets dirty.
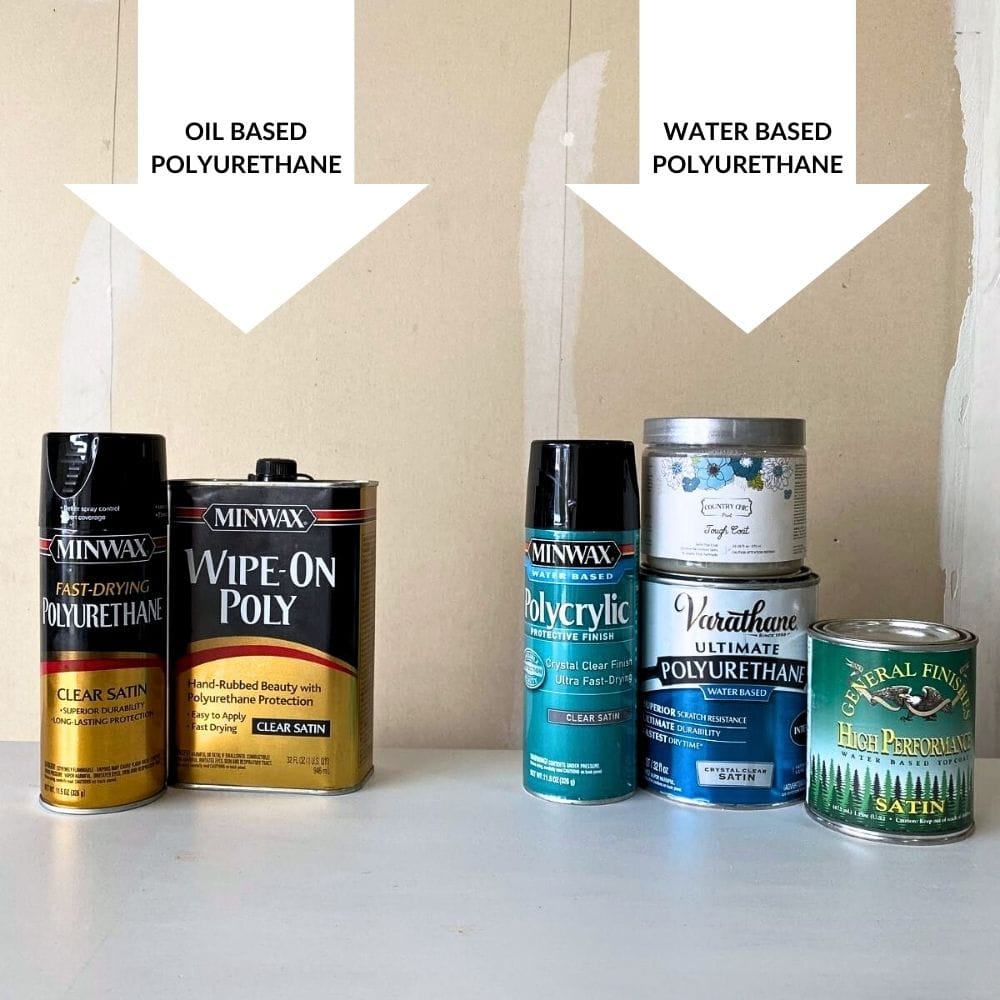
To topcoat, use a waterbased polyurethane and apply 3 coats to your stained wood. If you are using dark colors, an oil based polyurethane can also be used but for light colors, stick to waterbased polyurethane to avoid yellowing.
After using a topcoat for painting furniture, the nicks and scratches on your wood furniture will be virtually unnoticeable.
This final step not only guarantees a long-lasting repair, but also helps to maintain the appearance of your furniture for years to come. Whether you’re using stain or paint, don’t forget this important finishing touch!
Nicks and scratches on wood furniture are a common problem, but with the right supplies and techniques, they can be easily repaired.
Using wood filler, sanding it flush with the surface, and painting or staining over it will make your piece beautiful and spotless again. With these tips, we hope you’ll be able to confidently repair nicks in your wood furniture.

How To Fix Nicks In Wood Furniture
Let's dive into the easy solutions on how to fix nicks in wood furniture to keep those unsightly nicks and scratches away.
Materials
Instructions
- Before using wood filler, make sure the surface is clean and free from dust and debris to guarantee a proper finish.
- Simply scoop a small amount of wood filler onto a putty knife and gently press it into the nick, slightly overfilling the area for a smoother finish once sanded. If using Bondo Wood Filler, be sure to mix before application as it dries quickly.
- After the wood filler has dried, use medium grit sandpaper to gently sand down the surface until it is smooth and flush with the surrounding wood. Keep checking progress for a completely even surface.
- Use a wood repair kit to match the color of your wood. Test and color match on a scrap piece first before applying it to the filled area.
- For a more flawless finish, apply Old English on top of the repair - a dark oil that helps hide scratches and dings by staining them dark.
- If using paint instead of stain, choose a chalk or mineral type paint that can be thinned with water. Mix them in 1:1 ratio until similar to wood stain consistency.
- Apply the DIY stain in thin layers and wipe off any excess with a clean rag within a minute of application. Let each coat dry completely before adding more until desired color and coverage.
- Topcoat the stained or painted wood with waterbased polyurethane to protect it from damage and make it easier to clean. For dark colors, use oil based polyurethane and for light colors, stick to waterbased to avoid yellowing.
- With these steps, your wood furniture will look good as new with virtually unnoticeable nicks and scratches!
Recommended Products
As an Amazon Associate and member of other affiliate programs, I earn from qualifying purchases.


More Furniture Repair Tips
- How To Fix A Missing Chunk Of Wood
- How to Repair Broken Trim on Furniture
- How to Repair Deep Gouges in Wood Furniture
- Best Wood Repair Putty
- How To Repair Chipped Paint On Wood

Follow us on YouTube to get more tips for painting furniture. Or share your project with us on our Facebook Group and be part of our community. See you there!