How To Repair Chipped Paint On Wood
If you have an old piece of furniture with worn or chipped paint, don’t be quick to throw it away. In this guide, we will show you how to repair chipped paint on wood instead of getting rid of the piece altogether.
This is a cost-effective and sustainable solution for repairing old furniture, as well as a fun project for DIY-ers. Learning this skill is something that can come in handy for future projects and can save you money in the long run.
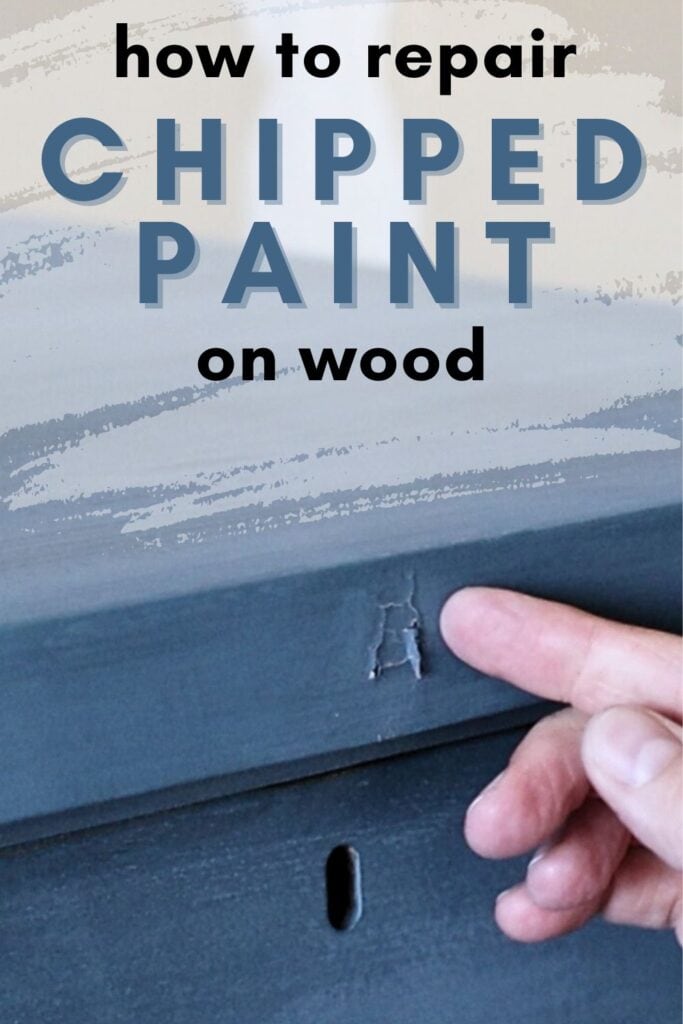
One of the most common problems with old furniture is dealing with chipped paint. Over time, painted wood can start to chip and peel due to wear and tear or other factors like moisture and sunlight. This can make the furniture look unappealing and worn out.

However, repairing chipped paint on wood is not as complicated as it may seem.
You can easily restore the paint from chipped areas and blend it seamlessly with the existing paint to give your furniture a fresh new look.
Repairing chipped paint is not just about fixing the appearance of the furniture, but also preserving its value and memories.
Supplies Used to Repair Chipped Paint on Wood
As an Amazon Associate, I earn from qualifying purchases. I also may earn from other qualifying purchases with other companies or get free product to review and use. All opinions are my own.
- 220 or 150 Grit Sandpaper
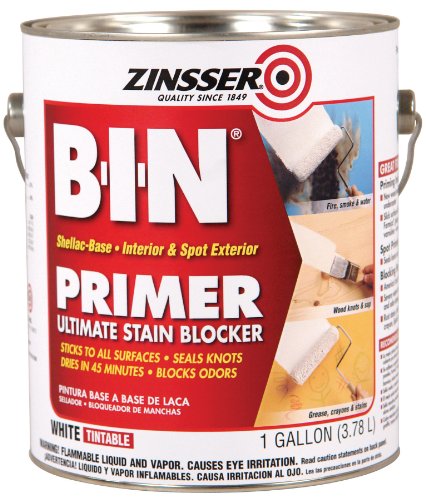
- BIN Shellac Primer
- Touch-up Paint
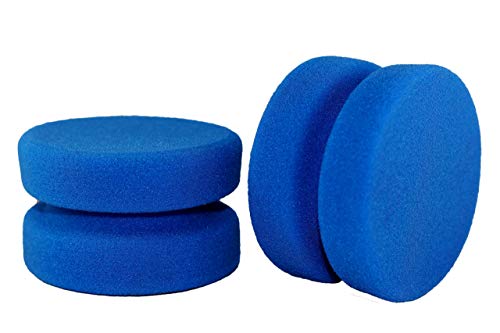
- Small Brush or Sponge
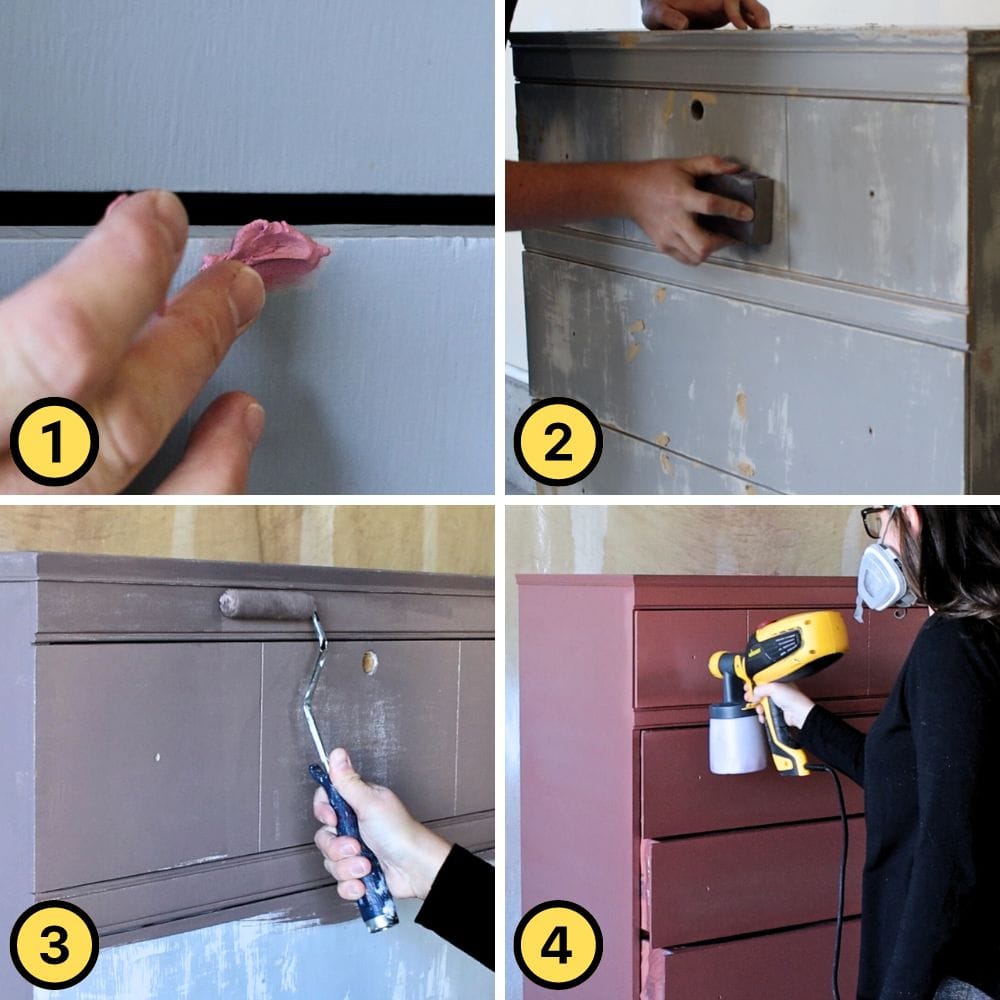
Sand and Prime Chipped Wood Area
Before starting any repairs, it is important to properly prepare the chipped area on your wood furniture.
Sanding the chipped area helps to smooth out any rough edges or bumps and create a clean surface for the primer and paint.
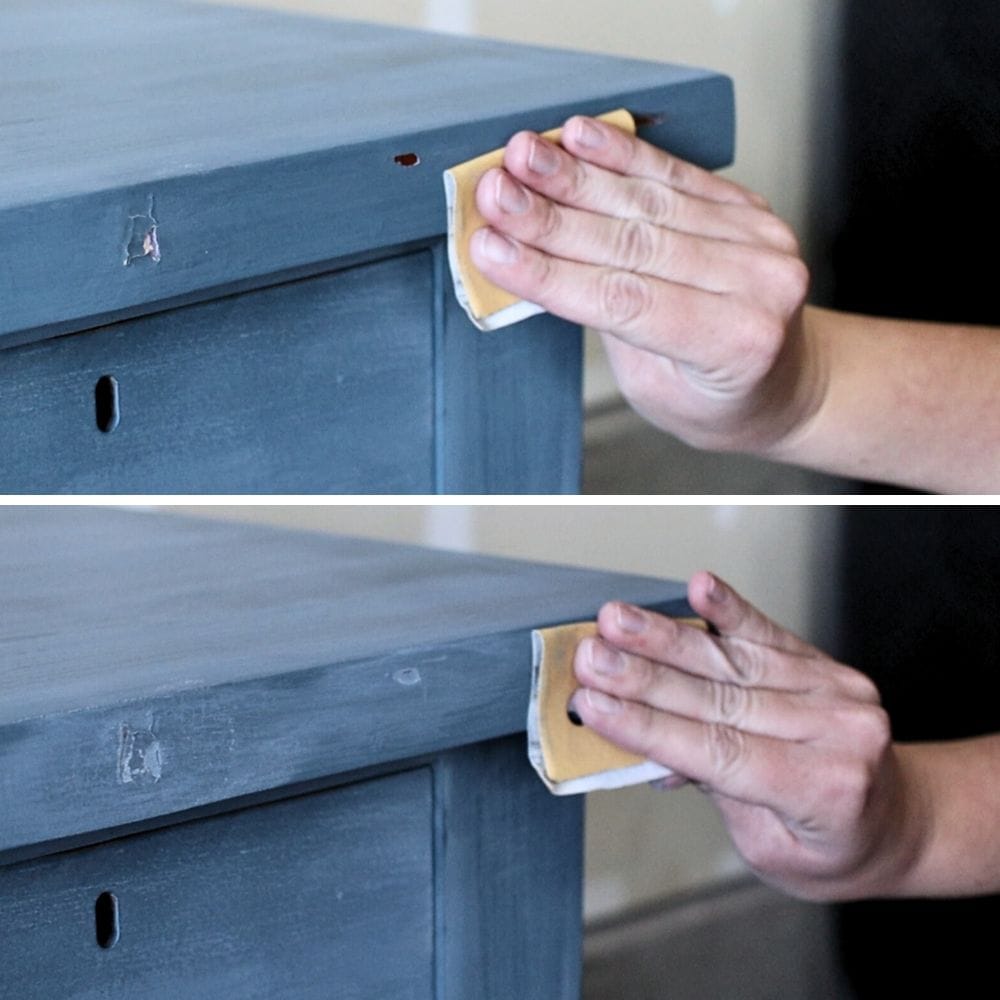
Using 220 or 150 grit sandpaper, gently sand the chipped area until it is smooth to the touch. Make sure to wipe away any dust or debris before moving on to the next step.
This will also help the primer and paint adhere better. Sanding for paint prep is also key to a smooth and long-lasting finish.
Next, apply a layer of BIN shellac primer to the sanded area. This type of primer for painting furniture is perfect for covering up small imperfections, creating a smooth base for the paint, and stopping stains from coming through paint.
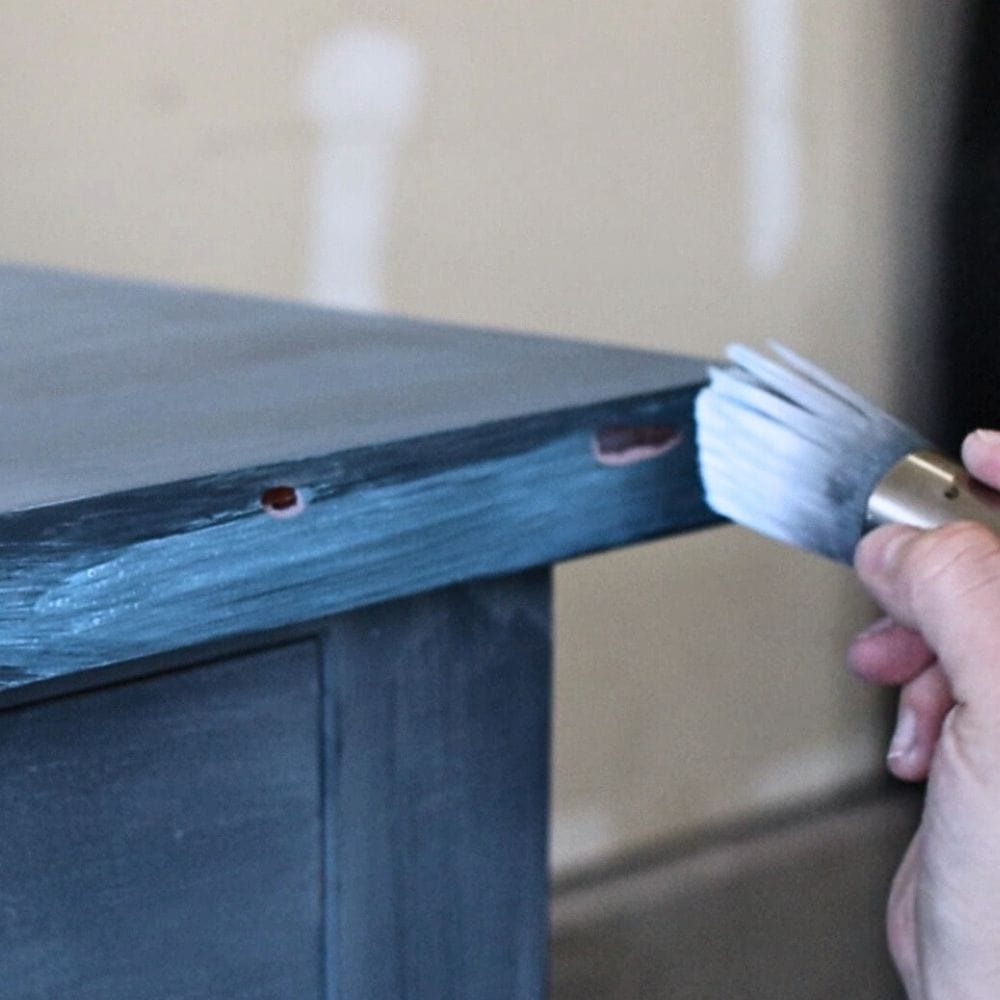
Allow the primer to fully dry before proceeding to painting.
Paint The Chipped Wood Area
Before anything else, make sure you have the right type of paint for your furniture. It will be a lot trickier to spot treat the chipped paint if you do not have the exact paint and paint color.
If you don’t know what type of paint was used before, you can bring a small sample to a paint store like Sherwin Williams or Home Depot and have them color match it. This will help your touch-up paint to blend in as seamlessly as possible.
But even if you do get the exact same paint and color, there may still be some slight differences in the touch-up paint compared to the existing paint.
This is because paint can change color over time due to factors such as exposure to sunlight and moisture, and the way it was originally applied.
However, with proper technique and blending, these differences can be minimized to give your furniture a refreshed look.
When applying the paint, make sure to use thin layers and blend it in with the existing paint using a small brush or sponge. This will help create a seamless transition between the old and new paint.
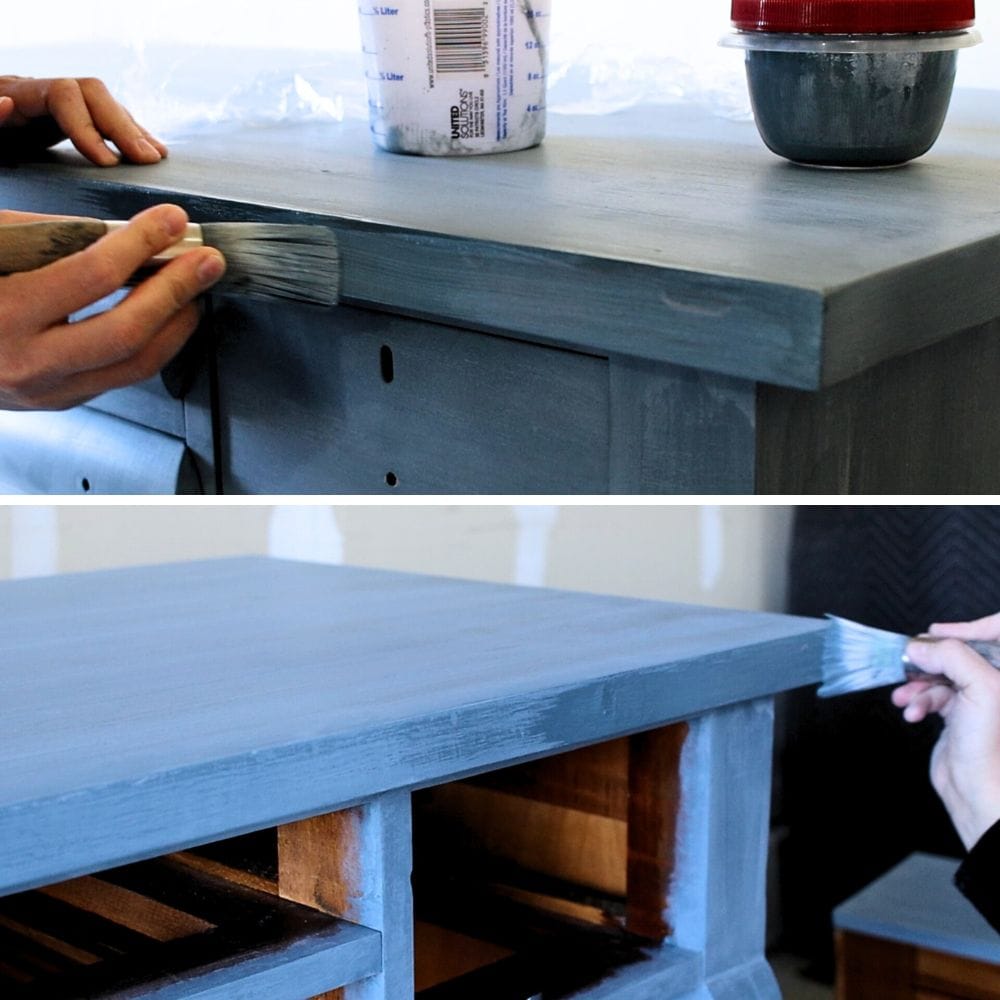
Don’t worry if it doesn’t look perfect at first, as you can always add more layers and continue blending until you are satisfied with the results.
Repainting Entire Wood Furniture
If you’re more particular about having a perfectly matching paint job on your furniture, then repainting the entire piece may be the best option for you.
This approach guarantees that not only will the chipped areas be repaired, but the entire piece will have a uniform and flawless finish.
Would you like to save this?
You can start by removing the old paint – here’s our guide on how to remove paint from furniture to help you out.
Then prepare the surface for repainting by cleaning it thoroughly. Cleaning furniture before repainting is an important step, as it removes any dirt or grime that can affect the paint’s adhesion.
After cleaning, you can then sand down the surface to create a smooth and even base for painting.
Sanding before repainting furniture not only helps the paint to adhere better but also removes any imperfections on the surface, including the chipped areas.
Once the surface is clean and smooth, you can proceed to priming, repainting and sealing the entire piece. Check out the steps of repainting furniture in detail in our post.
How long will the touch-up paint last on my furniture?
The longevity of touch-up paint on your furniture will depend on several factors such as the type of paint used, the condition of the furniture, and how well the touch-up was done.
In general, if done correctly, touch-up paint can last for years without any major signs of wear.
However, if the furniture is used frequently and experiences a lot of wear and tear, touch-up paint may need to be reapplied more often.
Additionally, factors such as sunlight exposure and moisture can also impact the longevity of touch-up paint.
How to prolong the lifespan of touch-up paint on wood furniture?
Sealing the touch-up paint with a topcoat for painting furniture can help protect it from daily wear and tear.
It acts as a barrier between the paint and any potential damage, making it last longer. Make sure to choose a topcoat that is compatible with your touch-up paint for the best results.

Another way to prolong the lifespan of touch-up paint on wood furniture is by keeping the furniture clean and free from dust and debris.
Regularly dust and wipe down the furniture to prevent buildup that can cause damage to the paint. You can also use a gentle cleaner specifically made for painted wood furniture.

Avoid placing your furniture in direct sunlight or areas with high humidity, as these factors can cause the paint to fade or peel over time.
Additionally, if you notice any more chipped areas or scratches, touch them up as soon as possible to prevent further damage and maintain the appearance of your furniture.
Properly addressing chipped paint on your wood furniture can save you from having to invest in costly repairs or replacements.
Whether you choose to spot treat the chipped areas or repaint the entire piece, following the right techniques and using quality products can help get your furniture looking as good as new.

How To Repair Chipped Paint On Wood
We will show you how to repair chipped paint on wood instead of getting rid of the piece altogether.
Materials
- 220 Grit Sandpaper
- 150 Grit Sandpaper
- Touch-up Paint
Tools
Instructions
- Identify the type of paint used on your furniture and obtain an exact match for easier touch-up application. You can color match a sample of the existing paint at a paint store for the best results.
- Prepare the chipped area by sanding it down with 220 or 150 grit sandpaper to create a smooth and even surface. Wipe away any dust or debris from sanding.
- Prime the chipped area with BIN primer for proper adhesion of the touch-up paint. Allow the primer to dry completely before proceeding with the next step.
- Using a small brush or sponge, apply thin layers of touch-up paint and blend it in with the existing paint on the furniture. Continue adding layers and blending until you get a seamless finish.
- Seal the touch-up paint with a topcoat to protect it from daily wear and tear. Allow the topcoat to dry completely before using the furniture.
Recommended Products
As an Amazon Associate and member of other affiliate programs, I earn from qualifying purchases.


More Furniture Repair Tips
- How To Fix A Chipped Wood Corner
- How To Repair Broken Wood
- How To Fill in Furniture Scratches
- How To Repair Veneer Edging
- How To Fix Nicks In Wood Furniture

Follow us on YouTube to get more tips for painting furniture. Or share your project with us on our Facebook Group and be part of our community. See you there!