Major Patio Table Makeover


If you’re looking to spruce up your outdoor space and transform it into a cozy and inviting spot for entertaining or relaxing, then this major patio table makeover is just what you need! Whether your current patio table is old and worn out or just in need of a refresh, this project will give it a whole new look and feel.
With furniture makeover ideas like this, you don’t need to spend a fortune on new patio furniture to transform your patio into a stylish and comfortable space. Let’s get started!

Welcome to Furniture Fixer Upper day, where we join 4 of our talented furniture friends and bring you brand new makeovers! I’ll link to my friend’s makeovers after our after photos at the bottom of this post! Don’t forget to check out their masterpieces!! Okay, back to our makeover!
Have you been spending more time outdoors lately and realized that your patio table could use a little TLC? If your current patio table is starting to show signs of wear and tear, don’t toss it out just yet!

Your patio table just needs a makeover, and you don’t even need to spend a lot of money to do it. And you don’t need to be an experienced DIY-er either! With just a few simple steps, you can give your old patio table a major update and make it look brand new.
Not only will this patio table makeover save you money, but it will also add a personal touch to your outdoor space. Plus, it’s a fun and easy project that you can do with friends or family over the weekend. So keep reading to see the beautiful transformation of this teak wood patio table, which you can easily recreate with your own.

Supplies Used for Major Patio Table Makeover
As an Amazon Associate, I earn from qualifying purchases. I also may earn from other qualifying purchases with other companies or get free product to review and use. All opinions are my own.
- Hex Key Allen Wrench
- Sander (Use code RAY10 to get 10% off your order)
- Sandpaper (80 Grit, 120 Grit and 150 Grit)
- Wood Glue
- Glue Syringes
- Clamps
- KwikWood
- Sunshield Oil
- Vacuum
- Tack Cloth
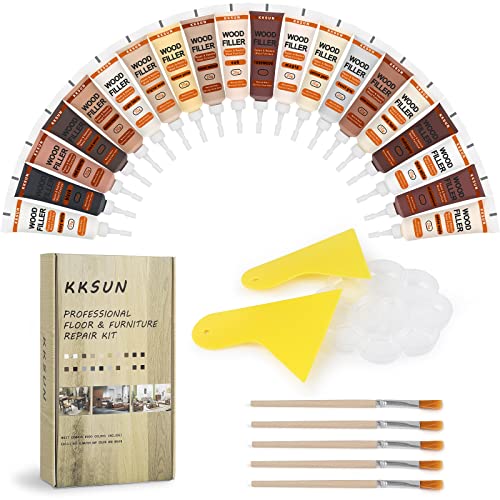
- Wood Stain Repair Kit
Tighten Wobbly Table Legs
First things first, we had to fix those super wobbly legs before we could do anything else on this table! We flipped it over and tightened the screws with a hex key Allen Wrench. Literally, that’s all we needed to do to fix them.
One screw was missing though, so we’ll need to get another screw, but they are sturdy without the extra screw! For a more detailed guide, here’s how to fix a broken table leg.

Sand Weathered Teak Wood Down
We flipped it back over and sanded the weathered gray look away! Look at how AMAZING the wood is underneath the gray!! I can’t believe I almost passed up on this table because it looked so old and worn out… but a little sanding with 80 grit sandpaper is cleaning it up so quickly!

While I used the sander and these Surfprep sanding screens, Taylor sanded in between the slats by hand. Thank goodness, because I didn’t want to do that part. Haha! We weren’t going for perfection here, just wanted to remove most of the gray look and bring out the beauty again. Learn more about this SurfPrep Electric Ray 3×4′′ Sander here!
The sanding even got rid of all the black moldy looking spots that I was worried about! I can’t even explain how satisfying all of the sanding was!


To remove any sanding swirls and make it feel extra smooth (because 80 grit sandpaper leaves the wood feeling rough still) we sanded it with 120 grit and then 150 grit sandpaper. We sanded some of it by hand to really make sure there were no sanding swirls left in the wood and to get into the tighter spaces and between the slats. And we also used the sander again with these sanding screens too. This sanding took us about 4 hours in total.
Repair Lifting Teak Veneer
This is where it started to get hairy. Some of the wood was loose on the legs… thanks to them using veneer on the legs instead of solid wood. So we glued the loose veneer down with some wood glue and these glue syringes, and clamped the veneer back down to prevent it from getting more damaged. Read this post to learn more about how to repair (and stain) chipped veneer furniture

After about an hour of waiting, we took off the clamps and then used Kwikwood to fill in some other areas on the legs where the veneer had completely chipped off. This stuff is more durable than wood and is so easy to use to fill in damage like this. Here’s how to use KwikWood to help you get the most out of this product.

But I wanted the areas we repaired to look like real wood in the end, so after filling it in I tried to use a brush to mimic the wood grain… but when it was all dry and I sanded it down the next day, the wood grain was gone since I used too much of the filler. So I used the tip and edge of a sharp screw to recreate the look of wood grain in the filler… and I think it worked!!

Sealing Teak Wood With Oil
Before I could try my hand at matching the filler to the look of the real wood, Taylor oiled the table with this Sunshield Oil that is supposed to protect the wood from getting weathered. I wanted to see what the wood looked like all finished before I tried to match the damaged spots.
Would you like to save this?

Of course, he cleaned off all the dust first with the vacuum and tack cloth. Then he rubbed the oil all over with a rag, leaving just a thin coat of oil on the surface. It soaked in and made the table have this deep rich color! Isn’t it PRETTY??
A little bit of it goes a long way, even on raw wood! We have over ½ of the bottle left over to put on it next year. And then we had to let the table dry for a day or so to see how it was really going to look in the end.
As time went on, the table lightened up some, so I’m glad I didn’t try to do this next step until I saw how the wood was really going to look.
how to repair teak veneer
Now let’s fix the legs! The goal was to make the wood filler look exactly like the wood… and that’s where this wood stain repair kit comes in. I picked a few colors that I saw in the wood. Some of the medium colors, a grey, and a dark color.

I painted on the medium brown color that was the most prevalent, and then I very lightly brushed on the other colors and kind of blended them together. For the really dark color, I used the smallest amount and very lightly brushed it on.

Slowly, it started to look more and more like the wood around it!! It was missing some grey, so I added that in, and then brushed on some of the first color very lightly to bring it all together. I didn’t go for perfection here, because nature isn’t perfect, but dang, I think it looks SO good with this repair!! Doesn’t it!!??

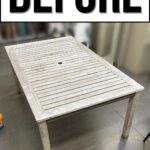
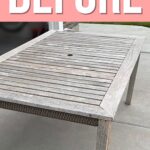
Okay, so remember, this is what it looked like before… and here’s what it looks like now!! For more similar makeovers, check out these chalk paint dining table ideas. If you’re looking for a way to add a unique touch to your table, check out this dining table makeover using gold spray paint for a sophisticated, high-end look.


More Before and After Makeovers
See All >
Click any of these “before” photos below to view the “after” of that makeover.


I didn’t make our goal of fixing it up in 1 day, all because the legs needed to be repaired. But, without those legs, this could have totally been done in one day!! I was tempted to not fix the chipped wood, but you know my OCD couldn’t let me leave them be!
Watch the full makeover of this patio table on our YouTube video below!

Don’t forget to check out these other awesome before and after furniture makeovers from my Furniture friends!! (Click the links below the photos!)

- Yard Sale Coffee Table from My Repurposed Life
- How to Strip Stain from Wood with Carbide Scraper from Salvaged Inspirations
- Side Table Makeover from Petticoat Junktion
- Chest on Chest Dresser Makeover from Confessions of a Serial DIYer


Major Patio Table Makeover
Learn how to transform your old, worn-out patio table into a stunning centerpiece with simple DIY steps that anyone can follow.
Materials
Instructions
- If your patio table has wobby legs, flip the table over and tighten any loose screws to eliminate that annoying wobble. Check if any screws are missing and try to replace them for extra stability, unless your table is till sturdy without it!
- Sand down the wood with 80 grit sandpaper to clean up the old surface as well as any weathered or moldy spots. Change up to 120 and then 150 grit sandpaper to make the wood extra smooth and remove any sanding swirls.
- Repair any lifting veneer by gluing it back down with wood glue and clamping it until dry for about an hour. Fill in any chipped areas with KwikWood after for a more durable fix. Sand down the KwikWood to smoothen it then you can recreate the wood grain with a brush or a sharp screw like we did.
- Seal the wood patio table with Sunshield Oil to protect it from further weathering and bring out its rich color. Apply a thin coat of oil and let it dry for at least a day before proceeding to any repairs or touch ups.
- To make the wood filler look exactly like the rest of the wood, use a wood stain repair kit. Choose colors that match the different shades of wood and lightly brush them on, blending them together for a natural look.
Recommended Products
As an Amazon Associate and member of other affiliate programs, I earn from qualifying purchases.


More Furniture Makeovers
- Painting a Side Table
- Painting a Coffee Table
- The Farmhouse Cabinet Makeover
- Curbside Table Makeover
- Painting a Dining Table White
Follow us on YouTube to get more tips for painting furniture. Or share your project with us on our Facebook Group and be part of our community. See you there!

Wow! It turned out SO good! Ready to go for many more years now! XOXO
Ahh, thank you so much Christy!!
This is an AWESOME transformation Natalie! I love teak for the outdoors and this table is stunning in your space! Pinned. XOXO
Appreciate it Denise! Thanks!!
Wow, that is really beautiful now! Interesting how you ‘mended’ the rough chipped surface of the leg. You would never know how it looked before. That KwikWood works great. I think I must get some! Just in case…of a needed wood repair. You. never know! But, Natalie, your expertise in making it match the wood grain of the leg is what made it a success. OCD sometimes pays off! Thanks for sharing this project folks!
Ahh thanks so much for the appreciation and for sharing your thoughts on this one Naomi!
I love it and you know Howard’s is one of my favorite brands.
Ahh thanks Kathy!!
Natalie,
Y’all sure have a lot of patience when it comes to sanding! But the end result is incredible. I love that screw trick you shared. That’s genius.
Pinned!
gail
Ahh thanks so much Gail!