Painting a Side Table

Today’s makeover project is all about painting a side table! Side tables are versatile pieces of furniture that can be used in any room, making them the perfect canvas for a transformation. So if you have an old side table that needs a little TLC, this is one of the painting furniture ideas that you definitely want to try out.
Plus, by doing it yourself, you have control over the color and finish, allowing you to personalize it to your taste and style. So keep reading for this side table makeover!

Welcome to Furniture Fixer Upper day, where we join 4 of our talented furniture friends and bring you brand new makeovers! I’ll link to my friend’s makeovers after our after photos at the bottom of this post! Don’t forget to check out their masterpieces!! Okay, back to our makeover!

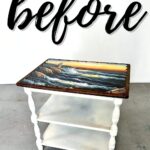
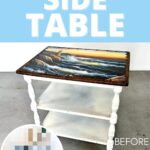
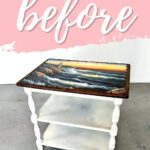
First, let’s talk about the potential this side table has. It’s a cute table with spindles and a pretty ocean lighthouse painting on top. But it was held on with nail heads, and it also had many scratches and dings all over. Plus, the partial paint job wasn’t really doing it for us.
Again, the actual piece is so cute, so we’re going to give it some love and bring out its full potential! And we’re going to turn it into more our style. And that’s the beauty of painting furniture!
So let’s get into the process of painting this side table. With just a few simple steps and some paint, you can completely transform this piece of furniture into something that fits your aesthetic perfectly.

Supplies Used for Painting a Side Table
As an Amazon Associate, I earn from qualifying purchases. I also may earn from other qualifying purchases with other companies or get free product to review and use. All opinions are my own.
- Nail Remover Tools (Metal Scraper, Staple Remover, Hammer and Pliers)
- Krud Kutter
- Damp Old Rag
- Stripwell QCS Stripper (Use code SUNLIGHT10 to get 10% off your order of Stripwell QCS!)
- Paper Towels
- Plastic Wood Filler
- Putty Knife
- Festool RTS 400 REQ Sander
- Foam Sanding Pads (Use code RAY10 to get 10% off your order)
- Vacuum
- Tack Cloth
- Vonforn Paint Sprayer
- Heirloom Traditions Paint
- Retique It Base Coat Wood n’ Primer
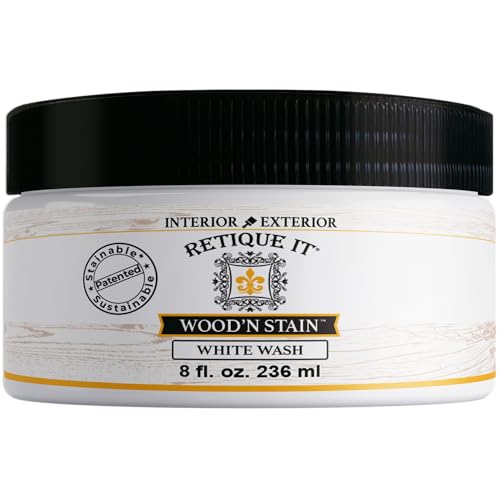
- Retique It White Wood’n Stain
- Special Walnut Waterbased Stain
- Wood Grain Tool
- Waterbased Polyurethane
- Foam Sponge
Removing Painting from Side Table Top
We started by removing the painting on the top of the side table. This was a bit of a challenge and it took a lot of time and effort to pry the nail heads off. We used a combination of tools like a metal scraper, staple remover, hammer, and pliers to get the job done. Some nail heads came out easily, while others required a bit more force.

With the nail heads removed, we did peel the painting off easily after. However, there was a lot of glue residue left on the surface. It was bumpy and textured, and we weren’t sure of the best method to get rid of it. But we knew we had to clean it up before moving on with the painting process.
So we grabbed our trusty cleaner, Krud Kutter, and wiped down the entire table to get rid of any grease, grime, and oils. Then we finished up with a damp old rag. Here’s how to clean furniture before painting to know the importance of this process before painting.
Stripping The Top of a Side Table
So we tackled the top and decided to use a chemical stripper to get rid of all the old finish and glue residue from the painting. We sprayed on the Stripwell QCS stripper and let it sit for about 15 minutes. And it scraped off so easily! Stripwell QCS stripper really works so well and it’s super easy to use. Check out our Stripwell QCS review here if you want to learn more about it.

We did apply another coat of the stripper after the first application for good measure and to see if any more of the finish needed to come off. Then we cleaned up the residue with paper towels and some water. Here’s how to remove paint from wood without sanding to learn more about the different methods of removing paint other than sanding.
Filling In Nail Holes
After letting the stripped top dry, we filled in the holes and gouges left behind from removing the nail heads with plastic wood filler and a putty knife. We made sure to fill in each hole for a smooth surface to paint on later.

Then after a few hours, we sanded the wood filler flush with the wood around it. We were careful not to sand too hard and remove any of the filler. We wanted to sand just enough to make the filler smooth and level with the rest of the surface. We used our Festool RTS 400 REQ sander for this and tested its ability to suck up dust without being attached to a vacuum – which it did pretty well, but it’s still far better hooked up to a vacuum.


Sanding Side Table Spindles
We sanded the spindles next, and it can be a bit of a tricky task with its curves and angles. The easy way to sand spindles would be to use foam sanding pads. These pads hug the curves and allow for smooth sanding, and you can use them with an electric sander. We used medium grit since we didn’t need to remove the paint – just smooth the spindles out and remove any sheen for better adhesion of the new paint.

We may have taken a break from the project for a few months since we moved to a new house and got settled. But we eventually came back to it, and the first thing we did was clean up the dust with a vacuum and then wipe down the surface with a tack cloth.
We were still not sure what to do with the side table top yet, so we covered it with plastic while we worked on the bottom part. It’s always a good idea to cover any areas you’re not currently working on to prevent paint or dust from getting on them.
Spray Painting Side Table
Since we’re working with spindles, the best way to paint it would be with a paint sprayer. We set up our spray shelter in the garage to prevent any paint from getting on other surfaces. Here’s how to prevent overspray when painting furniture to learn more about the proper way of protecting your surroundings, and your furniture from overspray.
And for the actual paint, we chose a vibrant green shade from Heirloom Traditions. We thinned the paint out with some water first and put it into our Vonforn sprayer. This was going to be my first time using this paint sprayer, and it actually did a great job especially with creating a flawless smooth finish!
Would you like to save this?

We were honestly a bit hesitant with this sprayer at first because it was a lot cheaper than the other sprayers we’ve tried before. But again, it worked just as well and didn’t disappoint us in terms of quality. If you’re curious about it, here’s our Vonforn paint sprayer review for a more in depth look.
We sprayed 2 coats of the green Heirloom Traditions Paint, lightly sanding the shelves between coats with a fine grit foam pad. There was some overspray which roughed up the surface a bit, but it’s completely normal and easily fixable with light sanding. Of course, don’t forget to clean off the dust before spraying the second coat.
Check out our blog post about Heirloom Traditions Paint here for a complete guide on its features, how to use it, and more helpful information about this paint.
Staining Side Table Top with Retique It
We moved on to the top and removed the plastic cover over it. We didn’t really have any plans for the top, so we tried something new! We applied a base coat of Retique it wood n primer and let it dry, then applied their white Wood’n Stain over it. We wanted the skinnier wood grain look so we did just that using a wood grain tool.

After letting that dry, we stained the top with special walnut waterbased stain. See how we used this in my DIY TV stand here. Retique It actually has wood fibers in it that help it stain like real wood! We were blown away by this cool feature and the final result.
Here’s how to restain a coffee table where we used another stain option. If you want to use paint as stain, here’s how to make paint look like stain. And if you want to give your furniture a fresh new look without having to strip off all the previous layers of stain, here’s how to stain over stain.
But we weren’t really satisfied with the green painted bottom and new stained top together, so we decided to switch things up and change the paint color.
We went with a beautiful light blue shade from Heirloom Traditions Paint, which added a whole new look to the side table. And this time, we were pleased with how it turned out! If you want other blue shades, check out this best blue paint for furniture list.

We sealed the top with waterbased polyurethane to make it more durable and protect it from damage. We applied 2 coats with a foam sponge for an even finish.
Watch how the full makeover went on our YouTube video:
And now the side table was finally complete! If you need more inspiration, check out these painted sofa table ideas. Here’s how to paint end tables but using chalk paint, instead.


More Before and After Makeovers
See All >
Click any of these “before” photos below to view the “after” of that makeover.


So which color do you prefer, the green or the blue? We personally love the new wood top look and the light blue paint. So, if you’re not satisfied with your project, don’t be afraid to make changes and try out different colors. You never know, you might end up with a whole new look that you love even more!
Don’t forget to check out these other awesome before and after furniture makeovers from my Furniture friends!! (Click the links below the photos!)

- Decoupaged Table Makeover from Confessions of a Serial DIYer
- Child’s Painted Secretary Desk from Salvaged Inspirations
- Old Painted Nightstand from Petticoat Junktion
- Small Pedestal Coffee Table from My Repurposed Life


Painting a Side Table
This makeover project is all about painting a side table with a beautiful light blue shade and a stained wood top for a whole new look.
Materials
- Krud Kutter
- Damp Old Rag
- Stripwell QCS Stripper (Use code SUNLIGHT10 to get 10% off your order of Stripwell QCS!)
- Paper Towels
- Plastic Wood Filler
- Foam Sanding Pads (Use code RAY10 to get 10% off your order)
- Tack Cloth
- Heirloom Traditions Paint
- Retique It Base Coat Wood n' Primer
- Retique It White Wood'n Stain
- Special Walnut Waterbased Stain
- Waterbased Polyurethane
- Foam Sponge
Tools
Instructions
- Strip the old finish and residue from the top of the side table by using a chemical stripper like Stripwell QCS for easy scraping, leaving a clean surface to work with. Sprayed on the Stripwell QCS and let it sit for about 15 minutes before scraping it off.
- Clean up the side table with Krud Kutter to remove grease, grime, and oils. Then finish up with a damp old rag.
- Fill in any holes or imperfections with plastic wood filler, making sure to fill them completely and level them out with a putty knife. Sand down any excess filler once it has dried for a seamless finish.
- Sand the spindles using medium grit foam sanding pads to smooth out curves and angles, removing any sheen from the previous paint job for better adhesion of the new paint. Clean up all the dust from sanding with a vacuum and wipe down with a tack cloth.
- Cover the top of the side table with plastic to protect it while working on the bottom part. Thin out Heirloom Traditions paint with water before spraying using a Vonforn paint sprayer for a flawless finish.
- Apply 2 coats of paint, lightly sanding between coats with a fine grit foam pad to remove any overspray that may have roughed up the surface. Clean off dust from sanding before applying second coat.
- Remove the plastic from the top and apply a base coat of Retique It wood n primer, followed by their white Wood'n Stain. Use a wood grain tool to create a skinny wood grain look. Then stain the top with special walnut waterbased stain.
- Seal the top with waterbased polyurethane for added durability and protection. Apply 2 coats with a foam sponge for an even finish.
- Step back and admire your newly painted side table, with a gorgeous stained top and a fresh coat of paint on the bottom. Don't be afraid to make changes and try new colors until you find the perfect combination that you love!
Recommended Products
As an Amazon Associate and member of other affiliate programs, I earn from qualifying purchases.


More Painted Furniture Makeovers
- Redoing End Tables
- Painting Wood End Tables
- Coffee Table Set Makeover
- How to Repaint Furniture
- Painting Bedroom Furniture White
Follow us on YouTube to get more tips for painting furniture. Or share your project with us on our Facebook Group and be part of our community. See you there!

Ohhh WOW! it looks like a totally different table! Beautiful Natalie! XOXO
Ahh thanks so much Denise!
BLUE!!! When I saw the green, I thought, “Yuck!” Then I continued to see your second choice and was happier. Nice job!
Thanks!
What a huge difference. It turned out so pretty. Thank you for all your tips and tricks.
Ahh thanks Cheryl!
Beautiful, Natalie! I did like the green, but the blue is pretty too! XOXO
Thanks, Christy!
I love how it turned out. The blue paint with the light wood is so beachy and pretty.
Thank you SO much!!
Natalie,
Great tips on this little side table project. I LOVE Irish Garden, that’s what I used on my table this month. Blue is my favorite color, and Irish Garden is my favorite HTP color.
Pinned
gail
Thanks so much Gail! I’m happy to know you liked the tips on this side table makeover. Irish Garden is such a beautiful light blue shade. I can definitely see why it’s your favorite!