How to Stain Over Stain


Are you tired of the same old look of your furniture but don’t want to go through the hassle of completely refinishing it? Well, we’ve got a solution for you! In this guide, we’ll show you some refinishing furniture techniques to give your furniture a fresh new look without having to strip off all the previous layers of stain. Here’s how to stain over stain!
Staining over stain can be possible when done correctly. This method is perfect for those who are on a budget or just want to give their furniture a quick and easy update. Let’s dive in!

We all have that one piece of furniture that we love, but it just doesn’t fit in with our current style. For us, it was this vintage Ethan Allen cabinet. We wanted it to be a little darker and to hide some scratches that were a lighter wood color.

Refinishing the entire cabinet seemed like too much work for something that was still in good condition. So, we decided to try staining over stain instead! This way, we could get our desired darker color and cover up those pesky scratches without starting from scratch.
Can you stain over stain? Yes, you can definitely do this even if there isn’t anything “wrong” with your furniture. Sometimes, we just want a change or an update to our pieces without completely redoing them. And that’s where staining over stain comes in handy!
Supplies Used to Stain Over Stain
As an Amazon Associate, I earn from qualifying purchases. I also may earn from other qualifying purchases with other companies or get free product to review and use. All opinions are my own.
- Krud Kutter
- Old Damp Rag
- 220 Grit Sandpaper
- Shop Vacuum
- Tack Cloth
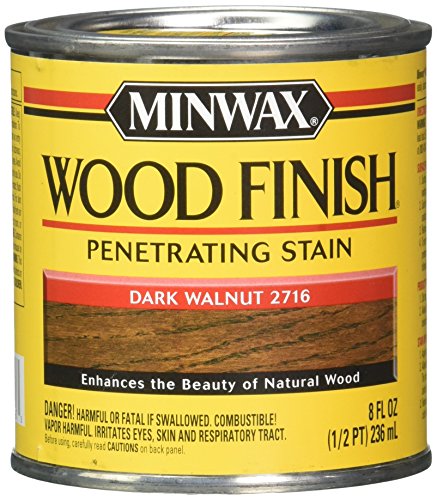
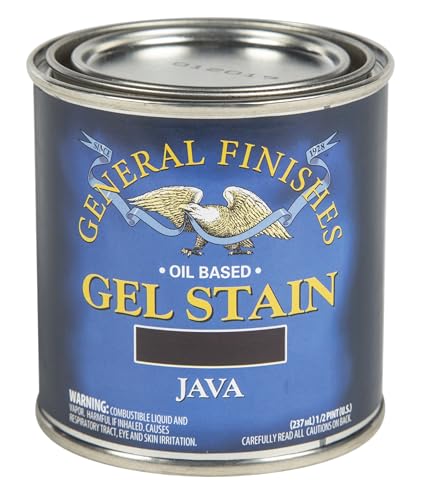
- General Finishes Java Gel Stain
- Lint Free Rag
- Cheap Paint Brush
- Polyurethane
- Zibra Topcoat Brush
- New Hardware
How to Easily Stain Over Stain
So, let’s get started on how to stain over stain! Don’t worry, we’ve got you covered every step of the way. Keep reading for some helpful tips and tricks! If you’ve never done this before, here’s how to stain furniture for beginners to learn the basics.
Prepare Furniture for Restaining
First things first, before you start restaining your furniture, it’s important to prepare it properly. This means removing any hardware such as handles or knobs from drawers and cabinet doors. This will make it easier to work on the piece and make sure that you don’t accidentally get any stain on them.

You also want to have a clean slate to work with, so make sure to give your furniture a good wipe down with Krud Kutter and an old damp rag. This will help remove any dirt, dust, or grime on the surface. Let it dry first before proceeding to sanding. To guide you with this, here’s how to clean furniture before painting.
Now lightly sand the stained wood with 220 grit sandpaper. This helps to remove some of the sheen from the previous stain, allowing for better adhesion of the new stain. But be careful not to sand too much that you remove the stain or finish completely.
Clean up the dust from sanding with a shop vacuum and then use a tack cloth to remove any remaining dust particles. If you want to skip sanding, check out this guide on how to stain furniture without sanding.

Stain Over Existing Stain
We move on to staining. For this, make sure you are in a well ventilated area. Start by wiping on General Finishes Java Gel Stain with a lint free rag on a small section of the stained wood. If your furniture has intricate details, using a cheap paint brush can help you reach those areas better. Wipe in the direction of the wood grain for a more natural look.
Would you like to save this?

Next, let the stain sit for just a couple of minutes, and then wipe off the excess with a clean lint free rag. Again, make sure to wipe in the direction of the wood grain so the streaks you leave blend in naturally. Get more tips on how to stain wood with a rag here.
Don’t let the stain sit for too long before wiping it off, or it will look like a mess. Don’t start wiping it off too soon as well, or you’ll end up with too little stain on the surface. When you’re happy with how it looks, move on to the next small section and repeat the process until you’ve gone through the whole piece.

Once you’re done, let the stain dry for 24 hours before deciding if you want to apply another coat for a darker finish. In this case, we only applied one coat as we were happy with the result. For a more detailed guide on creating a darker finish, here’s how to stain wood furniture darker.
So remember to always work in thin coats and build up gradually instead of applying too much stain at once. This will give you more control over the final outcome and prevent any mistakes or mishaps. Check out our how to stain wood furniture guide for more detailed tips and tricks.
Here’s how to make paint look like stain for another way to stain your wood furniture using paint.


Seal New Stain
Now that you have successfully restained your furniture, it’s important to protect and seal your new finish! Here are your options for topcoats for painting furniture, but in general, polyurethane is a great choice for sealing wood furniture.

You can choose between an oil based polyurethane, which is more durable than waterbased poly but has an amber color that may make your furniture appear more yellow. On the other hand, waterbased polyurethane is still a durable topcoat, and is clear so it won’t change the color of your furniture. However, you’ll have to wait 72 hours before applying waterbased polyurethane over the oil based stain.
Whichever you go for, apply 3 thin coats onto your restained furniture. It’s important to use a nice brush like the Zibra topcoat brush for an even and smooth application. Let each coat dry completely before applying the next one, and sand in between coats if needed to get a smooth finish.

After you have applied all 3 coats and the final coat has dried completely, you can attach the old hardware or add new ones to complete the new look like we did. Be gentle when handling your newly restained furniture for at least a month to allow the topcoat to fully cure and harden.
And there you have it! You have successfully stained over stain and given your furniture a fresh new look without too much effort or starting from scratch! You’ll just need to prep your piece and apply the stain depending on how light or dark you want your finish to be. And don’t forget to seal it with a topcoat for long lasting protection and durability!

How to Stain Over Stain
Here's how to stain over stain to give your furniture a fresh new look without having to strip off all the previous layers of stain.
Materials
- Krud Kutter
- Old Damp Rag
- 220 Grit Sandpaper
- Tack Cloth
- General Finishes Java Gel Stain
- Lint Free Rag
- Polyurethane
- New Hardware
Instructions
- Prepare your furniture by removing any hardware. This will make it easier to work on the piece and make sure that you don't accidentally get any stain on them.
- Give your furniture a good wipe down with Krud Kutter and an old damp rag to remove any dirt, dust, or grime on the surface. Let it dry before proceeding to sanding.
- Lightly sand the stained wood with 220 grit sandpaper to remove some of the sheen from the previous stain and allow for better adhesion of the new stain. Be careful not to sand too much that you remove the stain or finish completely. Clean up the dust from sanding with a shop vacuum and then use a tack cloth to remove any remaining dust particles before staining.
- In a well ventilated area, wipe on General Finishes Java Gel Stain with a lint free rag or cheap paint brush on a small section of the stained wood. Wipe in the direction of the wood grain for a more natural look.
- Let the stain sit for just a couple of minutes and then wipe off the excess with a clean lint free rag in the direction of the wood grain to blend in any streaks left behind.
- Repeat this process on small sections until you have gone through the whole piece, being careful not to let the stain sit too long or start wiping it off too soon.
- Let the stain dry for 24 hours before deciding if you want to apply another coat for a darker finish. Remember to work in thin coats and build up gradually instead of applying too much stain at once.
- Once you are satisfied with the color, choose an appropriate topcoat like polyurethane to protect and seal your new finish. Apply 3 thin coats, allowing each one to dry completely before adding the next one. If needed, sand in between coats for a smooth finish.
- After the final coat of poly has dried completely, gently handle your furniture for at least a month to allow the topcoat to fully cure and harden.
- Finally, attach any old hardware or add new ones to complete the new look of your restained furniture.
Recommended Products
As an Amazon Associate and member of other affiliate programs, I earn from qualifying purchases.


More Staining Furniture Tips
- Can You Stain Over Paint
- How to Restain a Dresser Without Stripping: My $70 Thrift Flip Transformation
- How to Stain Furniture White
- How to Restain a Coffee Table
- How To Change Dark Wood Stain To Light
Follow us on YouTube to get more tips for painting furniture. Or share your project with us on our Facebook Group and be part of our community. See you there!
How do I download “staining over a stain” into a PDF file?
Hey Miriam, unfortunately there is not a way to download this blog post into a PDF file. However, towards the bottom of the post there is a create card that you can print that includes all the materials used, steps we did in the process, etc. Hopefully this will help you to find the information that you need!