How to Repaint Furniture


Do you have an old piece of furniture that could use a fresh new look? Repainting is a great way to give your furniture a makeover and bring new life into your space. Whether you’re looking to update an old hand me down or refresh an outdated piece, we’ll show you how to repaint furniture in just a few easy steps!
Painting furniture ideas like this give you the opportunity to customize your pieces, but it also allows you to save money by avoiding the cost of buying new furniture. So let’s get started on repainting furniture!

Welcome to Furniture Fixer Upper day, where we join 4 of our talented furniture friends and bring you brand new makeovers! I’ll link to my friend’s makeovers after our after photos at the bottom of this post! Don’t forget to check out their masterpieces!! Okay, back to our makeover!
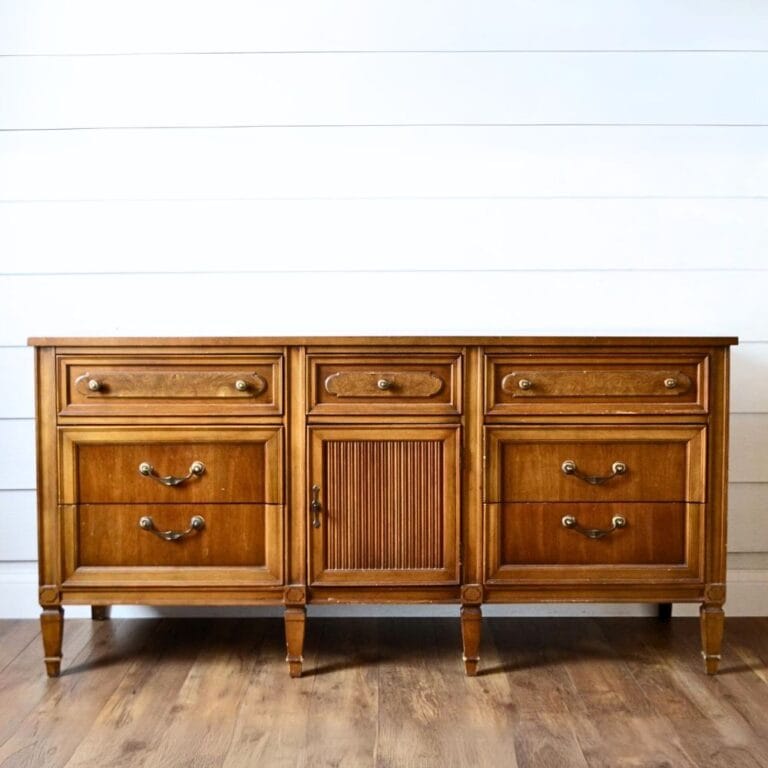
Here’s the piece we are painting today. It’s a mahogany buffet with 2 doors and 2 drawers – thrifted from Facebook Marketplace for $50! About 6 years ago, I painted it white and used it as a TV stand since then. Now we have moved to a new home and I want it to be fresh!

There are signs of wear and tear in the paint where the kids threw things at it, or ran into it with toys. But, it made it through 2 moves, 1 across the country, so I’ve gotta say, I think I did a pretty darn good job at painting it the first time around, even with paint chips in it at this point.
You might want to know that this piece was originally primed with the same primer I’m using on it today, painted with homemade chalk paint, and topcoated with multiple coats of waterbased polyurethane. And here’s what it looked like right before I painted it again.


Supplies Used for Repainting Furniture
As an Amazon Associate, I earn from qualifying purchases. I also may earn from other qualifying purchases with other companies or get free product to review and use. All opinions are my own.
- Electric Screwdriver
- Krud Kutter
- Old Damp Rag
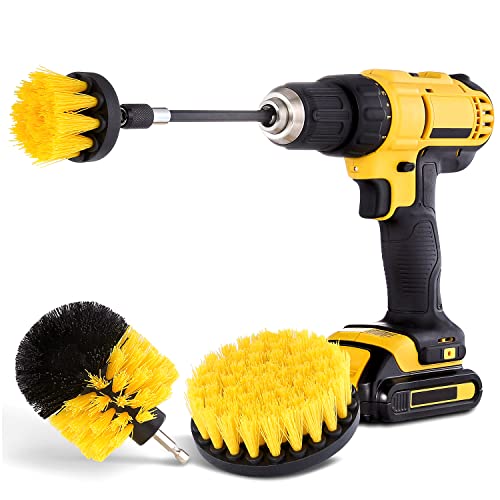
- Drill
- Drill Brush Attachments
- 150 Grit Sandpaper (Use code RAY10 to get 10% off your order)
- Medium & Fine Grit SurfPrep Foam Pads (Use code RAY10 to get 10% off your order)
- SurfPrep 3×4 Sander (Use code RAY10 to get 10% off your order)
- Carbide Scraper
- Plastic Wood Filler
- Kwikwood
- Shop Vacuum
- Tack Cloth
- Pre-Taped Plastic
- Painter’s Tape
- BIN Shellac Primer
- Zibra Pointed Round Brush
- Mohair Roller
- Clear Shellac in Aerosol Can (optional)
- Ammonia / Water Mixture
- Fine Grit Sanding Screens (Use code RAY10 to get 10% off your order)
- Paintable Caulk
- Sherwin Williams Emerald Urethane Trim Enamel
- Vonforn Paint Sprayer
- Paint Filter
- 400 Grit Sandpaper
- New Cabinet Pulls and Knobs
- Kreg Hardware Jig
Preparing buffet for Repainting
First I removed the old hardware and the hinges from the doors with my electric screwdriver. The hinges on one side wouldn’t come off due to stripped screws, so we left them on and taped them off.
Important when removing doors and hinges especially: label all hinges, the direction they go, and where they go. Label the screws as well. It will make it much easier to put together and helps the doors work properly when you put them back on.

Sometime around this point I also removed the back of the buffet, that was held on with staples, so I could easily get inside the buffet as I worked. It was already part of the way popped off, so it was really easy to pop it off with the help of a flathead screwdriver and definitely some work gloves so I didn’t get a sliver.
Cleaning and Sanding Buffet
With little kids constantly touching this buffet turned TV stand, there was a lot of gunk on it. So, I scrubbed the gunk off of the paint with Krud Kutter, an old damp rag, and for extra stubborn areas, I attached these drill brush attachments to my drill to give it a good scrub.

I wanted to remove all the grime to help the paint stick better and make the new paint finish look better. Man oh man, the buffet looked so much better after a good scrub down. For a detailed guide, here’s how to clean furniture before painting.
Before repainting, it’s also super important to sand the old paint at least a little bit. For this piece in particular, there were many dings and chips in the paint, and if I hadn’t sanded them smooth after I put a new coat of paint on, I would still have seen the outline of those chips.

If you want to totally remove the old paint, here’s our post that walks you through how to remove paint from furniture.
So, I sanded everything with 150 grit sandpaper and medium grit SurfPrep Foam pads and my SurfPrep 3×4 sander. I focused specifically on the chipped paint areas, but also sanded everything to help the new paint stick to the old paint.
Removing Chipped Paint
The base of the buffet had enough chips in it, so I used a carbide scraper to scrape off the old paint quickly, and then I sanded it smooth to get it down to raw wood. I figured the kids might still ram their toys into the base of the buffet, so I want it to be as durable as possible here. For what to use for removing paint, here are the best tools for removing paint from furniture.

Filling Chipped Veneer and Hardware Holes
After sanding, I saw a few pieces of chipped veneer that needed filled, so I filled them with plastic wood filler and I took this opportunity to also fill the old hardware holes in the drawers with Kwikwood, so I could replace the hardware with new pulls. Here’s how to repair chipped veneer furniture for more tips and tricks.
I also filled the hole in the middle cabinet “door” that isn’t really a door, so it doesn’t need a knob. The next day, it was all dry, so I sanded the filler all flush with the wood.

Then I was able to remove the dust with a shop vacuum hose and brush attachment and then wipe clean with tack cloth to remove every bit of dust. Otherwise, the dust will make the paint feel and look textured.
One last thing before I got out any paint, I taped off the drawers with pre-taped plastic and painter’s tape to prevent any spray paint from getting inside them. Here’s a more detailed guide on how to tape off drawers for painting with a paint sprayer.
Priming Buffet before Repainting
Finally, it’s time to transform the buffet. I primed with BIN shellac primer to block bleedthrough stains from coming through the areas where raw wood is showing. Here’s our list of the best primers for painting furniture and how to choose the right one!

But also, this buffet is Mahogany wood, which is some of the worst wood to paint because of the bleedthrough. Anytime you paint wood though, there are most likely going to be bleedthrough stains, where you can see yellow, brown, or pink stains coming through the paint. Learn more about how to stop stains from coming through paint from ruining your painted furniture here.
Would you like to save this?
Mahogany has pink stains that come through the paint, and even though I primed well when I first painted it, some areas still had a little bit of pink coming through, so I wanted to make sure to block that before painting again.

I brushed and rolled the BIN shellac primer onto the buffet with a Zibra pointed round brush and mohair roller. Another great primer alternative is clear shellac in the aerosol can. It is easy to spray on and dries smooth. It blocks stains and helps paint stick as well! Let primer dry overnight, and I applied 2 coats to completely block the stains from coming through.
I also cleaned my Zibra paint brush with an ammonia/water mixture immediately after use to completely clean the shellac out of the brush before it ruined it. I didn’t care as much about the mohair roller, but that’s how I clean the paint roller after using BIN primer.

Sanding Primer Smooth
This step is optional, but if you are OCD like me, it will make the paint look and feel better. Lightly sand the primer smooth with fine grit sanding screens and foam sanding pads to remove texture. Don’t sand through the primer if at all possible! Because then you will have to prime again.
Remove the dust again with the vacuum and tack cloth before moving on. Where ever we accidentally sanded through the primer, we sprayed a thin coat of clear shellac so I don’t have to sand it again. Let dry overnight for best stain blocking ability.
Filling in Seams on Buffet
At this point, I used paintable caulk to fill in the seams on the doors and sides of the buffet, because they didn’t look good to me. I squeezed it onto the crack, wiped my finger over it to push it in, and then used a damp cloth to wipe off the excess. It needs to dry for at least 20 minutes before painting.

Repainting Buffet
Time for painting! For this makeover I used Sherwin Williams Emerald Urethane Trim Enamel in the color Sommelier. I love this paint because it is self leveling, so you can brush, roll, or spray it on without a bunch of texture. I chose to spray it on with the cheap Vonforn paint sprayer from Amazon.
Here’s our Vonforn paint sprayer review for a more in depth look if you’re curious about this paint sprayer, and check out how to use Vonforn paint sprayer for a step by step guide.
How to Repaint Furniture with Paint Sprayer
I ran Sherwin Williams Emerald Urethane Trim Enamel through a filter before putting it in the sprayer’s container and then I thinned the paint with about 20% water. I sprayed on 2-3 thin coats of paint, letting it dry for 4 hours between coats. I cover my painting tools with plastic between coats and clean things out if it is sitting overnight.

Once again, my OCD is showing again here.. it especially comes out anytime I am keeping a piece for myself. Between coats of paint, I sanded the buffet with 400 grit sandpaper by hand, to remove any rough spots from the overspray landing back onto the buffet. Then I cleaned up the dust again.
The great thing about this paint is that you do not have to topcoat it. Actually, you should not topcoat it. Let the paint dry for at least 48 hours before putting the hardware on and putting everything back together.


Assembling Repainted Buffet
I put the back of the buffet back on and put some new staples in to secure it better than it was before. Thankfully the doors went back on perfectly smooth thanks to labeling the hinges so I could put them on exactly how they were before. It’s always nailbiting when putting doors back on because you never know if they are going to go on correctly or not.

And then I bought new cabinet pulls and knobs from Lowes, drilled new holes in the drawers with the help of the Kreg Hardware Jig, and put new champagne brass hardware on the buffet. Learn more about how to drill new hardware holes here, and here’s how to change hardware for more tips!
Here’s what it looks like now!!


More Before and After Makeovers
See All >
Click any of these “before” photos below to view the “after” of that makeover.


Isn’t it so pretty in this deep burgundy! I love the champagne brass hardware against this deep color and I can’t wait to keep using this buffet as our TV stand in our living room. For another warm tone option, check out these brown furniture paint ideas!
Don’t forget to check out these other awesome before and after furniture makeovers from my Furniture friends!! (Click the links below the photos!)

- Half Moon Table Makeover from My Repurposed Life
- Painted Antique Oak Dresser from Confessions of a Serial DIYer
- Boho Style Painted Table from Petticoat Junktion
- Fill in Dated Drawer Details from Salvaged Inspirations


How to Repaint Furniture
This guide on how to repaint furniture will show you how to update an old furniture into a stylish and fresh new look unjust a few easy steps.
Materials
- Krud Kutter
- Old Damp Rag
- 150 Grit Sandpaper (Use code RAY10 to get 10% off your order)
- Medium Grit SurfPrep Foam Pads (Use code RAY10 to get 10% off your order)
- Plastic Wood Filler
- Kwikwood
- Tack Cloth
- Pre-Taped Plastic
- Painter's Tape
- BIN Shellac Primer
- Clear Shellac in Aerosol Can (optional)
- Ammonia/Water Mixture
- Fine Grit Sanding Screens (Use code RAY10 to get 10% off your order)
- Foam Sanding Pads (Use code RAY10 to get 10% off your order)
- Paintable Caulk
- Sherwin Williams Emerald Urethane Trim Enamel
- Paint Filter
- 400 Grit Sandpaper
- New Cabinet Pulls
- New Knobs
Tools
Instructions
- Prep your furniture for repainting by removing hardware and cleaning it thoroughly with a degreaser. Label your hardware and doors to make reassembly easier. Clean furniture with Krud Kutter and an old damp rag to remove any dirt, grime, or wax. For stubborn areas, use drill and drill brush attachments to give it a good scrub.
- Sand the old paint using 150 grit sandpaper and SurfPrep Foam pads with a SurfPrep 3x4 sander. Focus on chipped areas and sand everything to help the new paint stick to the old paint. You can also use a carbide scraper to quickly remove old paint and sand it smooth afterwards.
- Fill any holes or dings with plastic wood filler or Kwikwood. Sand until flush with the wood surface, then use a vacuum hose and tack cloth to remove all dust before painting. This is to guarantee a smooth finish and prevent any texture from dust particles.
- Tape off areas that you don't want painted using pre-taped plastic and painter's tape. Make sure to cover drawers, hardware, and any other areas that won't be painted. This will save time on cleanup and avoid any accidental overspray inside the drawers.
- Prime your furniture with BIN shellac primer to block any potential bleedthrough stains. This is especially important for woods like mahogany, which tend to have pink stains that can come through the paint. Use a quality brush and roller, such as Zibra and mohair, for best results.
- Lightly sand the primer with fine grit sanding screens and foam pads to remove any texture. Remember not to sand through the primer if possible, or you will need to prime again. Clean off any dust from sanding before moving on.
- Fill in seams or imperfections with paintable caulk and wipe off any excess caulk with a damp cloth. Let it dry for at least 20 minutes before painting.
- Before spraying on the paint, filter it and thin it with 20% water. Spray on 2-3 thin coats, letting it dry for 4 hours between each coat. Between coats of paint, sand the furniture with 400 grit sandpaper by hand, to remove any rough spots from overspray. Clean up the dust after.
- Let the paint dry for at least 48 hours before reassembling and putting hardware back on. Drill new holes for hardware with the Kreg Hardware Jig for a perfect fit. Then attach the old hardware or update it with new ones for a fresh look.
Recommended Products
As an Amazon Associate and member of other affiliate programs, I earn from qualifying purchases.


More Painted Furniture Makeovers
- Flat File Cabinet Makeover
- Corner Cabinet Makeover
- Repainting the Radio Cabinet
- Painting Bedroom Furniture White
Follow us on YouTube to get more tips for painting furniture. Or share your project with us on our Facebook Group and be part of our community. See you there!

Ok, this piece is amazing! I was skeptical when you first mentioned the co!or, but no more. It’s beautiful!!
Thanks!!
I absolutely LOVE the deep burgundy Natalie!! Such a gorgeous color for this piece. Pinned XOXO
Yay! Thanks so much Denise! So glad you love it!
This makes for such a great TV stand! The finish on this is amazing, and we always put off projects for ourselves, so I know you are thrilled to have this done! XOXO
Haha I definitely was! Thanks as always Christy!
i have the exact same buffet in my living room today!! i inherited it from my mother and it has been in our family since it was purchased by my parents in the 1950’s. my mother kept the little booklet of instructions included on how to care for the piece so it was still in the top left hand drawer for me!! i haven’t decided if i will keep the buffet in its original condition or make it over at some point. you did the piece justice and it is stunning. good job!
That’s pretty awesome! It’s so cool that your mother kept a little booklet of instructions on how to care for it. That’s quite handy! Whatever you decide, I’m sure it’ll be amazing. And thank you so much for the love! It’s so appreciated!!
Natalie,
Isn’t it so fun to do a makeover on a makeover? That’s what’s so great about what we do. When our taste (or decor) changes, instead of throwing out the old and buying new, we REnew!
I love the new look.
pinned!
gail
Absolutely! That is so true! So glad you love the new look. Thanks Gail!
WOW! That turned out so nice. I’m loving the hardware you chose. Looks very classy!
Ahh thanks so much! I’m glad to know you loved the hardware as well!
What a beautiful color!
Thanks Cheryl! It’s awesome to know you love the color!